SKODA SUPERB 2007 1.G / (B5/3U) Sat Compass Navigation System Manual
Manufacturer: SKODA, Model Year: 2007, Model line: SUPERB, Model: SKODA SUPERB 2007 1.G / (B5/3U)Pages: 43, PDF Size: 2.92 MB
Page 21 of 43
Navigation
20
Navigation
Overview of navigation basic menu
Call up navigation basic menu
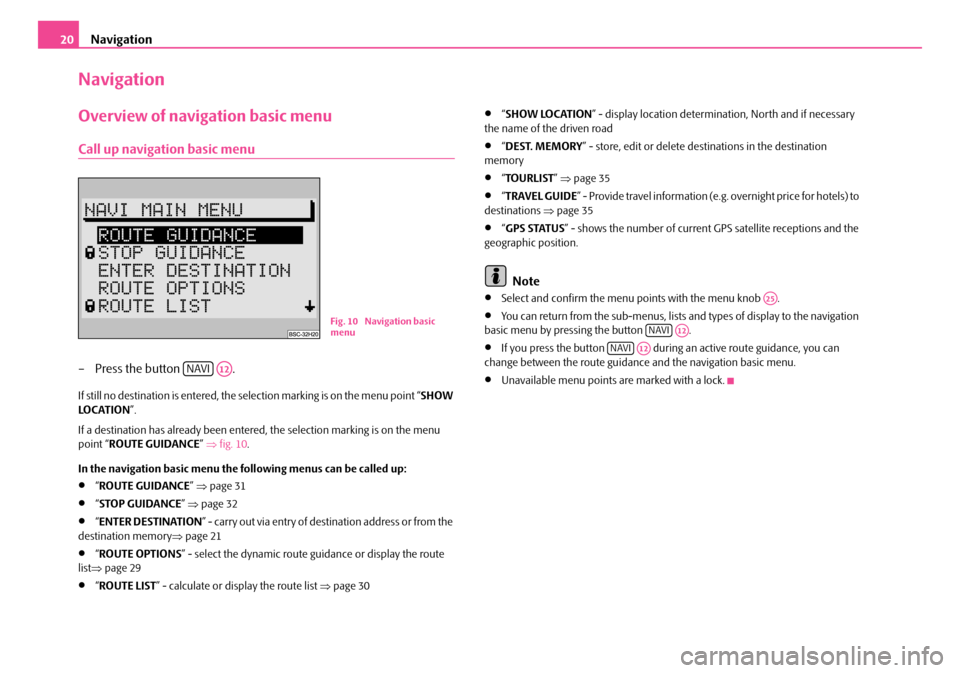
– Press the button .
If still no destination is entered, the selection marking is on the menu point “ SHOW
LO C AT I O N ”.
If a destination has already been entered, the selection marking is on the menu
point “ ROUTE GUIDANCE ” ⇒ fig. 10 .
In the navigation basic menu the following menus can be called up:
•“ ROUTE GUIDANCE ” ⇒ page 31
•“STOP GUIDANCE ” ⇒ page 32
•“ENTER DESTINATION ” - carry out via entry of destination address or from the
destination memory ⇒page 21
•“ROUTE OPTIONS ” - select the dynamic route guidance or display the route
list ⇒ page 29
•“ROUTE LIST ” - calculate or display the route list ⇒page 30
•“SHOW LOCATION ” - display location determinat ion, North and if necessary
the name of the driven road
•“ DEST. MEMORY ” - store, edit or delete destinations in the destination
memory
•“ TOURLIST ” ⇒ page 35
•“TRAVEL GUIDE ” - Provide travel information (e.g. overnight price for hotels) to
destinations ⇒page 35
•“GPS STATUS ” - shows the number of current GPS satellite receptions and the
geographic position.
Note
•Select and confirm the menu points with the menu knob .
•You can return from the sub-menus, lists and types of display to the navigation
basic menu by pressing the button .
•If you press the button during an active route guidance, you can
change between the route guidance and the navigation basic menu.
•Unavailable menu points are marked with a lock.
Fig. 10 Navigation basic
menu
NAVIA12
A25
NAVIA12
NAVIA12
s2ck.7.book Page 20 Friday, April 20, 2007 12:38 PM
Page 22 of 43
Navigation21
Enter
Overview
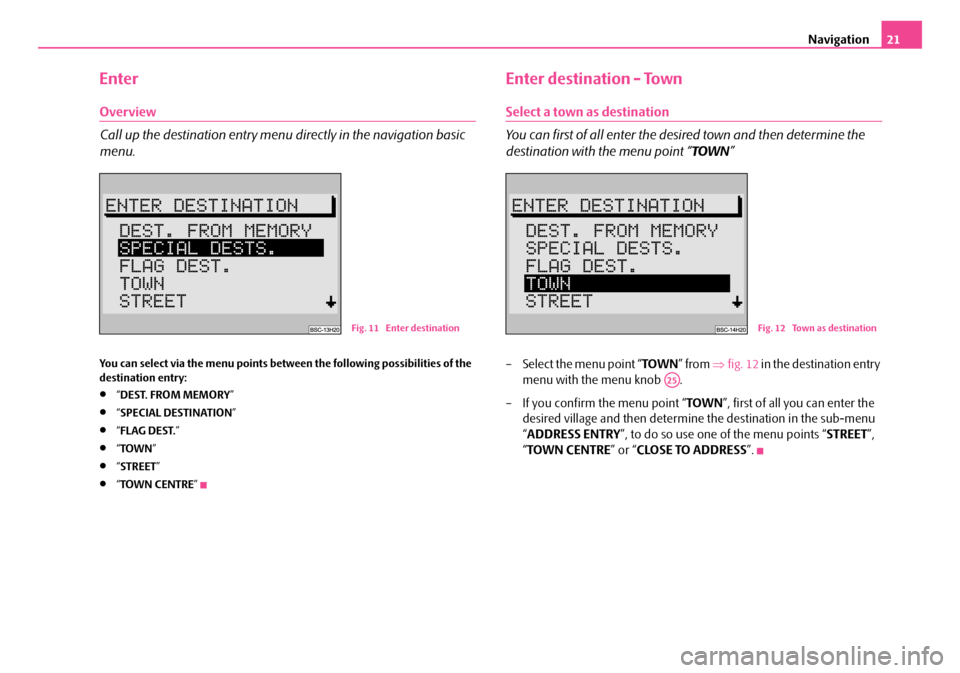
Call up the destination entry menu directly in the navigation basic
menu.
You can select via the menu points between the following possibilities of the
destination entry:
•“DEST. FROM MEMORY ”
•“SPECIAL DESTINATION ”
•“FLAG DEST. ”
•“TOWN ”
•“STREET ”
•“TOWN CENTRE ”
Enter destination - Town
Select a town as destination
You can first of all enter the desired town and then determine the
destination with the menu point “ TOWN”
– Select the menu point “ TOWN” from ⇒fig. 12 in the destination entry
menu with the menu knob .
– If you confirm the menu point “ TOWN”, first of all you can enter the
desired village and then determine the destination in the sub-menu
“ ADDRESS ENTRY ”, to do so use one of the menu points “ STREET”,
“ TOWN CENTRE ” or “CLOSE TO ADDRESS ”.
Fig. 11 Enter destinationFig. 12 Town as destination
A25
s2ck.7.book Page 21 Friday, April 20, 2007 12:38 PM
Page 23 of 43
Navigation
22
Editor
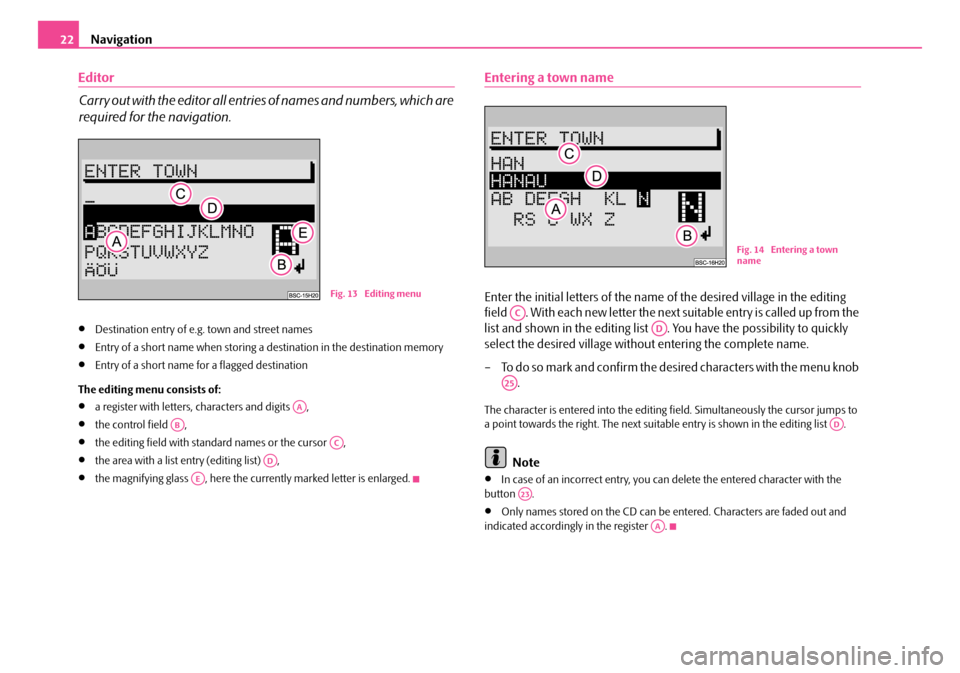
Carry out with the editor all entrie s of names and numbers, which are
required for the navigation.
•Destination entry of e.g. town and street names
•Entry of a short name when storing a destination in the destination memory
•Entry of a short name for a flagged destination
The editing menu consists of:
•a register with letters, characters and digits ,
•the control field ,
•the editing field with standard names or the cursor ,
•the area with a list entry (editing list) ,
•the magnifying glass , here the currently marked letter is enlarged.
Entering a town name
Enter the initial letters of the name of the desired village in the editing
field . With each new letter the next suitable entry is called up from the
list and shown in the editing list . You have the possibility to quickly
select the desired village without entering the complete name.
– To do so mark and confirm the desired characters with the menu knob .
The character is entered into the editing fi eld. Simultaneously the cursor jumps to
a point towards the right. The next suitable entry is shown in the editing list .
Note
•In case of an incorrect entry, you can delete the entered character with the
button .
•Only names stored on the CD can be entered. Characters are faded out and
indicated accordingly in the register .
Fig. 13 Editing menu
AA
AB
AC
AD
AE
Fig. 14 Entering a town
name
AC
AD
A25
AD
A23
AA
s2ck.7.book Page 22 Friday, April 20, 2007 12:38 PM
Page 24 of 43
Navigation23
Call up list
The desired town is selected as destination with the aid of a list.
You have two possibilities to call up the list via the editing menu.
– Press the menu knob more than two seconds or
– mark and confirm the control field with the menu knob .
Select street names from the list
Select and confirm the desired entry with the menu knob .
Note
•Scroll the list: by turning the menu knob first move the selection marking
onto the arrow and then over the first or last entry.
•Scroll line by line by moving the selection marking onto the arrow and then
press the menu knob .
•With the button you can complete ly display a shortened list entry
with ...
Determine the destination exactly
The sub-menu “ ADDRESS ENTRY ” is displayed, if the destination town is deter-
mined.
In this sub-menu you can determine your destination:
•“ STREET ” - allows the selection of a street and an intersection stated below,
•“TOWN CENTRE ” - allows the selection of a town centre of the selected village,
•“CLOSE TO ADDRESS ” - allows the selection of a destination close to the last
entered destination. The selection is performed via columns, e.g. motorway
connection point or shopping centre. The requirement is that the corresponding
data is available on the navigation CD.
Enter destination - Street - Intersection
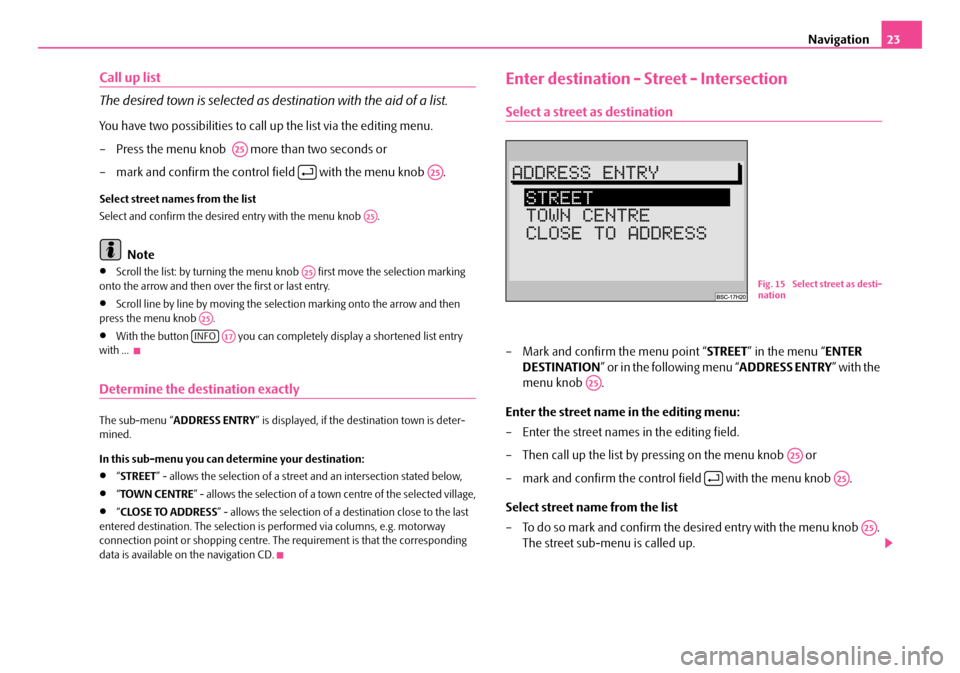
Select a street as destination
– Mark and confirm the menu point “ STREET” in the menu “ ENTER
DESTINATION ” or in the following menu “ ADDRESS ENTRY” with the
menu knob .
Enter the street name in the editing menu:
– Enter the street names in the editing field.
– Then call up the list by pressing on the menu knob or
– mark and confirm the control field with the menu knob .
Select street name from the list
– To do so mark and confirm the de sired entry with the menu knob .
The street sub-menu is called up.
A25
A25
A25
A25
A25
INFOA17
Fig. 15 Select street as desti-
nation
A25
A25
A25
A25
s2ck.7.book Page 23 Friday, April 20, 2007 12:38 PM
Page 25 of 43
Navigation
24
Note
•Scroll the list: by turning the menu knob first move the selection marking
onto the arrow and then beyond the first or last entry.
•If the selected street name exists several times in a town, then a sub-menu is
called up, from which the desired entry can be selected.
•In order to facilitate the search for long (consisting of several words) street
names, these can be stored in some versions with different writing - full text search.
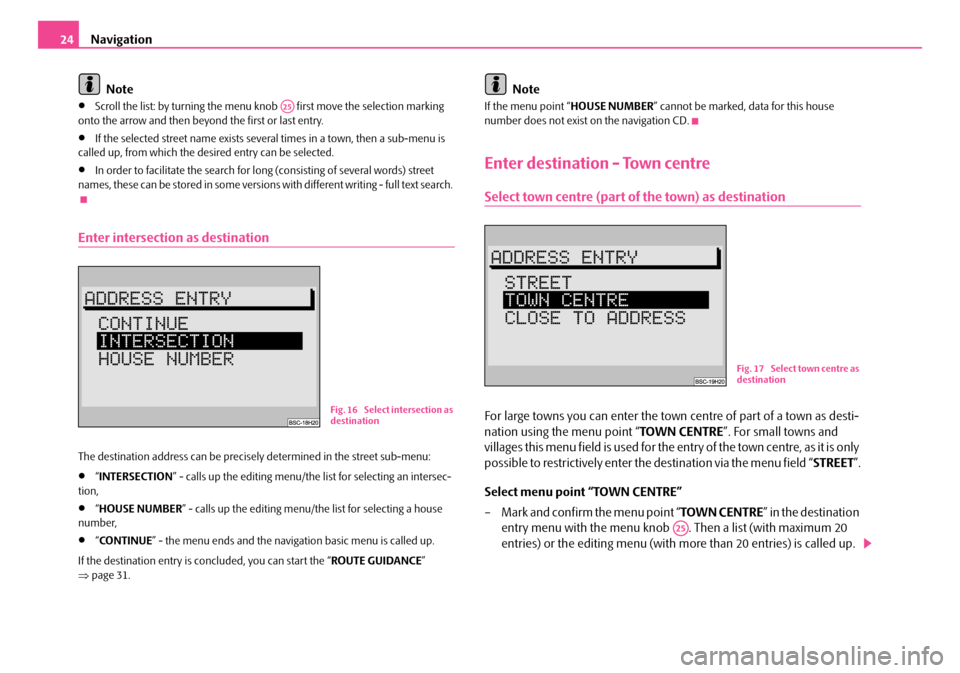
Enter intersection as destination
The destination address can be precisely determined in the street sub-menu:
•“ INTERSECTION ” - calls up the editing menu/the list for selecting an intersec-
tion,
•“ HOUSE NUMBER” - calls up the editing menu/the list for selecting a house
number,
•“ CO N T I N U E ” - the menu ends and the navigati on basic menu is called up.
If the destination entry is concluded, you can start the “ ROUTE GUIDANCE”
⇒ page 31.
Note
If the menu point “ HOUSE NUMBER” cannot be marked, data for this house
number does not exist on the navigation CD.
Enter destination - Town centre
Select town centre (part of the town) as destination
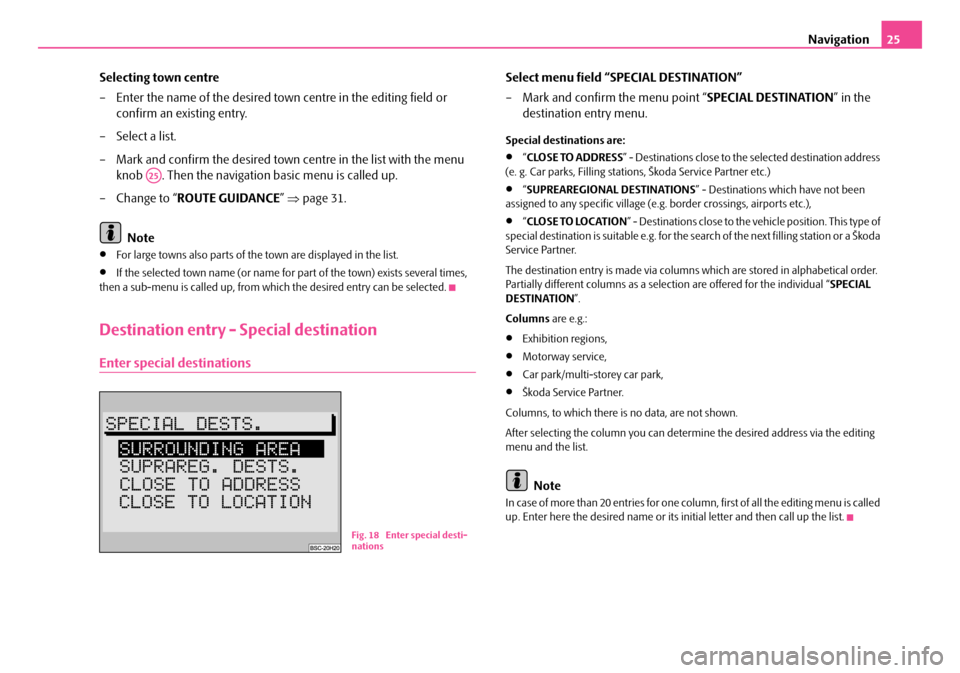
For large towns you can enter the town centre of part of a town as desti-
nation using the menu point “ TOWN CENTRE”. For small towns and
villages this menu field is used for the entry of the town centre, as it is only
possible to restrictively enter the destination via the menu field “ STREET”.
Select menu point “TOWN CENTRE”
– Mark and confirm the menu point “ TOWN CENTRE” in the destination
entry menu with the menu knob . Then a list (with maximum 20
entries) or the editing menu (with more than 20 entries) is called up.
A25
Fig. 16 Select intersection as
destination
Fig. 17 Select town centre as
destination
A25
s2ck.7.book Page 24 Friday, April 20, 2007 12:38 PM
Page 26 of 43
Navigation25
Selecting town centre
– Enter the name of the desired town centre in the editing field or confirm an existing entry.
– Select a list.
– Mark and confirm the desired town centre in the list with the menu knob . Then the navigation basic menu is called up.
– Change to “ ROUTE GUIDANCE ” ⇒ page 31.
Note
•For large towns also parts of the town are displayed in the list.
•If the selected town name (or name for part of the town) exists several times,
then a sub-menu is called up, from whic h the desired entry can be selected.
Destination entry - Special destination
Enter special destinations
Select menu field “SPECIAL DESTINATION”
– Mark and confirm the menu point “SPECIAL DESTINATION” in the
destination entry menu.
Special destinations are:
•“ CLOSE TO ADDRESS ” - Destinations close to the selected destination address
(e. g. Car parks, Filling stations, Škoda Service Partner etc.)
•“ SUPREAREGIONAL DESTINATIONS” - Destinations which have not been
assigned to any specific village (e.g . border crossings, airports etc.),
•“CLOSE TO LOCATION ” - Destinations close to the ve hicle position. This type of
special destination is suitable e.g. for the search of the next filling station or a Škoda
Service Partner.
The destination entry is made via columns which are stored in alphabetical order.
Partially different columns as a selection are offered for the individual “ SPECIAL
DESTINATION ”.
Columns are e.g.:
•Exhibition regions,
•Motorway service,
•Car park/multi-storey car park,
•Škoda Service Partner.
Columns, to which there is no data, are not shown.
After selecting the column you can determine the desired address via the editing
menu and the list.
Note
In case of more than 20 entries for one column, first of all the editing menu is called
up. Enter here the desired name or its initial letter and then call up the list.
A25
Fig. 18 Enter special desti-
nations
s2ck.7.book Page 25 Friday, April 20, 2007 12:38 PM
Page 27 of 43
Navigation
26
Enter destination - From destination memory
Store destination in the destination memory
Select menu point “STORE DESTINATION”
– Confirm the menu point “ STORE DESTINATION”. Then the editing
menu is called up for the entry of a short name.
Enter short name
– Enter the short name into the editing menu (e. g. “ AT HOME”).
– Press the menu knob more than two seconds or
– mark and confirm the control field with the menu knob .
Note
•A destination must first of all be stored in the destination memory, so that it can
be used for a later destination entry.
•First of all a destination is stored in the alphabetical destination memory. Here
the destination entries are alphabetically classified according to the short name (if
you have given them a name); town name, street name, intersection etc... house
number are stored.
•The destinations can be shown either in the order of their entry or alphabeti-
cally.
•A memory “ LAST DESTINATIONS ” is available for the destination entry from
the destination memory. The last 10 destinations of the route guidance are stored
here automatically.
•You can assign a short name (e.g. first name) to a destination. This makes it
easier for you to later on fetch out th e destination entry from the destination
memory.
•If the destination memory can no lo nger take any other destinations, “DESTI-
NATION MEMORY IS ASSIGNED ” is displayed. Then you must delete one or
several destinations.
Sort destinations in memory
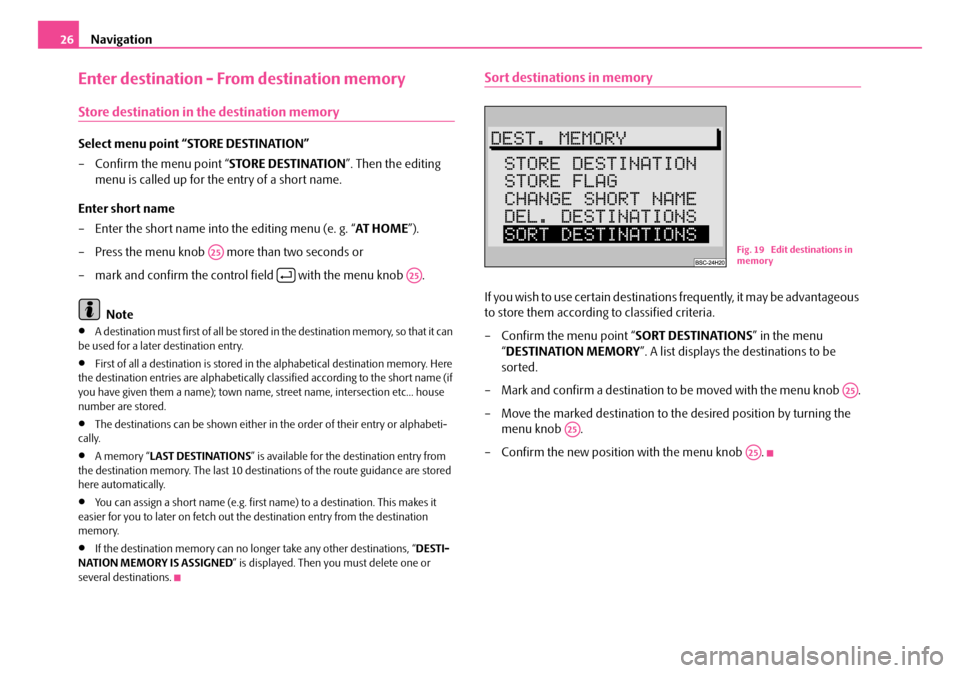
If you wish to use certain destinations frequently, it may be advantageous
to store them according to classified criteria.
– Confirm the menu point “ SORT DESTINATIONS” in the menu
“ DESTINATION MEMORY ”. A list displays the destinations to be
sorted.
– Mark and confirm a destination to be moved with the menu knob .
– Move the marked destination to the desired position by turning the menu knob .
– Confirm the new position with the menu knob .
A25
A25
Fig. 19 Edit destinations in
memory
A25
A25
A25
s2ck.7.book Page 26 Friday, April 20, 2007 12:38 PM
Page 28 of 43
Navigation27
Select destination from the memory
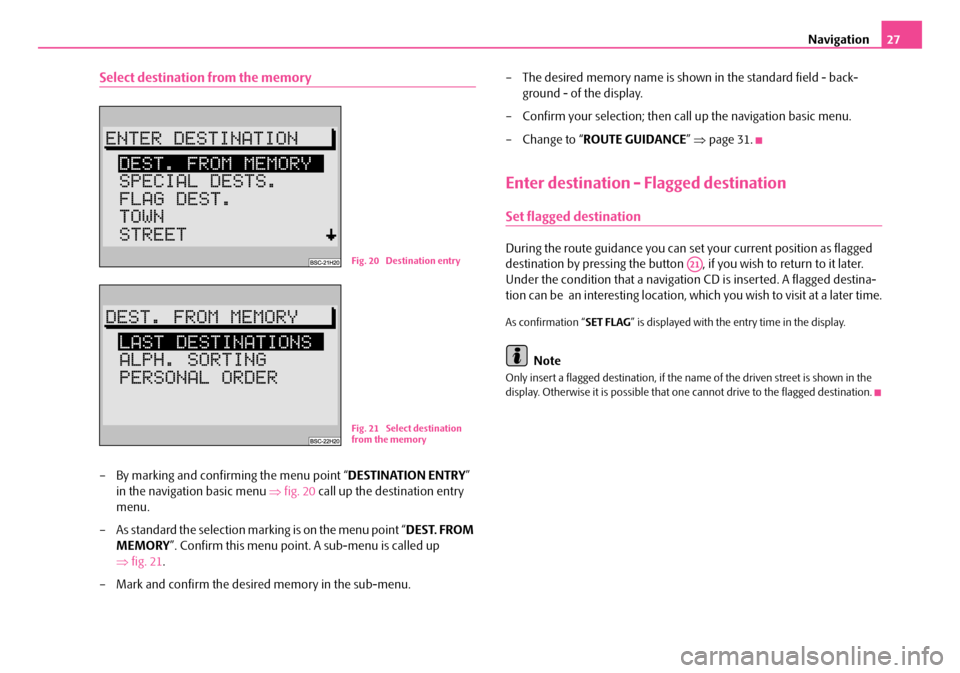
– By marking and confirming the menu point “ DESTINATION ENTRY”
in the navigation basic menu ⇒fig. 20 call up the destination entry
menu.
– As standard the selection marking is on the menu point “ DEST. FROM
MEMORY ”. Confirm this menu point. A sub-menu is called up
⇒ fig. 21 .
– Mark and confirm the desired memory in the sub-menu. – The desired memory name is shown in the standard field - back-
ground - of the display.
– Confirm your selection; then call up the navigation basic menu.
– Change to “ ROUTE GUIDANCE ” ⇒ page 31.
Enter destination - Flagged destination
Set flagged destination
During the route guidance you can se t your current position as flagged
destination by pressing the button , if you wish to return to it later.
Under the condition that a navigation CD is inserted. A flagged destina-
tion can be an interesting location, wh ich you wish to visit at a later time.
As confirmation “SET FLAG” is displayed with the entry time in the display.
Note
Only insert a flagged destination, if the name of the driven street is shown in the
display. Otherwise it is possible that one cannot drive to the flagged destination.
Fig. 20 Destination entry
Fig. 21 Select destination
from the memory
A21
s2ck.7.book Page 27 Friday, April 20, 2007 12:38 PM
Page 29 of 43
Navigation
28
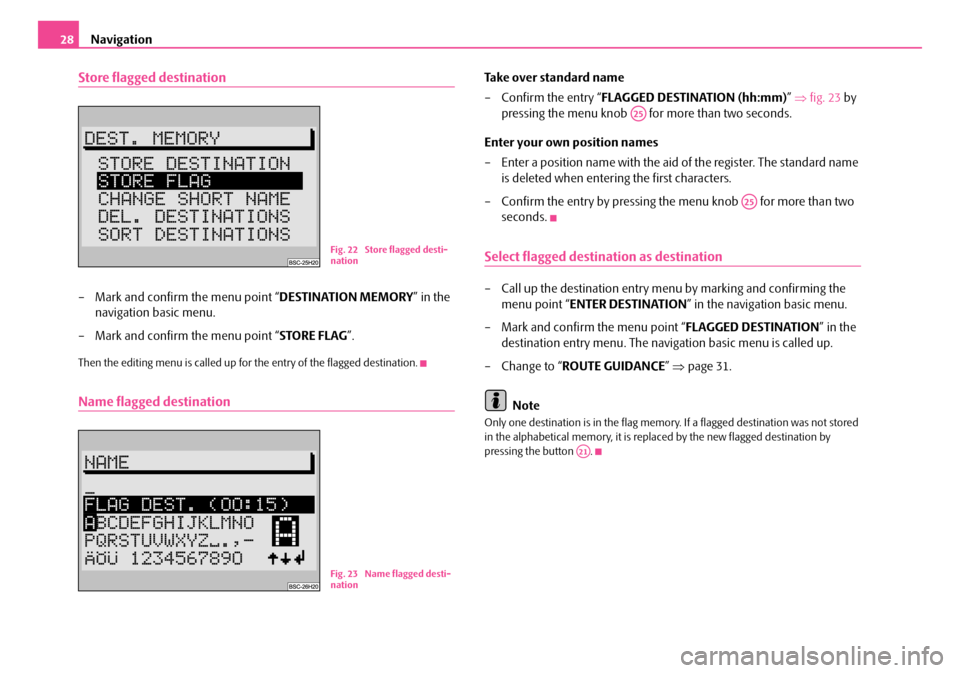
Store flagged destination
– Mark and confirm the menu point “ DESTINATION MEMORY” in the
navigation basic menu.
– Mark and confirm the menu point “ STORE FLAG”.
Then the editing menu is called up for the entry of the flagged destination.
Name flagged destination
Take over standard name
– Confirm the entry “ FLAGGED DESTINATION (hh:mm) ” ⇒ fig. 23 by
pressing the menu knob for more than two seconds.
Enter your own position names
– Enter a position name with the aid of the register. The standard name is deleted when entering the first characters.
– Confirm the entry by pressing the menu knob for more than two seconds.
Select flagged destination as destination
– Call up the destination entry me nu by marking and confirming the
menu point “ENTER DESTINATION ” in the navigation basic menu.
– Mark and confirm the menu point “ FLAGGED DESTINATION” in the
destination entry menu. The navi gation basic menu is called up.
– Change to “ ROUTE GUIDANCE ” ⇒ page 31.
Note
Only one destination is in the flag memory. If a flagged destination was not stored
in the alphabetical memory, it is repl aced by the new flagged destination by
pressing the button .
Fig. 22 Store flagged desti-
nation
Fig. 23 Name flagged desti-
nation
A25
A25
A21
s2ck.7.book Page 28 Friday, April 20, 2007 12:38 PM
Page 30 of 43
Navigation29
Route options
Plan route
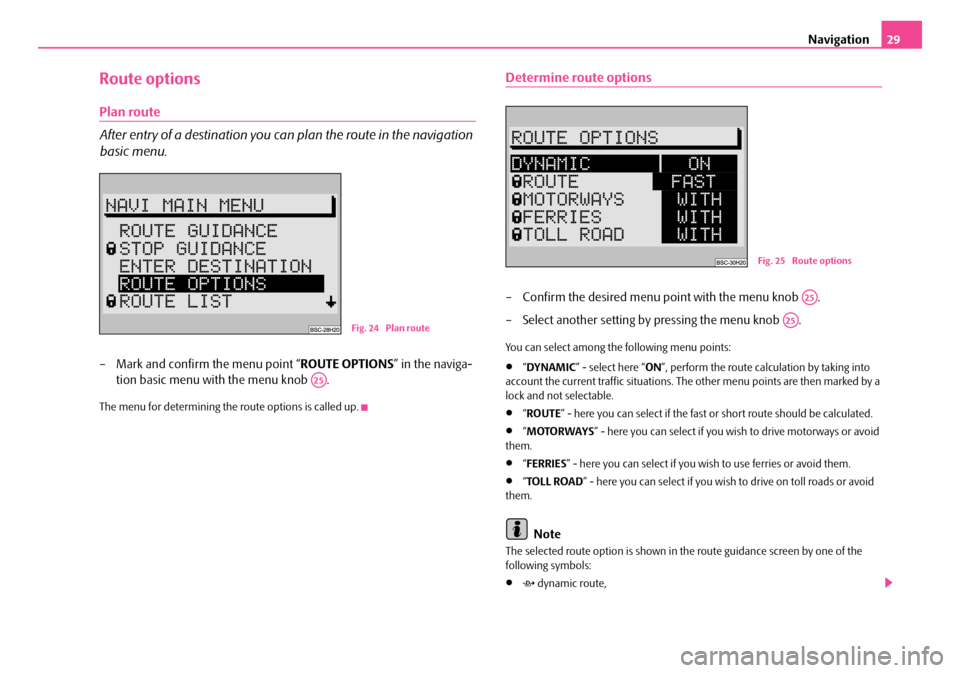
After entry of a destination you can plan the route in the navigation
basic menu.
– Mark and confirm the menu point “ ROUTE OPTIONS” in the naviga-
tion basic menu with the menu knob .
The menu for determining the route options is called up.
Determine route options
– Confirm the desired menu point with the menu knob .
– Select another setting by pressing the menu knob .
You can select among the following menu points:
•“ DYNAMIC ” - select here “ ON”, perform the route calculation by taking into
account the current traffic situations. The other menu points are then marked by a
lock and not selectable.
•“ ROUTE ” - here you can select if the fast or short route should be calculated.
•“MOTORWAYS ” - here you can select if you wi sh to drive motorways or avoid
them.
•“ FERRIES ” - here you can select if you wi sh to use ferries or avoid them.
•“TOLL ROAD ” - here you can select if you wish to drive on toll roads or avoid
them.
Note
The selected route option is shown in th e route guidance screen by one of the
following symbols:
• dynamic route,
Fig. 24 Plan route
A25
Fig. 25 Route options
A25
A25
s2ck.7.book Page 29 Friday, April 20, 2007 12:38 PM