Lights SKODA SUPERB 2010 2.G / (B6/3T) Repair Manual
[x] Cancel search | Manufacturer: SKODA, Model Year: 2010, Model line: SUPERB, Model: SKODA SUPERB 2010 2.G / (B6/3T)Pages: 287, PDF Size: 16.59 MB
Page 126 of 287
Starting-off and Driving125
Using the system
Safety
Driving Tips
General Maintenance
Breakdown assistance
Technical Data
– Hold the button pressed and push the handbrake lever down fully
.
The handbrake warning light
lights up when the handbrak e is applied, provided the
ignition is on.
A warning signal sounds and the following text appears in the display* if you have inad-
vertently driven off with the handbrake applied:
Release parking brake!
The handbrake warning is acti vated if you drive at a speed of more than 6 km/h for
more than 3 seconds.
WARNING
Please note that the handbrake must be fully released. A handbrake which
is only partially released can result in the rear brakes overheating which will
have a negative effect on the operation of the brake system - risk of accident! In
addition this can result in premature wear of the rear brake pads.
Never leave children unattended in the vehicle. The children might, for
example, release the handbrake or take the vehicle out of gear. The vehicle
might then move off - risk of accident!Caution
After the car has come to a stop, always firs t of all apply the handbrake firmly before
then additionally engaging a gear (manual gearbox) or moving the selector lever into
position P (automatic gearbox).KESSY system*IntroductionThe KESSY system makes it possible to switch the ignition on/off and to start/stop the
engine without actively using the key.
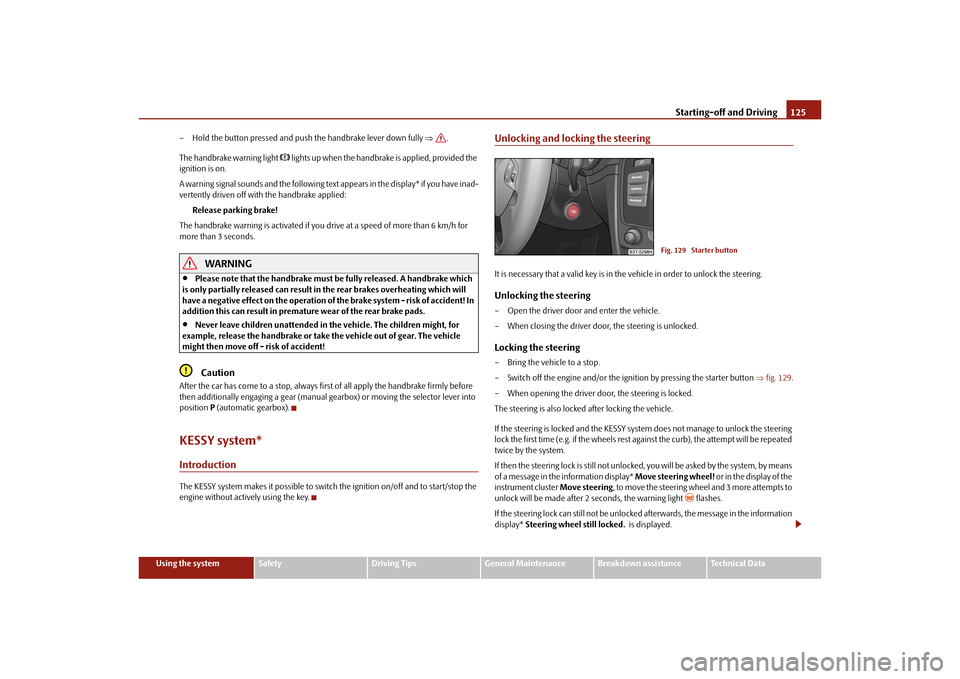
Unlocking and locking the steeringIt is necessary that a valid key is in th e vehicle in order to unlock the steering.Unlocking the steering– Open the driver door and enter the vehicle.
– When closing the driver door, the steering is unlocked.Locking the steering– Bring the vehicle to a stop.
– Switch off the engine and/or the ignition by pressing the starter button fig. 129 .
– When opening the driver door, the steering is locked.
The steering is also locked after locking the vehicle.
If the steering is locked and the KESSY syst em does not manage to unlock the steering
lock the first time (e.g. if the wheels rest against the curb), the attempt will be repeated
twice by the system.
If then the steering lock is still not unlocke d, you will be asked by the system, by means
of a message in the information display* Move steering wheel! or in the display of the
instrument cluster Move steering, to move the steering wheel and 3 more attempts to
unlock will be made after 2 seconds, the warning light
flashes.
If the steering lock can still not be unlocke d afterwards, the message in the information
display* Steering wheel still locked. is displayed.
Fig. 129 Starter button
s3fg.2.book Page 125 Friday, April 30, 2010 12:17 PM
Page 127 of 287

Starting-off and Driving
126
It is necessary to eliminate the possible ca use which prevents the unlocking and repeat
the attempt to unlock the steering.
Engine protection for electric steering lock
The electric steering lock has an engine protection which slows down the locking and
unlocking of the steering if the starter button is pressed repeatedly at short intervals.
Note
After pressing the starter button while th e steering is locked, the steering is
unlocked, the electrical components are acti vated (e.g. radio, navigation system etc.)
and the igntion is switched on.
If you do not exit or enter the vehicle again using the valid key after locking the
steering, however you wish to unlock the st eering, you must press the starter button.
At the same time, electrical components ar e activated (e.g. radio, navigation system
etc.) and the ignition is switched on.
If you switch off the ignition or the engine by pressing the starter button and if the
driver door is already opened, the steering wi ll not lock. In order to lock the steering, it
is necessary to close and open the driver door again or to lock the vehicle with the aid
of the sensor page 40, fig. 26 .
Switching on the ignitionIt is necessary that a valid key is in the vehicle and that the steering is unlocked in order
to switch on the ignition.
– The ignition is switched on by briefly pressing the starter button page 125,
fig. 129 .
Once you switch on the ignition an d open the driver door, the message Switch off
ignition! appears in the information display*.Switching off the ignition– The ignition is switched off by briefly pressing the starter button page 125,
fig. 129 .
The ignition can be switched off up to a speed of 2 km/h. On vehicles fitted with a manual gearbox,
the clutch must not be pressed after
switching off the ignition otherwise the system would try to start.
On vehicles fitted with an automatic gearbox, the selector lever must be in the position
P or N and the brake pedal must not be pressed.
Emergency ignition shutoff systemIn an emergency it is possible to switch off the ignition even at speeds greater than 2
km/h, by way of the so-called em ergency ignition shutoff system.
– Press the starter button page 125, fig. 129 for longer than 1 second or press it
twice within 1 second.
WARNING
Never switch off the ignition while dr iving, otherwise the steering and brake
assist do no longer function - risk of accident!Starting the engineIt is necessary that a valid key is in the vehi cle, the steering is unlocked and the ignition
is switched on in order to start the vehicle. On vehicles with manual gearbox, hold the
clutch pressed when starting the vehicle, on vehicles with automatic gearbox move the
selector lever into position P or N and hold the brake pedal pressed until the engine
starts.Petrol engines– Press the starter button page 125, fig. 129 until the engine has started.Diesel engines– If the starter button is pressed during the whole preglow period, the engine starts
after the warning light
has gone out.
The diesel engine can also be started by pressing the starter button, the ignition is
switched on and the preglow warning light
lights up. You must wait until the
preglow warning light
goes out and then press the starter button again until the
engine starts.
A1
s3fg.2.book Page 126 Friday, April 30, 2010 12:17 PM
Page 130 of 287

Starting-off and Driving129
Using the system
Safety
Driving Tips
General Maintenance
Breakdown assistance
Technical Data
Note
The parking aid does not operate if you are towing a trailer (applies to models
which feature a factory-fitted towing device*).
If a warning signal sounds for about 3 seconds after switching the ignition on and
engaging reverse gear, and there is no obstac le close to your vehicle, this indicates a
system fault. Have the fault rectified by a specialist workshop.
The sensors must be kept clean and free of ice to enable the parking aid to operate
properly.
Front and rear parking aid*
The parking aid provides a warning of obstacles in front and behind the
vehicle.Fig. 132 Activating the parkin g aid / parking aid: Detection range of the front sensorsThe audible parking aid determines the distance between the front or rear bumper and
an obstacle with the aid of ultrasound sens ors. The sensors are integrated in the front
and rear bumper. The signal tones for the fr ont parking aid sound higher as standard
than for the rear parking aid. The tones of the parking aid can be adapted in the menu
of the information display* page 25.
Range of sensors
The distance warning begins at a distance of about 120 cm from the obstacle in front
of the vehicle (area fig. 132 ) and about 160 cm from the obstacle behind the
vehicle (area fig. 132). The interval between the warning signals becomes
shorter as the clearance is reduced. A continuous tone sounds from
a distance of approx. 30 cm (area ) - danger area.
From this moment on do not continue driving! If the vehicle is equipped with a
factory-fitted towing device*, the border of the danger area starts - continuous tone -
5 cm further behind the vehicle. The vehi cle can be extended through an installed
detachable towing device.
On vehicles equipped with a factory-fitted radio* or navigation system*, the distance
to the obstruction is shown graphically in the display. On vehicles with a factory-fitted
towing device, the rear sensors are deactivated when towing a trailer. The driver is
informed about this by a graphic display (vehic le towing a trailer) in the radio* or the
navigation* display. The factory-fitted radio* or navigation system* can be set so that
the play function volume decreases when activating the parking aid, see Owner's
Manual radio* or navigation system*. This improves the audibility of the parking aid.
Activating
The parking aid is activated when the reverse gear is engaged and the ignition is
turned on or by pressing the button fig. 132 - the symbol
lights up in the button.
The activation is confirmed by a brief acknowledgement signal.
Deactivating
The parking aid is deactivated after pressing the button°
fig. 132 or at a speed of
more than 10 km/h - the symbol
in the button is no longer illuminated.
WARNING
The parking aid is not a substitute for the driver paying proper attention and
it is always the driver's re sponsibility to take care when reversing the vehicle or
carrying out similar manoeuvres.
You should therefore satisfy yourself, before reversing, that there is no small
obstacle, such as a rock, thin post, trailer drawbar etc., in front or behind your
vehicle. Such an obstacle might not be within the range detected by the sensors.
Under certain circumstances, surfaces of certain objects and types of
clothing cannot reflect the signal of the parking aid. Thus, these objects or
people who wear such clothing are not recognised by the sensors of the parking
aid.
AA
AA
AB
s3fg.2.book Page 129 Friday, April 30, 2010 12:17 PM
Page 132 of 287

Starting-off and Driving131
Using the system
Safety
Driving Tips
General Maintenance
Breakdown assistance
Technical Data
In order to avoid damaging th e sensors while cleaning with high-pressure cleaners
or steam jets, the sensors must only be directly sprayed for short periods while a
minimum distance of 10 cm must be observed.Note
A component of the park assist is the front and rear parking aid*.
The electronic stability programme (ESP) must always be switched on for the
parking procedure.
Only the front parking aid operates if yo u are towing a trailer (applies only to
models which feature a factory-fitted towing device*). This is why it is not possible to
park backwards with the help of the park assist when towing a trailer.
The sensors must be kept clean and free of ice to enable the parking aid to operate
properly.
Switch on display of the park as sist in the information display*Fig. 133 Switch on display of the park assist in the information display / information display:
Finding a suitable parking spaceSwitch on display of the park assist in the information display*– Press the button fig. 133 .
– Drive past the parking row up to maximum 30 km/h and with a distance of 0.5 m to 1.5 m fig. 133. Operate the turn signal for the driver's side if you wish to park on this side of the road.
In the information display* the search area
for the parking space is indicated on the
driver's side.
If the button is pressed above a speed of 30 km/h, the display appears in the display of
the instrument cluster as soon as you drive slower than 30 km/h.
Note
If the park assist is switched on, a yello w warning light lights up in the button.
The search for suitable parking spaces is automatic after switching on the ignition
at speeds of more than 30 km/h. Searchin g for a parking space is performed at the
same time on the driver and front passenger side.
If the sensors find a suitable parking space, they store its parameters until another
suitable parking space has been found or until a distance of 10 m had been driven after
finding the parking space. This is why it is possible to switch on the park assist after
driving past the parking space, the information on whether this parking space is suit-
able for parking appears in the information display*.
Parking with the help of the park assist and concluding the parking procedureFig. 134 Information display: the determined pa rking space with the information to drive on
and for engaging the reverse gear AA
AB
s3fg.2.book Page 131 Friday, April 30, 2010 12:17 PM
Page 138 of 287
Automatic gearbox DSG*137
Using the system
Safety
Driving Tips
General Maintenance
Breakdown assistance
Technical Data
Caution
The double clutch on the automatic gear box DSG is equipped with an overload
protection. If you make use of the uphill function on a vehicle which is stationary or
driving slowly uphill, it will result in an increase of thermal stress of the clutches.
In the event that they overheat, the symbol
and a warning page 36 appear in
the information display*. In such a case bring the vehicle to a stop, switch off the
engine and wait until the warning light and the warning go out - risk of gearbox
damage! You can continue the trip as soon as the symbol and the warning go out.
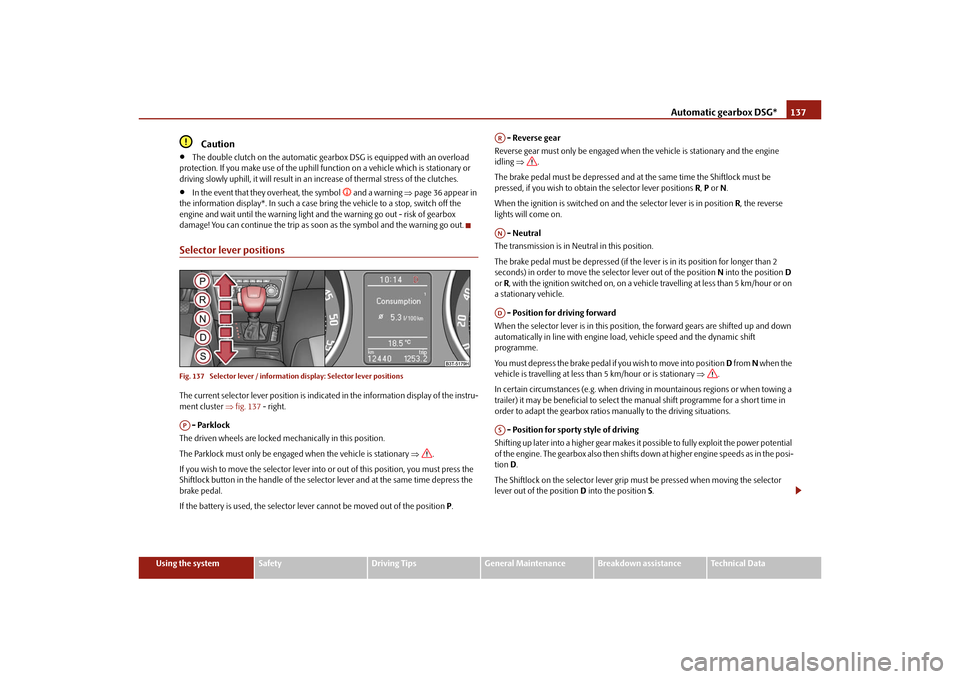
Selector lever positionsFig. 137 Selector lever / information display: Selector lever positionsThe current selector lever position is indica ted in the information display of the instru-
ment cluster fig. 137 - right.
- Parklock
The driven wheels are locked me chanically in this position.
The Parklock must only be engage d when the vehicle is stationary .
If you wish to move the selector lever into or out of this position, you must press the
Shiftlock button in the handle of the select or lever and at the same time depress the
brake pedal.
If the battery is used, the selector lever cannot be moved out of the position P. - Reverse gear
Reverse gear must only be engaged when the vehicle is stationary and the engine
idling .
The brake pedal must be depressed and at the same time the Shiftlock must be
pressed, if you wish to obtain the selector lever positions R, P or N.
When the ignition is switched on an d the selector lever is in position R, the reverse
lights will come on.
- Neutral
The transmission is in Neutral in this position.
The brake pedal must be depressed (if the le ver is in its position for longer than 2
seconds) in order to move the se lector lever out of the position N into the position D
or R, with the ignition switched on, on a vehicle travelling at less than 5 km/hour or on
a stationary vehicle.
- Position for driving forward
When the selector lever is in this position, the forward gears are shifted up and down
automatically in line with engine load, vehicle speed and the dynamic shift
programme.
You must depress the brake pedal if you wish to move into position D from N when the
vehicle is travelling at less th an 5 km/hour or is stationary .
In certain circumstances (e.g. when driving in mountainous regions or when towing a
trailer) it may be beneficial to select th e manual shift programme for a short time in
order to adapt the gearbox ratios manually to the driving situations.
- Position for sporty style of driving
Shifting up later into a higher gear makes it possible to fully exploit the power potential
of the engine. The gearbox also then shifts down at higher engine speeds as in the posi-
tion D.
The Shiftlock on the selector lever grip must be pressed when moving the selector
lever out of the position D into the position S.AP
ARANADAS
s3fg.2.book Page 137 Friday, April 30, 2010 12:17 PM
Page 139 of 287
Automatic gearbox DSG*
138WARNING
Never move the selector lever into position R or P when driving - risk of an
accident!
When the engine is running and the vehicle is stationary, it is necessary to
hold the car with the brake pedal in all the positions of the selector lever (except
P and N) since the power transmission is never completely interrupted, also not
when the engine is idling - the vehicle creeps.
You must on no account unintentionally operate the throttle (e.g. by hand
from the engine compartment) if a driv e position is engaged when the car is
stationary. The vehicle would otherwise immediately start off - also when the
handbrake is firmly applied - risk of an accident!
You must move the selector lever into position P and firmly apply the hand-
brake first before you or any other person opens the bonnet and starts working
on the engine when it is running - risk of accident! It is also essential to observe
all warnings page 216.
Selector lever lockAutomatic selector lever lock
With the ignition on, the selector lever is locked when it is in the positions P and N . You
must first of all depress the brake pedal in or der to move the selector lever out of this
position. The warning light
page 27 lights up in the instrument cluster as a
reminder for the driver when the selector lever is in the positions P and N.
A time delay element ensures that the selector lever is not blocked when rapidly
switching over the position N (e.g. from R to D). This does, for example, allow one to
seesaw out a stuck vehicle. The selector lever lo ck will click into place if the lever is in
the N position for more than 2 seconds without the brake pedal being pressed.
The selector lever lock is only active if the vehicle is stationary or moving at speed of
less than 5 km/hour. The lock is swit ched off automatically into position N when the
car is travelling at a higher speed.
Shiftlock button
The Shiftlock button in the hand le of selector lever prevents certain selector lever posi-
tions being engaged inadvertently. The select or lever lock is cancelled when you press
the Shiftlock button. Keylock - Ignition key withdrawal lock
You can only withdraw the ignition key after
switching off the ignition if the selector
lever is in position P. If the ignition key is withdrawn, the selector lever is blocked in
position P.
Kickdown function
The kickdown function provides you with maximum acceleration
power.Fully depressing the accelerato r pedal allows the kickdown function to be activated in
the desired driving program. This function has precedence over the driving
programme and serves for maximum accelerati on of the vehicle when exploiting the
maximum power potential of the engine wi thout taking into account the current
selector lever position ( D, S or Tiptronic). The gearbox shifts down to one or several
gears in line with the driving state and the vehicle accelerates. The gearbox does not
shift up into the highest gear until the en gine has reached its maximum revolutions for
this gear range.
WARNING
Please note that using the kickdown function can result in the driven wheels
spinning on a smooth or slippery road surface - risk of skidding!Dynamic shift programmeThe automatic gearbox of your vehicle is controlled electronically. Shifting up and
down through the gears is performed automati cally on the basis of pre-defined driving
programmes.
Adopting a moderate style of driving will cause the gearbox to select the most
economical driving programme. Shifting up into a higher gear as soon as possible and
shifting down as late as po ssible will have a favourable effect on your fuel consump-
tion.
Adopting a sporty style of driving with rapid movements of the accelerator pedal
combined with sharp acceleration and frequent changes in speed, exploiting the top
speed of the car or depressing the accele rator pedal (kickdown function), will cause
s3fg.2.book Page 138 Friday, April 30, 2010 12:17 PM
Page 143 of 287

Communication
142
CommunicationMultifunction steering wheel*Operate radio und navigation on the multifunction steering wheelThe buttons for setting the basic functions of the factory-fitted radio and navigation
system are located on the multifunction steering wheel* fig. 141 .
You can of course operate the radio and navi gation at the appliance. You will find a
description in the operating instructions of your radio.
If the side lights are switched on, the butt ons on the multifunction steering wheel are
illuminated.
The buttons apply for the respective operating mode of the current radio or navigation
system.
By pressing or turning the buttons, you can carry out the following functions.
Fig. 141 Multifunction steering wheel:
control buttons
s3fg.2.book Page 142 Friday, April 30, 2010 12:17 PM
Page 149 of 287
Communication
148
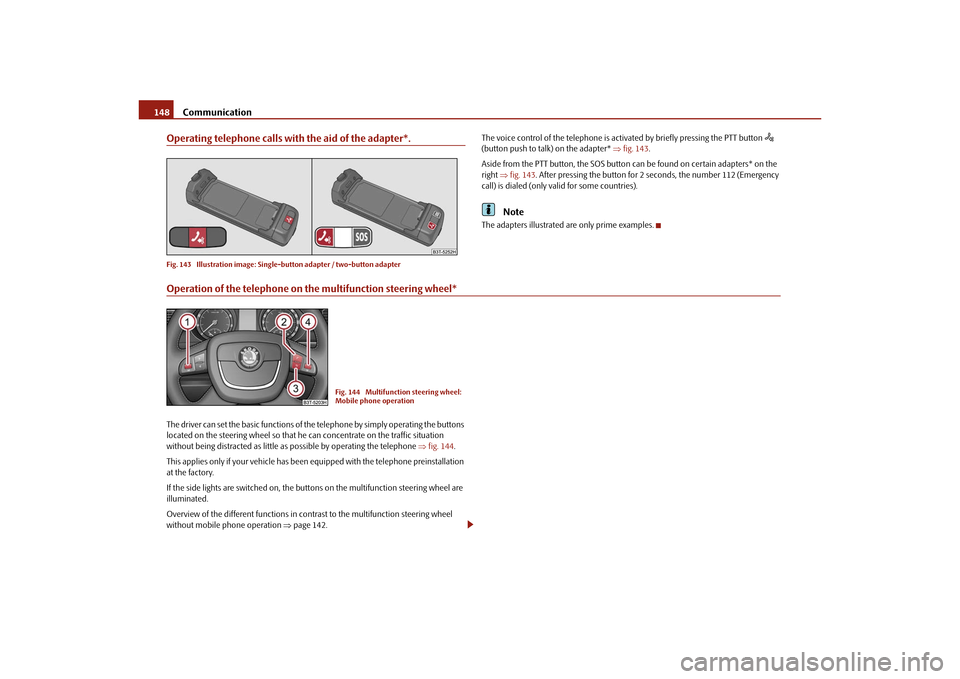
Operating telephone calls with the aid of the adapter*.Fig. 143 Illustration image: Single -button adapter / two-button adapter
The voice control of the telephone is acti vated by briefly pressing the PTT button
(button push to talk) on the adapter* fig. 143 .
Aside from the PTT button, the SOS button can be found on certain adapters* on the
right fig. 143 . After pressing the button for 2 seconds, the number 112 (Emergency
call) is dialed (only valid for some countries).
Note
The adapters illustrated are only prime examples.
Operation of the telephone on the multifunction steering wheel*The driver can set the basic functions of the telephone by simply operating the buttons
located on the steering whee l so that he can concentrate on the traffic situation
without being distracted as little as possible by operating the telephone fig. 144 .
This applies only if your vehicle has been equipped with the telephone preinstallation
at the factory.
If the side lights are switched on, the butt ons on the multifunction steering wheel are
illuminated.
Overview of the different functions in contrast to the multifunction steering wheel
without mobile phone operation page 142.
Fig. 144 Multifunction steering wheel:
Mobile phone operation
s3fg.2.book Page 148 Friday, April 30, 2010 12:17 PM
Page 155 of 287
Communication
154WARNING
Pay attention primarily to the traffic situation! As the driver you are fully
responsible for road safety. Use the teleph one system only to such an extent, so
that you are in full control of your vehicle at any time - risk of accident!
In the event of air transport, the Bluetooth
® function of the hands-free
system must be switched off by a specialist garage!
Note
In the memory of the control unit, up to three users can be stored, whereby the
hands-free system can only communicate active ly with one user. In the case of mutual
connection with a fourth mobile phone, you must erase one user.
Not valid for all mobile phones which enable a communication via Bluetooth
®.
You can ask at an authorised Škoda Service Partner if your telephone is compatible
with the universal telephon e preinstallation GSM IIl.
If the telephone book of the mobile phone contains more than 2 000 entries, the
system announces Phone book not fully loaded .
When connecting to the control unit, follow the instructions on your mobile phone.
The range of the Bluetooth
® connection to the hands-free system is intended for
the vehicle interior. The range is dependent on local factors, e.g. obstacles between the
devices and interferences with other devices.
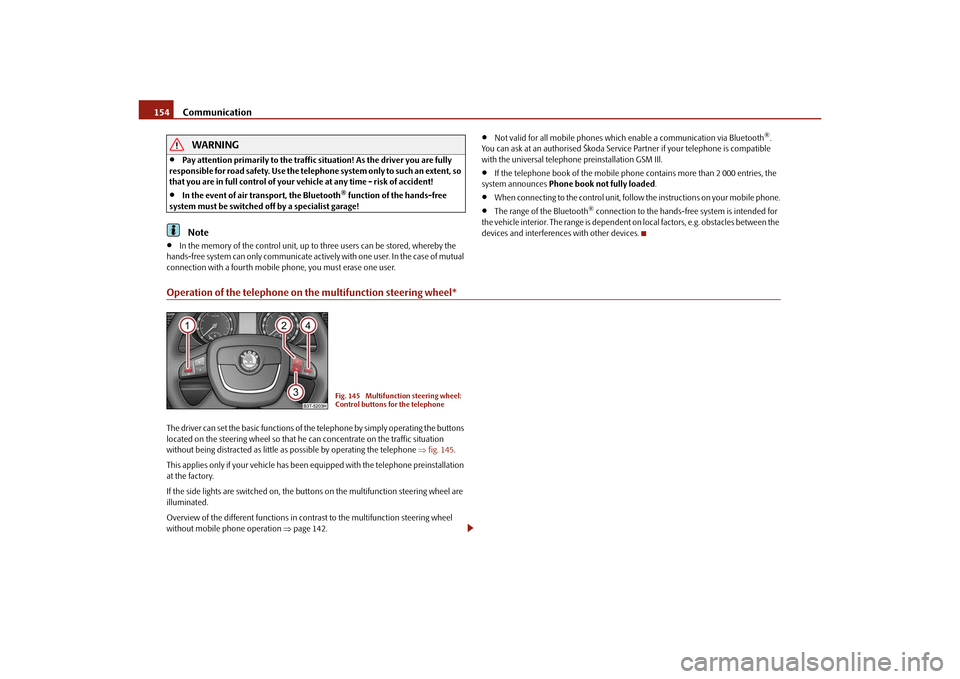
Operation of the telephone on the multifunction steering wheel*The driver can set the basic functions of the telephone by simply operating the buttons
located on the steering whee l so that he can concentrate on the traffic situation
without being distracted as little as possible by operating the telephone fig. 145 .
This applies only if your vehicle has been equipped with the telephone preinstallation
at the factory.
If the side lights are switched on, the butt ons on the multifunction steering wheel are
illuminated.
Overview of the different functions in contrast to the multifunction steering wheel
without mobile phone operation page 142.
Fig. 145 Multifunction steering wheel:
Control buttons for the telephone
s3fg.2.book Page 154 Friday, April 30, 2010 12:17 PM
Page 161 of 287
Communication
160
Ejecting all CDs
– Hold the button pressed for more than 2 seconds, in order to eject the CDs. All CDs in the CD-changer are ejected consecutively.
Note
Always guide the CD into the CD-case with the printed side pointing upwards.
Never push the CD with force into the CD-case as the insertion is performed auto-
matically.
After loading a CD into the CD-changer, yo u must wait until the LED of the corre-
sponding button lights up. Then the CD -case is free to load the next CD.
If you have selected a position, on which a CD is already located, this CD will be
ejected. Take out the ejected CD and load the desired CD.
AA
AB
AD
AB
s3fg.2.book Page 160 Friday, April 30, 2010 12:17 PM