remove seats SKODA SUPERB 2014 2.G / (B6/3T) Owner's Manual
[x] Cancel search | Manufacturer: SKODA, Model Year: 2014, Model line: SUPERB, Model: SKODA SUPERB 2014 2.G / (B6/3T)Pages: 246, PDF Size: 17.16 MB
Page 13 of 246
WARNING (Continued)■The lock tongue should only be inserted into the lock which is the correct
one for your seat. Wrong use of the safety belt will reduce its capacity to
protect and the risk of injury increases.■
The slot of the belt tongue must not be blocked, otherwise the belt
tongue will not lock in place properly.
■
Many layers of clothing and loose clothing (e. g. a winter coat over a jack-
et) do not allow you to be correctly seated and impairs proper operation of
the seat belts.
■
It is prohibited to use clamps or other objects to adjust seat belts (e. g. for
shortening the belts for smaller persons).
■
The seat belts for the rear seats can only fulfil their function reliably
when the seat backrests are correctly locked into position » page 85.
WARNINGInformation on the care and maintenance of the safety belts■The belt webbing must always be kept clean. Soiled belt webbing may im-
pair proper operation of the inertia reel » page 178.■
The seat belts must not be removed or changed in any way. Do not at-
tempt to repair the seat belts yourself.
■
Check the condition of all the seat belts on a regular basis. If any damage
to the seat belts, seat belt connections, inertia reel or the lock is detected,
the relevant seat belt must be replaced by a specialist garage.
■
Damaged seat belts which have been subjected to stress in an accident
and were therefore stretched, must be replaced – this is best done by a
specialist garage. The anchorage points of the belts must also be inspec-
ted. The anchorage points for the belts should also be checked.
Note
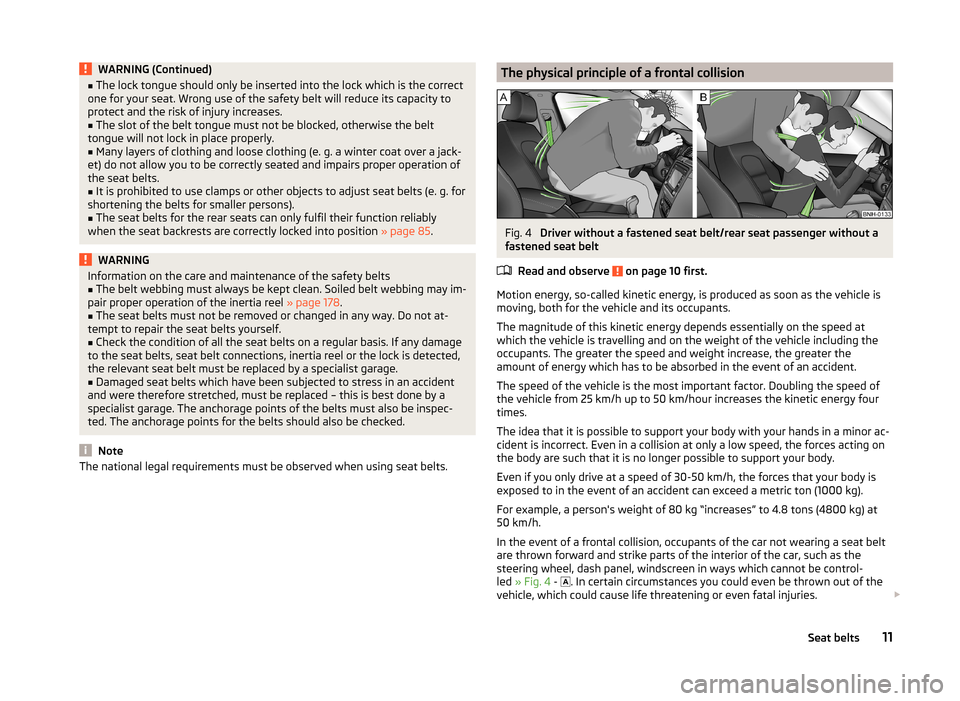
The national legal requirements must be observed when using seat belts.The physical principle of a frontal collisionFig. 4
Driver without a fastened seat belt/rear seat passenger without a
fastened seat belt
Read and observe
on page 10 first.
Motion energy, so-called kinetic energy, is produced as soon as the vehicle is
moving, both for the vehicle and its occupants.
The magnitude of this kinetic energy depends essentially on the speed at
which the vehicle is travelling and on the weight of the vehicle including the
occupants. The greater the speed and weight increase, the greater the
amount of energy which has to be absorbed in the event of an accident.
The speed of the vehicle is the most important factor. Doubling the speed of
the vehicle from 25 km/h up to 50 km/hour increases the kinetic energy four
times.
The idea that it is possible to support your body with your hands in a minor ac-
cident is incorrect. Even in a collision at only a low speed, the forces acting on
the body are such that it is no longer possible to support your body.
Even if you only drive at a speed of 30-50 km/h, the forces that your body is
exposed to in the event of an accident can exceed a metric ton (1000 kg).
For example, a person's weight of 80 kg “increases” to 4.8 tons (4800 kg) at
50 km/h.
In the event of a frontal collision, occupants of the car not wearing a seat belt
are thrown forward and strike parts of the interior of the car, such as the
steering wheel, dash panel, windscreen in ways which cannot be control-
led » Fig. 4 -
. In certain circumstances you could even be thrown out of the
vehicle, which could cause life threatening or even fatal injuries.
11Seat belts
Page 19 of 246
WARNING■Adjust the driver's seat in a forward/back direction so that there is a gap
of at least 10 cm between the legs B and the dash panel in the vicinity of
the knee airbag » Fig. 10. If it is not possible to meet this requirement due
to your body size, visit a specialist garage.■
The surface of the airbag module in the lower part of the dash panel be-
low the steering column not have stickers attached, be covered or modified
in any other way. This part should only be cleaned with a cloth that is dry or
has been moistened with water. No objects must be attached to the cover
of the airbag module or located within the immediate vicinity.
■
Do not attach any bulky and heavy objects (bunch of keys etc.) to the igni-
tion key. These can be ejected by the knee airbag when it is deployed and
can cause injuries.
Note
In vehicles with a driver's knee airbag, a symbol with the word AIRBAG is loca-
ted on the side panel on the driver's side.
Side airbags
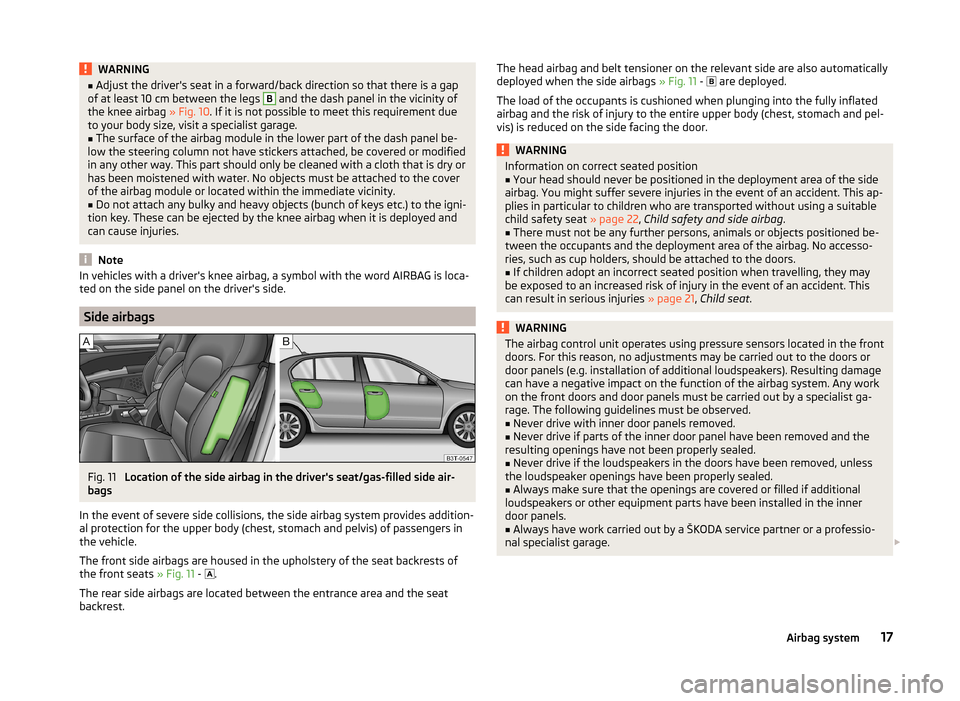
Fig. 11
Location of the side airbag in the driver's seat/gas-filled side air-
bags
In the event of severe side collisions, the side airbag system provides addition-
al protection for the upper body (chest, stomach and pelvis) of passengers in
the vehicle.
The front side airbags are housed in the upholstery of the seat backrests of
the front seats » Fig. 11 -
.
The rear side airbags are located between the entrance area and the seat backrest.
The head airbag and belt tensioner on the relevant side are also automatically
deployed when the side airbags » Fig. 11 - are deployed.
The load of the occupants is cushioned when plunging into the fully inflated
airbag and the risk of injury to the entire upper body (chest, stomach and pel-
vis) is reduced on the side facing the door.WARNINGInformation on correct seated position■Your head should never be positioned in the deployment area of the side
airbag. You might suffer severe injuries in the event of an accident. This ap-
plies in particular to children who are transported without using a suitable
child safety seat » page 22, Child safety and side airbag .■
There must not be any further persons, animals or objects positioned be-
tween the occupants and the deployment area of the airbag. No accesso-
ries, such as cup holders, should be attached to the doors.
■
If children adopt an incorrect seated position when travelling, they may
be exposed to an increased risk of injury in the event of an accident. This
can result in serious injuries » page 21, Child seat .
WARNINGThe airbag control unit operates using pressure sensors located in the front
doors. For this reason, no adjustments may be carried out to the doors or
door panels (e.g. installation of additional loudspeakers). Resulting damage
can have a negative impact on the function of the airbag system. Any work
on the front doors and door panels must be carried out by a specialist ga-
rage. The following guidelines must be observed.■
Never drive with inner door panels removed.
■
Never drive if parts of the inner door panel have been removed and the
resulting openings have not been properly sealed.
■
Never drive if the loudspeakers in the doors have been removed, unless
the loudspeaker openings have been properly sealed.
■
Always make sure that the openings are covered or filled if additional
loudspeakers or other equipment parts have been installed in the inner
door panels.
■
Always have work carried out by a ŠKODA service partner or a professio-
nal specialist garage.
17Airbag system
Page 21 of 246
WARNINGThe airbag control unit operates using pressure sensors located in the front
doors. For this reason, no adjustments may be carried out to the doors or
door panels (e.g. installation of additional loudspeakers). Resulting damage
can have a negative impact on the function of the airbag system. Any work
on the front doors and door panels must be carried out by a specialist ga-
rage. The following guidelines must be observed.■
Never drive with inner door panels removed.
■
Never drive if parts of the inner door panel have been removed and the
resulting openings have not been properly sealed.
■
Never drive if the loudspeakers in the doors have been removed, unless
the loudspeaker openings have been properly sealed.
■
Always make sure that the openings are covered or filled if additional
loudspeakers or other equipment parts have been installed in the inner
door panels.
■
Always have work carried out by a ŠKODA service partner or a professio-
nal specialist garage.
Note
In vehicles with head airbags, the word AIRBAG can be seen on the B column cladding.
Deactivating airbags
Introduction
This chapter contains information on the following subjects:
Deactivating airbags
19
Deactivating the front passenger airbag
20
Deactivating airbags
Deactivating an airbag should be considered in cases such as the ones below. › If using a rear-facing child seat on the front passenger seat (due to different
legal regulations, the airbag must be deactivated if using a forwards-facing
child seat in some countries) » page 21, Transporting children safely .
› If it is not possible to maintain a distance of at least 25 cm between the mid-
dle of the steering wheel and chest, despite the driver's seat being correctly
adjusted.
› If special attachments are required in the area of the steering wheel because
of a physical disability.
› If different seats have been fitted (e.g. orthopaedic seats without side air-
bags).
The front passenger airbag can be switched off with the key-operated
switch » page 20 , Deactivating the front passenger airbag .
We recommend that you ask a ŠKODA service partner to deactivate any other airbags.
Monitoring the airbag system
The operational capability of the airbag system is monitored electronically, in-
cluding when one of the airbags is switched off.
Airbag deactivated using diagnostic equipment
› The warning light
lights up for approximately 4 seconds after the ignition
is switched on and then flashes again for approximately 12 seconds.
Front passenger airbag deactivated using the key switch in the storage com-
partment
› The warning light
lights up for approximately 4 seconds after the ignition
is switched on.
› The
3rd
» Fig. 13 on page 20 warning light comes on when the igni-
tion is switched on.
Note
■ The national regulations for switching off airbags must be observed.■A ŠKODA service partner will be able to inform you which, if any, of your vehi-
cle's airbags can or must be deactivated.19Airbag system
Page 23 of 246
Transporting children safely
Child seat
Introduction
This chapter contains information on the following subjects:
Use of a child seat on the front passenger seat
21
Child safety and side airbag
22
Classification of child seats
23
Use of child seats fastened with a seat belt
23
Children are generally safer on the rear seats than on the front passenger
seat.
In contrast to adults, the muscles and bone structure of children are not yet
fully developed. Thus children are exposed to increased risk of injury.
Children should be transported in accordance with the relevant statutory pro-
visions.
Child seats complying with the ECE-R 44 standard must be used. ECE-R stands
for: Economic Commission for Europe - Regulation.
Child seats that comply with the ECE-R 44 standard are identified with a test
mark that cannot be removed: a large E within a circle with the test number
below.
WARNING■ The national legal requirements must be observed when using child
seats.■
One should never carry children, and also not babies! - on one's lap.
■
Never leave children unattended in the vehicle. Certain outside climatic
conditions can cause life-threatening temperatures in the vehicle.
■
The child must be secured in the vehicle during the entire journey! Other-
wise, the child would be thrown through the vehicle in the event of an acci-
dent, causing fatal injuries to both the child and other occupants.
■
Children are exposed to an increased risk of injury in the event of an acci-
dent if they lean forward or adopt an incorrect seated position when the
vehicle is moving. This particularly applies to children who are transported
on the front passenger seat as they can suffer severe, or even fatal injuries
if the airbag system is deployed!
WARNING (Continued)■ Pay particular attention to the information provided by the manufacturer
of the child safety seat regarding the correct routing of the belt. Seat belts
which are not correctly adjusted can themselves cause injuries even in mi-
nor accidents.■
Safety belts must be checked to ensure that they are running properly.
One should also ensure that the belt is not damaged by sharp-edged fit-
tings.
■
The front passenger airbag must be deactivated if using a rear-facing
child seat on the front passenger seat. Further information » page 21, Use
of a child seat on the front passenger seat .
CAUTION
When installing a child seat in which the child faces forward, adjust the head
restraints so that they are as high as possible.
Note
We recommend that you use child seats from ŠKODA Original Accessories.
These child seats were developed and also tested for use in ŠKODA vehicles.
They meet the ECE-R 44 standard.
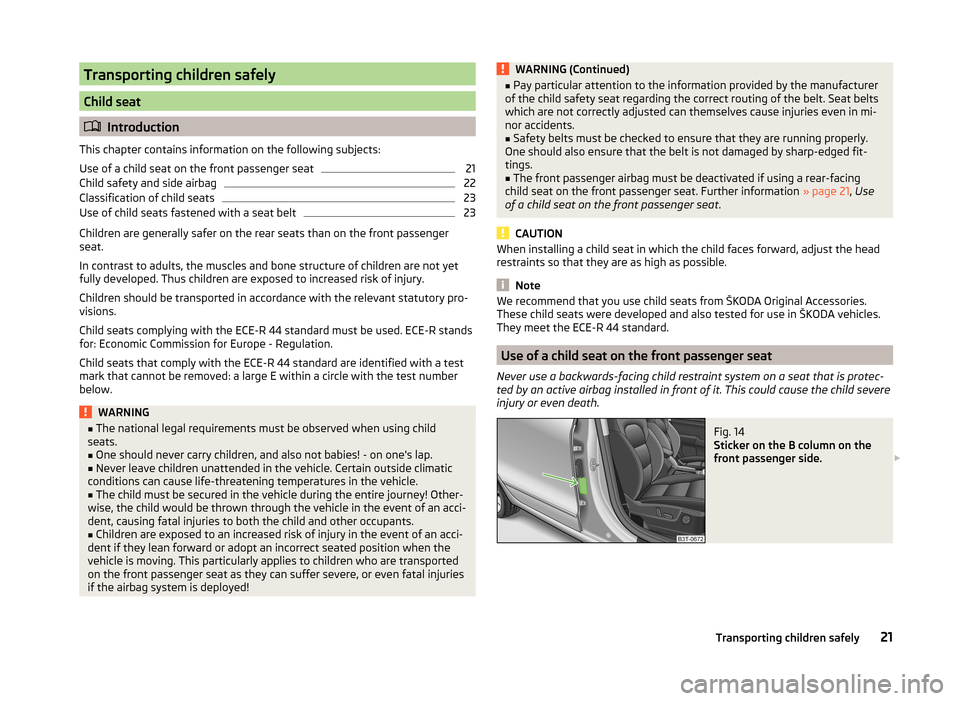
Use of a child seat on the front passenger seat
Never use a backwards-facing child restraint system on a seat that is protec-
ted by an active airbag installed in front of it. This could cause the child severe
injury or even death.
Fig. 14
Sticker on the B column on the
front passenger side.
21Transporting children safely
Page 68 of 246
WARNING (Continued)■The automatic driving lamp control only operates as a support and
does not release the driver from his responsibility to check the light and, if
necessary, to switch on the light depending on the given light conditions.
The light sensor cannot, for example, detect rain or snow. Under these con-
ditions we recommend switching on the low beam or fog lights!■
Never drive with only the side lights on! The side lights are not bright
enough to light up the road sufficiently in front of you or to be seen by oth-
er oncoming traffic. Therefore always switch on the low beam when it is
dark or if visibility is poor.
Note
The headlights may mist up temporarily. When the driving lights are switched
on, the light outlet surfaces are free from mist after a short period, although
the headlight lenses may still be misted up in the peripheral areas. This mist
has no influence on the life of the lighting system.
Parking and low beam lights
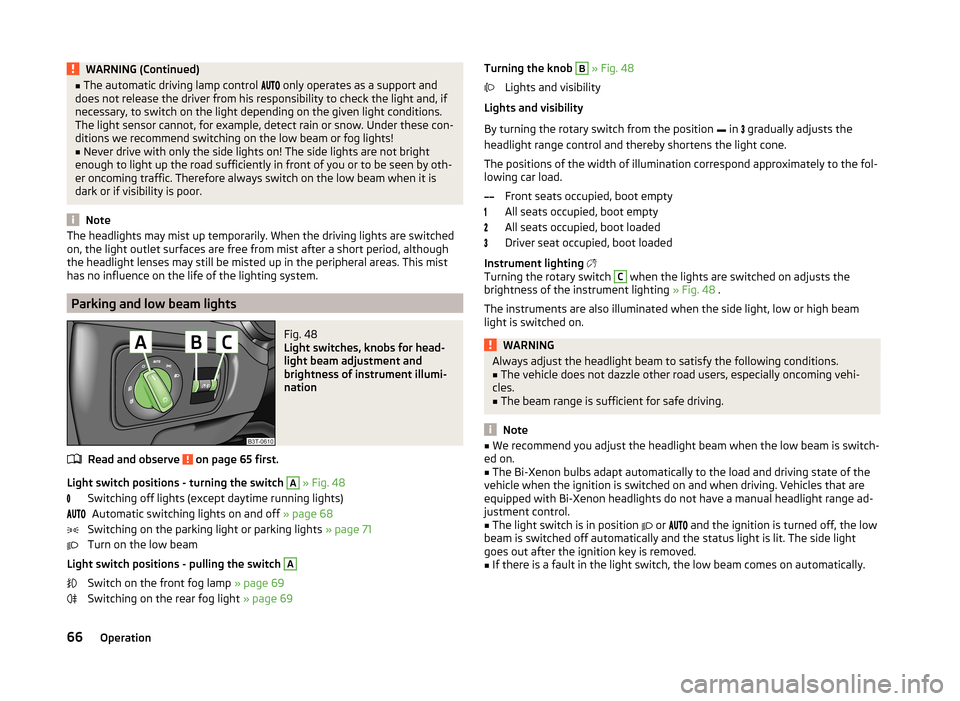
Fig. 48
Light switches, knobs for head-
light beam adjustment and
brightness of instrument illumi-
nation
Read and observe on page 65 first.
Light switch positions - turning the switch
A
» Fig. 48
Switching off lights (except daytime running lights) Automatic switching lights on and off » page 68
Switching on the parking light or parking lights » page 71
Turn on the low beam
Light switch positions - pulling the switch
A
Switch on the front fog lamp » page 69
Switching on the rear fog light » page 69
Turning the knob B » Fig. 48
Lights and visibility
Lights and visibility
By turning the rotary switch from the position in
gradually adjusts the
headlight range control and thereby shortens the light cone.
The positions of the width of illumination correspond approximately to the fol-
lowing car load.
Front seats occupied, boot empty
All seats occupied, boot empty
All seats occupied, boot loaded
Driver seat occupied, boot loaded
Instrument lighting
Turning the rotary switch C
when the lights are switched on adjusts the
brightness of the instrument lighting » Fig. 48 .
The instruments are also illuminated when the side light, low or high beam
light is switched on.
WARNINGAlways adjust the headlight beam to satisfy the following conditions.■The vehicle does not dazzle other road users, especially oncoming vehi-
cles.■
The beam range is sufficient for safe driving.
Note
■ We recommend you adjust the headlight beam when the low beam is switch-
ed on.■
The Bi-Xenon bulbs adapt automatically to the load and driving state of the
vehicle when the ignition is switched on and when driving. Vehicles that are
equipped with Bi-Xenon headlights do not have a manual headlight range ad-
justment control.
■
The light switch is in position
or
and the ignition is turned off, the low
beam is switched off automatically and the status light is lit. The side light
goes out after the ignition key is removed.
■
If there is a fault in the light switch, the low beam comes on automatically.
66Operation
Page 81 of 246
CAUTION■The exterior mirrors with fold-in function never mechanically fold by hand
- there is a risk of damaging the electric mirror actuator!■
When the mirror is swung by external influences (due to impact during ma-
noeuvring, for example), then first fold-in the mirror by turning the knob and
wait for a loud clapping noise.
Note
■ The mirror heater only operates when the engine is running and up to an
outside temperature of +35 ℃.■
If the electrical mirror setting fails at any time, the mirrors can be adjusted by
hand by pressing on the edge of the mirror surface.
Seats and useful equipment
Adjusting the seats
Introduction
This chapter contains information on the following subjects:
Manually adjusting the front seats
80
Electric front seat adjustment
80
Head restraints
81
Memory function of the electrically adjustable seat
82
Memory function of the remote control key
82
The driver's seat should be adjusted in such a way that the pedals can be fully
pressed to the floor with slightly bent legs.
The seat backrest on the driver's seat should be adjusted in such a way that the upper point of the steering wheel can be easily reached with slightly bent
arms.
Correct adjustment of the seats is particularly important for the following rea-
sons.
› Reaching the controls safely and quickly.
› A relaxed and fatigue-free body position.
› Achieving the maximum protection offered by the seat belts and the airbag
system.
WARNING■ Only adjust the driver's seat when the vehicle is stationary – risk of acci-
dent!■
Caution when adjusting the seat! You may suffer injuries or bruises as a
result of adjusting the seat without paying proper attention.
■
The electric front seat adjustment is still functional if the ignition is
switched off (even with the ignition key removed). Therefore, when leaving
the vehicle, never leave people who are not completely independent, such
as children, unattended in the vehicle - there is a danger of injury!
■
Never carry more people than the number of seats in the vehicle.
■
Do not carry any objects on the front passenger seat except objects de-
signed for this purpose (e.g. child seats) – risk of accident!
79Seats and useful equipment
Page 83 of 246
Raising or lowering the curvature of the lumbar support›Push the switch A in the region of one of the arrows1 » Fig. 66 .
The adjusted driver's seat position can be set in the memory of the
seat » page 82 or the remote control key » page 82.
Note
If the setting procedure is interrupted, you will need to press the button again.
Head restraints
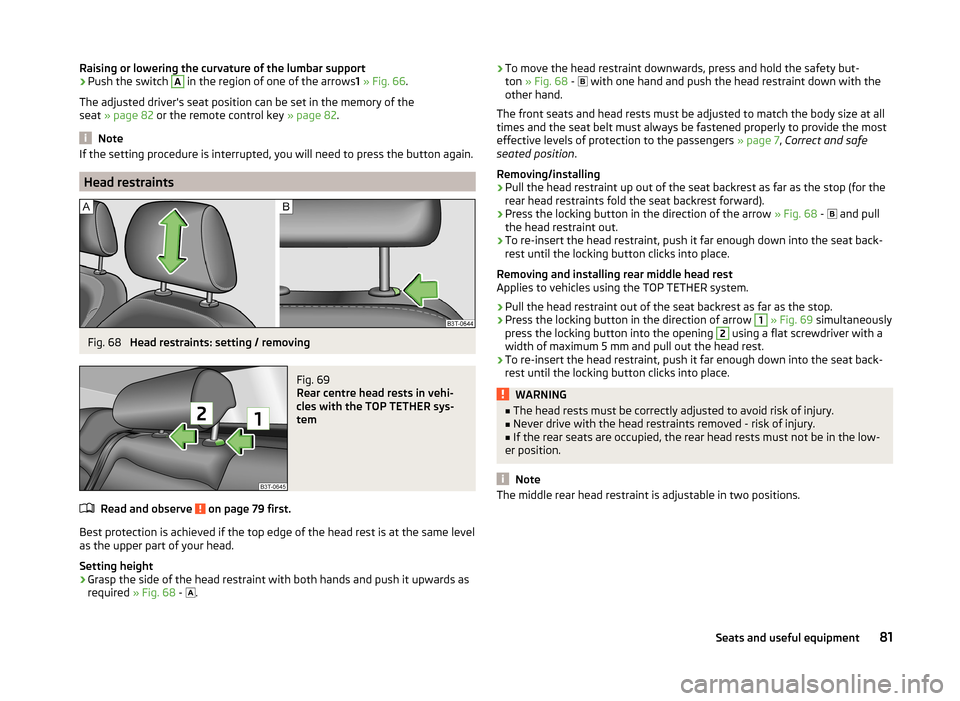
Fig. 68
Head restraints: setting / removing
Fig. 69
Rear centre head rests in vehi-
cles with the TOP TETHER sys-
tem
Read and observe on page 79 first.
Best protection is achieved if the top edge of the head rest is at the same level
as the upper part of your head.
Setting height
›
Grasp the side of the head restraint with both hands and push it upwards as
required » Fig. 68 -
.
›To move the head restraint downwards, press and hold the safety but-
ton » Fig. 68 - with one hand and push the head restraint down with the
other hand.
The front seats and head rests must be adjusted to match the body size at all
times and the seat belt must always be fastened properly to provide the most
effective levels of protection to the passengers » page 7, Correct and safe
seated position .
Removing/installing›
Pull the head restraint up out of the seat backrest as far as the stop (for the
rear head restraints fold the seat backrest forward).
›
Press the locking button in the direction of the arrow » Fig. 68 -
and pull
the head restraint out.
›
To re-insert the head restraint, push it far enough down into the seat back-
rest until the locking button clicks into place.
Removing and installing rear middle head rest
Applies to vehicles using the TOP TETHER system.
›
Pull the head restraint out of the seat backrest as far as the stop.
›
Press the locking button in the direction of arrow
1
» Fig. 69 simultaneously
press the locking button into the opening
2
using a flat screwdriver with a
width of maximum 5 mm and pull out the head rest.
›
To re-insert the head restraint, push it far enough down into the seat back-
rest until the locking button clicks into place.
WARNING■ The head rests must be correctly adjusted to avoid risk of injury.■Never drive with the head restraints removed - risk of injury.■
If the rear seats are occupied, the rear head rests must not be in the low-
er position.
Note
The middle rear head restraint is adjustable in two positions.81Seats and useful equipment
Page 86 of 246
WARNINGIf you have a subdued pain and/or temperature sensitivity, e.g. through
medication, paralysis or because of chronic illness (e.g. diabetes), we rec-
ommend not to use the seat heating. This can lead to burns on the back,
the posterior and the legs which are difficult to heal. If the seat heating is
used, we recommend to make regular breaks in your journey when driving
long distances, so that the body can recuperate from the stress of the jour-
ney. Please consult your doctor, who can evaluate your specific condition.
CAUTION
■ Do not kneel on the seats or otherwise apply concentrated pressure to them.■Do not turn on the seat heater if seats are not occupied.■
Do not switch on the seat heating if the seats have objects attached to or
placed on them, for example a child seat, a bag, etc. A fault of the heating ele-
ments in the seat heating can occur.
■
If additional seat covers or protective covers are attached to the seats, do
not turn on the seat heater - there is a risk of damaging the seat covers and
seat heating.
■
Do not clean the seats using moisture » page 178, Seat covers .
Note
■
If the on-board voltage drops, the seat heating is switched off automatically,
in order to provide sufficient electrical energy for the engine con-
trol » page 193 .■
If the heaters for the rear seats are set to the highest intensity - level 3, they
are automatically switched over to level 2 after 10 minutes (two indicator lights
are illuminated on the switch).
Ventilated front seats
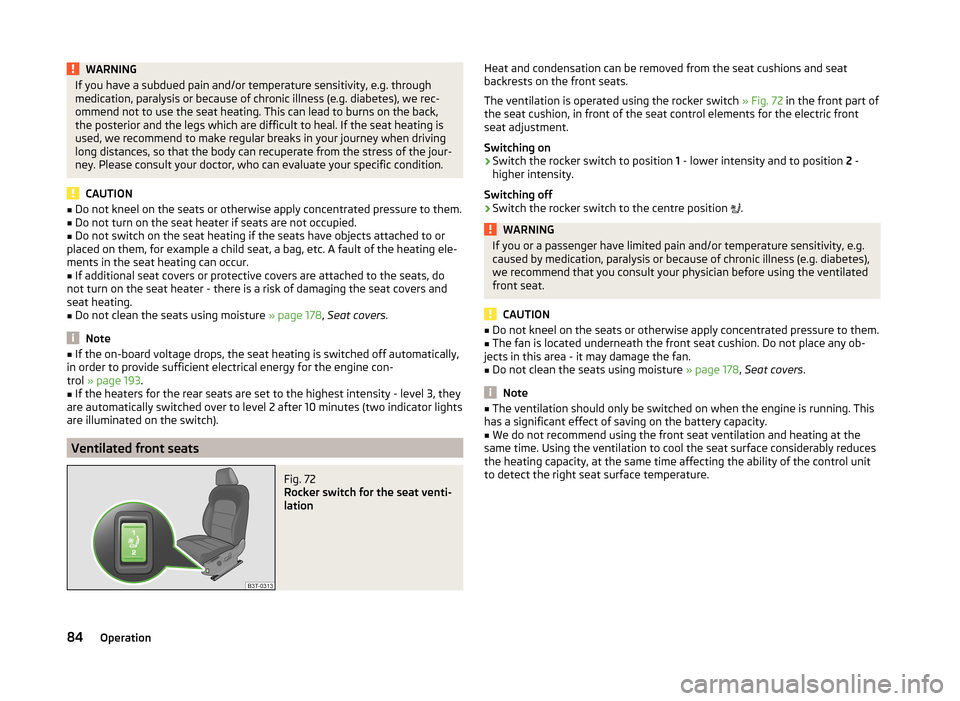
Fig. 72
Rocker switch for the seat venti-
lation
Heat and condensation can be removed from the seat cushions and seat
backrests on the front seats.
The ventilation is operated using the rocker switch » Fig. 72 in the front part of
the seat cushion, in front of the seat control elements for the electric front
seat adjustment.
Switching on›
Switch the rocker switch to position 1 - lower intensity and to position 2 -
higher intensity.
Switching off
›
Switch the rocker switch to the centre position
.
WARNINGIf you or a passenger have limited pain and/or temperature sensitivity, e.g.
caused by medication, paralysis or because of chronic illness (e.g. diabetes),
we recommend that you consult your physician before using the ventilated
front seat.
CAUTION
■ Do not kneel on the seats or otherwise apply concentrated pressure to them.■The fan is located underneath the front seat cushion. Do not place any ob-
jects in this area - it may damage the fan.■
Do not clean the seats using moisture » page 178, Seat covers .
Note
■
The ventilation should only be switched on when the engine is running. This
has a significant effect of saving on the battery capacity.■
We do not recommend using the front seat ventilation and heating at the
same time. Using the ventilation to cool the seat surface considerably reduces
the heating capacity, at the same time affecting the ability of the control unit
to detect the right seat surface temperature.
84Operation
Page 88 of 246
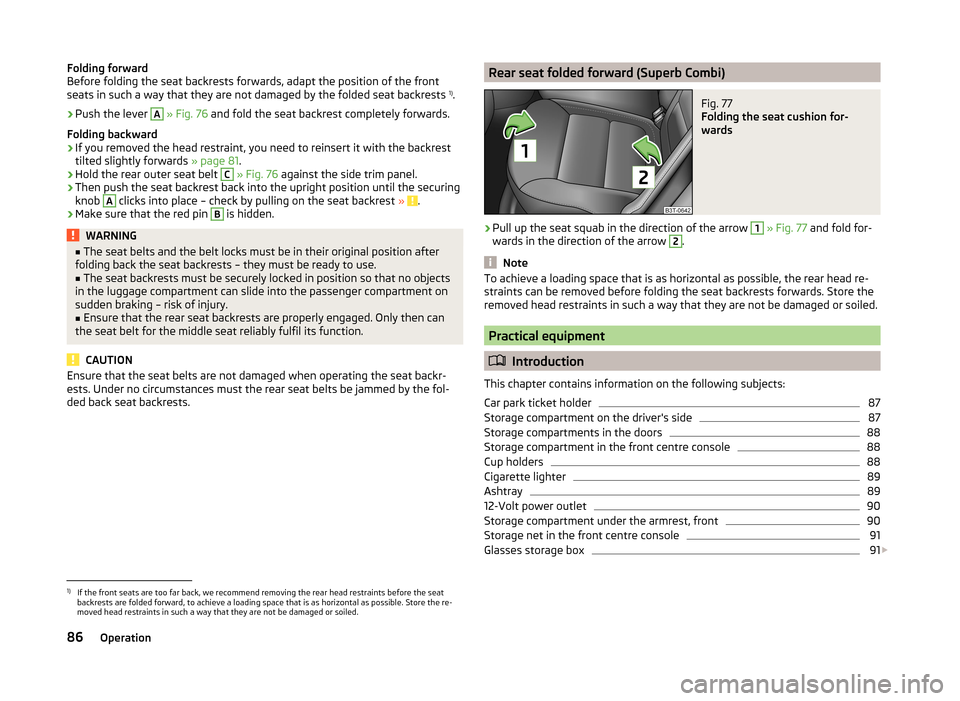
Folding forward
Before folding the seat backrests forwards, adapt the position of the front
seats in such a way that they are not damaged by the folded seat backrests 1)
.›
Push the lever
A
» Fig. 76 and fold the seat backrest completely forwards.
Folding backward
›
If you removed the head restraint, you need to reinsert it with the backrest
tilted slightly forwards » page 81.
›
Hold the rear outer seat belt
C
» Fig. 76 against the side trim panel.
›
Then push the seat backrest back into the upright position until the securing
knob
A
clicks into place – check by pulling on the seat backrest » .
›
Make sure that the red pin
B
is hidden.
WARNING■
The seat belts and the belt locks must be in their original position after
folding back the seat backrests – they must be ready to use.■
The seat backrests must be securely locked in position so that no objects
in the luggage compartment can slide into the passenger compartment on
sudden braking – risk of injury.
■
Ensure that the rear seat backrests are properly engaged. Only then can
the seat belt for the middle seat reliably fulfil its function.
CAUTION
Ensure that the seat belts are not damaged when operating the seat backr-
ests. Under no circumstances must the rear seat belts be jammed by the fol-
ded back seat backrests.Rear seat folded forward (Superb Combi)Fig. 77
Folding the seat cushion for-
wards
›
Pull up the seat squab in the direction of the arrow
1
» Fig. 77 and fold for-
wards in the direction of the arrow
2
.
Note
To achieve a loading space that is as horizontal as possible, the rear head re-
straints can be removed before folding the seat backrests forwards. Store the
removed head restraints in such a way that they are not be damaged or soiled.
Practical equipment
Introduction
This chapter contains information on the following subjects:
Car park ticket holder
87
Storage compartment on the driver's side
87
Storage compartments in the doors
88
Storage compartment in the front centre console
88
Cup holders
88
Cigarette lighter
89
Ashtray
89
12-Volt power outlet
90
Storage compartment under the armrest, front
90
Storage net in the front centre console
91
Glasses storage box
91
1)
If the front seats are too far back, we recommend removing the rear head restraints before the seat
backrests are folded forward, to achieve a loading space that is as horizontal as possible. Store the re-
moved head restraints in such a way that they are not be damaged or soiled.
86Operation
Page 89 of 246
Storage compartment on the passenger side92Storage compartment under the passenger seat92
Clothes hook
92
Storage pockets on the front seats
93
Storage compartment for umbrella
93
Storage compartment in rear centre console
93
Storage compartment in the rear armrest
94
Rear seat backrest with long-cargo channel
94
Removable ski bag
95WARNING■Do not place anything on the dash panel. These objects might slide or fall
down when driving (when accelerating or cornering) and may distract you
from concentrating on the traffic – there is the risk of an accident.■
When driving, ensure that no objects from the centre console or from oth-
er storage compartments can get into the driver's footwell. You would not
be able to brake, operate the clutch pedal or accelerate - danger of causing
an accident!
■
No objects should be placed in the storage compartments nor in the
drinks holders; the vehicle occupants could be endangered if there is sud-
den braking or the vehicle collides with something.
■
Ash and cigarette or cigar stubs must only be discarded in ashtrays!
Car park ticket holder
Fig. 78
Windscreen: Parking ticket hold-
er
Read and observe on page 87 first.
The note holder is designed e.g. for attaching car park tickets.
WARNINGThe attached note has to always be removed before starting off in order
not to restrict the driver's vision.
Storage compartment on the driver's side
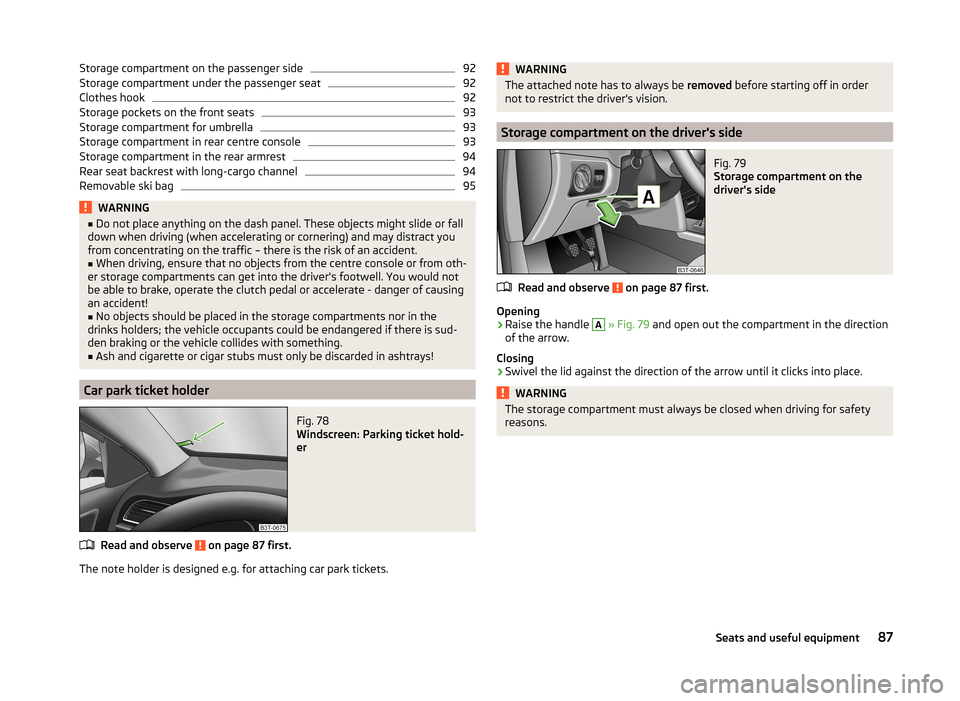
Fig. 79
Storage compartment on the
driver's side
Read and observe on page 87 first.
Opening
›
Raise the handle
A
» Fig. 79 and open out the compartment in the direction
of the arrow.
Closing
›
Swivel the lid against the direction of the arrow until it clicks into place.
WARNINGThe storage compartment must always be closed when driving for safety
reasons.87Seats and useful equipment