ESP SKODA SUPERB 2015 3.G / (B8/3V) Amundsen Bolero Infotainment System Manual
[x] Cancel search | Manufacturer: SKODA, Model Year: 2015, Model line: SUPERB, Model: SKODA SUPERB 2015 3.G / (B8/3V)Pages: 84, PDF Size: 8.21 MB
Page 6 of 84
Important information about this manual
This Owner's Manual is valid for the different versions of the Infotainment Bo-
lero and Amundsen (hereinafter referred to only as device). The device may dif-
fer depending on the vehicle model, in which it is installed in both its appear-
ance and in the arrangement of the controls.
This Owner's Manual describes all possible device functions without identify-
ing them as special equipment, model variants or market-dependent equip-
ment. Consequently, the device on this vehicle does not need to contain all of
the functions described in this Owner's Manual.
For example, if the vehicle is not equipped from the factory with a navigation function, then the menu item Clock time source: for the date and time settings
is not displayed.
The availability of some features described in this manual depends on the
type of external devices (for example, phone, music player, etc..).
Information on the compatibility of external devices can be found on ŠKODAIn-
ternet pages http://infotainment.skoda-auto.com .
The Images in these Operating Instructions are for illustrative purposes only.
The illustrations can differ in minor details from your vehicle; they are only in-
tended to provide general information.
ŠKODA AUTO a.s. pursues a policy of ongoing product and model development
with all vehicles. Changes in terms of supply scope are possible at any time
with regard to design, equipment and technology. The information listed in
these Operating Instructions corresponds to the information available at the
time of going to press.
It is therefore not possible for legal claims to be made based on the technical
data, illustrations and information contained in these Operating Instructions.
Declaration of conformity
ŠKODA AUTO a.s. hereby declares that the ŠKODA Infotainment systems meet
the basic requirements and additional provisions of Directive 1999/5/EC with
reference to radio equipment and telecommunications devices.
Applies to Nigeria: ŠKODA AUTO a.s. hereby declares that the “connection and
the use of this communication device is granted by the Nigerian Communica-
tions Commission.”3Important information about this manual
Page 9 of 84
Introductory information
Important notes
Introduction
This chapter contains information on the following subjects:
Information on use, updating and compatibility
6
Component protection
6WARNING■ Concentrate fully at all times on your driving! As the driver you are fully
responsible for the operation of your vehicle.■
Only use the device in such a way that you are in full control of your vehi-
cle in every traffic situation – there is the risk of accidents!
■
Adjust the volume to ensure that acoustic signals from outside the vehi-
cle, e.g. sirens from emerging vehicles instructing you to give way to, such
as the police, ambulance and fire brigade, can be heard at all times.
■
High volumes can cause hearing damage.
CAUTION
In some countries, some unit features can no longer be selected when the ve-
hicle is running faster than a certain speed. This is not a malfunction, but com-
plies with the national legal regulations.
Information on use, updating and compatibility
Read and observe
and on page 6 first.
Refer to the ŠKODA Internet pages http://infotainment.skoda-auto.com for
information on the compatibility of external devices as well as software up-
dates and navigation data.
Component protection
Read and observe
and on page 6 first.
Some electronic control units are equipped with protection components, which
serve as protective mechanisms, for example, in cases of theft of the ECUs.
When component protection is enabled, the following message appears on the
display Component theft protection: infotainment system availability cur-
rently limited. Please switch on the ignition.
If the component protection does not activate by switching on the ignition,
please contact a ŠKODA specialist garage.6Introductory information
Page 13 of 84
Slider - Position and movement in the menu (movement is possible by
moving the slider down / up with the finger or by turning the control dial left or right)
Menu item with “Checkbox”
Open a submenu of the menu item with the “pop-up window”
Status line
In some menus a status bar located at the top of the screen shows the time
and outdoor temperature along with other information.
Function keys
Screen areas which confirm a function or a menu are called “ function keys”.
White background - The button is active and thus selectable
Grey background - The button is inactive and thus not selectable
Green frame - Currently selected key
Selecting menu/menu item/function › Drag your finger over the screen in the required direction.
› Turning the knob
.
Confirming menu/menu item/function
› by touching the function button with your finger.
› Press the wheel
.
Returning to higher-level menu › by pressing the function key
.
› By touching the screen outside of the “pop-up window” with your finger.
› By pressing the corresponding button next to the screen (e.g. in the menu
Media by pressing the button
).
Switching function with “Checkbox” on/off
›
- Function is switched on
›
- Function is switched off
Select the menu item / function value
›
- Selected menu item / function value
›
- Deselected menu / function value
Set value › By pressing the function button with one of the following symbols
,
,
,
,
,
.
› Touching or moving your finger over the scale.
› Turning the knob
.
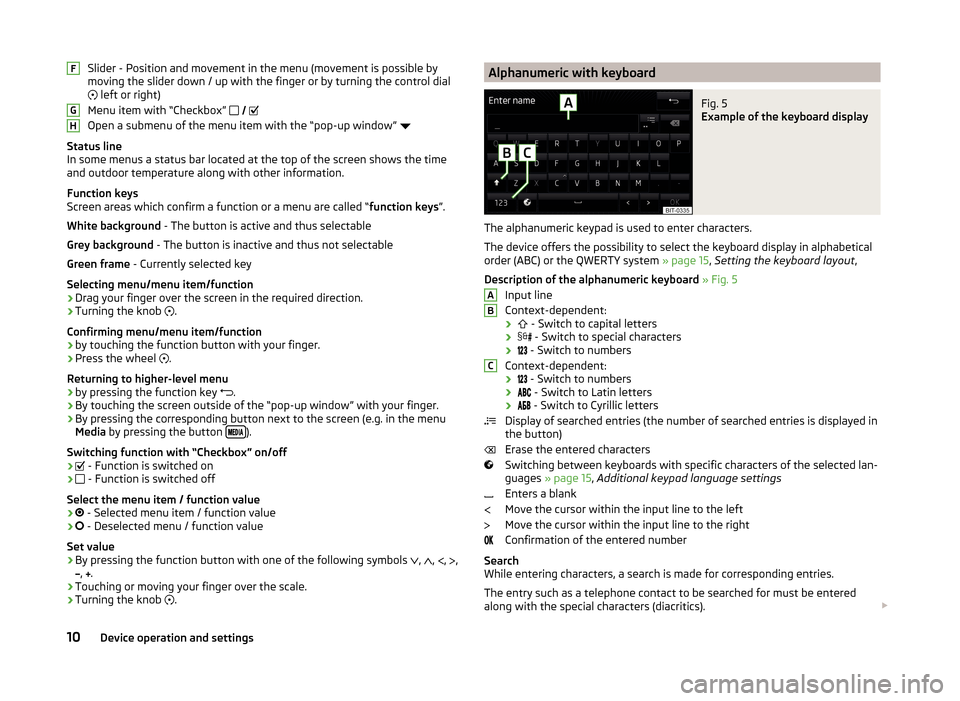
FGHAlphanumeric with keyboardFig. 5
Example of the keyboard display
The alphanumeric keypad is used to enter characters.
The device offers the possibility to select the keyboard display in alphabetical
order (ABC) or the QWERTY system » page 15, Setting the keyboard layout ,
Description of the alphanumeric keyboard » Fig. 5
Input line
Context-dependent: ›
- Switch to capital letters
›
- Switch to special characters
›
- Switch to numbers
Context-dependent: ›
- Switch to numbers
›
- Switch to Latin letters
›
- Switch to Cyrillic letters
Display of searched entries (the number of searched entries is displayed in
the button)
Erase the entered characters
Switching between keyboards with specific characters of the selected lan-
guages » page 15 , Additional keypad language settings
Enters a blank
Move the cursor within the input line to the left
Move the cursor within the input line to the right
Confirmation of the entered number
Search
While entering characters, a search is made for corresponding entries.
The entry such as a telephone contact to be searched for must be entered
along with the special characters (diacritics).
ABC10Device operation and settings
Page 25 of 84
Media
Operation
Introduction
This chapter contains information on the following subjects:
Main menu
22
Select audio source
22
Playback
23
Folder / track list
23
Multimedia database
24
Settings
24
The device allows you to play audio files from different media and connected
devices (hereinafter referred to only as “audio sources”).
Main menu
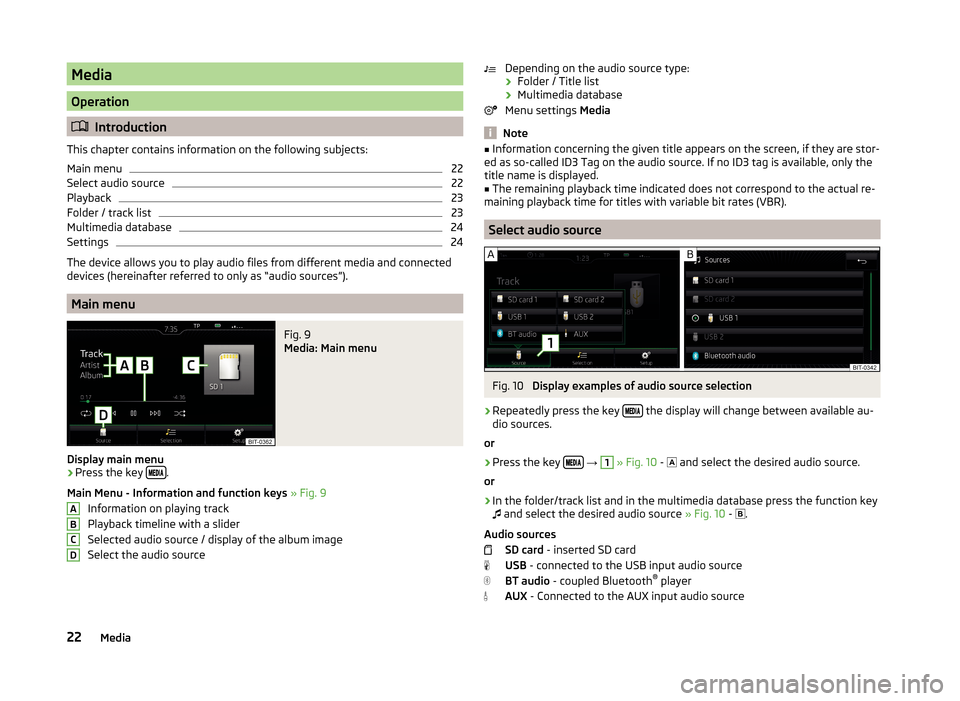
Fig. 9
Media: Main menu
Display main menu
›
Press the key .
Main Menu - Information and function keys » Fig. 9
Information on playing track
Playback timeline with a slider
Selected audio source / display of the album image
Select the audio source
ABCDDepending on the audio source type:
› Folder / Title list
› Multimedia database
Menu settings Media
Note
■
Information concerning the given title appears on the screen, if they are stor-
ed as so-called ID3 Tag on the audio source. If no ID3 tag is available, only the
title name is displayed.■
The remaining playback time indicated does not correspond to the actual re-
maining playback time for titles with variable bit rates (VBR).
Select audio source
Fig. 10
Display examples of audio source selection
›
Repeatedly press the key the display will change between available au-
dio sources.
or
›
Press the key
→
1
» Fig. 10 -
and select the desired audio source.
or
›
In the folder/track list and in the multimedia database press the function key
and select the desired audio source » Fig. 10 -
.
Audio sources SD card - inserted SD card
USB - connected to the USB input audio source
BT audio - coupled Bluetooth ®
player
AUX - Connected to the AUX input audio source
22Media
Page 27 of 84
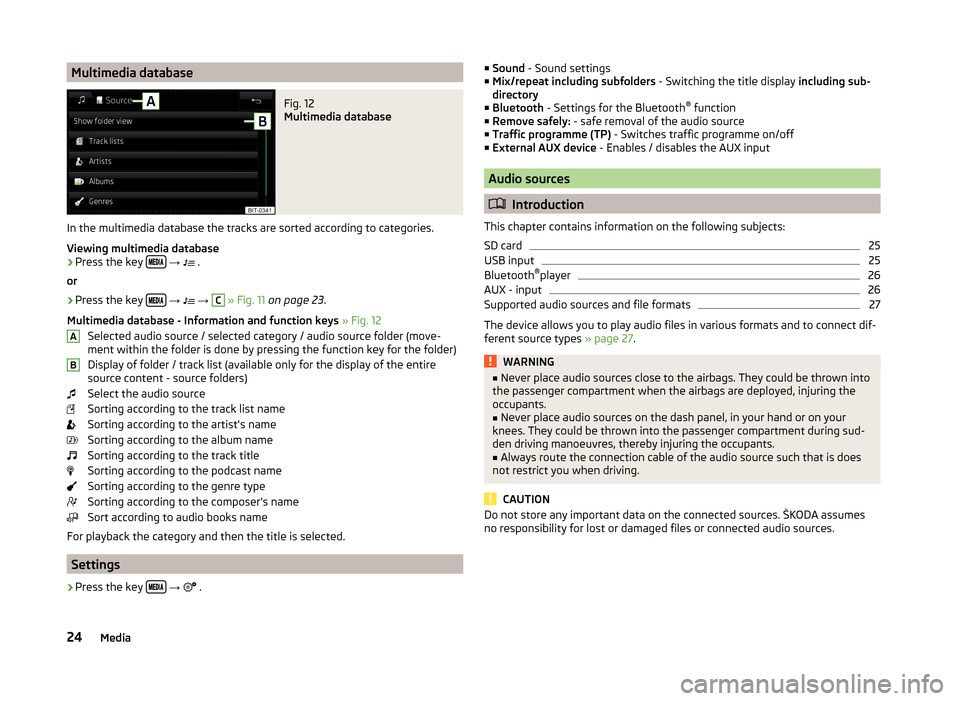
Multimedia databaseFig. 12
Multimedia database
In the multimedia database the tracks are sorted according to categories.
Viewing multimedia database
›
Press the key
→
.
or
›
Press the key
→
→
C
» Fig. 11 on page 23 .
Multimedia database - Information and function keys » Fig. 12
Selected audio source / selected category / audio source folder (move- ment within the folder is done by pressing the function key for the folder)
Display of folder / track list (available only for the display of the entire
source content - source folders)
Select the audio source
Sorting according to the track list name
Sorting according to the artist's name
Sorting according to the album name
Sorting according to the track title
Sorting according to the podcast name
Sorting according to the genre type
Sorting according to the composer's name
Sort according to audio books name
For playback the category and then the title is selected.
Settings
›
Press the key
→
.
AB■
Sound - Sound settings
■ Mix/repeat including subfolders - Switching the title display including sub-
directory
■ Bluetooth - Settings for the Bluetooth ®
function
■ Remove safely: - safe removal of the audio source
■ Traffic programme (TP) - Switches traffic programme on/off
■ External AUX device - Enables / disables the AUX input
Audio sources
Introduction
This chapter contains information on the following subjects:
SD card
25
USB input
25
Bluetooth ®
player
26
AUX - input
26
Supported audio sources and file formats
27
The device allows you to play audio files in various formats and to connect dif-
ferent source types » page 27.
WARNING■
Never place audio sources close to the airbags. They could be thrown into
the passenger compartment when the airbags are deployed, injuring the
occupants.■
Never place audio sources on the dash panel, in your hand or on your
knees. They could be thrown into the passenger compartment during sud-
den driving manoeuvres, thereby injuring the occupants.
■
Always route the connection cable of the audio source such that is does
not restrict you when driving.
CAUTION
Do not store any important data on the connected sources. ŠKODA assumes
no responsibility for lost or damaged files or connected audio sources.24Media
Page 28 of 84
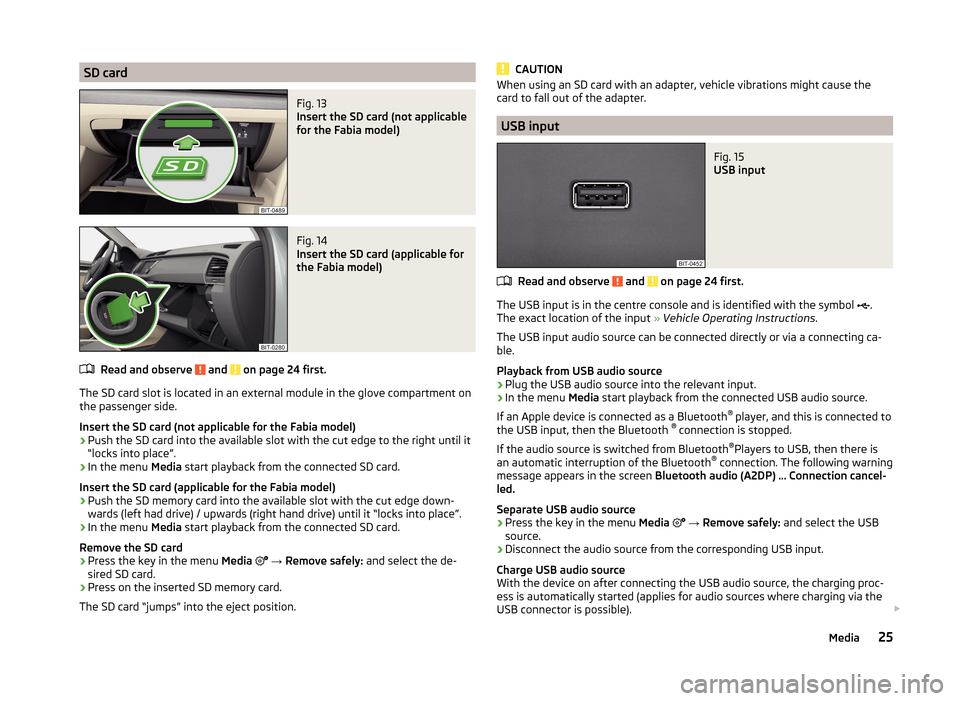
SD cardFig. 13
Insert the SD card (not applicable
for the Fabia model)
Fig. 14
Insert the SD card (applicable for
the Fabia model)
Read and observe and on page 24 first.
The SD card slot is located in an external module in the glove compartment on the passenger side.
Insert the SD card (not applicable for the Fabia model)
›
Push the SD card into the available slot with the cut edge to the right until it
“locks into place”.
›
In the menu Media start playback from the connected SD card.
Insert the SD card (applicable for the Fabia model)
›
Push the SD memory card into the available slot with the cut edge down-
wards (left had drive) / upwards (right hand drive) until it “locks into place”.
›
In the menu Media start playback from the connected SD card.
Remove the SD card
›
Press the key in the menu Media
→ Remove safely: and select the de-
sired SD card.
›
Press on the inserted SD memory card.
The SD card “jumps” into the eject position.
CAUTIONWhen using an SD card with an adapter, vehicle vibrations might cause the
card to fall out of the adapter.
USB input
Fig. 15
USB input
Read and observe and on page 24 first.
The USB input is in the centre console and is identified with the symbol
.
The exact location of the input » Vehicle Operating Instructions .
The USB input audio source can be connected directly or via a connecting ca-
ble.
Playback from USB audio source
›
Plug the USB audio source into the relevant input.
›
In the menu Media start playback from the connected USB audio source.
If an Apple device is connected as a Bluetooth ®
player, and this is connected to
the USB input, then the Bluetooth ®
connection is stopped.
If the audio source is switched from Bluetooth ®
Players to USB, then there is
an automatic interruption of the Bluetooth ®
connection. The following warning
message appears in the screen Bluetooth audio (A2DP) … Connection cancel-
led.
Separate USB audio source
›
Press the key in the menu Media
→ Remove safely: and select the USB
source.
›
Disconnect the audio source from the corresponding USB input.
Charge USB audio source
With the device on after connecting the USB audio source, the charging proc-
ess is automatically started (applies for audio sources where charging via the
USB connector is possible).
25Media
Page 29 of 84
Some connected audio sources may not be recognised and cannot be charged.
CAUTION
USB extension cords, or reducers may impair the function of the connected au-
dio source.
Note
We recommend that you use extension cords from ŠKODA Original Accesso-
ries.
Bluetooth ®
player
Read and observe
and on page 24 first.
The unit allows audio files of a connected Bluetooth ®
player to play using the
A2DP and AVRCP audio profile.
Connect the Bluetooth ®
player
›
Connect the player to the device - follow the same instructions as for pairing
the device with a telephone » page 32.
›
Select the audio source
BT audio » page 22 , Select audio source and then
the desired player.
Separate the Bluetooth ®
player
›
Terminate the connection in the list of paired devices » page 33.
If an Apple device is connected as a Bluetooth ®
player, and this is connected to
the USB input, then the Bluetooth ®
connection is stopped.
If the audio source is switched from Bluetooth ®
Players to USB, then there is
an automatic interruption of the Bluetooth ®
connection. The following warning
message appears in the screen Bluetooth audio (A2DP) … Connection cancel-
led.
If you want to replace a telephone that is also connected to the device as an
audio player, then the following message appears on the screen.
Two devices are already connected. Please disconnect at least one of these
devices first in order to connect
Disconnect from the telephone to be replaced and repeat the coupling proce-
dure » page 33 , Administering paired devices .
Note
If a device is connected to the device using Apple CarPlay, then a connection
using Bluetooth ®
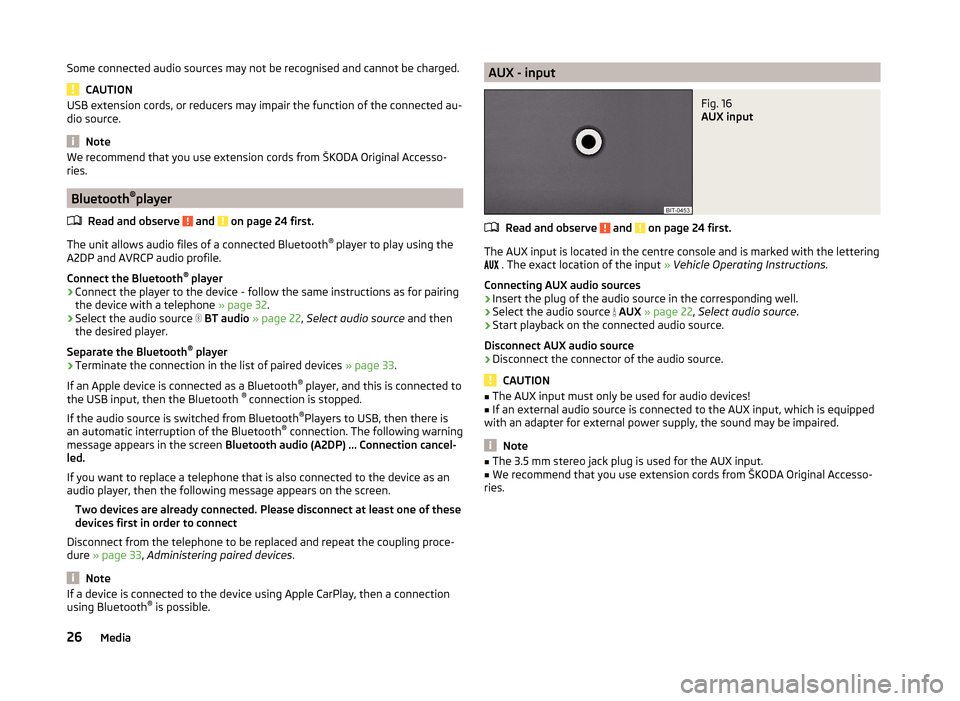
is possible.AUX - inputFig. 16
AUX input
Read and observe and on page 24 first.
The AUX input is located in the centre console and is marked with the lettering
. The exact location of the input
» Vehicle Operating Instructions .
Connecting AUX audio sources
›
Insert the plug of the audio source in the corresponding well.
›
Select the audio source
AUX » page 22 , Select audio source .
›
Start playback on the connected audio source.
Disconnect AUX audio source
›
Disconnect the connector of the audio source.
CAUTION
■ The AUX input must only be used for audio devices!■If an external audio source is connected to the AUX input, which is equipped
with an adapter for external power supply, the sound may be impaired.
Note
■ The 3.5 mm stereo jack plug is used for the AUX input.■We recommend that you use extension cords from ŠKODA Original Accesso-
ries.26Media
Page 30 of 84
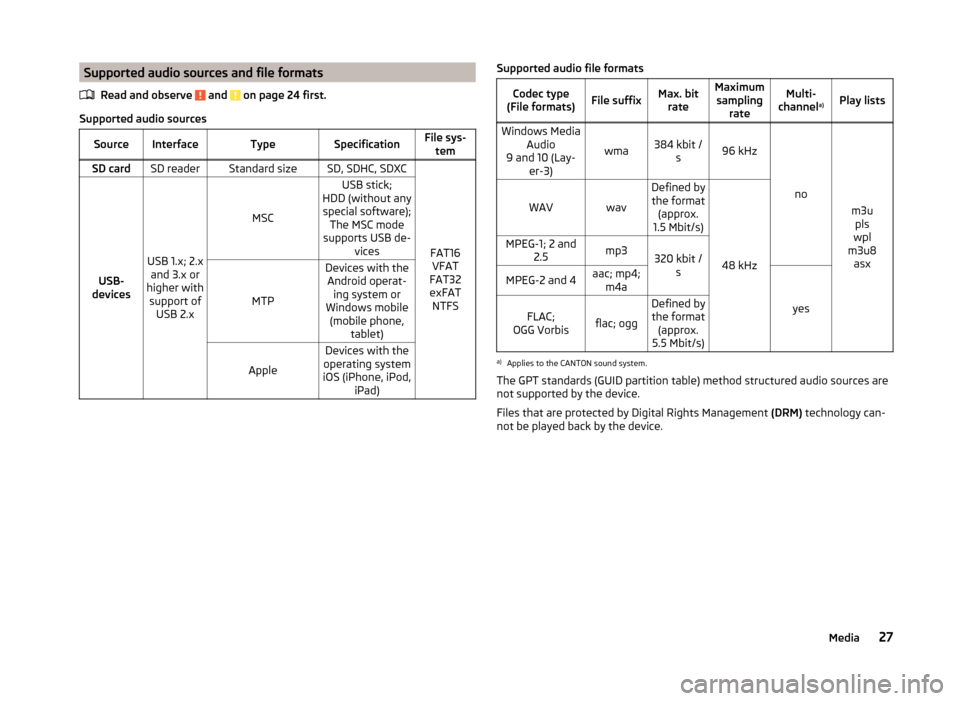
Supported audio sources and file formatsRead and observe
and on page 24 first.
Supported audio sources
SourceInterfaceTypeSpecificationFile sys-temSD cardSD readerStandard sizeSD, SDHC, SDXC
FAT16VFAT
FAT32
exFAT NTFSUSB-
devices
USB 1.x; 2.x and 3.x or
higher with support of USB 2.x
MSC
USB stick;
HDD (without any special software); The MSC mode
supports USB de- vices
MTP
Devices with theAndroid operat- ing system or
Windows mobile (mobile phone, tablet)
Apple
Devices with the
operating system
iOS (iPhone, iPod, iPad)Supported audio file formatsCodec type
(File formats)File suffixMax. bit rateMaximumsampling rateMulti-
channel a)Play listsWindows Media
Audio
9 and 10 (Lay- er-3)
wma384 kbit /s96 kHz
no
m3upls
wpl
m3u8 asx
WAVwav
Defined bythe format (approx.
1.5 Mbit/s)
48 kHz
MPEG-1; 2 and 2.5mp3320 kbit /sMPEG-2 and 4aac; mp4;m4a
yes
FLAC;
OGG Vorbisflac; ogg
Defined by the format (approx.
5.5 Mbit/s)a)
Applies to the CANTON sound system.
The GPT standards (GUID partition table) method structured audio sources are
not supported by the device.
Files that are protected by Digital Rights Management (DRM) technology can-
not be played back by the device.
27Media
Page 32 of 84
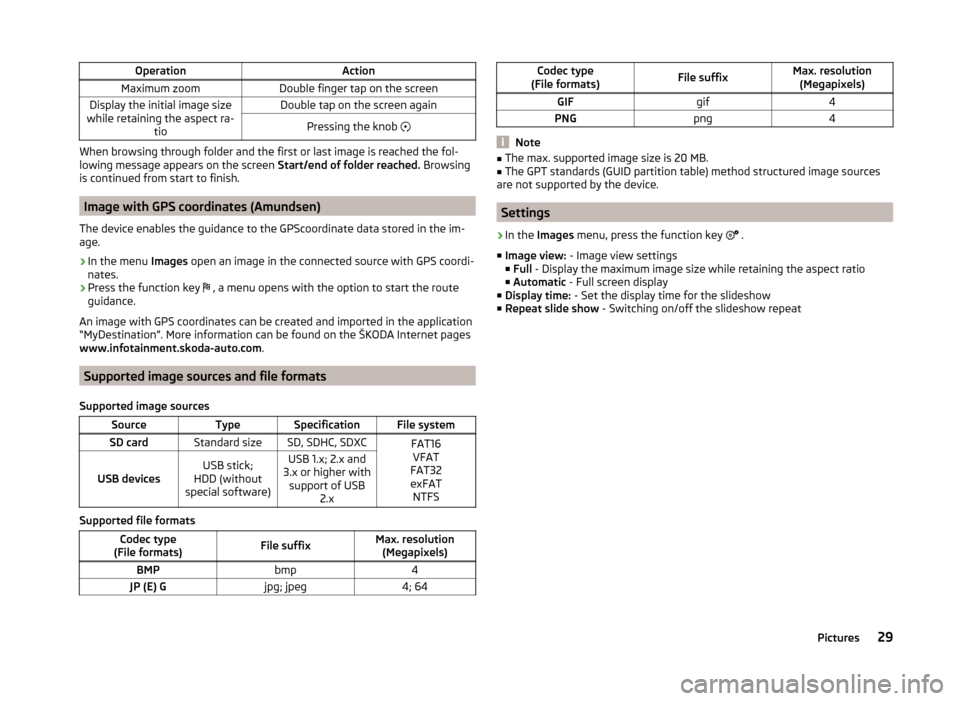
OperationActionMaximum zoomDouble finger tap on the screenDisplay the initial image size
while retaining the aspect ra- tioDouble tap on the screen againPressing the knob
When browsing through folder and the first or last image is reached the fol-
lowing message appears on the screen Start/end of folder reached. Browsing
is continued from start to finish.
Image with GPS coordinates (Amundsen)
The device enables the guidance to the GPScoordinate data stored in the im-
age.
›
In the menu Images open an image in the connected source with GPS coordi-
nates.
›
Press the function key , a menu opens with the option to start the route
guidance.
An image with GPS coordinates can be created and imported in the application “MyDestination”. More information can be found on the ŠKODA Internet pages www.infotainment.skoda-auto.com .
Supported image sources and file formats
Supported image sources
SourceTypeSpecificationFile systemSD cardStandard sizeSD, SDHC, SDXCFAT16 VFAT
FAT32
exFAT NTFS
USB devicesUSB stick;
HDD (without
special software)USB 1.x; 2.x and
3.x or higher with support of USB 2.x
Supported file formats
Codec type
(File formats)File suffixMax. resolution (Megapixels)BMPbmp4JP (E) Gjpg; jpeg4; 64Codec type
(File formats)File suffixMax. resolution (Megapixels)GIFgif4PNGpng4
Note
■ The max. supported image size is 20 MB.■The GPT standards (GUID partition table) method structured image sources
are not supported by the device.
Settings
›
In the Images menu, press the function key
.
■ Image view: - Image view settings
■ Full - Display the maximum image size while retaining the aspect ratio
■ Automatic - Full screen display
■ Display time: - Set the display time for the slideshow
■ Repeat slide show - Switching on/off the slideshow repeat
29Pictures
Page 43 of 84
CAUTION■ŠKODA is not responsible for damage to the unit or to the vehicle by the use
of faulty or incorrectly programmed applications in the connected device.■
Due to the low charging current from the USB input, intensive use of the
SmartLink function can lead to the discharge of the battery of the connected
device.
■
To establish the connection, it is necessary that the date and time values in
the device are set correctly. If the setting of the date and time values are
based on the GPS signal, then a connection may not be possible with bad
signal reception. If there is sufficient signal reception, the synchronization of
the device with the GPS signal may take up to ten minutes.
Note
■ We recommend that you use extension cords from ŠKODA Original Accesso-
ries.■
The device saves the last 10 connected devices.
■
With some connected devices, it is necessary that the connected device is
“unlocked” over the entire duration of the connection for trouble-free func-
tioning of the SmartLink function.
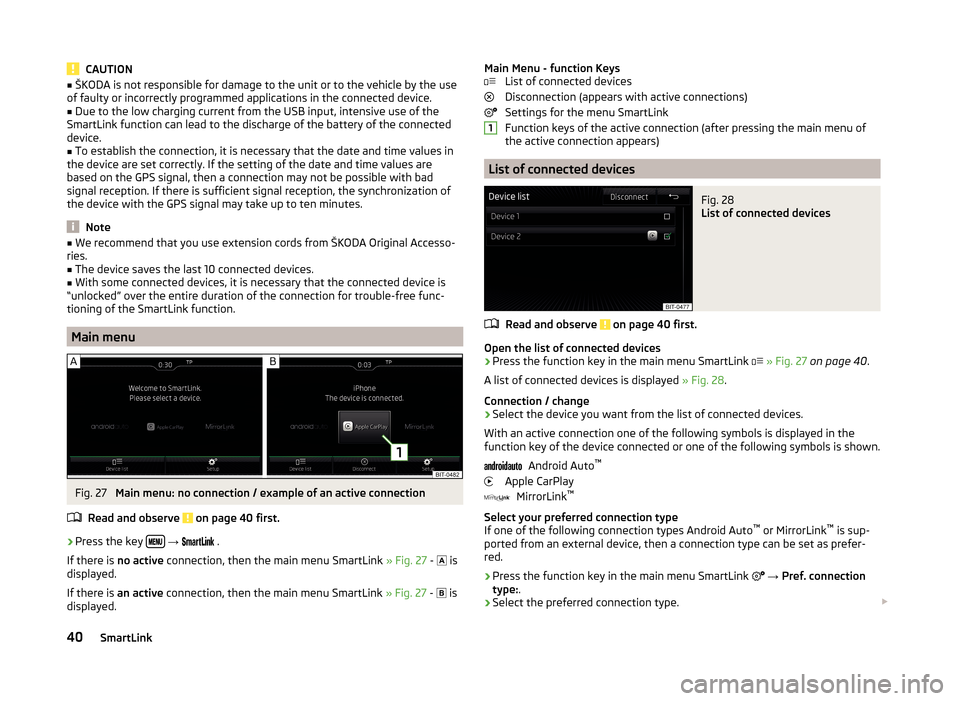
Main menu
Fig. 27
Main menu: no connection / example of an active connection
Read and observe
on page 40 first.
›
Press the key
→
.
If there is no active connection, then the main menu SmartLink » Fig. 27 -
is
displayed.
If there is an active connection, then the main menu SmartLink » Fig. 27 -
is
displayed.
Main Menu - function Keys List of connected devices
Disconnection (appears with active connections)
Settings for the menu SmartLink
Function keys of the active connection (after pressing the main menu of
the active connection appears)
List of connected devices
Fig. 28
List of connected devices
Read and observe on page 40 first.
Open the list of connected devices
›
Press the function key in the main menu SmartLink
» Fig. 27 on page 40 .
A list of connected devices is displayed » Fig. 28.
Connection / change
› Select the device you want from the list of connected devices.
With an active connection one of the following symbols is displayed in the
function key of the device connected or one of the following symbols is shown.
Android Auto ™
Apple CarPlay MirrorLink ™
Select your preferred connection type
If one of the following connection types Android Auto ™
or MirrorLink ™
is sup-
ported from an external device, then a connection type can be set as prefer-
red.
› Press the function key in the main menu SmartLink
→ Pref. connection
type: .
› Select the preferred connection type.
140SmartLink