headlamp SKODA SUPERB 2015 3.G / (B8/3V) Owner's Manual
[x] Cancel search | Manufacturer: SKODA, Model Year: 2015, Model line: SUPERB, Model: SKODA SUPERB 2015 3.G / (B8/3V)Pages: 276, PDF Size: 42.14 MB
Page 4 of 276
Table of Contents
On-board literature4
Notes
5
Structure and more information about the
Owner's Manual
6
Abbreviations
Safety
Passive Safety
8
General information
8
Correct and safe seated position
8
Seat belts
11
Using seat belts
11
Belt retractors and belt tensioners, reversible
seat belts
13
Airbag system
14
Description of the airbag system
14
Airbag overview
15
Deactivating airbags
19
Transporting children safely
20
Child seat
20
Fastening systems
23
Using the system
Cockpit
27
Overview
26
Instruments and warning lights
28
Instrument cluster
28
Warning lights
31
Information system
41
Driver information system
41
Driving data (Multifunction display)
42MAXI DOT display45Service interval display49
SmartGate
50
Unlocking and opening
52
Unlocking and locking
52
Anti-theft alarm system
57
Luggage compartment lid
58
Electric boot lid
59
Window operation
61
Panorama sliding/tilting roof
64
Lights and visibility
67
Lights
67
Headlamp Assistant (Light Assist / Dynamic
Light Assist)
72
Interior lights
74
Visibility
75
Windscreen wipers and washers
77
Rear mirror
79
Seats and head restraints
81
Front seats
81
Rear seats
85
Head restraints
87
Seat heating and ventilation
88
Transporting and practical equipment
90
Useful equipment
90
Electrical sockets and cigarette lighter
99
Ashtrays
103
Tablet holder
104
Luggage compartment and transport of
cargo
105
Variable loading floor in the luggage
compartment (Estate)
115Net partition116Roof rack117
Heating and ventilation
118
Heating, manual air conditioning system,
Climatronic
118
Auxiliary heating (auxiliary heating and
ventilation)
123
Driving
Starting-off and Driving
126
Starting and stopping the engine using the
key
126
Starting and stopping the engine at the push
of the button
128
START-STOPsystem
130
Brakes and parking
132
Manual gear changing and pedals
135
Automatic transmission
135
Running-in and economical driving
138
Avoiding damage to your vehicle
141
Assist systems
142
General information
142
Braking and stabilisation systems
143
Parking aid (ParkPilot)
147
Rear Traffic Alert
149
Rear View Camera
151
Park Assist
155
Cruise Control System
160
Speed Limiter
162
Adaptive Cruise Control (ACC)
163
Front Assist
168
Selection of the driving mode(Driving Mode
Selection)
171
Proactive passenger protection (Crew Protect
Assist)
173
Lane Departure Warning (Lane Assist)
174
Assistant for “blind spot monitoring”
1772Table of Contents
Page 29 of 276
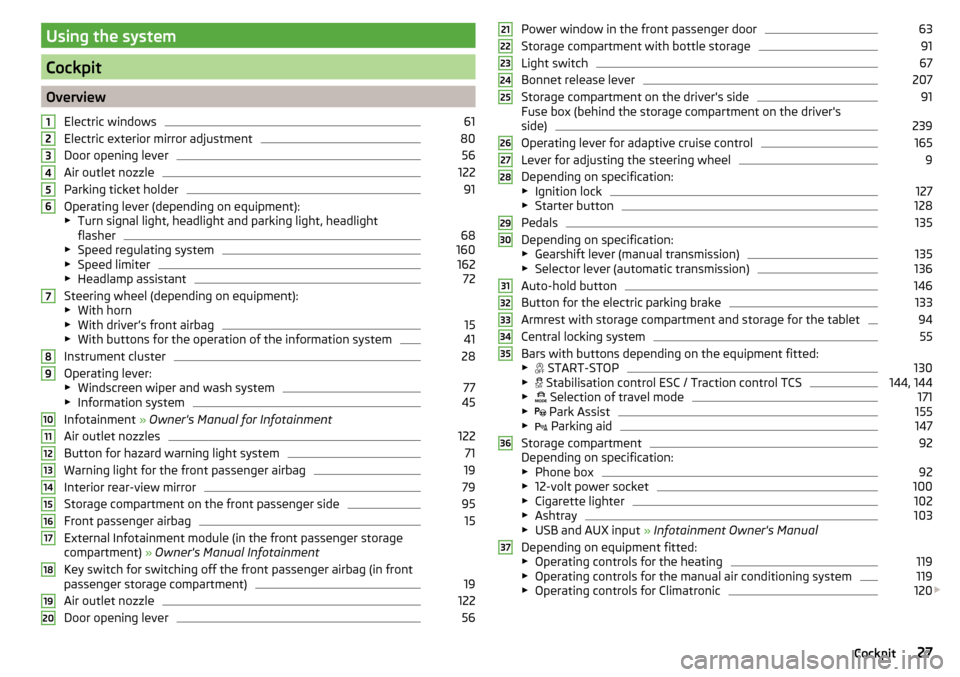
Using the system
Cockpit
OverviewElectric windows
61
Electric exterior mirror adjustment
80
Door opening lever
56
Air outlet nozzle
122
Parking ticket holder
91
Operating lever (depending on equipment):
▶ Turn signal light, headlight and parking light, headlight
flasher
68
▶ Speed regulating system
160
▶Speed limiter
162
▶Headlamp assistant
72
Steering wheel (depending on equipment):
▶ With horn
▶ With driver’s front airbag
15
▶With buttons for the operation of the information system
41
Instrument cluster
28
Operating lever:
▶ Windscreen wiper and wash system
77
▶Information system
45
Infotainment » Owner's Manual for Infotainment
Air outlet nozzles
122
Button for hazard warning light system
71
Warning light for the front passenger airbag
19
Interior rear-view mirror
79
Storage compartment on the front passenger side
95
Front passenger airbag
15
External Infotainment module (in the front passenger storage
compartment) » Owner's Manual Infotainment
Key switch for switching off the front passenger airbag (in front
passenger storage compartment)
19
Air outlet nozzle
122
Door opening lever
561234567891011121314151617181920Power window in the front passenger door63
Storage compartment with bottle storage
91
Light switch
67
Bonnet release lever
207
Storage compartment on the driver's side
91
Fuse box (behind the storage compartment on the driver's
side)
239
Operating lever for adaptive cruise control
165
Lever for adjusting the steering wheel
9
Depending on specification:
▶ Ignition lock
127
▶Starter button
128
Pedals
135
Depending on specification:
▶ Gearshift lever (manual transmission)
135
▶Selector lever (automatic transmission)
136
Auto-hold button
146
Button for the electric parking brake
133
Armrest with storage compartment and storage for the tablet
94
Central locking system
55
Bars with buttons depending on the equipment fitted:
▶ START-STOP
130
▶
Stabilisation control ESC / Traction control TCS
144, 144
▶
Selection of travel mode
171
▶
Park Assist
155
▶
Parking aid
147
Storage compartment
92
Depending on specification:
▶ Phone box
92
▶12-volt power socket
100
▶Cigarette lighter
102
▶Ashtray
103
▶USB and AUX input » Infotainment Owner's Manual
Depending on equipment fitted: ▶ Operating controls for the heating
119
▶Operating controls for the manual air conditioning system
119
▶Operating controls for Climatronic
120
212223242526272829303132333435363727Cockpit
Page 34 of 276
Engine electronics check (petrol engine)35 Safety systems35
Tyre pressure
35
Brake linings
36
Fuel reserve
36
Lane departure warning (Lane Assist)
36
Turn signal system
36
Trailer turn signal lights
36
Fog lights
36
Speed regulating system / Speed limiter
37
Brake pedal (automatic transmission)
37
Parking brake - Auto Hold function
37
Main beam
37
Automatic transmission
37
Rear seat belt warning light
37
Alternator
37
Coolant
38
Engine oil pressure too low
38
Engine oil level
38
AdBlue ®
39
Lamp failure
39
Diesel particulate filter (diesel engine)
39
Windscreen washer fluid level
40
Headlamp assistant
40
START-STOP system
40
Low temperature displayed
40
Water in the fuel filter (diesel engine)
40
Automatic Distance Control (ACC)
40
Distance warning (Front Assist)
40
Advance warning / emergency braking (Front Assist)
41
Economy mode
41
Adaptive chassis control (DCC) fault
41
Service
41
The warning lights in the instrument cluster indicate certain functions or
faults.
Some warning lights can be accompanied by acoustic signals and messages in
the display of the instrument cluster.
After switching on the ignition, some warning lights light up briefly as a func-
tion test.
If the tested systems are OK, the corresponding warning lights go out a few
seconds after switching on the ignition or after starting the engine.
Warning lights in the display
Depending on the importance the warning light
(danger) or
(warning) illu-
minate along with some of the warning lights in the list with the warning
lights.
Depending on vehicle specification, some warning lights may be displayed in
colour on the display. For example. the coolant warning lamp may be represen-
ted as follows.
▶ - Segment Display / monochromatic (“black and white”) MAXI DOT display
▶ - colour MAXI DOT displayWARNING■
Ignoring illuminated warning lights and related messages or instructions
in the display of the instrument cluster may lead to serious personal injury
or damage to the vehicle.■
If you have to stop for technical reasons, then park the vehicle at a safe
distance from the traffic, switch off the engine and switch on the hazard
warning lights » page 71. Place the warning triangle at the prescribed dis-
tance.
■
The engine compartment of your car is a hazardous area. The following
warning instructions must be followed at all times when working in the en-
gine compartment » page 206, Engine compartment .
Parking brake
Read and observe
on page 32 first.
illuminates - the hand brake light is switched on.
Parking brake error
illumi-
nates
Fault: electric parking brakePARKING BRAKE FAULT
Seek help from a specialist garage.
Parking on a slope that is too steep
illumi-
nates
Parking brake: grad. too steep. Owner's manual!GRADIENT TOO STEEP
32Using the system
Page 42 of 276

WARNING■Always adjust the speed and driving style to the actual weather, road, ter-
rain and traffic conditions.■
The diesel particulate filter reaches very high temperatures - there is a
fire hazard and serious injury could be caused. Therefore, never stop the
vehicle at places where the underside of your vehicle can come into contact
with flammable materials such as dry grass, undergrowth, leaves, spilled
fuel or such like.
CAUTION
■ As long as the warning light illuminates, one must take into account an
increased fuel consumption and a power reduction of the engine.■
Using diesel fuel with an increased sulphur content can considerably reduce
the life of the diesel particle filter. A ŠKODA partner will be able to tell you
which countries use diesel fuel with a high sulphur content.
Note
We encourage you to avoid constant short journeys. This will improve the com-
bustion process of the soot particles in the diesel particulate filter.
Windscreen washer fluid level
Read and observe
on page 32 first.
illuminates – the windscreen washer fluid level is too low.
Add washer fluid!WASHER FLUID PLEASE TOP UP›
Fill up the windscreen washer fluid.
Headlamp assistant
Read and observe
on page 32 first.
illuminates – the headlamp assistant is activated
» page 72.
START-STOP system
Read and observe
on page 32 first.
The warning lights
indicates the state of the START STOP system
» page 130 .
Low temperature displayed
Read and observe
on page 32 first.
illuminates – the outside temperature is below +4 °C.
WARNINGEven at temperatures around +4 °C, black ice may still be on the road sur-
face! Do not only rely upon the information given on the outside tempera-
ture display that there is no ice on the road.
Water in the fuel filter (diesel engine)
Read and observe
on page 32 first.
The fuel filter with water separator, filters out dirt and water from the fuel.
If too much water is present in the separator, the following information ap-
pears on the instrument cluster display.
The warning light is only shown in the MAXI DOTdisplay.
illumi-
nates
Water in fuel filter. Owner's manual!WATER IN FUEL FILTER
Seek help from a specialist garage.
Automatic Distance Control (ACC)
Read and observe
on page 32 first.
The warning lights
indicate the condition of the ACC system
» page 163 .
Distance warning (Front Assist)
Read and observe
on page 32 first.
illuminates – vehicle is below the safe distance from the vehicle in front.
The warning light is only shown in the MAXI DOTdisplay.
Information on the Front Assist system » page 168.
40Using the system
Page 70 of 276
All seats occupied, boot loaded
Driver seat occupied, boot loaded
Xenon headlight
The Xenon bulbs adapt automatically to the load and driving state of the vehi-
cle when the ignition is switched on and when driving. Vehicles that are equip-
ped with Xenon headlights do not have a manual headlight range adjustment
control.WARNINGAlways adjust the headlight range control to meet the following conditions.■The vehicle does not dazzle other road users, especially oncoming vehi-
cles.■
The beam range is sufficient for safe driving.
Note
■ The light switch is in position or and the ignition is turned off, the low
beam is switched off automatically 1)
and the status light is lit. The side light is
switched off when the ignition key is removed, for vehicles with the KESSY
system after switching off the ignition and opening the driver's door.■
If there is a fault in the light switch, the low beam comes on automatically.
Daylight running lights (DAY LIGHT)
Read and observe
on page 67 first.
The daytime running lights light up the area in front of and to the rear of the
vehicle (only applicable for some countries).
The lights are switched on automatically if the following conditions are met. The light switch is in the position
or
.
The ignition is switched on.
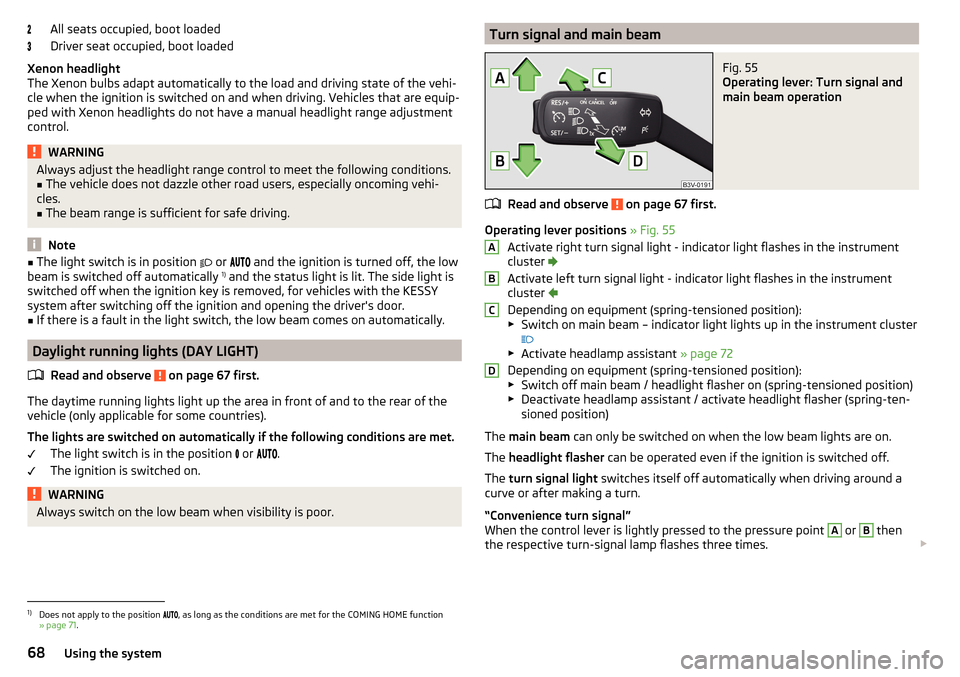
WARNINGAlways switch on the low beam when visibility is poor.Turn signal and main beamFig. 55
Operating lever: Turn signal and
main beam operation
Read and observe on page 67 first.
Operating lever positions » Fig. 55
Activate right turn signal light - indicator light flashes in the instrument cluster
Activate left turn signal light - indicator light flashes in the instrument
cluster
Depending on equipment (spring-tensioned position):
▶ Switch on main beam – indicator light lights up in the instrument cluster
▶ Activate headlamp assistant » page 72
Depending on equipment (spring-tensioned position):
▶ Switch off main beam / headlight flasher on (spring-tensioned position)
▶ Deactivate headlamp assistant / activate headlight flasher (spring-ten-
sioned position)
The main beam can only be switched on when the low beam lights are on.
The headlight flasher can be operated even if the ignition is switched off.
The turn signal light switches itself off automatically when driving around a
curve or after making a turn.
“Convenience turn signal”
When the control lever is lightly pressed to the pressure point
A
or
B
then
the respective turn-signal lamp flashes three times.
ABCD1)
Does not apply to the position
, as long as the conditions are met for the COMING HOME function
» page 71 .
68Using the system
Page 74 of 276

When the hazard warning system is on and the indicator light is switched on
(e.g. when turning), the hazard warning lights are switched off temporarily and
only the turn signal flashes on the relevant side of the vehicle.
Parking lights
Read and observe
on page 67 first.
The side light is provided for lighting of the parked vehicle.
Switching on the side light
on one side
›
Switch off the ignition.
›
Press the control lever to position
A
or
B
as far as the stop » Fig. 55 on
page 68 .
The parking lights on the right or left side of the vehicle are turned on.
Switching on the side light on both sides
›
With the ignition switched on turn the light switch to position .
›
Switch off the ignition.
›
Lock the vehicle.
After pulling out the ignition key and opening the driver's door, an audible
warning sounds.
After a few seconds or after closing the driver's door, the audible alarm is
turned off, but the parking lights will remain switched on.
CAUTION
■ Turning on the parking light means the battery is heavily loaded.■The parking light cannot be turned off automatic due to the low battery
charge level.■
If the two-sided parking lights are switched on when the ignition is off, then
there is no automatic switching off of the parking light.
Driving abroad
Read and observe
on page 67 first.
When driving in countries with opposing traffic system (traffic on the
left/right), your headlights may dazzle oncoming traffic. In order to avoid this,
the headlights must be adjusted at a specialist garage.
You can adjust the Xenon headlights yourself by setting the travel mode in In- fotainment » Owner´s Manual Infotainment , chapter CARVehicle settings .
Headlamp Assistant (Light Assist / Dynamic Light Assist)
Introduction
Fig. 59
Camera view window for the
headlamp assistant
This chapter contains information on the following subjects:
Function
73
Switching on and off
73
Information messages
73
The headlamp assistant (following as system) can prevent the dazzling of oth-
er road users.
The system automatically switches the high beam on / off, if necessary, ad-
justs the beam of the headlights in accordance with the existing traffic (other
vehicles) and environmental conditions (e.g. driving through a lighted village).
The switching on / off of the high beam, if necessary adaptation of the head-
lamp is controlled by a camera » Fig. 59.
Depending on the equipment, the following system versions can exist. ▶
Light Assist
▶
Dynamic Light AssistLight Assist
The system automatically switches the high beam on / off.
Dynamic Light Assist
The system automatically adjusts the light cone shape of the headlights in or-
der to prevent the dazzling oncoming and preceding vehicles, while ensuring
the highest possible illumination of the road edges.
72Using the system
Page 75 of 276
In the following cases, the automatic adjustment of the cone of light of the
headlights is disabled, the system automatically switches only the high beam
on/off.
▶ The driving mode Eco is selected » page 171, Selection of the driving
mode(Driving Mode Selection) .
▶ The driving mode Travel mode is selected » page 70, travel mode .
In the following case the Dynamic Light Assist
is disabled.
▶ The system is in rain or fog mode » page 69, Xenon headlight .
WARNINGThe system only serves as a support and does not relieve the driver of his
or her responsibility to check the headlights and low beam and, if necessa-
ry, to switch on the lights depending on the light conditions. The manual
operation may be required for example, in the following situations.■
When visibility is poor, e.g. fog, heavy rain, or thick snowfall.
■
Passing poorly lit road users, e.g. cyclists or pedestrians.
■
When driving around “sharp” bends.
■
Driving through poorly-lit locations.
■
The camera viewing range is obstructed by an obstacle.
CAUTION
Do not attach any stickers or similar objects to the windscreen to avoid impair-
ing the functions of the systems.
Function
Read and observe
and on page 73 first.
Operating conditions
The system works under the following conditions.
The light switch is in the position
.
The system is activated.
The system is activated » page 73, Switching on and off .
The vehicle speed is over 60 km / h or for some countries more than 40
km / h.
The headlight switches off automatically when the speed falls below 30 km/h.
The system can be activated/deactivated in the Infotainment » Owner´s Man-
ual Infotainment , chapter CAR - vehicle settings .
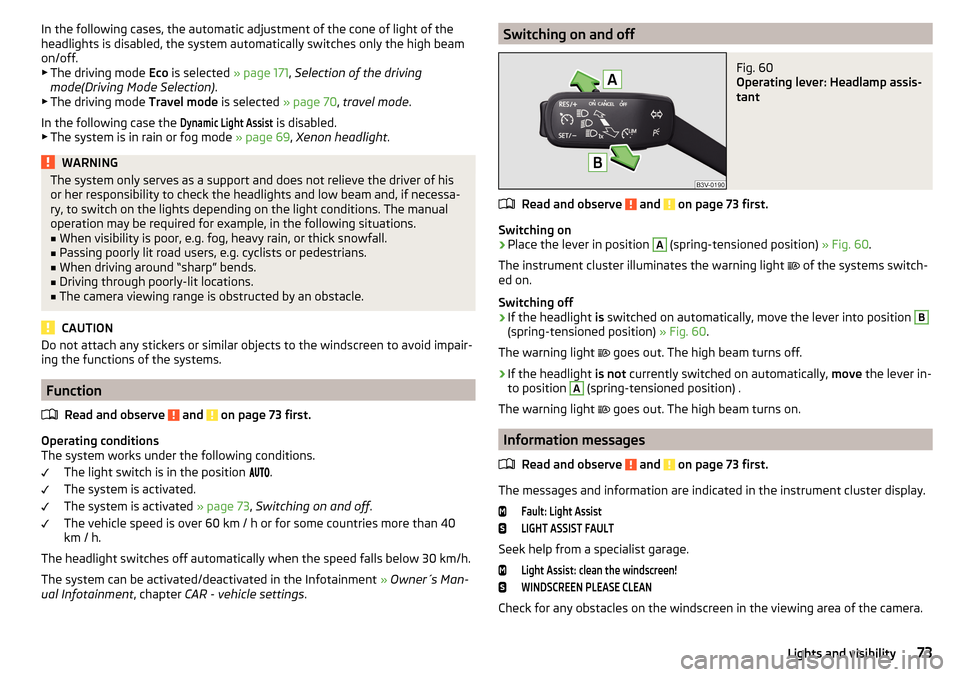
Switching on and offFig. 60
Operating lever: Headlamp assis-
tant
Read and observe and on page 73 first.
Switching on
›
Place the lever in position
A
(spring-tensioned position) » Fig. 60.
The instrument cluster illuminates the warning light of the systems switch-
ed on.
Switching off
›
If the headlight is switched on automatically, move the lever into position
B
(spring-tensioned position) » Fig. 60.
The warning light goes out. The high beam turns off.
›
If the headlight
is not currently switched on automatically, move the lever in-
to position
A
(spring-tensioned position) .
The warning light goes out. The high beam turns on.
Information messages
Read and observe
and on page 73 first.
The messages and information are indicated in the instrument cluster display.
Fault: Light AssistLIGHT ASSIST FAULT
Seek help from a specialist garage.
Light Assist: clean the windscreen!WINDSCREEN PLEASE CLEAN
Check for any obstacles on the windscreen in the viewing area of the camera.
73Lights and visibility
Page 80 of 276

Windscreen wipers and washersFig. 69
Operation of wipers and washers: front / rear
Read and observe
and on page 77 first.
Operating lever positions Wipers off
Depending on specification:
▶ Intermittent windscreen wiping
▶ Automatic windscreen wiping in rain
Slow windscreen wiping
Rapid windscreen wiping
Front screen touch wiping / wiper arms service position (spring-loaded
position)
Spraying and wiping the windscreen (spring-loaded position)
Rear screen wiping
Spraying and wiping the rear window (spring-loaded position)
Depending on specification:
▶ To set the wiper interval for the windscreen
▶ Sensitivity setting of the automatic wiping with rain
By setting the switch in the direction of the arrow wipers sweep more of-
ten.
Spraying and wiping the windscreen
After releasing the operating lever, the wipers will make from 2 to 3 wiper
strokes.
At a speed of more than 2 km/h, the wiper wipes once again 5 seconds after
the last wiper stroke in order to wipe the last drops from the windscreen. This
function can be activated/deactivated by a specialist garage.
01234567ASpraying and wiping the rear window
After releasing the operating lever, the wipers will make from 2 to 3 wiper
strokes.
The operating lever remains in position 6
.
Activating / deactivating of the automatic windscreen wiping with rain
Automatic windscreen wiping in rain can be activated or deactivated in the In-
fotainment » Owner´s Manual Infotainment , chapter CAR - Vehicle settings .
Automatic rear window wiping
If the lever is in position
2
or
3
» Fig. 69 , the rear window is wiped every
30 or 10 seconds if the vehicle's speed exceeds 5 km/h.
If automatic windscreen wiping in rain is activated (the operating lever is in the
position
1
) the function is only active if the windscreen wipers operate in
continuous mode (no break between each wiping process).
The automatic rear wiper can be activated/deactivated in the Infotainment
» Owner´s Manual Infotainment , chapter CAR - vehicle settings .
WARNINGAutomatic wiping during rain is only a support. The driver is not released
from the responsibility to set the function of the windscreen wipers man-
ually depending on the visibility conditions.
Note
■ If the operating lever is in the position 2 or 3 and the speed of the vehicle
drops below 4 km / h, the wiping speed is reduced. The original wiping speed is
restored step by step when the speed of the vehicle exceeds 8 km/h.■
The rear window is wiped once automatically if the windscreen wipers are on
when reverse gear is selected.
Headlight cleaning system
Read and observe
and on page 77 first.
To clean the headlights, the headlamp is also sprayed after every ten squirts.
The headlight washer system works under the following conditions. The ignition is switched on.
The low beam is switched on.
The outside temperature is about -12° C to +39° C.
78Using the system
Page 174 of 276

Normal
Read and observe on page 171 first.
This mode is suitable for a conventional driving.
Sport
mode
Read and observe
on page 171 first.
This mode is suitable for a sporty driving.
Selecting this mode primarily affects the function of the following systems.
DCC
The DCC adjusts the chassis for the sporty driving style.
Steering
The power steering is reduced slightly, i.e., the driver needs to exert more
force for steering .
Engine / drive
The vehicle acceleration is more dynamic than in
Normal
mode.
Adaptive Cruise Control (ACC)
The acceleration is quicker than in
Normal
mode with distance control
» page 163 .
Xenon headlight
The headlamps adapt to the driving style more dynamically than in mode
Nor-mal
» page 69 .
ProActive passenger protection
The first level of protection is deactivated » page 173.
Eco
mode
Read and observe
on page 171 first.
This mode is suitable for a relaxed style of driving and helps to save fuel.
Selecting this mode primarily affects the function of the following systems.
Engine / drive
Vehicle acceleration is more relaxed than in
Normal
mode.
The recommended gear is controlled such to achieve the lowest possible fuel
consumption » page 42.
When the START-STOP system was deactivated manually » page 130, it is au-
tomatically activated.
The automatic gearbox is set automatically to mode E » page 135 .
Adaptive Cruise Control (ACC)
Acceleration occurs more relaxed than in Normal
» page 163 mode with distance
control.
Xenon headlight
The system is in economic mode » page 69. The headlamps are in basic setting
and do not adapt to the direction of travel.
Air conditioning (Climatronic)
The air conditioning is controlled so as to save energy. For this reason, for ex-
ample, it may take longer to reach the desired interior temperature in mode
Normal
.
Note
■ The mode Eco is not available when towing a trailer or when another acces-
sory is connected to the trailer socket. If the vehicle is in drive mode Eco
and a
trailer is hitched up or another accessory is connected, the vehicle is automati-
cally set to the driving mode
Normal
.
■
The maximum vehicle acceleration (kick down function) is possible also in
driving mode
Eco
.
Individual
mode
Read and observe
on page 171 first.
In the mode
Individual
each system can be set independently » page 173, Mode
settings
Individual
.
172Driving
Page 242 of 276
Installing the storage compartment›Raise the storage compartment in the direction of the arrow 4.›
Overcome the resistance of the detents
A
.
›
Insert the brake control linkage in the opposite direction to arrow
2
.
›
Lock the brake control linkage in the opposite direction to arrow
1
.
›
Close the storage compartment.
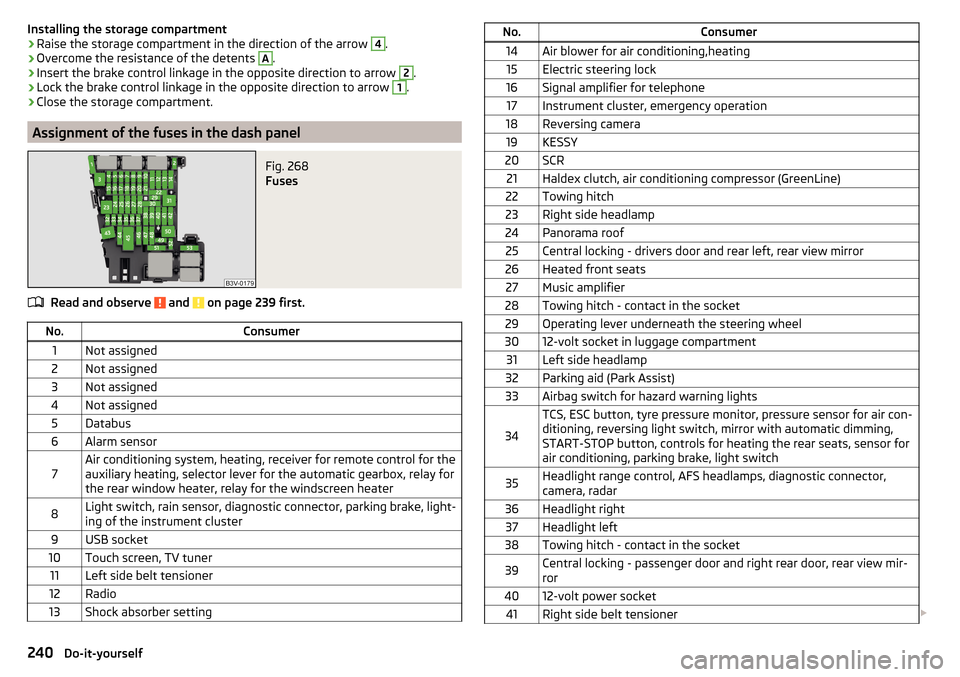
Assignment of the fuses in the dash panel
Fig. 268
Fuses
Read and observe and on page 239 first.
No.Consumer1Not assigned2Not assigned3Not assigned4Not assigned5Databus6Alarm sensor7Air conditioning system, heating, receiver for remote control for the
auxiliary heating, selector lever for the automatic gearbox, relay for
the rear window heater, relay for the windscreen heater8Light switch, rain sensor, diagnostic connector, parking brake, light-
ing of the instrument cluster9USB socket10Touch screen, TV tuner11Left side belt tensioner12Radio13Shock absorber settingNo.Consumer14Air blower for air conditioning,heating15Electric steering lock16Signal amplifier for telephone17Instrument cluster, emergency operation18Reversing camera19KESSY20SCR21Haldex clutch, air conditioning compressor (GreenLine)22Towing hitch23Right side headlamp24Panorama roof25Central locking - drivers door and rear left, rear view mirror26Heated front seats27Music amplifier28Towing hitch - contact in the socket29Operating lever underneath the steering wheel3012-volt socket in luggage compartment31Left side headlamp32Parking aid (Park Assist)33Airbag switch for hazard warning lights
34
TCS, ESC button, tyre pressure monitor, pressure sensor for air con-
ditioning, reversing light switch, mirror with automatic dimming,
START-STOP button, controls for heating the rear seats, sensor for
air conditioning, parking brake, light switch35Headlight range control, AFS headlamps, diagnostic connector,
camera, radar36Headlight right37Headlight left38Towing hitch - contact in the socket39Central locking - passenger door and right rear door, rear view mir-
ror4012-volt power socket41Right side belt tensioner 240Do-it-yourself