open bonnet SKODA SUPERB 2015 3.G / (B8/3V) Owner's Manual
[x] Cancel search | Manufacturer: SKODA, Model Year: 2015, Model line: SUPERB, Model: SKODA SUPERB 2015 3.G / (B8/3V)Pages: 276, PDF Size: 42.14 MB
Page 29 of 276
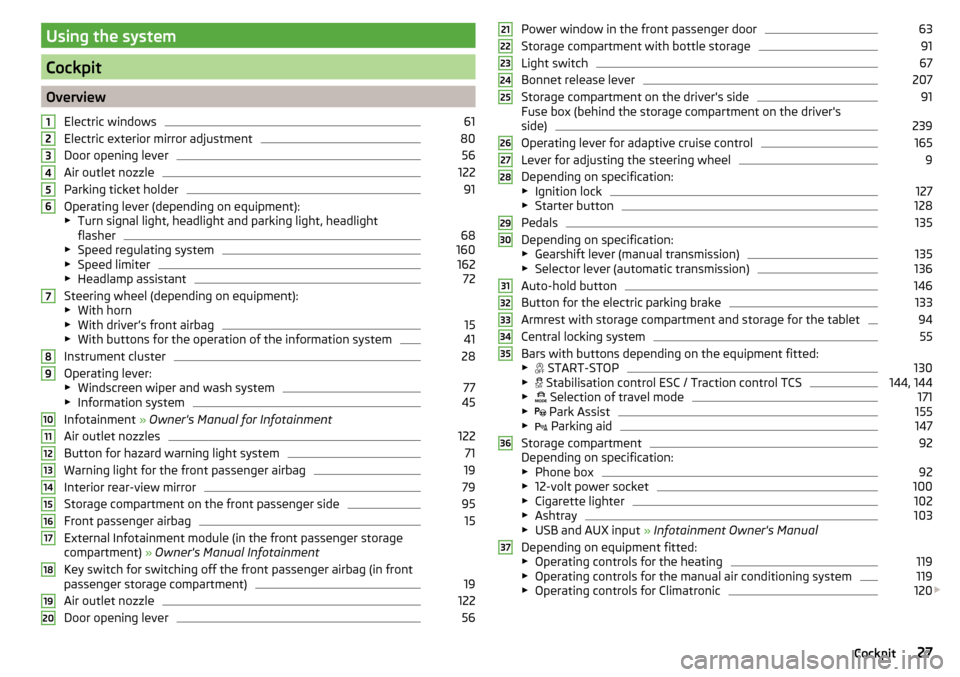
Using the system
Cockpit
OverviewElectric windows
61
Electric exterior mirror adjustment
80
Door opening lever
56
Air outlet nozzle
122
Parking ticket holder
91
Operating lever (depending on equipment):
▶ Turn signal light, headlight and parking light, headlight
flasher
68
▶ Speed regulating system
160
▶Speed limiter
162
▶Headlamp assistant
72
Steering wheel (depending on equipment):
▶ With horn
▶ With driver’s front airbag
15
▶With buttons for the operation of the information system
41
Instrument cluster
28
Operating lever:
▶ Windscreen wiper and wash system
77
▶Information system
45
Infotainment » Owner's Manual for Infotainment
Air outlet nozzles
122
Button for hazard warning light system
71
Warning light for the front passenger airbag
19
Interior rear-view mirror
79
Storage compartment on the front passenger side
95
Front passenger airbag
15
External Infotainment module (in the front passenger storage
compartment) » Owner's Manual Infotainment
Key switch for switching off the front passenger airbag (in front
passenger storage compartment)
19
Air outlet nozzle
122
Door opening lever
561234567891011121314151617181920Power window in the front passenger door63
Storage compartment with bottle storage
91
Light switch
67
Bonnet release lever
207
Storage compartment on the driver's side
91
Fuse box (behind the storage compartment on the driver's
side)
239
Operating lever for adaptive cruise control
165
Lever for adjusting the steering wheel
9
Depending on specification:
▶ Ignition lock
127
▶Starter button
128
Pedals
135
Depending on specification:
▶ Gearshift lever (manual transmission)
135
▶Selector lever (automatic transmission)
136
Auto-hold button
146
Button for the electric parking brake
133
Armrest with storage compartment and storage for the tablet
94
Central locking system
55
Bars with buttons depending on the equipment fitted:
▶ START-STOP
130
▶
Stabilisation control ESC / Traction control TCS
144, 144
▶
Selection of travel mode
171
▶
Park Assist
155
▶
Parking aid
147
Storage compartment
92
Depending on specification:
▶ Phone box
92
▶12-volt power socket
100
▶Cigarette lighter
102
▶Ashtray
103
▶USB and AUX input » Infotainment Owner's Manual
Depending on equipment fitted: ▶ Operating controls for the heating
119
▶Operating controls for the manual air conditioning system
119
▶Operating controls for Climatronic
120
212223242526272829303132333435363727Cockpit
Page 40 of 276
CoolantRead and observe
on page 32 first.
Coolant level too low
illumi-
nates
Check coolant! Owner's manual!ENGINE COOLANT PLEASE CHECK
▶ Stop the vehicle, switch off the engine and let it cool.
▶ Check the coolant level » page 211, Checking the coolant level .
If the coolant level is within the specified range and the warning light
lights
up again, then there may be a malfunction of the cooling fan.
▶ Switch off the ignition.
▶ Check the fuse for the radiator fan, replace if necessary.
If the coolant level and fan fuse are both OK but the warning light lights up
again,
stop driving!
Seek help from a specialist garage.
Coolant temperature too high
illumi-
nates
Engine overheat. Stop! Owner's manual!ENGINE OVERHEAT STOP
▶ Stop the vehicle, switch off the engine and let it cool.
▶ Continue your journey only after the warning light has disappeared.
Engine oil pressure too low
Read and observe
on page 32 first.
flashes – the engine oil pressure is too low.
Oil pressure: stop! Owner's manual!STOP VEHICLE OIL PRESSURE›
Stop the vehicle, switch off the engine, and check the engine oil level.
Even if the oil level is correct,
do not drive any further if the warning light is
flashing. Also do not leave the engine running at an idling speed.
Seek help from a specialist garage.
CAUTIONDo not continue if for some reason it is not possible to fill with engine oil un-
der the current circumstances! Switch off the engine and seek assistance
from a specialist garage.
Engine oil level
Read and observe
on page 32 first.
Engine oil level too low
illumi-
nates
Oil level: add oil!ADD OIL
▶ Stop the vehicle, switch off the engine, and check the engine oil level, top up
if necessary.
The warning light will go out if the bonnet is left open for more than 30 sec-
onds. If no engine oil has been replenished, the warning light will come on
again after driving about 100 km.
Engine oil level too high
illumi-
nates
Reduce oil level!OIL LEVEL TOO HIGH
▶ Stop the vehicle, switch off the engine, and check the engine oil level.
In the event of a high oil level, seek assistance from a specialist garage.
Fault on the engine oil level sensor
illumi-
nates
Oil sensor: workshop!OIL SENSOR WORKSHOP
Seek help from a specialist garage.
CAUTION
Do not continue if for some reason it is not possible to fill with engine oil un-
der the current circumstances! Switch off the engine and seek assistance
from a specialist garage.38Using the system
Page 43 of 276

Advance warning / emergency braking (Front Assist)Read and observe
on page 32 first.
illuminates – the system has detected the risk of a collision or automatically
triggered an emergency braking manoeuvre.
Information on the Front Assist system » page 168.
Economy mode
Read and observe
on page 32 first.
illuminates - the vehicle is in economy mode through the intervention of
the active cylinder management or in the neutral position of the automatic
transmission.
Adaptive chassis control (DCC) fault
Read and observe
on page 32 first.
The warning light is only shown in the MAXI DOTdisplay.
illumi-
nates
Fault: damperDAMPER FAULT
A DCC-fault is present.
Seek help from a specialist garage.
Service
Read and observe
on page 32 first.
illuminates – service is due
» page 49, Service interval display .
Information system
Driver information system
Introduction
This chapter contains information on the following subjects:
Door, luggage compartment or bonnet warning
41
Auto-check control
41
Overspeed warning at 120 km/h
42
Gear recommendation
42
Depending on the vehicle's equipment, the information system vie the display
of the instrument cluster provides the following information.
▶ Driving data (multifunction display) » page 42.
▶ Data relating to the Maxi DOT display » page 45.
▶ Service interval display » page 49.
▶ Selector lever positions for an automatic gearbox » page 136.
▶ Information and alerts in the Assist systems » page 142.
WARNINGConcentrate fully at all times on your driving! As the driver you are fully re-
sponsible for the operation of your vehicle.
Door, luggage compartment or bonnet warning
Read and observe
on page 41 first.
If at least one door is open, or the boot or bonnet is open, the display indicates
the relevant open door or boot/bonnet.
An acoustic signal will also sound if you drive the vehicle above 6 km/h when a
door is open.
Auto-check control
Read and observe
on page 41 first.
Certain functions and conditions of individual vehicle systems are checked
continuously when the ignition is switched on.
41Information system
Page 59 of 276

Child safety lockFig. 42
Rear door: Child safety system switch on / off
Read and observe
and on page 53 first.
The child safety lock prevents the rear door from being opened from the in-
side. The door can only be opened from the outside.
Switching the child safety lock on/off » Fig. 42
Switching on
Switching off
You can switch the child safety lock on and off using the vehicle key.
Malfunctions
Read and observe
and on page 53 first.
Fault with the central locking
If the warning light in the driver's door initially flashes quickly for around 2 sec-
onds, and then lights up for 30 seconds without interruption before flashing
again slowly, you will need to seek the assistance of a specialist garage.
If there is a central locking fault, the key can be used to lock or unlock the driv-
er's door only. The other doors and the boot lid can be manually locked or un-
locked. ▶ Locking/unlocking of the Driver's door » page 236.
▶ Locking door » page 236.
▶ Unlocking the boot lid » page 236.
Failure of the system KESSY
If the following message is displayed in the display of the instrument cluster,
then help is required from a specialist company.Keyless access system faulty.KEYLESS ACCESS SYSTEM FAULTY
Key battery discharged
If the voltage of the key battery is too low, the following message appears in
the display of the instrument cluster.
Change the key battery!KEY BATTERY PLEASE CHANGE
Replace the battery » page 234.
Anti-theft alarm system
Introduction
This chapter contains information on the following subjects:
Interior monitor and towing protection
58
The anti-theft alarm system (hereinafter referred as alarm system) increases
protection against theft and break-in attempts into the vehicle.
The alarm system is activated automatically approximately 30 seconds after the vehicle is locked. This is automatically disabled after release.
The alarm system triggers audible and visual signals if an attempt is made to
break into the vehicle (hereafter referred to as alarm).
Triggering the alarm
The alarm is triggered when the following unauthorized actions are carried out
on the locked vehicle.
▶ Opening the bonnet.
▶ Opening the boot lid.
▶ Opening the doors.
▶ Manipulation of the ignition lock.
▶ Towing the vehicle.
▶ Movement in the vehicle.
▶ Sudden and significant voltage drop of the electrical system.
▶ Uncoupling the trailer.
If the driver's door of a vehicle is unlocked and opened by the lock cylinder,
then the alarm is triggered.
57Unlocking and opening
Page 133 of 276

OperationFig. 164
Display
Vehicles with manual transmission
The engine is automatically switched off as soon as the vehicle comes to a
halt, the shift lever is moved into neutral and the clutch pedal is released.
The engine is automatically started as soon as the clutch pedal is depressed.
Vehicles with automatic transmission
The engine is automatically switched off as soon as the vehicle comes to a
halt and the brake pedal is operated.
The motor is automatically started as soon as the accelerator pedal is de-
pressed or, if the Auto Hold function is deactivated, when the brake pedal is
released.
Requirements for the system to function correctly
The following conditions must be met for the system to function correctly.
The driver's door is closed.
The driver has fastened the seat belt.
The bonnet is closed.
The driving speed was higher than 4 km.h after the last stop.
System status
The system status is shown in the display when the vehicle comes to a halt
» Fig. 164 .
The engine is switched off automatically; when moving off, the ignition
process will be initiated automatically.
The engine is not switched off automatically.
Reasons for the engine running
It may be essential for the engine to keep running when the vehicle comes to
a halt, for the following reasons. ▶ The engine temperature for the proper function of the system has not yet
been reached.
▶ The charge state of the vehicle battery is too low.
▶ The current consumption is too high.
▶ High air-conditioning or heating capacity (high fan speed, big difference be-
tween the desired and actual interior temperature).
When the engine is shut-down automatically and the system detects that the
engine is required such as when the brake pedal is pressed repeatedly then
the system automatically starts the engine.
Infotainment display
Information about the current status of the system can be displayed in the In-
fotainment display » Owner´s Manual Infotainment , chapter CAR - Vehicle set-
tings (CAR button) .
Note
■
If the vehicle remains outdoors for a long time in minus temperatures or in
direct sunlight, it can take several hours until the internal temperature of the
vehicle battery reaches a suitable temperature for proper operation of the
START STOP system.■
If the driver's seat belt is removed for more than approx. 30 seconds or the
driver's door is opened during stop mode, the engine will have to be started
manually.
■
No automatic engine shut-down takes place when a vehicle with automatic
transmission is moving at low speed (e.g. during a traffic jam) and remains sta-
tionary after pressing the brake pedal lightly. Automatic engine shut-down
takes place if you press the brake pedal down with more force.
■
For vehicles with automatic transmission there is no automatic engine shut-
down when the system detects a manoeuvring action due to a large steering
angle.
131Starting-off and Driving
Page 208 of 276
After refilling›After refilling AdBlue®
put the cap on the fuel filler neck and turn in the oppo-
site direction of the arrow 3
until it engages.
›
Close the fuel filler flap until it clicks into place.
Before driving
›
After filling AdBlue ®
only switch on the ignition and leave it on for at least 30
s, so that the refilling can be recognized by the system.
Only then start the engine.
CAUTION
The AdBlue ®
- tank is full when no AdBlue ®
flows from the refill bottle or as
soon as the correctly operated pump cuts out for the first time. Do not contin-
ue refilling AdBlue ®
.
Note
The working life of the AdBlue ®
solution is 4 years. Thereafter the solution
must be replaced by a specialist garage.
Engine compartment
Introduction
This chapter contains information on the following subjects:
Opening and closing the bonnet
207
Engine compartment overview
208
Radiator fan
208
Windscreen washer system
208WARNINGInjuries or scolding or risks of accident or fire may occur when working in
the engine compartment. For this reason, it is essential to comply with the
warning instructions outlined below and with the general applicable safety
rules. The engine compartment of your car is a hazardous area!WARNINGInstructions before beginning work in the engine compartment■Turn off the engine and remove the ignition key.■
The parking brake switch.
WARNING (Continued)■ For vehicles with manual transmission the lever into the neutral position.■On vehicles with automatic transmission, shift the selector lever into the
P position.■
Allow the engine to cool.
■
Never open the bonnet if you can see steam or coolant escaping from the
engine compartment – risk of scalding! Wait until no more steam or coolant
is escaping.
WARNINGInformation for working in the engine room■Keep all people, especially children, away from the engine compartment.■
Never touch the radiator fan. The fan might suddenly start running!
■
Do not touch any hot engine parts – risk of burns!
WARNINGInformation for working in the engine compartment with the engine run-
ning■
Pay particular attention to moving engine parts, e.g. V-ribbed belt, gener-
ator, radiator fan - danger to life!
■
Never touch the electric wiring on the ignition system.
■
Avoid short circuits in the electrical system, particularly on the vehicle's
battery.
■
Always make sure that no jewellery, loose clothing or long hair can get
caught in rotating engine parts – risk to life! Always remove any jewellery,
tie back long hair and wear tight fitting clothing before completing any
work.
WARNINGInformation for working on the fuel system or the electrical system■Always disconnect the vehicle battery from the electrical system.■
Do not smoke.
■
Never work near open flames.
■
Always have a functioning fire extinguisher nearby.
206General Maintenance
Page 209 of 276

WARNING■Read and observe the information and warning instructions on the fluid
containers.■
Keep the working fluids in sealed original containers and safe from peo-
ple who are not completely independent, e.g. children.
■
Never spill operating fluids over the hot engine - risk of fire.
■
If you intend to work underneath the vehicle, you must secure the vehicle
from rolling away and support it with suitable supporting blocks; the car
jack is not sufficient – risk of injury!
CAUTION
Always top up using the correct specification of fluids. This may result in major
operating problems and also vehicle damage!
For the sake of the environment
In view of the requirements for the environmentally friendly disposal of fluids and the special tools and knowledge required for such work, we recommend
that fluids be changed by a specialist garage.
Note
■ Please consult a specialist garage for any questions relating to fluids.■Fluids with the proper specifications can be purchased from the ŠKODA Origi-
nal Accessories or from the ŠKODA Genuine Parts ranges.
Opening and closing the bonnet
Fig. 227
Opening the bonnet
Read and observe and on page 206 first.
Open flap
›
Open the driver door.
›
Pull the release lever underneath the dash panel in the direction of the ar-
row
1
» Fig. 227 .
Before opening the bonnet, ensure that the arms of the windscreen wipers
are correctly in place against the windscreen, otherwise the paintwork on the
flap could be damaged.
›
Push the release lever in the direction of arrow
2
.
The bonnet is then unlocked.
›
Grasp the bonnet and lift up until it is held open by the pressurised gas
spring.
Close the flap
›
Pull the bonnet down far enough to overcome the force of the pressurised
gas spring.
›
Close the bonnet from a height of approximately 20 cm with a slight swing.
Check whether the bonnet has been closed properly. Also make sure that a ve-
hicle with an opened bonnet does not appear in the instrument cluster display
» page 41 .
WARNING■
If you notice that the lock is not properly engaged while driving, stop the
vehicle immediately and close the bonnet – risk of accident!■
Make sure that when closing the engine compartment lid, no body parts
are crushed - there is danger of injury!
207Inspecting and replenishing
Page 212 of 276
CAUTION■In an emergency, another engine oil to be refilled. To prevent damage to the
engine, a maximum of 0.5 litres only of the following engine oils may be used:
■ For petrol engine models: ACEA A3/ACEA B4 or API SN, (API SM);
■ For diesel engine models: ACEA C3 or API CJ-4.
Checking the oil level
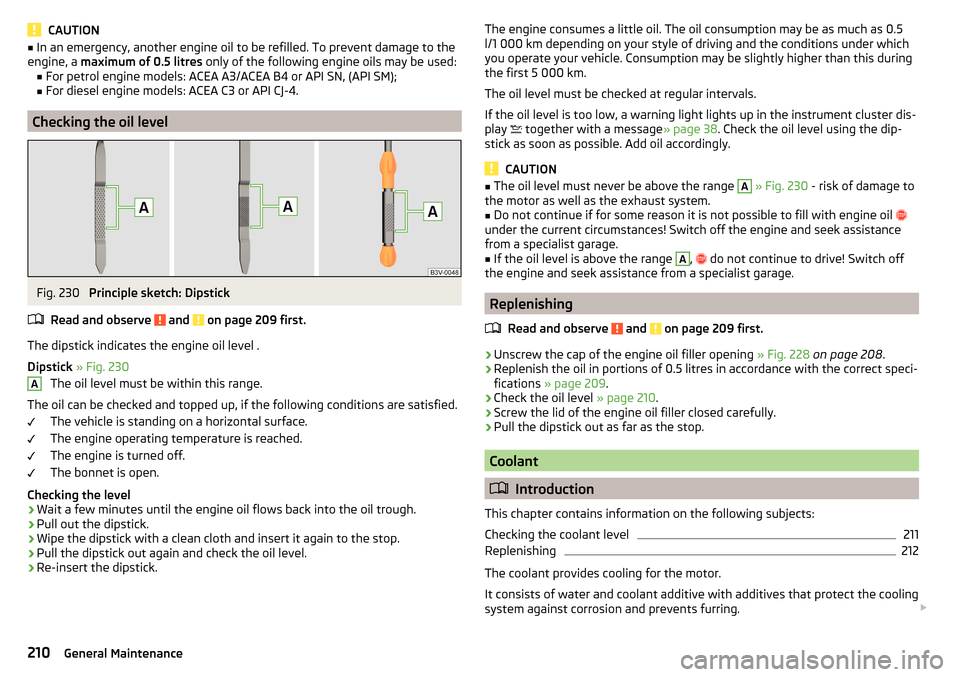
Fig. 230
Principle sketch: Dipstick
Read and observe
and on page 209 first.
The dipstick indicates the engine oil level .
Dipstick » Fig. 230
The oil level must be within this range.
The oil can be checked and topped up, if the following conditions are satisfied. The vehicle is standing on a horizontal surface.
The engine operating temperature is reached.
The engine is turned off.
The bonnet is open.
Checking the level
›
Wait a few minutes until the engine oil flows back into the oil trough.
›
Pull out the dipstick.
›
Wipe the dipstick with a clean cloth and insert it again to the stop.
›
Pull the dipstick out again and check the oil level.
›
Re-insert the dipstick.
AThe engine consumes a little oil. The oil consumption may be as much as 0.5
l/1 000 km depending on your style of driving and the conditions under which
you operate your vehicle. Consumption may be slightly higher than this during
the first 5 000 km.
The oil level must be checked at regular intervals.
If the oil level is too low, a warning light lights up in the instrument cluster dis-
play
together with a message » page 38. Check the oil level using the dip-
stick as soon as possible. Add oil accordingly.
CAUTION
■ The oil level must never be above the range A » Fig. 230 - risk of damage to
the motor as well as the exhaust system.■
Do not continue if for some reason it is not possible to fill with engine oil
under the current circumstances! Switch off the engine and seek assistance
from a specialist garage.
■
If the oil level is above the range
A
,
do not continue to drive! Switch off
the engine and seek assistance from a specialist garage.
Replenishing
Read and observe
and on page 209 first.
›
Unscrew the cap of the engine oil filler opening » Fig. 228 on page 208 .
›
Replenish the oil in portions of 0.5 litres in accordance with the correct speci-
fications » page 209 .
›
Check the oil level » page 210.
›
Screw the lid of the engine oil filler closed carefully.
›
Pull the dipstick out as far as the stop.
Coolant
Introduction
This chapter contains information on the following subjects:
Checking the coolant level
211
Replenishing
212
The coolant provides cooling for the motor.
It consists of water and coolant additive with additives that protect the cooling
system against corrosion and prevents furring.
210General Maintenance
Page 213 of 276

The proportion of coolant additive in the mixture must be at least 40%.
The coolant additive may be increased to a maximum of 60%.
The correct mixing ratio of water and coolant additive is to be checked if nec-
essary by a specialist garage or is to be restored if necessary.
The description of the coolant is shown in the coolant expansion reservoir
» Fig. 231 on page 211 .WARNINGThe engine compartment of your car is a hazardous area. The following
warning instructions must be followed at all times when working in the en- gine compartment » page 206.■
The coolant is harmful to health.
■
Avoid contact with the coolant.
■
Coolant vapours are harmful to health.
■
Never open the end cover of the coolant expansion reservoir while the
engine is still warm. The cooling system is pressurized!
■
When opening the end cover of the coolant expansion reservoir, cover it
with a cloth to protect your face, hands and arms from hot steam or hot
coolant.
■
If any coolant splashes into your eyes, immediately rinse out your eyes
with clear water and contact a doctor as soon as possible.
■
Always keep the coolant in the original container, safe from people who
are not completely independent, especially children - there is a danger of
poisoning!
■
If coolant is swallowed, consult a doctor immediately.
■
Never spill operating fluids over the hot engine - risk of fire.
CAUTION
■ Do not continue if for some reason it is not possible to fill with coolant un-
der the current circumstances! Switch off the engine and seek assistance from
a specialist garage.■
If the expansion tank is empty, do not top up with coolant. The system could
ventilate - there is a risk of engine damage,
not continue! Switch off the en-
gine and seek assistance from a specialist garage.
■
The concentration of coolant additive in the coolant must never be under
40%.
■
Over 60% of coolant additive in the coolant reduces the antifreeze protec-
tion and cooling effect.
■
A coolant additive that does not comply with the correct specification can
significantly reduce the corrosion protection of the cooling system.
■ Any faults resulting from corrosion may cause a loss of coolant and can con-
sequently result in major engine damage.■
Do not fill the coolant above the mark
A
» Fig. 231 on page 211 .
■
If an error occurs, leading to the engine overheating, the help of a professio-
nal garage is to be sought - there is a risk of serious engine damage occurring.
■
Additional headlights and other attached components in front of the air inlet
impair the cooling efficiency of the coolant.
■
Never cover the radiator - there is a risk of the engine overheating.
Note
The coolant capacity is approximately 1 l greater on vehicles that are fitted
with an auxiliary heater (auxiliary heating and ventilation).
Checking the coolant level
Fig. 231
Coolant expansion reservoir
Read and observe and on page 211 first.
The coolant expansion bottle is located in the engine compartment.
Coolant expansion reservoir » Fig. 231
Mark for the maximum permissible coolant level
Mark for the lowest permissible coolant level
The coolant level should be kept between the marks
A
and
B
.
The coolant can be checked and topped up, if the following conditions are sat-
isfied.
The vehicle is standing on a horizontal surface.
The engine is turned off.
The engine is not heated.
The bonnet is open.
AB211Inspecting and replenishing
Page 214 of 276
Checking the level›Check the coolant level in the coolant expansion tank » Fig. 231.
If the engine is warm, the test result may be inaccurate. The level can also be
above the mark A
» Fig. 231 .
If the oil level is too low, a warning light lights up in the instrument cluster dis-
play
together with a message » page 38. We still recommend inspecting the
coolant level directly at the reservoir from time to time.
Loss of coolant
A loss of coolant is first and foremost an indication of a leak in the cooling sys-
tem. Do not merely top up the coolant. Have the cooling system checked by a
specialist garage.
Replenishing
Read and observe
and on page 211 first.
The coolant expansion tank must always contain a small amount of coolant» page 211, in section Introduction .
›
Place a cloth over the cap of the coolant expansion tank and unscrew the
cap carefully .
›
Replenish the coolant.
›
Turn the cap until it clicks into place.
Do not use an alternative additive if the specified coolant is not available. In
this case, use just water and have the correct mixing ratio of water and cool-
ant additive restored by a specialist garage as soon as possible.
Only top up with new coolant.
Brake fluid
Introduction
This chapter contains information on the following subjects:
Checking the brake fluid level
212
Specification
213
The brake fluid reservoir is located in the engine compartment » Fig. 232 on
page 212 .
WARNING■
The engine compartment of your car is a hazardous area. The following
warning instructions must be followed at all times when working in the en-
gine compartment » page 206.■
Do not use used brake fluid - the function of the brake system may be im-
paired – risk of accident!
CAUTION
■ Do not continue your journey if the fluid level has dropped below the “MIN”
marking » Fig. 232 on page 212 , - there is a risk of an accident! Seek help
from a specialist garage.■
Brake fluid damages the paintwork of the vehicle.
Note
■ The brake fluid is changed as part of a compulsory inspection service.■We recommend using oils from the ŠKODA Original Accessories range.
Checking the brake fluid level
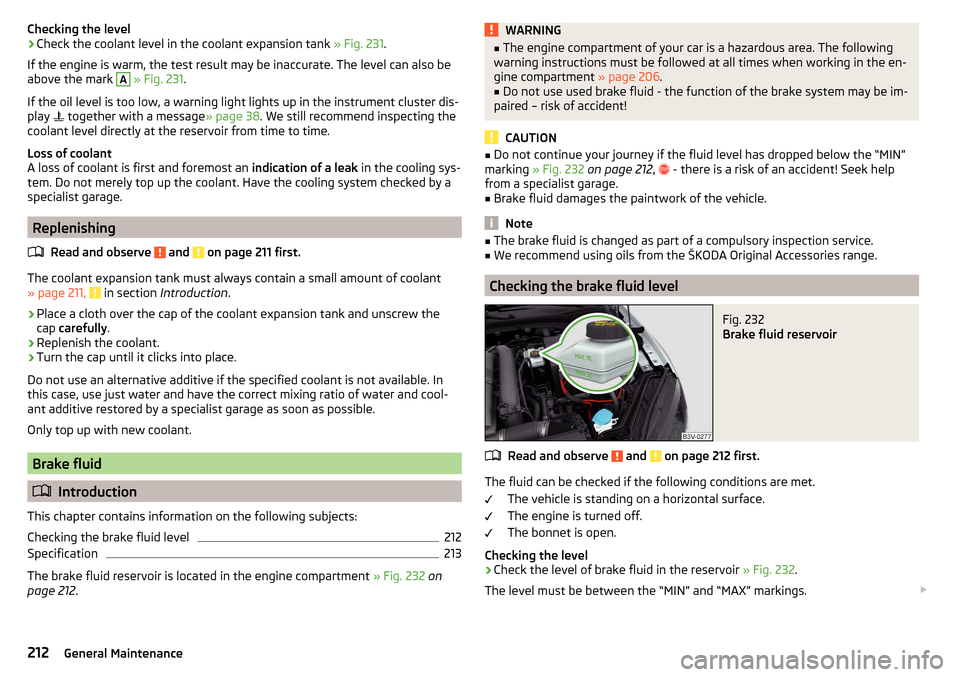
Fig. 232
Brake fluid reservoir
Read and observe and on page 212 first.
The fluid can be checked if the following conditions are met.
The vehicle is standing on a horizontal surface.
The engine is turned off.
The bonnet is open.
Checking the level
›
Check the level of brake fluid in the reservoir » Fig. 232.
The level must be between the “MIN” and “MAX” markings.
212General Maintenance