ESP SKODA SUPERB 2016 3.G / (B8/3V) Owner's Guide
[x] Cancel search | Manufacturer: SKODA, Model Year: 2016, Model line: SUPERB, Model: SKODA SUPERB 2016 3.G / (B8/3V)Pages: 336, PDF Size: 53.89 MB
Page 127 of 336
Infotainment operation
Infotainment operation
Operation principles and screen areas
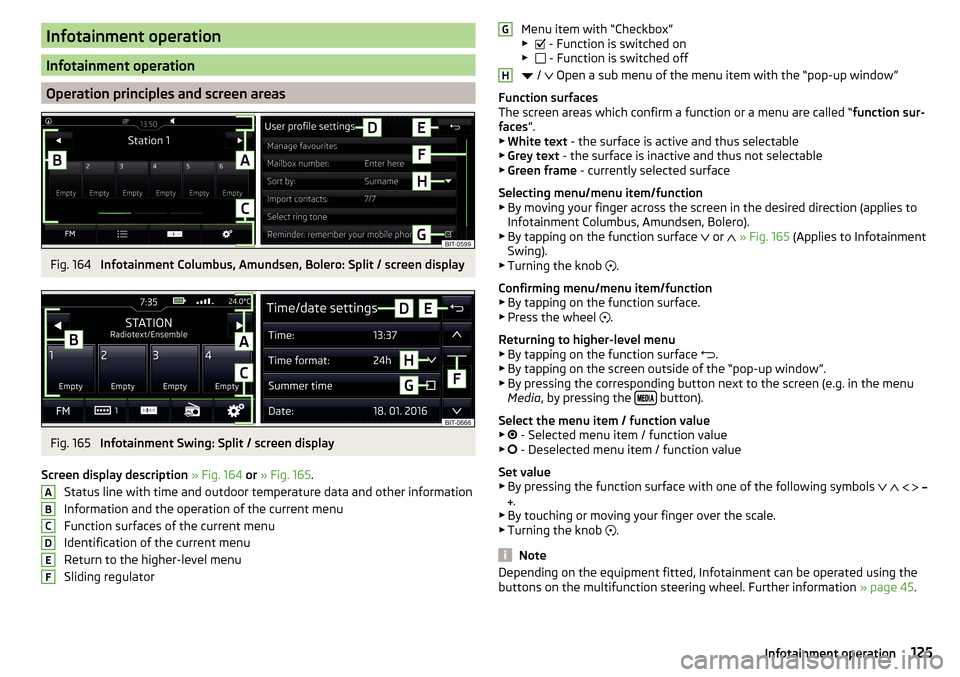
Fig. 164
Infotainment Columbus, Amundsen, Bolero: Split / screen display
Fig. 165
Infotainment Swing: Split / screen display
Screen display description » Fig. 164 or » Fig. 165 .
Status line with time and outdoor temperature data and other information
Information and the operation of the current menu
Function surfaces of the current menu
Identification of the current menu
Return to the higher-level menu
Sliding regulator
ABCDEFMenu item with “Checkbox”
▶ - Function is switched on
▶ - Function is switched off
/
Open a sub menu of the menu item with the “pop-up window”
Function surfaces
The screen areas which confirm a function or a menu are called “ function sur-
faces ”.
▶ White text - the surface is active and thus selectable
▶ Grey text - the surface is inactive and thus not selectable
▶ Green frame - currently selected surface
Selecting menu/menu item/function ▶ By moving your finger across the screen in the desired direction (applies to
Infotainment Columbus, Amundsen, Bolero).
▶ By tapping on the function surface or
» Fig. 165 (Applies to Infotainment
Swing).
▶ Turning the knob .
Confirming menu/menu item/function ▶ By tapping on the function surface.
▶ Press the wheel .
Returning to higher-level menu ▶ By tapping on the function surface .
▶ By tapping on the screen outside of the “pop-up window”.
▶ By pressing the corresponding button next to the screen (e.g. in the menu
Media , by pressing the
button).
Select the menu item / function value ▶ - Selected menu item / function value
▶ - Deselected menu item / function value
Set value
▶ By pressing the function surface with one of the following symbols
.
▶ By touching or moving your finger over the scale.
▶ Turning the knob .
Note
Depending on the equipment fitted, Infotainment can be operated using the
buttons on the multifunction steering wheel. Further information » page 45.GH125Infotainment operation
Page 128 of 336
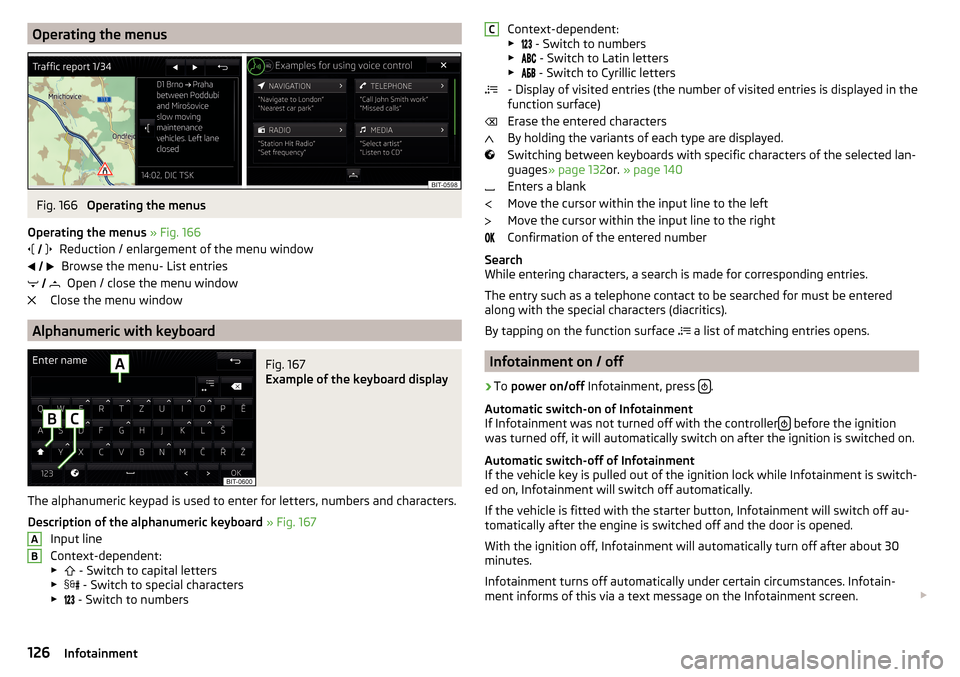
Operating the menusFig. 166
Operating the menus
Operating the menus » Fig. 166
Reduction / enlargement of the menu window Browse the menu- List entries Open / close the menu window
Close the menu window
Alphanumeric with keyboard
Fig. 167
Example of the keyboard display
The alphanumeric keypad is used to enter for letters, numbers and characters.
Description of the alphanumeric keyboard » Fig. 167
Input line
Context-dependent: ▶ - Switch to capital letters
▶ - Switch to special characters
▶ - Switch to numbers
ABContext-dependent:
▶ - Switch to numbers
▶ - Switch to Latin letters
▶
- Switch to Cyrillic letters
- Display of visited entries (the number of visited entries is displayed in the
function surface)
Erase the entered characters
By holding the variants of each type are displayed.
Switching between keyboards with specific characters of the selected lan-
guages » page 132 or. » page 140
Enters a blank
Move the cursor within the input line to the left
Move the cursor within the input line to the right
Confirmation of the entered number
Search
While entering characters, a search is made for corresponding entries.
The entry such as a telephone contact to be searched for must be entered
along with the special characters (diacritics).
By tapping on the function surface a list of matching entries opens.
Infotainment on / off
›
To
power on/off Infotainment, press .
Automatic switch-on of Infotainment
If Infotainment was not turned off with the controller
before the ignition
was turned off, it will automatically switch on after the ignition is switched on.
Automatic switch-off of Infotainment
If the vehicle key is pulled out of the ignition lock while Infotainment is switch-
ed on, Infotainment will switch off automatically.
If the vehicle is fitted with the starter button, Infotainment will switch off au-
tomatically after the engine is switched off and the door is opened.
With the ignition off, Infotainment will automatically turn off after about 30
minutes.
Infotainment turns off automatically under certain circumstances. Infotain-
ment informs of this via a text message on the Infotainment screen.
C126Infotainment
Page 129 of 336
Restart Infotainment
If Infotainment does not respond (if it “freezes”) This can be restarted by hold-
ing
for longer than 10 s.
Adjusting the volume
Every change in volume is displayed on the screen.
›
To increase the volume , turn the controller clockwise.
›
To
reduce volume , turn the controller anticlockwise.
›
To
mute , turn the controller to the left to 0.
›
or:
Press the button (applies to Infotainment Swing).
The following symbol appears in the display when the sound is muted .
If, at the time of muting, sound is played from the source in the media menu,
then the playback is interrupted (pause) 1)
.
CAUTION
■ High volumes can cause sound resonance in the vehicle.■When changing or connecting an audio source, this may cause sudden
changes in volume. Reduce the volume before changing or connecting an au-
dio source.
Infotainment menus
Applies to Infotainment Columbus, Amundsen, Bolero.
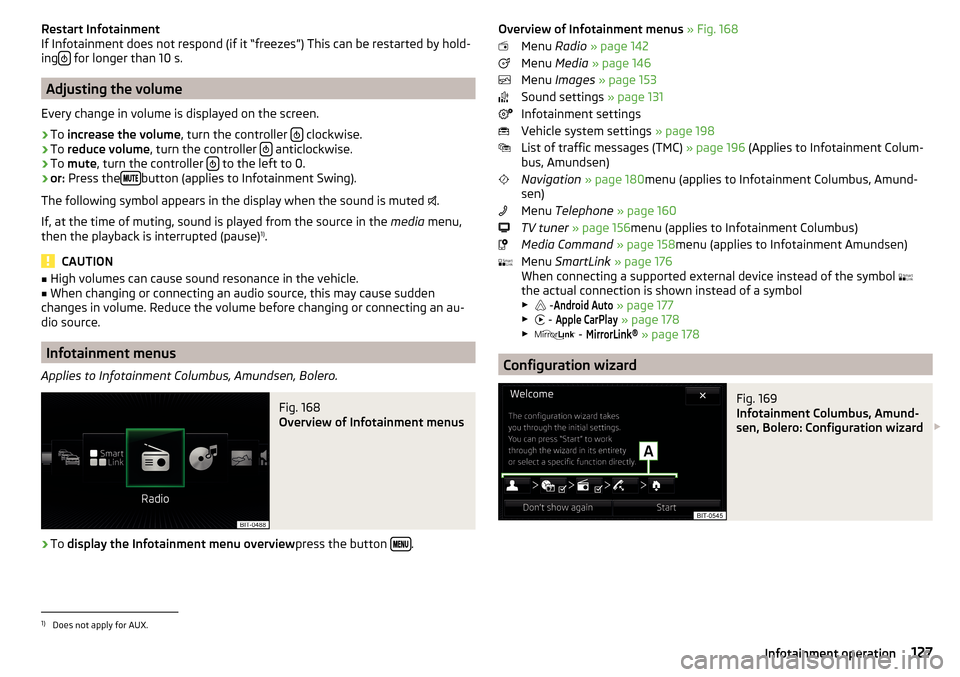
Fig. 168
Overview of Infotainment menus
›
To display the Infotainment menu overview press the button .
Overview of Infotainment menus
» Fig. 168
Menu Radio » page 142
Menu Media » page 146
Menu Images » page 153
Sound settings » page 131
Infotainment settings
Vehicle system settings » page 198
List of traffic messages (TMC) » page 196 (Applies to Infotainment Colum-
bus, Amundsen)
Navigation » page 180 menu (applies to Infotainment Columbus, Amund-
sen)
Menu Telephone » page 160
TV tuner » page 156 menu (applies to Infotainment Columbus)
Media Command » page 158 menu (applies to Infotainment Amundsen)
Menu SmartLink » page 176
When connecting a supported external device instead of the symbol
the actual connection is shown instead of a symbol ▶ -Android Auto
» page 177
▶ -
Apple CarPlay
» page 178
▶ -
MirrorLink®
» page 178
Configuration wizard
Fig. 169
Infotainment Columbus, Amund-
sen, Bolero: Configuration wizard
1)
Does not apply for AUX.
127Infotainment operation
Page 130 of 336
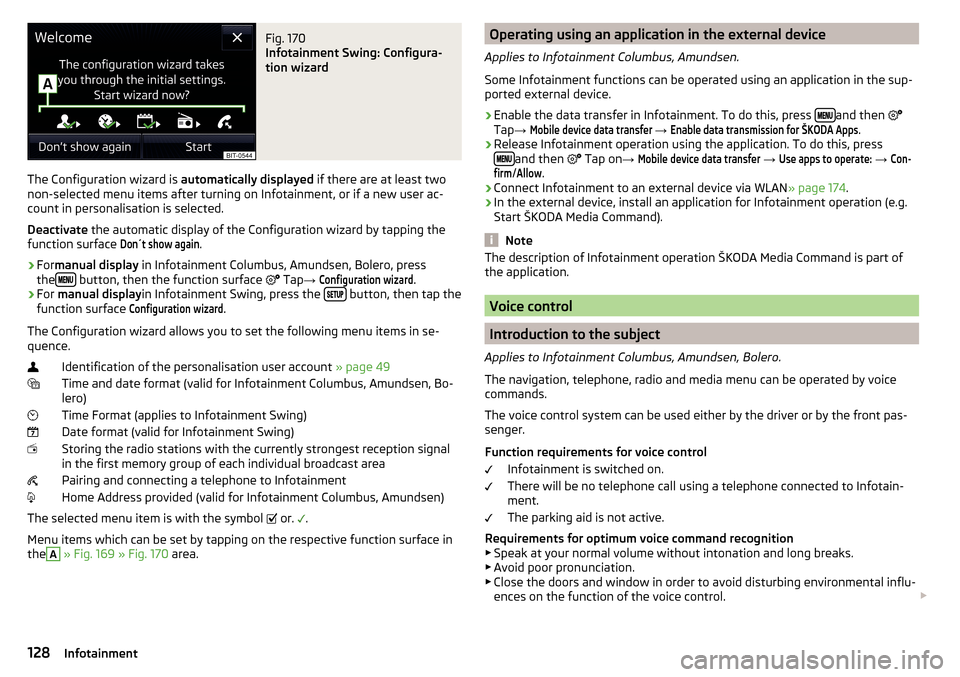
Fig. 170
Infotainment Swing: Configura-
tion wizard
The Configuration wizard is automatically displayed if there are at least two
non-selected menu items after turning on Infotainment, or if a new user ac-
count in personalisation is selected.
Deactivate the automatic display of the Configuration wizard by tapping the
function surface
Don´t show again
.
›
For manual display in Infotainment Columbus, Amundsen, Bolero, press
the button, then the function surface
Tap
→
Configuration wizard
.
›
For manual display in Infotainment Swing, press the button, then tap the
function surface
Configuration wizard
.
The Configuration wizard allows you to set the following menu items in se-
quence.
Identification of the personalisation user account » page 49
Time and date format (valid for Infotainment Columbus, Amundsen, Bo-
lero)
Time Format (applies to Infotainment Swing)
Date format (valid for Infotainment Swing)
Storing the radio stations with the currently strongest reception signal
in the first memory group of each individual broadcast area
Pairing and connecting a telephone to Infotainment
Home Address provided (valid for Infotainment Columbus, Amundsen)
The selected menu item is with the symbol or.
.
Menu items which can be set by tapping on the respective function surface in the
A
» Fig. 169 » Fig. 170 area.
Operating using an application in the external device
Applies to Infotainment Columbus, Amundsen.
Some Infotainment functions can be operated using an application in the sup-
ported external device.›
Enable the data transfer in Infotainment. To do this, press and then
Tap →
Mobile device data transfer
→
Enable data transmission for ŠKODA Apps
.
›
Release Infotainment operation using the application. To do this, press
and then
Tap on →
Mobile device data transfer
→
Use apps to operate:
→
Con-firm
/
Allow
.
›
Connect Infotainment to an external device via WLAN » page 174.
›
In the external device, install an application for Infotainment operation (e.g.
Start ŠKODA Media Command).
Note
The description of Infotainment operation ŠKODA Media Command is part of
the application.
Voice control
Introduction to the subject
Applies to Infotainment Columbus, Amundsen, Bolero.
The navigation, telephone, radio and media menu can be operated by voice
commands.
The voice control system can be used either by the driver or by the front pas-
senger.
Function requirements for voice control Infotainment is switched on.
There will be no telephone call using a telephone connected to Infotain-
ment.
The parking aid is not active.
Requirements for optimum voice command recognition
▶ Speak at your normal volume without intonation and long breaks.
▶ Avoid poor pronunciation.
▶ Close the doors and window in order to avoid disturbing environmental influ-
ences on the function of the voice control.
128Infotainment
Page 131 of 336
▶You are recommended to speak louder at higher speeds, so that the sound of
your voice is not drowned out by the increased ambient noise.
▶ During voice control, limit additional noise in the vehicle, e.g. passengers
talking at the same time.WARNINGThe emergency number must be dialled manually. Your voice commands
may not be recognized in such situations. The telephone connection may
not be established or the connection may take too much time to complete.
CAUTION
■ The messages are generated by Infotainment. The flawless clarity (e.g. road
or city name) cannot always be guaranteed.■
For some Infotainment languages, there is no voice control available. Info-
tainment indicates this fact through a text message that is displayed after set-
ting the device language screen.
Note
During voice control, no nav. announcements and traffic announcements are
played.
Voice control on / off
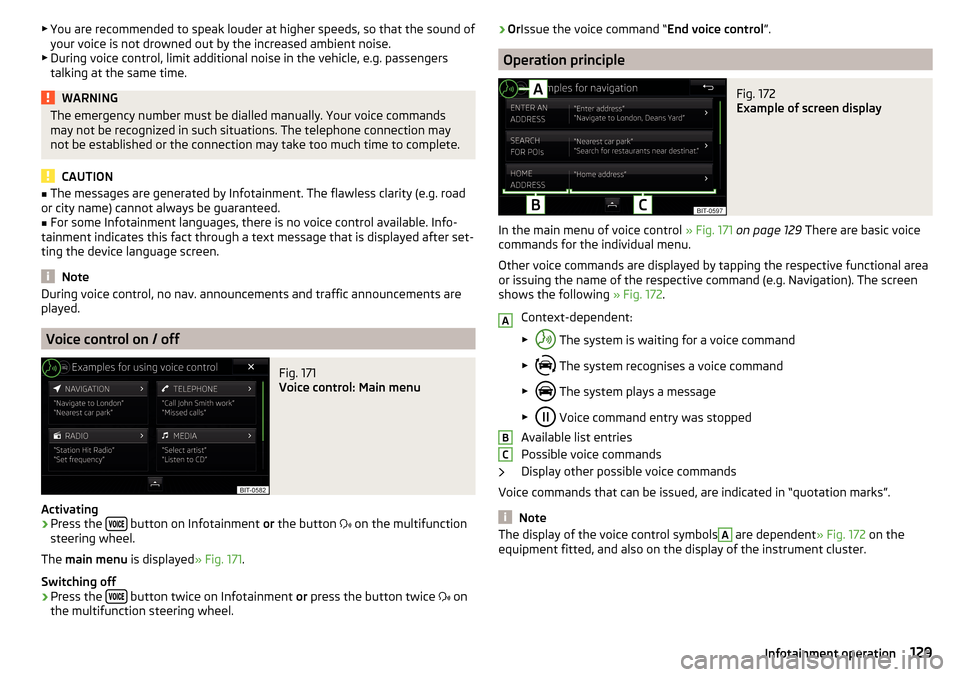
Fig. 171
Voice control: Main menu
Activating
›
Press the button on Infotainment
or the button
on the multifunction
steering wheel.
The main menu is displayed » Fig. 171.
Switching off
›
Press the button twice on Infotainment
or press the button twice
on
the multifunction steering wheel.
› Or
Issue the voice command “ End voice control”.
Operation principle
Fig. 172
Example of screen display
In the main menu of voice control » Fig. 171 on page 129 There are basic voice
commands for the individual menu.
Other voice commands are displayed by tapping the respective functional area
or issuing the name of the respective command (e.g. Navigation). The screen
shows the following » Fig. 172.
Context-dependent:
▶ The system is waiting for a voice command
▶ The system recognises a voice command
▶ The system plays a message
▶ Voice command entry was stopped
Available list entries
Possible voice commands
Display other possible voice commands
Voice commands that can be issued, are indicated in “quotation marks”.
Note
The display of the voice control symbolsA are dependent » Fig. 172 on the
equipment fitted, and also on the display of the instrument cluster.ABC129Infotainment operation
Page 137 of 336
■Auto-save station logos- Automatic storage of the station logos
■DAB traffic announcements
- Switch on/off DAB traffic announcements
■
Other DAB messages
- Switch on/off other announcements (e.g., warnings, re-
gional weather, sports reports, financial news)
■
DAB - DAB station tracking
- Switch on/off automatic DAB station tracking on an-
other frequency or in other station groups
■
Automatic DAB - FM switching
- Switch on/off auto-switching from DAB to the FM
broadcasting range if the DAB signal is lost
■
Switch to a similar station
- Enable / disable automatic switching to another sta-
tion with similar content in the event of signal loss (applies to Infotainment
Columbus)
■
L-band
- Enable / disable the availability of L-band
Automatic change from DAB to FM
If DAB reception is poor, the device tries to find an FM station.
The station name is followed by ( ) while the station is being received on the
FM band. When the corresponding DAB station is can be received again, the
system automatically switches from FM to DAB.
If a DAB station is also not available in the FM band due to poor reception, In-
fotainment will be switched to mute.
L-band
For the DAB radio reception in different countries, different broadcasting rang-
es are used. In some countries the DAB radio reception is only possible in the
so called L-band.
If no L-band DAB radio reception is possible in the country then we recom-
mend turning off the L-band. The channel scan is therefore faster.
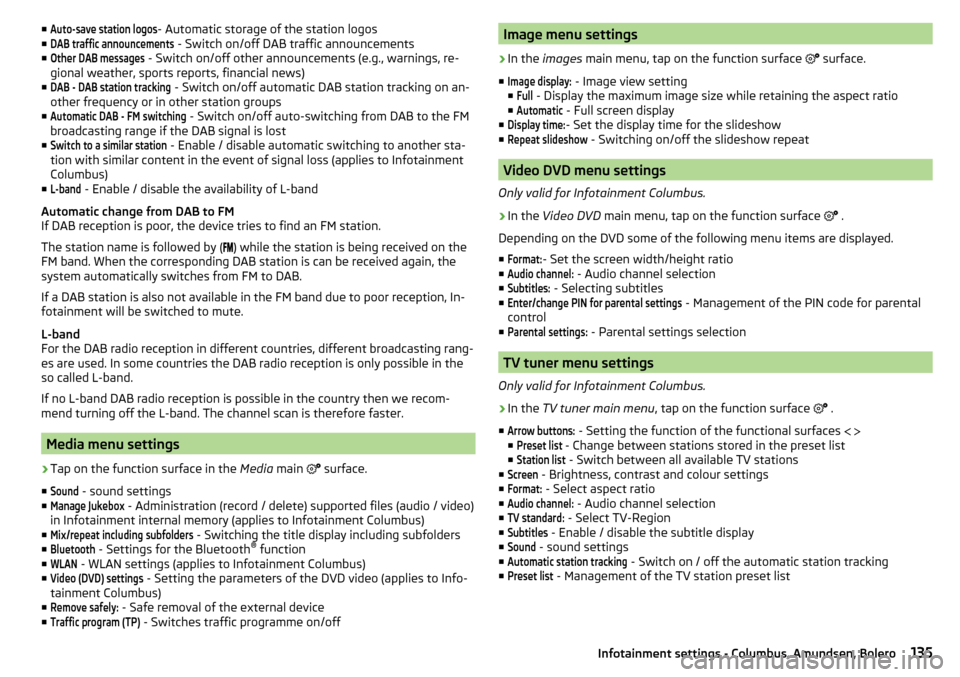
Media menu settings
›
Tap on the function surface in the Media main
surface.
■
Sound
- sound settings
■
Manage Jukebox
- Administration (record / delete) supported files (audio / video)
in Infotainment internal memory (applies to Infotainment Columbus)
■
Mix/repeat including subfolders
- Switching the title display including subfolders
■
Bluetooth
- Settings for the Bluetooth ®
function
■
WLAN
- WLAN settings (applies to Infotainment Columbus)
■
Video (DVD) settings
- Setting the parameters of the DVD video (applies to Info-
tainment Columbus)
■
Remove safely:
- Safe removal of the external device
■
Traffic program (TP)
- Switches traffic programme on/off
Image menu settings›
In the images main menu, tap on the function surface
surface.
■
Image display:
- Image view setting
■
Full
- Display the maximum image size while retaining the aspect ratio
■
Automatic
- Full screen display
■
Display time:
- Set the display time for the slideshow
■
Repeat slideshow
- Switching on/off the slideshow repeat
Video DVD menu settings
Only valid for Infotainment Columbus.
›
In the Video DVD main menu, tap on the function surface
.
Depending on the DVD some of the following menu items are displayed.
■
Format:
- Set the screen width/height ratio
■
Audio channel:
- Audio channel selection
■
Subtitles:
- Selecting subtitles
■
Enter/change PIN for parental settings
- Management of the PIN code for parental
control
■
Parental settings:
- Parental settings selection
TV tuner menu settings
Only valid for Infotainment Columbus.
›
In the TV tuner main menu , tap on the function surface
.
■
Arrow buttons:
- Setting the function of the functional surfaces
■
Preset list
- Change between stations stored in the preset list
■
Station list
- Switch between all available TV stations
■
Screen
- Brightness, contrast and colour settings
■
Format:
- Select aspect ratio
■
Audio channel:
- Audio channel selection
■
TV standard:
- Select TV-Region
■
Subtitles
- Enable / disable the subtitle display
■
Sound
- sound settings
■
Automatic station tracking
- Switch on / off the automatic station tracking
■
Preset list
- Management of the TV station preset list
135Infotainment settings - Columbus, Amundsen, Bolero
Page 143 of 336
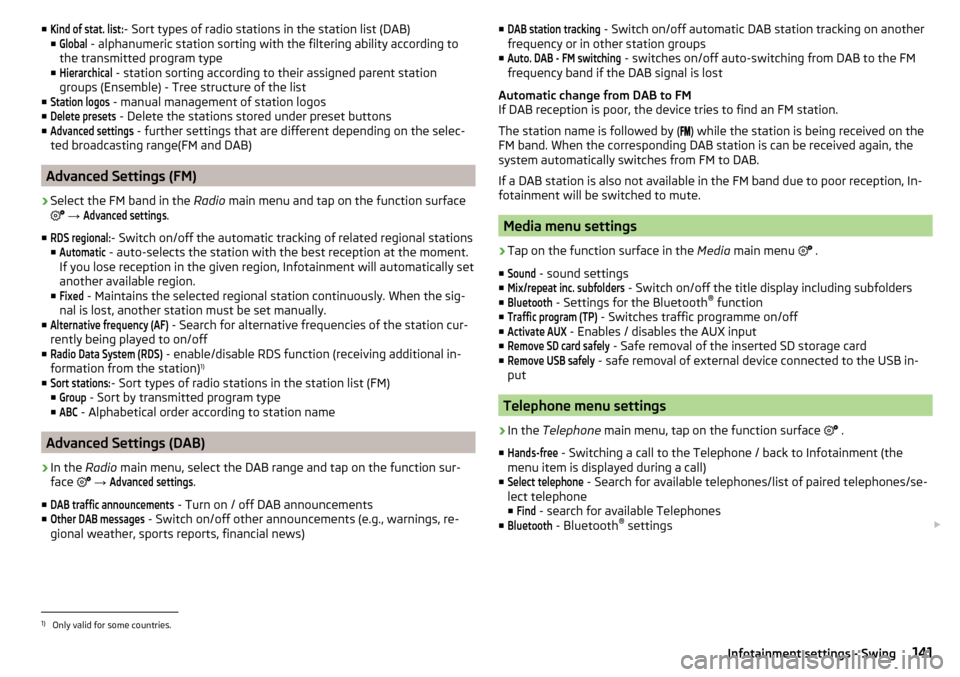
■Kind of stat. list:- Sort types of radio stations in the station list (DAB)
■Global
- alphanumeric station sorting with the filtering ability according to
the transmitted program type
■
Hierarchical
- station sorting according to their assigned parent station
groups (Ensemble) - Tree structure of the list
■
Station logos
- manual management of station logos
■
Delete presets
- Delete the stations stored under preset buttons
■
Advanced settings
- further settings that are different depending on the selec-
ted broadcasting range(FM and DAB)
Advanced Settings (FM)
›
Select the FM band in the Radio main menu and tap on the function surface
→
Advanced settings
.
■
RDS regional:
- Switch on/off the automatic tracking of related regional stations
■
Automatic
- auto-selects the station with the best reception at the moment.
If you lose reception in the given region, Infotainment will automatically set
another available region.
■
Fixed
- Maintains the selected regional station continuously. When the sig-
nal is lost, another station must be set manually.
■
Alternative frequency (AF)
- Search for alternative frequencies of the station cur-
rently being played to on/off
■
Radio Data System (RDS)
- enable/disable RDS function (receiving additional in-
formation from the station) 1)
■
Sort stations:
- Sort types of radio stations in the station list (FM)
■
Group
- Sort by transmitted program type
■
ABC
- Alphabetical order according to station name
Advanced Settings (DAB)
›
In the Radio main menu, select the DAB range and tap on the function sur-
face
→
Advanced settings
.
■
DAB traffic announcements
- Turn on / off DAB announcements
■
Other DAB messages
- Switch on/off other announcements (e.g., warnings, re-
gional weather, sports reports, financial news)
■DAB station tracking - Switch on/off automatic DAB station tracking on another
frequency or in other station groups
■Auto. DAB - FM switching
- switches on/off auto-switching from DAB to the FM
frequency band if the DAB signal is lost
Automatic change from DAB to FM
If DAB reception is poor, the device tries to find an FM station.
The station name is followed by (
) while the station is being received on the
FM band. When the corresponding DAB station is can be received again, the
system automatically switches from FM to DAB.
If a DAB station is also not available in the FM band due to poor reception, In-
fotainment will be switched to mute.
Media menu settings
›
Tap on the function surface in the Media main menu
.
■
Sound
- sound settings
■
Mix/repeat inc. subfolders
- Switch on/off the title display including subfolders
■
Bluetooth
- Settings for the Bluetooth ®
function
■
Traffic program (TP)
- Switches traffic programme on/off
■
Activate AUX
- Enables / disables the AUX input
■
Remove SD card safely
- Safe removal of the inserted SD storage card
■
Remove USB safely
- safe removal of external device connected to the USB in-
put
Telephone menu settings
›
In the Telephone main menu, tap on the function surface
.
■
Hands-free
- Switching a call to the Telephone / back to Infotainment (the
menu item is displayed during a call)
■
Select telephone
- Search for available telephones/list of paired telephones/se-
lect telephone
■
Find
- search for available Telephones
■
Bluetooth
- Bluetooth ®
settings
1)
Only valid for some countries.
141Infotainment settings - Swing
Page 147 of 336
Radio station logos - Columbus, Amundsen, Bolero
Station logos are stored in the Infotainment memory which are assigned auto-
matically when storing the stations under preset buttons.
Assign station logo automatically›
to Disable / Enable in the radio main menu, tap on the function surface
→
Advanced settings
→
Automatic storage station logos
.
Assign station logo manually
›
Tap the Radio main menu function
→
Station logos
.
›
Tap on an occupied station button and select the data carrier (SD card, USB).
›
Search for and select the desired station logo on the respective data carrier.
Remove station logo manually
›
Tap the Radio main menu function
→
Station logos
.
›
Tap on the station button from which you want to remove a logo.
Note
■
The following image formats are supported: jpg, gif, png, bmp.■We recommend a resolution of up to 500x500 pixels.
Station logos - Swing
The station key of a preferred station can contain the name and the station
logo.
Assign a station logo
›
Tap on the Radio main menu function
→
Station logos
.
›
Tap on an occupied station button and select the data carrier (SD card, USB).
›
Search for and select the desired station logo on the respective data carrier.
Remove station logo
›
Tap on the Radio main menu function
→
Station logos
.
›
Tap on the station button from which you want to remove a logo.
›
Or: : tap on the function surface
All
to delete the logos of all the station
buttons simultaneously.
›
Confirm / cancel the removal.
Note
■ The following image formats are supported: jpg, gif, png, bmp (we recom-
mend using the png format).■
Maximum resolution 400x240 pixels.
Traffic program (TP)›
To switch on/off the traffic monitoring in the main menu Radio, tap on the
function surface
→
Traffic program (TP)
.
During a traffic announcement, it is possible to cancel the current announce-
ment if necessary by deactivating the traffic monitoring.
Note
■ Should this station not transmit traffic reports or the signal is not available,
then Infotainment automatically searches in the background for another TP
station.■
During playback in menu Media or a station in the AM radio range, traffic
news is received from the previously selected FM radio range.
145Radio
Page 148 of 336
Media
Operation
Main menu
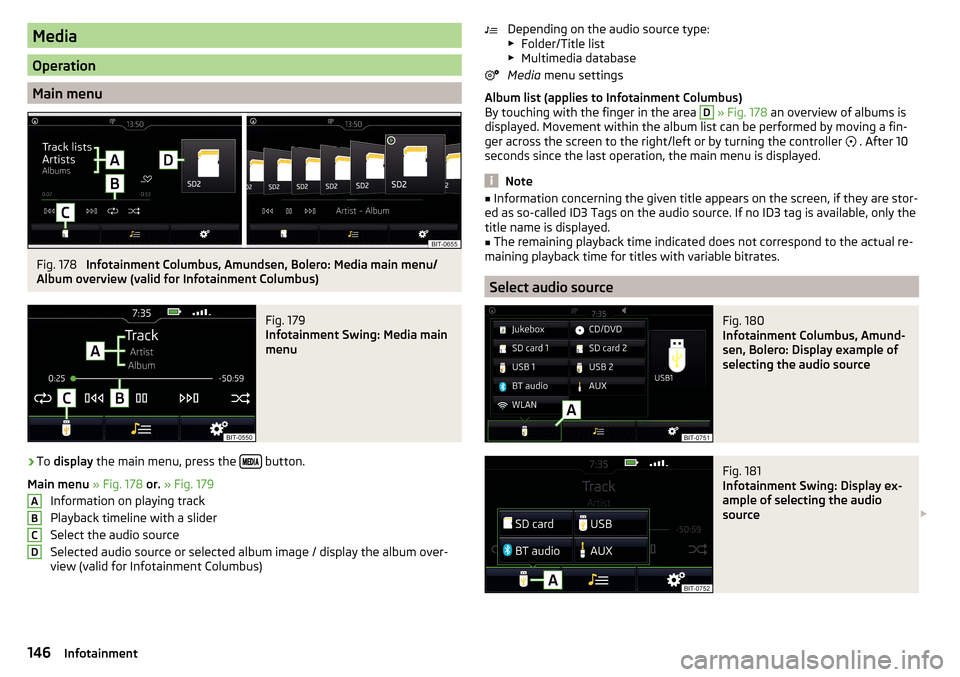
Fig. 178
Infotainment Columbus, Amundsen, Bolero: Media main menu/
Album overview (valid for Infotainment Columbus)
Fig. 179
Infotainment Swing: Media main
menu
›
To display the main menu, press the button.
Main menu » Fig. 178 or. » Fig. 179
Information on playing track
Playback timeline with a slider
Select the audio source
Selected audio source or selected album image / display the album over- view (valid for Infotainment Columbus)
ABCDDepending on the audio source type:
▶ Folder/Title list
▶ Multimedia database
Media menu settings
Album list (applies to Infotainment Columbus)
By touching with the finger in the area D
» Fig. 178 an overview of albums is
displayed. Movement within the album list can be performed by moving a fin-
ger across the screen to the right/left or by turning the controller
. After 10
seconds since the last operation, the main menu is displayed.
Note
■ Information concerning the given title appears on the screen, if they are stor-
ed as so-called ID3 Tags on the audio source. If no ID3 tag is available, only the
title name is displayed.■
The remaining playback time indicated does not correspond to the actual re-
maining playback time for titles with variable bitrates.
Select audio source
Fig. 180
Infotainment Columbus, Amund-
sen, Bolero: Display example of
selecting the audio source
Fig. 181
Infotainment Swing: Display ex-
ample of selecting the audio
source
146Infotainment
Page 151 of 336
Select the audio source
Tap - selection of the parent folder / Hold - selection of the audio source
Audio sources
Introduction to the subject
›
To playback connect or insert the desired audio source. Starts playback auto-
matically, then select the audio source » page 146.
If AUX is selected as the audio source, the playback must be started on the
connected device.
CAUTION
■ Do not save any important data or that which has not been backed up on the
connected audio sources. ŠKODA assumes no responsibility for lost or dam-
aged files or connected audio sources.■
When changing or connecting an audio source, this may cause sudden
changes in volume. Reduce the volume before changing or connecting an au-
dio source.
■
When connecting an external audio source, the external source information
messages can be displayed. These messages must be observed and confirmed
if necessary (e.g. enabling data transfer etc).
Note
The national copyright laws that apply in your country must be observed.
CD / DVD
Only applies to Infotainment Columbus.
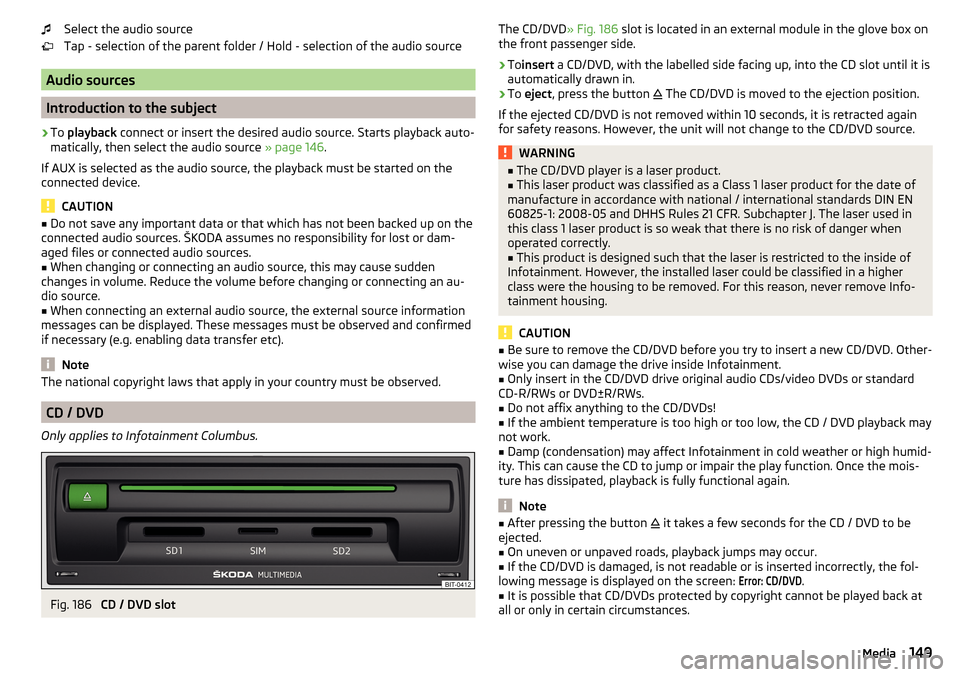
Fig. 186
CD / DVD slot
The CD/DVD
» Fig. 186 slot is located in an external module in the glove box on
the front passenger side.›
To insert a CD/DVD, with the labelled side facing up, into the CD slot until it is
automatically drawn in.
›
To eject , press the button
The CD/DVD is moved to the ejection position.
If the ejected CD/DVD is not removed within 10 seconds, it is retracted again
for safety reasons. However, the unit will not change to the CD/DVD source.
WARNING■ The CD/DVD player is a laser product.■This laser product was classified as a Class 1 laser product for the date of
manufacture in accordance with national / international standards DIN EN
60825-1: 2008-05 and DHHS Rules 21 CFR. Subchapter J. The laser used in
this class 1 laser product is so weak that there is no risk of danger when
operated correctly.■
This product is designed such that the laser is restricted to the inside of
Infotainment. However, the installed laser could be classified in a higher
class were the housing to be removed. For this reason, never remove Info-
tainment housing.
CAUTION
■ Be sure to remove the CD/DVD before you try to insert a new CD/DVD. Other-
wise you can damage the drive inside Infotainment.■
Only insert in the CD/DVD drive original audio CDs/video DVDs or standard
CD-R/RWs or DVD±R/RWs.
■
Do not affix anything to the CD/DVDs!
■
If the ambient temperature is too high or too low, the CD / DVD playback may
not work.
■
Damp (condensation) may affect Infotainment in cold weather or high humid-
ity. This can cause the CD to jump or impair the play function. Once the mois-
ture has dissipated, playback is fully functional again.
Note
■ After pressing the button it takes a few seconds for the CD / DVD to be
ejected.■
On uneven or unpaved roads, playback jumps may occur.
■
If the CD/DVD is damaged, is not readable or is inserted incorrectly, the fol-
lowing message is displayed on the screen:
Error: CD/DVD
.
■
It is possible that CD/DVDs protected by copyright cannot be played back at
all or only in certain circumstances.
149Media