long SKODA SUPERB 2016 3.G / (B8/3V) Repair Manual
[x] Cancel search | Manufacturer: SKODA, Model Year: 2016, Model line: SUPERB, Model: SKODA SUPERB 2016 3.G / (B8/3V)Pages: 336, PDF Size: 53.89 MB
Page 259 of 336

ŠKODA Original partsRead and observe
on page 256 first.
We recommend the use of ŠKODA Original Parts for your vehicle, as these
parts are approved by ŠKODA AUTO. These parts correspond exactly to the
ŠKODA AUTO regulations and are identical to the parts used in series produc-
tion.
ŠKODA AUTO is able to warrant the safety, suitability, and long life of these
products.
ŠKODA Service Partners are liable for any defects of ŠKODA Genuine Parts for
a period of 2 years after sale in accordance with the materials defect liability,
unless agreed otherwise in the purchase agreement.
ŠKODA Original accessories
Read and observe
on page 256 first.
If you wish to fit accessories to your vehicle, you should remember the follow-ing.
We recommend that you use ŠKODA Genuine Accessories in your vehicle.
ŠKODA AUTO has selected such accessories to ensure that they are reliable,
safe and suitable for your particular vehicle. Although we constantly monitor
the market, we are not able to assess or vouch for other products, even
though in some instances such parts may have operational approval or may have been approved by a nationally recognised testing laboratory.
ŠKODA Service Partners are liable for any defects of ŠKODA Genuine Accesso- ries for a period of 2 years after installation or delivery in accordance with the
materials defect liability, unless agreed otherwise in the purchase agreement
or any other agreements.
Spoiler
Read and observe
on page 256 first.
WARNINGIf your vehicle is equipped with an original spoiler on the front bumper in
combination with the spoiler on the boot lid, the following instructions
must be observed - otherwise there is a risk of accidents and serious inju-
ries!■
The vehicle must always be equipped with a spoiler on the front bumper
only in combination with the corresponding spoiler on the boot lid.
■
This kind of spoiler cannot be left on the front bumper either on its own,
in combination with another spoiler not on the luggage compartment lid or
in combination with an unsuitable spoiler on the luggage compartment lid.
■
We recommend that you consult the ŠKODA Service Partner for any re-
pairs to or replacement, addition or removal of spoilers.
■
Improperly conducted work on the spoilers of your vehicle may result in
malfunction.
Component protection
Read and observe
on page 256 first.
Some electronic vehicle components (such as the instrument cluster) are fac-
tory-equipped with component protection. This ensures the functional limita-
tion of these components in a non-legitimate installation in another vehicle
(e.g. after a theft) or operation outside the vehicle.
Airbags
Read and observe
on page 256 first.
WARNING■Modifications, repairs and technical alterations that have been carried out
unprofessionally can cause damage and operational faults, and can also se-
riously impair the effectiveness of the airbag system – risk of accident and
fatal injury!■
A change to the vehicle's wheel suspension, including the use of non-ap-
proved wheels and tyre combinations, can alter the functioning of the air-
bag system - risk of accident and fatal injury!
257Care and maintenance
Page 260 of 336
WARNING■No changes may be made to parts of the airbag system, the front bumper
and the body.■
Any work on the airbag system including the installation and removal of
system components due to other repair work (e.g. removal of the steering
wheel) must only be carried out by a specialist garage.
■
Do not manipulate individual parts of the airbag system, as this might re-
sult in the airbag being deployed.
■
If the airbag is triggered, the airbag system must be exchanged.
WARNINGThe airbag system operates using pressure sensors located in the front
doors. For this reason, no adjustments may be carried out to the doors or
door panels (e.g. installation of additional loudspeakers). The resulting
damage can negatively affect the function of the airbag system - there is a
risk of accidents and fatal injuries! The following guidelines must be ob-
served.■
Any work on the front doors and their door panels must be carried out by
a specialist garage.
■
Never drive with removed inner door panels or openings in the panels.
Acceptance and recycling of used vehicles
Read and observe
on page 256 first.
All new ŠKODA vehicles are 95% recyclable.
Service intervals
Introduction
This chapter contains information on the following subjects:
Overview of service intervals
259
Fixed service intervals QI1 - QI4
259
Flexible service interval QI6
259
Digital Service Plan
260
The service interval display in the display of the instrument cluster will remind
you to carry out every service stipulated by the manufacturer at the right time
in order to prevent you from forgetting them » page 49.
The completion of services can be verified through the printed verification
from the digital service schedule and the respective receipts.
The specified service intervals are tailored to normal operating conditions.
In the case of difficult operating conditions, it is necessary to have some serv-
ice work performed before the date of the next service or between the speci-
fied service intervals. This applies mainly to the cleaning or the replacement of
the air filter insert in regions with heavy dust pollution as well as checking and
replacing the toothed belt, but also to vehicles with diesel particle filters,
which can put greater strain on the engine oil.
The following is understood under difficult conditions:
▶ Fuel containing sulphur.
▶ Frequent short trips.
▶ Longer periods of engine idling (e.g. taxis).
▶ Operation in areas with heavy dust pollution.
▶ Frequent trailer operation.
▶ Predominantly stop-and-go traffic as is often the case in city driving, for ex-
ample.
▶ Operation predominantly during winter.
You will be told at the specialist garage whether the operating conditions of your vehicle may make it necessary for service work to be carried out between
the normal service intervals.
Different service charges may apply from the particular scope of work required,
depending on the vehicle type and equipment and the status of your vehicle.
Note
■ The customer is responsible for covering the cost of all services including
changing or replenishing the oil, even during the warranty period, unless sta-
ted otherwise in the ŠKODA AUTO. warranty terms or other agreements.■
You will be informed about the current service scopes for the particular serv-
ice work by the specialist garage.
258General Maintenance
Page 261 of 336
Overview of service intervalsFig. 312
Vehicle data: Service interval
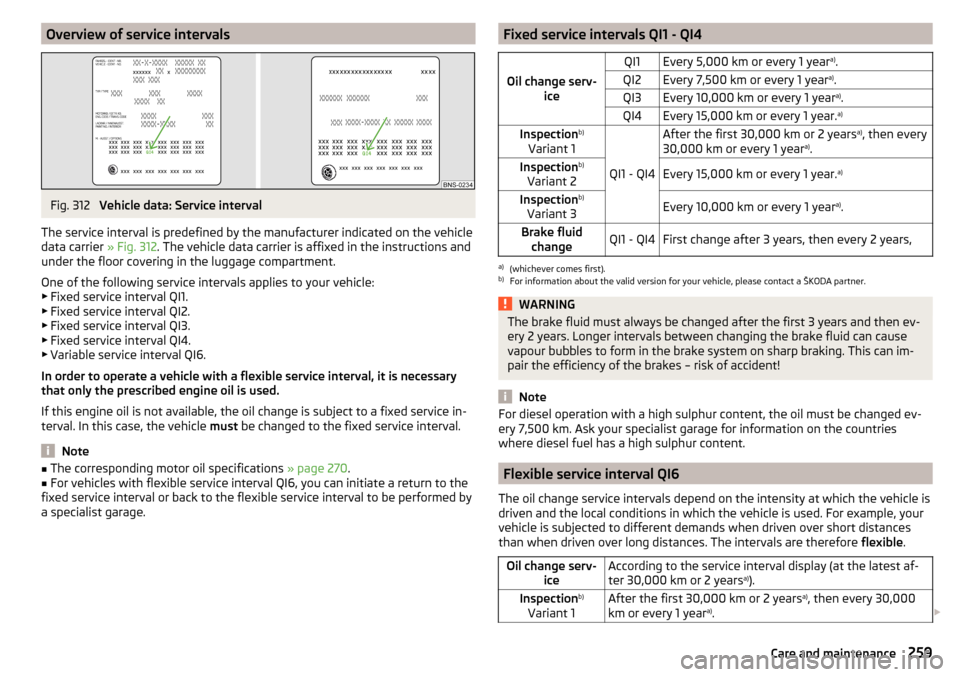
The service interval is predefined by the manufacturer indicated on the vehicle
data carrier » Fig. 312. The vehicle data carrier is affixed in the instructions and
under the floor covering in the luggage compartment.
One of the following service intervals applies to your vehicle:
▶ Fixed service interval QI1.
▶ Fixed service interval QI2.
▶ Fixed service interval QI3.
▶ Fixed service interval QI4.
▶ Variable service interval QI6.
In order to operate a vehicle with a flexible service interval, it is necessary
that only the prescribed engine oil is used.
If this engine oil is not available, the oil change is subject to a fixed service in-
terval. In this case, the vehicle must be changed to the fixed service interval.
Note
■
The corresponding motor oil specifications » page 270.■For vehicles with flexible service interval QI6, you can initiate a return to the
fixed service interval or back to the flexible service interval to be performed by
a specialist garage.Fixed service intervals QI1 - QI4
Oil change serv- ice
QI1Every 5,000 km or every 1 year a)
.QI2Every 7,500 km or every 1 year a)
.QI3Every 10,000 km or every 1 year a)
.QI4Every 15,000 km or every 1 year. a)Inspectionb)
Variant 1
QI1 - QI4
After the first 30,000 km or 2 years a)
, then every
30,000 km or every 1 year a)
.Inspection b)
Variant 2Every 15,000 km or every 1 year. a)Inspectionb)
Variant 3Every 10,000 km or every 1 year a)
.Brake fluid
changeQI1 - QI4First change after 3 years, then every 2 years,a)
(whichever comes first).
b)
For information about the valid version for your vehicle, please contact a ŠKODA partner.
WARNINGThe brake fluid must always be changed after the first 3 years and then ev-
ery 2 years. Longer intervals between changing the brake fluid can cause
vapour bubbles to form in the brake system on sharp braking. This can im-
pair the efficiency of the brakes – risk of accident!
Note
For diesel operation with a high sulphur content, the oil must be changed ev-
ery 7,500 km. Ask your specialist garage for information on the countries
where diesel fuel has a high sulphur content.
Flexible service interval QI6
The oil change service intervals depend on the intensity at which the vehicle is
driven and the local conditions in which the vehicle is used. For example, your
vehicle is subjected to different demands when driven over short distances
than when driven over long distances. The intervals are therefore flexible.
Oil change serv-
iceAccording to the service interval display (at the latest af-
ter 30,000 km or 2 years a)
).Inspection b)
Variant 1After the first 30,000 km or 2 years a)
, then every 30,000
km or every 1 year a)
. 259Care and maintenance
Page 262 of 336
Inspectionb)
Variant 2Every 15 000 km or every 1 year a)
.Brake fluid
changeFirst change after 3 years, then every 2 years,a)
(whichever comes first).
b)
For information about the valid version for your vehicle, please contact a ŠKODA partner.
WARNINGThe brake fluid must always be changed after the first 3 years and then ev-
ery 2 years. Longer intervals between changing the brake fluid can cause
vapour bubbles to form in the brake system on sharp braking. This can im-
pair the efficiency of the brakes – risk of accident!
Digital Service Plan
A specialist garage does not confirm the corresponding service evidence in this
Owner´s Manual, but in the service information system called Digital Service
Plan.
Therefore, we recommend that you always print the respective Service Certifi-
cate as evidence of the service work carried out.
Benefits of the digital service plan
▶ High level of security when it comes to the manipulation of the event entries.
▶ Transparent documentation of service work carried out.
▶ Protection against loss or damage of the event entries – you receive a com-
plete service-verification if required.
▶ Optional; request of complete verification in electronic form.
▶ You can have the vehicle serviced in any specialist garage (also abroad) – the
database is accessible worldwide.
▶ Increased transparency when purchasing a used vehicle due to event entries
being stored centrally.
▶ The system entries support you in the enforcement of obligations under the
ŠKODA extended warranty and mobility guarantee.
Cleaning and care
Introduction
This chapter contains information on the following subjects:
Washing the vehicle
260
Caring for the outside of the vehicle
261
Remove ice and snow from the windows
263
Caring for the interior
263
Regular and thorough care retains the value of your vehicle.
When using the care product, always observe the instructions on the packag-
ing. We recommend that you use the preservative from the ŠKODA Original Ac-
cessories.
WARNING■ Vehicle care products may be harmful to your health if not used according
to the instructions.■
Always keep the vehicle care products safe from people who are not com-
pletely independent, e.g. children - there is a danger of poisoning!
CAUTION
■ Do not use any insect sponges, rough kitchen sponges or similar cleaning
products – risk of damaging the paintwork surface.■
Do not use aggressive cleaning agents or chemical solvents - there is a dan-
ger of damaging the material that is to be cleaned.
Note
We recommend that the vehicle is cleaned and cared for by a ŠKODA Service
Partner.
Washing the vehicle
Read and observe
and on page 260 first.
The best way to protect your vehicle against harmful environmental influencesis frequent washing.
260General Maintenance
Page 263 of 336

The longer insect residues, bird droppings, road salt and other aggressive de-
posits remain on the paintwork of your vehicle, the more detrimental their de-
structive effect can be. High temperatures, such as those caused by intensive
sun's rays, accentuate this caustic effect.
It is essential to also thoroughly clean the underside of the vehicle at the end
of the winter.
Washing by hand
Wash the vehicle from top to bottom, if necessary, wash using a soft sponge or
washing mitt and plenty of water with appropriate detergents. Wash out the
sponge or washing glove thoroughly at short intervals.
Use a different sponge for the wheels, door sills and lower vehicle areas.
Give the vehicle a good rinse after washing it and dry it off using a chamois
leather.
Automatic car washes
The usual precautionary measures must be taken before washing the vehicle
in an automatic car wash system (e.g. closing the windows and the sliding/tilt-
ing roof etc.).
If your vehicle is fitted with any particular attached parts, such as a spoiler,
roof rack system, two-way radio aerial etc., it is best to consult the operator of
the car wash system beforehand.
After an automatic wash with wax treatment, the blades of the wipers should
be cleaned with cleaning agents specially designed for the purpose, and then
degreased.
Pressure washer
When washing the vehicle with a high-pressure cleaner, the instructions for
use of the equipment must be observed. This particularly applies to informa-
tion with respect to the pressure and spray distance from the vehicle surface.WARNING■
When washing your vehicle in the winter: Water and ice in the braking
system can affect the braking efficiency – risk of accident!■
Take care when cleaning the underbody or the inside of the wheel wells -
there is a risk of injury on sharp metal parts!
CAUTION■ Do not wash the vehicle in direct sunlight, do not exert pressure on the body
while washing. The temperature of the washing water should be max. 60 ° C -
otherwise there is a risk of damaging the vehicle paint.■
Before driving through a car wash, fold in the exterior mirrors - there is a risk
of damage.
CAUTION
Washing the vehicle using pressure washers■The foils should not be washed using pressure washers - there is a risk of
damage .■
Do not aim the water jet directly at the lock cylinders or the door or opening
joints when washing the vehicle in the winter – there is a risk of freezing.
■
During cleaning always keep a sufficiently large spraying distance to the
parking sensors, the rear camera lens, to external decorative and protective
plastic parts (e.g. Roof racks, spoilers, protective strips) and other vehicle parts
made of non-metallic materials such as rubber hoses or insulation materials.
■
The sensors of the parking aid can be sprayed only for a short time and there
must be a minimum distance of 10 cm - there is a risk of damage.
■
When washing the vehicle, do not point the water jet directly at the tow bar
or the trailer socket - there is a risk of seal damage or washing out the grease.
Caring for the outside of the vehicle
Read and observe
and on page 260 first.
Vehicle compo- nentFacts of thematterRemedy
Paint
Spilled fuelClear water, cloth, (clean as soon as
possible)No water drop-
lets form on the
paintUse hard wax (min. twice a year), apply
wax to clean and dry bodyMatt paintUse polish, then preserve (if the polish
does not contain any preservative in-
gredients)Chromed
and anodised
partsSoilingClear water, cloth or cleaning agent
provided for this purpose, then polish
with a soft dry clothFoilsSoilingSoft sponge and mild soap solution a)
261Care and maintenance
Page 269 of 336
CAUTIONDiesel fuel additives■The diesel fuel in accordance with the prescribed standards meets all the
conditions for a smooth running engine. Therefore, we recommend that you do
not add any fuel additives to the diesel - - there is a risk of engine damage or
damage to the exhaust system.
AdBlue ®
and its refilling
Introduction
This chapter contains information on the following subjects:
Check level
267
AdBlue ®
Refill
267
In order to reduce pollutant emissions from vehicles with diesel engines and
the SCR catalyst, a urea - AdBlue ®
solution is injected into the exhaust system.
Only use AdBlue ®
that corresponds to the standard ISO 22241-1. Do not add
additives to AdBlue ®
.
The AdBlue ®
-consumption depends on driving style, the operating tempera-
ture of the system and on the weather conditions.
The AdBlue ®
-tank filling is about 13 litres.
WARNINGAdBlue®
can cause skin, eye and respiratory irritation. If your eyes or skin
come into contact with the AdBlue ®
fluid, immediately wash the affected
area for a few minutes long with a lot of water. Seek medical assistance if
required.
CAUTION
AdBlue ®
attacks the surface of some materials (e.g. as painted parts, plastics,
fabrics). Clean the areas affected with AdBlue ®
using a damp cloth and plenty
of cold water. Remove any dried AdBlue ®
with warm water and a sponge.
Note
■ The AdBlue ®
solution freezes at a temperature of -11° C and lower. The sys-
tem has a heater to ensure the operability at low temperatures.■
We recommend purchasing AdBlue ®
refill bottles from the ŠKODA original
parts.
■ The working life of the AdBlue ®
solution is 4 years. Thereafter the solution
must be replaced by a specialist garage.■
AdBlue ®
is a registered trademark of the VDA. AdBlue ®
is also known as AUS
32 (Aqueous Urea Solution) or DEF (Diesel Exhaust Fluid).
Check level
Read and observe
and on page 267 first.
The AdBlue ®
level is automatically monitored.
If the available travel distance that can be completed with the remaining AdBl- ue ®
tank capacity drops to about 2400 km, the warning
appears on the in-
strument cluster and a request for replenishment of AdBlue ®
appears.
An indication also appears in the instrument cluster showing the maximum
and minimum AdBlue ®
tank capacity.
If the available travel distance that can be driven with the existing AdBlue ®
-
tank capacity drops down to 0 km, then no motor start is possible.
The distance which can still be driven with the remaining AdBlue ®
, can be de-
termined using the travel data » page 46.
AdBlue®
Refill
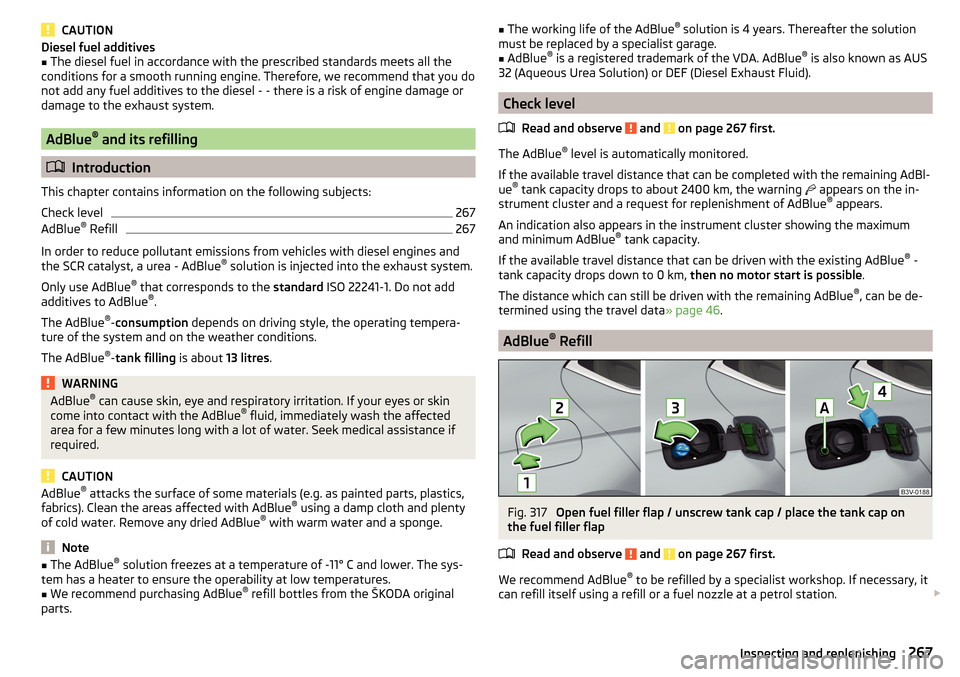
Fig. 317
Open fuel filler flap / unscrew tank cap / place the tank cap on
the fuel filler flap
Read and observe
and on page 267 first.
We recommend AdBlue ®
to be refilled by a specialist workshop. If necessary, it
can refill itself using a refill or a fuel nozzle at a petrol station.
267Inspecting and replenishing
Page 274 of 336
The coolant additive proportion in the coolant must be between 40 and 60 %.
The correct mixing ratio of water and coolant additive should be checked if
necessary by a specialist garage or corrected if necessary.WARNING■ The following warning instructions must be followed at all times when
working in the engine compartment » page 268.■
Never open the end cover of the coolant expansion reservoir while the
engine is still warm. The cooling system is pressurized - risk of scalding or
injury from being splashed with coolant!
■
To protect against coolant splashes, cover the cap with a cloth when
opening.
■
Coolant and coolant fumes are harmful - avoid contact with the coolant. If
your eyes or skin come into contact with the coolant, immediately wash the
affected area for a few minutes long with a lot of water and seek medical
advice if required.
CAUTION
Do not cover the radiator or fit any parts (e.g. auxiliary lights) in front of the air
intakes - there is a risk of the engine overheating.
Checking and refilling
Fig. 322
Coolant expansion reservoir
Read and observe and on page 272 first.
Check the coolant under the following conditions and refill.
The vehicle is on a horizontal surface.
The engine is not warm (if the engine is warm, the test results could be
inaccurate).
The engine is turned off.
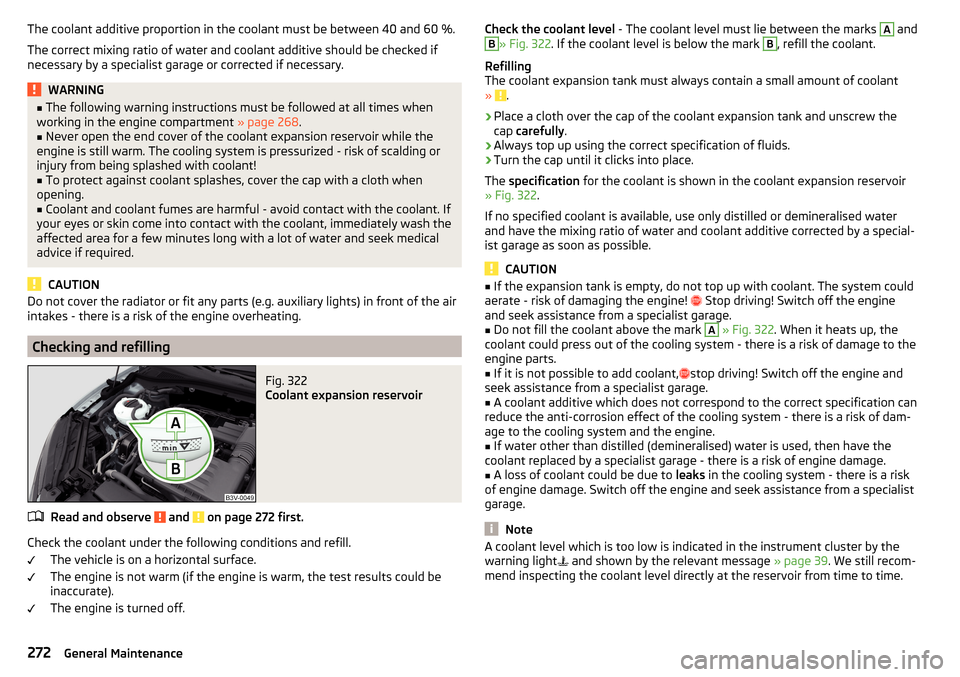
Check the coolant level - The coolant level must lie between the marks A andB» Fig. 322. If the coolant level is below the mark B, refill the coolant.
Refilling
The coolant expansion tank must always contain a small amount of coolant
»
.
›
Place a cloth over the cap of the coolant expansion tank and unscrew the
cap carefully .
›
Always top up using the correct specification of fluids.
›
Turn the cap until it clicks into place.
The specification for the coolant is shown in the coolant expansion reservoir
» Fig. 322 .
If no specified coolant is available, use only distilled or demineralised water
and have the mixing ratio of water and coolant additive corrected by a special-
ist garage as soon as possible.
CAUTION
■ If the expansion tank is empty, do not top up with coolant. The system could
aerate - risk of damaging the engine! Stop driving! Switch off the engine
and seek assistance from a specialist garage.■
Do not fill the coolant above the mark
A
» Fig. 322 . When it heats up, the
coolant could press out of the cooling system - there is a risk of damage to the
engine parts.
■
If it is not possible to add coolant,
stop driving! Switch off the engine and
seek assistance from a specialist garage.
■
A coolant additive which does not correspond to the correct specification can
reduce the anti-corrosion effect of the cooling system - there is a risk of dam-
age to the cooling system and the engine.
■
If water other than distilled (demineralised) water is used, then have the
coolant replaced by a specialist garage - there is a risk of engine damage.
■
A loss of coolant could be due to leaks in the cooling system - there is a risk
of engine damage. Switch off the engine and seek assistance from a specialist
garage.
Note
A coolant level which is too low is indicated in the instrument cluster by the
warning light and shown by the relevant message » page 39. We still recom-
mend inspecting the coolant level directly at the reservoir from time to time.272General Maintenance
Page 275 of 336
Brake fluidFig. 323
Brake fluid reservoir
Check the brake fluid under the following conditions.The vehicle is on a horizontal surface.
The engine is turned off.
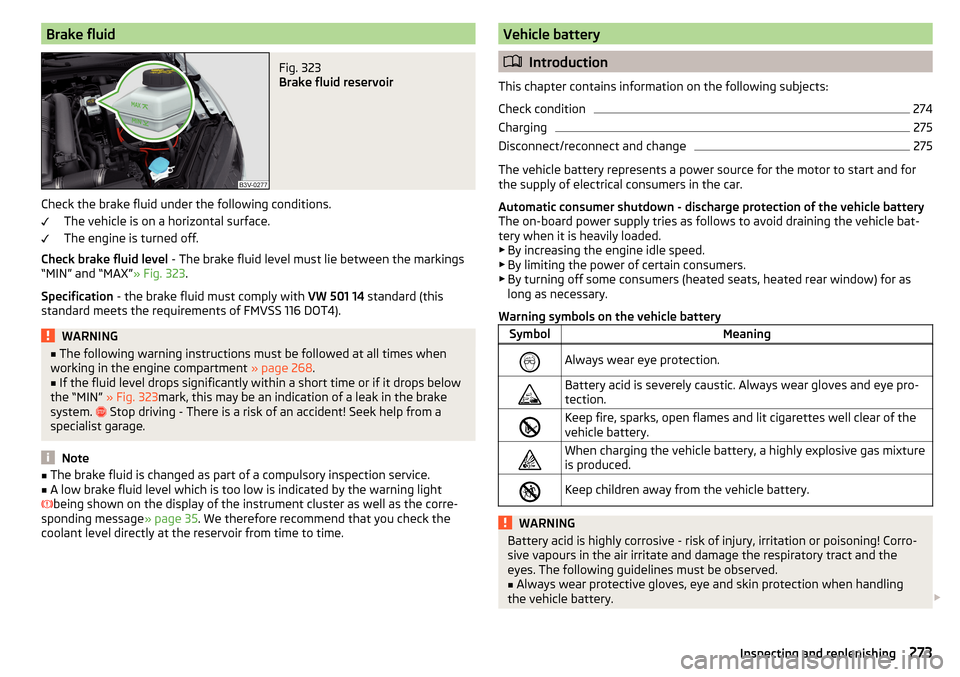
Check brake fluid level - The brake fluid level must lie between the markings
“MIN” and “MAX” » Fig. 323.
Specification - the brake fluid must comply with VW 501 14 standard (this
standard meets the requirements of FMVSS 116 DOT4).
WARNING■ The following warning instructions must be followed at all times when
working in the engine compartment » page 268.■
If the fluid level drops significantly within a short time or if it drops below
the “MIN” » Fig. 323mark, this may be an indication of a leak in the brake
system.
Stop driving - There is a risk of an accident! Seek help from a
specialist garage.
Note
■ The brake fluid is changed as part of a compulsory inspection service.■A low brake fluid level which is too low is indicated by the warning light
being shown on the display of the instrument cluster as well as the corre-
sponding message » page 35. We therefore recommend that you check the
coolant level directly at the reservoir from time to time.Vehicle battery
Introduction
This chapter contains information on the following subjects:
Check condition
274
Charging
275
Disconnect/reconnect and change
275
The vehicle battery represents a power source for the motor to start and for the supply of electrical consumers in the car.
Automatic consumer shutdown - discharge protection of the vehicle battery
The on-board power supply tries as follows to avoid draining the vehicle bat-
tery when it is heavily loaded.
▶ By increasing the engine idle speed.
▶ By limiting the power of certain consumers.
▶ By turning off some consumers (heated seats, heated rear window) for as
long as necessary.
Warning symbols on the vehicle battery
SymbolMeaningAlways wear eye protection.Battery acid is severely caustic. Always wear gloves and eye pro-
tection.Keep fire, sparks, open flames and lit cigarettes well clear of the
vehicle battery.When charging the vehicle battery, a highly explosive gas mixture
is produced.Keep children away from the vehicle battery.WARNINGBattery acid is highly corrosive - risk of injury, irritation or poisoning! Corro-
sive vapours in the air irritate and damage the respiratory tract and the
eyes. The following guidelines must be observed.■
Always wear protective gloves, eye and skin protection when handling
the vehicle battery.
273Inspecting and replenishing
Page 276 of 336
WARNING (Continued)■If your eyes or skin come into contact with the electrolyte fluid, immedi-
ately wash the affected area for a few minutes with plenty of water. Seek
medical assistance if required.■
Keep the vehicle battery away from people who are not completely inde-
pendent, especially children.
■
Do not tilt the battery otherwise battery electrolyte may flow out of the
battery vent openings.
WARNINGWhen working on the car battery, there is the risk of explosion, fire, injury
or irritation! The following guidelines must be observed.■
Avoid smoking, the use of open flames or light and any activities that
could cause sparks.
■
A discharged vehicle battery can freeze slightly. Never charge up a fro-
zen or thawed vehicle battery. Replace a frozen vehicle battery.
■
Never use a damaged vehicle battery – risk of explosion!
■
Do not connect the battery terminals with each other by bridging the two
poles of a short circuit.
CAUTION
Ensure that battery acid does not come into contact with the bodywork – risk
of damage to the paintwork.
Note
■ We recommend having all work on the vehicle battery carried out by a spe-
cialist garage.■
You should replace batteries older than 5 years.
Check conditionFig. 324
Vehicle battery: Open the cover / acid level indicator
Read and observe
and on page 273 first.
The battery condition is checked regularly by a specialist garage as part of the
inspection service.
Check the acid level
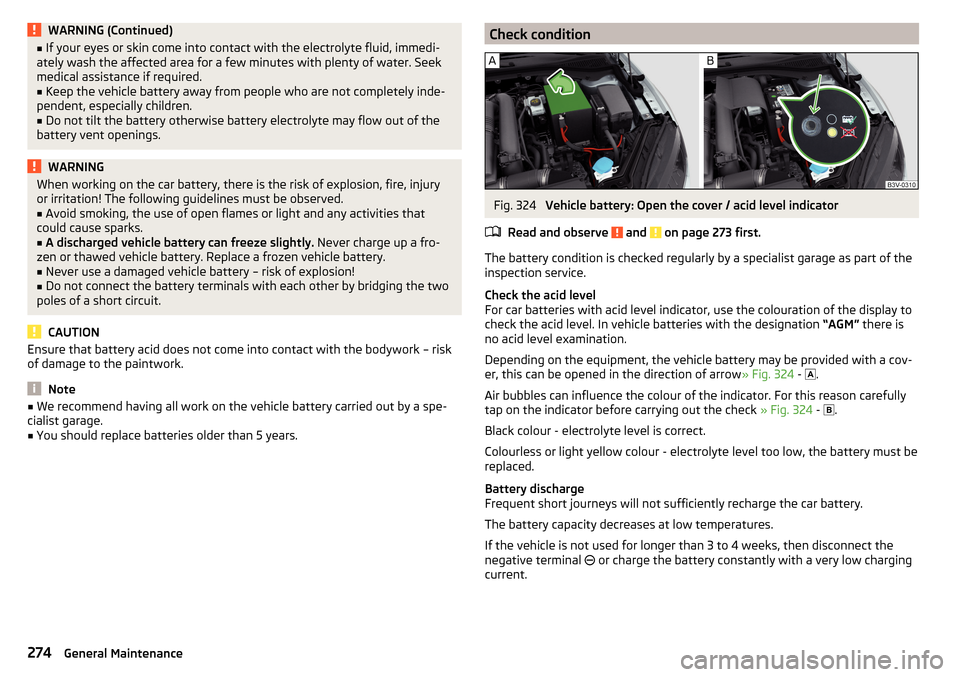
For car batteries with acid level indicator, use the colouration of the display to
check the acid level. In vehicle batteries with the designation “AGM” there is
no acid level examination.
Depending on the equipment, the vehicle battery may be provided with a cov-
er, this can be opened in the direction of arrow » Fig. 324 -
.
Air bubbles can influence the colour of the indicator. For this reason carefully
tap on the indicator before carrying out the check » Fig. 324 -
.
Black colour - electrolyte level is correct.
Colourless or light yellow colour - electrolyte level too low, the battery must be
replaced.
Battery discharge
Frequent short journeys will not sufficiently recharge the car battery.
The battery capacity decreases at low temperatures.
If the vehicle is not used for longer than 3 to 4 weeks, then disconnect the
negative terminal or charge the battery constantly with a very low charging
current.
274General Maintenance
Page 279 of 336
Tyre pressureFig. 325
Label with a table of tyre sizes and tyre pressure value / inflate
tyres
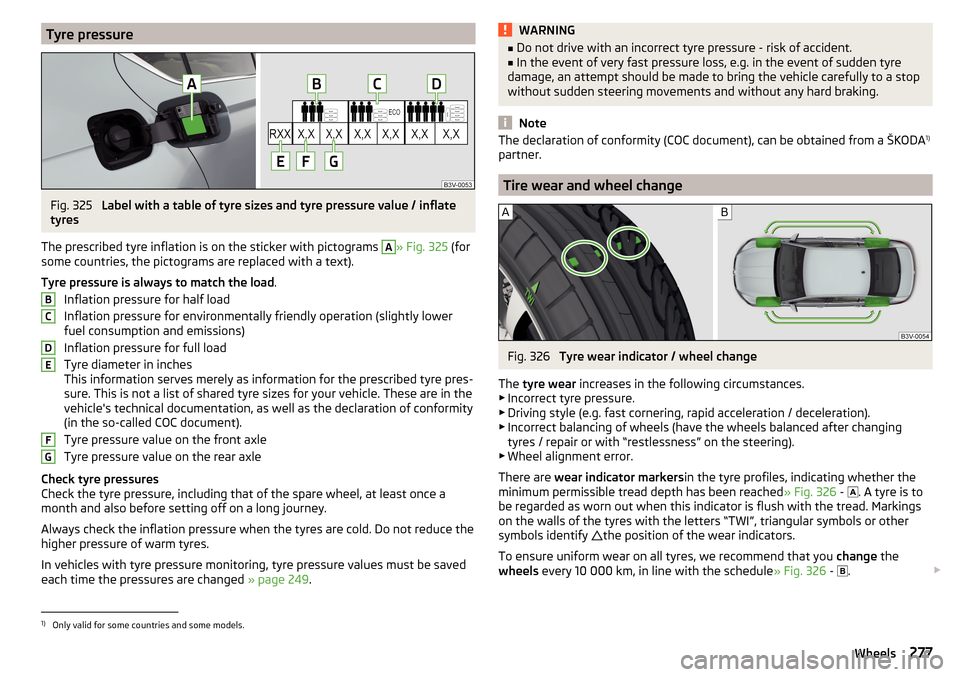
The prescribed tyre inflation is on the sticker with pictograms
A
» Fig. 325 (for
some countries, the pictograms are replaced with a text).
Tyre pressure is always to match the load .
Inflation pressure for half load
Inflation pressure for environmentally friendly operation (slightly lower
fuel consumption and emissions)
Inflation pressure for full load
Tyre diameter in inches
This information serves merely as information for the prescribed tyre pres-
sure. This is not a list of shared tyre sizes for your vehicle. These are in the
vehicle's technical documentation, as well as the declaration of conformity
(in the so-called COC document).
Tyre pressure value on the front axle
Tyre pressure value on the rear axle
Check tyre pressures
Check the tyre pressure, including that of the spare wheel, at least once a
month and also before setting off on a long journey.
Always check the inflation pressure when the tyres are cold. Do not reduce the
higher pressure of warm tyres.
In vehicles with tyre pressure monitoring, tyre pressure values must be saved
each time the pressures are changed » page 249.
BCDEFGWARNING■
Do not drive with an incorrect tyre pressure - risk of accident.■In the event of very fast pressure loss, e.g. in the event of sudden tyre
damage, an attempt should be made to bring the vehicle carefully to a stop
without sudden steering movements and without any hard braking.
Note
The declaration of conformity (COC document), can be obtained from a ŠKODA 1)
partner.
Tire wear and wheel change
Fig. 326
Tyre wear indicator / wheel change
The tyre wear increases in the following circumstances.
▶ Incorrect tyre pressure.
▶ Driving style (e.g. fast cornering, rapid acceleration / deceleration).
▶ Incorrect balancing of wheels (have the wheels balanced after changing
tyres / repair or with “restlessness” on the steering).
▶ Wheel alignment error.
There are wear indicator markers in the tyre profiles, indicating whether the
minimum permissible tread depth has been reached » Fig. 326 -
. A tyre is to
be regarded as worn out when this indicator is flush with the tread. Markings
on the walls of the tyres with the letters “TWI”, triangular symbols or other
symbols identify the position of the wear indicators.
To ensure uniform wear on all tyres, we recommend that you change the
wheels every 10 000 km, in line with the schedule » Fig. 326 -
.
1)
Only valid for some countries and some models.
277Wheels