headlights SKODA SUPERB 2016 3.G / (B8/3V) Owner's Manual
[x] Cancel search | Manufacturer: SKODA, Model Year: 2016, Model line: SUPERB, Model: SKODA SUPERB 2016 3.G / (B8/3V)Pages: 336, PDF Size: 53.89 MB
Page 68 of 336
Activating operation of the sunshadeRead and observe
and on page 64 first.
If the operation of sunshade is deactivated (e.g. after disconnecting and con-
necting the battery), then the operation will have to be activated.
›
Switch on the ignition, press and hold the
» Fig. 47 on page 65 button.
The sunshade opens and closes again after around 10 seconds.
›
Release the button.
Lights and visibility
Light
Introduction
This chapter contains information on the following subjects:
Operating the lights
67
Daytime running lights(DAY LIGHT)
67
Turn signal and main beam
68
Automatic driving light control
68
Xenon headlight
69
Fog lights/rear fog light
69
Fog lights with CORNER function
70
COMING HOME / LEAVING HOME
70
Hazard warning light system
70
Parking light
70
Entry space lighting
71
Driving abroad
71
Unless otherwise stated, the lights only work when the ignition is switched on.
WARNINGThe automatic driving lamp control only operates as a support and
does not release the driver from his responsibility to check the lights and, if
necessary, to switch on the light depending on the prevailing light condi-
tions.
Note
The headlights may mist up temporarily. When the light is switched on, the
light-emitting surface demists after a short period of time.66Using the system
Page 69 of 336
Operating the lightsFig. 48
Light switch
Read and observe on page 66 first.
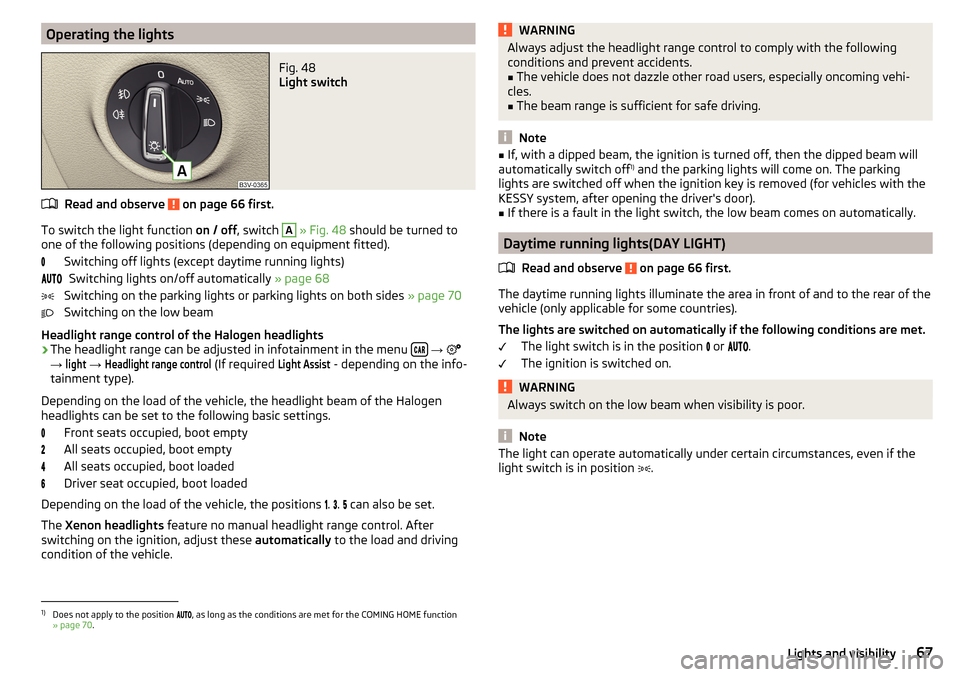
To switch the light function on / off, switch
A
» Fig. 48 should be turned to
one of the following positions (depending on equipment fitted).
Switching off lights (except daytime running lights)Switching lights on/off automatically » page 68
Switching on the parking lights or parking lights on both sides » page 70
Switching on the low beam
Headlight range control of the Halogen headlights
›
The headlight range can be adjusted in infotainment in the menu
→
→
light
→
Headlight range control
(If required
Light Assist
- depending on the info-
tainment type).
Depending on the load of the vehicle, the headlight beam of the Halogen
headlights can be set to the following basic settings.
Front seats occupied, boot empty
All seats occupied, boot empty
All seats occupied, boot loaded
Driver seat occupied, boot loaded
Depending on the load of the vehicle, the positions .
.
can also be set.
The Xenon headlights feature no manual headlight range control. After
switching on the ignition, adjust these automatically to the load and driving
condition of the vehicle.
WARNINGAlways adjust the headlight range control to comply with the following
conditions and prevent accidents.■
The vehicle does not dazzle other road users, especially oncoming vehi-
cles.
■
The beam range is sufficient for safe driving.
Note
■ If, with a dipped beam, the ignition is turned off, then the dipped beam will
automatically switch off 1)
and the parking lights will come on. The parking
lights are switched off when the ignition key is removed (for vehicles with the
KESSY system, after opening the driver's door).■
If there is a fault in the light switch, the low beam comes on automatically.
Daytime running lights(DAY LIGHT)
Read and observe
on page 66 first.
The daytime running lights illuminate the area in front of and to the rear of thevehicle (only applicable for some countries).
The lights are switched on automatically if the following conditions are met. The light switch is in the position
or
.
The ignition is switched on.
WARNINGAlways switch on the low beam when visibility is poor.
Note
The light can operate automatically under certain circumstances, even if the
light switch is in position .1)
Does not apply to the position , as long as the conditions are met for the COMING HOME function
» page 70 .
67Lights and visibility
Page 71 of 336
CAUTIONPoorer visibility is evaluated by a sensor mounted below the windscreen in the
holder of the rear-view mirror. Do not cover the sensor - the system can be af-
fected.
Note
The setting (activate/deactivate) of the automatic driving light control during
rain is stored (depending on the Infotainment type) in the active user account
personalisation » page 49.
Xenon headlight
Read and observe
on page 66 first.
The Xenon headlights (hereinafter referred to as just system) use the drivingdata to automatically ensure the for the best possible light cone in front of the
vehicle.
The system will automatically operate in the following modes: urban, extra-ur-
ban, motorway, rain, fog, adjusting the lighting direction of the headlights for
road illumination on bends.
The system works as long as the light switch is in position
.
WARNINGIf there is a system malfunction the headlights are automatically lowered
to the emergency position, which prevents a possible dazzling of oncoming
traffic. This reduces the cone of light in front of the vehicle. Seek help from
a specialist garage.Fog lights/rear fog lightFig. 51
Light switch – switch on front
and rear fog lights
Read and observe on page 66 first.
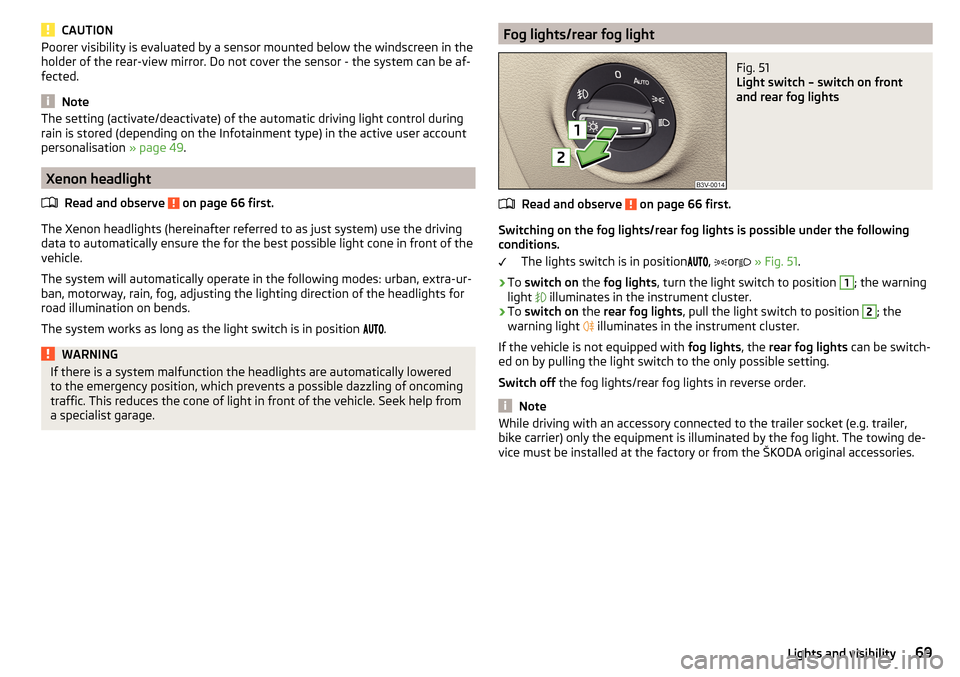
Switching on the fog lights/rear fog lights is possible under the following
conditions.
The lights switch is in position ,
or
» Fig. 51 .
›
To switch on the fog lights , turn the light switch to position
1
; the warning
light illuminates in the instrument cluster.
›
To
switch on the rear fog lights , pull the light switch to position
2
; the
warning light illuminates in the instrument cluster.
If the vehicle is not equipped with fog lights, the rear fog lights can be switch-
ed on by pulling the light switch to the only possible setting.
Switch off the fog lights/rear fog lights in reverse order.
Note
While driving with an accessory connected to the trailer socket (e.g. trailer,
bike carrier) only the equipment is illuminated by the fog light. The towing de-
vice must be installed at the factory or from the ŠKODA original accessories.69Lights and visibility
Page 73 of 336
›Press the control lever all the way into position
or until it stops » Fig. 49
on page 68 .
The parking lights on the respective side of the vehicle are turned on.
Switching on the side light on both sides ›
Switch on the ignition and turn the light switch to position
» page 67 , the
parking lights are turned on.
›
Switch off the ignition and lock the car.
After removing the ignition key and opening the driver's door, an audible warn-
ing sounds. After a few seconds, or after closing the driver's door, the acoustic
warning signal stops.
CAUTION
■ Turning on the parking light means the battery is heavily loaded.■The parking lights may switch off automatically due to a low battery charge.
If the two-sided parking lights are switched on when the ignition is off, the
parking lights will not switch on automatically.
Entry space lighting
Read and observe
on page 66 first.
The lighting is positioned on the lower edge of the exterior mirror and illumi-nates the entry area of the front door.
The lighting switches on after unlocking or opening the vehicle door (depend-
ing on the lighting conditions).
The lighting switches off after around 30 seconds after closing the front door
or switching on the ignition.
Driving abroad
Read and observe
on page 66 first.
When driving in countries with opposing traffic system (traffic on the
left/right), your headlights may dazzle oncoming traffic. Therefore, it is neces-
sary to have the headlights adapted by a specialist garage.
You can set the xenon headlights yourself by activating Travel mode Infotain-
ment menu
→
→
Light
. In this mode, no automatic beam adjustment is
made ahead of the vehicle.
Headlight Assist (Light Assist / Dynamic Light Assist)
Introduction
Fig. 53
Sensor window for the headlight
assistant
This chapter contains information on the following subjects:
Operating conditions
72
Switching on and off
72
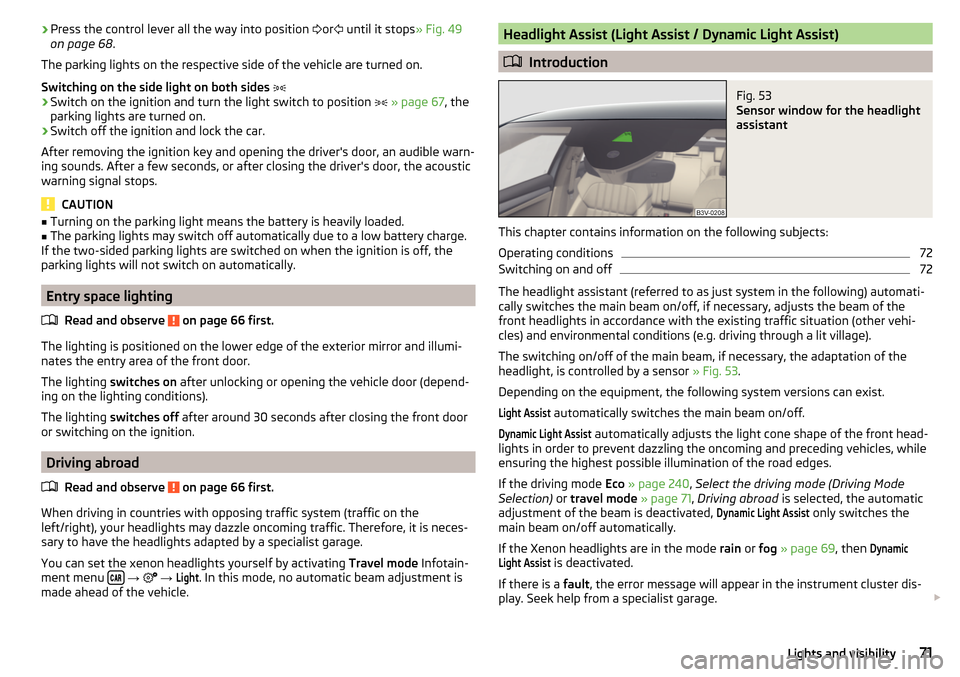
The headlight assistant (referred to as just system in the following) automati-
cally switches the main beam on/off, if necessary, adjusts the beam of the
front headlights in accordance with the existing traffic situation (other vehi-
cles) and environmental conditions (e.g. driving through a lit village).
The switching on/off of the main beam, if necessary, the adaptation of the
headlight, is controlled by a sensor » Fig. 53.
Depending on the equipment, the following system versions can exist.
Light Assist
automatically switches the main beam on/off.
Dynamic Light Assist
automatically adjusts the light cone shape of the front head-
lights in order to prevent dazzling the oncoming and preceding vehicles, while
ensuring the highest possible illumination of the road edges.
If the driving mode Eco » page 240 , Select the driving mode (Driving Mode
Selection) or travel mode » page 71 , Driving abroad is selected, the automatic
adjustment of the beam is deactivated,
Dynamic Light Assist
only switches the
main beam on/off automatically.
If the Xenon headlights are in the mode rain or fog » page 69 , then
DynamicLight Assist
is deactivated.
If there is a fault, the error message will appear in the instrument cluster dis-
play. Seek help from a specialist garage.
71Lights and visibility
Page 79 of 336

Automatic windscreen wiping during rain can be in the Infotainment menu
→ →
Mirrors and wipers
enabled / disabled .WARNINGAutomatic wiping during rain is only a support. The driver is not released
from the responsibility to set the function of the windscreen wipers man-
ually depending on the visibility conditions.
Note
■ If the wiping is carried out without interruption, the wiping speed varies de-
pending on the vehicle speed.■
The setting (activation/deactivation) of the automatic windscreen wiping in
the rain is stored (depending on the Infotainment type) in the active user ac-
count personalisation » page 49.
Rear window wipers and washers / reversing camera cleaning
system
Fig. 64
Operating the windscreen wipers
and washing system
Read and observe and on page 76 first.
The lever can be moved to the following positions » Fig. 64
Spraying and wiping the windscreen (sprung position) - after releasing the
control stalk, the wipers perform another 2 to 3 wiper strokes
Spraying the rear view camera (sprung position)
Windscreen wiping
Wipers and washers off
Automatic rear wiper
If the windscreen wiping is performed without interruption, then the automat-
ic regular intermittent wiping of the rear window takes place.
This function can be activated / deactivated in the Infotainment menu
→
→ Mirrors and wipers
.
Note
■
The rear window is wiped automatically if the windscreen wipers are on
when reverse gear is selected.■
The setting (activation/deactivation) of the automatic rear window wiping in
the rain is stored (depending on the Infotainment type) in the active user ac-
count personalisation » page 49.
Headlight cleaning system
Read and observe
and on page 76 first.
The headlights are cleaned with every first and after every tenth spraying of
the windscreen under the following conditions.
The ignition is switched on.
The low beam is switched on.
The outside temperature is about -12° C to +39° C.
To ensure the correct functioning of the system, even in winter, this needs to
be regularly cleared of snow and ice (e.g. using the de-icing spray).
Rear view mirror
Introduction
This chapter contains information on the following subjects:
Interior mirror dimming
78
Exterior mirrors
78WARNINGExterior mirrors increase the field of view, however, make objects appear
smaller and further away. Therefore, use the rear-view mirror to determine
the distances to the following vehicles. 77Lights and visibility
Page 214 of 336
Assist systems
General information
Introduction
This chapter contains information on the following subjects:
Radar sensor
212WARNING■ The assistance systems only serve to support the driver and do not re-
lieve the driver of the responsibility for driving the vehicle.■
The increased safety provision, as well as the increased occupant protec-
tion provided by the assistance systems must not tempt you to take risks -
risk of accident!
■
Adjust the speed and driving style to the current visibility, weather, road
and traffic conditions.
■
The assistance systems have physical and system-related limitations. For
this reason, the driver may experience some undesired or delayed system
responses in certain situations. You should therefore always be alert and
ready to intervene!
■
Only enable, disable or set the assistance systems when you have the car
fully under control, in every traffic situation - risk of accident!
Radar sensor
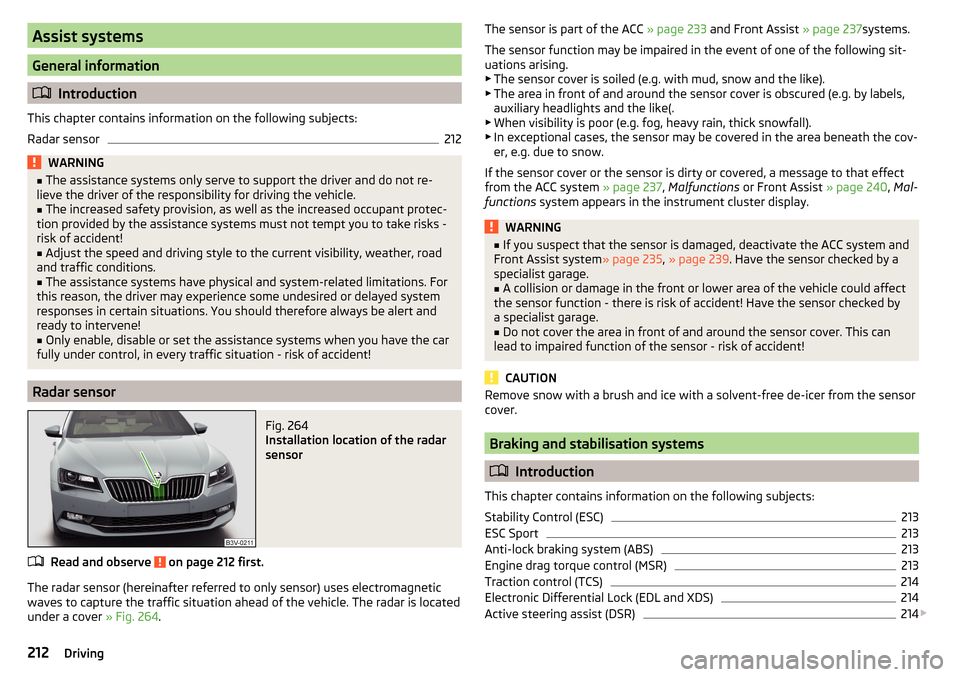
Fig. 264
Installation location of the radar
sensor
Read and observe on page 212 first.
The radar sensor (hereinafter referred to only sensor) uses electromagnetic
waves to capture the traffic situation ahead of the vehicle. The radar is located
under a cover » Fig. 264.
The sensor is part of the ACC » page 233 and Front Assist » page 237systems.
The sensor function may be impaired in the event of one of the following sit-
uations arising. ▶ The sensor cover is soiled (e.g. with mud, snow and the like).
▶ The area in front of and around the sensor cover is obscured (e.g. by labels,
auxiliary headlights and the like(.
▶ When visibility is poor (e.g. fog, heavy rain, thick snowfall).
▶ In exceptional cases, the sensor may be covered in the area beneath the cov-
er, e.g. due to snow.
If the sensor cover or the sensor is dirty or covered, a message to that effect
from the ACC system » page 237, Malfunctions or Front Assist » page 240, Mal-
functions system appears in the instrument cluster display.WARNING■
If you suspect that the sensor is damaged, deactivate the ACC system and
Front Assist system » page 235, » page 239 . Have the sensor checked by a
specialist garage.■
A collision or damage in the front or lower area of the vehicle could affect
the sensor function - there is risk of accident! Have the sensor checked by
a specialist garage.
■
Do not cover the area in front of and around the sensor cover. This can
lead to impaired function of the sensor - risk of accident!
CAUTION
Remove snow with a brush and ice with a solvent-free de-icer from the sensor
cover.
Braking and stabilisation systems
Introduction
This chapter contains information on the following subjects:
Stability Control (ESC)
213
ESC Sport
213
Anti-lock braking system (ABS)
213
Engine drag torque control (MSR)
213
Traction control (TCS)
214
Electronic Differential Lock (EDL and XDS)
214
Active steering assist (DSR)
214
212Driving
Page 244 of 336
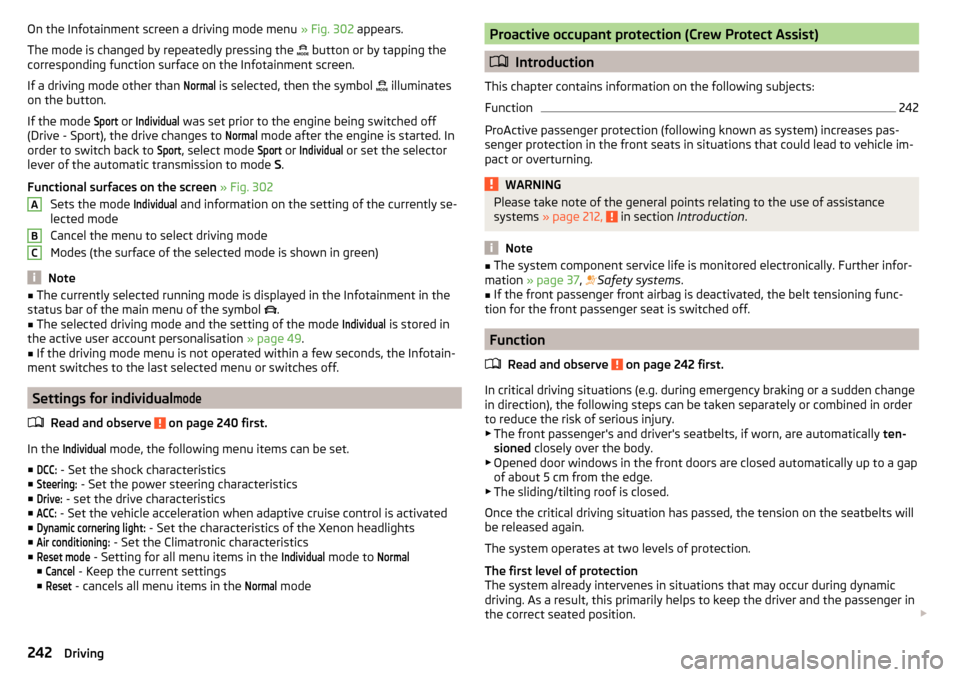
On the Infotainment screen a driving mode menu » Fig. 302 appears.
The mode is changed by repeatedly pressing the
button or by tapping the
corresponding function surface on the Infotainment screen.
If a driving mode other than Normal
is selected, then the symbol
illuminates
on the button.
If the mode
Sport
or
Individual
was set prior to the engine being switched off
(Drive - Sport), the drive changes to
Normal
mode after the engine is started. In
order to switch back to
Sport
, select mode
Sport
or
Individual
or set the selector
lever of the automatic transmission to mode S.
Functional surfaces on the screen » Fig. 302
Sets the mode
Individual
and information on the setting of the currently se-
lected mode
Cancel the menu to select driving mode
Modes (the surface of the selected mode is shown in green)
Note
■ The currently selected running mode is displayed in the Infotainment in the
status bar of the main menu of the symbol .■
The selected driving mode and the setting of the mode
Individual
is stored in
the active user account personalisation » page 49.
■
If the driving mode menu is not operated within a few seconds, the Infotain-
ment switches to the last selected menu or switches off.
Settings for individual
mode
Read and observe on page 240 first.
In the
Individual
mode, the following menu items can be set.
■
DCC:
- Set the shock characteristics
■
Steering:
- Set the power steering characteristics
■
Drive:
- set the drive characteristics
■
ACC:
- Set the vehicle acceleration when adaptive cruise control is activated
■
Dynamic cornering light:
- Set the characteristics of the Xenon headlights
■
Air conditioning:
- Set the Climatronic characteristics
■
Reset mode
- Setting for all menu items in the
Individual
mode to
Normal
■
Cancel
- Keep the current settings
■
Reset
- cancels all menu items in the
Normal
mode
ABCProactive occupant protection (Crew Protect Assist)
Introduction
This chapter contains information on the following subjects:
Function
242
ProActive passenger protection (following known as system) increases pas-
senger protection in the front seats in situations that could lead to vehicle im-
pact or overturning.
WARNINGPlease take note of the general points relating to the use of assistance
systems » page 212, in section Introduction .
Note
■
The system component service life is monitored electronically. Further infor-
mation » page 37 , Safety systems .■
If the front passenger front airbag is deactivated, the belt tensioning func-
tion for the front passenger seat is switched off.
Function
Read and observe
on page 242 first.
In critical driving situations (e.g. during emergency braking or a sudden changein direction), the following steps can be taken separately or combined in order
to reduce the risk of serious injury.
▶ The front passenger's and driver's seatbelts, if worn, are automatically ten-
sioned closely over the body.
▶ Opened door windows in the front doors are closed automatically up to a gap
of about 5 cm from the edge.
▶ The sliding/tilting roof is closed.
Once the critical driving situation has passed, the tension on the seatbelts will
be released again.
The system operates at two levels of protection.
The first level of protection
The system already intervenes in situations that may occur during dynamic
driving. As a result, this primarily helps to keep the driver and the passenger in
the correct seated position.
242Driving
Page 254 of 336
Using hitch
Trailer (accessory) connect and disconnect
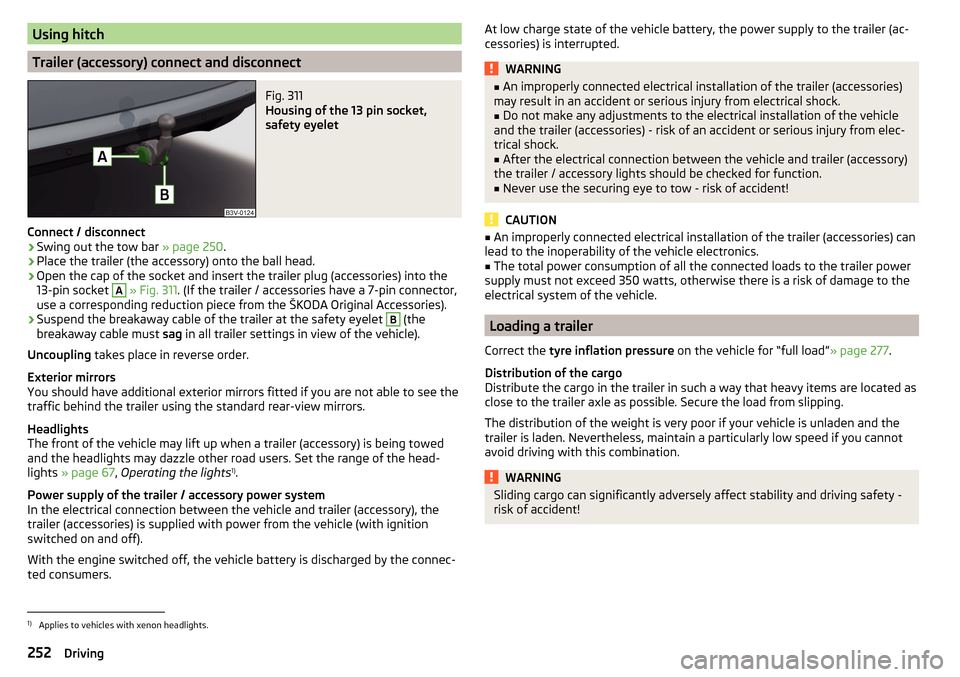
Fig. 311
Housing of the 13 pin socket,
safety eyelet
Connect / disconnect
›
Swing out the tow bar » page 250.
›
Place the trailer (the accessory) onto the ball head.
›
Open the cap of the socket and insert the trailer plug (accessories) into the
13-pin socket
A
» Fig. 311 . (If the trailer / accessories have a 7-pin connector,
use a corresponding reduction piece from the ŠKODA Original Accessories).
›
Suspend the breakaway cable of the trailer at the safety eyelet
B
(the
breakaway cable must sag in all trailer settings in view of the vehicle).
Uncoupling takes place in reverse order.
Exterior mirrors
You should have additional exterior mirrors fitted if you are not able to see the
traffic behind the trailer using the standard rear-view mirrors.
Headlights
The front of the vehicle may lift up when a trailer (accessory) is being towed
and the headlights may dazzle other road users. Set the range of the head-
lights » page 67 , Operating the lights 1)
.
Power supply of the trailer / accessory power system
In the electrical connection between the vehicle and trailer (accessory), the
trailer (accessories) is supplied with power from the vehicle (with ignition
switched on and off).
With the engine switched off, the vehicle battery is discharged by the connec-
ted consumers.
At low charge state of the vehicle battery, the power supply to the trailer (ac-
cessories) is interrupted.WARNING■ An improperly connected electrical installation of the trailer (accessories)
may result in an accident or serious injury from electrical shock.■
Do not make any adjustments to the electrical installation of the vehicle
and the trailer (accessories) - risk of an accident or serious injury from elec-
trical shock.
■
After the electrical connection between the vehicle and trailer (accessory)
the trailer / accessory lights should be checked for function.
■
Never use the securing eye to tow - risk of accident!
CAUTION
■ An improperly connected electrical installation of the trailer (accessories) can
lead to the inoperability of the vehicle electronics.■
The total power consumption of all the connected loads to the trailer power
supply must not exceed 350 watts, otherwise there is a risk of damage to the
electrical system of the vehicle.
Loading a trailer
Correct the tyre inflation pressure on the vehicle for “full load” » page 277.
Distribution of the cargo
Distribute the cargo in the trailer in such a way that heavy items are located as
close to the trailer axle as possible. Secure the load from slipping.
The distribution of the weight is very poor if your vehicle is unladen and the
trailer is laden. Nevertheless, maintain a particularly low speed if you cannot
avoid driving with this combination.
WARNINGSliding cargo can significantly adversely affect stability and driving safety -
risk of accident!1)
Applies to vehicles with xenon headlights.
252Driving
Page 264 of 336

Vehicle compo-nentFacts of thematterRemedyWindows
and door mirrorsSoilingWash with clean water and dry using
the intended clothHeadlights/lightsSoilingSoft sponge and mild soap solution a)
Reversing cameraSoilingWash with clean water and dry with a
soft clothSnow / iceHand brush / de-icerDoor lock cylinderSnow / iceDe-icerWiper / wiper
bladesSoilingGlass cleaner, sponge or clothWheelsSoilingClear water, then coat with appropriate
conservation solutiona)
Mild soap solution = 2 tablespoons of natural soap to 1 litre of lukewarm water.
The jack is maintenance-free. If necessary, the moving parts of the jack should
be lubricated with a suitable lubricant.
The towing device is maintenance-free. Coat the ball head of the towing de-
vice with a suitable grease whenever necessary.
Protection of hollow spaces
All the hollow spaces on your vehicle which are at risk from corrosion are pro-
tected for life by a layer of protective wax applied in the factory.
If any small amount of wax flow out of the cavities at high temperatures, these
must be removed with a plastic scraper and the stains cleaned using a petrole-
um cleaner.
Underbody protection
The underside of your vehicle is already permanently protected by the factory
against chemical and mechanical influences.
We recommend having the protective coating underneath the vehicle and the
chassis checked — preferably before the beginning of winter and at the end of winter.
Product life of the films
Environmental influences (e.g. sunlight, humidity, air pollution, rockfall) affect
the life of the films. Films will age and become brittle – this is entirely normal:
this is not a fault.
Sunlight may also affect the strength of the film colour.
When transporting a load on the roof rack (e.g. roof box or similar), there is an
increased risk of film damage (e.g. of chipping from the secured load).
CAUTION
■ Vehicle paint
■ Damaged areas should be repaired as soon as possible.
■ Do not treat painted parts with or hard waxes.
■ Do not polish the paintwork in a dusty environment - risk of paint scratch-
es. ■ Do not apply any paint care products to door seals or window guides.■
Plastic parts
■ Do not use paint care products.
■
Chromed and anodised parts
■ Do not polish the chrome parts in a dusty environment - risk of surface
scratches.
■
Foils
The following instructions must be observed, otherwise there is a risk of foil
damage.
■ Do not clean with dirty cloths or sponges.
■ To remove ice and snow, do not use a scraper or other means.
■ Do not polish the foils
■ Do not use a pressure washer to clean the foils
■
Rubber seals
■ Do not treat the door seals and window guides with any products - the pro-
tective lacquer layer could be affected.
■
Windows and external mirror glass
■ Do not clean the inside of the windows with sharp objects - there is a risk
of damage to the filaments or glass antenna. ■ Do not use a cloth, which was used to polish the body - this could soil the
window and reduce visibility.
■
Headlights/lights ■ Do not dry off the headlights/lights, do not use sharp objects - there is a
risk of damage to the protective coating and subsequent cracking of the
headlight glass.
■
Reversing camera
The following instructions must be observed, otherwise there is a risk of
camera damage.
■ Do not remove snow / ice with warm / hot water.
■ To wash, never use a pressure washer or steam jet.
■ For cleaning, do not use abrasive cleaners.
262General Maintenance
Page 272 of 336
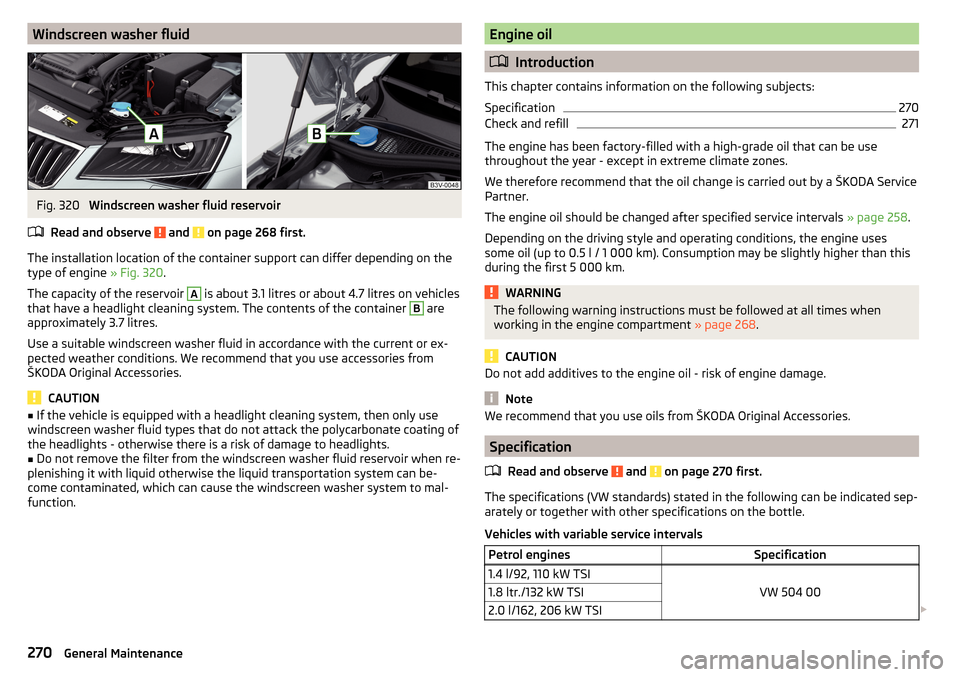
Windscreen washer fluidFig. 320
Windscreen washer fluid reservoir
Read and observe
and on page 268 first.
The installation location of the container support can differ depending on the
type of engine » Fig. 320.
The capacity of the reservoir
A
is about 3.1 litres or about 4.7 litres on vehicles
that have a headlight cleaning system. The contents of the container
B
are
approximately 3.7 litres.
Use a suitable windscreen washer fluid in accordance with the current or ex-
pected weather conditions. We recommend that you use accessories from
ŠKODA Original Accessories.
CAUTION
■ If the vehicle is equipped with a headlight cleaning system, then only use
windscreen washer fluid types that do not attack the polycarbonate coating of
the headlights - otherwise there is a risk of damage to headlights.■
Do not remove the filter from the windscreen washer fluid reservoir when re-
plenishing it with liquid otherwise the liquid transportation system can be-
come contaminated, which can cause the windscreen washer system to mal-
function.
Engine oil
Introduction
This chapter contains information on the following subjects:
Specification
270
Check and refill
271
The engine has been factory-filled with a high-grade oil that can be use
throughout the year - except in extreme climate zones.
We therefore recommend that the oil change is carried out by a ŠKODA Service
Partner.
The engine oil should be changed after specified service intervals » page 258.
Depending on the driving style and operating conditions, the engine uses
some oil (up to 0.5 l / 1 000 km). Consumption may be slightly higher than this
during the first 5 000 km.
WARNINGThe following warning instructions must be followed at all times when
working in the engine compartment » page 268.
CAUTION
Do not add additives to the engine oil - risk of engine damage.
Note
We recommend that you use oils from ŠKODA Original Accessories.
Specification
Read and observe
and on page 270 first.
The specifications (VW standards) stated in the following can be indicated sep-arately or together with other specifications on the bottle.
Vehicles with variable service intervals
Petrol enginesSpecification1.4 l/92, 110 kW TSI
VW 504 00
1.8 ltr./132 kW TSI2.0 l/162, 206 kW TSI 270General Maintenance