lock SKODA YETI 2014 1.G / 5L Amundsen Infotainment Navigation System Manual
[x] Cancel search | Manufacturer: SKODA, Model Year: 2014, Model line: YETI, Model: SKODA YETI 2014 1.G / 5LPages: 88, PDF Size: 8.18 MB
Page 11 of 88
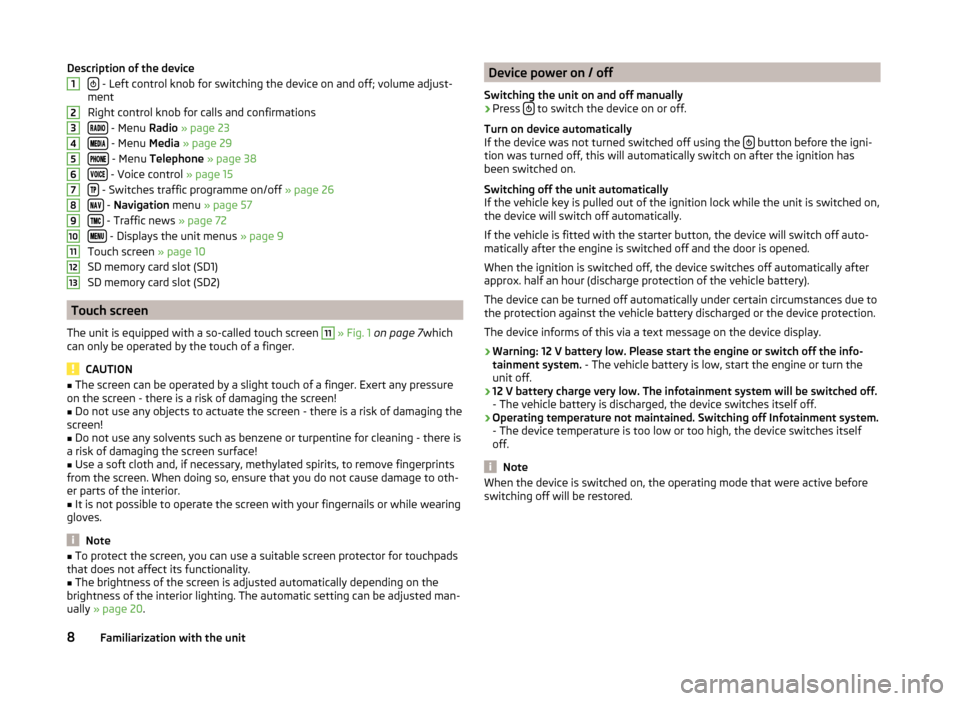
Description of the device
- Left control knob for switching the device on and off; volume adjust-
ment
Right control knob for calls and confirmations
- Menu Radio » page 23
- Menu Media » page 29
- Menu Telephone » page 38
- Voice control » page 15
- Switches traffic programme on/off » page 26
- Navigation menu » page 57
- Traffic news » page 72
- Displays the unit menus » page 9
Touch screen » page 10
SD memory card slot (SD1)
SD memory card slot (SD2)
Touch screen
The unit is equipped with a so-called touch screen
11
» Fig. 1 on page 7 which
can only be operated by the touch of a finger.
CAUTION
■ The screen can be operated by a slight touch of a finger. Exert any pressure
on the screen - there is a risk of damaging the screen!■
Do not use any objects to actuate the screen - there is a risk of damaging the
screen!
■
Do not use any solvents such as benzene or turpentine for cleaning - there is
a risk of damaging the screen surface!
■
Use a soft cloth and, if necessary, methylated spirits, to remove fingerprints
from the screen. When doing so, ensure that you do not cause damage to oth-
er parts of the interior.
■
It is not possible to operate the screen with your fingernails or while wearing
gloves.
Note
■ To protect the screen, you can use a suitable screen protector for touchpads
that does not affect its functionality.■
The brightness of the screen is adjusted automatically depending on the
brightness of the interior lighting. The automatic setting can be adjusted man-
ually » page 20 .
12345678910111213Device power on / off
Switching the unit on and off manually›
Press to switch the device on or off.
Turn on device automatically
If the device was not turned switched off using the
button before the igni-
tion was turned off, this will automatically switch on after the ignition has
been switched on.
Switching off the unit automatically
If the vehicle key is pulled out of the ignition lock while the unit is switched on,
the device will switch off automatically.
If the vehicle is fitted with the starter button, the device will switch off auto-
matically after the engine is switched off and the door is opened.
When the ignition is switched off, the device switches off automatically after
approx. half an hour (discharge protection of the vehicle battery).
The device can be turned off automatically under certain circumstances due to
the protection against the vehicle battery discharged or the device protection.
The device informs of this via a text message on the device display.
› Warning: 12 V battery low. Please start the engine or switch off the info-
tainment system. - The vehicle battery is low, start the engine or turn the
unit off.
› 12 V battery charge very low. The infotainment system will be switched off.
- The vehicle battery is discharged, the device switches itself off.
› Operating temperature not maintained. Switching off Infotainment system.
- The device temperature is too low or too high, the device switches itself
off.
Note
When the device is switched on, the operating mode that were active before
switching off will be restored.8Familiarization with the unit
Page 23 of 88
Menu Setup
Introduction
This chapter contains information on the following subjects:
Main Menu
20
Screen settings
20
Setting the device language
20
Keyboard settings
21
Additional keypad language settings
21
Voice control settings
21
Data transmission of mobile devices
21
Safe removal of the audio source
21
Restore factory settings
21
Bluetooth ®
settings
21
System Information
22
First and foremost, pay attention to the safety instructions » page 7 , Impor-
tant notes .
This chapter covers the device settings.
Main Menu
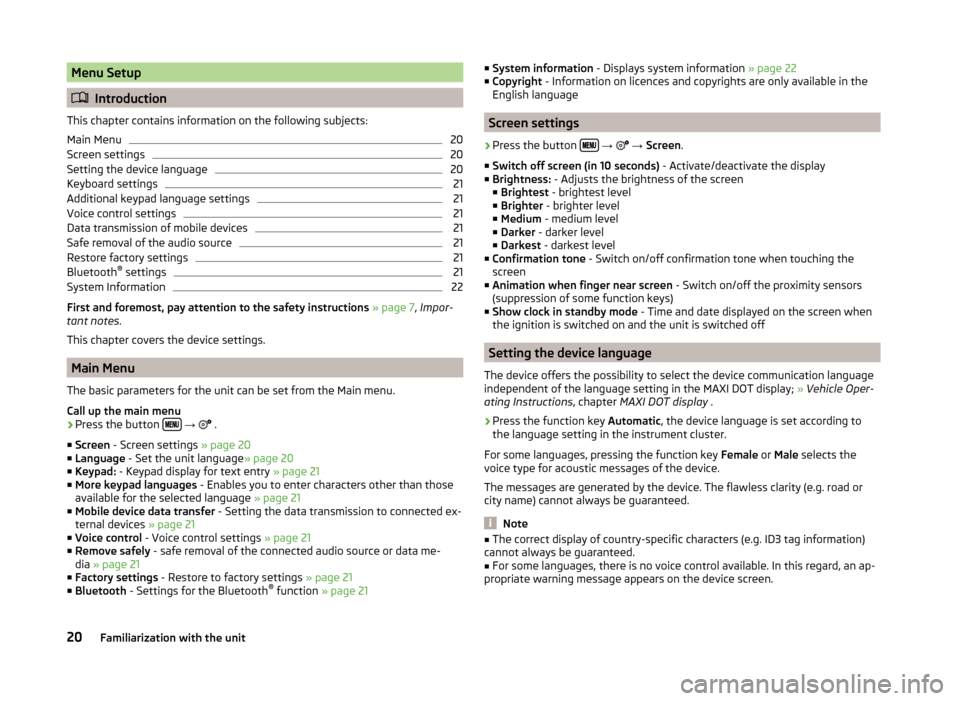
The basic parameters for the unit can be set from the Main menu.
Call up the main menu
›
Press the button
→
.
■ Screen - Screen settings » page 20
■ Language - Set the unit language » page 20
■ Keypad: - Keypad display for text entry » page 21
■ More keypad languages - Enables you to enter characters other than those
available for the selected language » page 21
■ Mobile device data transfer - Setting the data transmission to connected ex-
ternal devices » page 21
■ Voice control - Voice control settings » page 21
■ Remove safely - safe removal of the connected audio source or data me-
dia » page 21
■ Factory settings - Restore to factory settings » page 21
■ Bluetooth - Settings for the Bluetooth ®
function » page 21
■
System information - Displays system information » page 22
■ Copyright - Information on licences and copyrights are only available in the
English language
Screen settings
›
Press the button
→
→ Screen .
■ Switch off screen (in 10 seconds) - Activate/deactivate the display
■ Brightness: - Adjusts the brightness of the screen
■ Brightest - brightest level
■ Brighter - brighter level
■ Medium - medium level
■ Darker - darker level
■ Darkest - darkest level
■ Confirmation tone - Switch on/off confirmation tone when touching the
screen
■ Animation when finger near screen - Switch on/off the proximity sensors
(suppression of some function keys)
■ Show clock in standby mode - Time and date displayed on the screen when
the ignition is switched on and the unit is switched off
Setting the device language
The device offers the possibility to select the device communication language
independent of the language setting in the MAXI DOT display; » Vehicle Oper-
ating Instructions , chapter MAXI DOT display .
›
Press the function key Automatic, the device language is set according to
the language setting in the instrument cluster.
For some languages, pressing the function key Female or Male selects the
voice type for acoustic messages of the device.
The messages are generated by the device. The flawless clarity (e.g. road or
city name) cannot always be guaranteed.
Note
■ The correct display of country-specific characters (e.g. ID3 tag information)
cannot always be guaranteed.■
For some languages, there is no voice control available. In this regard, an ap-
propriate warning message appears on the device screen.
20Familiarization with the unit
Page 36 of 88
If the main and the additional telephones » page 40are connected to the de-
vice the audio source appears after selection BT Audio a menu for selecting
the Bluetooth ®
Player.
Bluetooth ®
Player
Read and observe
and on page 32 first.
The unit allows audio files of a connected Bluetooth ®
player to play using the
A2DP and AVRCP audio profile.
›
For connecting follow the same instructions as for pairing the device with a
telephone » page 42.
If an Apple device is connected as a Bluetooth ®
player, and this is connected
to the USB input, then the Bluetooth ®
connection is dropped.
The following warning message appears in the device screen Bluetooth-Audio
(A2DP) … Connection cancelled.
Note
■
We recommend setting the maximum output level of the Bluetooth ®
Play-
er » page 19 , Sound settings .■
Some operator options via the device may not be supported and are depend-
ent on the Bluetooth ®
player being used.
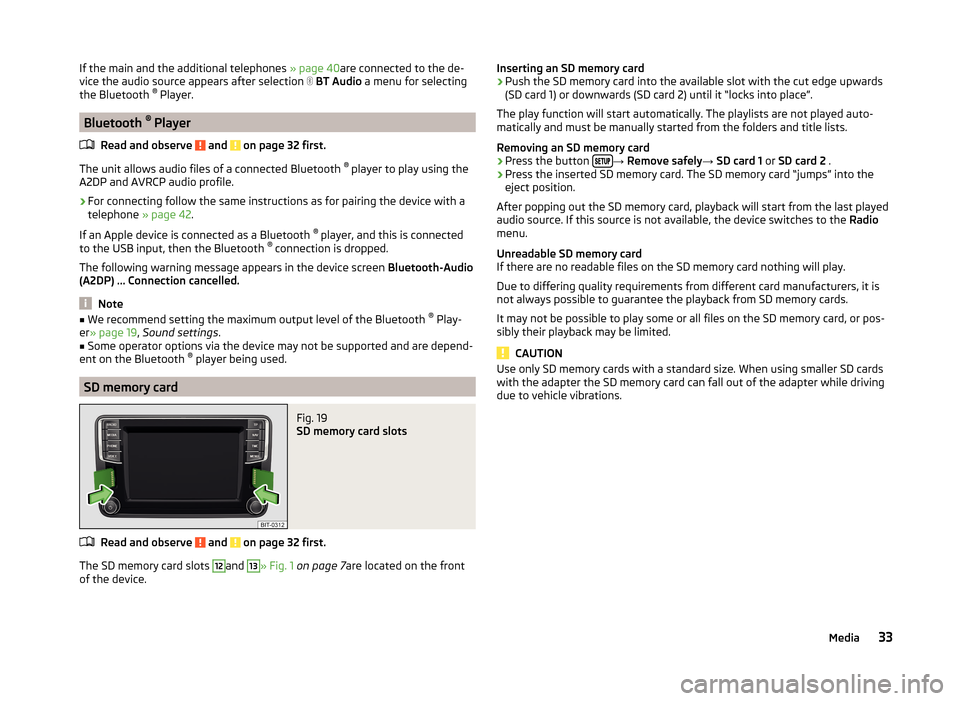
SD memory card
Fig. 19
SD memory card slots
Read and observe and on page 32 first.
The SD memory card slots
12
and
13
» Fig. 1 on page 7 are located on the front
of the device.
Inserting an SD memory card›Push the SD memory card into the available slot with the cut edge upwards
(SD card 1) or downwards (SD card 2) until it “locks into place”.
The play function will start automatically. The playlists are not played auto-
matically and must be manually started from the folders and title lists.
Removing an SD memory card›
Press the button →
Remove safely → SD card 1 or SD card 2 .
›
Press the inserted SD memory card. The SD memory card “jumps” into the
eject position.
After popping out the SD memory card, playback will start from the last played
audio source. If this source is not available, the device switches to the Radio
menu.
Unreadable SD memory card
If there are no readable files on the SD memory card nothing will play.
Due to differing quality requirements from different card manufacturers, it is
not always possible to guarantee the playback from SD memory cards.
It may not be possible to play some or all files on the SD memory card, or pos-
sibly their playback may be limited.
CAUTION
Use only SD memory cards with a standard size. When using smaller SD cards
with the adapter the SD memory card can fall out of the adapter while driving
due to vehicle vibrations.33Media
Page 40 of 88
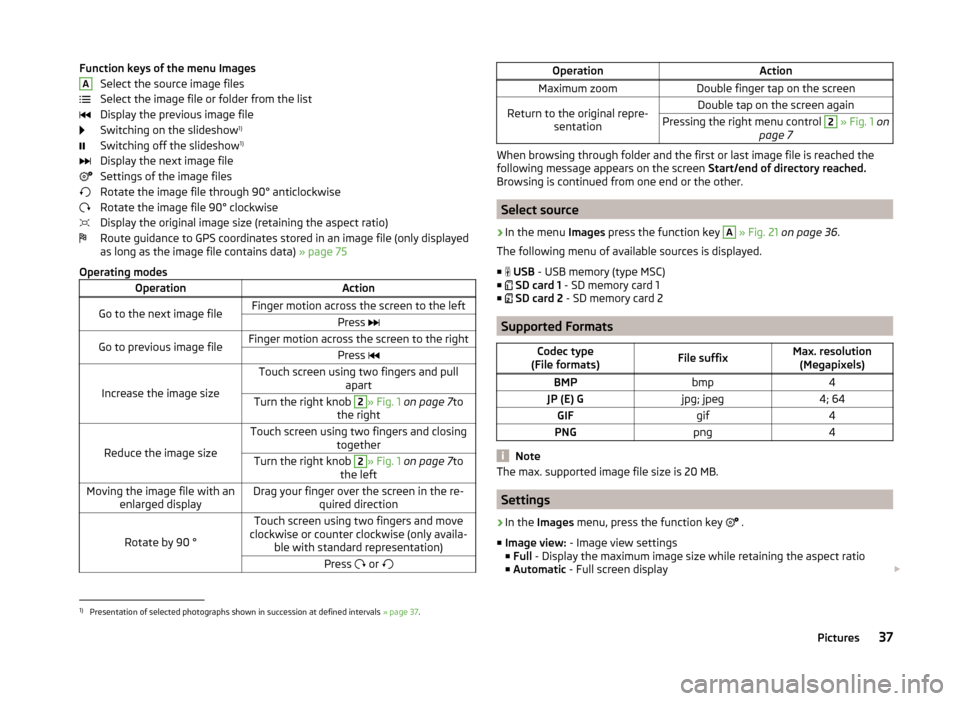
Function keys of the menu ImagesSelect the source image files
Select the image file or folder from the list
Display the previous image file
Switching on the slideshow 1)
Switching off the slideshow 1)
Display the next image file
Settings of the image files
Rotate the image file through 90° anticlockwise
Rotate the image file 90° clockwise
Display the original image size (retaining the aspect ratio)
Route guidance to GPS coordinates stored in an image file (only displayed as long as the image file contains data) » page 75
Operating modesOperationActionGo to the next image fileFinger motion across the screen to the leftPress Go to previous image fileFinger motion across the screen to the rightPress
Increase the image size
Touch screen using two fingers and pull
apartTurn the right knob 2» Fig. 1 on page 7 to
the right
Reduce the image size
Touch screen using two fingers and closing togetherTurn the right knob 2» Fig. 1 on page 7 to
the leftMoving the image file with an enlarged displayDrag your finger over the screen in the re- quired direction
Rotate by 90 °
Touch screen using two fingers and move
clockwise or counter clockwise (only availa- ble with standard representation)Press or AOperationActionMaximum zoomDouble finger tap on the screenReturn to the original repre-
sentationDouble tap on the screen againPressing the right menu control 2 » Fig. 1 on
page 7
When browsing through folder and the first or last image file is reached the
following message appears on the screen Start/end of directory reached.
Browsing is continued from one end or the other.
Select source
›
In the menu Images press the function key
A
» Fig. 21 on page 36 .
The following menu of available sources is displayed. ■
USB - USB memory (type MSC)
■
SD card 1 - SD memory card 1
■
SD card 2 - SD memory card 2
Supported Formats
Codec type
(File formats)File suffixMax. resolution (Megapixels)BMPbmp4JP (E) Gjpg; jpeg4; 64GIFgif4PNGpng4
Note
The max. supported image file size is 20 MB.
Settings
›
In the Images menu, press the function key
.
■ Image view: - Image view settings
■ Full - Display the maximum image size while retaining the aspect ratio
■ Automatic - Full screen display
1)
Presentation of selected photographs shown in succession at defined intervals
» page 37.
37Pictures
Page 45 of 88
If there are problems with the availability of the mobile network or with the
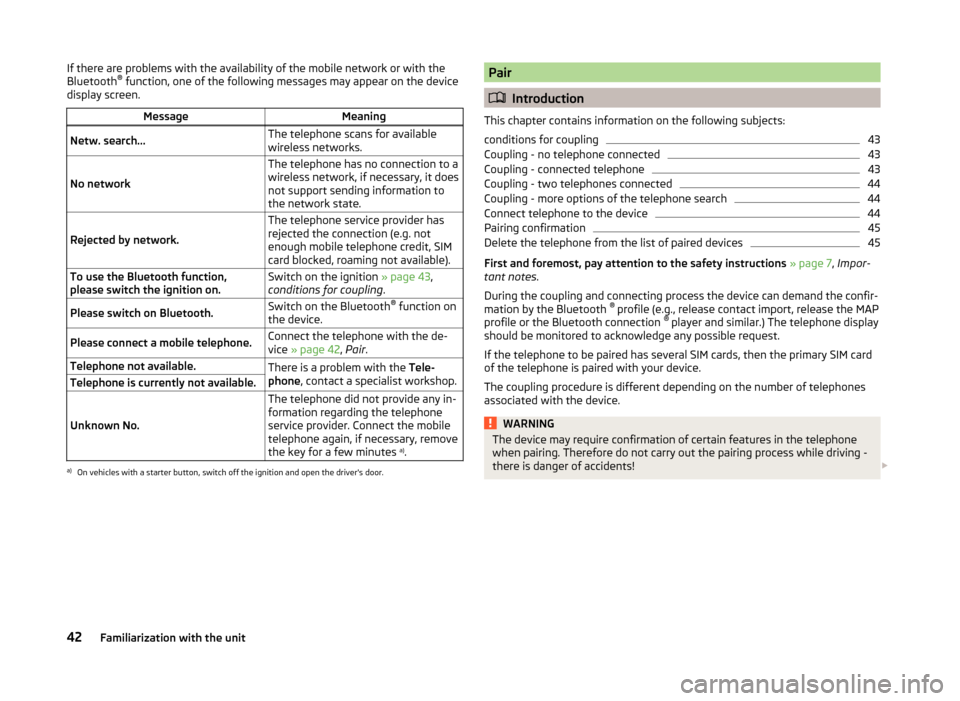
Bluetooth ®
function, one of the following messages may appear on the device
display screen.MessageMeaningNetw. search…The telephone scans for available
wireless networks.
No network
The telephone has no connection to a
wireless network, if necessary, it does
not support sending information to
the network state.
Rejected by network.
The telephone service provider has
rejected the connection (e.g. not
enough mobile telephone credit, SIM
card blocked, roaming not available).To use the Bluetooth function,
please switch the ignition on.Switch on the ignition » page 43,
conditions for coupling .Please switch on Bluetooth.Switch on the Bluetooth ®
function on
the device.Please connect a mobile telephone.Connect the telephone with the de-
vice » page 42 , Pair .Telephone not available.There is a problem with the Tele-
phone , contact a specialist workshop.Telephone is currently not available.
Unknown No.
The telephone did not provide any in-
formation regarding the telephone
service provider. Connect the mobile
telephone again, if necessary, remove
the key for a few minutes a)
.a)
On vehicles with a starter button, switch off the ignition and open the driver's door.
Pair
Introduction
This chapter contains information on the following subjects:
conditions for coupling
43
Coupling - no telephone connected
43
Coupling - connected telephone
43
Coupling - two telephones connected
44
Coupling - more options of the telephone search
44
Connect telephone to the device
44
Pairing confirmation
45
Delete the telephone from the list of paired devices
45
First and foremost, pay attention to the safety instructions » page 7 , Impor-
tant notes .
During the coupling and connecting process the device can demand the confir-
mation by the Bluetooth ®
profile (e.g., release contact import, release the MAP
profile or the Bluetooth connection ®
player and similar.) The telephone display
should be monitored to acknowledge any possible request.
If the telephone to be paired has several SIM cards, then the primary SIM card
of the telephone is paired with your device.
The coupling procedure is different depending on the number of telephones
associated with the device.
WARNINGThe device may require confirmation of certain features in the telephone
when pairing. Therefore do not carry out the pairing process while driving -
there is danger of accidents! 42Familiarization with the unit
Page 57 of 88
MirrorLink ™
Introduction
This chapter contains information on the following subjects:
Connection conditions
54
Start function
54
Operation
55
Settings
55
Function problems
55
First and foremost, pay attention to the safety instructions » page 7 , Impor-
tant notes .
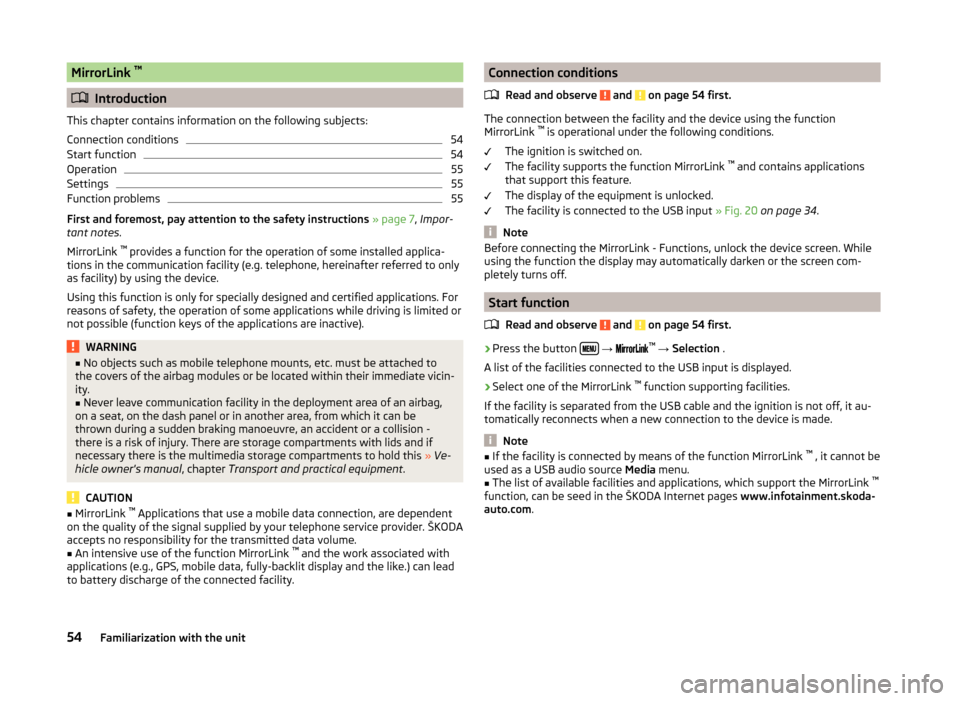
MirrorLink ™
provides a function for the operation of some installed applica-
tions in the communication facility (e.g. telephone, hereinafter referred to only
as facility) by using the device.
Using this function is only for specially designed and certified applications. For
reasons of safety, the operation of some applications while driving is limited or
not possible (function keys of the applications are inactive).
WARNING■ No objects such as mobile telephone mounts, etc. must be attached to
the covers of the airbag modules or be located within their immediate vicin-
ity.■
Never leave communication facility in the deployment area of an airbag,
on a seat, on the dash panel or in another area, from which it can be
thrown during a sudden braking manoeuvre, an accident or a collision -
there is a risk of injury. There are storage compartments with lids and if
necessary there is the multimedia storage compartments to hold this » Ve-
hicle owner's manual , chapter Transport and practical equipment .
CAUTION
■
MirrorLink ™
Applications that use a mobile data connection, are dependent
on the quality of the signal supplied by your telephone service provider. ŠKODA
accepts no responsibility for the transmitted data volume.■
An intensive use of the function MirrorLink ™
and the work associated with
applications (e.g., GPS, mobile data, fully-backlit display and the like.) can lead
to battery discharge of the connected facility.
Connection conditions
Read and observe
and on page 54 first.
The connection between the facility and the device using the function
MirrorLink ™
is operational under the following conditions.
The ignition is switched on.
The facility supports the function MirrorLink ™
and contains applications
that support this feature.
The display of the equipment is unlocked.
The facility is connected to the USB input » Fig. 20 on page 34 .
Note
Before connecting the MirrorLink - Functions, unlock the device screen. While
using the function the display may automatically darken or the screen com-
pletely turns off.
Start function
Read and observe
and on page 54 first.
›
Press the button
→
™
→ Selection .
A list of the facilities connected to the USB input is displayed.
›
Select one of the MirrorLink ™
function supporting facilities.
If the facility is separated from the USB cable and the ignition is not off, it au- tomatically reconnects when a new connection to the device is made.
Note
■ If the facility is connected by means of the function MirrorLink ™
, it cannot be
used as a USB audio source Media menu.■
The list of available facilities and applications, which support the MirrorLink ™
function, can be seed in the ŠKODA Internet pages www.infotainment.skoda-
auto.com .
54Familiarization with the unit
Page 76 of 88
Dynamic route switch on / off›
Press in the menu Navigation function key
→ Route options → Dynamic
route .
The TMC traffic reports affect the route guidance when the function Dynamic
route » page 61 is switched on.
Dynamic route guidance can also be switched on / off during active route guid-
ance.
Dynamic route switched on
Information on traffic problems which affect the route are displayed in the
map by means of a coloured symbol (e.g., ,
,
, etc.). Traffic problems,
which do not affect the route, are displayed in the map by means of a grey
symbol. The direction in which a traffic problem is found, is displayed by means
of an arrow in the symbol.
Dynamic route switched off
You are not alerted to received traffic disruptions along your route and are gui-
ded through this traffic disruption by the radio navigation system. The traffic
reports are updated automatically in the unit and displayed by pressing
.
If there is a traffic obstruction on your route the route can be locked manually
by entering a traffic jam » page 72, Route .
Note
Making a diversion from a traffic jam based on TMC traffic reports may not al-
ways offer a time advantage, e.g. if the diversion route is also congested.
Traffic report details
Pressing
causes the following information to be displayed:
■ Function key All - show all traffic information.
■ Function key Route - only display the traffic information on the current route.
■ A map showing the traffic obstruction.
■ Window with the following information.
■ Location of event, the accuracy depends on the timeliness of the naviga-
tion data.
■ Description of up to three events related to the respective information.
■ Description of the direction with respect to the event.
■ Probable duration of the event.
■ Additional information, such as probable delay time.
■
An information line, on how current the information is and on the provider
of the message.
■ Symbol that specifies the type of information.
■ - zoom in window with described traffic obstruction.
■ - zoom out window with described traffic obstruction.
■ - show previous traffic information.
■ - show the following traffic information.
■ - display list of all received traffic messages.
My tour
Introduction
This chapter contains information on the following subjects:
New Tour / Tour editing
73
Tour memory
74
First and foremost, pay attention to the safety instructions » page 7 , Impor-
tant notes .
This chapter discusses the procedure for route entry and route processing or
storage.
New Tour / Tour editing
Fig. 43
Enter a new route / route processing
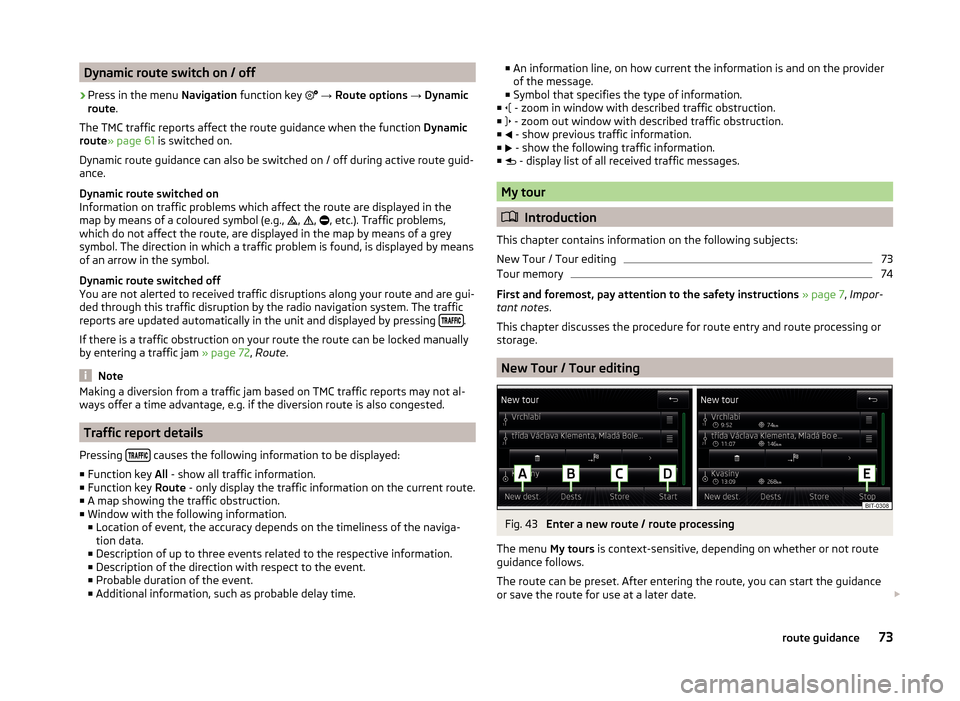
The menu My tours is context-sensitive, depending on whether or not route
guidance follows.
The route can be preset. After entering the route, you can start the guidance
or save the route for use at a later date.
73route guidance