SUBARU BRZ 2022 Getting Started Guide
Manufacturer: SUBARU, Model Year: 2022, Model line: BRZ, Model: SUBARU BRZ 2022Pages: 108, PDF Size: 29.44 MB
Page 31 of 108
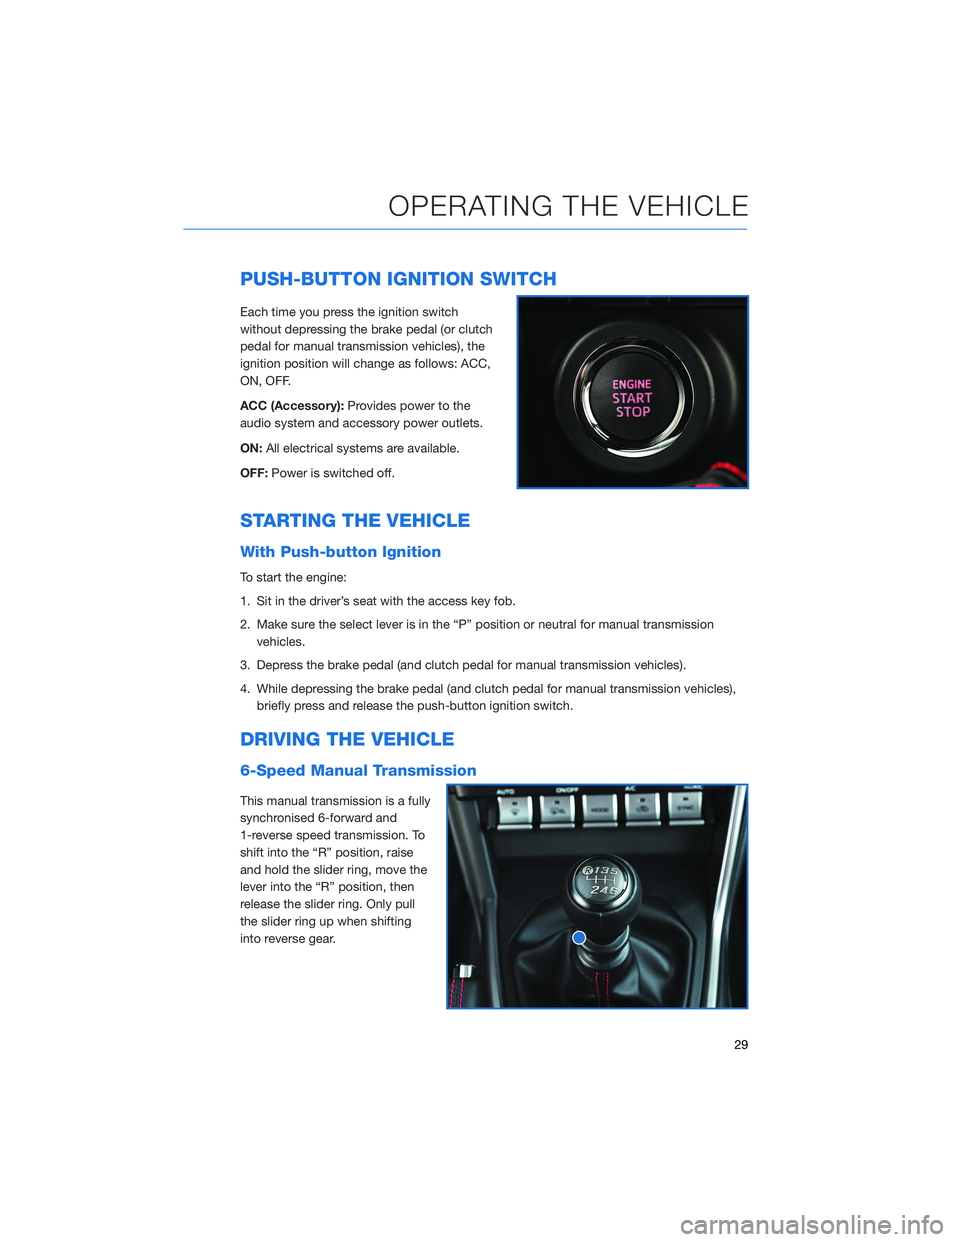
PUSH-BUTTON IGNITION SWITCH
Each time you press the ignition switch
without depressing the brake pedal (or clutch
pedal for manual transmission vehicles), the
ignition position will change as follows: ACC,
ON, OFF.
ACC (Accessory):Provides power to the
audio system and accessory power outlets.
ON:All electrical systems are available.
OFF:Power is switched off.
STARTING THE VEHICLE
With Push-button Ignition
To start the engine:
1. Sit in the driver’s seat with the access key fob.
2. Make sure the select lever is in the “P” position or neutral for manual transmission
vehicles.
3. Depress the brake pedal (and clutch pedal for manual transmission vehicles).
4. While depressing the brake pedal (and clutch pedal for manual transmission vehicles),
briefly press and release the push-button ignition switch.
DRIVING THE VEHICLE
6-Speed Manual Transmission
This manual transmission is a fully
synchronised 6-forward and
1-reverse speed transmission. To
shift into the “R” position, raise
and hold the slider ring, move the
lever into the “R” position, then
release the slider ring. Only pull
the slider ring up when shifting
into reverse gear.
OPERATING THE VEHICLE
29
Page 32 of 108
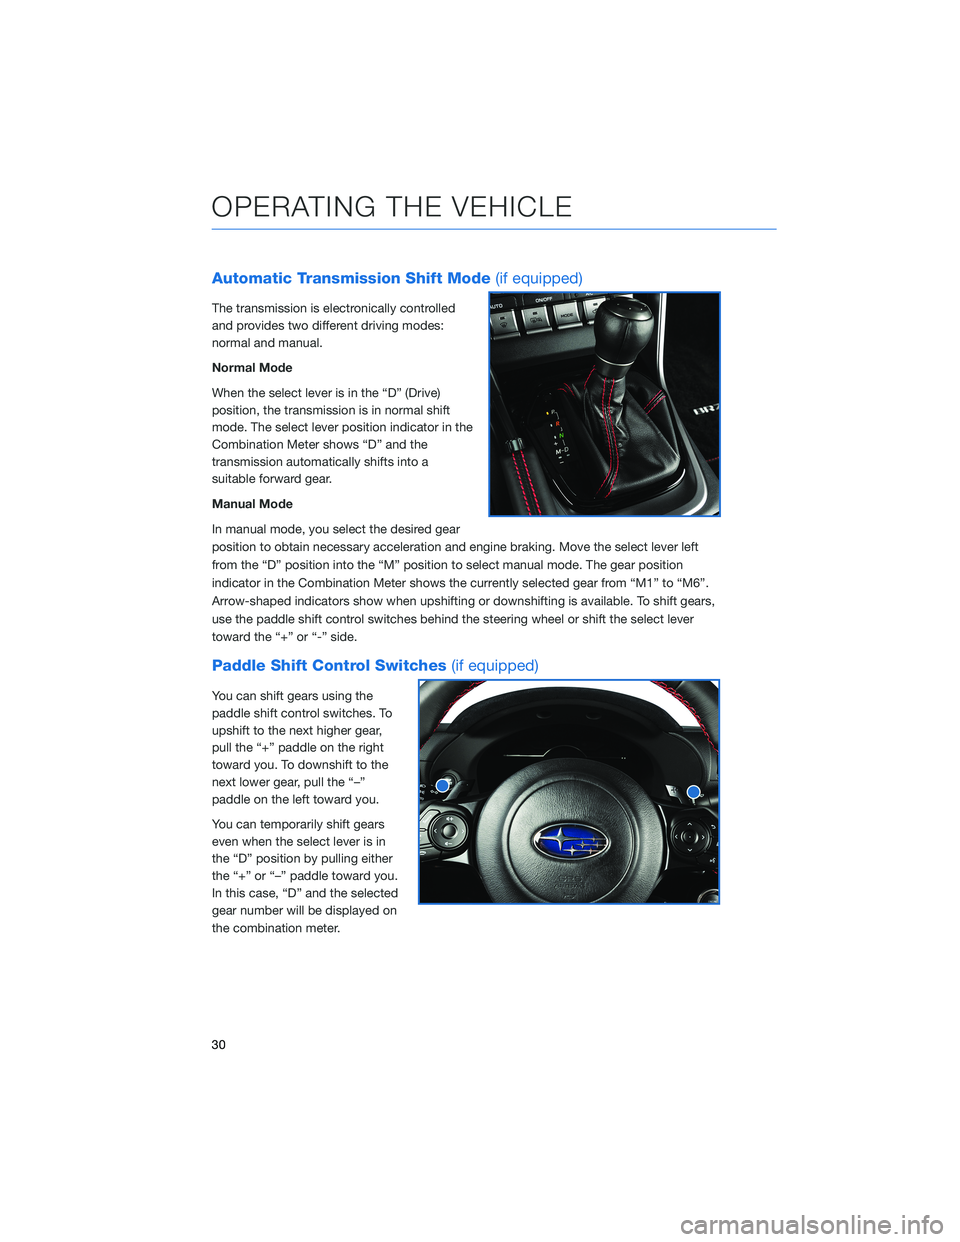
Automatic Transmission Shift Mode(if equipped)
The transmission is electronically controlled
and provides two different driving modes:
normal and manual.
Normal Mode
When the select lever is in the “D” (Drive)
position, the transmission is in normal shift
mode. The select lever position indicator in the
Combination Meter shows “D” and the
transmission automatically shifts into a
suitable forward gear.
Manual Mode
In manual mode, you select the desired gear
position to obtain necessary acceleration and engine braking. Move the select lever left
from the “D” position into the “M” position to select manual mode. The gear position
indicator in the Combination Meter shows the currently selected gear from “M1” to “M6”.
Arrow-shaped indicators show when upshifting or downshifting is available. To shift gears,
use the paddle shift control switches behind the steering wheel or shift the select lever
toward the “+” or “-” side.
Paddle Shift Control Switches(if equipped)
You can shift gears using the
paddle shift control switches. To
upshift to the next higher gear,
pull the “+” paddle on the right
toward you. To downshift to the
next lower gear, pull the “–”
paddle on the left toward you.
You can temporarily shift gears
even when the select lever is in
the “D” position by pulling either
the “+” or “–” paddle toward you.
In this case, “D” and the selected
gear number will be displayed on
the combination meter.
OPERATING THE VEHICLE
30
Page 33 of 108
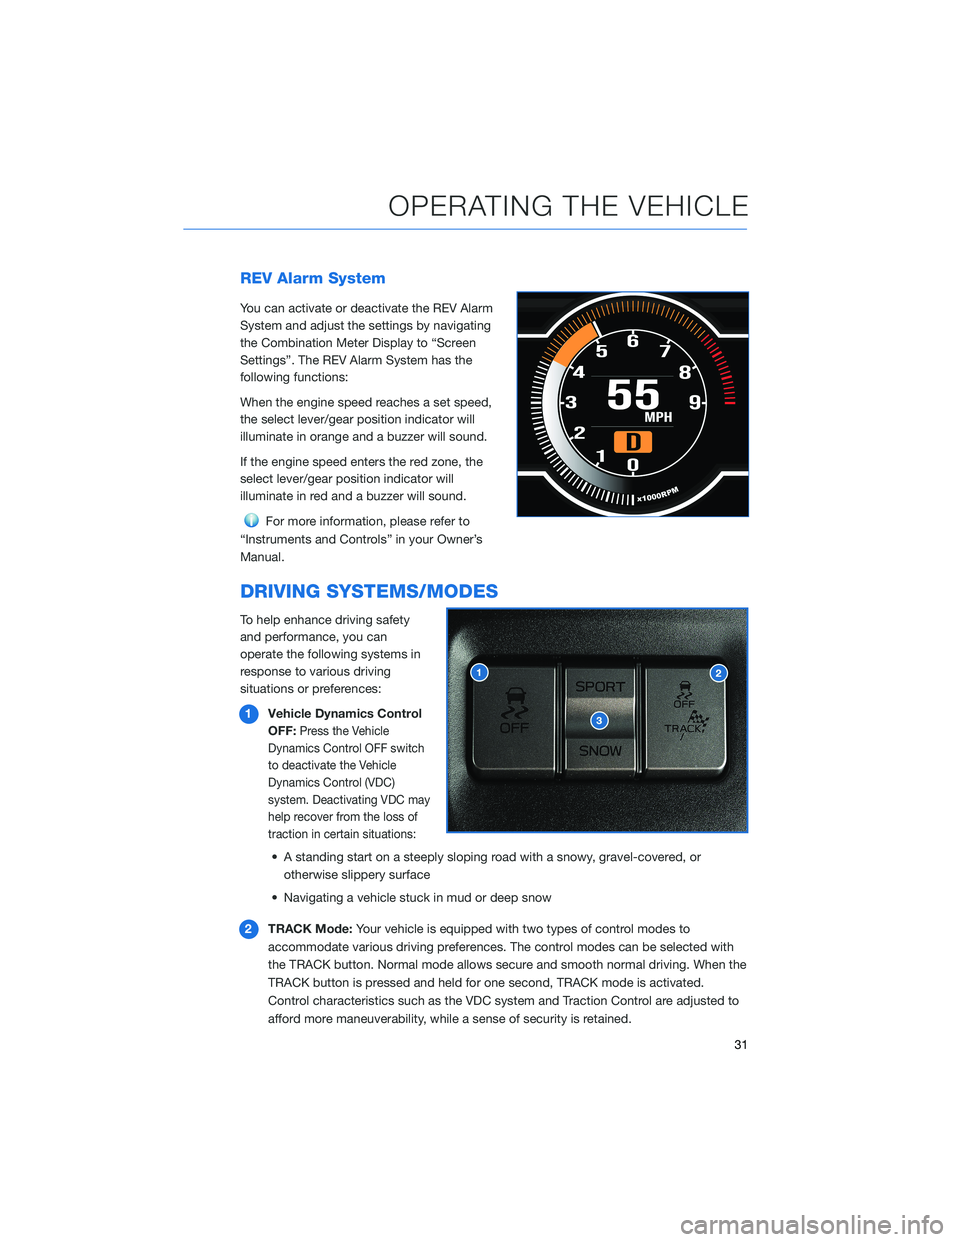
REV Alarm System
You can activate or deactivate the REV Alarm
System and adjust the settings by navigating
the Combination Meter Display to “Screen
Settings”. The REV Alarm System has the
following functions:
When the engine speed reaches a set speed,
the select lever/gear position indicator will
illuminate in orange and a buzzer will sound.
If the engine speed enters the red zone, the
select lever/gear position indicator will
illuminate in red and a buzzer will sound.
For more information, please refer to
“Instruments and Controls” in your Owner’s
Manual.
DRIVING SYSTEMS/MODES
To help enhance driving safety
and performance, you can
operate the following systems in
response to various driving
situations or preferences:
1Vehicle Dynamics Control
OFF:
Press the Vehicle
Dynamics Control OFF switch
to deactivate the Vehicle
Dynamics Control (VDC)
system. Deactivating VDC may
help recover from the loss of
traction in certain situations:
• A standing start on a steeply sloping road with a snowy, gravel-covered, or
otherwise slippery surface
• Navigating a vehicle stuck in mud or deep snow
2TRACK Mode:Your vehicle is equipped with two types of control modes to
accommodate various driving preferences. The control modes can be selected with
the TRACK button. Normal mode allows secure and smooth normal driving. When the
TRACK button is pressed and held for one second, TRACK mode is activated.
Control characteristics such as the VDC system and Traction Control are adjusted to
afford more maneuverability, while a sense of security is retained.
OPERATING THE VEHICLE
31
Page 34 of 108
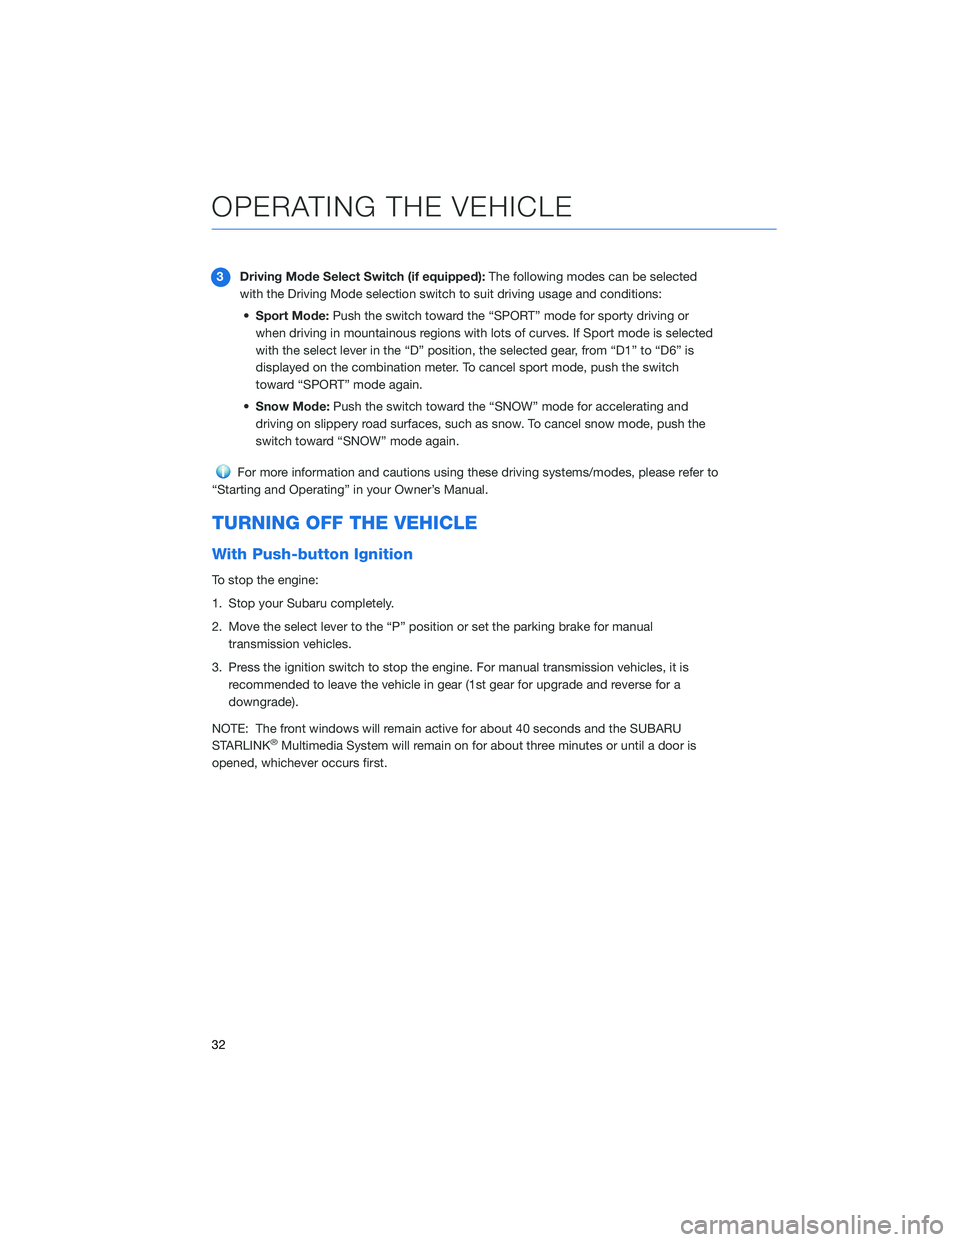
3Driving Mode Select Switch (if equipped):The following modes can be selected
with the Driving Mode selection switch to suit driving usage and conditions:
•Sport Mode:Push the switch toward the “SPORT” mode for sporty driving or
when driving in mountainous regions with lots of curves. If Sport mode is selected
with the select lever in the “D” position, the selected gear, from “D1” to “D6” is
displayed on the combination meter. To cancel sport mode, push the switch
toward “SPORT” mode again.
•Snow Mode:Push the switch toward the “SNOW” mode for accelerating and
driving on slippery road surfaces, such as snow. To cancel snow mode, push the
switch toward “SNOW” mode again.
For more information and cautions using these driving systems/modes, please refer to
“Starting and Operating” in your Owner’s Manual.
TURNING OFF THE VEHICLE
With Push-button Ignition
To stop the engine:
1. Stop your Subaru completely.
2. Move the select lever to the “P” position or set the parking brake for manual
transmission vehicles.
3. Press the ignition switch to stop the engine. For manual transmission vehicles, it is
recommended to leave the vehicle in gear (1st gear for upgrade and reverse for a
downgrade).
NOTE: The front windows will remain active for about 40 seconds and the SUBARU
STARLINK
®Multimedia System will remain on for about three minutes or until a door is
opened, whichever occurs first.
OPERATING THE VEHICLE
32
Page 35 of 108
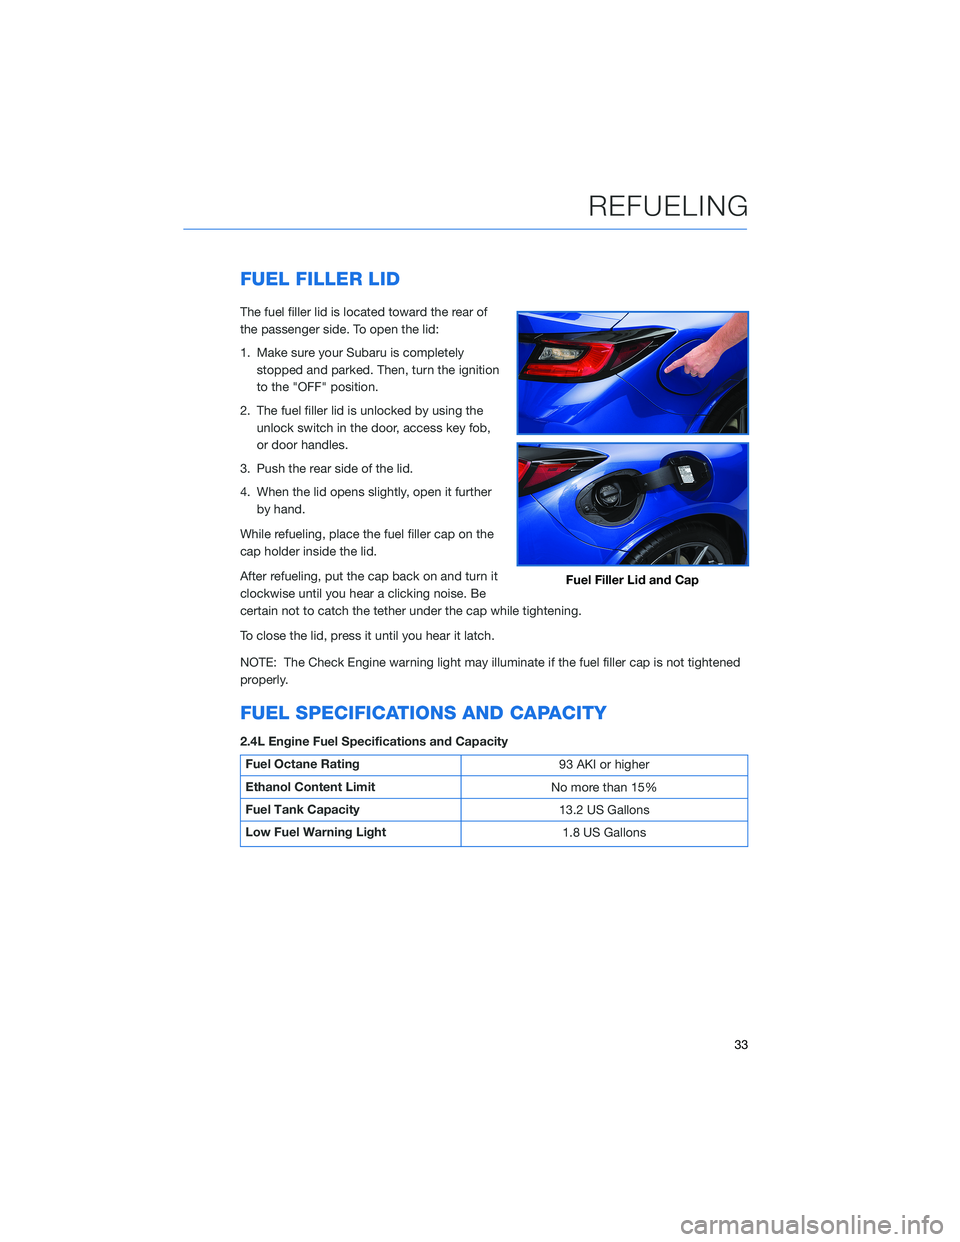
FUEL FILLER LID
The fuel filler lid is located toward the rear of
the passenger side. To open the lid:
1. Make sure your Subaru is completely
stopped and parked. Then, turn the ignition
to the "OFF" position.
2. The fuel filler lid is unlocked by using the
unlock switch in the door, access key fob,
or door handles.
3. Push the rear side of the lid.
4. When the lid opens slightly, open it further
by hand.
While refueling, place the fuel filler cap on the
cap holder inside the lid.
After refueling, put the cap back on and turn it
clockwise until you hear a clicking noise. Be
certain not to catch the tether under the cap while tightening.
To close the lid, press it until you hear it latch.
NOTE: The Check Engine warning light may illuminate if the fuel filler cap is not tightened
properly.
FUEL SPECIFICATIONS AND CAPACITY
2.4L Engine Fuel Specifications and Capacity
Fuel Octane Rating
93 AKI or higher
Ethanol Content Limit
No more than 15%
Fuel Tank Capacity
13.2 US Gallons
Low Fuel Warning Light
1.8 US Gallons
Fuel Filler Lid and Cap
REFUELING
33
Page 36 of 108
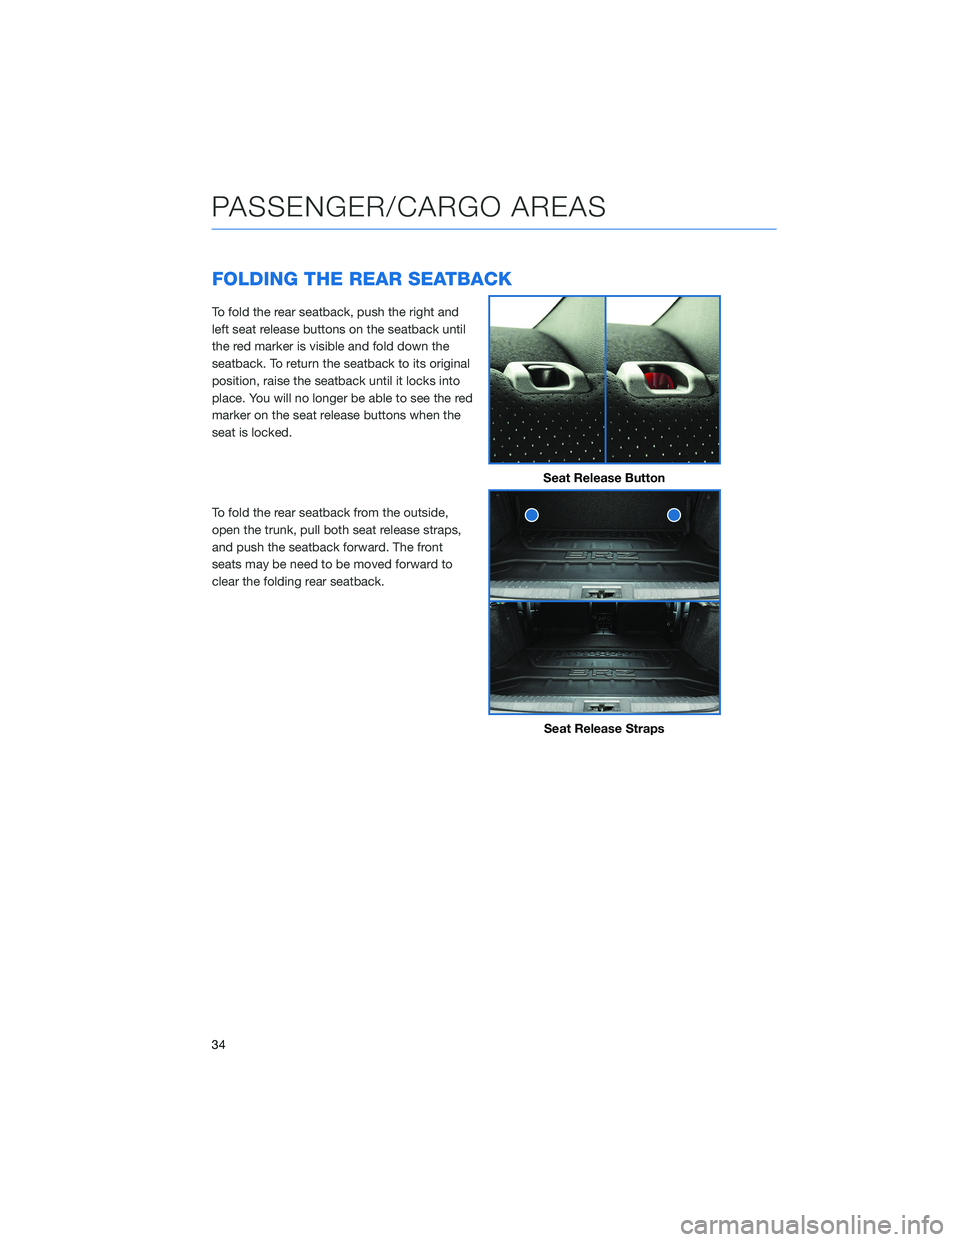
FOLDING THE REAR SEATBACK
To fold the rear seatback, push the right and
left seat release buttons on the seatback until
the red marker is visible and fold down the
seatback. To return the seatback to its original
position, raise the seatback until it locks into
place. You will no longer be able to see the red
marker on the seat release buttons when the
seat is locked.
To fold the rear seatback from the outside,
open the trunk, pull both seat release straps,
and push the seatback forward. The front
seats may be need to be moved forward to
clear the folding rear seatback.
Seat Release Button
Seat Release Straps
PASSENGER/CARGO AREAS
34
Page 37 of 108
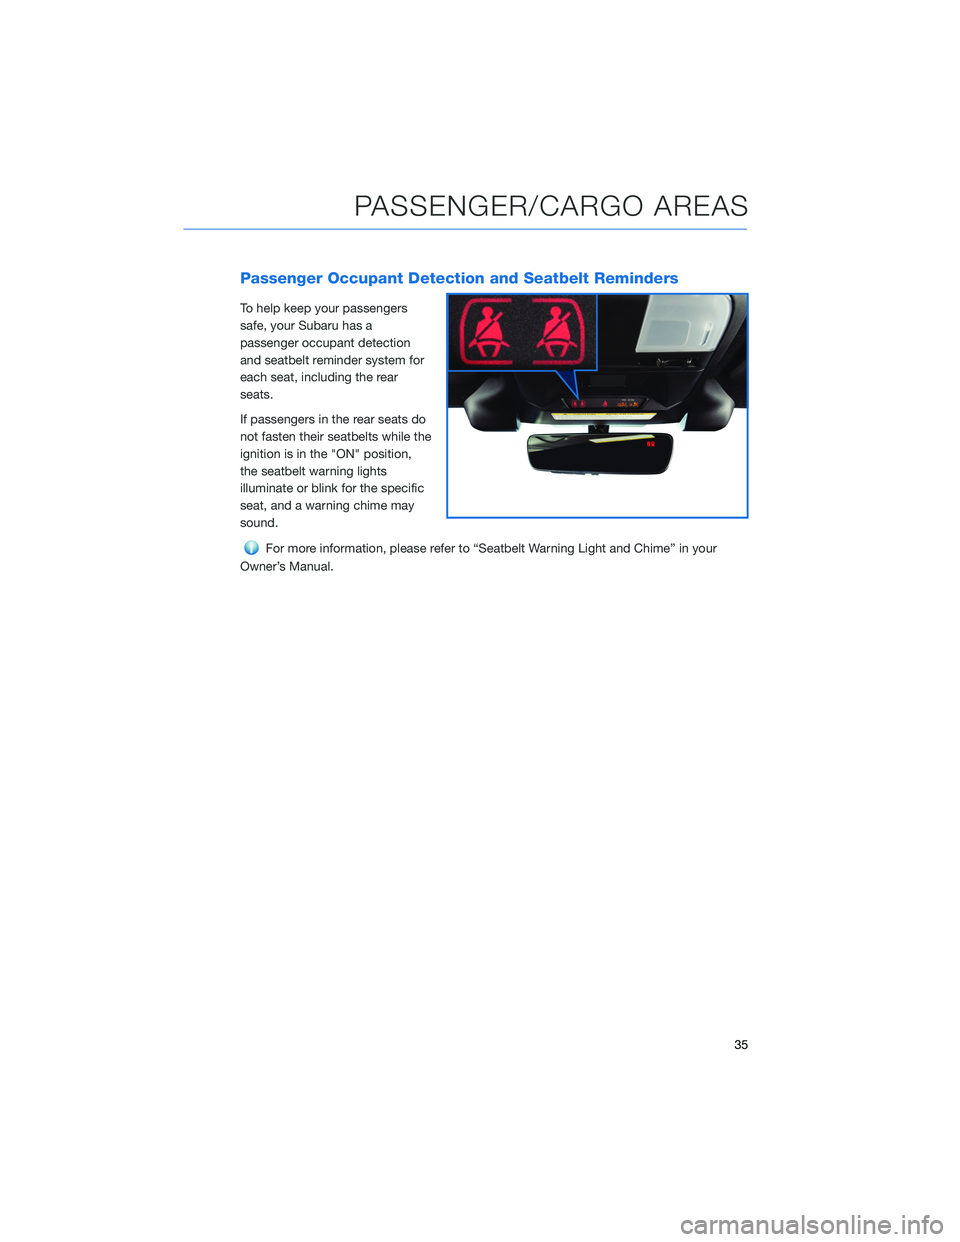
Passenger Occupant Detection and Seatbelt Reminders
To help keep your passengers
safe, your Subaru has a
passenger occupant detection
and seatbelt reminder system for
each seat, including the rear
seats.
If passengers in the rear seats do
not fasten their seatbelts while the
ignition is in the "ON" position,
the seatbelt warning lights
illuminate or blink for the specific
seat, and a warning chime may
sound.
For more information, please refer to “Seatbelt Warning Light and Chime” in your
Owner’s Manual.
PASSENGER/CARGO AREAS
35
Page 38 of 108
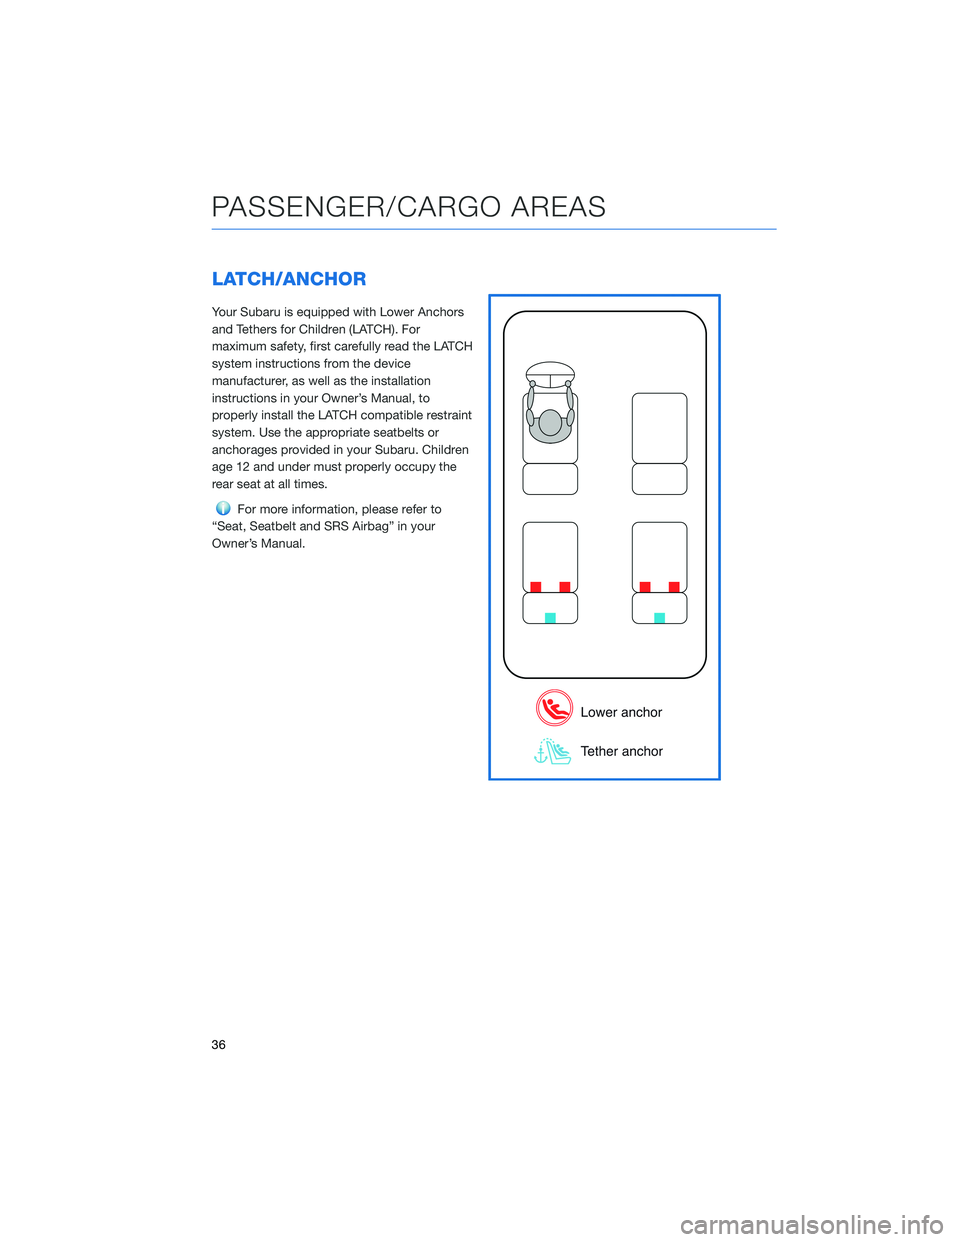
LATCH/ANCHOR
Your Subaru is equipped with Lower Anchors
and Tethers for Children (LATCH). For
maximum safety, first carefully read the LATCH
system instructions from the device
manufacturer, as well as the installation
instructions in your Owner’s Manual, to
properly install the LATCH compatible restraint
system. Use the appropriate seatbelts or
anchorages provided in your Subaru. Children
age 12 and under must properly occupy the
rear seat at all times.
For more information, please refer to
“Seat, Seatbelt and SRS Airbag” in your
Owner’s Manual.
PASSENGER/CARGO AREAS
36
Page 39 of 108
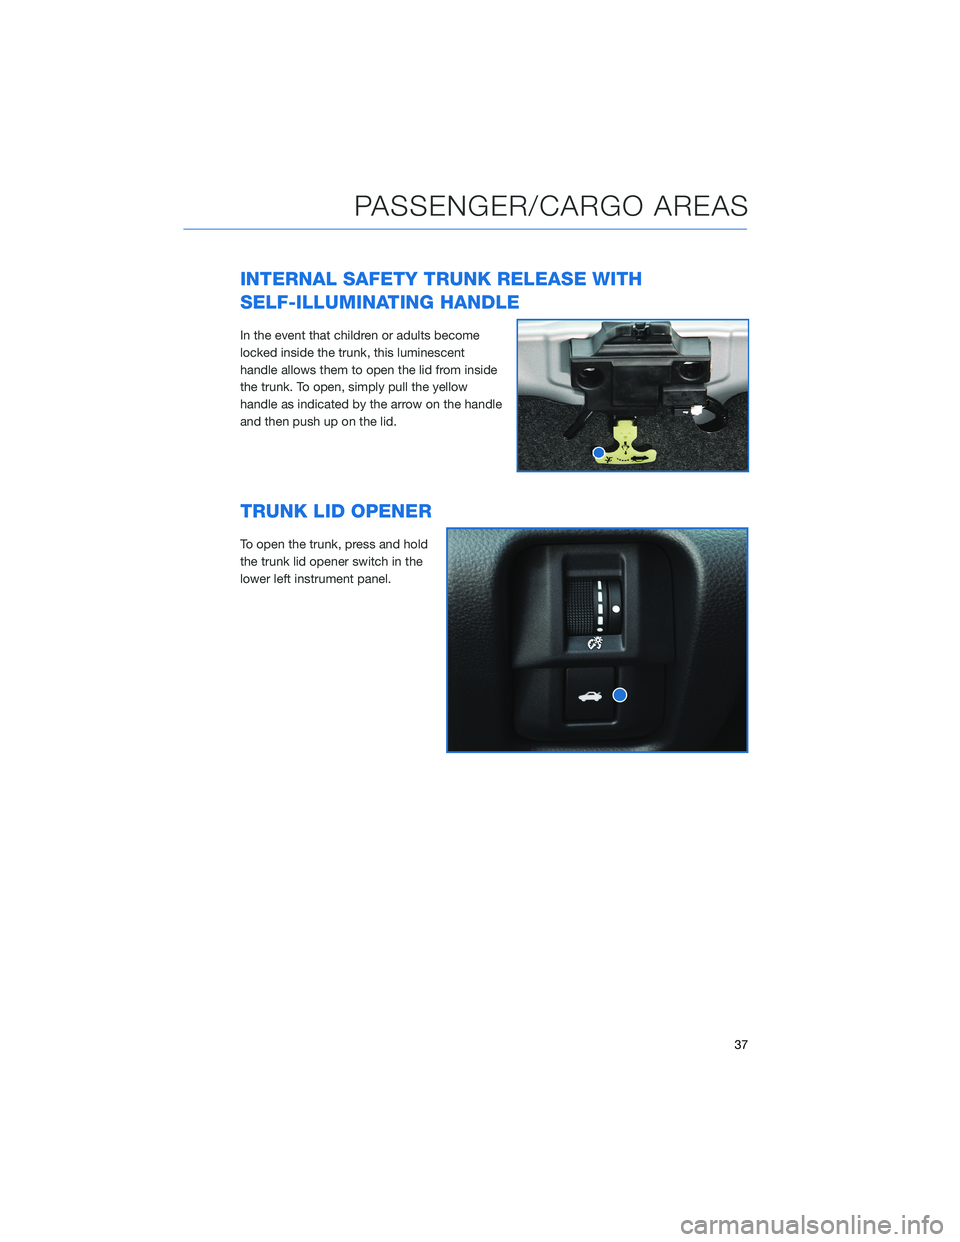
INTERNAL SAFETY TRUNK RELEASE WITH
SELF-ILLUMINATING HANDLE
In the event that children or adults become
locked inside the trunk, this luminescent
handle allows them to open the lid from inside
the trunk. To open, simply pull the yellow
handle as indicated by the arrow on the handle
and then push up on the lid.
TRUNK LID OPENER
To open the trunk, press and hold
the trunk lid opener switch in the
lower left instrument panel.
PASSENGER/CARGO AREAS
37
Page 40 of 108
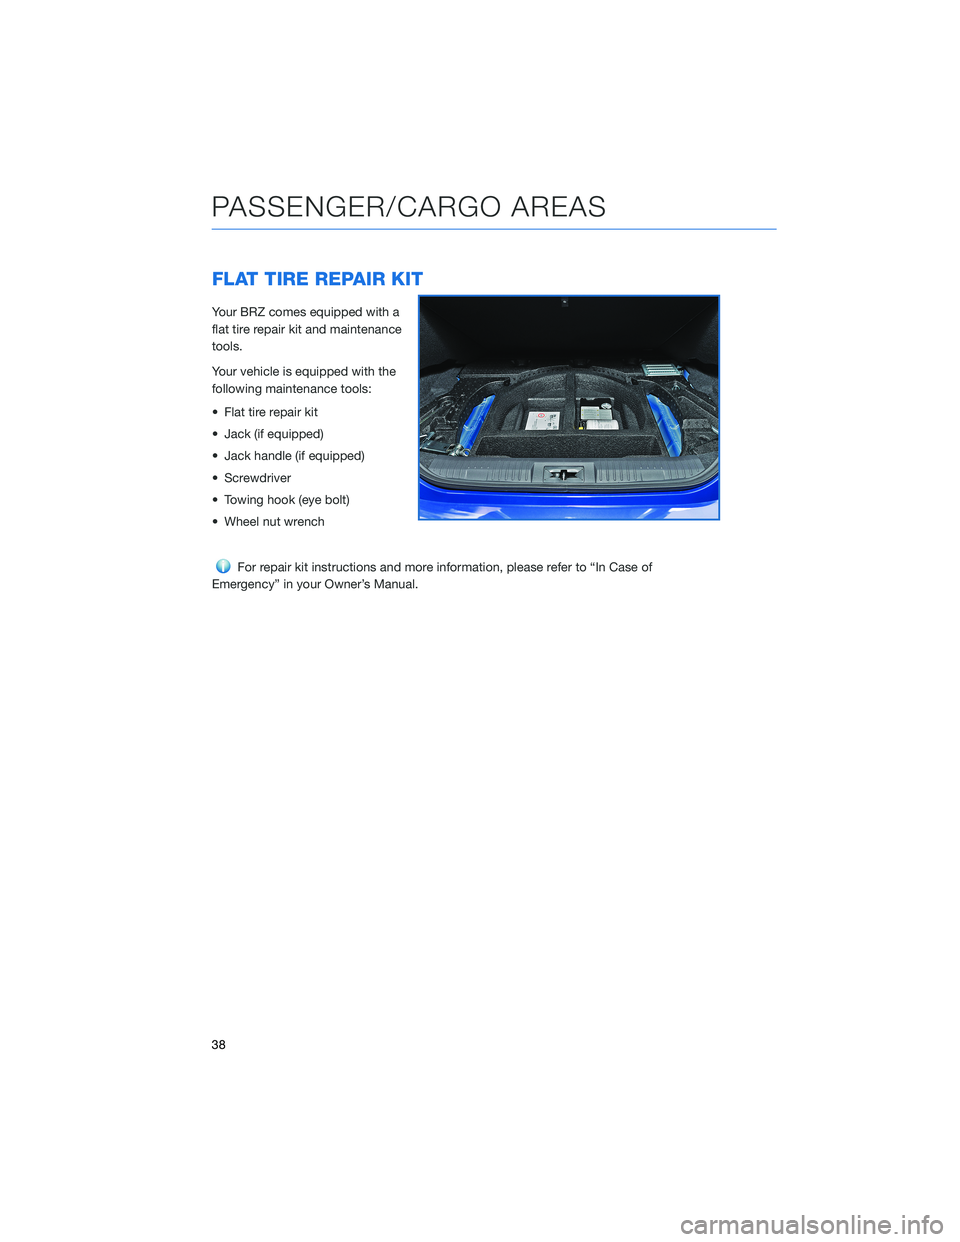
FLAT TIRE REPAIR KIT
Your BRZ comes equipped with a
flat tire repair kit and maintenance
tools.
Your vehicle is equipped with the
following maintenance tools:
• Flat tire repair kit
• Jack (if equipped)
• Jack handle (if equipped)
• Screwdriver
• Towing hook (eye bolt)
• Wheel nut wrench
For repair kit instructions and more information, please refer to “In Case of
Emergency” in your Owner’s Manual.
PASSENGER/CARGO AREAS
38