key SUBARU WRX 2016 Service Manual
[x] Cancel search | Manufacturer: SUBARU, Model Year: 2016, Model line: WRX, Model: SUBARU WRX 2016Pages: 594, PDF Size: 19.43 MB
Page 124 of 594
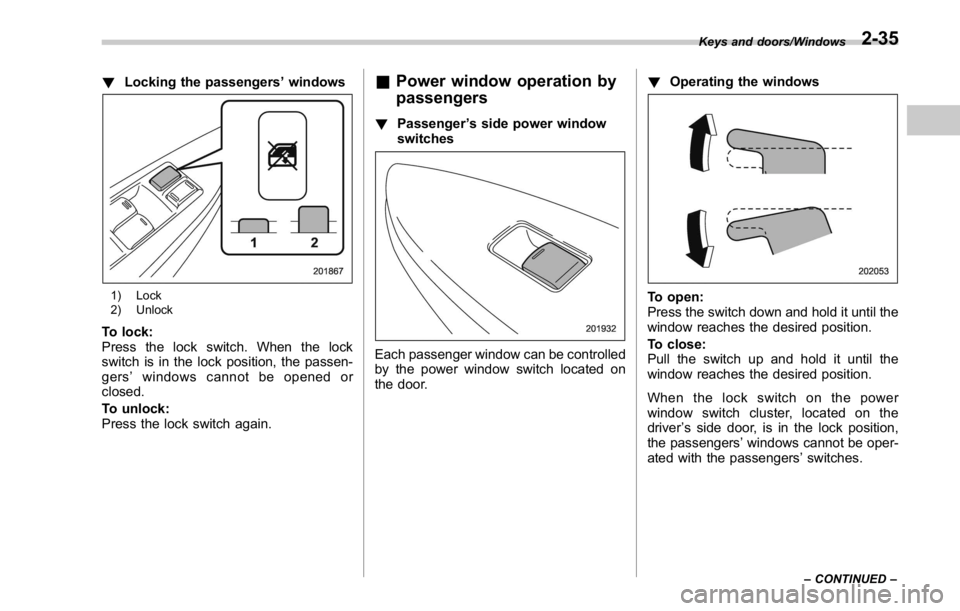
! Locking the passengers ’ windows
1) Lock
2) Unlock
To lock:
Press the lock switch. When the lock
switch is in the lock position, the passen-
gers ’ windows cannot be opened or
closed.
To unlock:
Press the lock switch again. & Power window operation by
passengers ! Passenger ’ s side power window
switches
Each passenger window can be controlled
by the power window switch located on
the door. ! Operating the windows
To open:
Press the switch down and hold it until the
window reaches the desired position.
To close:
Pull the switch up and hold it until the
window reaches the desired position.
When the lock switch on the power
window switch cluster, located on the
driver ’ s side door, is in the lock position,
the passengers ’ windows cannot be oper-
ated with the passengers ’ switches.Keys and doors/Windows
– CONTINUED –2-35
Page 125 of 594
Keys and doors/Trunk lid
& Initialization of power win-
dowIf the vehicle ’ s battery is disconnected due
to situations such as battery or fuse
replacement, the following functions will
be deactivated.
. One-touch auto up/down function
. Anti-entrapment function
Initialize the power window using the
following procedure to reactivate these
functions.
1. Close the driver ’ s door.
2. Turn the ignition switch to the “ ON ”
position.
3. Open the driver ’ s side window halfway
by pushing down the power window
switch.
4. Pull up the power window switch and
close the window completely. Continue
pulling up the switch for approximately 1
second after the window is closed com-
pletely.
5. Open the driver ’ s side window com-
pletely by fully pushing down the power
windows switch. Trunk lid WARNING. To prevent dangerous exhaust
gas from entering the vehicle,
always keep the trunk lid closed
while driving.
. Help prevent children, adults or
animals from locking themselves
in the trunk. On hot or sunny
days, the temperature in the
trunk could quickly become high
enough to cause death or serious
heat-related injuries including
brain damage to anyone locked
inside, particularly for small chil-
dren.
. When leaving the vehicle, close
all windows and lock all doors.
Also make certain that the trunk
is closed.
& To open and close the trunk
lid from outside The trunk lid can be opened using the
keyless access function or remote keyless
entry system. For details, refer to the
following section.
. For models with “ keyless access with push-button start system ” , refer to “ Open-
ing trunk ” F 2-15.
. For models without “ keyless access
with push-button start system ” , refer to
“ Opening the trunk lid ” F 2-23.
To close the trunk lid, lightly press the
trunk lid down until the latch engages.
NOTE Do not leave your valuables in the
trunk when you leave your vehicle.
& To open the trunk lid from
inside
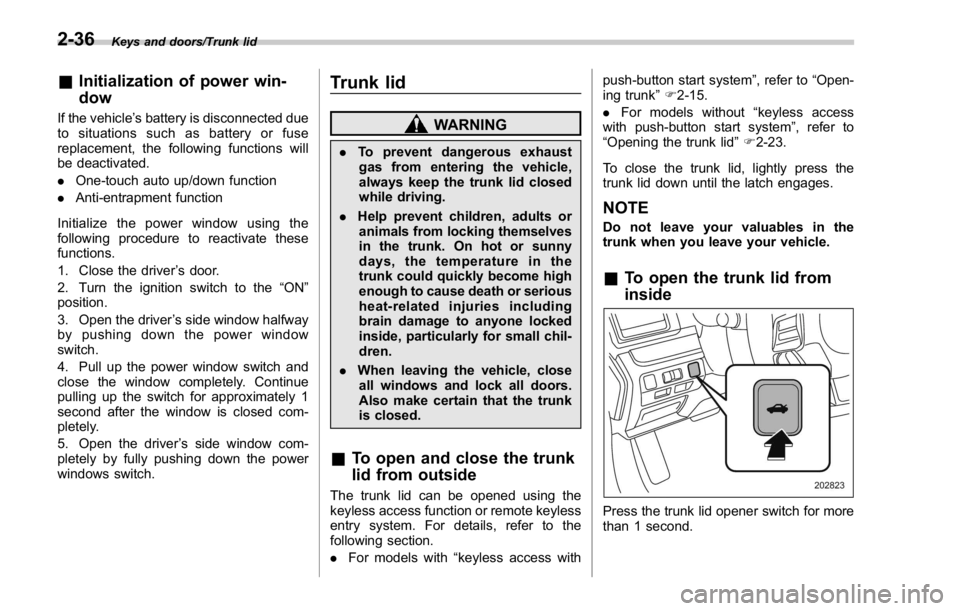
Press the trunk lid opener switch for more
than 1 second.2-36
Page 126 of 594
NOTE The trunk lid will not open when the
select lever is in a position other than
the “ P ” position (CVT models) or the
vehicle is moving.
& Internal trunk lid release
handle The internal trunk lid release handle is a
device designed to open the trunk lid from
inside the trunk. In the event children or
adults become locked inside the trunk, the
handle allows them to open the lid. The
handle is located on the inside of the trunk
lid.
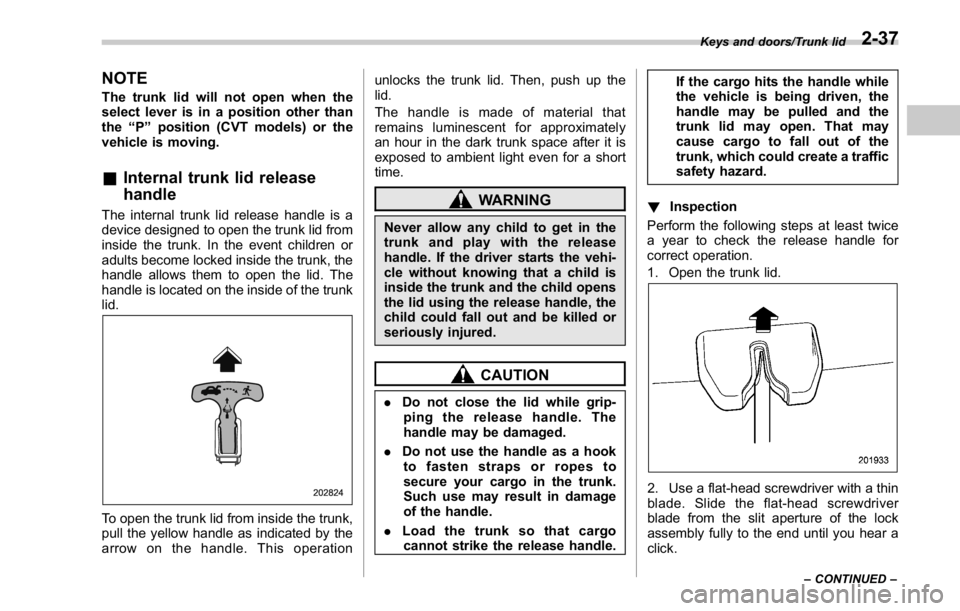
To open the trunk lid from inside the trunk,
pull the yellow handle as indicated by the
arrow on the handle. This operation unlocks the trunk lid. Then, push up the
lid.
The handle is made of material that
remains luminescent for approximately
an hour in the dark trunk space after it is
exposed to ambient light even for a short
time.
WARNINGNever allow any child to get in the
trunk and play with the release
handle. If the driver starts the vehi-
cle without knowing that a child is
inside the trunk and the child opens
the lid using the release handle, the
child could fall out and be killed or
seriously injured.
CAUTION
. Do not close the lid while grip-
ping the release handle. The
handle may be damaged.
. Do not use the handle as a hook
to fasten straps or ropes to
secure your cargo in the trunk.
Such use may result in damage
of the handle.
. Load the trunk so that cargo
cannot strike the release handle. If the cargo hits the handle while
the vehicle is being driven, the
handle may be pulled and the
trunk lid may open. That may
cause cargo to fall out of the
trunk, which could create a traffic
safety hazard.
! Inspection
Perform the following steps at least twice
a year to check the release handle for
correct operation.
1. Open the trunk lid.
2. Use a flat-head screwdriver with a thin
blade. Slide the flat-head screwdriver
blade from the slit aperture of the lock
assembly fully to the end until you hear a
click. Keys and doors/Trunk lid
– CONTINUED –2-37
Page 127 of 594
Keys and doors/Moonroof
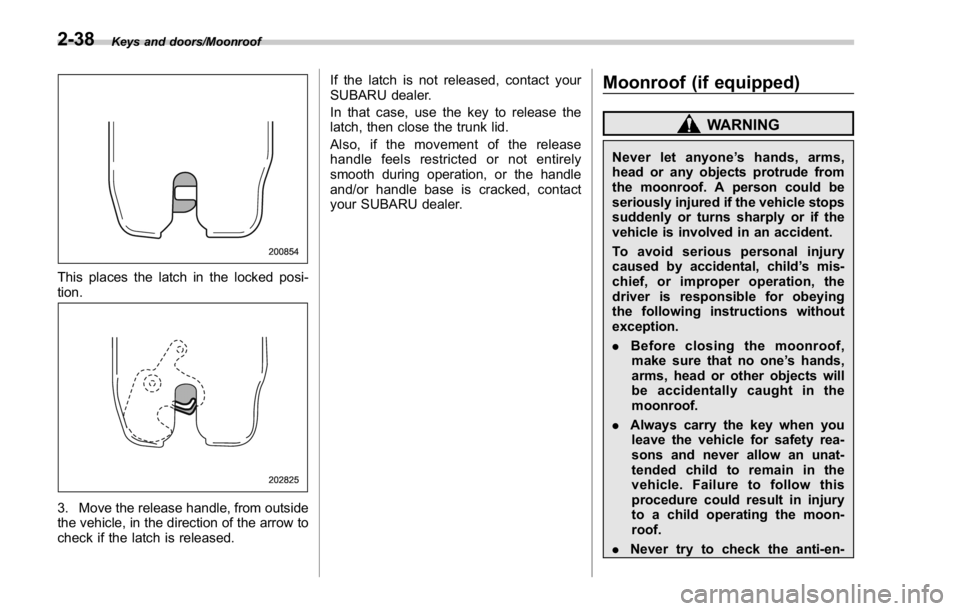
This places the latch in the locked posi-
tion.
3. Move the release handle, from outside
the vehicle, in the direction of the arrow to
check if the latch is released. If the latch is not released, contact your
SUBARU dealer.
In that case, use the key to release the
latch, then close the trunk lid.
Also, if the movement of the release
handle feels restricted or not entirely
smooth during operation, or the handle
and/or handle base is cracked, contact
your SUBARU dealer.
Moonroof (if equipped) WARNINGNever let anyone ’ shands,arms,
head or any objects protrude from
the moonroof. A person could be
seriously injured if the vehicle stops
suddenly or turns sharply or if the
vehicle is involved in an accident.
To avoid serious personal injury
caused by accidental, child ’ s mis-
chief, or improper operation, the
driver is responsible for obeying
the following instructions without
exception.
. Before closing the moonroof,
make sure that no one ’ s hands,
arms, head or other objects will
be accidentally caught in the
moonroof.
. Always carry the key when you
leave the vehicle for safety rea-
sons and never allow an unat-
tended child to remain in the
vehicle. Failure to follow this
procedure could result in injury
to a child operating the moon-
roof.
. Never try to check the anti-en-2-38
Page 128 of 594
trapment function by deliberately
placing part of your body in the
moonroof.
CAUTION. Do not sit on the edge of the open
moonroof.
. Do not operate the moonroof if
falling snow or extremely cold
conditions have caused it to
freeze shut.
. The anti-entrapment function
does not operate when the moon-
roof is being tilted down. Be sure
to confirm that it is safe to do so
before tilting the moonroof down.
. If the moonroof does not close,
we recommend that you have the
system checked by a SUBARU
dealer.
The moonroof has both tilting and sliding
functions.
The moonroof operates only when the
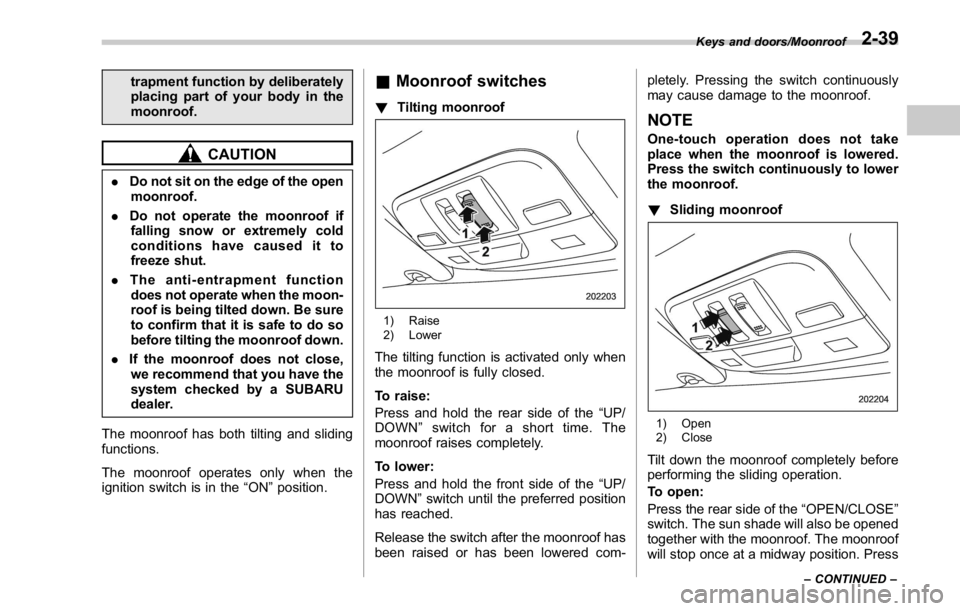
ignition switch is in the “ ON ” position. & Moonroof switches ! Tilting moonroof
1) Raise
2) Lower
The tilting function is activated only when
the moonroof is fully closed.
To raise:
Press and hold the rear side of the “ UP/
DOWN ” switch for a short time. The
moonroof raises completely.
To lower:
Press and hold the front side of the “ UP/
DOWN ” switch until the preferred position
has reached.
Release the switch after the moonroof has
been raised or has been lowered com- pletely. Pressing the switch continuously
may cause damage to the moonroof.
NOTE One-touch operation does not take
place when the moonroof is lowered.
Press the switch continuously to lower
the moonroof.
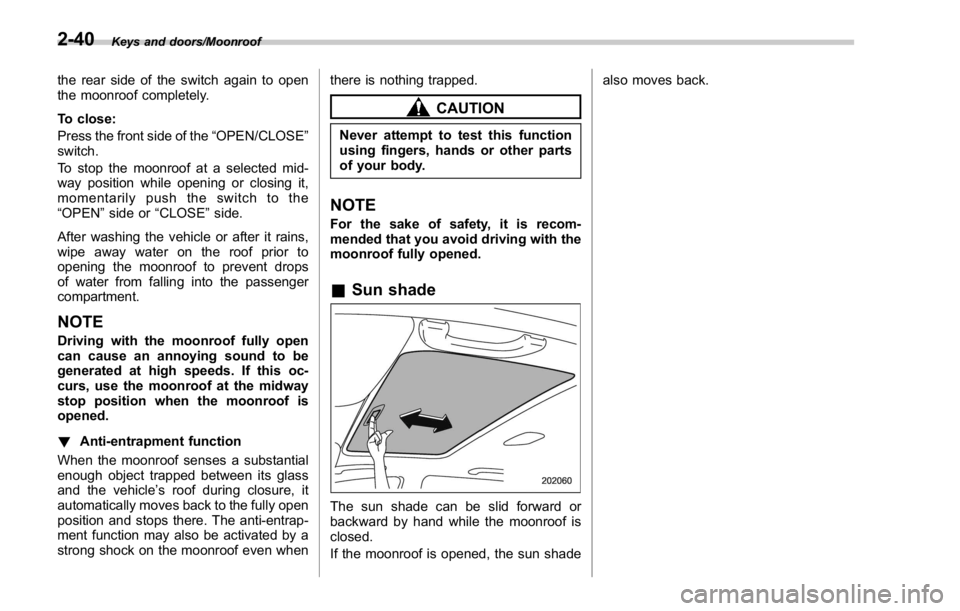
! Sliding moonroof
1) Open
2) Close
Tilt down the moonroof completely before
performing the sliding operation.
To open:
Press the rear side of the “ OPEN/CLOSE ”
switch. The sun shade will also be opened
together with the moonroof. The moonroof
will stop once at a midway position. Press Keys and doors/Moonroof
– CONTINUED –2-39
Page 129 of 594
Keys and doors/Moonroof
the rear side of the switch again to open
the moonroof completely.
To close:
Press the front side of the “ OPEN/CLOSE ”
switch.
To stop the moonroof at a selected mid-
way position while opening or closing it,
momentarily push the switch to the
“ OPEN ” side or “ CLOSE ” side.
After washing the vehicle or after it rains,
wipe away water on the roof prior to
opening the moonroof to prevent drops
of water from falling into the passenger
compartment.
NOTE Driving with the moonroof fully open
can cause an annoying sound to be
generated at high speeds. If this oc-
curs, use the moonroof at the midway
stop position when the moonroof is
opened.
! Anti-entrapment function
When the moonroof senses a substantial
enough object trapped between its glass
and the vehicle ’ s roof during closure, it
automatically moves back to the fully open
position and stops there. The anti-entrap-
ment function may also be activated by a
strong shock on the moonroof even when there is nothing trapped.
CAUTIONNever attempt to test this function
using fingers, hands or other parts
of your body.
NOTE For the sake of safety, it is recom-
mended that you avoid driving with the
moonroof fully opened.
& Sun shade
The sun shade can be slid forward or
backward by hand while the moonroof is
closed.
If the moonroof is opened, the sun shade also moves back.
2-40
Page 130 of 594

Ignition switch (models without push-
button start system) ......................................... 3-4LOCK .................................................................. 3-4
ACC.................................................................... 3-5
ON...................................................................... 3-5
START ................................................................ 3-5
Key reminder chime ............................................ 3-5
Ignition switch light ............................................. 3-6
Push-button ignition switch (models with
push-button start system) ............................... 3-6Safety precautions .............................................. 3-6
Operating range for push-button start system ...... 3-6
Switching power ................................................. 3-7
When access key does not operate properly ........ 3-8
Hazard warning flasher ....................................... 3-8
Meters and gauges. ............................................. 3-8Combination meter illumination ........................... 3-8
Canceling the function for meter/gauge needle
movement upon turning on the ignition
switch ............................................................... 3-9
Speedometer ....................................................... 3-9
Odometer ............................................................ 3-9
Double trip meter ................................................ 3-9
Tachometer ........................................................ 3-10
Fuel gauge ......................................................... 3-10
Temperature gauge ............................................ 3-11
ECO gauge ........................................................ 3-12
REV indicator light and buzzer (STI). ................ 3-12
Warning and indicator lights ............................. 3-13
Seatbelt warning light and chime ........................ 3-14
SRS airbag system warning light ........................ 3-15 Front passenger ’ s frontal airbag ON and OFF
indicators ........................................................ 3-16
CHECK ENGINE warning light/Malfunction
indicator light .................................................. 3-16
Charge warning light .......................................... 3-17
Oil pressure warning light .................................. 3-17
Engine low oil level warning indicator (except
STI) ................................................................. 3-17
Windshield washer fluid warning indicator .......... 3-18
AT OIL TEMP warning light (CVT models) ........... 3-18
Rear differential oil temperature warning light
(STI) ................................................................ 3-18
Low tire pressure warning light (U.S.-spec.
models) ........................................................... 3-19
ABS warning light .............................................. 3-20
Brake system warning light ................................ 3-21
Electronic parking brake indicator light (models
with electronic parking brake system) .............. 3-23
Low fuel warning light ....................................... 3-24
Hill start assist warning light/Hill start assist OFF
indicator light (models without electronic
parking brake system) ..................................... 3-24
Hill Holder indicator light (models with electronic
parking brake system) ..................................... 3-24
Door open warning light .................................... 3-25
All-Wheel Drive warning light (if equipped) ......... 3-25
Power steering warning light (except STI) ........... 3-25
LED headlight warning light (if equipped) ........... 3-25
Vehicle Dynamics Control warning light/Vehicle
Dynamics Control operation indicator light .. ..... 3-26
Vehicle Dynamics Control OFF indicator light/
Traction mode indicator light.. .......................... 3-27Instruments and controls 3
Page 131 of 594

Instruments and controls
Warning chimes and warning indicator of the
keyless access with push-button start system (if
equipped) ......................................................... 3-28
Security indicator light ....................................... 3-33
SI-DRIVE indicator (if equipped) .......................... 3-34
Shift-up indicator (STI) ........................................ 3-34
Select lever/gear position indicator (CVT
models). ........................................................... 3-34
Turn signal indicator lights ................................. 3-35
High beam indicator light ................................... 3-35
Cruise control indicator ...................................... 3-35
Cruise control set indicator ................................ 3-35
Automatic headlight beam leveler warning light
(models with LED headlights) ........................... 3-35
Front fog light indicator light (if equipped) .......... 3-35
Headlight indicator light ..................................... 3-35
Driver ’ s control center differential auto indicator
(STI) ................................................................. 3-35
Driver ’ s control center differential indicator and
warning (STI) .................................................... 3-36
REV indicator light (STI) ..................................... 3-37
Steering responsive fog lights warning indicator/
Steering responsive fog lights OFF indicator (if
equipped) ......................................................... 3-37
BSD/RCTA warning indicator (if equipped) .......... 3-37
BSD/RCTA OFF indicator (if equipped) ................ 3-37
Multi information display ................................... 3-37
Basic operation .................................................. 3-38
Welcome screen ................................................. 3-38
Good-bye screen ................................................ 3-39
Warning screen .................................................. 3-39
Basic screens .................................................... 3-44 Menu screens .................................................... 3-45
Multi function display ........................................ 3-48Basic operation ................................................. 3-49
Welcome screen ................................................ 3-49
Date screen ....................................................... 3-50
Ending screen ................................................... 3-50
Self-check screen .............................................. 3-50
Interruption screen ............................................ 3-52
Basic screens .................................................... 3-52
Selection screen ................................................ 3-58
Date and time settings ....................................... 3-62
Image quality and volume settings ..................... 3-69
Screen settings. ................................................. 3-71
Maintenance settings ......................................... 3-79
Driving history registration ................................. 3-82
Car settings ....................................................... 3-83
Initialize ............................................................. 3-92
Light control switch ........................................... 3-94Headlights ......................................................... 3-95
High/low beam change (dimmer) ... ..................... 3-96
Headlight flasher ............................................... 3-96
Daytime running light system ............................. 3-97
Turn signal lever ................................................ 3-97
One-touch lane changer ..................................... 3-98
Illumination brightness control ......................... 3-98
Headlight beam leveler (if equipped) ............... 3-99
Automatic headlight beam leveler (models with
LED headlights) ............................................... 3-99
Fog light switch (if equipped) ........................... 3-99
Steering responsive fog lights system (models
with EyeSight system) ..................................... 3-99
Page 133 of 594
Instruments and controls/Ignition switch (models without push – button start system)
Ignition switch (models with-
out push-button start sys-
tem) WARNING. Never turn the ignition switch to
“ LOCK ” while the vehicle is
being driven or towed because
that will lock the steering wheel,
preventing steering control. And
when the engine is turned off, it
takes a much greater effort than
usual to steer.
. Before leaving the vehicle, al-
ways remove the key from the
ignition switch for safety and
never allow an unattended child
to remain in the vehicle. Failure
to follow this procedure could
result in injury to a child or
others. Children could operate
the power windows, the moon-
roof or other controls or even
make the vehicle move.
CAUTION
Do not attach a large key holder or
key case to either key. If it banged against your knees or hands while
you are driving, it could turn the
ignition switch from the “ ON ” posi-
tion to the “ ACC ” or “ LOCK ” posi-
tion, thereby stopping the engine.
Also, if the key is attached to a
keyholder or to a large bunch of
other keys, centrifugal force may act
on it as the vehicle moves, resulting
in unwanted turning of the ignition
switch.
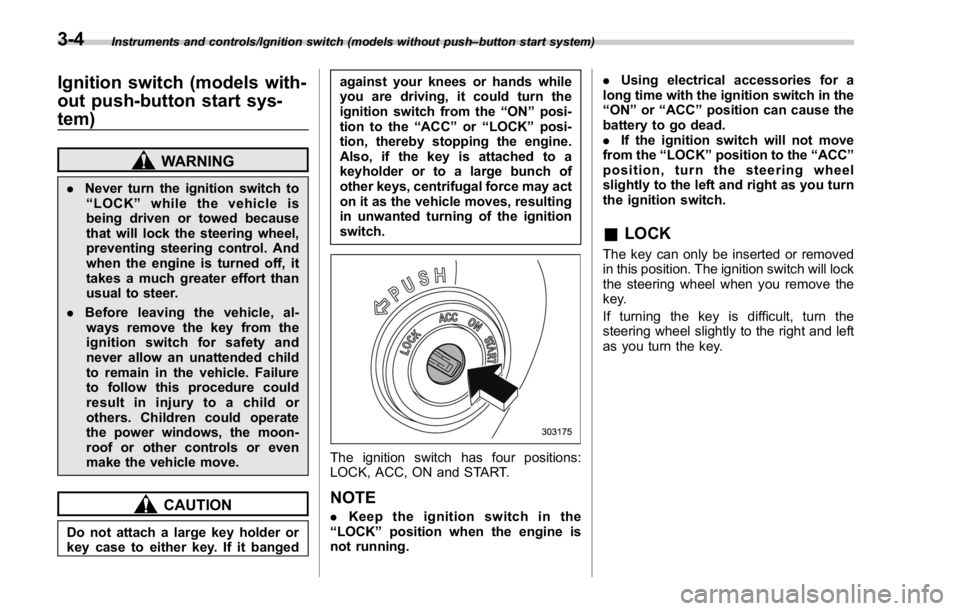
The ignition switch has four positions:
LOCK, ACC, ON and START.
NOTE . Keep the ignition switch in the
“ LOCK ” position when the engine is
not running. . Using electrical accessories for a
long time with the ignition switch in the
“ ON ” or “ ACC ” position can cause the
battery to go dead.
. If the ignition switch will not move
from the “ LOCK ” position to the “ ACC ”
position, turn the steering wheel
slightly to the left and right as you turn
the ignition switch.
& LOCK The key can only be inserted or removed
in this position. The ignition switch will lock
the steering wheel when you remove the
key.
If turning the key is difficult, turn the
steering wheel slightly to the right and left
as you turn the key.3-4
Page 134 of 594
The key can be turned from the “ ACC ” to
“ LOCK ” position only when the select
lever is in the “ P ” position (CVT models)
and the key is pushed in while turning it
(all models).
& ACC In this position the electrical accessories
(audio, accessory power outlet, etc.) can
be used.
& ON This is the normal operating position after
the engine is started.
& START
The engine is started in this position. The
starter cranks the engine to start it. When the key is released (after the engine has
started), the key automatically returns to
the “ ON ” position.
CAUTIONDo not turn the ignition switch to the
“ START ” position while the engine
is running.
If your registered key fails to start the
engine, pull out the key once (the security
indicator light will blink), and then insert
the key in the ignition switch and turn it to
the “ START ” position and again try to start
the engine.
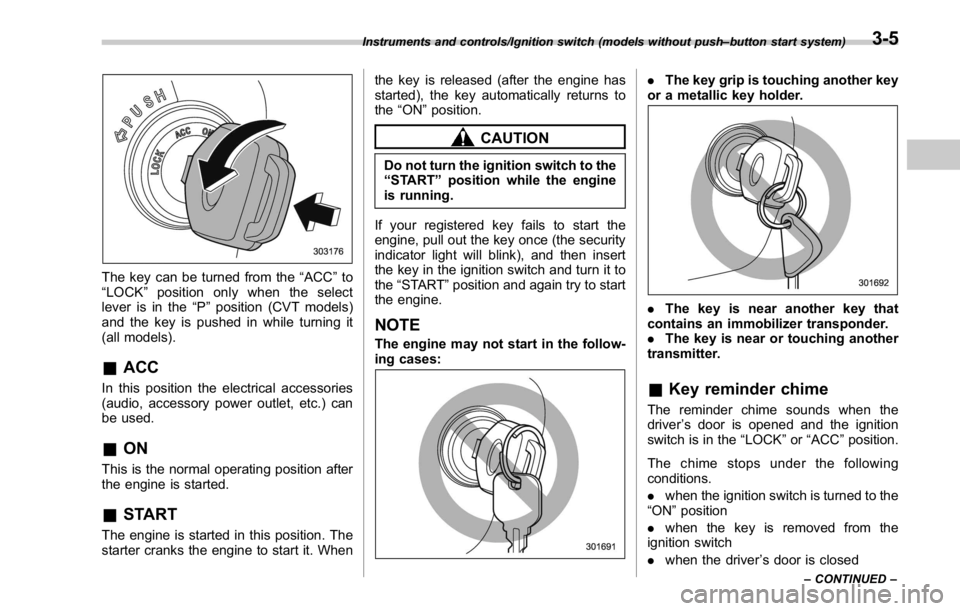
NOTE The engine may not start in the follow-
ing cases: . The key grip is touching another key
or a metallic key holder.
. The key is near another key that
contains an immobilizer transponder.
. The key is near or touching another
transmitter.
& Key reminder chime The reminder chime sounds when the
driver ’ s door is opened and the ignition
switch is in the “ LOCK ” or “ ACC ” position.
The chime stops under the following
conditions.
. when the ignition switch is turned to the
“ ON ” position
. when the key is removed from the
ignition switch
. when the driver ’ s door is closedInstruments and controls/Ignition switch (models without push – button start system)
– CONTINUED –3-5