change SUZUKI CELERIO 2022 Owners Manual
[x] Cancel search | Manufacturer: SUZUKI, Model Year: 2022, Model line: CELERIO, Model: SUZUKI CELERIO 2022Pages: 201, PDF Size: 5.82 MB
Page 1 of 201
99011M76M02-74ECODE 02/03/2015/5000 Service Division
MAR UTI SUZUKI INDIA LIMITED
Palam Gurgaon Road, Gurgaon - 122 015 (Haryana) www.marutisuzuki.com PEA
CE OF MIND 1
800 10 2 1800 India's No. 1 Car Exchange Programme
O
W NER 'S M ANUA L & S ER VIC E B OOKLE T K
eep Wit h Veh ic le A t All Tim es.
C onta in s I mpo rta n t I nfo rm atio n
O n S afe ty , O pera tio n & M ain te n an ce .
ENG.Part No. 99011M76M02-74E M arch, 2015
ORIHSTEUDASEECRIV
99011M76M03-74ECODE 02/03/2015/5000 Service Division
MAR UTI SUZUKI INDIA LIMITED
Palam Gurgaon Road, Gurgaon - 122 015 (Haryana) www.marutisuzuki.com PEA
CE OF MIND 1
800 10 2 1800 India's No. 1 Car Exchange Programme
O
W NER 'S M ANUA L & S ER VIC E B OOKLE T K
eep Wit h Veh ic le A t All Tim es.
C onta in s I mpo rta n t I nfo rm atio n
O n S afe ty , O pera tio n & M ain te n an ce .
ENG.Part No. 99011M76M03-74E M arch, 2015
ORIHSTEUDASEECRIV
Page 13 of 201
0-1
76MH1-74E
FOREWORD
This manual is an essential part of your
vehicle and should remain with the vehicle
when resold or otherwise transferred to a
new owner or operator. Please read this
manual carefully before operating your
new MARUTI SUZUKI and review the
manual from time to time. It contains
important information on safety, operation
and maintenance. You are invited to avail
the three Free Inspection Services as
described in the manual. Three free
inspection coupons are attached to this
manual. Please show this manual to your
dealer while you take your MARUTI
SUZUKI for any Service.
To prolong the life of your vehicle and
reduce maintenance cost, the periodic
maintenance must be carried out accord-
ing to “PERIODIC MAINTENANCE
SCHEDULE” described in “INSPECTION
AND MAINTENANCE” section of this man-
ual. It is essential for preventing trouble
and accidents to ensure your satisfaction
and safety.
Daily inspection and care as per “DAILY
INSPECTION CHECKLIST” described in
the “INSPECTION AND MAINTENANCE”
section of this manual is essential for pro-
longing the life of the vehicle and for safe
driving.
MARUTI SUZUKI INDIA LIMITED believes
in conservation and protection of Earth’s
natural resources.
To that end, we encourage every vehicle
owner to recycle, trade-in or properly dis-
pose of, as appropriate, used Engine Oil,
coolant and other fluids, batteries and
tyres etc.
MARUTI SUZUKI INDIA LIMITED
All information in this manual is based on the latest product information avail-able at the time of publication. Due toimprovements or other changes, theremay be discrepancies between informa-tion in this manual and your vehicle.MARUTI SUZUKI INDIA LIMITEDreserves the right to make productionchanges at any time, without notice andwithout incurring any obligation tomake the same or similar changes tovehicles previously built or sold.
This vehicle may not comply with stan-dards or regulations of other countries.Before attempting to register this vehi-cle in any other country, check all appli-cable regulations and make any neces-sary modifications.
2
Page 17 of 201
0-5
76MH1-74E
WARRANTY POLICY
Maruti Suzuki India Limited (hereinafter called “Maruti Suzuki”), warrants that each new Maruti Suzuki vehicle distributed in Indiaby Maruti Suzuki and sold by an authorised Maruti Suzuki dealerwill be free, under normal use and service, from any defects inmaterial and workmanship at the time of manufacture SUBJECTTO THE FOLLOWING TERMS AND CONDITIONS:
(1) Qualification:To qualify for this warranty:(a) The Maruti Suzuki vehicle must be delivered by MarutiSuzuki authorised dealer and set-up, serviced by MarutiSuzuki authorised dealer / service station.(b) The warranty registration card in respect of each vehiclemust be completed by the dealer at the time of delivery ofthe vehicle and dealer should retain the same.
(2) Term:The term of the warranty shall be twenty-four (24) months or40,000 kilometers (whichever occurs first) from the date ofdelivery to the first owner.
(3) Maruti Suzuki Warranty Obligation:If any defect(s) should be found in a Maruti Suzuki vehicle withinthe term stipulated above, Maruti Suzuki’s only obligation is torepair or replace at its sole discretion any part shown to be defec-tive, with a new part or the equivalent at no cost to the owner forparts or labour, when Maruti Suzuki acknowledges that such adefect is attributable to faulty material or workmanship at the timeof manufacture. The owner is responsible for any repair or replace-ments which are not covered by this warranty.
(4) Limitation:This warranty shall not apply to:1) Normal maintenance service required other than the threefree services, including without limitation, oil and fluidchanges, headlight aiming, fastener retightening, wheel bal-ancing, wheel alignment and tyre rotation, cleaning of injec-tors, adjustments of carburettor, ignition timing, clutch andvalve clearance.
2) The replacement of normal wear parts including without lim-itation, bulbs, tyres and tubes, spark plugs, belts, hoses, fil-ters, wiper blades, brushes, contact points, fuses, clutch disc,brake shoes, brake pads, cable and all rubber parts (exceptoil seal and glass run).
3) Any vehicle which has been used for competition or racing.
4) Any repairs or replacement required as a result of accidentsor collision.
5) Any defects caused by misuse, negligence, abnormal use orinsufficient care.
6) Any vehicle which has been modified or altered, includingwithout limitation, the installation of performance accesso- ries.
7) Any vehicle on which parts or accessories not approved byMaruti Suzuki have been used.
8) Any vehicle which has not been operated in accordance withthe operating instructions in the Maruti Suzuki Owner’s Man-ual.
9) Any vehicle which has not received, during the warranty term,the service inspections prescribed in the Maruti SuzukiOwner’s Manual.
10) Any vehicle which has been assembled, disassembled,adjusted or repaired by other than an Maruti Suzuki autho-rised dealer/service station.
6
Page 18 of 201
0-6
76MH1-74E
55KS0-74E
11) Any vehicle which has been used for purposes other thanwhat it was designed for.
12) Any damage or deterioration caused by industrial pollutionand bird droppings.
13) Insignificant defects which do not affect the function of thevehicle including without limitation, sound, vibration and fluid seep.
14) Any natural wear and tear including without limitation, agingetc.
15) Installation and usage of domestic LPG gas/LPG Cylinder.
16) V-belts, hoses and gas leaks (For Maruti Suzuki AC vehicle).
17) Any vehicle retrofitted with LPG/CNG kits.
(5) Extent of Warranty:This warranty is the entire written warranty given by Maruti Suzuki
for Maruti Suzuki vehicles and no dealer or its or his agent or
employee is authorised to extend or enlarge this warranty and no
dealer or its or his agent or employee is authorised to make any
oral warranty on Maruti Suzuki’s behalf.
Maruti Suzuki reserves the right to add any improvements or
change the design of any model at any time with no obligation to
make the same changes on units previously sold.
(6) Warranty Service:To obtain warranty service, the complete vehicle must be pre-
sented at the owner’s expenses to any authorised Maruti Suzuki
dealer.
(7) Owner’s Warranty ResponsibIlities:It is responsibility of each owner to:
– Make certain that the warranty registration/PDl card was
completed at the time of delivery of the vehicle;
– Have performed, at his own expenses, by an Maruti Suzuki
authorised dealer/service station all the service inspections
specified in the Maruti Suzuki “Owner’s Manual and Service
Booklet and maintain adequate proof that such service
inspections have been performed.
– Make certain that the Maruti Suzuki authorised dealer/ser-
vice station performing the service inspection has certified
the work on the “Maintenance Service Record” page in the
“Owner’s Manual and Service Booklet and
– Present the Maruti Suzuki “Owner’s Manual and Service
Booklet to the authorised Maruti Suzuki dealer whenever
requesting service inspections or warranty service.
If the “Owner’s Manual and Service Booklet should be lost or
destroyed the owner should consult the authorised Maruti Suzuki
dealer from whom the vehicle was purchased for instructions con-
cerning replacement of the “Owner’s Manual and Service Booklet.
(8) Disclaimer of Consequential Damage:Maruti Suzuki assumes no responsibility for loss of vehicle, loss of
time, inconvenience or any other indirect incidental or consequen-
tial damage resulting from the vehicle not being available to the
owner because of any defect covered by this warranty.
(9) Change of OwnerEven if ownership of the vehicle changes, the remaining warranty
period is effective for the new owner.
7
Page 19 of 201
0-7
76MH1-74E
EMISSION WARRANTY POLICY
Maruti Suzuki offers the Emission Warranty on all Maruti Suzuki vehicles (apart from the Regular Warranty and will run parallel tothe regular product warranty) only in four metropolitan cities (NewDelhi, Kolkata, Mumbai and Chennai) with effect from July 1st,2001.
Te r m s :The Emission Warranty will be applicable for 80,000 kms or 3years (Whichever comes earlier) from the date of delivery to thefirst owner. The remaining warranty terms will be valid in case ofany change in ownership provided the production of all valid docu-ments.
Conditions:1. Under Emission Waranty, Warranty claims will be admitted fora prima facie examination, in case vehicle fails to meet theEmission Standard as specified in sub rule (2) of rule no. 115of Central Motor Vehicles Rules (CMVR), 1989.
2. The warranty claims will only be accepted after examinationcarried out by Maruti Suzuki or it’s dealer which leads to firmconclusions that thea) Original settings have not been tempered in any case.b) Part (as given in Annexure - A) has a manufacturing defect.c) Vehicle is unable to meet the Emission Standards (as givenin 1.), inspite of the vehicle having been maintained andused in accordance with the instructions as specified inOwner’s Manual and Service Booklet and the used fuel anddifferent oils (Engine oil, Transmission oil, Brake oil etc.) arealso as per specification.
3. The method of examination for deciding the warranty of theparts will be at the sole discretion of Maruti Suzuki and it’sdealer and results of the examination will be final and binding.If after examination, the warrantable condition is not estab-lished, Maruti Suzuki and it’s dealer has the right to charge all,or part of the cost of such examination.
4. Under Emission Warranty, the parts (as given in Annexure - A)will be changed free of cost, but the consumables will becharged as per actual.
5. If the part covered under Emission Warranty or the associatedparts, are not independently replaceable, on account of thesebeing integral parts of a complete assembly, Maruti Suzuki andit’s dealer will have the sole discretion to replace either theentire assembly or by using some of the parts of the systemthrough suitable repairs or modifications.
6. Any consequential repairs or replacement of parts which maybe found necessary to establish compliance of Emission War-ranty, will not be considered under warranty, unless the same isunder product warranty. The consumable will be charged asper actual under such repair or replacement.
7. Maruti Suzuki will not be responsible for the cost of transporta-tion of the vehicle to the nearest Maruti Suzuki dealer work-shop or any loss due to non-availability of the vehicle duringthe period of lodging of a warranty claim and examination and/or repair by Maruti Suzuki dealer.
8. Maruti Suzuki will not be responsible for any penalty that maybe charged by statutory authorities on account of failure tocomply with the EMISSION STANDARDS.
9. Emission Waranty will not be affected on the change of owner,provided all the documents are available.
8
Page 25 of 201
2-3
BEFORE DRIVING
76MH1-74E
76MH1-74E
NOTE: You can switch the function that unlocks alldoors from twice operations to once opera- tion, and vice versa, via the setting modeof the information display. For details onhow to use the information display, refer to“Information Display” in this section.
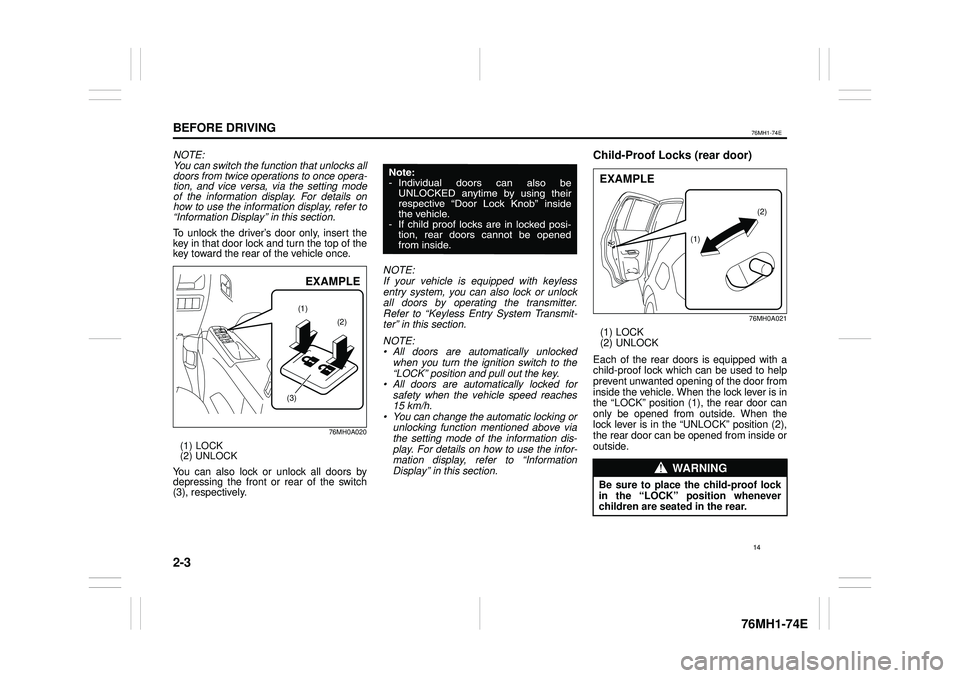
To unlock the driver’s door only, insert the key in that door lock and turn the top of thekey toward the rear of the vehicle once.
76MH0A020
(1) LOCK (2) UNLOCK
You can also lock or unlock all doors by depressing the front or rear of the switch(3), respectively.
NOTE: If your vehicle is equipped with keyless entry system, you can also lock or unlockall doors by operating the transmitter. Refer to “Keyless Entry System Transmit- ter” in this section.
NOTE: • All doors are automatically unlockedwhen you turn the ignition switch to the “LOCK” position and pull out the key.• All doors are automatically locked forsafety when the vehicle speed reaches15 km/h.• You can change the automatic locking orunlocking function mentioned above viathe setting mode of the information dis- play. For details on how to use the infor-mation display, refer to “Information Display” in this section.
Child-Proof Locks (rear door)
76MH0A021
(1) LOCK (2) UNLOCK
Each of the rear doors is equipped with achild-proof lock which can be used to help prevent unwanted opening of the door from inside the vehicle. When the lock lever is inthe “LOCK” position (1), the rear door can only be opened from outside. When the lock lever is in the “UNLOCK” position (2),the rear door can be opened from inside or outside.
(1)
(2)
(3)
EXAMPLE
WA R N I N G
Be sure to place the child-proof lockin the “LOCK” position whenever children are seated in the rear.
(1)
(2)
EXAMPLE
14
Page 32 of 201
2-10
BEFORE DRIVING
76MH1-74E
76MH1-74E
4) Push the lock end (4) (forward end) ofthe central door locking switch (5), and then push the unlock end (6) (backwardend). Repeat this operation 3 times.
Every time you perform the series of theabove steps, the state of the security sys- tem changes from the currently selected one to the other. You can check whetherthe system is enabled or disabled by the number of interior buzzer beeps at the end of the procedure as follows.
If you cannot complete the operations instep 3) and 4) within 15 seconds cor- rectly, the state of the security systemwill not change and the interior buzzer does not beep. Perform the procedure again from the beginning.
NOTE: You can also switch the security systemfrom the enabled state to the disabled state, and vice versa, via the setting mode of the information display. For details onhow to use the information display, refer to“Information Display” in this section.
Windows
Manual Window Control
(if equipped)
60G010
Raise or lower the door windows by turning the handle located on the door panel.
Electric Window Controls
(if equipped)The electric windows can only be operated when the ignition switch is in the “ON” posi- tion.
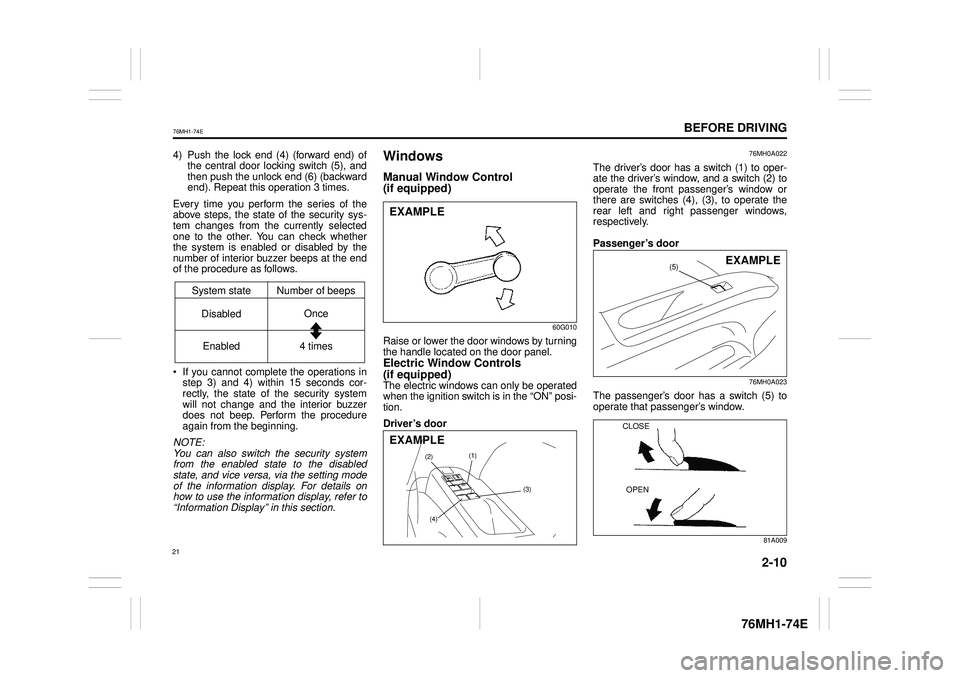
Driver’s door
76MH0A022
The driver’s door has a switch (1) to oper- ate the driver’s window, and a switch (2) tooperate the front passenger’s window or there are switches (4), (3), to operate the rear left and right passenger windows,respectively.
Passenger’s door
76MH0A023
The passenger’s door has a switch (5) to operate that passenger’s window.
81A009
System state Number of beeps
DisabledOnce
Enabled 4 times
EXAMPLE
(1)(2)
(3)
(4)
EXAMPLE
(5)EXAMPLE
CLOSE
OPEN
21
Page 53 of 201
2-31
BEFORE DRIVING
76MH1-74E
76MH1-74E
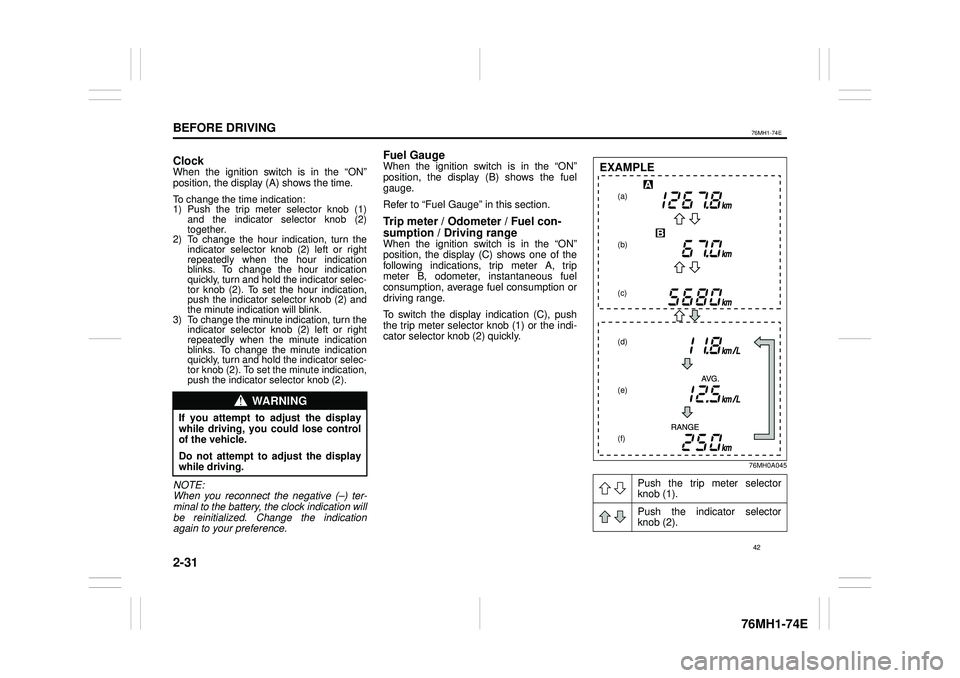
ClockWhen the ignition switch is in the “ON” position, the display (A) shows the time.
To change the time indication: 1) Push the trip meter selector knob (1)and the indicator selector knob (2)together.2) To change the hour indication, turn theindicator selector knob (2) left or rightrepeatedly when the hour indicationblinks. To change the hour indication quickly, turn and hold the indicator selec- tor knob (2). To set the hour indication,push the indicator selector knob (2) and the minute indication will blink.3) To change the minute indication, turn theindicator selector knob (2) left or rightrepeatedly when the minute indication blinks. To change the minute indicationquickly, turn and hold the indicator selec- tor knob (2). To set the minute indication, push the indicator selector knob (2).
NOTE: When you reconnect the negative (–) ter-minal to the battery, the clock indication will be reinitialized. Change the indication again to your preference.
Fuel GaugeWhen the ignition switch is in the “ON”position, the display (B) shows the fuel gauge.
Refer to “Fuel Gauge” in this section.
Trip meter / Odometer / Fuel con-
sumption / Driving rangeWhen the ignition switch is in the “ON” position, the display (C) shows one of the following indications, trip meter A, tripmeter B, odometer, instantaneous fuel consumption, average fuel consumption or driving range.
To switch the display indication (C), push the trip meter selector knob (1) or the indi-cator selector knob (2) quickly.
76MH0A045
WA R N I N G
If you attempt to adjust the display while driving, you could lose control of the vehicle.
Do not attempt to adjust the displaywhile driving.
Push the trip meter selector knob (1).
Push the indicator selector knob (2).
(a)
(b)
(c)
(d)
(e)
(f)
EXAMPLE
42
Page 54 of 201
2-32
BEFORE DRIVING
76MH1-74E
76MH1-74E
(a) Trip meter A (b) Trip meter B (c) Odometer(d) Instantaneous fuel consumption (e) Average fuel consumption (f) Driving range
NOTE:• Indications will change when you pushand release a knob.• The display shows estimated values.Indications may not be the same as actual values.Trip meter The trip meter can be used to measure the distance traveled on short trips or between fuel stops.You can use the trip meter A or trip meter B independently.
To reset the trip meter to zero, push and hold the trip meter selector knob (1) for a while when the display shows the tripmeter.
NOTE: The indicated maximum value of the trip meter is 9999.9. When you run past the
maximum value, the indicated value willreturn to 0.0.
Odometer The odometer records the total distance the vehicle has been driven.
Instantaneous Fuel ConsumptionThe display shows the value of instanta- neous fuel consumption only when the vehi- cle is moving.
NOTE:• The display does not show the valueunless the vehicle is moving.• The indicated maximum value of instanta-neous fuel consumption is 30. No more than 30 will be indicated on the displayeven if the actual instantaneous fuel con-sumption is higher.• The indication on the display may bedelayed if fuel consumption is greatly affected by driving conditions.• The display shows estimated values. Indi-cations may not be the same as actual values.• You can change the units that instanta-neous fuel consumption is displayed in.Refer to “Average fuel consumption” in this section.
Average fuel consumptionIf you selected average fuel consumptionthe last time you drove the vehicle, the dis- play shows the last value of average fuelconsumption from previous driving when the ignition switch is turned to the “ON”position. Unless you reset the value of aver- age fuel consumption, the display indicates the value of average fuel consumption which includes average fuel consumptionduring previous driving.
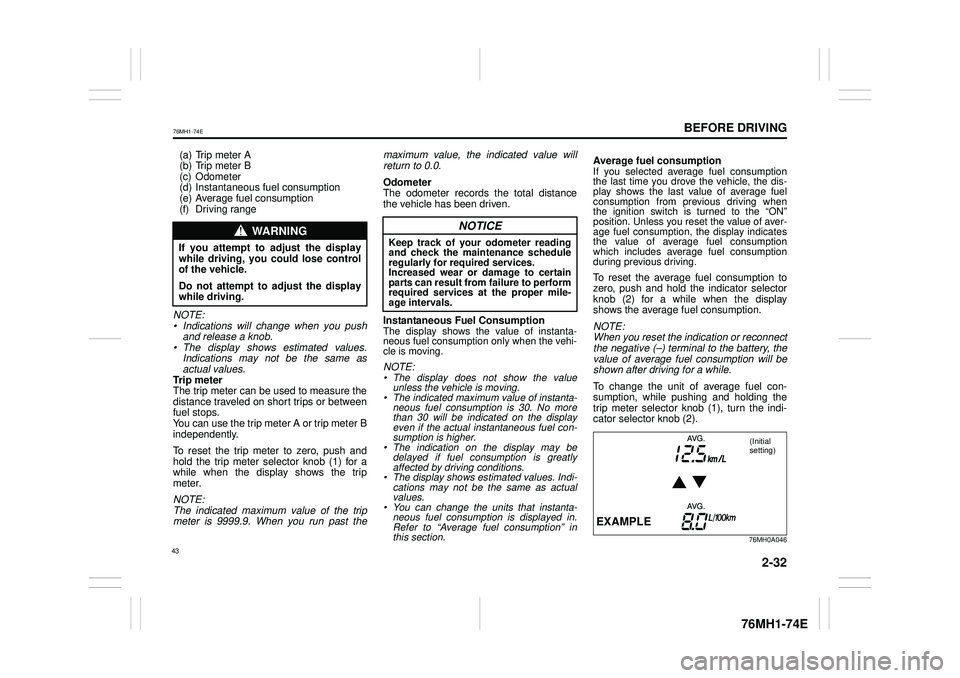
To reset the average fuel consumption to zero, push and hold the indicator selector knob (2) for a while when the display shows the average fuel consumption.
NOTE: When you reset the indication or reconnectthe negative (–) terminal to the battery, the value of average fuel consumption will be shown after driving for a while.
To change the unit of average fuel con- sumption, while pushing and holding thetrip meter selector knob (1), turn the indi- cator selector knob (2).
76MH0A046
WA R N I N G
If you attempt to adjust the display while driving, you could lose controlof the vehicle.
Do not attempt to adjust the displaywhile driving.
NOTICE
Keep track of your odometer reading and check the maintenance scheduleregularly for required services. Increased wear or damage to certain parts can result from failure to performrequired services at the proper mile-age intervals.
EXAMPLE
(Initial setting)
43
Page 55 of 201
2-33
BEFORE DRIVING
76MH1-74E
76MH1-74E
NOTE:• When you change the units that averagefuel consumption is displayed in, the instantaneous fuel consumption units will be changed automatically.• When you reconnect the negative (–) ter-minal to the battery, the unit of the aver-age fuel consumption will be reinitialized.Change the unit again to your preference.
Driving rangeIf you selected driving range the last timeyou drove the vehicle, the display indicates“---” for a few seconds and then indicatesthe current driving range when the ignitionswitch is turned to the “ON” position. The driving range shown in the display is the approximate distance you can drive untilthe fuel gauge indicates “E”, based on cur-rent driving conditions.
When the low fuel warning light comes on, the display “---” will appear.
If the low fuel warning light comes on, fill thefuel tank immediately regardless of the valueof driving range shown in the display.
As the driving range after refueling is calcu-lated based on the most recent driving con-dition, the value is different each time you refuel.
NOTE: • If you refuel when the ignition switch is inthe “ON” position, the driving range may not indicate the correct value.• When you reconnect the negative (–) ter-minal to the battery, the value of drivingrange will be shown after driving for awhile.
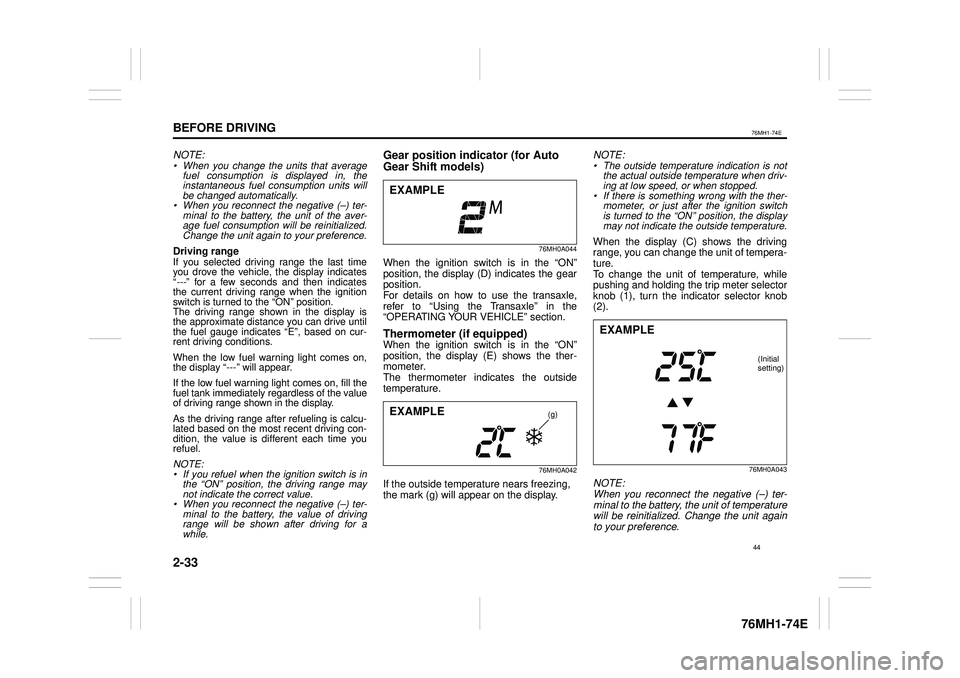
Gear position indicator (for Auto
Gear Shift models)
76MH0A044
When the ignition switch is in the “ON” position, the display (D) indicates the gearposition. For details on how to use the transaxle, refer to “Using the Transaxle” in the“OPERATING YOUR VEHICLE” section.
Thermometer (if equipped)When the ignition switch is in the “ON”position, the display (E) shows the ther-mometer. The thermometer indicates the outside temperature.
76MH0A042
If the outside temperature nears freezing, the mark (g) will appear on the display.
NOTE:• The outside temperature indication is notthe actual outside temperature when driv- ing at low speed, or when stopped.• If there is something wrong with the ther-mometer, or just after the ignition switchis turned to the “ON” position, the display may not indicate the outside temperature.
When the display (C) shows the driving range, you can change the unit of tempera-ture. To change the unit of temperature, while pushing and holding the trip meter selectorknob (1), turn the indicator selector knob (2).
76MH0A043
NOTE: When you reconnect the negative (–) ter- minal to the battery, the unit of temperaturewill be reinitialized. Change the unit again to your preference.
EXAMPLE
(g)EXAMPLE
EXAMPLE
(Initial setting)
44