remove SUZUKI GRAND VITARA 2022 User Guide
[x] Cancel search | Manufacturer: SUZUKI, Model Year: 2022, Model line: GRAND VITARA, Model: SUZUKI GRAND VITARA 2022Pages: 482, PDF Size: 21 MB
Page 70 of 482
2-48
BEFORE DRIVING
54P00-01E
1) Remove the luggage compartment cover.2) Secure the child restraint on the rear
seat using the procedure described
above for securing a restraint system
that does not require a top tether strap.
3) Hook the top tether strap to the top
tether anchorage bracket and tighten
the top tether strap according to the
instructions provided by the child
restraint system manufacturer. Attach
the top tether strap to the correspond-
ing top tether anchorage bracket
located directly behind the child
restraint. Do not attach the top tether
strap to the luggage restraint loops.
54P000264
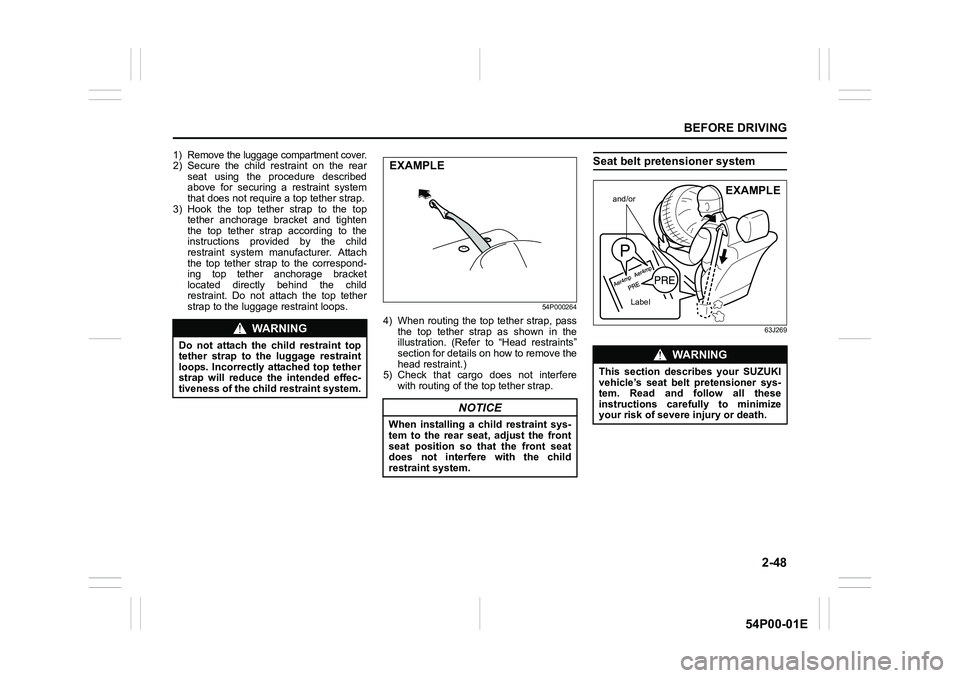
4) When routing the top tether strap, pass
the top tether strap as shown in the
illustration. (Refer to “Head restraints”
section for details on how to remove the
head restraint.)
5) Check that cargo does not interfere
with routing of the top tether strap.
Seat belt pretensioner system
63J269WA R N I N G
Do not attach the child restraint top
tether strap to the luggage restraint
loops. Incorrectly attached top tether
strap will reduce the intended effec-
tiveness of the child restraint system.
NOTICE
When installing a child restraint sys-
tem to the rear seat, adjust the front
seat position so that the front seat
does not interfere with the child
restraint system.
EXAMPLE
WA R N I N G
This section describes your SUZUKI
vehicle’s seat belt pretensioner sys-
tem. Read and follow all these
instructions carefully to minimize
your risk of severe injury or death.
and/or
Label
EXAMPLE
Page 134 of 482
2-112
BEFORE DRIVING
54P00-01E
NOTE:
• Under the following conditions, the rain
sensor may not be able to sense rain or
snow correctly, and thus the rain-sensing
wiper function may not work or may work
incorrectly. (Use a position other than
“AUTO” under these conditions.)
– Rain or snow does not hit the rain sen-
sor area of the windshield, or the snow
is not of a type that is able to be
detected by the sensor.
– The rain sensor area is covered with
mud, ice or other similar substance.
You should remove any foreign sub-
stance.– There were already raindrops on the
windshield before starting rain-sensing
wiper operation. You should remove
the raindrops by operating the wipers
under manual control.
– The rain sensor is hotter than 80°C
(176°F) in the sun or lower than –10°C
(14°F) in freezing weather. (The wip-
ers do not operate under this condi-
tion.)
– The windshield is coated with a water-
repellent substance, which causes
raindrops to run down quickly. This will
give a clearer view and the wipers
may seem to operate too frequently. In
this case, decrease the system’s sen-
sitivity.
– The sensor area is covered with a
sticker.
– The wiper blades are damaged. You
should replace them.
• The following conditions may indicate
problems with the rain-sensing wiper
system. If your system exhibits any of
the following conditions, have it
inspected by an authorized SUZUKI
dealer.
– Rainfall/snowfall rate varies but the
wiping interval remains constant.
– Rain/snow is falling but the wipers do
not operate.Reprogramming the rain-sensing wiper
function
“AUTO” position operation of the rain-
sensing wiper function can be customized
to your preference by reprogramming its
setting as follows. Please contact an
authorized SUZUKI dealer for this customi-
zation.
Full-automatic wiping (factory setting)
The system automatically selects the most
appropriate of the following wiping modes:
no wiping, intermittent wiping, low-speed
wiping or high-speed wiping.
Semi-automatic wiping
The system automatically selects the most
appropriate of the following wiping modes:
intermittent wiping, low-speed wiping or
high-speed wiping. (The wipers do not stop
automatically.)
Intermittent wiping
The wipers operate only in the intermittent
wiping mode. The wiping interval can be
changed with the knob on the control lever.
CAUTION
• Observe the following instructions
when the wiper lever is set to
“AUTO” position with the engine
switch in “ON” mode. Otherwise,
the wipers could unexpectedly
operate and cause injury, and could
also be damaged.
– Do not touch or wipe the rain
sensor area of the windshield
with a cloth.
– Do not hit the windshield or rain
sensor.
• Set the wiper control lever to “OFF”
position before washing the vehicle
in an automatic car wash or clean-
ing the windshield.
Page 135 of 482
2-113
BEFORE DRIVING
54P00-01E
Windshield washer
61MM0A099
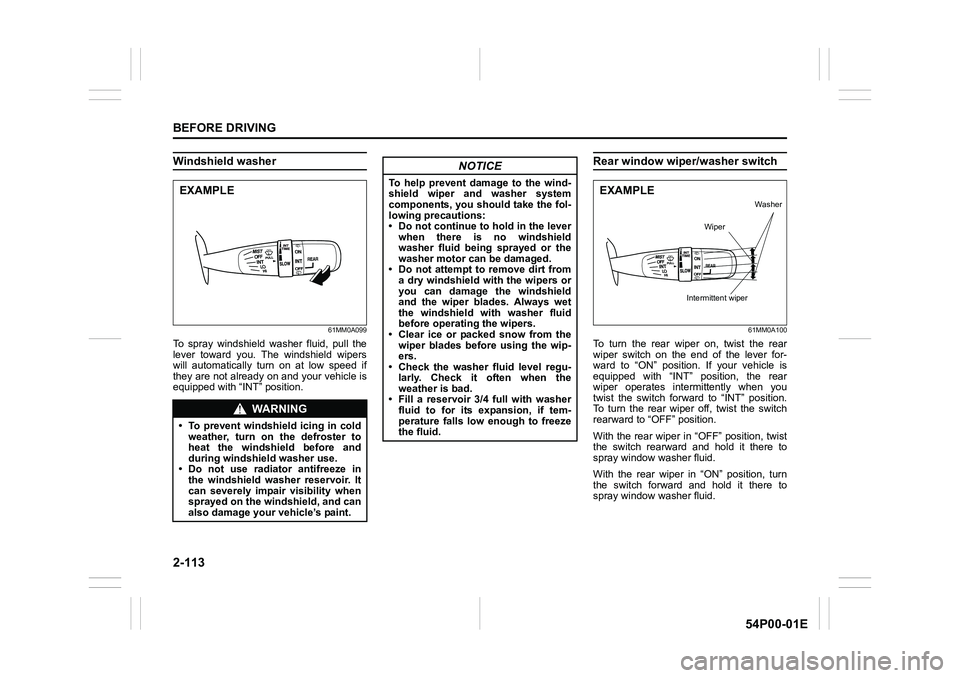
To spray windshield washer fluid, pull the
lever toward you. The windshield wipers
will automatically turn on at low speed if
they are not already on and your vehicle is
equipped with “INT” position.
Rear window wiper/washer switch
61MM0A100
To turn the rear wiper on, twist the rear
wiper switch on the end of the lever for-
ward to “ON” position. If your vehicle is
equipped with “INT” position, the rear
wiper operates intermittently when you
twist the switch forward to “INT” position.
To turn the rear wiper off, twist the switch
rearward to “OFF” position.
With the rear wiper in “OFF” position, twist
the switch rearward and hold it there to
spray window washer fluid.
With the rear wiper in “ON” position, turn
the switch forward and hold it there to
spray window washer fluid.
WA R N I N G
• To prevent windshield icing in cold
weather, turn on the defroster to
heat the windshield before and
during windshield washer use.
• Do not use radiator antifreeze in
the windshield washer reservoir. It
can severely impair visibility when
sprayed on the windshield, and can
also damage your vehicle’s paint.
EXAMPLE
NOTICE
To help prevent damage to the wind-
shield wiper and washer system
components, you should take the fol-
lowing precautions:
• Do not continue to hold in the lever
when there is no windshield
washer fluid being sprayed or the
washer motor can be damaged.
• Do not attempt to remove dirt from
a dry windshield with the wipers or
you can damage the windshield
and the wiper blades. Always wet
the windshield with washer fluid
before operating the wipers.
• Clear ice or packed snow from the
wiper blades before using the wip-
ers.
• Check the washer fluid level regu-
larly. Check it often when the
weather is bad.
• Fill a reservoir 3/4 full with washer
fluid to for its expansion, if tem-
perature falls low enough to freeze
the fluid.EXAMPLE
Intermittent wiperWasher
Wiper
Page 143 of 482
3-3
OPERATING YOUR VEHICLE
54P00-01E
making it appear that the oil level has not
changed.
You should also be aware that the diluting
ingredients evaporate out when the vehicle
is subsequently driven at high speeds,
such as on an expressway, making it
appear that oil is excessively consumed
after high-speed driving.Ignition switch
(vehicle without keyless push
start system)
65D61160B041
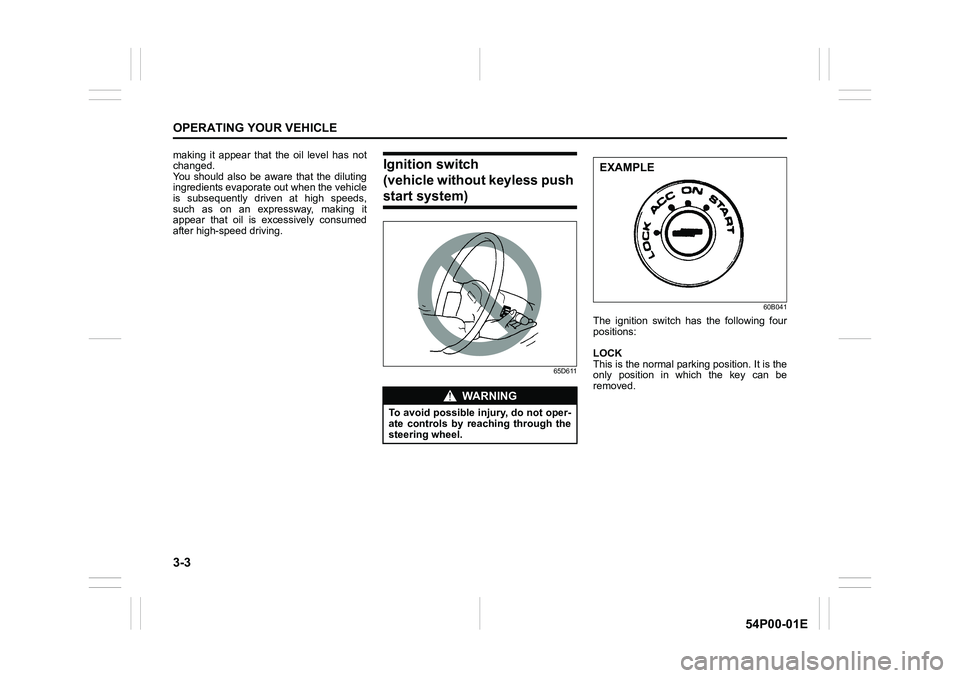
The ignition switch has the following four
positions:
LOCK
This is the normal parking position. It is the
only position in which the key can be
removed.
WA R N I N G
To avoid possible injury, do not oper-
ate controls by reaching through the
steering wheel.
EXAMPLE
Page 144 of 482
3-4
OPERATING YOUR VEHICLE
54P00-01E
Manual transaxle
60G033
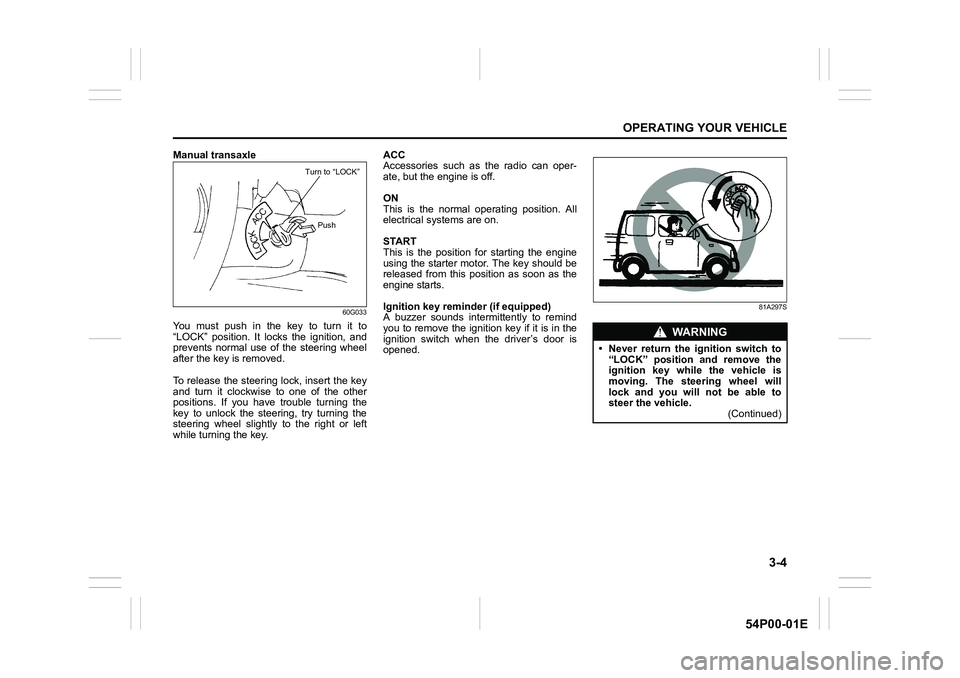
You must push in the key to turn it to
“LOCK” position. It locks the ignition, and
prevents normal use of the steering wheel
after the key is removed.
To release the steering lock, insert the key
and turn it clockwise to one of the other
positions. If you have trouble turning the
key to unlock the steering, try turning the
steering wheel slightly to the right or left
while turning the key.ACC
Accessories such as the radio can oper-
ate, but the engine is off.
ON
This is the normal operating position. All
electrical systems are on.
START
This is the position for starting the engine
using the starter motor. The key should be
released from this position as soon as the
engine starts.
Ignition key reminder (if equipped)
A buzzer sounds intermittently to remind
you to remove the ignition key if it is in the
ignition switch when the driver’s door is
opened.
81A297S
Turn to “LOCK”
Push
WA R N I N G
• Never return the ignition switch to
“LOCK” position and remove the
ignition key while the vehicle is
moving. The steering wheel will
lock and you will not be able to
steer the vehicle.
(Continued)
Page 145 of 482
3-5
OPERATING YOUR VEHICLE
54P00-01E
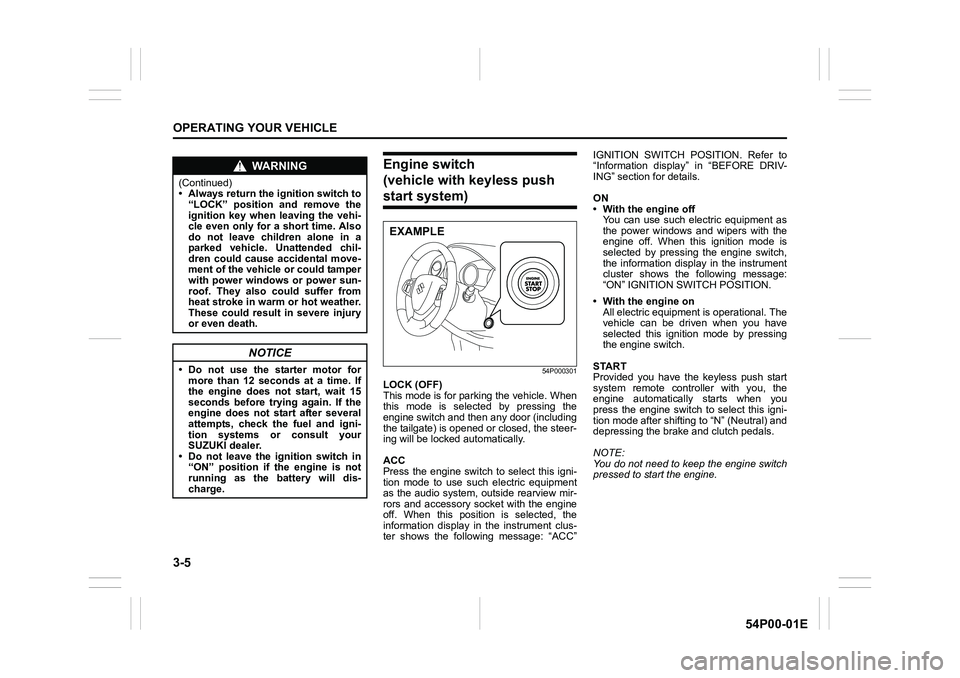
Engine switch
(vehicle with keyless push
start system)
54P000301
LOCK (OFF)
This mode is for parking the vehicle. When
this mode is selected by pressing the
engine switch and then any door (including
the tailgate) is opened or closed, the steer-
ing will be locked automatically.
ACC
Press the engine switch to select this igni-
tion mode to use such electric equipment
as the audio system, outside rearview mir-
rors and accessory socket with the engine
off. When this position is selected, the
information display in the instrument clus-
ter shows the following message: “ACC”IGNITION SWITCH POSITION. Refer to
“Information display” in “BEFORE DRIV-
ING” section for details.
ON
• With the engine off
You can use such electric equipment as
the power windows and wipers with the
engine off. When this ignition mode is
selected by pressing the engine switch,
the information display in the instrument
cluster shows the following message:
“ON” IGNITION SWITCH POSITION.
• With the engine on
All electric equipment is operational. The
vehicle can be driven when you have
selected this ignition mode by pressing
the engine switch.
START
Provided you have the keyless push start
system remote controller with you, the
engine automatically starts when you
press the engine switch to select this igni-
tion mode after shifting to “N” (Neutral) and
depressing the brake and clutch pedals.
NOTE:
You do not need to keep the engine switch
pressed to start the engine.
WA R N I N G
(Continued)
• Always return the ignition switch to
“LOCK” position and remove the
ignition key when leaving the vehi-
cle even only for a short time. Also
do not leave children alone in a
parked vehicle. Unattended chil-
dren could cause accidental move-
ment of the vehicle or could tamper
with power windows or power sun-
roof. They also could suffer from
heat stroke in warm or hot weather.
These could result in severe injury
or even death.
NOTICE
• Do not use the starter motor for
more than 12 seconds at a time. If
the engine does not start, wait 15
seconds before trying again. If the
engine does not start after several
attempts, check the fuel and igni-
tion systems or consult your
SUZUKI dealer.
• Do not leave the ignition switch in
“ON” position if the engine is not
running as the battery will dis-
charge.
EXAMPLE
Page 151 of 482
3-11
OPERATING YOUR VEHICLE
54P00-01E
Parking brake reminder buzzer
A buzzer sounds intermittently to remind
you to release the parking brake if you
start the vehicle without releasing the park-
ing brake. Check that the parking brake is
fully released and the brake system warn-
ing light turns off.
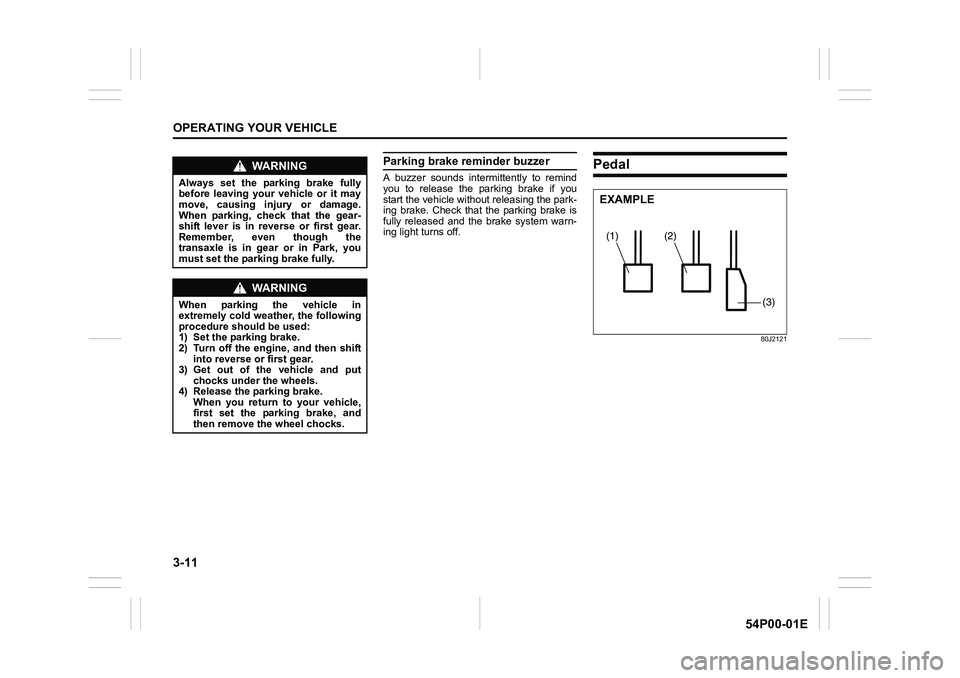
Pedal
80J2121
WA R N I N G
Always set the parking brake fully
before leaving your vehicle or it may
move, causing injury or damage.
When parking, check that the gear-
shift lever is in reverse or first gear.
Remember, even though the
transaxle is in gear or in Park, you
must set the parking brake fully.
WA R N I N G
When parking the vehicle in
extremely cold weather, the following
procedure should be used:
1) Set the parking brake.
2) Turn off the engine, and then shift
into reverse or first gear.
3) Get out of the vehicle and put
chocks under the wheels.
4) Release the parking brake.
When you return to your vehicle,
first set the parking brake, and
then remove the wheel chocks.
(2)(1)
(3)
EXAMPLE
Page 199 of 482
3-59
OPERATING YOUR VEHICLE
54P00-01E
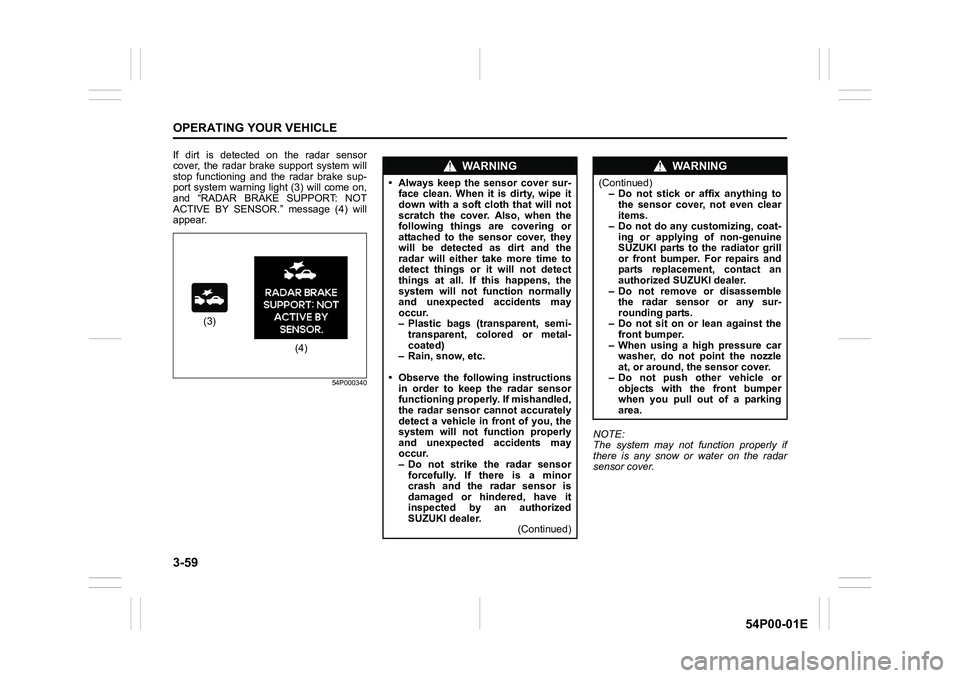
If dirt is detected on the radar sensor
cover, the radar brake support system will
stop functioning and the radar brake sup-
port system warning light (3) will come on,
and “RADAR BRAKE SUPPORT: NOT
ACTIVE BY SENSOR.” message (4) will
appear.
54P000340
NOTE:
The system may not function properly if
there is any snow or water on the radar
sensor cover.
(3)
(4)
WA R N I N G
• Always keep the sensor cover sur-
face clean. When it is dirty, wipe it
down with a soft cloth that will not
scratch the cover. Also, when the
following things are covering or
attached to the sensor cover, they
will be detected as dirt and the
radar will either take more time to
detect things or it will not detect
things at all. If this happens, the
system will not function normally
and unexpected accidents may
occur.
– Plastic bags (transparent, semi-
transparent, colored or metal-
coated)
– Rain, snow, etc.
• Observe the following instructions
in order to keep the radar sensor
functioning properly. If mishandled,
the radar sensor cannot accurately
detect a vehicle in front of you, the
system will not function properly
and unexpected accidents may
occur.
– Do not strike the radar sensor
forcefully. If there is a minor
crash and the radar sensor is
damaged or hindered, have it
inspected by an authorized
SUZUKI dealer.
(Continued)
WA R N I N G
(Continued)
– Do not stick or affix anything to
the sensor cover, not even clear
items.
– Do not do any customizing, coat-
ing or applying of non-genuine
SUZUKI parts to the radiator grill
or front bumper. For repairs and
parts replacement, contact an
authorized SUZUKI dealer.
– Do not remove or disassemble
the radar sensor or any sur-
rounding parts.
– Do not sit on or lean against the
front bumper.
– When using a high pressure car
washer, do not point the nozzle
at, or around, the sensor cover.
– Do not push other vehicle or
objects with the front bumper
when you pull out of a parking
area.
Page 207 of 482
3-67
OPERATING YOUR VEHICLE
54P00-01E
NOTE:
• Thin poles or obstacles lower than the
sensors may become undetectable as
the vehicle moves closer to them even if
they have been detected from longer
distances.
• The system may calculate the distance
to a road sign or similar obstacle to be
shorter than the actual distance.
WA R N I N G
• Under the following conditions, the
parking sensor system may not
work normally because the sensors
cannot detect obstacles correctly.
– Sensors are covered with mud,
ice or other materials. (Such
materials must be removed for
normal operation.)
– Sensors are wet from water
splashes or heavy rain.
– Sensors are covered by a hand,
sticker, accessory, etc.
– There is an accessory or other
object attached within the sen-
sor’s sensing area.
– Items such as tow hooks, com-
mercially available corner poles,
radio antenna, etc. are installed
on the bumper.
– The height of the bumper is
changed due to alteration to the
suspension or other causes.
– The sensor areas are extremely
hot from direct sunlight or cold
due to freezing weather.
– The vehicle is on a rough sur-
face, slope, gravel road or grass
field.
– The vehicle is at a steep angle.
(Continued)
WA R N I N G
(Continued)
– Sensors have intercepted ultra-
sonic noise from another vehi-
cle’s horn, engine, air braking
system (large vehicles), or park-
ing sensor.
– Obstacles are too close to the
sensors.
– Sensors are at an angle to a
highly reflective object such as
glass. (Ultrasonic waves are not
reflected back from the obstacle.)
• Sensors may not be able to cor-
rectly detect the following types of
obstacles:
– Objects made of a thin material
such as wire netting and ropes
– Square-shaped curbstones or
other objects with sharp edges
– Tall objects with a large upper
part such as a road sign
– Low-profile objects such as curb-
stones
– Sound-absorbing objects such
as cotton and snow
Page 211 of 482
3-71
OPERATING YOUR VEHICLE
54P00-01E
Rearview camera
(if equipped)
When the gearshift lever is shifted to “R”
position while the ignition switch is in “ON”
position or the ignition mode is “ON”, the
rearview camera system automatically
shows the view behind the vehicle on the
display.
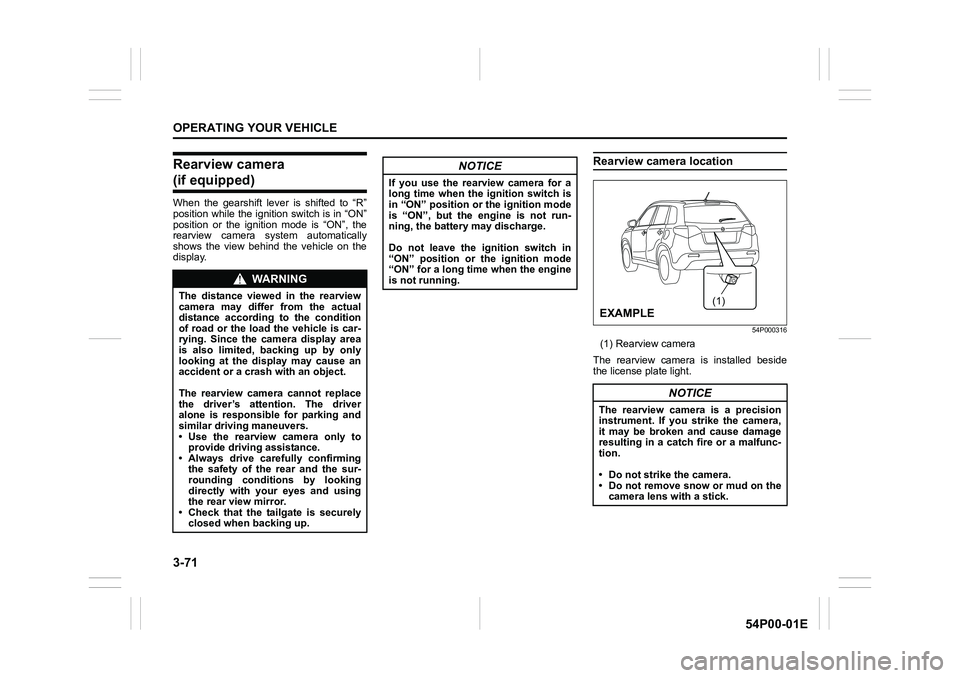
Rearview camera location
54P000316
(1) Rearview camera
The rearview camera is installed beside
the license plate light.
WA R N I N G
The distance viewed in the rearview
camera may differ from the actual
distance according to the condition
of road or the load the vehicle is car-
rying. Since the camera display area
is also limited, backing up by only
looking at the display may cause an
accident or a crash with an object.
The rearview camera cannot replace
the driver’s attention. The driver
alone is responsible for parking and
similar driving maneuvers.
• Use the rearview camera only to
provide driving assistance.
• Always drive carefully confirming
the safety of the rear and the sur-
rounding conditions by looking
directly with your eyes and using
the rear view mirror.
• Check that the tailgate is securely
closed when backing up.
NOTICE
If you use the rearview camera for a
long time when the ignition switch is
in “ON” position or the ignition mode
is “ON”, but the engine is not run-
ning, the battery may discharge.
Do not leave the ignition switch in
“ON” position or the ignition mode
“ON” for a long time when the engine
is not running.
NOTICE
The rearview camera is a precision
instrument. If you strike the camera,
it may be broken and cause damage
resulting in a catch fire or a malfunc-
tion.
• Do not strike the camera.
• Do not remove snow or mud on the
camera lens with a stick.
(1)
EXAMPLE