engine SUZUKI IGNIS 2021 Owners Manual
[x] Cancel search | Manufacturer: SUZUKI, Model Year: 2021, Model line: IGNIS, Model: SUZUKI IGNIS 2021Pages: 505, PDF Size: 8.36 MB
Page 280 of 505
5-25OTHER CONTROLS AND EQUIPMENT
75RM4-01E
Models with ENG A-STOP System
(if equipped)
• If the heating performance can no longerperform at a sufficient level due to auto-
matically stopping the engine, press the
ENG A-STOP OFF switch to deactivate
the ENG A-STOP system. (The engine
will automatically restart and the air con-
ditioning performanc e will be restored.)
• If the windshield and/or the driver’s side/ passenger side door windows are
fogged during automatic ally stopping the
engine, stop the ENG A-STOP system
and restart the engine. Then, turn the air
flow selector (3) to change the air flow to
the HEAT & DEFROST or DEFROST
position to defog the windows.
MaintenanceIf you do not use the air conditioner for a
long period, such as during winter, it may
not give the best performance when you
start using it again. To help maintain opti-
mum performance and durability of your air
conditioner, it needs to be run periodically.
Operate the air conditioner at least once a
month for one minute with the engine
idling. This circulates the refrigerant and oil
and helps protect the internal components.
If your air conditioner is equipped with air
filters, clean or replace them as specified
in “Maintenance schedule” in the
“INSPECTION AND MAINTENANCE” sec-
tion.
(For vehicles using “HFO-1234yf” refrig-
erant)
NOTE:
Your vehicle uses the air conditioning
refrigerant HFO-1234yf, commonly called
R-1234yf. R-1234yf replaced R-134a for
automotive applications. Other refriger-
ants are available, but only R-1234yf
should be used in your vehicle.
NOTICE
Using the wrong refrigerant may
damage your air conditioning sys-
tem. Use R-1234yf only. Do not mix or
replace the R-1234yf with other refrig-
erants.
(Except for vehicles using “HFO-1234yf”
refrigerant)
NOTE:
Your vehicle uses the air conditioning
refrigerant HFC-134a, commonly called
R-134a. R-134a replaced R-12 around
1993 for automotive applications. Other
refrigerants are available, including recy-
cled R-12, but only R-134a should be used
in your vehicle.
NOTICE
Using the wrong refrigerant may
damage your air conditioning sys-
tem. Use R-134a only. Do not mix or
replace the R-134a with other refrig-
erants.
Page 284 of 505
5-29OTHER CONTROLS AND EQUIPMENT
75RM4-01E
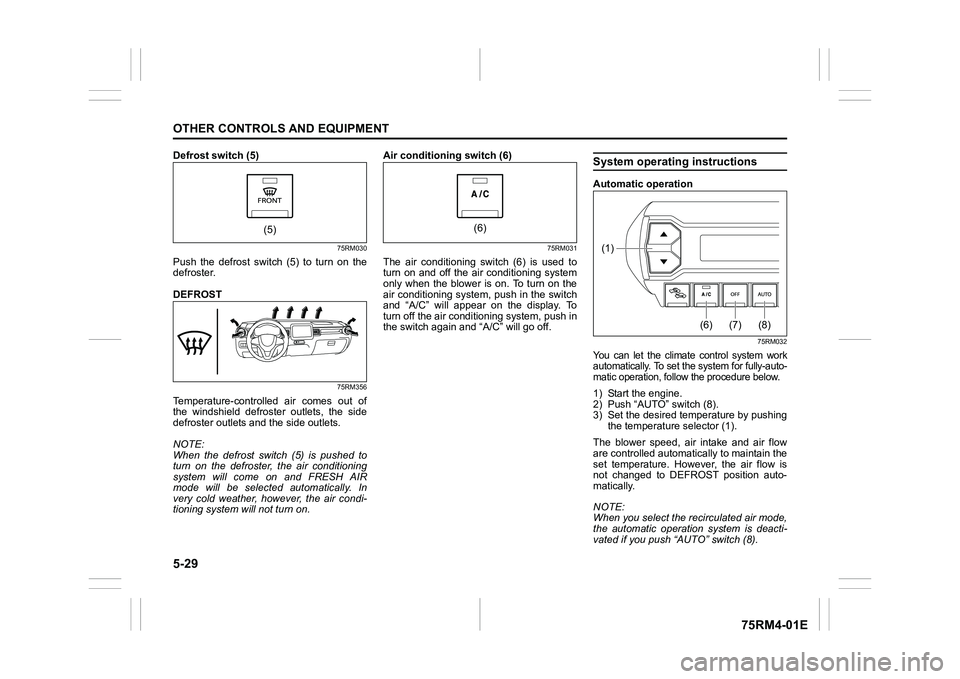
Defrost switch (5)
75RM030
Push the defrost switch (5) to turn on the
defroster.
DEFROST
75RM356
Temperature-controlled air comes out of
the windshield defroster outlets, the side
defroster outlets and the side outlets.
NOTE:
When the defrost switch (5) is pushed to
turn on the defroster, the air conditioning
system will come on and FRESH AIR
mode will be selected automatically. In
very cold weather, however, the air condi-
tioning system will not turn on. Air conditioning switch (6)
75RM031
The air conditioning switch (6) is used to
turn on and off the air conditioning system
only when the blower is on. To turn on the
air conditioning system, push in the switch
and “A/C” will appear on the display. To
turn off the air cond
itioning system, push in
the switch again and “A/C” will go off.
System operating instructionsAutomatic operation
75RM032
You can let the climate control system work
automatically. To set the system for fully-auto-
matic operation, follow the procedure below.1) Start the engine.
2) Push “AUTO” switch (8).
3) Set the desired te mperature by pushing
the temperature selector (1).
The blower speed, air intake and air flow
are controlled automatically to maintain the
set temperature. However, the air flow is
not changed to DEFROST position auto-
matically.
NOTE:
When you select the recirculated air mode,
the automatic operation system is deacti-
vated if you push “AUTO” switch (8).
(5)
(6)
(8)
(7)
(6)
(1)
Page 286 of 505
5-31OTHER CONTROLS AND EQUIPMENT
75RM4-01E
Models with ENG A-STOP System
(if equipped)
• If the heating performance can no longerperform at a sufficient level due to auto-
matically stopping the engine, press the
ENG A-STOP OFF switch to deactivate
the ENG A-STOP system. (The engine
will automatically restart and the air con-
ditioning performanc e will be restored.)
• If the windshield and/or the driver’s side/ passenger side door windows are
fogged during automatic ally stopping the
engine, stop the ENG A-STOP system
and restart the engine. Then, turn the air
flow selector (4) to change the air flow to
the HEAT & DEFROST or DEFROST
position to defog the windows.
MaintenanceIf you do not use the air conditioner for a
long period, such as during winter, it may
not give the best performance when you
start using it again. To help maintain opti-
mum performance and durability of your air
conditioner, it needs to be run periodically.
Operate the air conditioner at least once a
month for one minute with the engine
idling. This circulates the refrigerant and oil
and helps protect the internal components.
If your air conditioner is equipped with air
filters, clean or replace them as specified
in “Maintenance schedule” in the
“INSPECTION AND MAINTENANCE” sec-
tion. Have this job done by your SUZUKI
dealer as the lower glove box must be low-
ered for this job.
(For vehicles using “HFO-1234yf” refrig-
erant)
NOTE:
Your vehicle uses the air conditioning
refrigerant HFO-1234yf, commonly called
R-1234yf. R-1234yf replaced R-134a for
automotive applications. Other refriger-
ants are available, but only R-1234yf
should be used in your vehicle. (Except for vehicles using “HFO-1234yf”
refrigerant)
NOTE:
Your vehicle uses the air conditioning
refrigerant HFC-134a, commonly called
R-134a. R-134a replaced R-12 around
1993 for automotive applications. Other
refrigerants are available, including recy-
cled R-12, but only R-134a should be used
in your vehicle.
NOTICE
Using the wrong refrigerant may
damage your air conditioning sys-
tem. Use R-1234yf only. Do not mix or
replace the R-1234yf with other refrig-
erants.
NOTICE
Using the wrong refrigerant may
damage your air conditioning sys-
tem. Use R-134a only. Do not mix or
replace the R-134a with other refrig-
erants.
Page 306 of 505
5-51OTHER CONTROLS AND EQUIPMENT
75RM4-01E
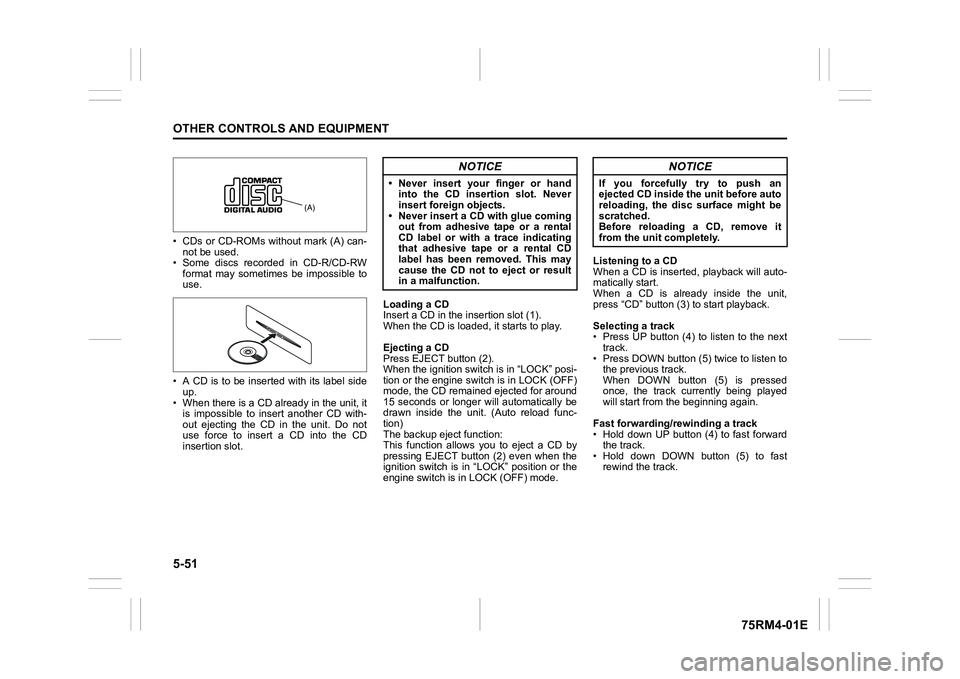
• CDs or CD-ROMs without mark (A) can-not be used.
• Some discs recorded in CD-R/CD-RW format may sometime s be impossible to
use.
• A CD is to be inserted with its label side up.
• When there is a CD already in the unit, it is impossible to insert another CD with-
out ejecting the CD in the unit. Do not
use force to insert a CD into the CD
insertion slot. Loading a CD
Insert a CD in the insertion slot (1).
When the CD is loaded, it starts to play.
Ejecting a CD
Press EJECT button (2).
When the ignition switch is in “LOCK” posi-
tion or the engine switch is in LOCK (OFF)
mode, the CD remained ejected for around
15 seconds or longer will automatically be
drawn inside the unit. (Auto reload func-
tion)
The backup eject function:
This function allows you to eject a CD by
pressing EJECT button (2) even when the
ignition switch is in “LOCK” position or the
engine switch is in LOCK (OFF) mode. Listening to a CD
When a CD is inserted, playback will auto-
matically start.
When a CD is already inside the unit,
press “CD” button (3
) to start playback.
Selecting a track
• Press UP button (4) to listen to the next track.
• Press DOWN button (5) twice to listen to the previous track.
When DOWN button (5) is pressed
once, the track currently being played
will start from the beginning again.
Fast forwarding/rewinding a track
• Hold down UP button (4) to fast forward the track.
• Hold down DOWN button (5) to fast rewind the track.
(A)
NOTICE
• Never insert your finger or handinto the CD insertion slot. Never
insert foreign objects.
• Never insert a CD with glue coming out from adhesive tape or a rental
CD label or with a trace indicating
that adhesive tape or a rental CD
label has been removed. This may
cause the CD not to eject or result
in a malfunction.
NOTICE
If you forcefully try to push an
ejected CD inside the unit before auto
reloading, the disc surface might be
scratched.
Before reloading a CD, remove it
from the unit completely.
Page 317 of 505
![SUZUKI IGNIS 2021 Owners Manual 5-62
OTHER CONTROLS AND EQUIPMENT
75RM4-01E
Playing mode selection
1) Press the button numbered [6] of PRE-SET buttons (8) for 1 second or longer.
2) Turn “TUNE/FLD PUSH SOUND” knob (2).
Eac SUZUKI IGNIS 2021 Owners Manual 5-62
OTHER CONTROLS AND EQUIPMENT
75RM4-01E
Playing mode selection
1) Press the button numbered [6] of PRE-SET buttons (8) for 1 second or longer.
2) Turn “TUNE/FLD PUSH SOUND” knob (2).
Eac](/img/20/43482/w960_43482-316.png)
5-62
OTHER CONTROLS AND EQUIPMENT
75RM4-01E
Playing mode selection
1) Press the button numbered [6] of PRE-SET buttons (8) for 1 second or longer.
2) Turn “TUNE/FLD PUSH SOUND” knob (2).
Each time the knob is turned, the mode
will change as follows:
3) Press “TUNE/FLD PUSH SOUND” knob (2) to select the desired mode.
NOTE:
• When the button numbered [6] of PRE- SET buttons (8) is pressed, the previous
mode will be displayed.
Notes on iPod
®
Supported iPod
®
•iPod
® touch (6th generation)
•iPod® touch (5th generation)
•iPod® touch (4th generation)
•iPod® touch (3rd generation)
•iPod® touch (2nd generation)
•iPod® touch (1st generation)
•iPod® classic
•iPod® nano (7th generation)
•iPod® nano (6th generation)
•iPod® nano (5th generation)
•iPod® nano (4th generation)
•iPod® nano (3rd generation)
•iPod® nano (2nd generation)
•iPod® nano (1st generation)
•iPod® (5th generation)
• iPhone® 6S Plus
• iPhone® 6S
• iPhone® 6 Plus
• iPhone® 6
• iPhone® 5S
• iPhone® 5C
• iPhone® 5
• iPhone® 4S
• iPhone® 4
• iPhone® 3GS
• iPhone® 3G
• iPhone®
* Some functions may not be available depending on the model of iPod
®.
*iPod
® is a trademark of Apple Inc., regis-
tered in the U.S. and other countries.
* iPhone® is a trademark of Apple Inc.,
registered in the U.S. and other coun-
tries.
* Apple is not responsible for the opera- tion of this device or its compliance with
safety and regulatory standards.
iPod
® connection
• Make sure to detach the iPod
® after
turning the ignition switch to “LOCK”
position or pressing the engine switch to
change the ignition mode to LOCK
(OFF). The iPod
® may not be shut down
when it is being connected and may
result in battery depletion.
• Do not connect iPod
® accessories such
as an iPod
® remote control or head-
phones while connecting the iPod
® with
the unit. The unit may not operate cor-
rectly.
PLAYLIST
ARTIST
ALBUM
SONGS
PODCAST
GENRE
AUDIOBOOK
Page 332 of 505

5-77OTHER CONTROLS AND EQUIPMENT
75RM4-01E
Deletion of audio device information
(Delete Audio)
Follow the instructions below to delete the
registered audio device information.
1) Press the Bluetooth
® setup button (7)
or (8).
The Bluetooth
® setup menu will be dis-
played.
2) Turn “TUNE/FLD PUSH SOUND” knob
(2) to select “Setup Bluetooth”, and
press the knob (2) to determine the
selection.
3) Turn “TUNE/FLD PUSH SOUND” knob (2) to select “List Audio”, and press the
knob (2) to determine the selection.
4) Turn “TUNE/FLD PUSH SOUND” knob (2) to select an audio device to be
deleted, and press the knob (2) to
determine the selection.
5) Turn “TUNE/FLD PUSH SOUND” knob
(2) to select “Delete”, and press the
knob (2) to determine the selection.
6) Turn “TUNE/FLD PUSH SOUND” knob
(2) to select “Delete?”, and press the
knob (2) to determine the selection.
7) Turn “TUNE/FLD PUSH SOUND” knob
(2) to select “Confirm”, and press the
knob (2) to complete the deletion.
NOTE:
When selecting “Go Back” or pressing
BACK button (6), the previous menu will
be displayed.
Disclaimer for Bluetooth
® function
• Depending on compatibility of mobile phone models, no Bluetooth
® function
can be used, or some Bluetooth® func-
tions may be restricted.
• Connectivity or voice quality may get
affected depending on circumstances.
• After the ignition switch is turned to “ON” position or the engine switch is pressed
to change the ignition mode to ON, the
audio system takes few seconds to
detect and connect to the Bluetooth
®
device (if already paired).
Remote audio controls (if equipped)Controlling basic functions of the audio
system is available us ing the switches on
the steering wheel.
75RM063
(4) (4)
(2)
(1) (3)
Page 343 of 505
6-2
VEHICLE LOADING AND TOWING
75RM4-01E
To w b a r sOnly use a tow bar that is designed to
attach to the chassis of your vehicle, and a
hitch that is designed to bolt to this tow bar.
We recommend that you use a genuine
SUZUKI tow bar (available as option), or
equivalent.Safety chainsAlways attach safety chains between your
vehicle and trailer. Cross safety chains
under the nose of the trailer so that the
nose will not drop to the road if the trailer
becomes separated from the tow bar. Fol-
low the manufacturer’s recommendation
for attaching safety chains. Always leave
just enough slack to permit full turning.
Never allow safety chains to drag on the
road.
Trailer lightsCheck that your trailer is equipped with
lights which meet local requirements.
Always check for the proper operation of
all trailer lights before you start to tow.Brakes
WA R N I N G
For vehicles equipped with the dual
camera brake support, if your vehicle
is used to tow a trailer, press the dual
camera brake support OFF switch
and turn off the dual camera brake
support. If not, unexpected acci-
dents related to the system being
turned on may occur.
NOTICE
Trailer towing puts additional stress
on the engine, drive train and brakes
of your vehicle. Never tow a trailer
during the first 960 km (600 miles) of
vehicle operation.
NOTICE
When towing by a vehicle with CVT
on a long steep hill, try to take some
rest on the way to prevent overheat
or damage of the engine or transaxle.
WA R N I N G
Never use a tow bar which attaches
to the axle or the bumper of your
vehicle.
WA R N I N G
Never attach safety chains to the
bumper of your vehicle. Secure con-
nections so that they cannot come
loose.
WA R N I N G
Never connect trailer lights directly
into your vehicle’s electrical system,
or electrical system damage may
occur.
WA R N I N G
If trailer brakes are used, follow all
instructions provided by the manu-
facturer. Never connect to the brake
system of your vehicle and never
take an electrical supply directly from
the wiring harness.
Page 346 of 505
6-5VEHICLE LOADING AND TOWING
75RM4-01E
60A186
WA R N I N G
(Continued)
• Be careful when overtaking othervehicles. Allow enough room for
your trailer before changing lanes,
and use turn signal lights properly
in advance.
• Slow down and shift into a lower gear before you reach long or steep
downhill grades. It is hazardous to
attempt downshifting while you are
descending a hill.
• Do not step on the brake pedal strongly. This could cause the
brakes to over-heat resulting in
reduced braking efficiency. Use
engine braking as much as possi-
ble.
• Because of the added trailer weight, your engine may overheat
on hot days when going up long or
steep hills. Pay attention to your
engine temperature. If the high
engine coolant temperature warn-
ing light (red color) indicates over-
heating, pull off the road and stop
the vehicle in a safe place. Refer to
“Engine trouble: Overheating” in
the “EMERGENCY SERVICE” sec-
tion.
WA R N I N G
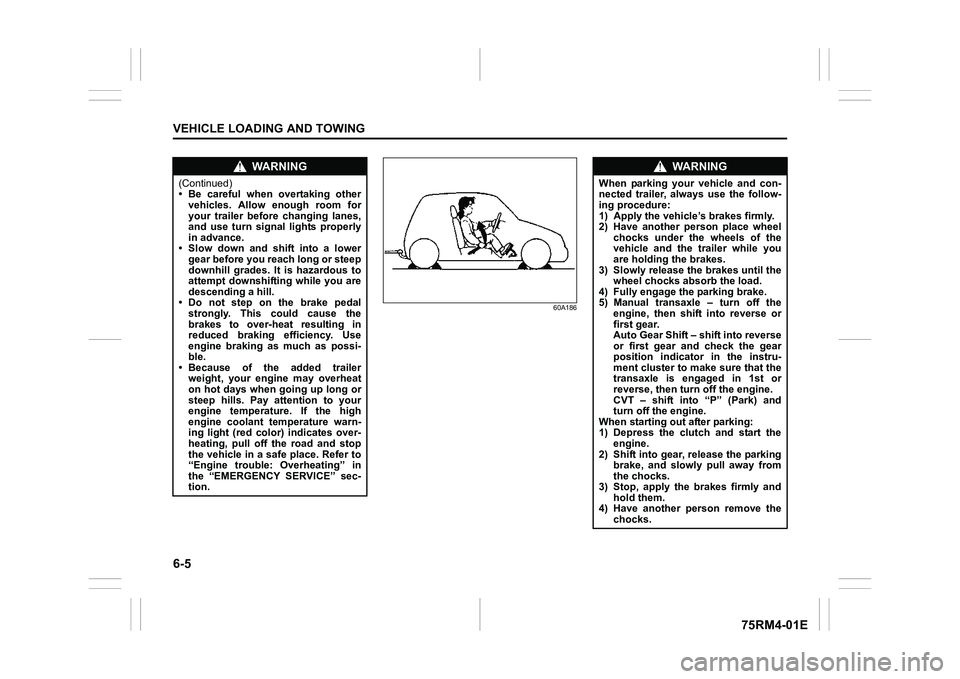
When parking your vehicle and con-
nected trailer, always use the follow-
ing procedure:
1) Apply the vehicle’s brakes firmly.
2) Have another person place wheel
chocks under the wheels of the
vehicle and the trailer while you
are holding the brakes.
3) Slowly release the brakes until the wheel chocks absorb the load.
4) Fully engage the parking brake.
5) Manual transaxle – turn off the engine, then shift into reverse or
first gear.
Auto Gear Shift – shift into reverse
or first gear and check the gear
position indicator in the instru-
ment cluster to make sure that the
transaxle is engaged in 1st or
reverse, then turn off the engine.
CVT – shift into “P” (Park) and
turn off the engine.
When starting out after parking:
1) Depress the clutch and start the engine.
2) Shift into gear, release the parking brake, and slowly pull away from
the chocks.
3) Stop, apply the brakes firmly and hold them.
4) Have another person remove the
chocks.
Page 349 of 505
INSPECTION AND MAINTENANCE
7
75RM4-01E
60G410
INSPECTION AND MAINTENANCEMaintenance schedule ........................................................ 7-2
Periodic maintenance schedule
(except for EU countries and Israel) .......................... ........ 7-3
Maintenance recommended under severe driving
conditions (except for EU countries and Israel) .............. 7 -8
Periodic maintenance schedule
(for EU countries and Israel) ................................. ............. 7-13
Maintenance recommended under severe driving
conditions (for EU countries and Israel) ........................... 7-18
Drive belt .................................................... .......................... 7-23
Engine oil and filter ......................................... .................... 7-23
Engine coolant ................................................ .................... 7-28
Air cleaner ................................................... ......................... 7-29
Spark plugs ................................................... ....................... 7-31
Continuously variable transaxle (CVT) fluid ................... .. 7-32
Gear oil ...................................................... ........................... 7-34
Clutch pedal .................................................. ....................... 7-36
Brakes ............. ..................................................................... 7-36
Steering ...................................................... .......................... 7-38
Tires ......................................................... ............................. 7-39
Battery ....................................................... ........................... 7-42
Fuses ......................................................... ........................... 7-45
Headlight aiming .............................................. ................... 7-48
Bulb replacement .............................................. .................. 7-49
Wiper blades .................................................. ...................... 7-55
Windshield washer fluid ....................................... .............. 7-58
Air conditioning system ....................................... .............. 7-58
Page 350 of 505
7-1INSPECTION AND MAINTENANCE
75RM4-01E
60B128S
WA R N I N G
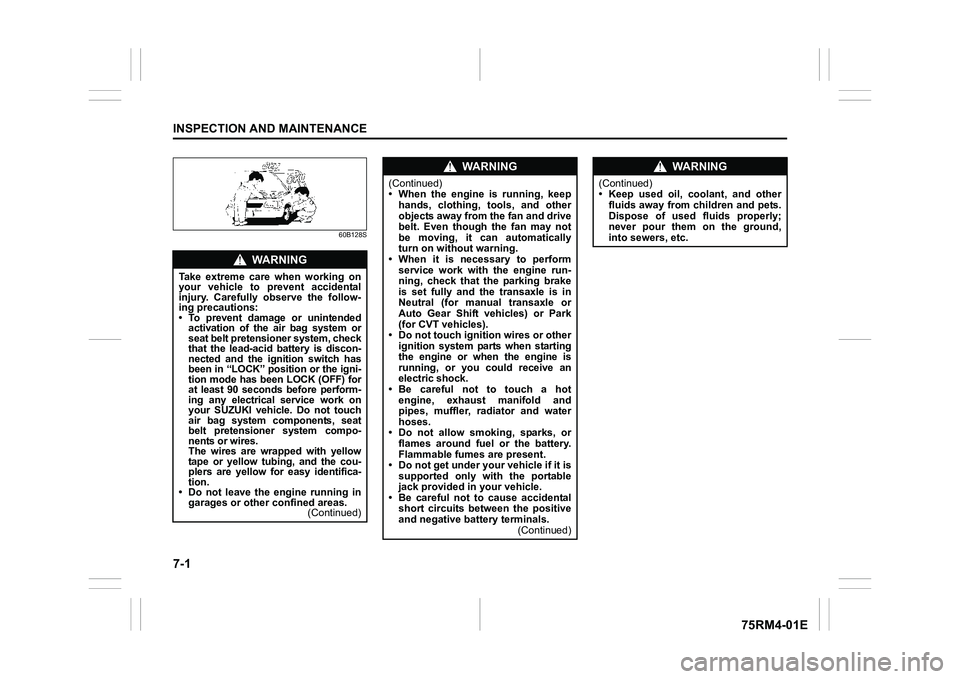
Take extreme care when working on
your vehicle to prevent accidental
injury. Carefully observe the follow-
ing precautions:
• To prevent damage or unintendedactivation of the air bag system or
seat belt pretensioner system, check
that the lead-acid battery is discon-
nected and the ignition switch has
been in “LOCK” position or the igni-
tion mode has been LOCK (OFF) for
at least 90 seconds before perform-
ing any electrical service work on
your SUZUKI vehicle. Do not touch
air bag system components, seat
belt pretensioner system compo-
nents or wires.
The wires are wrapped with yellow
tape or yellow tubing, and the cou-
plers are yellow for easy identifica-
tion.
• Do not leave the engine running in garages or other confined areas. (Continued)
WA R N I N G
(Continued)
• When the engine is running, keep
hands, clothing, tools, and other
objects away from the fan and drive
belt. Even though the fan may not
be moving, it can automatically
turn on without warning.
• When it is necessary to perform
service work with the engine run-
ning, check that the parking brake
is set fully and the transaxle is in
Neutral (for manual transaxle or
Auto Gear Shift vehicles) or Park
(for CVT vehicles).
• Do not touch ignition wires or other ignition system parts when starting
the engine or when the engine is
running, or you could receive an
electric shock.
•Be careful not to touch a hot engine, exhaust manifold and
pipes, muffler, radiator and water
hoses.
• Do not allow smoking, sparks, or flames around fuel or the battery.
Flammable fumes are present.
• Do not get under your vehicle if it is supported only with the portable
jack provided in your vehicle.
• Be careful not to cause accidental short circuits between the positive
and negative battery terminals. (Continued)
WA R N I N G
(Continued)
• Keep used oil, coolant, and other
fluids away from children and pets.
Dispose of used fluids properly;
never pour them on the ground,
into sewers, etc.