SUZUKI KIZASHI 2010 1.G Owners Manual
Manufacturer: SUZUKI, Model Year: 2010, Model line: KIZASHI, Model: SUZUKI KIZASHI 2010 1.GPages: 388, PDF Size: 4.94 MB
Page 151 of 388
3-20
OPERATING YOUR VEHICLE
57L20-03E
2WD/i-AWD Switch OperationOperate the 2WD/i-AWD switch according
to the appropriate procedure described
below:
How to turn on 2WD/i-AWD switch
2WD/i-AWD switch will activate when the
engine switch is pressed to change the
ignition mode to “ON”.
From 2WD to i-AWD
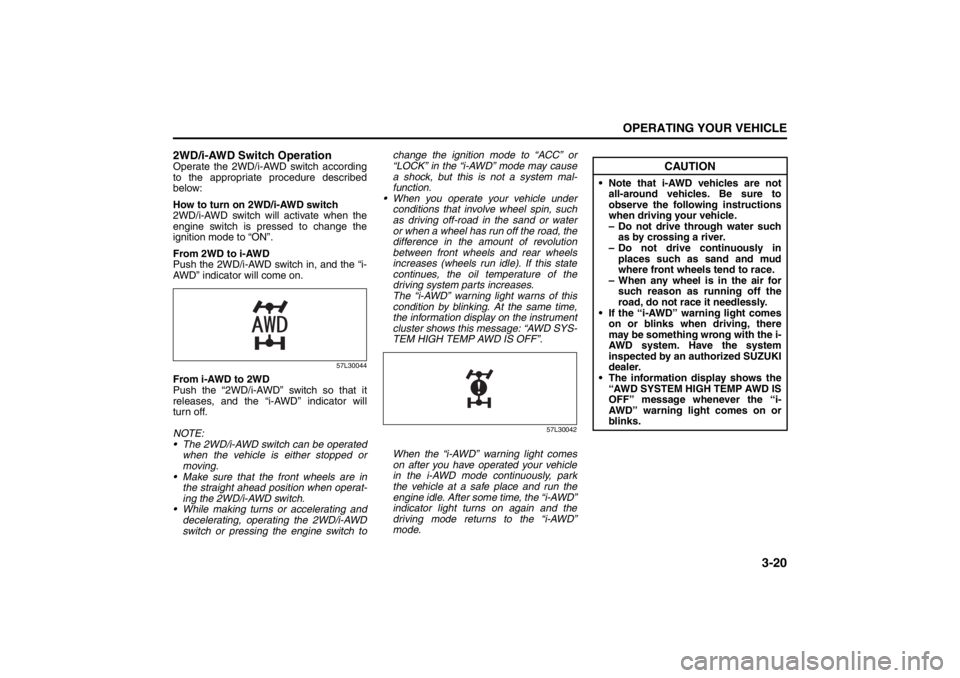
Push the 2WD/i-AWD switch in, and the “i-
AWD” indicator will come on.
57L30044
From i-AWD to 2WD
Push the “2WD/i-AWD” switch so that it
releases, and the “i-AWD” indicator will
turn off.
NOTE:
The 2WD/i-AWD switch can be operated
when the vehicle is either stopped or
moving.
Make sure that the front wheels are in
the straight ahead position when operat-
ing the 2WD/i-AWD switch.
While making turns or accelerating and
decelerating, operating the 2WD/i-AWD
switch or pressing the engine switch tochange the ignition mode to “ACC” or
“LOCK” in the “i-AWD” mode may cause
a shock, but this is not a system mal-
function.
When you operate your vehicle under
conditions that involve wheel spin, such
as driving off-road in the sand or water
or when a wheel has run off the road, the
difference in the amount of revolution
between front wheels and rear wheels
increases (wheels run idle). If this state
continues, the oil temperature of the
driving system parts increases.
The “i-AWD” warning light warns of this
condition by blinking. At the same time,
the information display on the instrument
cluster shows this message: “AWD SYS-
TEM HIGH TEMP AWD IS OFF”.
57L30042
When the “i-AWD” warning light comes
on after you have operated your vehicle
in the i-AWD mode continuously, park
the vehicle at a safe place and run the
engine idle. After some time, the “i-AWD”
indicator light turns on again and the
driving mode returns to the “i-AWD”
mode.
CAUTION
Note that i-AWD vehicles are not
all-around vehicles. Be sure to
observe the following instructions
when driving your vehicle.
– Do not drive through water such
as by crossing a river.
– Do not drive continuously in
places such as sand and mud
where front wheels tend to race.
– When any wheel is in the air for
such reason as running off the
road, do not race it needlessly.
If the “i-AWD” warning light comes
on or blinks when driving, there
may be something wrong with the i-
AWD system. Have the system
inspected by an authorized SUZUKI
dealer.
The information display shows the
“AWD SYSTEM HIGH TEMP AWD IS
OFF” message whenever the “i-
AWD” warning light comes on or
blinks.
Page 152 of 388
3-21OPERATING YOUR VEHICLE
57L20-03E
Cruise Control (if equipped)
57L31017
The cruise control system allows you to
maintain a steady speed without keeping
your foot on the accelerator pedal. The
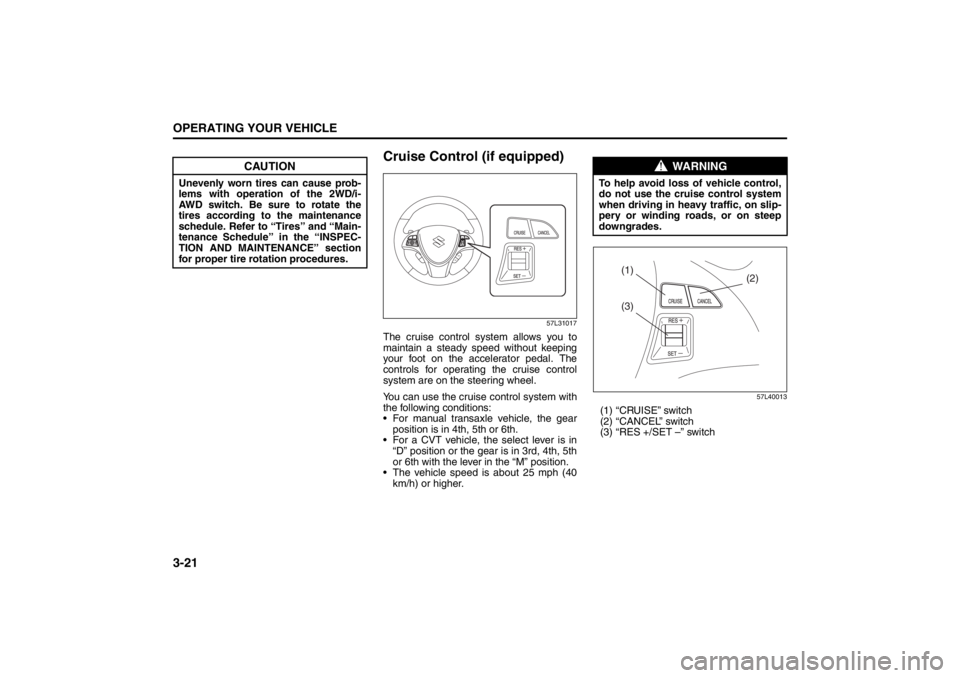
controls for operating the cruise control
system are on the steering wheel.
You can use the cruise control system with
the following conditions:
For manual transaxle vehicle, the gear
position is in 4th, 5th or 6th.
For a CVT vehicle, the select lever is in
“D” position or the gear is in 3rd, 4th, 5th
or 6th with the lever in the “M” position.
The vehicle speed is about 25 mph (40
km/h) or higher.
57L40013
(1) “CRUISE” switch
(2) “CANCEL” switch
(3) “RES +/SET –” switch
CAUTION
Unevenly worn tires can cause prob-
lems with operation of the 2WD/i-
AWD switch. Be sure to rotate the
tires according to the maintenance
schedule. Refer to “Tires” and “Main-
tenance Schedule” in the “INSPEC-
TION AND MAINTENANCE” section
for proper tire rotation procedures.
WARNING
To help avoid loss of vehicle control,
do not use the cruise control system
when driving in heavy traffic, on slip-
pery or winding roads, or on steep
downgrades.
(3)
(2) (1)
Page 153 of 388
3-22
OPERATING YOUR VEHICLE
57L20-03E
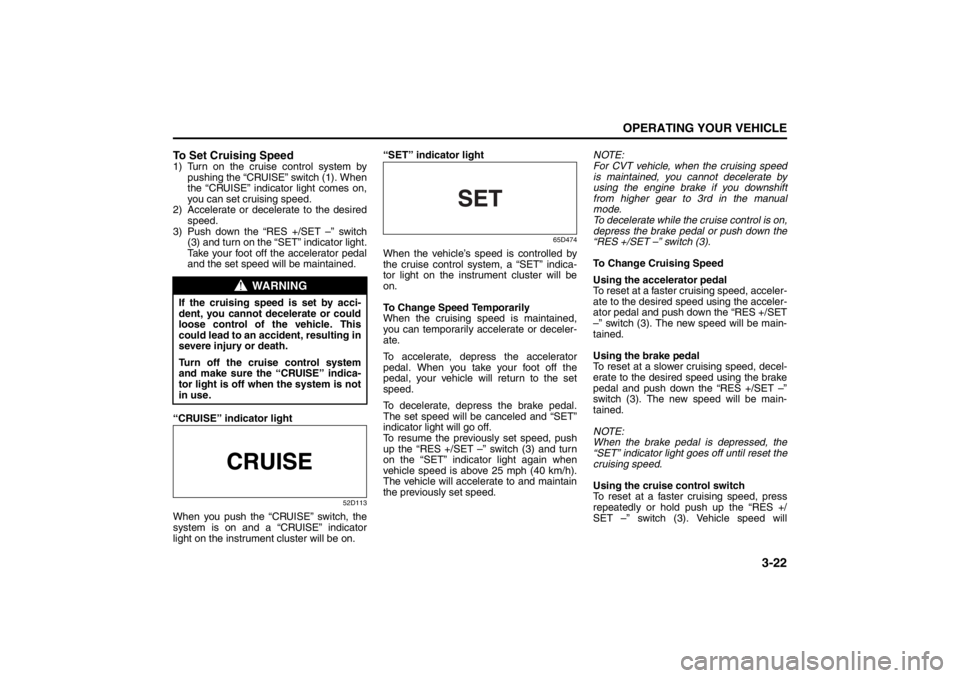
To Set Cruising Speed1) Turn on the cruise control system by
pushing the “CRUISE” switch (1). When
the “CRUISE” indicator light comes on,
you can set cruising speed.
2) Accelerate or decelerate to the desired
speed.
3) Push down the “RES +/SET –” switch
(3) and turn on the “SET” indicator light.
Take your foot off the accelerator pedal
and the set speed will be maintained.
“CRUISE” indicator light
52D113
When you push the “CRUISE” switch, the
system is on and a “CRUISE” indicator
light on the instrument cluster will be on.“SET” indicator light
65D474
When the vehicle’s speed is controlled by
the cruise control system, a “SET” indica-
tor light on the instrument cluster will be
on.
To Change Speed Temporarily
When the cruising speed is maintained,
you can temporarily accelerate or deceler-
ate.
To accelerate, depress the accelerator
pedal. When you take your foot off the
pedal, your vehicle will return to the set
speed.
To decelerate, depress the brake pedal.
The set speed will be canceled and “SET”
indicator light will go off.
To resume the previously set speed, push
up the “RES +/SET –” switch (3) and turn
on the “SET” indicator light again when
vehicle speed is above 25 mph (40 km/h).
The vehicle will accelerate to and maintain
the previously set speed.NOTE:
For CVT vehicle, when the cruising speed
is maintained, you cannot decelerate by
using the engine brake if you downshift
from higher gear to 3rd in the manual
mode.
To decelerate while the cruise control is on,
depress the brake pedal or push down the
“RES +/SET –” switch (3).
To Change Cruising Speed
Using the accelerator pedal
To reset at a faster cruising speed, acceler-
ate to the desired speed using the acceler-
ator pedal and push down the “RES +/SET
–” switch (3). The new speed will be main-
tained.
Using the brake pedal
To reset at a slower cruising speed, decel-
erate to the desired speed using the brake
pedal and push down the “RES +/SET –”
switch (3). The new speed will be main-
tained.
NOTE:
When the brake pedal is depressed, the
“SET” indicator light goes off until reset the
cruising speed.
Using the cruise control switch
To reset at a faster cruising speed, press
repeatedly or hold push up the “RES +/
SET –” switch (3). Vehicle speed will
WARNING
If the cruising speed is set by acci-
dent, you cannot decelerate or could
loose control of the vehicle. This
could lead to an accident, resulting in
severe injury or death.
Turn off the cruise control system
and make sure the “CRUISE” indica-
tor light is off when the system is not
in use.
Page 154 of 388

3-23OPERATING YOUR VEHICLE
57L20-03E
steadily increase. When you release the
switch, the new speed will be maintained.
To reset at a slower cruising speed, press
repeatedly or hold push down the “RES +/
SET –” switch (3) until the vehicle has
slowed to the desired speed, then release
the switch. The new speed will be main-
tained.
NOTE:
You can adjust the set speed by approxi-
mately 1.0 mph (1.6 km/h) by pushing a
cruise control switch quickly.
Cancellation of the Cruise Control
The “SET” indicator light will go off and the
cruise control will be canceled temporarily
with following procedures:
Push the “CANCEL” switch (2).
Depress the brake pedal.
For manual transaxle, depress the clutch
pedal.
For CVT, downshift from 3rd to 2nd in the
manual mode.
The vehicle speed falls more than about
20 percent from the set speed.
Any time the vehicle speed falls below
25 mph (40 km/h).
When the vehicle skids and ESP
® (if
equipped) is activated.
To resume the previously set speed, push
up the “RES +/SET –” switch (3) and turn
on the “SET” indicator light. Besides, the
vehicle speed has to be above 25 mph (40km/h) when the vehicle is not in the above
conditions.
To turn off the cruise control system, push
the “CRUISE” switch (1) and make sure
the “CRUISE” indicator light is off.
Also, if the malfunction indicator light in the
instrument cluster comes on or blinks, the
cruise control system will be turned off.
NOTE:
If you turn off the cruise control system, the
previously set speed in the memory is
cleared. Reset your cruising speed again.
Parking Sensors
(if equipped)
57L40019
(1) Symbol representing an obstacle
detected by parking sensor*
* This symbol represents an obstacle that
is located to the right rear at the vehicle.
The parking sensor system uses ultra-
sonic sensors to detect obstacles near
the rear bumper. If obstacles are sensed
while you are parking or moving the
vehicle slowly, the system warns you by
sounding a buzzer and displaying sym-
bols representing the obstacles on the
information display in the instrument
cluster.
The system emits an ultrasonic wave
and the relevant sensor detects the
return of the wave reflected by an obsta-
cle. The system measures the time
(1)
Page 155 of 388
3-24
OPERATING YOUR VEHICLE
57L20-03E
taken by the ultrasonic wave to reach the
obstacle and return from it, from which it
determines the obstacle’s position.
The parking sensor function can be used
when you press the engine switch to
change the ignition mode to “ON”, the
gearshift lever is in the “R” position and
the parking sensor switch is in the ON
position. This function is helpful when
parallel-parking the vehicle, steering the
vehicle into the garage or moving slowly
in a place with obstacles.
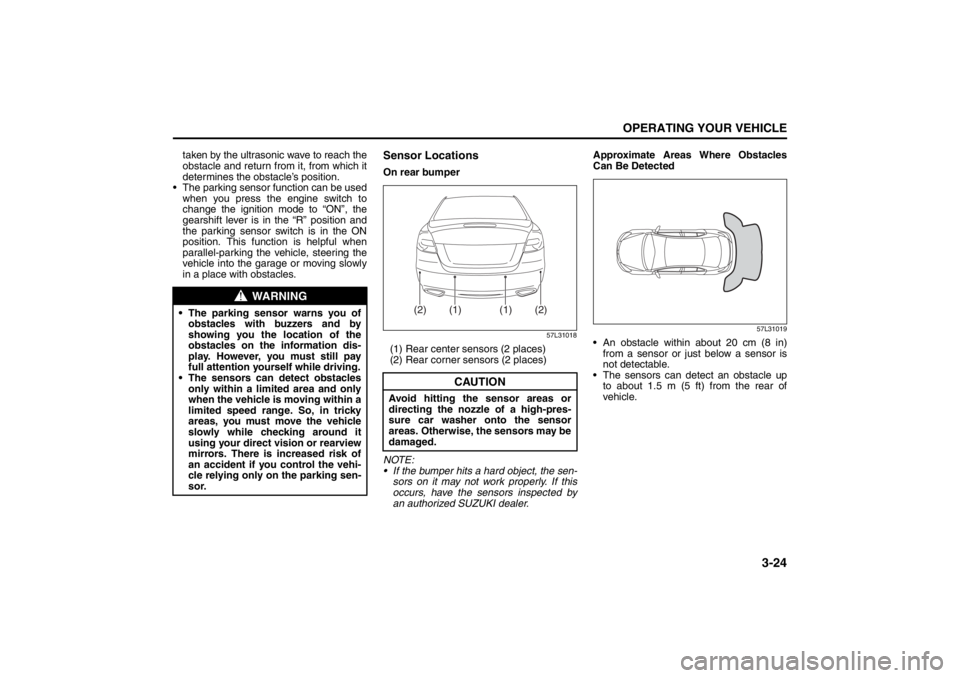
Sensor LocationsOn rear bumper
57L31018
(1) Rear center sensors (2 places)
(2) Rear corner sensors (2 places)
NOTE:
If the bumper hits a hard object, the sen-
sors on it may not work properly. If this
occurs, have the sensors inspected by
an authorized SUZUKI dealer.Approximate Areas Where Obstacles
Can Be Detected
57L31019
An obstacle within about 20 cm (8 in)
from a sensor or just below a sensor is
not detectable.
The sensors can detect an obstacle up
to about 1.5 m (5 ft) from the rear of
vehicle.
WARNING
The parking sensor warns you of
obstacles with buzzers and by
showing you the location of the
obstacles on the information dis-
play. However, you must still pay
full attention yourself while driving.
The sensors can detect obstacles
only within a limited area and only
when the vehicle is moving within a
limited speed range. So, in tricky
areas, you must move the vehicle
slowly while checking around it
using your direct vision or rearview
mirrors. There is increased risk of
an accident if you control the vehi-
cle relying only on the parking sen-
sor.
CAUTION
Avoid hitting the sensor areas or
directing the nozzle of a high-pres-
sure car washer onto the sensor
areas. Otherwise, the sensors may be
damaged.
(1)
(1)
(2)
(2)
Page 156 of 388

3-25OPERATING YOUR VEHICLE
57L20-03E
NOTE:
Thin poles or obstacles lower than the
sensors may become undetectable as
the vehicle moves closer to them even if
they have been detected from longer dis-
tances. The system may calculate the distance
to a road sign or similar obstacle to be
shorter than the actual distance.
Certification (Canada only)
This ISM device complies with Canadian
ICES*-001
* Interference-Causing Equipment Stan-
dards
CAUTION
Under the following conditions, the
parking sensor system may not
work normally because the sensors
cannot detect obstacles correctly.
– Sensors are covered with mud,
ice or other materials. (Such
materials must be removed for
normal operation.)
– Sensors are wet from water
splashes or heavy rain.
– Sensors are covered by a hand,
sticker, accessory, etc.
– There is an accessory or other
object attached within the sen-
sor’s sensing area.
– Items such as tow hooks, a back-
lit license plate, commercially
available corner poles, radio
antenna, etc. are installed on the
bumper.
– The height of the bumper is
changed due to alteration to the
suspension or other causes.
– The sensor areas are extremely
hot from direct sunlight or cold
due to freezing weather.
– The vehicle is on a rough sur-
face, slope, gravel road or grass
field.
– The vehicle is at a steep angle.
(Continued)
CAUTION
(Continued)
– Sensors have intercepted ultra-
sonic noise from another vehi-
cle’s horn, engine, air braking
system (large vehicles), or park-
ing sensor.
– Obstacles are too close to the
sensors.
– Sensors are at an angle to a
highly reflective object such as
glass. (Ultrasonic waves are not
reflected back from the obstacle.)
Sensors may not be able to cor-
rectly detect the following types of
obstacles:
– Objects made of a thin material
like wire netting and ropes
– Square-shaped curbstones or
other objects with sharp edges
– Tall objects with a large upper
part like a road sign
– Low-profile objects such as curb-
stones
– Sound-absorbing objects such
as cotton and snow
Page 157 of 388
3-26
OPERATING YOUR VEHICLE
57L20-03E
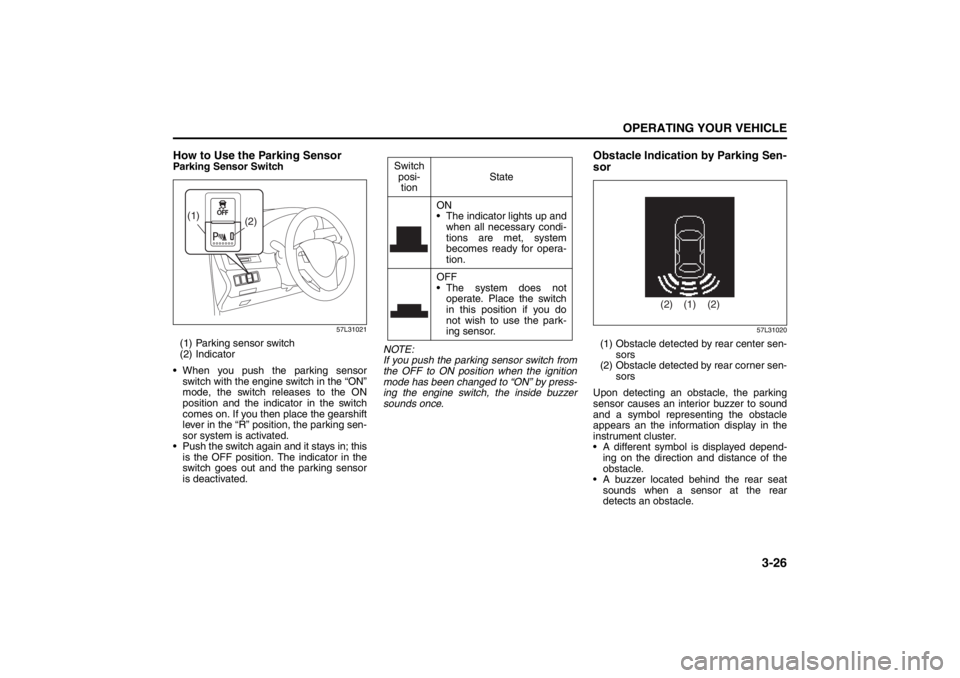
How to Use the Parking SensorParking Sensor Switch
57L31021
(1) Parking sensor switch
(2) Indicator
When you push the parking sensor
switch with the engine switch in the “ON”
mode, the switch releases to the ON
position and the indicator in the switch
comes on. If you then place the gearshift
lever in the “R” position, the parking sen-
sor system is activated.
Push the switch again and it stays in; this
is the OFF position. The indicator in the
switch goes out and the parking sensor
is deactivated.NOTE:
If you push the parking sensor switch from
the OFF to ON position when the ignition
mode has been changed to “ON” by press-
ing the engine switch, the inside buzzer
sounds once.
Obstacle Indication by Parking Sen-
sor
57L31020
(1) Obstacle detected by rear center sen-
sors
(2) Obstacle detected by rear corner sen-
sors
Upon detecting an obstacle, the parking
sensor causes an interior buzzer to sound
and a symbol representing the obstacle
appears an the information display in the
instrument cluster.
A different symbol is displayed depend-
ing on the direction and distance of the
obstacle.
A buzzer located behind the rear seat
sounds when a sensor at the rear
detects an obstacle.
(2) (1)
Switch
posi-
tionState
ON
The indicator lights up and
when all necessary condi-
tions are met, system
becomes ready for opera-
tion.
OFF
The system does not
operate. Place the switch
in this position if you do
not wish to use the park-
ing sensor.
(1) (2) (2)
Page 158 of 388
3-27OPERATING YOUR VEHICLE
57L20-03E
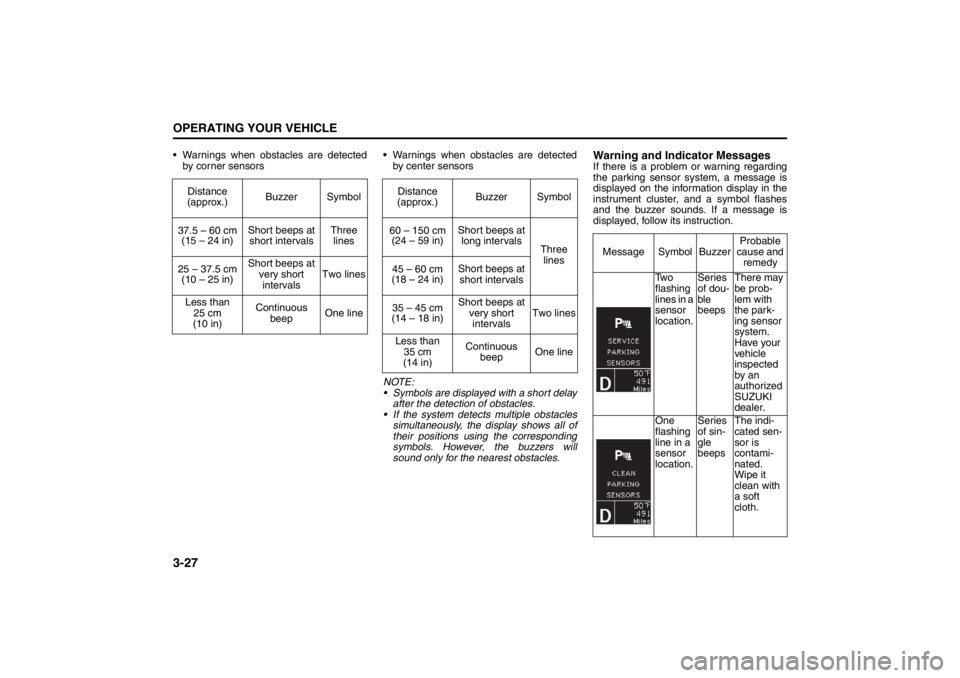
Warnings when obstacles are detected
by corner sensors Warnings when obstacles are detected
by center sensors
NOTE:
Symbols are displayed with a short delay
after the detection of obstacles.
If the system detects multiple obstacles
simultaneously, the display shows all of
their positions using the corresponding
symbols. However, the buzzers will
sound only for the nearest obstacles.
Warning and Indicator MessagesIf there is a problem or warning regarding
the parking sensor system, a message is
displayed on the information display in the
instrument cluster, and a symbol flashes
and the buzzer sounds. If a message is
displayed, follow its instruction. Distance
(approx.)Buzzer Symbol
37.5 – 60 cm
(15 – 24 in)Short beeps at
short intervalsThree
lines
25 – 37.5 cm
(10 – 25 in)Short beeps at
very short
intervalsTwo lines
Less than
25 cm
(10 in)Continuous
beepOne line
Distance
(approx.)Buzzer Symbol
60 – 150 cm
(24 – 59 in)Short beeps at
long intervals
Three
lines
45 – 60 cm
(18 – 24 in)Short beeps at
short intervals
35 – 45 cm
(14 – 18 in)Short beeps at
very short
intervalsTwo lines
Less than
35 cm
(14 in)Continuous
beepOne line
Message Symbol BuzzerProbable
cause and
remedy
Tw o
flashing
lines in a
sensor
location.Series
of dou-
ble
beepsThere may
be prob-
lem with
the park-
ing sensor
system.
Have your
vehicle
inspected
by an
authorized
SUZUKI
dealer.
One
flashing
line in a
sensor
location.Series
of sin-
gle
beepsThe indi-
cated sen-
sor is
contami-
nated.
Wipe it
clean with
a soft
cloth.
Page 159 of 388
3-28
OPERATING YOUR VEHICLE
57L20-03E
Braking
60G165
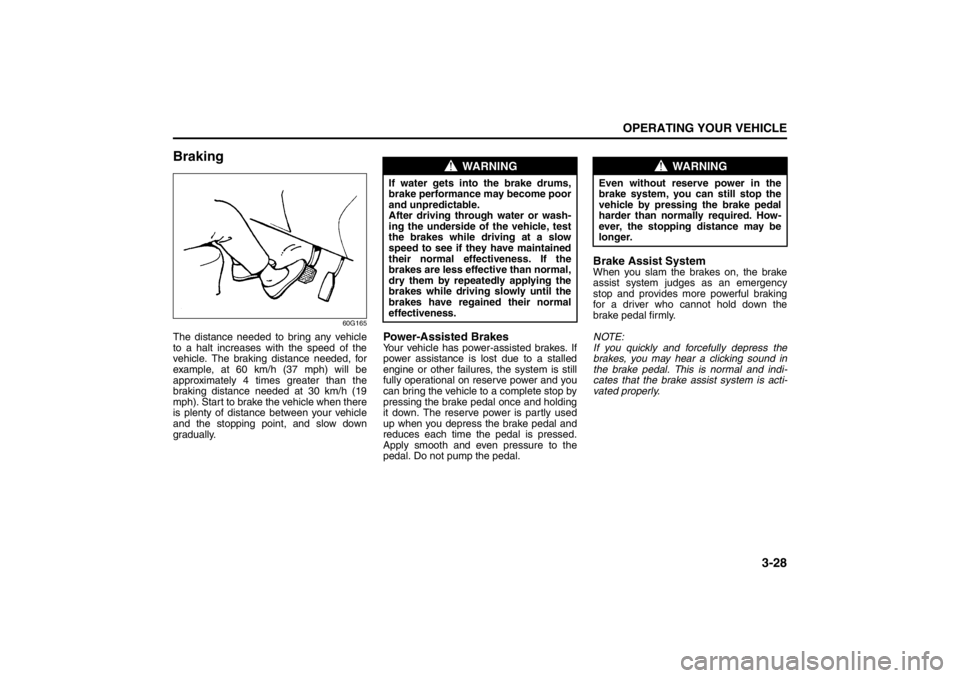
The distance needed to bring any vehicle
to a halt increases with the speed of the
vehicle. The braking distance needed, for
example, at 60 km/h (37 mph) will be
approximately 4 times greater than the
braking distance needed at 30 km/h (19
mph). Start to brake the vehicle when there
is plenty of distance between your vehicle
and the stopping point, and slow down
gradually.
Power-Assisted BrakesYour vehicle has power-assisted brakes. If
power assistance is lost due to a stalled
engine or other failures, the system is still
fully operational on reserve power and you
can bring the vehicle to a complete stop by
pressing the brake pedal once and holding
it down. The reserve power is partly used
up when you depress the brake pedal and
reduces each time the pedal is pressed.
Apply smooth and even pressure to the
pedal. Do not pump the pedal.
Brake Assist SystemWhen you slam the brakes on, the brake
assist system judges as an emergency
stop and provides more powerful braking
for a driver who cannot hold down the
brake pedal firmly.
NOTE:
If you quickly and forcefully depress the
brakes, you may hear a clicking sound in
the brake pedal. This is normal and indi-
cates that the brake assist system is acti-
vated properly.
WARNING
If water gets into the brake drums,
brake performance may become poor
and unpredictable.
After driving through water or wash-
ing the underside of the vehicle, test
the brakes while driving at a slow
speed to see if they have maintained
their normal effectiveness. If the
brakes are less effective than normal,
dry them by repeatedly applying the
brakes while driving slowly until the
brakes have regained their normal
effectiveness.
WARNING
Even without reserve power in the
brake system, you can still stop the
vehicle by pressing the brake pedal
harder than normally required. How-
ever, the stopping distance may be
longer.
Page 160 of 388
3-29OPERATING YOUR VEHICLE
57L20-03E
Anti-Lock Brake System (ABS)
(if equipped)ABS will help you avoid skidding by elec-
tronically controlling braking pressure. It
will also help you maintain steering control
when braking on slippery surfaces or when
braking hard.
The ABS works automatically, so you do
not need any special braking technique.
Just push the brake pedal down without
pumping. The ABS will operate whenever it
senses that the wheels are locking up.
You may feel the brake pedal pulsate while
the ABS is operating.
NOTE:
The ABS will not work if vehicle speed is
under about 10 km/h (6 mph).
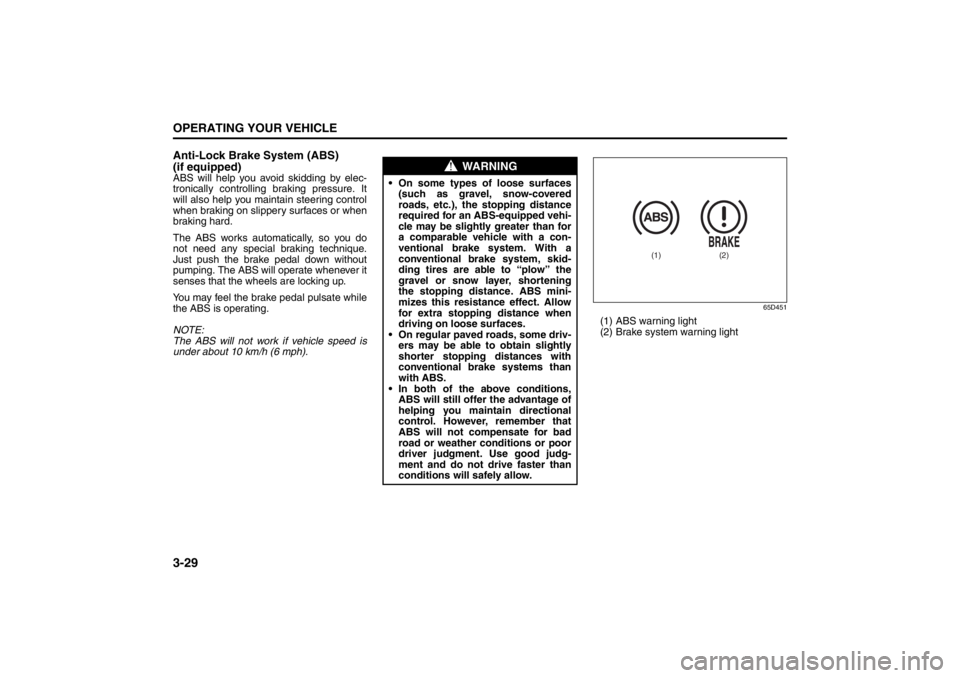
65D451
(1) ABS warning light
(2) Brake system warning light
WARNING
On some types of loose surfaces
(such as gravel, snow-covered
roads, etc.), the stopping distance
required for an ABS-equipped vehi-
cle may be slightly greater than for
a comparable vehicle with a con-
ventional brake system. With a
conventional brake system, skid-
ding tires are able to “plow” the
gravel or snow layer, shortening
the stopping distance. ABS mini-
mizes this resistance effect. Allow
for extra stopping distance when
driving on loose surfaces.
On regular paved roads, some driv-
ers may be able to obtain slightly
shorter stopping distances with
conventional brake systems than
with ABS.
In both of the above conditions,
ABS will still offer the advantage of
helping you maintain directional
control. However, remember that
ABS will not compensate for bad
road or weather conditions or poor
driver judgment. Use good judg-
ment and do not drive faster than
conditions will safely allow.
(1)
(2)