Notice SUZUKI SWIFT 2017 5.G Owners Manual
[x] Cancel search | Manufacturer: SUZUKI, Model Year: 2017, Model line: SWIFT, Model: SUZUKI SWIFT 2017 5.GPages: 336, PDF Size: 6.24 MB
Page 9 of 336
0-1
FOREWORDThis manual is an essential part of your
vehicle and should remain with the vehicle
when resold or otherwise transferred to a
new owner or operator. Please read this
manual carefully before operating your
new MARUTI SUZUKI and review the
manual from time to time. It contains
important information on safety, operation
and maintenance. You are invited to avail
the three Free Inspection Services as
described in the manual. Three free
inspection coupons are attached to this
manual. Please show this manual to your
dealer while you take your MARUTI
SUZUKI for any Service.
To prolong the life of your vehicle and
reduce maintenance cost, the periodic
maintenance must be carried out accord-
ing to “PERIODIC MAINTENANCE
SCHEDULE” described in “INSPECTION
AND MAINTENANCE” section of this man-
ual. It is essential for preventing trouble
and accidents to ensure your satisfaction
and safety.
Daily inspection and care as per “DAILY
INSPECTION CHECKLIST” described in
the “INSPECTION AND MAINTENANCE”
section of this manual is essential for pro-
longing the life of the vehicle and for safe
driving. MARUTI SUZUKI INDIA LIMITED believes
in conservation and protection of Earth’s
natural resources.
To that end, we encourage every vehicle
owner to recycle, trade-in or properly dis-
pose of, as appropriate, used Engine Oil,
coolant and other fluids, batteries and
tyres etc.
MARUTI SUZUKI INDIA LIMITED
All information in
this manual is based
on the latest product information avail-
able at the time of publication. Due to
improvements or other changes, there
may be discrepancies between informa-
tion in this manual and your vehicle.
MARUTI SUZUKI INDIA LIMITED
reserves the right to make production
changes at any time, without notice and
without incurring any obligation to
make the same or similar changes to
vehicles previously built or sold.
This vehicle may not co mply with stan-
dards or regulations of other countries.
Before attempting to register this vehi-
cle in any other country, check all appli-
cable regulations and make any neces-
sary modifications.
Page 10 of 336
0-2
55KS0-74E
IMPORTANT
WARNING/CAUTION/ NOTICE/
NOTE
Please read this manual and follow its
instructions carefully. To emphasize spe-
cial information, the symbol and the words
WARNING , CAUTION, NOTICEand
NOTE have special meanings. Pay particu-
lar attention to messages highlighted by
these signal words:
NOTE:
Indicates special information to make
maintenance easier or instructions clearer.
75F135
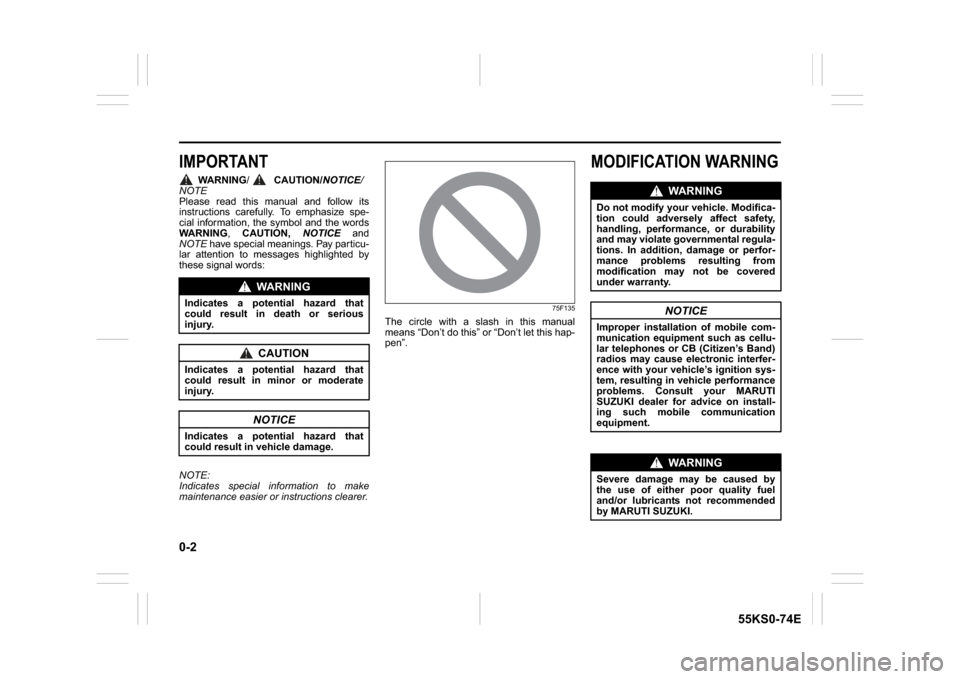
The circle with a slash in this manual
means “Don’t do this” or “Don’t let this hap-
pen”.
MODIFICATION WARNING
WA R N I N G
Indicates a potential hazard that
could result in death or serious
injury.
CAUTION
Indicates a potential hazard that
could result in minor or moderate
injury.
NOTICE
Indicates a potential hazard that
could result in vehicle damage.
WA R N I N G
Do not modify your vehicle. Modifica-
tion could adversely affect safety,
handling, performance, or durability
and may violate governmental regula-
tions. In addition, damage or perfor-
mance problems resulting from
modification may not be covered
under warranty.
NOTICE
Improper installation of mobile com-
munication equipment such as cellu-
lar telephones or CB (Citizen’s Band)
radios may cause electronic interfer-
ence with your vehicle’s ignition sys-
tem, resulting in vehicle performance
problems. Consult your MARUTI
SUZUKI dealer for advice on install-
ing such mo bile communication
equipment.
WA R N I N G
Severe damage may be caused by
the use of either poor quality fuel
and/or lubricants not recommended
by MARUTI SUZUKI.
Page 18 of 336
3/3
HWGN"TGEQOOGPFCVKQP
96NJ2/96G
HWGN"TGEQOOGPFCVKQPRgvtqn"GpikpgYou must use unleaded petrol with an
octane number (RON) of 91 or higher.
Rgvtqn1Gvjcpqn"dngpfu
Blends of unleaded petrol and ethanol
(grain alcohol), also known as gasohol, are
commercially available in some areas.
Blends of this type may be used in your
vehicle if they are no more than 10% etha-
nol. Make sure this petrol-ethanol blend
has octane ratings no lower than those
recommended for petrol.
Rgvtqn1Ogvjcpqn"dngpfu
Blends of unleaded Petrol and methanol
(wood alcohol) are also commercially
available in some areas. DO NOT USE
fuels containing more than 5% methanol
under any circumstances. Fuel system
damage or vehicle performance problems
resulting from the use of such fuels are not
the responsibility of MARUTI SUZUKI and
may not be covered under the New Vehicle
Warranty. Fuels containing 5% or less
methanol may be suitable for use in your
vehicle if they contain cosolvents and cor-
rosion inhibitors. NOTE:
If you are not satisfied with the driveability
or fuel economy of your vehicle when you
are using a Petrol/alcohol blend, you
should switch back to unleaded Petrol con-
taining no alcohol.
Fkgugn"Gpikpg
The diesel fuel should be with Cetane
Number (CN) higher than 51 and sulfur
content less than 50 ppm (parts per mil-
lion). MARUTI SUZUKI recommends to
use the diesel fuel conformable to EN590.
Do not use marine diesel fuel, heating oils
and so forth.
NOTICE
Vjg" hwgn" vcpm" jcu" cp" ckt" urceg" vq
cnnqy" hqt" hwgn" gzrcpukqp" kp" jqv
ygcvjgt0" Kh" {qw" eqpvkpwg" vq" cff" hwgn
chvgt" vjg" hknngt" pq||ng" jcu" cwvqocvk/
ecnn{" ujwv" qhh" qt" cp" kpkvkcn" dnqydcem
qeewtu." vjg" ckt" ejcodgt" yknn" dgeqog
hwnn0" Gzrquwtg" vq" jgcv" yjgp" hwnn{
hwgngf" kp" vjku" ocppgt" yknn" tguwnv" kp
ngcmcig" fwg" vq" hwgn" gzrcpukqp0" Vq
rtgxgpv"uwej"hwgn"ngcmcig."uvqr"hknnkpi
chvgt" vjg" hknngt" pq||ng" jcu" cwvqocvk/
ecnn{"ujwv"qhh."qt"yjgp"wukpi"cp"cnvgt/
pcvkxg" pqp/cwvqocvke" u{uvgo." kpkvkcn
xgpv"dnqydcem"qeewtu0
NOTICE
Dg"ectghwn"pqv"vq"urknn"hwgn"eqpvckpkpi
cneqjqn" yjkng" tghwgnkpi0" Kh" hwgn" ku
urknngf"qp"vjg"xgjkeng"dqf{."ykrg"kv"wr
koogfkcvgn{0" Hwgnu" eqpvckpkpi" cneq/
jqn"ecp"ecwug"rckp
v"fcocig."yjkej"ku
pqv" eqxgtgf" wpfgt" vjg" Pgy" Xgjkeng
Nkokvgf"Ycttcpv{0"
NOTICE
Vjg" hwgn" vcpm" jcu" cp" ckt" urceg" vq
cnnqy" hqt" hwgn" gzrcpukqp" kp" jqv
ygcvjgt0" Kh" {qw" eqpvkpwg" vq" cff" hwgn
chvgt" vjg" hknngt" pq||ng" jcu" cwvqocvk/
ecnn{" ujwv" qhh" qt" cp" kpkvkcn" dnqydcem
qeewtu." vjg" ckt" ejcodgt" yknn" dgeqog
hwnn0" Gzrquwtg" vq" jgcv" yjgp" hwnn{
hwgnngf" kp" vjku" ocppgt" yknn" tguwnv" kp
ngcmcig" fwg" vq" hwgn" gzrcpukqp0" Vq
rtgxgpv"uwej"hwgn"ngcmcig."uvqr"hknnkpi
chvgt" vjg" hknngt" pq||ng" jcu" cwvqocvk/
ecnn{"ujwv"qhh."qt"yjgp"wukpi"cp"cnvgt/
pcvkxg" pqp/cwvqocvke" u{uvgo." kpkvkcn
xgpv"dnqydcem"qeewtu0
NOTICE
Dg"ectghwn"pqv"vq"urknn"hwgn"eqpvckpkpi
cneqjqn" yjkng" tghwgnkpi0" Kh" hwgn" ku
urknngf"qp"vjg"xgjkeng"dqf{."ykrg"kv"wr
koogfkcvgn{0" Hwgnu" eqpvckpkpi" cneq/
jqn"ecp"ecwug"rckp v"fcocig."yjkej"ku
pqv" eqxgtgf" wpfgt" vjg" Pgy" Xgjkeng
Nkokvgf"Ycttcpv{0"
Hwgn"Tgeqoogpfcvkqp<"3."4
Page 21 of 336
2-2
BEFORE DRIVING
74LH0-74E
Ignition Key Reminder (if equipped)
A buzzer sounds intermittently to remind
you to remove the ignition key if it is in the
ignition switch when the driver’s door is
opened.
Door Locks
Side Door Locks
60B008
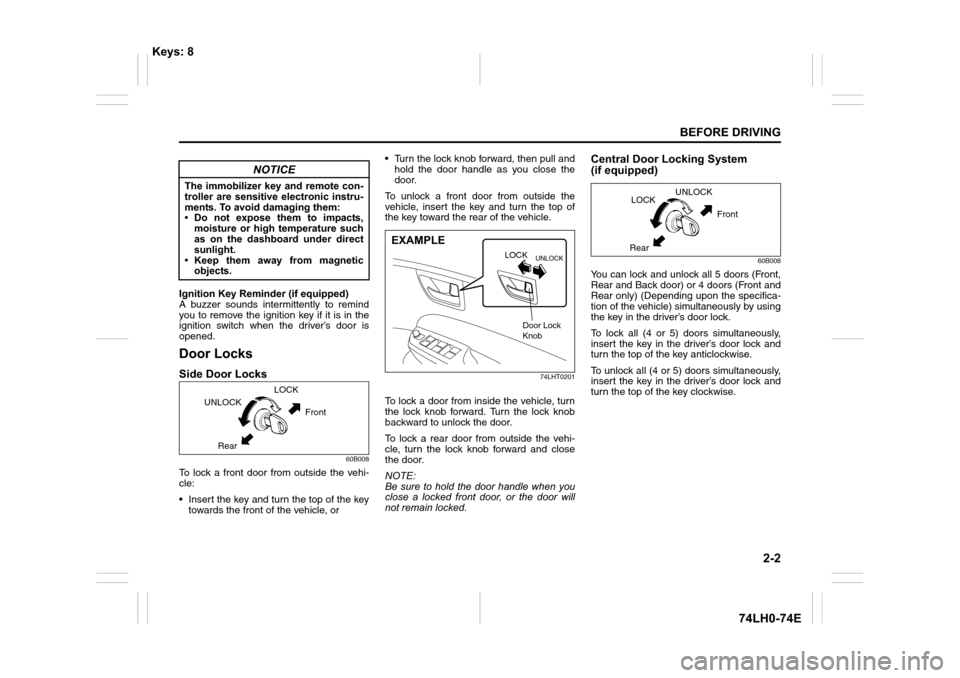
To lock a front door from outside the vehi-
cle:
• Insert the key and turn the top of the key
towards the front of the vehicle, or• Turn the lock knob forward, then pull and
hold the door handle as you close the
door.
To unlock a front door from outside the
vehicle, insert the key and turn the top of
the key toward the rear of the vehicle.
74LHT0201
To lock a door from inside the vehicle, turn
the lock knob forward. Turn the lock knob
backward to unlock the door.
To lock a rear door from outside the vehi-
cle, turn the lock knob forward and close
the door.
NOTE:
Be sure to hold the door handle when you
close a locked front door, or the door will
not remain locked.
Central Door Locking System
(if equipped)
60B008
You can lock and unlock all 5 doors (Front,
Rear and Back door) or 4 doors (Front and
Rear only) (Depending upon the specifica-
tion of the vehicle) simultaneously by using
the key in the driver’s door lock.
To lock all (4 or 5) doors simultaneously,
insert the key in the driver’s door lock and
turn the top of the key anticlockwise.
To unlock all (4 or 5) doors simultaneously,
insert the key in the driver’s door lock and
turn the top of the key clockwise.
NOTICE
The immobilizer key and remote con-
troller are sensitive electronic instru-
ments. To avoid damaging them:
• Do not expose them to impacts,
moisture or high temperature such
as on the dashboard under direct
sunlight.
• Keep them away from magnetic
objects.
UNLOCKLOCK
Front
Rear
UNLOCKLOCK
EXAMPLE
Door Lock
Knob
UNLOCK
LOCK
Front
Rear
Keys: 8
Page 28 of 336
2-9
BEFORE DRIVING
74LH0-74E
NOTE:
• If the remote controller is outside the
request switch operating range
described above, you will not be able to
operate the request switch.
• If the battery of the remote controller
runs down or there are strong radio
waves or noise, the request switch oper-
ating range may be reduced or the
remote controller may be inoperative.
• If the remote controller is too close to the
door glass, the request switches may not
operate.
• If a spare remote controller is in the vehi-
cle, the request switches may not oper-
ate normally.
• The remote controller will only operate a
request switch if it is within the switch’s
operating range. For example, if the
remote controller is within the operating
range of the driver’s door request switch
but not the front passenger’s door
request switch, the driver’s door switch
can be operated but the front passen-
ger’s door switch cannot be operated.
• Avoid operations of switch with sharp
objects or long nails.NOTE:
The keyless push start system may not
function correctly in certain environments
or under certain operating conditions such
as the following:
• When there are strong signals coming
from a television, power station or a cel-
lular phone.
• When the remote controller is in contact
with or covered by a metal object.
• When a radio wave type remote keyless
entry is used nearby.
• When the remote controller is placed
near an electronic device such as per-
sonal computer.
Some additional precautions you should
take and information you should be aware
of are:
• Make sure the key is stowed in the
remote controller. If the remote controller
becomes unreliable, you will not be able
to lock or unlock the doors.• Be sure that the driver always carries the
remote controller.
• If you lose one of the remote controllers,
ask your MARUTI SUZUKI dealer as
soon as possible for a replacement. Be
sure to have your dealer program the
new remote controller code in your vehi-
cle’s memory so that the old code is
erased.
• You can use up to four remote control-
lers and the keys for your vehicle. Ask
your MARUTI SUZUKI dealer for details.
• The battery life of the remote controller
is about two years, but it can vary
depending on usage conditions.
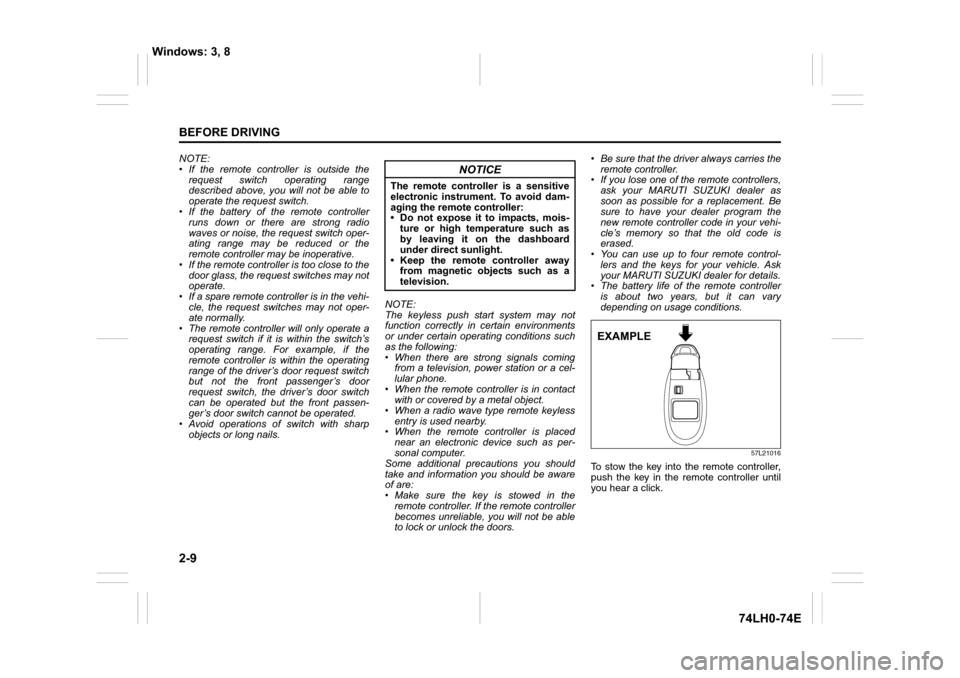
57L21016
To stow the key into the remote controller,
push the key in the remote controller until
you hear a click.
NOTICE
The remote controller is a sensitive
electronic instrument. To avoid dam-
aging the remote controller:
• Do not expose it to impacts, mois-
ture or high temperature such as
by leaving it on the dashboard
under direct sunlight.
• Keep the remote controller away
from magnetic objects such as a
television.
EXAMPLE
Windows: 3, 8
Page 30 of 336
2-11
BEFORE DRIVING
74LH0-74E
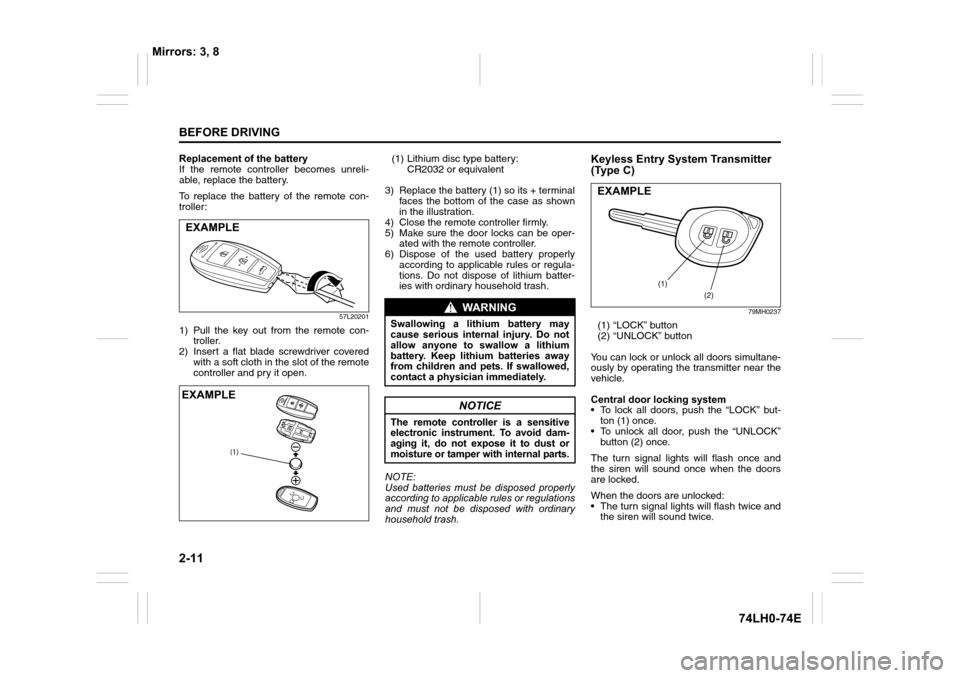
Replacement of the battery
If the remote controller becomes unreli-
able, replace the battery.
To replace the battery of the remote con-
troller:
57L20201
1) Pull the key out from the remote con-
troller.
2) Insert a flat blade screwdriver covered
with a soft cloth in the slot of the remote
controller and pry it open.(1) Lithium disc type battery:
CR2032 or equivalent
3) Replace the battery (1) so its + terminal
faces the bottom of the case as shown
in the illustration.
4) Close the remote controller firmly.
5) Make sure the door locks can be oper-
ated with the remote controller.
6) Dispose of the used battery properly
according to applicable rules or regula-
tions. Do not dispose of lithium batter-
ies with ordinary household trash.
NOTE:
Used batteries must be disposed properly
according to applicable rules or regulations
and must not be disposed with ordinary
household trash.
Keyless Entry System Transmitter
(Type C)
79MH0237
(1) “LOCK” button
(2) “UNLOCK” button
You can lock or unlock all doors simultane-
ously by operating the transmitter near the
vehicle.
Central door locking system
• To lock all doors, push the “LOCK” but-
ton (1) once.
• To unlock all door, push the “UNLOCK”
button (2) once.
The turn signal lights will flash once and
the siren will sound once when the doors
are locked.
When the doors are unlocked:
• The turn signal lights will flash twice and
the siren will sound twice.
EXAMPLE
(1)
EXAMPLE
WA R N I N G
Swallowing a lithium battery may
cause serious internal injury. Do not
allow anyone to swallow a lithium
battery. Keep lithium batteries away
from children and pets. If swallowed,
contact a physician immediately.
NOTICE
The remote controller is a sensitive
electronic instrument. To avoid dam-
aging it, do not expose it to dust or
moisture or tamper with internal parts.
(1)
(2)
EXAMPLE
Mirrors: 3, 8
Page 31 of 336
2-12
BEFORE DRIVING
74LH0-74E
• If the interior light switch is in the
“DOOR” position, the interior light will
turn on for about 15 seconds and then
fade out. If you insert the key into the
ignition switch during this time, the light
will start to fade out immediately.
Be sure the doors are locked after you
operate the “LOCK” button (1). If no door is
opened within about 30 seconds after the
“UNLOCK” button (2) is operated, the
doors will automatically lock again.NOTE:
• The maximum operating distance of the
keyless entry system transmitter is about
5 m (16 ft.), but this can vary depending
on the surroundings, especially near
other transmitting devices such as radio
towers or CB (Citizen’s Band) radios.
• The door locks cannot be operated with
the transmitter, if the ignition key is
inserted in the ignition switch.
• If any door is open, you cannot lock the
door by operating the transmitter, how-
ever unlock the door.
• If you lose one of the transmitters, ask
your MARUTI SUZUKI dealer as soon
as possible for a replacement. Be sure
to have your dealer program the new
transmitter code in your vehicle’s mem-
ory so that the old code is erased.Security System (Vehicle with
Keyless entry system)
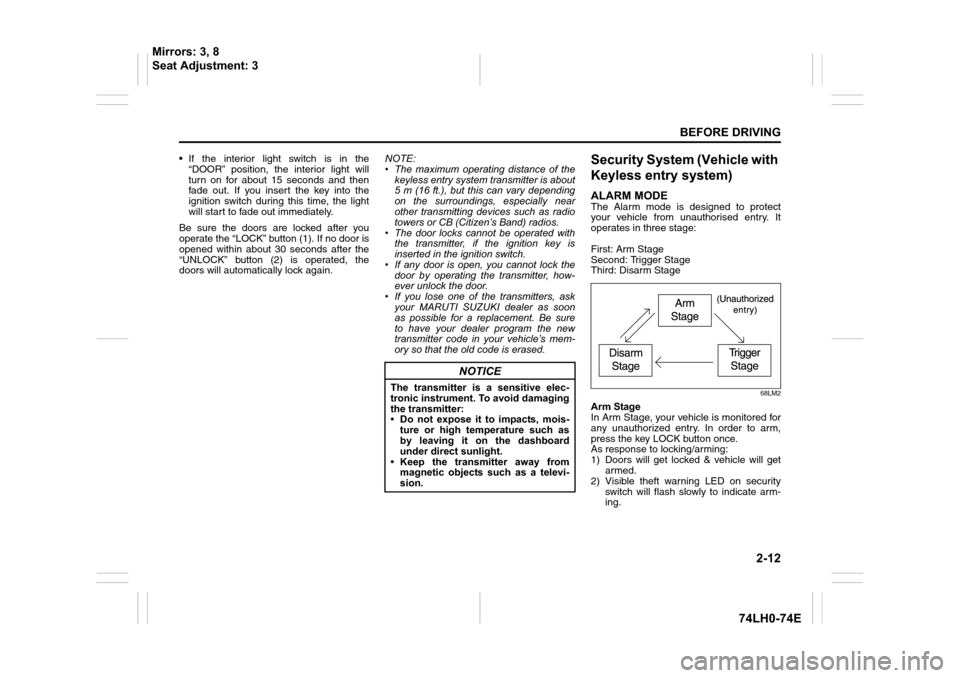
ALARM MODEThe Alarm mode is designed to protect
your vehicle from unauthorised entry. It
operates in three stage:
First: Arm Stage
Second: Trigger Stage
Third: Disarm Stage
68LM2
Arm Stage
In Arm Stage, your vehicle is monitored for
any unauthorized entry. In order to arm,
press the key LOCK button once.
As response to locking/arming:
1) Doors will get locked & vehicle will get
armed.
2) Visible theft warning LED on security
switch will flash slowly to indicate arm-
ing.
NOTICE
The transmitter is a sensitive elec-
tronic instrument. To avoid damaging
the transmitter:
• Do not expose it to impacts, mois-
ture or high temperature such as
by leaving it on the dashboard
under direct sunlight.
• Keep the transmitter away from
magnetic objects such as a televi-
sion.
Mirrors: 3, 8
Seat Adjustment: 3
Page 43 of 336
2-24
BEFORE DRIVING
74LH0-74E
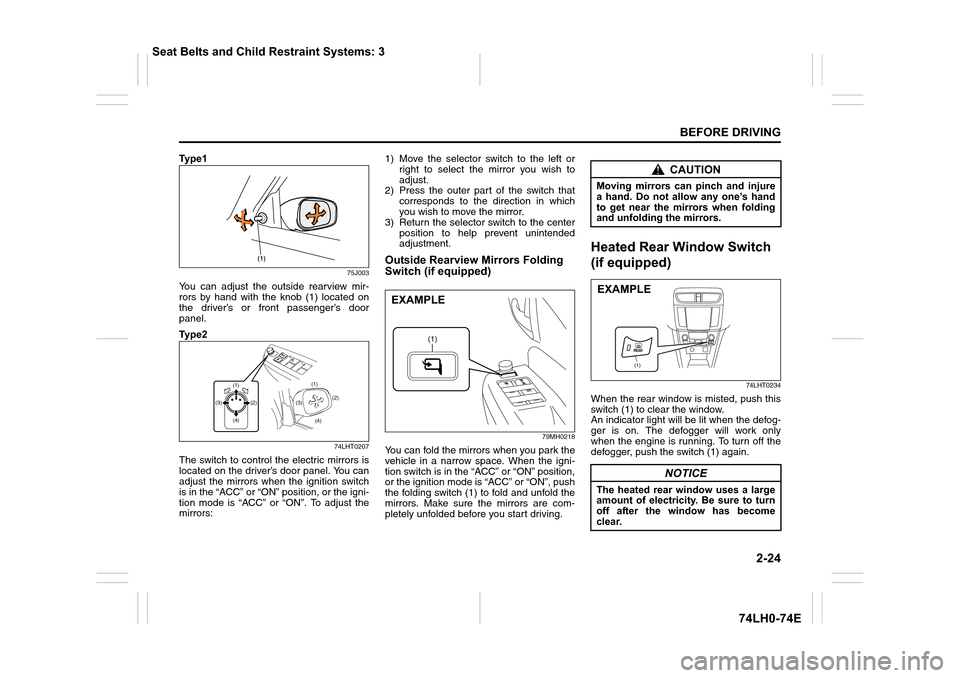
Ty p e 1
75J003
You can adjust the outside rearview mir-
rors by hand with the knob (1) located on
the driver’s or front passenger’s door
panel.
Ty p e 2
74LHT0207
The switch to control the electric mirrors is
located on the driver’s door panel. You can
adjust the mirrors when the ignition switch
is in the “ACC” or “ON” position, or the igni-
tion mode is “ACC” or “ON”. To adjust the
mirrors:1) Move the selector switch to the left or
right to select the mirror you wish to
adjust.
2) Press the outer part of the switch that
corresponds to the direction in which
you wish to move the mirror.
3) Return the selector switch to the center
position to help prevent unintended
adjustment.
Outside Rearview Mirrors Folding
Switch (if equipped)
79MH0218
You can fold the mirrors when you park the
vehicle in a narrow space. When the igni-
tion switch is in the “ACC” or “ON” position,
or the ignition mode is “ACC” or “ON”, push
the folding switch (1) to fold and unfold the
mirrors. Make sure the mirrors are com-
pletely unfolded before you start driving.
Heated Rear Window Switch
(if equipped)
74LHT0234
When the rear window is misted, push this
switch (1) to clear the window.
An indicator light will be lit when the defog-
ger is on. The defogger will work only
when the engine is running. To turn off the
defogger, push the switch (1) again.
(1)(1)
(4) (4)(2)(2)
(3)(3)
(1)
EXAMPLE
CAUTION
Moving mirrors can pinch and injure
a hand. Do not allow any one’s hand
to get near the mirrors when folding
and unfolding the mirrors.
NOTICE
The heated rear window uses a large
amount of electricity. Be sure to turn
off after the window has become
clear.
(1)
EXAMPLE
Seat Belts and Child Restraint Systems: 3
Page 44 of 336
2-25
BEFORE DRIVING
74LH0-74E
NOTE:
• The defogger will work only when the
engine is running.
• The defogger will automatically turn off
after the defogger remains on for 15 min-
utes to prevent discharging of the bat-
tery.
Front Seats
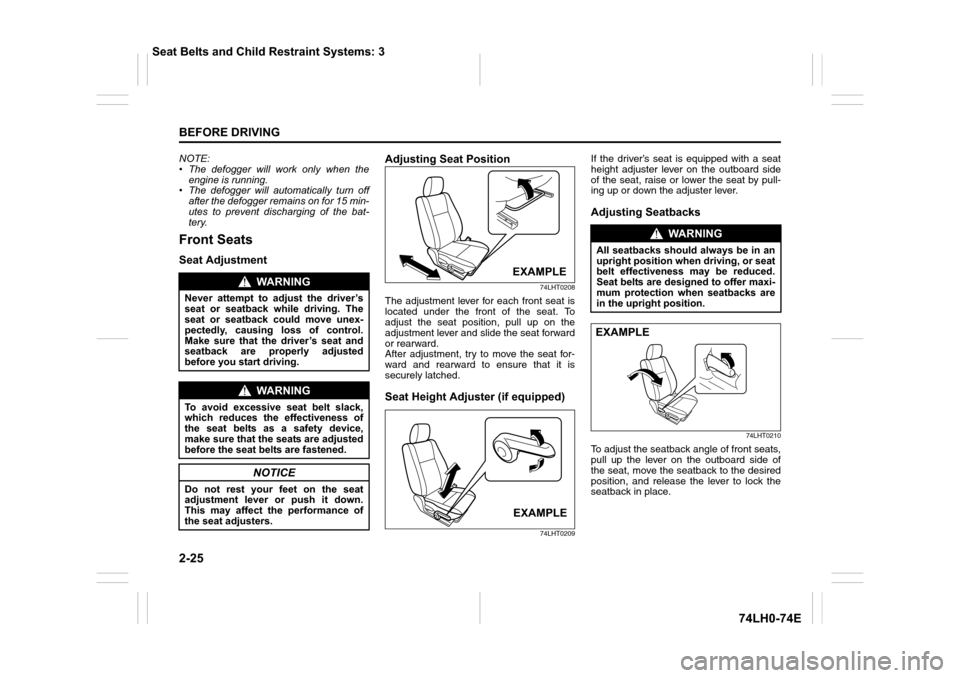
Seat AdjustmentAdjusting Seat Position
74LHT0208
The adjustment lever for each front seat is
located under the front of the seat. To
adjust the seat position, pull up on the
adjustment lever and slide the seat forward
or rearward.
After adjustment, try to move the seat for-
ward and rearward to ensure that it is
securely latched.
Seat Height Adjuster (if equipped)
74LHT0209
If the driver’s seat is equipped with a seat
height adjuster lever on the outboard side
of the seat, raise or lower the seat by pull-
ing up or down the adjuster lever.
Adjusting Seatbacks
74LHT0210
To adjust the seatback angle of front seats,
pull up the lever on the outboard side of
the seat, move the seatback to the desired
position, and release the lever to lock the
seatback in place.
WA R N I N G
Never attempt to adjust the driver’s
seat or seatback while driving. The
seat or seatback could move unex-
pectedly, causing loss of control.
Make sure that the driver’s seat and
seatback are properly adjusted
before you start driving.
WA R N I N G
To avoid excessive seat belt slack,
which reduces the effectiveness of
the seat belts as a safety device,
make sure that the seats are adjusted
before the seat belts are fastened.
NOTICE
Do not rest your feet on the seat
adjustment lever or push it down.
This may affect the performance of
the seat adjusters.
EXAMPLE
EXAMPLE
WA R N I N G
All seatbacks should always be in an
upright position when driving, or seat
belt effectiveness may be reduced.
Seat belts are designed to offer maxi-
mum protection when seatbacks are
in the upright position.
EXAMPLE
Seat Belts and Child Restraint Systems: 3
Page 46 of 336
2-27
BEFORE DRIVING
74LH0-74E
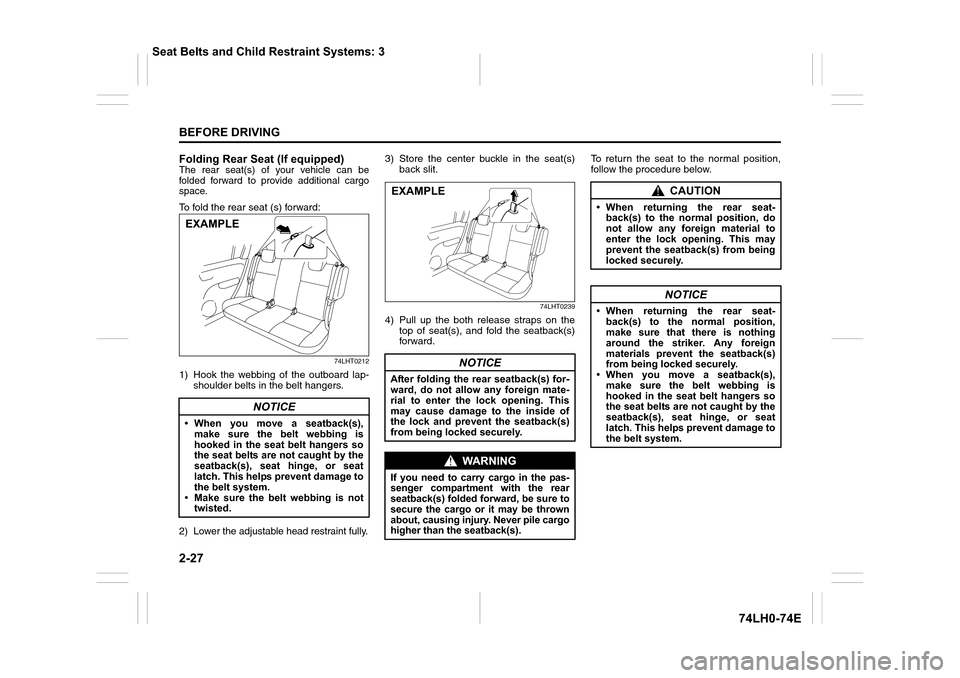
Folding Rear Seat (If equipped)The rear seat(s) of your vehicle can be
folded forward to provide additional cargo
space.
To fold the rear seat (s) forward:
74LHT0212
1) Hook the webbing of the outboard lap-
shoulder belts in the belt hangers.
2) Lower the adjustable head restraint fully.3) Store the center buckle in the seat(s)
back slit.
74LHT0239
4) Pull up the both release straps on the
top of seat(s), and fold the seatback(s)
forward.To return the seat to the normal position,
follow the procedure below.
NOTICE
• When you move a seatback(s),
make sure the belt webbing is
hooked in the seat belt hangers so
the seat belts are not caught by the
seatback(s), seat hinge, or seat
latch. This helps prevent damage to
the belt system.
• Make sure the belt webbing is not
twisted.
EXAMPLE
NOTICE
After folding the rear seatback(s) for-
ward, do not allow any foreign mate-
rial to enter the lock opening. This
may cause damage to the inside of
the lock and prevent the seatback(s)
from being locked securely.
WA R N I N G
If you need to carry cargo in the pas-
senger compartment with the rear
seatback(s) folded forward, be sure to
secure the cargo or it may be thrown
about, causing injury. Never pile cargo
higher than the seatback(s).
EXAMPLECAUTION
• When returning the rear seat-
back(s) to the normal position, do
not allow any foreign material to
enter the lock opening. This may
prevent the seatback(s) from being
locked securely.
NOTICE
• When returning the rear seat-
back(s) to the normal position,
make sure that there is nothing
around the striker. Any foreign
materials prevent the seatback(s)
from being locked securely.
• When you move a seatback(s),
make sure the belt webbing is
hooked in the seat belt hangers so
the seat belts are not caught by the
seatback(s), seat hinge, or seat
latch. This helps prevent damage to
the belt system.
Seat Belts and Child Restraint Systems: 3