warning TATA SAFARI 2015 Owners Manual
[x] Cancel search | Manufacturer: TATA, Model Year: 2015, Model line: SAFARI, Model: TATA SAFARI 2015Pages: 161, PDF Size: 2.55 MB
Page 7 of 161
7
S SS S
S
af afaf af
af
et etet et
et
y symb y symby symb y symb
y symb
ol olol ol
ol
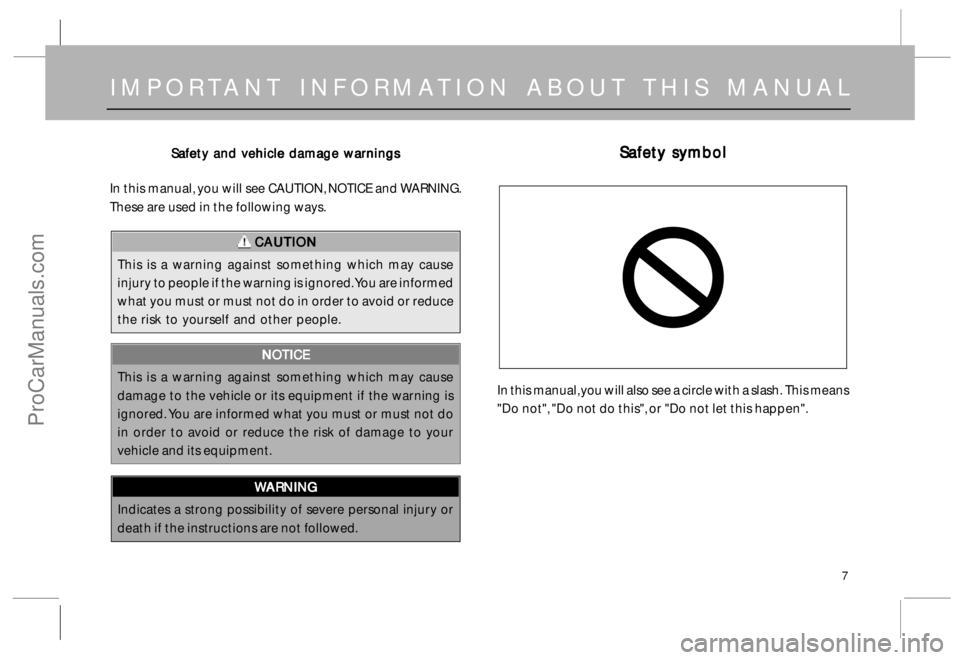
In this manual, you will also see a circle with a slash. This means
"Do not", "Do not do this", or "Do not let this happen".
S SS S
S
af afaf af
af
et etet et
et
y and v y and vy and v y and v
y and v
ehicle damage w ehicle damage wehicle damage w ehicle damage w
ehicle damage w
ar arar ar
ar
nings ningsnings nings
nings
In this manual, you will see CAUTION, NOTICE and WARNING.
These are used in the following ways.
CAUTION CAUTIONCAUTION CAUTION
CAUTION
This is a warning against something which may cause
injury to people if the warning is ignored. You are informed
what you must or must not do in order to avoid or reduce
the risk to yourself and other people.
NO NONO NO
NO
TICE TICETICE TICE
TICE
This is a warning against something which may cause
damage to the vehicle or its equipment if the warning is
ignored. You are informed what you must or must not do
in order to avoid or reduce the risk of damage to your
vehicle and its equipment.
W WW W
W
ARNING ARNINGARNING ARNING
ARNING
Indicates a strong possibility of severe personal injury or
death if the instructions are not followed.
IMPORTANT INFORMATION ABOUT THIS MANUAL
ProCarManuals.com
Page 15 of 161
15
Y O U R S A F E T Y
• •• •
•Seat belt system Seat belt systemSeat belt system Seat belt system
Seat belt system
• •• •
•W WW W
W
ear earear ear
ear
ing sea ing seaing sea ing sea
ing sea
t b t bt b t b
t b
elt eltelt elt
elt
• •• •
•Headrestraint HeadrestraintHeadrestraint Headrestraint
Headrestraint
• •• •
•Door locks Door locksDoor locks Door locks
Door locks
• •• •
•Child lock Child lockChild lock Child lock
Child lock
• •• •
•Audio warning Audio warningAudio warning Audio warning
Audio warning
• •• •
•Collapsible steering column Collapsible steering columnCollapsible steering column Collapsible steering column
Collapsible steering column
• •• •
•Air Bag (if fitted) Air Bag (if fitted)Air Bag (if fitted) Air Bag (if fitted)
Air Bag (if fitted)
• •• •
•Anti-Lock Brake System (if fitted) Anti-Lock Brake System (if fitted)Anti-Lock Brake System (if fitted) Anti-Lock Brake System (if fitted)
Anti-Lock Brake System (if fitted)
This section gives you important information about
safety features of the vehicle meant for occupant
protection. It provides information on the use of seat,
seat belts, headrest and seat adjustments.
In addition to seat and seat belts, there are number
of other features as listed alongside which are built
in the design of the vehicle so as to take care of your
safety.
ProCarManuals.com
Page 21 of 161

21
A AA A
A
udio udio udio udio
udio
W WW W
W
ar arar ar
ar
ning : ning :ning : ning :
ning :
Seat Belt Reminder Seat Belt ReminderSeat Belt Reminder Seat Belt Reminder
Seat Belt Reminder
(Beeper and tell-tale indicator)
When the key is in ignition position & driver's seat belt is
not fastened, you get an audio warning as well as tell-tale
indication in cluster, indicating seat belts are not fastened.
The beeper will go off automatically after a few seconds,
but the tell-tale indicator will remain on as long as seat belts
is not fastened.
D DD D
D
o oo o
o
or Op or Opor Op or Op
or Op
en en en en
en
W WW W
W
ar arar ar
ar
ning ningning ning
ning
Prior to driving, ensure that all the doors are properly closed. If
any one of the doors is partially open, the door open indicator
will come on. In addition to this, in case driver side door is not
properly closed an audio beep will come for few seconds, when
the key is inserted.
H HH H
H
ead Lamps ead Lamps ead Lamps ead Lamps
ead Lamps
‘‘ ‘‘
‘
ON’ ON’ON’ ON’
ON’
R R R R
R
eminder emindereminder eminder
eminder
While leaving the vehicle (key out), if the head lamps are left
on and driver door is opened, you will get an audio warning to
remind you to put off the head-lamps. This beeper will go off
after a few seconds or immediately if the head lamps are
switched off.
Y O U R S A F E T YA AA A
A
UDIO UDIO UDIO UDIO
UDIO
W WW W
W
ARNING ARNINGARNING ARNING
ARNING
,, ,,
,
C CC C
C
OLL OLLOLL OLL
OLL
APSIBLE STEERING APSIBLE STEERINGAPSIBLE STEERING APSIBLE STEERING
APSIBLE STEERING
AND AIR B AND AIR B AND AIR B AND AIR B
AND AIR B
A AA A
A
GS (IF FIT GS (IF FITGS (IF FIT GS (IF FIT
GS (IF FIT
TED) TED)TED) TED)
TED)
Collapsible Steering Column Collapsible Steering ColumnCollapsible Steering Column Collapsible Steering Column
Collapsible Steering Column
The steering column of TATA SAFARI is of collapsible type. During
normal operation it works as a solid one piece column and
takes all the steering efforts effectively. In case of frontal impact,
the intermediate tube connecting upper and lower part of the
column will collapse. This will prevent the steering column from
protruding in the driver cabin and avoid injury to the driver.
ProCarManuals.com
Page 24 of 161
24
Y O U R S A F E T YAIR BAGS (IF FITTED) AIR BAGS (IF FITTED)AIR BAGS (IF FITTED) AIR BAGS (IF FITTED)
AIR BAGS (IF FITTED)
Air bag warning light : Air bag warning light :Air bag warning light : Air bag warning light :
Air bag warning light :
The diagnostic system continually monitors the readiness of the
SRS AIR BAG while the vehicle is being driven. The air bag warning
light on the instrument panel will illuminate for approximately
5 seconds when the ignition is switched on. This is normal and
indicates the system is performing a self check. The following
components are monitored by the indicator.
• •• •
•Airbag control module - ECU
• •• •
•Driver airbag
• •• •
•Passenger air bag (If fitted)
• •• •
•Retractor Pre-tensioners.
• •• •
•All related wiring.
Air bag maintenance and servicing : Air bag maintenance and servicing :Air bag maintenance and servicing : Air bag maintenance and servicing :
Air bag maintenance and servicing :
If the warning light does not illuminate when ignition is
switched on, or remains illuminated after the initial check
period of 5 seconds or flashes during driving, indicates fault
with air bag and seat belt pre-tensioner and it should be
checked by an authorized
TA TATA TA
TA
T TT T
T
A MO A MOA MO A MO
A MO
T TT T
T
ORS DEALER ORS DEALERORS DEALER ORS DEALER
ORS DEALER
immediately.
• •• •
•The air bag warning light does not illuminate when the
ignition key is turned on.
• •• •
•The air bag warning light illuminates while driving.If the air bag system is not attended to when a warning
is given, it will not function properly in the event of
collision, or it may deploy unexpectedly. The air bag
system fitted to your vehicle does not require regular
maintenance.
NOTE : NOTE :NOTE : NOTE :
NOTE :
1. 1.1. 1.
1.
Any maintenance on or near the SRS components must be
performed only by an authorized
T TT T
T
A AA A
A
T TT T
T
A MO A MOA MO A MO
A MO
T TT T
T
ORS ORS ORS ORS
ORS dealer. Do
not permit anyone else to do service, inspection,
maintenance or repair on any SRS components or wiring.
Similarly, no part of the SRS system should ever be handled
or disposed of by anyone except an authorized
T TT T
T
A AA A
A
T TT T
T
A AA A
A
MO MOMO MO
MO
T TT T
T
ORS ORS ORS ORS
ORS dealer. Improper work on the SRS system will result
inadvertent deployment of the air bag or could render the
SRS system inoperative. This could also lead to personal injury.
2. 2.2. 2.
2.Do not modify your steering wheel or any other SRS
components, For example replacement of steering wheel
or modifications to the steering column, front bumper, body
or frame structure can adversely affect the SRS performance
and lead to possible injury.
3. 3.3. 3.
3.If your vehicle has received any front end damage, you
should have the SRS system inspected by an authorized
T TT T
T
A AA A
A
T TT T
T
A MO A MOA MO A MO
A MO
T TT T
T
ORS ORS ORS ORS
ORS dealer to ensure it is in proper working
order.
SRS SRSSRS SRS
SRS
ProCarManuals.com
Page 37 of 161
37
D R I V I N G C O N T R O L SSTEERING STEERING STEERING STEERING
STEERING
WHEEL POSITION ADJUST WHEEL POSITION ADJUSTWHEEL POSITION ADJUST WHEEL POSITION ADJUST
WHEEL POSITION ADJUST
MENT MENTMENT MENT
MENT
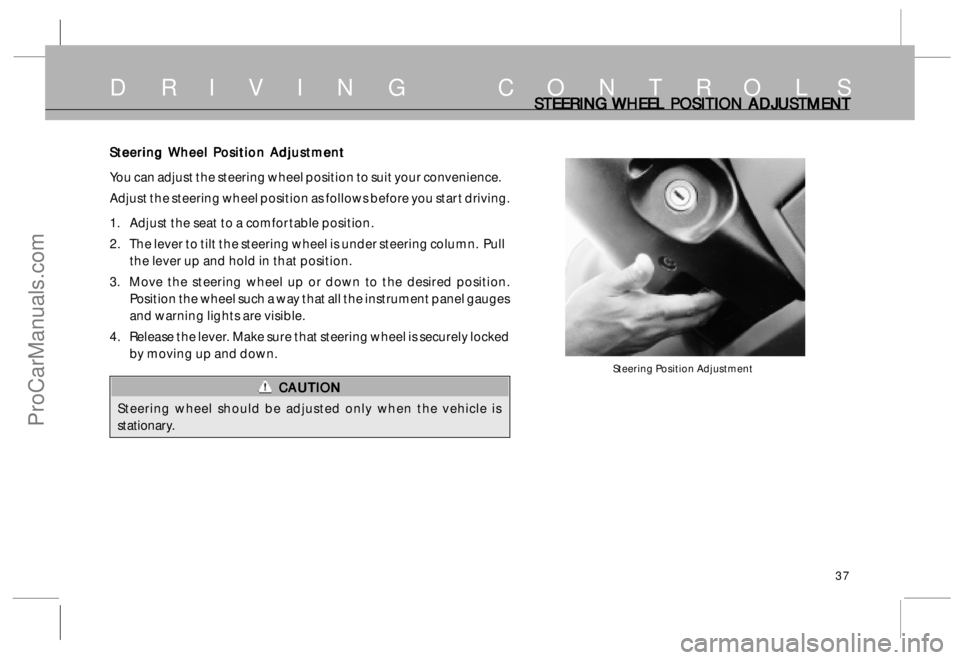
Steering Position Adjustment
Steering Wheel Position Adjustment Steering Wheel Position AdjustmentSteering Wheel Position Adjustment Steering Wheel Position Adjustment
Steering Wheel Position Adjustment
You can adjust the steering wheel position to suit your convenience.
Adjust the steering wheel position as follows before you start driving.
1. Adjust the seat to a comfortable position.
2. The lever to tilt the steering wheel is under steering column. Pull
the lever up and hold in that position.
3. Move the steering wheel up or down to the desired position.
Position the wheel such a way that all the instrument panel gauges
and warning lights are visible.
4. Release the lever. Make sure that steering wheel is securely locked
by moving up and down.
CAUTION CAUTIONCAUTION CAUTION
CAUTION
Steering wheel should be adjusted only when the vehicle is
stationary.
ProCarManuals.com
Page 38 of 161
38
D R I V I N G C O N T R O L SOPER OPEROPER OPER
OPER
A AA A
A
TING SWIT TING SWITTING SWIT TING SWIT
TING SWIT
CHES, CHES,CHES, CHES,
CHES,
FOG L FOG L FOG L FOG L
FOG L
AMPS AND FUEL AMPS AND FUEL AMPS AND FUEL AMPS AND FUEL
AMPS AND FUEL
T TT T
T
ANK FL ANK FLANK FL ANK FL
ANK FL
AP APAP AP
AP
Operating Switches Operating SwitchesOperating Switches Operating Switches
Operating Switches
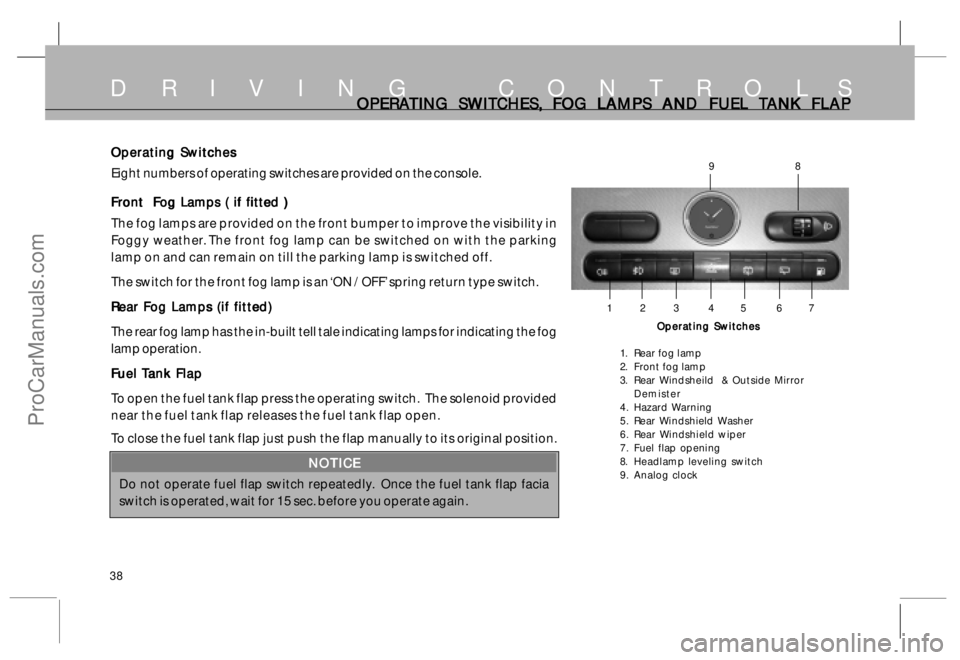
Eight numbers of operating switches are provided on the console.
Front Fog Lamps ( if fitted ) Front Fog Lamps ( if fitted )Front Fog Lamps ( if fitted ) Front Fog Lamps ( if fitted )
Front Fog Lamps ( if fitted )
The fog lamps are provided on the front bumper to improve the visibility in
Foggy weather. The front fog lamp can be switched on with the parking
lamp on and can remain on till the parking lamp is switched off.
The switch for the front fog lamp is an ‘ON / OFF’ spring return type switch.
Rear Fog Lamps (if fitted) Rear Fog Lamps (if fitted)Rear Fog Lamps (if fitted) Rear Fog Lamps (if fitted)
Rear Fog Lamps (if fitted)
The rear fog lamp has the in-built tell tale indicating lamps for indicating the fog
lamp operation.
F FF F
F
uel uel uel uel
uel
T TT T
T
ank F ank Fank F ank F
ank F
lap laplap lap
lap
To open the fuel tank flap press the operating switch. The solenoid provided
near the fuel tank flap releases the fuel tank flap open.
To close the fuel tank flap just push the flap manually to its original position.
NOTICE NOTICENOTICE NOTICE
NOTICE
Do not operate fuel flap switch repeatedly. Once the fuel tank flap facia
switch is operated, wait for 15 sec. before you operate again.
Operating Switches Operating SwitchesOperating Switches Operating Switches
Operating Switches
1. Rear fog lamp
2. Front fog lamp
3. Rear Windsheild & Outside Mirror
Demister
4. Hazard Warning
5. Rear Windshield Washer
6. Rear Windshield wiper
7. Fuel flap opening
8. Headlamp leveling switch
9. Analog clock
1 2 3 4 5 6 7
98
ProCarManuals.com
Page 39 of 161
39
D R I V I N G C O N T R O L SREAR REAR REAR REAR
REAR
WINDSHIELD DEMISTER AND HAZARD WINDSHIELD DEMISTER AND HAZARD WINDSHIELD DEMISTER AND HAZARD WINDSHIELD DEMISTER AND HAZARD
WINDSHIELD DEMISTER AND HAZARD
W WW W
W
ARNING ARNINGARNING ARNING
ARNING
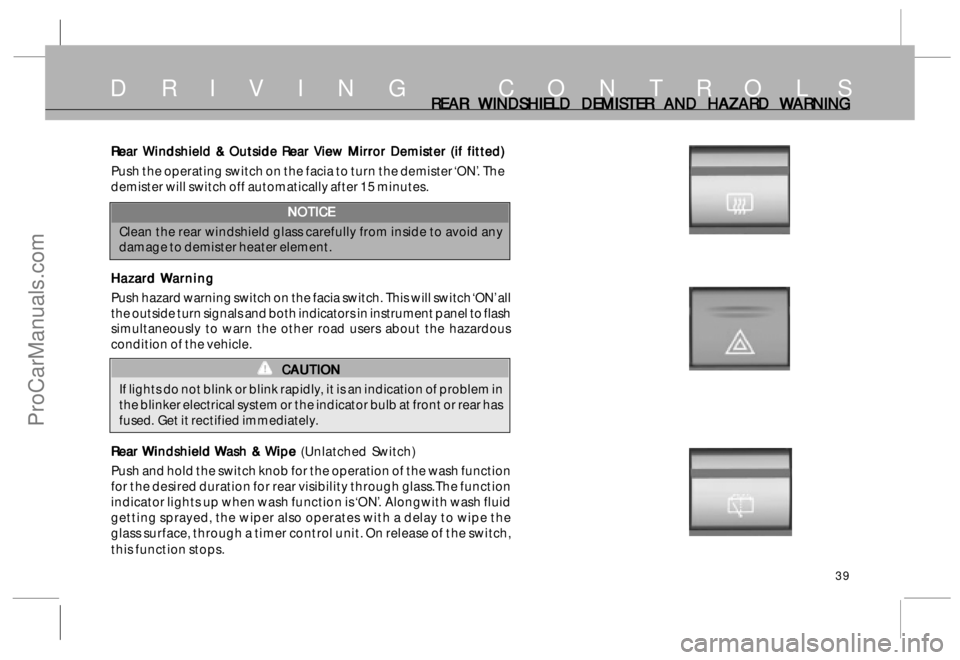
Rear Windshield & Outside Rear View Mirror Demister (if fitted) Rear Windshield & Outside Rear View Mirror Demister (if fitted)Rear Windshield & Outside Rear View Mirror Demister (if fitted) Rear Windshield & Outside Rear View Mirror Demister (if fitted)
Rear Windshield & Outside Rear View Mirror Demister (if fitted)
Push the operating switch on the facia to turn the demister ‘ON’. The
demister will switch off automatically after 15 minutes.
NOTICE NOTICENOTICE NOTICE
NOTICE
Clean the rear windshield glass carefully from inside to avoid any
damage to demister heater element.
Hazar HazarHazar Hazar
Hazar
d d d d
d
W WW W
W
ar arar ar
ar
ning ningning ning
ning
Push hazard warning switch on the facia switch. This will switch ‘ON’ all
the outside turn signals and both indicators in instrument panel to flash
simultaneously to warn the other road users about the hazardous
condition of the vehicle.
CAUTION CAUTIONCAUTION CAUTION
CAUTION
If lights do not blink or blink rapidly, it is an indication of problem in
the blinker electrical system or the indicator bulb at front or rear has
fused. Get it rectified immediately.
R RR R
R
ear ear ear ear
ear
W WW W
W
indshield indshield indshield indshield
indshield
W WW W
W
ash & ash & ash & ash &
ash &
W WW W
W
ip ipip ip
ip
e e e e
e (Unlatched Switch)
Push and hold the switch knob for the operation of the wash function
for the desired duration for rear visibility through glass. The function
indicator lights up when wash function is ‘ON’. Alongwith wash fluid
getting sprayed, the wiper also operates with a delay to wipe the
glass surface, through a timer control unit. On release of the switch,
this function stops.
ProCarManuals.com
Page 40 of 161
40
D R I V I N G C O N T R O L SREAR REAR REAR REAR
REAR
WINDSHIELD WINDSHIELD WINDSHIELD WINDSHIELD
WINDSHIELD
WASH & WASH & WASH & WASH &
WASH &
WIPE AND HEAD L WIPE AND HEAD LWIPE AND HEAD L WIPE AND HEAD L
WIPE AND HEAD L
AMP LE AMP LEAMP LE AMP LE
AMP LE
VELLING SWIT VELLING SWITVELLING SWIT VELLING SWIT
VELLING SWIT
CH CHCH CH
CH
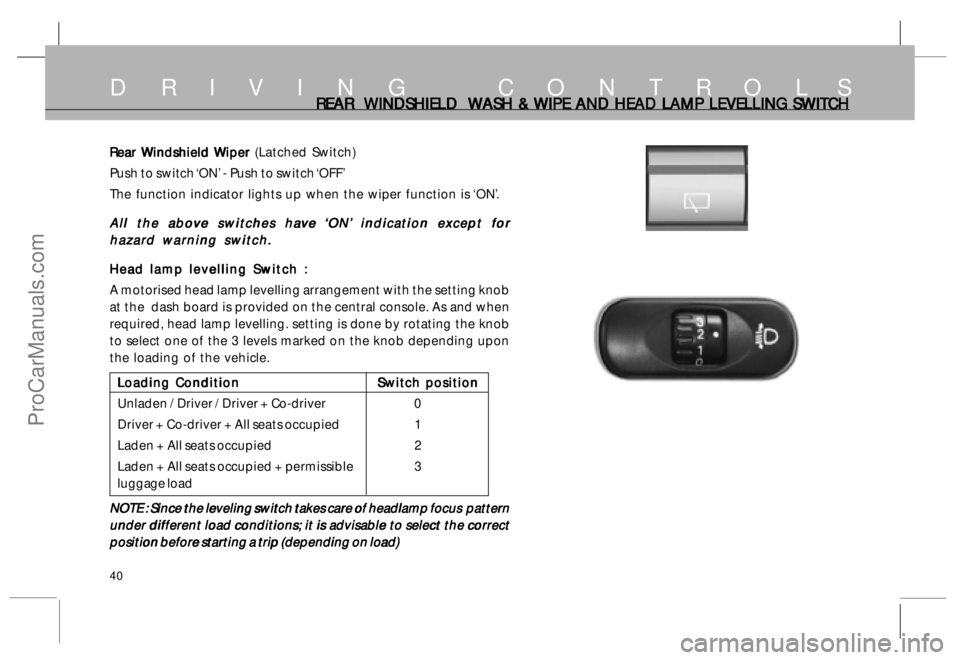
Rear Windshield Wiper Rear Windshield Wiper Rear Windshield Wiper Rear Windshield Wiper
Rear Windshield Wiper (Latched Switch)
Push to switch ‘ON’ - Push to switch ‘OFF’
The function indicator lights up when the wiper function is ‘ON’.
A AA A
A
ll the ab ll the abll the ab ll the ab
ll the ab
o oo o
o
v vv v
v
e swit e swite swit e swit
e swit
ches ha ches haches ha ches ha
ches ha
v vv v
v
e e e e
e
‘‘ ‘‘
‘
ON’ ON’ON’ ON’
ON’
indic indic indic indic
indic
a aa a
a
tion e tion etion e tion e
tion e
x xx x
x
c cc c
c
ept f ept fept f ept f
ept f
or oror or
or
hazard warning switch. hazard warning switch.hazard warning switch. hazard warning switch.
hazard warning switch.
Head lamp levelling Switch Head lamp levelling Switch Head lamp levelling Switch Head lamp levelling Switch
Head lamp levelling Switch
:: ::
:
A motorised head lamp levelling arrangement with the setting knob
at the dash board is provided on the central console. As and when
required, head lamp levelling. setting is done by rotating the knob
to select one of the 3 levels marked on the knob depending upon
the loading of the vehicle.
Loading Condition Loading ConditionLoading Condition Loading Condition
Loading Condition
Switch position Switch positionSwitch position Switch position
Switch position
Unladen / Driver / Driver + Co-driver 0
Driver + Co-driver + All seats occupied 1
Laden + All seats occupied 2
Laden + All seats occupied + permissible 3
luggage load
NOTE : Since the leveling switch takes care of headlamp focus pattern NOTE : Since the leveling switch takes care of headlamp focus patternNOTE : Since the leveling switch takes care of headlamp focus pattern NOTE : Since the leveling switch takes care of headlamp focus pattern
NOTE : Since the leveling switch takes care of headlamp focus pattern
under different load conditions; it is advisable to select the correct under different load conditions; it is advisable to select the correctunder different load conditions; it is advisable to select the correct under different load conditions; it is advisable to select the correct
under different load conditions; it is advisable to select the correct
position before starting a trip (depending on load) position before starting a trip (depending on load)position before starting a trip (depending on load) position before starting a trip (depending on load)
position before starting a trip (depending on load)
ProCarManuals.com
Page 44 of 161
44
INDICATORS AND INSTRUMENTSINDIC INDICINDIC INDIC
INDIC
A AA A
A
T TT T
T
ORS ORSORS ORS
ORS
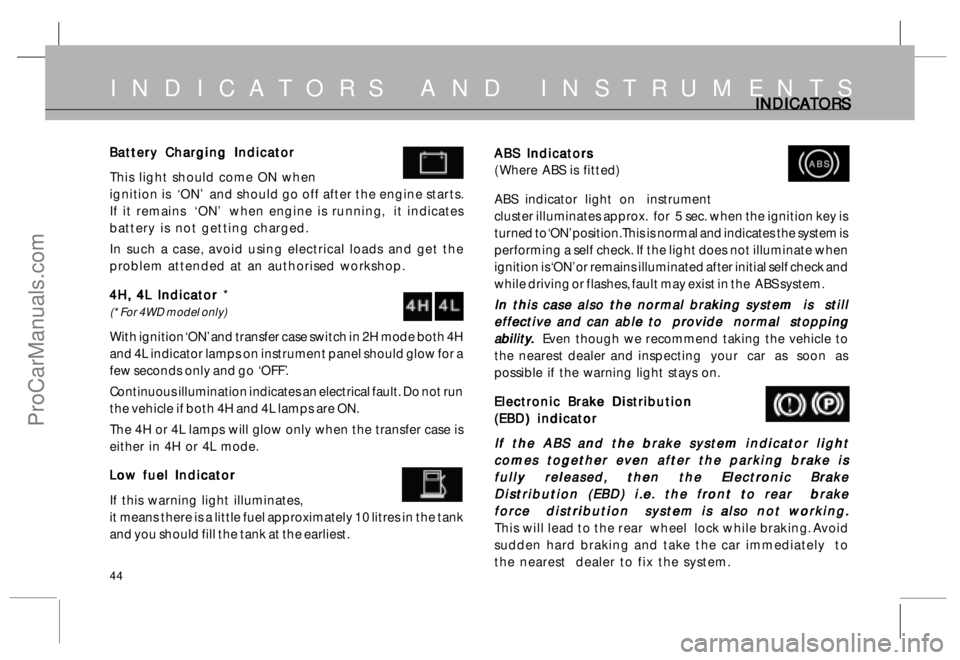
ABS Indicators ABS IndicatorsABS Indicators ABS Indicators
ABS Indicators
( Where ABS is fitted)
ABS indicator light on instrument
cluster illuminates approx. for 5 sec. when the ignition key is
turned to ‘ON’ position. This is normal and indicates the system is
performing a self check. If the light does not illuminate when
ignition is ‘ON’ or remains illuminated after initial self check and
while driving or flashes, fault may exist in the ABS system.
In this case also the normal braking system is still In this case also the normal braking system is stillIn this case also the normal braking system is still In this case also the normal braking system is still
In this case also the normal braking system is still
effective and can able to provide normal stopping effective and can able to provide normal stoppingeffective and can able to provide normal stopping effective and can able to provide normal stopping
effective and can able to provide normal stopping
abilit abilitabilit abilit
abilit
y yy y
y
.. ..
.
Even though we recommend taking the vehicle to
the nearest dealer and inspecting your car as soon as
possible if the warning light stays on.
Electronic Brake Distribution Electronic Brake DistributionElectronic Brake Distribution Electronic Brake Distribution
Electronic Brake Distribution
(EBD) indicator (EBD) indicator(EBD) indicator (EBD) indicator
(EBD) indicator
If the ABS and the brake system indicator light If the ABS and the brake system indicator lightIf the ABS and the brake system indicator light If the ABS and the brake system indicator light
If the ABS and the brake system indicator light
comes together even after the parking brake is comes together even after the parking brake iscomes together even after the parking brake is comes together even after the parking brake is
comes together even after the parking brake is
fully released, then the Electronic Brake fully released, then the Electronic Brakefully released, then the Electronic Brake fully released, then the Electronic Brake
fully released, then the Electronic Brake
Distribution (EBD) i.e. the front to rear brake Distribution (EBD) i.e. the front to rear brakeDistribution (EBD) i.e. the front to rear brake Distribution (EBD) i.e. the front to rear brake
Distribution (EBD) i.e. the front to rear brake
force distribution system is also not working. force distribution system is also not working.force distribution system is also not working. force distribution system is also not working.
force distribution system is also not working.
This will lead to the rear wheel lock while braking. Avoid
sudden hard braking and take the car immediately to
the nearest dealer to fix the system.
ABS ABSABS ABS
ABSBattery Charging Indicator Battery Charging IndicatorBattery Charging Indicator Battery Charging Indicator
Battery Charging Indicator
This light should come ON when
ignition is ‘ON’ and should go off after the engine starts.
If it remains ‘ON’ when engine is running, it indicates
battery is not getting charged.
In such a case, avoid using electrical loads and get the
problem attended at an authorised workshop.
4H, 4L Indicator 4H, 4L Indicator 4H, 4L Indicator 4H, 4L Indicator
4H, 4L Indicator *
(* For 4WD model only)
With ignition ‘ON’ and transfer case switch in 2H mode both 4H
and 4L indicator lamps on instrument panel should glow for a
few seconds only and go ‘OFF’.
Continuous illumination indicates an electrical fault. Do not run
the vehicle if both 4H and 4L lamps are ON.
The 4H or 4L lamps will glow only when the transfer case is
either in 4H or 4L mode.
Low fuel Indicator Low fuel IndicatorLow fuel Indicator Low fuel Indicator
Low fuel Indicator
If this warning light illuminates,
it means there is a little fuel approximately 10 litres in the tank
and you should fill the tank at the earliest.
ProCarManuals.com
Page 50 of 161
50
T TT T
T
emp empemp emp
emp
er erer er
er
a aa a
a
tur turtur tur
tur
e G e Ge G e G
e G
auge augeauge auge
auge
High
Temperature
Warning
T TT T
T
emp empemp emp
emp
er erer er
er
a aa a
a
tur turtur tur
tur
e G e Ge G e G
e G
auge augeauge auge
auge
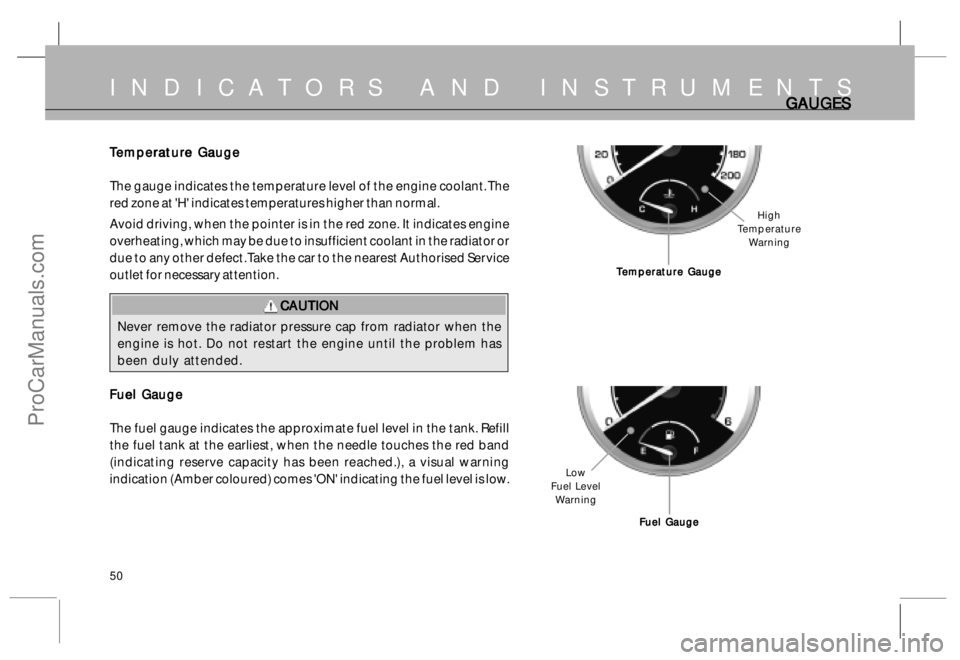
The gauge indicates the temperature level of the engine coolant. The
red zone at 'H' indicates temperatures higher than normal.
Avoid driving, when the pointer is in the red zone. It indicates engine
overheating, which may be due to insufficient coolant in the radiator or
due to any other defect. Take the car to the nearest Authorised Service
outlet for necessary attention.
CAUTION CAUTIONCAUTION CAUTION
CAUTION
Never remove the radiator pressure cap from radiator when the
engine is hot. Do not restart the engine until the problem has
been duly attended.
Fuel Gauge Fuel GaugeFuel Gauge Fuel Gauge
Fuel Gauge
The fuel gauge indicates the approximate fuel level in the tank. Refill
the fuel tank at the earliest, when the needle touches the red band
(indicating reserve capacity has been reached.), a visual warning
indication (Amber coloured) comes 'ON' indicating the fuel level is low.
INDICATORS AND INSTRUMENTSGA GAGA GA
GA
UGES UGESUGES UGES
UGES
Fuel Gauge Fuel GaugeFuel Gauge Fuel Gauge
Fuel Gauge Low
Fuel Level
Warning
ProCarManuals.com