display TESLA MODEL S 2014 (Europe) Owner's Guide
[x] Cancel search | Manufacturer: TESLA, Model Year: 2014, Model line: MODEL S, Model: TESLA MODEL S 2014Pages: 152, PDF Size: 17.5 MB
Page 58 of 152
Trip InformationTrip Information
4.18MODEL S OWNERS MANUAL
Tr i p I n f o r m a t i o nDisplaying Trip Information
Trip information displays on the touchscreen
when you touch Controls > Trips. There are two
trip meters available, A and B. To reset a
particular trip meter, touch its associated
RESET.
NOTE: You can also display range and trip
information on the instrument panel (see
page 4.3).,
book.book Page 18 Friday, July 19, 2013 12:53 PM
Page 59 of 152
Energy Usage
DRIVING4.19
Energy UsageDisplaying Energy Usage
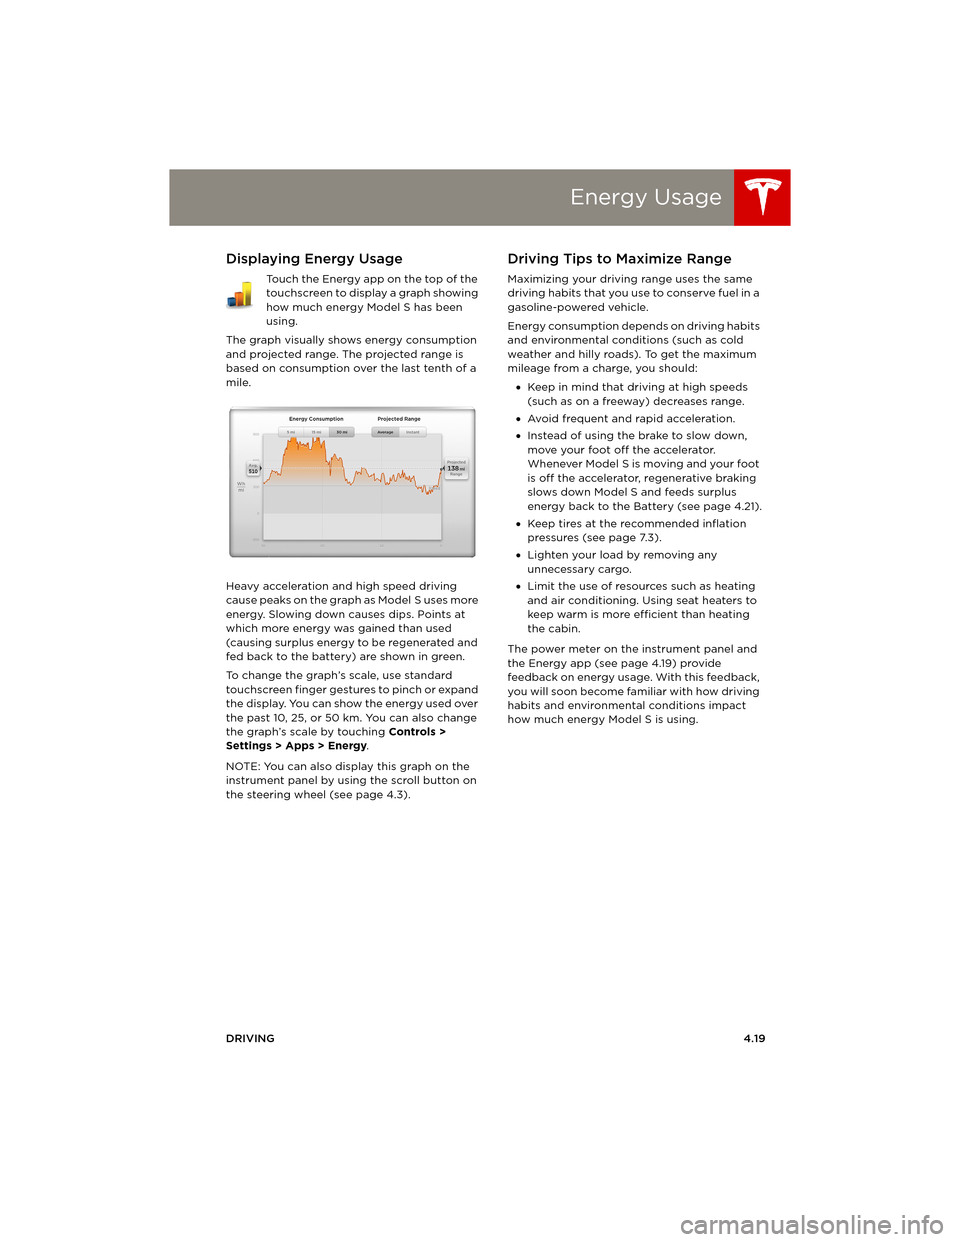
Touch the Energy app on the top of the
touchscreen to display a graph showing
how much energy Model S has been
using.
The graph visually shows energy consumption
and projected range. The projected range is
based on consumption over the last tenth of a
mile.
Heavy acceleration and high speed driving
cause peaks on the graph as Model S uses more
energy. Slowing down causes dips. Points at
which more energy was gained than used
(causing surplus energy to be regenerated and
fed back to the battery) are shown in green.
To change the graph’s scale, use standard
touchscreen finger gestures to pinch or expand
the display. You can show the energy used over
the past 10, 25, or 50 km. You can also change
the graph’s scale by touching Controls >
Settings > Apps > Energy.
NOTE: You can also display this graph on the
instrument panel by using the scroll button on
the steering wheel (see page 4.3).
Driving Tips to Maximize Range
Maximizing your driving range uses the same
driving habits that you use to conserve fuel in a
gasoline-powered vehicle.
Energy consumption depends on driving habits
and environmental conditions (such as cold
weather and hilly roads). To get the maximum
mileage from a charge, you should:
•Keep in mind that driving at high speeds
(such as on a freeway) decreases range.
•Avoid frequent and rapid acceleration.
•Instead of using the brake to slow down,
move your foot off the accelerator.
Whenever M odel S is moving and your foot
is off the accelerator, regenerative braking
slows down Model S and feeds surplus
energy back to the Battery (see page 4.21).
•Keep tires at the recommended inflation
pressures (see page 7.3).
•Lighten your load by removing any
unnecessary cargo.
•Limit the use of resources such as heating
and air conditioning. Using seat heaters to
keep warm is more efficient than heating
the cabin.
The power meter on the instrument panel and
the Energy app (see page 4.19) provide
feedback on energy usage. With this feedback,
you will soon become familiar with how driving
habits and environmental conditions impact
how much energy Model S is using.
book.book Page 19 Friday, July 19, 2013 12:53 PM
Page 60 of 152
BrakesBrakes
4.20MODEL S OWNERS MANUAL
BrakesBraking Systems
Model S has an anti-lock braking system (ABS)
that prevents the wheels from locking when
you apply maximum brake pressure. This
improves steering control during heavy braking
in most road conditions.
During emergency braking conditions, the ABS
constantly monitors the speed of each wheel
and varies the brake pressure according to the
grip available.
The alteration of brake pressure can be felt as a
pulsing sensation through the brake pedal. This
demonstrates that ABS is operating and is not
a cause for concern. Keep firm and steady
pressure on the brake pedal while experiencing
the pulsing.
The ABS indicator flashes briefly on the
instrument panel when you first start
Model S. If this indicator displays at any
other time, an ABS fault has occurred
and ABS is not operating. Contact Tesla.
The braking system remains fully
operational and is not affected by an
ABS failure. However, braking distances
may increase.
If the instrument panel displays this
indicator at any time other than
displaying briefly when you first start
Model S, a brake system fault is
detected or the brake fluid level is low.
Contact Tesla immediately.
Emergency Braking
In an emergency, fully press the brake pedal
and maintain firm pressure, even on low
traction surfaces. ABS varies the braking
pressure to each wheel according to the
amount of traction available. This prevents
wheels from locking and ensures that you stop
as safely as possible.
WARNING: Do not pump the brake pedal.
Doing so interrupts operation of the ABS
and can increase braking distance.
WARNING: Always maintain a safe
distance from the vehicle in front of you
and be aware of hazardous driving conditions.
While ABS can improve stopping distance, it
cannot overcome the laws of physics. It also
does not prevent the danger of hydroplaning
(where a layer of water prevents direct contact
between the tires and the road).
Brake Wear
Model S brake pads are equipped with wear
indicators. A wear indicator is a thin metal strip
attached to the brake pad that squeals as it
rubs against the rotor when the pad wears
down. This squealing sound indicates that the
brake pads have reached the end of their
service life and require replacement. To stop
the squealing, contact Tesla Service.
Brakes must be periodically inspected visually
by removing the tire and wheel. For detailed
specifications and service limits for rotors and
brake pads, see page 8.6.
WARNING: Neglecting to replace worn
brake pads will result in damage to the
braking system and can create a braking
hazard.
book.book Page 20 Friday, July 19, 2013 12:53 PM
Page 61 of 152
Brakes
DRIVING4.21
Regenerative Braking
Whenever Model S is moving and your foot is
off the accelerator, regenerative braking slows
down Model S and feeds any surplus energy
back to the Battery.
By anticipating your stops and simply removing
your foot from the accelerator to slow down,
you can take advantage of regenerative
braking to increase driving range. Of course,
this is no substitute for regular braking when
needed for safety.
NOTE: If regenerative braking is aggressively
slowing Model S, such as on a steep descent,
brake lights turn on to alert other road users
that you are slowing down.
The power meter on the instrument panel
displays real-time feedback on the amount of
energy being gained by regenerative braking.
The amount of energy fed back to the Battery
using regenerative braking can depend on the
current state of the Battery and the charge
level setting that you are using. If regenerative
braking is limited, a dashed yellow line displays
on the power meter. For example, regenerative
braking may be limited if the Battery is
extremely hot or cold because the surplus
energy is used to cool or heat the Battery.
Regenerative braking is also limited if the
Battery is already fully charged.
To Set the Regenerative Braking Level
You can use the touchscreen to change the
level of regenerative braking:
1.Touch Controls.
2.Choose from two levels:
•Standard - provides the maximum
amount of regenerative braking. When
you release the accelerator, Model S slows
down faster, reducing the need to use the
brakes.
•Low - limits the amount of regenerative
braking. When you release the
accelerator, Model S takes longer to slow
down and coasts further.
NOTE: Regenerative braking resets to Standard
each time you start Model S.
Parking Brake
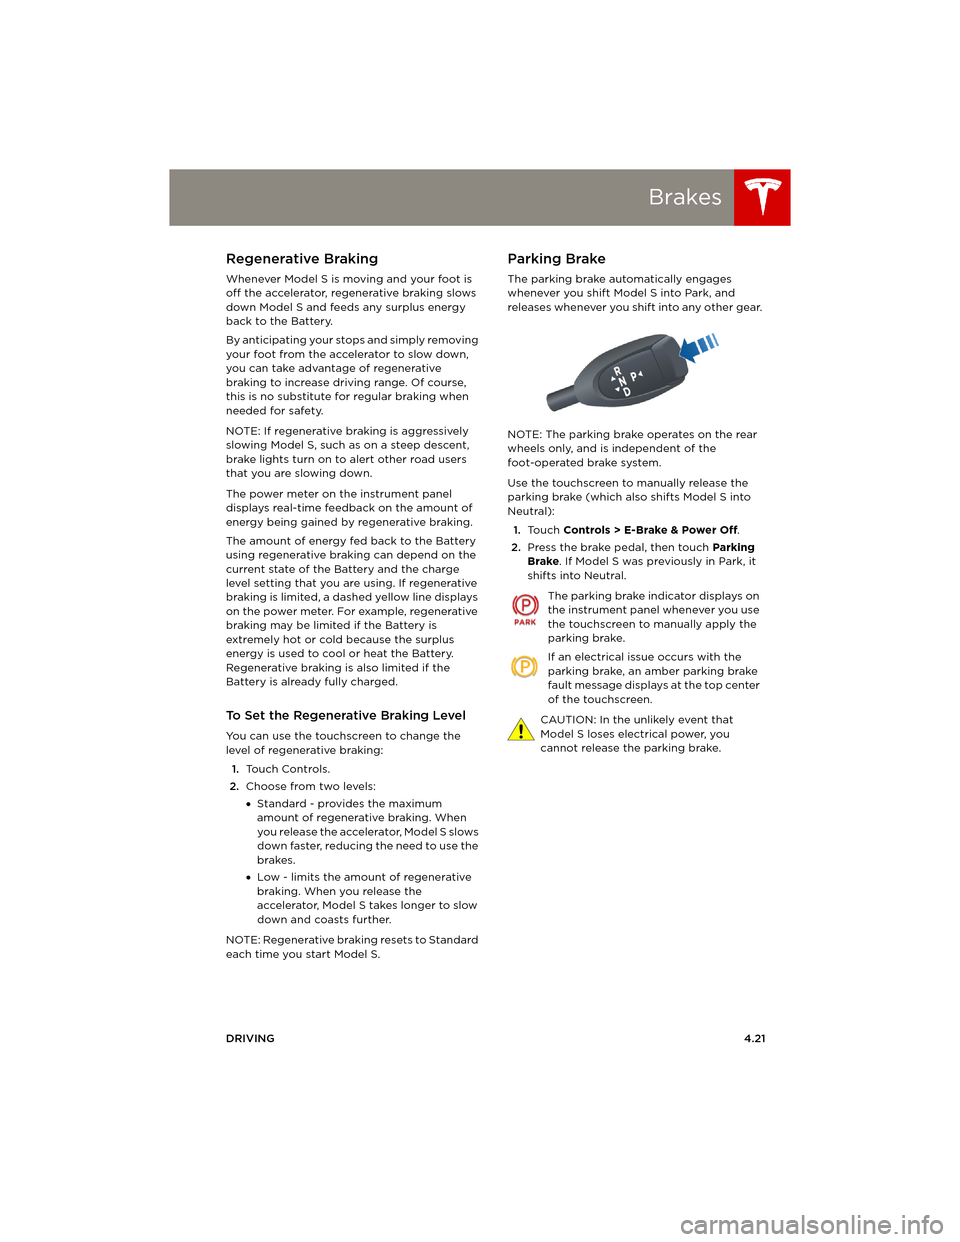
The parking brake automatically engages
whenever you shift Model S into Park, and
releases whenever you shift into any other gear.
NOTE: The parking brake operates on the rear
wheels only, and is independent of the
foot-operated brake system.
Use the touchscreen to manually release the
parking brake (which also shifts Model S into
Neutral):
1.Touch Controls > E-Brake & Power Off.
2.Press the brake pedal, then touch Parking
Brake. If Model S was previously in Park, it
shifts into Neutral.
The parking brake indicator displays on
the instrument panel whenever you use
the touchscreen to manually apply the
parking brake.
If an electrical issue occurs with the
parking brake, an amber parking brake
fault message displays at the top center
of the touchscreen.
CAUTION: In the unlikely event that
Model S loses electrical power, you
cannot release the parking brake.
book.book Page 21 Friday, July 19, 2013 12:53 PM
Page 62 of 152
Traction ControlTraction Control
4.22MODEL S OWNERS MANUAL
Tr a c t i o n C o n t r o lHow It Works
The traction control system constantly
monitors the difference in speed between the
front and rear wheels. If Model S experiences a
loss of traction, the traction control system
minimizes wheel spin by controlling brake
pressure and motor power.
The electronic stability control indicator
displays on the instrument panel
whenever the traction control system is
actively controlling brake pressure and
motor power.
WARNING: Traction control does not
prevent accidents caused by driving
dangerously or turning too sharply at high
speeds.
Turning Off
Under normal conditions, you should leave
traction control on. Turn it off only in
circumstances where you deliberately want the
wheels to spin, such as:
•Starting on a loose surface, such as gravel
or snow.
•Driving in deep snow, sand or mud.
•Rocking out of a hole or deep rut.
To turn traction control off, touch
Controls > Driving > Traction Control > Off.
The Traction Control Off indicator
displays at the top center of the
touchscreen whenever the traction
control system is turned off.
Although traction control turns on again
automatically the next time you start Model S,
turn it on using the touchscreen as soon as the
circumstances that required you to turn it off
have passed.
TC
book.book Page 22 Friday, July 19, 2013 12:53 PM
Page 63 of 152
Cruise Control
DRIVING4.23
Cruise ControlOperating Cruise Control
Cruise control makes it easy for you to maintain
a consistent speed without holding your foot
on the accelerator. This is useful when driving at
the same speed over a long distance.
You must be driving over 32 km/h to operate
cruise control.
WARNING: Do not use cruise control on
winding or slippery road surfaces, or
when traffic conditions make it unsafe to drive
at a consistent speed.
To operate cruise control:
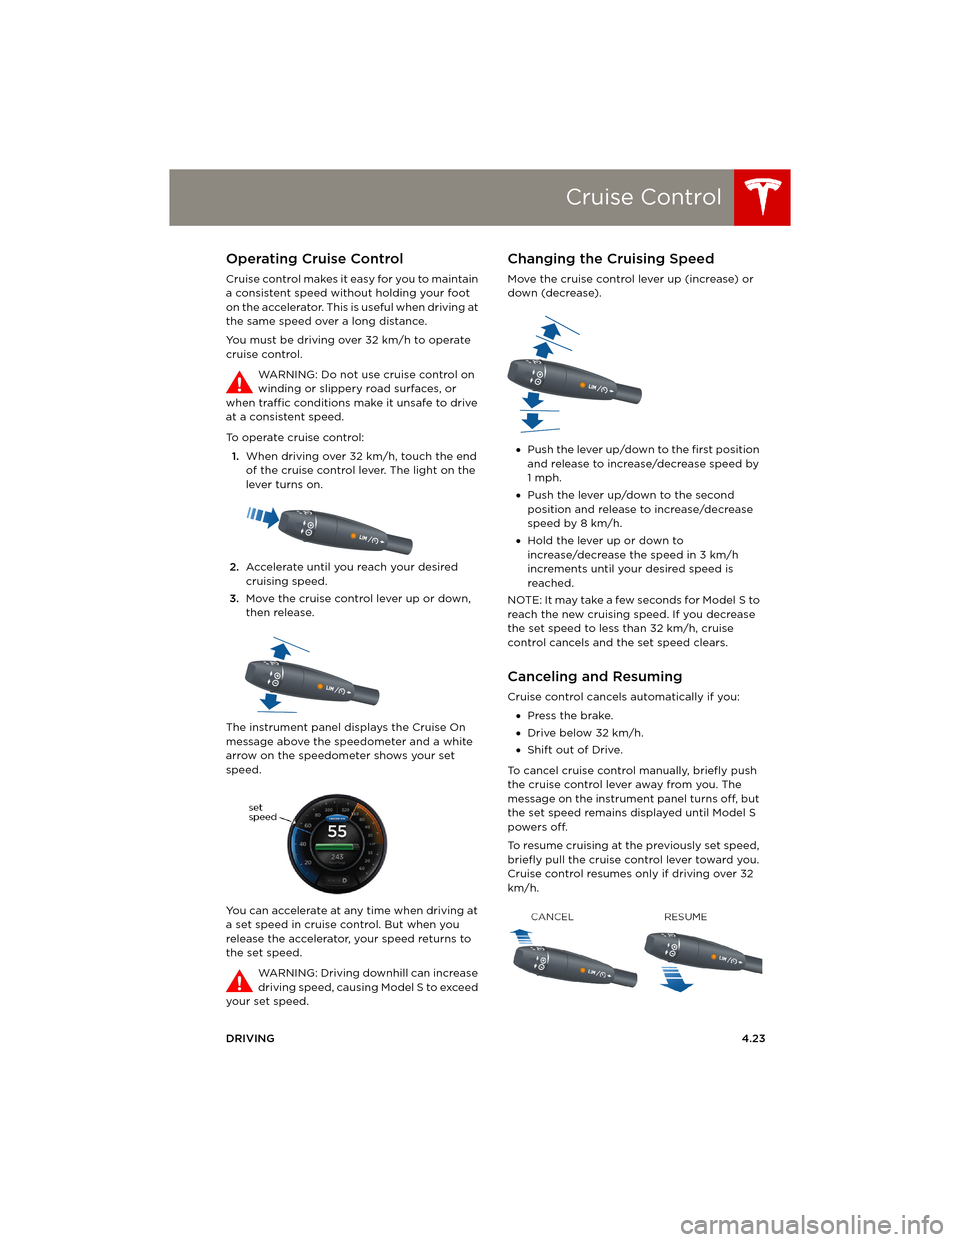
1.When driving over 32 km/h, touch the end
of the cruise control lever. The light on the
lever turns on.
2.Accelerate until you reach your desired
cruising speed.
3.Move the cruise control lever up or down,
then release.
The instrument panel displays the Cruise On
message above the speedometer and a white
arrow on the speedometer shows your set
speed.
You can accelerate at any time when driving at
a set speed in cruise control. But when you
release the accelerator, your speed returns to
the set speed.
WARNING: Driving downhill can increase
driving speed, causing Model S to exceed
your set speed.
Changing the Cruising Speed
Move the cruise control lever up (increase) or
down (decrease).
•Push the lever up/down to the first position
and release to increase/decrease speed by
1mph.
•Push the lever up/down to the second
position and release to increase/decrease
speed by 8 km/h.
•Hold the lever up or down to
increase/decrease the speed in 3 km/h
increments until your desired speed is
reached.
NOTE: It may take a few seconds for Model S to
reach the new cruising speed. If you decrease
the set speed to less than 32 km/h, cruise
control cancels and the set speed clears.
Canceling and Resuming
Cruise control cancels automatically if you:
•Press the brake.
•Drive below 32 km/h.
•Shift out of Drive.
To cancel cruise control manually, briefly push
the cruise control lever away from you. The
message on the instrument panel turns off, but
the set speed remains displayed until Model S
powers off.
To resume cruising at the previously set speed,
briefly pull the cruise control lever toward you.
Cruise control resumes only if driving over 32
km/h.
book.book Page 23 Friday, July 19, 2013 12:53 PM
Page 64 of 152
Rear View CameraRear View Camera
4.24MODEL S OWNERS MANUAL
Rear View CameraCamera Location
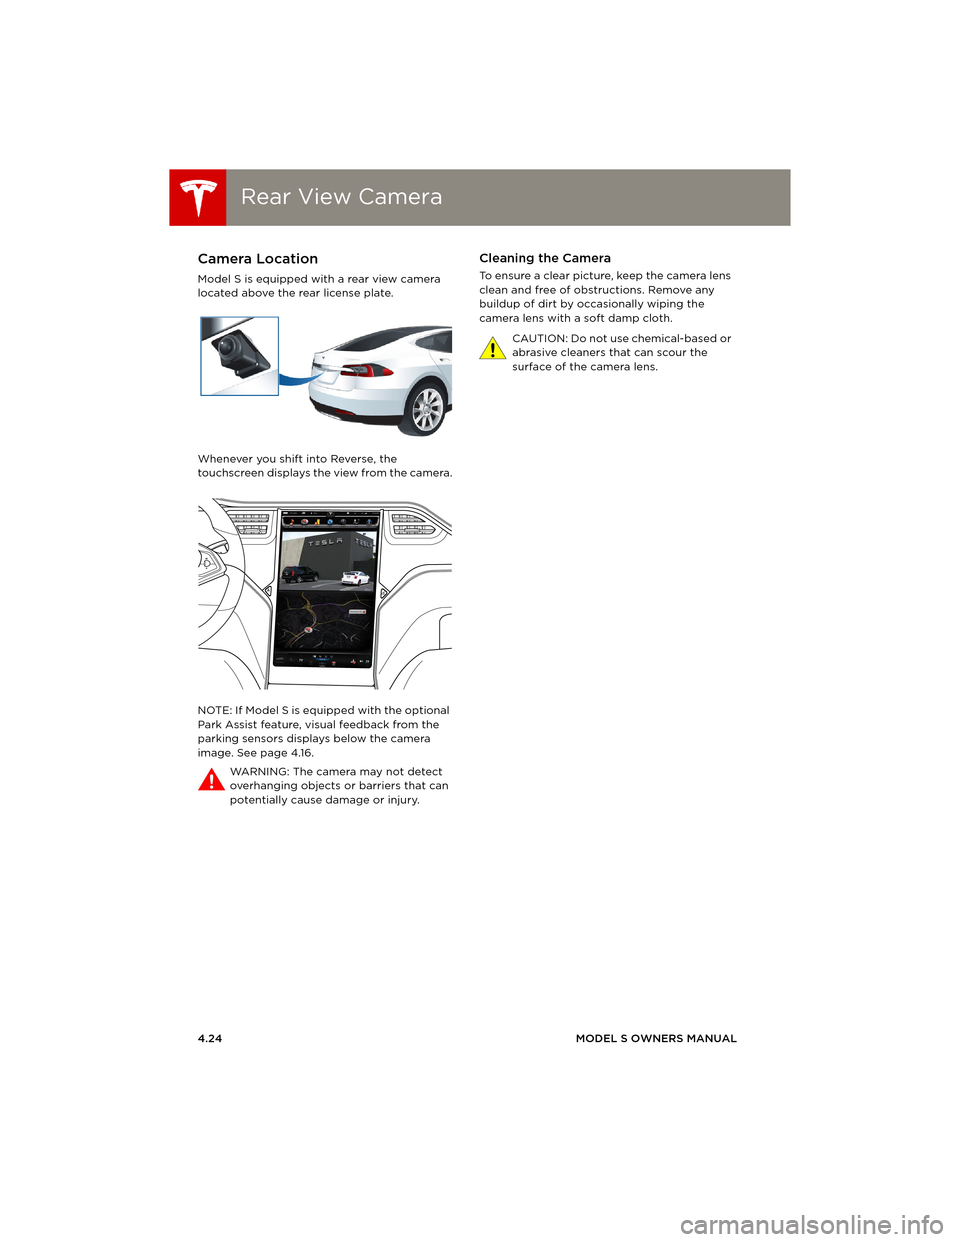
Model S is equipped with a rear view camera
located above the rear license plate.
Whenever you shift into Reverse, the
touchscreen displays the view from the camera.
NOTE: If Model S is equipped with the optional
Park Assist feature, visual feedback from the
parking sensors displays below the camera
image. See page 4.16.
WA R N I N G : T h e c a m e r a m a y n o t d e t e c t
overhanging objects or barriers that can
potentially cause damage or injury.
Cleaning the Camera
To ensure a clear picture, keep the camera lens
clean and free of obstructions. Remove any
buildup of dirt by occasionally wiping the
camera lens with a soft damp cloth.
CAUTION: Do not use chemical-based or
abrasive cleaners that can scour the
surface of the camera lens.
book.book Page 24 Friday, July 19, 2013 12:53 PM
Page 66 of 152
Touchscreen OverviewTouchscreen Overview
5.2MODEL S OWNERS MANUAL
USING THE TOUCHSCREEN
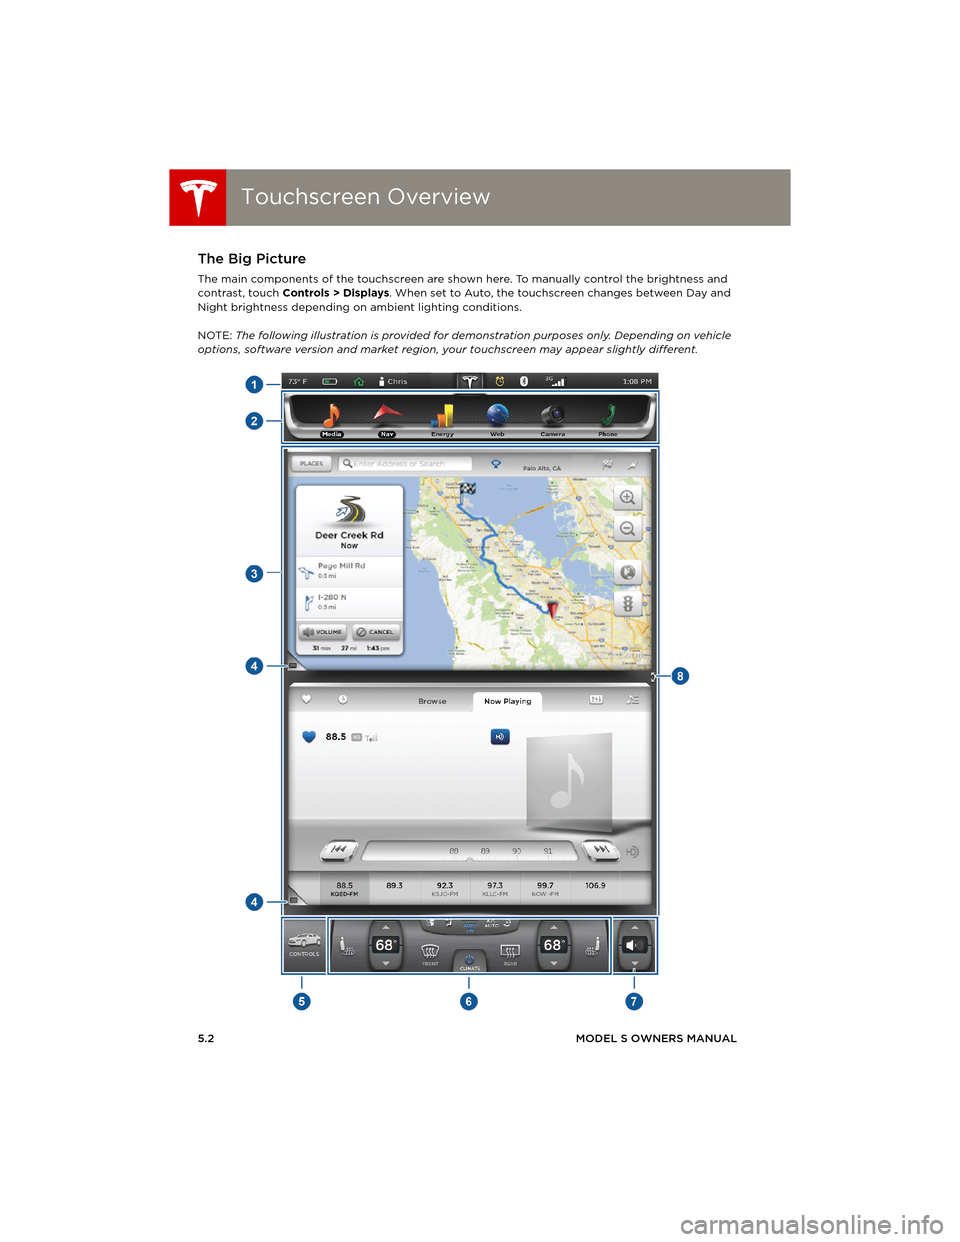
Touchscreen OverviewThe Big Picture
The main components of the touchscreen are shown here. To manually control the brightness and
contrast, touch Controls > Displays. When set to Auto, the touchscreen changes between Day and
Night brightness depending on ambient lighting conditions.
NOTE: The following illustration is provided for demonstration purposes only. Depending on vehicle
options, software version and market region, your touchscreen may appear slightly different.
book.book Page 2 Friday, July 19, 2013 12:53 PM
Page 67 of 152
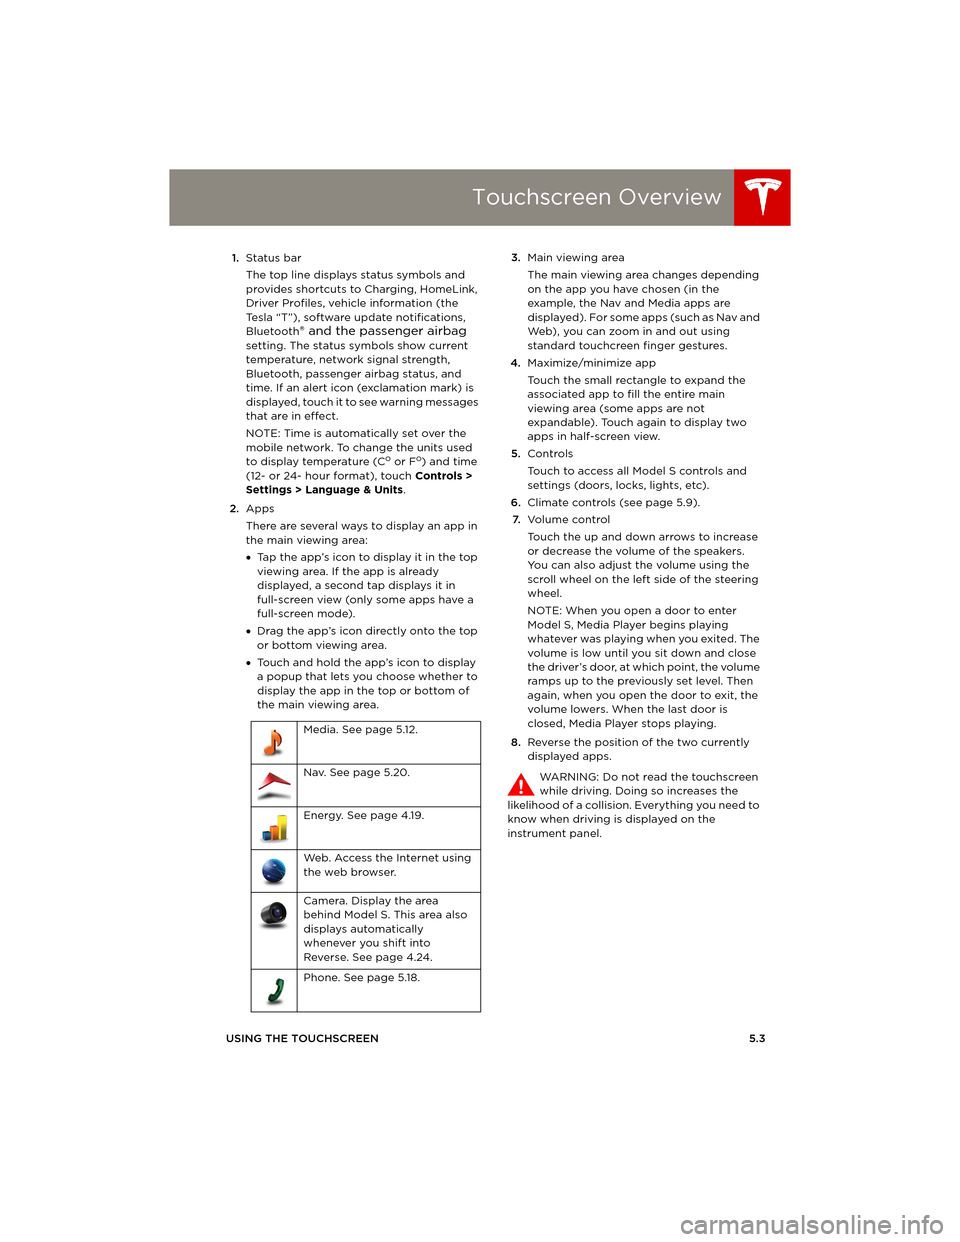
Touchscreen Overview
USING THE TOUCHSCREEN5.3 1.Status bar
The top line displays status symbols and
provides shortcuts to Charging, HomeLink,
Driver Profiles, vehicle information (the
Tesla “T”), software update notifications,
Bluetooth
® and the passenger airbag
setting. The status symbols show current
temperature, network signal strength,
Bluetooth, passenger airbag status, and
time. If an alert icon (exclamation mark) is
displayed, touch it to see warning messages
that are in effect.
NOTE: Time is automatically set over the
mobile network. To change the units used
to display temperature (C
o or Fo) and time
(12- or 24- hour format), touch Controls >
Settings > Language & Units.
2.Apps
There are several ways to display an app in
the main viewing area:
•Tap the app’s icon to display it in the top
viewing area. If the app is already
displayed, a second tap displays it in
full-screen view (only some apps have a
full-screen mode).
•Drag the app’s icon directly onto the top
or bottom viewing area.
•Touch and hold the app’s icon to display
a popup that lets you choose whether to
display the app in the top or bottom of
the main viewing area. 3.Main viewing area
The main viewing area changes depending
on the app you have chosen (in the
example, the Nav and Media apps are
displayed). For some apps (such as Nav and
Web), you can zoom in and out using
standard touchcreen finger gestures.
4.Maximize/minimize app
Touch the small rectangle to expand the
associated app to fill the entire main
viewing area (some apps are not
expandable). Touch again to display two
apps in half-screen view.
5.Controls
Touch to access all Model S controls and
settings (doors, locks, lights, etc).
6.Climate controls (see page 5.9).
7.Vo l u m e co n t r o l
Touch the up and down arrows to increase
or decrease the volume of the speakers.
You can also adjust the volume using the
scroll wheel on the left side of the steering
wheel.
NOTE: When you open a door to enter
Model S, Media Player begins playing
whatever was playing when you exited. The
volume is low until you sit down and close
the driver’s door, at which point, the volume
ramps up to the previously set level. Then
again, when you open the door to exit, the
volume lowers. When the last door is
closed, Media Player stops playing.
8.Reverse the position of the two currently
displayed apps.
WARNING: Do not read the touchscreen
while driving. Doing so increases the
likelihood of a collision. Everything you need to
know when driving is displayed on the
instrument panel. Media. See page 5.12.
Nav. See page 5.20.
Energy. See page 4.19.
Web. Access the Internet using
the web browser.
Camera. Display the area
behind Model S. This area also
displays automatically
whenever you shift into
Reverse. See page 4.24.
Phone. See page 5.18.
book.book Page 3 Friday, July 19, 2013 12:53 PM
Page 69 of 152
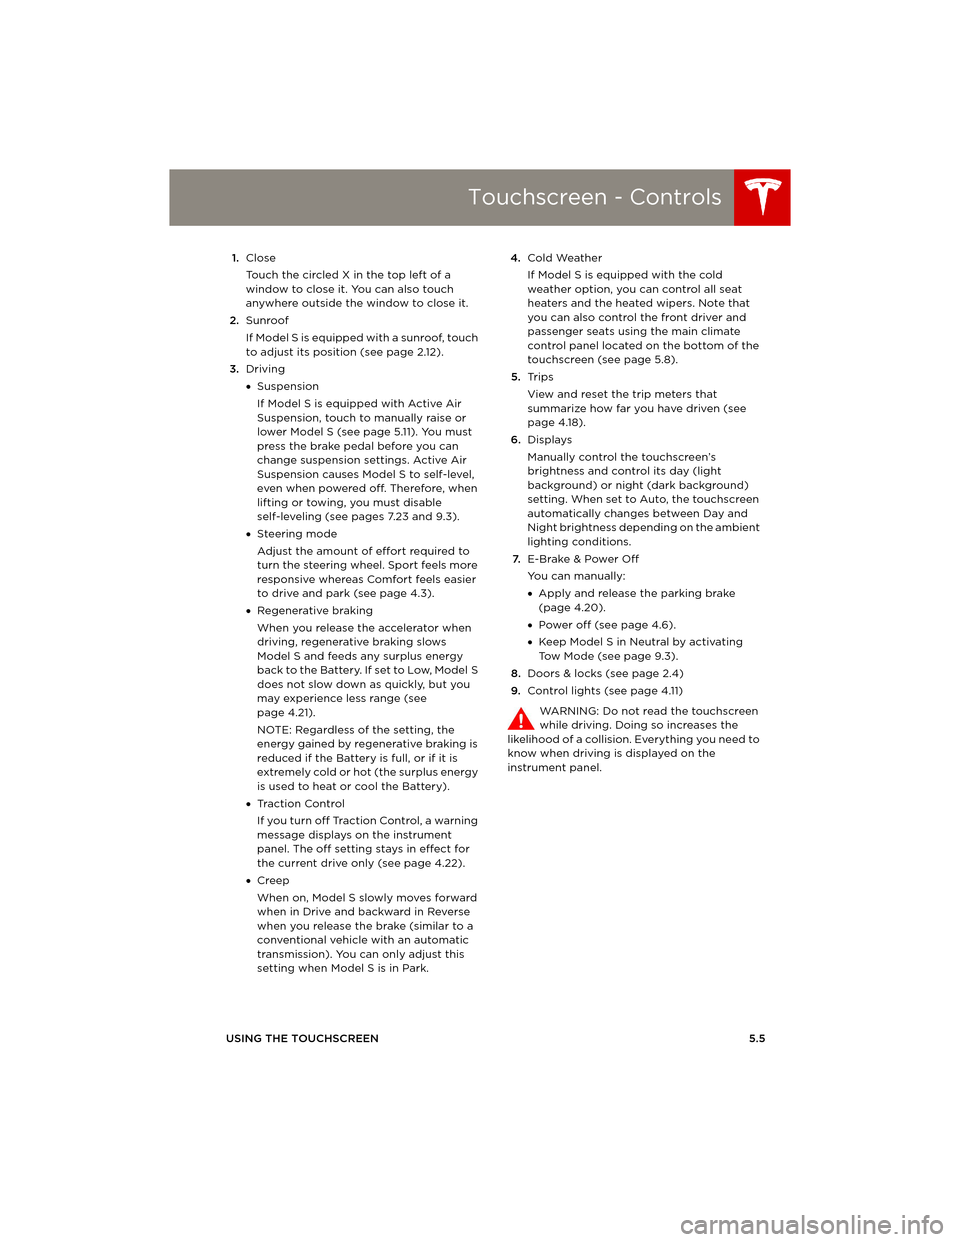
Touchscreen - Controls
USING THE TOUCHSCREEN5.5 1.Close
Touch the circled X in the top left of a
window to close it. You can also touch
anywhere outside the window to close it.
2.Sunroof
If Model S is equipped with a sunroof, touch
to adjust its position (see page 2.12).
3.Driving
•Suspension
If Model S is equipped with Active Air
Suspension, touch to manually raise or
lower Model S (see page 5.11). You must
press the brake pedal before you can
change suspension settings. Active Air
Suspension causes Model S to self-level,
even when powered off. Therefore, when
lifting or towing, you must disable
self-leveling (see pages 7.23 and 9.3).
•Steering mode
Adjust the amount of effort required to
turn the steering wheel. Sport feels more
responsive whereas Comfort feels easier
to drive and park (see page 4.3).
•Regenerative braking
When you release the accelerator when
driving, regenerative braking slows
Model S and feeds any surplus energy
b a c k t o t h e B a t t e r y. I f s e t t o L o w, M o d e l S
does not slow down as quickly, but you
may experience less range (see
page 4.21).
NOTE: Regardless of the setting, the
energy gained by regenerative braking is
reduced if the Battery is full, or if it is
extremely cold or hot (the surplus energy
is used to heat or cool the Battery).
•Tr a c t i o n C o n t r o l
If you turn off Traction Control, a warning
message displays on the instrument
panel. The off setting stays in effect for
the current drive only (see page 4.22).
•Creep
When on, Model S slowly moves forward
when in Drive and backward in Reverse
when you release the brake (similar to a
conventional vehicle with an automatic
transmission). You can only adjust this
setting when Model S is in Park.4.Cold Weather
If Model S is equipped with the cold
weather option, you can control all seat
heaters and the heated wipers. Note that
you can also control the front driver and
passenger seats using the main climate
control panel located on the bottom of the
touchscreen (see page 5.8).
5.Tr i p s
View and reset the trip meters that
summarize how far you have driven (see
page 4.18).
6.Displays
Manually control the touchscreen’s
brightness and control its day (light
background) or night (dark background)
setting. When set to Auto, the touchscreen
automatically changes between Day and
Night brightness depending on the ambient
lighting conditions.
7.E-Brake & Power Off
You can manually:
•Apply and release the parking brake
(page 4.20).
•Power off (see page 4.6).
•Keep Model S in Neutral by activating
Tow Mode (see page 9.3).
8.Doors & locks (see page 2.4)
9.Control lights (see page 4.11)
WARNING: Do not read the touchscreen
while driving. Doing so increases the
likelihood of a collision. Everything you need to
know when driving is displayed on the
instrument panel.
book.book Page 5 Friday, July 19, 2013 12:53 PM