TESLA MODEL S 2021 Owner´s Manual
MODEL S 2021
TESLA
TESLA
https://www.carmanualsonline.info/img/26/38037/w960_38037-0.png
TESLA MODEL S 2021 Owner´s Manual
Trending: ECU, headlights, key battery, hood release, water pump, mileage, oil pressure
Page 181 of 281

Charging Status
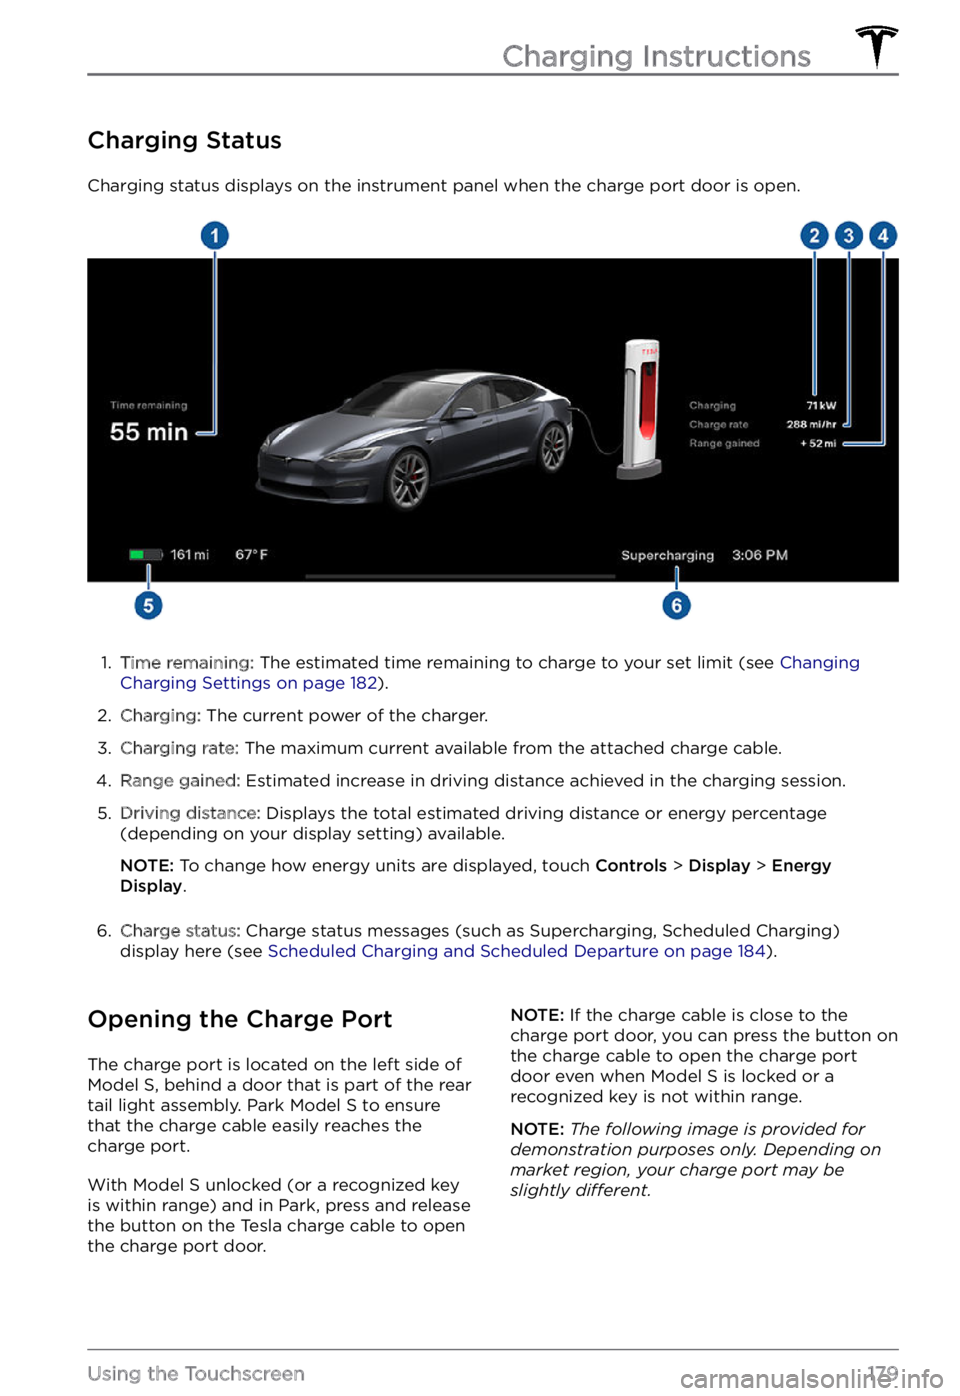
Charging status displays on the instrument panel when the charge port door is open.
1.
Time remaining: The estimated time remaining to charge to your set limit (see Changing Charging Settings on page 182).
2.
Charging: The current power of the charger.
3.
Charging rate: The maximum current available from the attached charge cable.
4.
Range gained: Estimated increase in driving distance achieved in the charging session.
5.
Driving distance: Displays the total estimated driving distance or energy percentage
(depending on your display setting) available.
NOTE: To change how energy units are displayed, touch Controls > Display > Energy Display.
6.
Charge status: Charge status messages (such as Supercharging, Scheduled Charging)
display here (see Scheduled Charging and Scheduled Departure on page 184).
Opening the Charge Port
The charge port is located on the left side of Model S, behind a door that is part of the rear
tail light assembly. Park Model S to ensure
that the charge cable easily reaches the
charge port.
With Model S unlocked (or a recognized key is within range) and in Park, press and release
the button on the Tesla charge cable to open the charge port door.
NOTE: If the charge cable is close to the
charge port door, you can press the button on
the charge cable to open the charge port
door even when Model S is locked or a recognized key is not within range.
NOTE: The following image is provided for demonstration purposes only. Depending on market region, your charge port may be slightly di
Page 182 of 281
You can also open the charge port door using
any of these methods:
Page 183 of 281
CAUTION: The connector end of the charge cable can damage the paint if dropped onto the vehicle.
Charge Port Light
Page 184 of 281

2. While holding the public charging handle
in one hand and the adapter in the other
hand, press and hold the button on the
public charging handle and pull both
outwards, removing the handle and adapter at the same time.
NOTE: If the charging station handle
separates from the adapter, leaving the
adapter in
Model S, use the touchscreen
to unlock the charge port (touch the
charging icon on the overhead view of the
vehicle).
3.
Press and hold the charging handle button again to release the adapter from
the charging handle.
NOTE: The charge port automatically closes
within approximately 10 seconds of removing
the connector from the charge port.
CAUTION: Tesla strongly recommends leaving Model S plugged in when not in use. This maintains the Battery at the optimum level of charge.
Manually Releasing Charge
Cable
If the usual methods for releasing a charge
cable from the charge port (using the charge
handle release button, touchscreen, or mobile
app) do not work, carefully follow these steps:
1.
Ensure that Model S is not actively
charging by displaying the charging
screen on the touchscreen. If necessary,
touch
Stop Charging.
2.
Open the rear trunk.
3.
Pull the charge port
Page 185 of 281

1.
Driving distance: Displays the total
estimated driving distance available.
2.
Set limit: Adjust the charge limit by
dragging the arrow below the battery to
indicate the level of charging you want.
The setting you choose applies to
immediate and scheduled charging
sessions.
NOTE: A portion of the battery image
may appear blue. This indicates that a
small portion of the energy stored in the
battery is not available because the
battery is cold. This is normal and no
reason for concern. When the battery warms up, the blue portion no longer displays.
3.
Stop charging: Touch to stop charging.
4.
Charge current at this location: The
current automatically sets to the
maximum current available from the
attached charge cable, unless it was previously reduced to a lower level. If
needed, touch
- or + to change the
current (for example, you may want to
reduce the current if you are concerned
about overloading a domestic wiring
circuit shared by other equipment). It is
not possible to set the charging current to
a level that exceeds the maximum
available from the attached charge cable.
When you change the current,
Model S remembers the location. If you charge at
the same location, you do not need to
change it again.
NOTE: If Model S is charging and detects
unexpected
Page 186 of 281
Scheduled Charging and
Scheduled Departure
Toggle between Scheduled Departure and
Scheduled Charging by touching Controls > Charging > Switch to Scheduled Departure/Scheduled Charging.
Using Scheduled Charging
With Scheduled Charging selected, enable
the feature then set a daily time when you
want
Model S to start charging.
Using Scheduled Departure
When Scheduled Departure is displayed,
touch Schedule to set a daily time when you
want Model S to be ready to drive. Specify a
time, then touch Settings to enable either or
both of the following departure features:
Page 187 of 281
Log into your Tesla Account to view fees and
details about Supercharger sessions, track the remaining balance of free credits, set up a
payment method, and make payments. Once
a payment method is saved, fees are automatically paid from your account.Charging Instructions
185Charging
Page 188 of 281
Service Intervals
Your vehicle should generally be serviced on
an as-needed basis. However, Tesla
recommends the following maintenance items
and intervals, as applicable to your vehicle, to
ensure continued reliability and
efficiency of
your Model S.
Page 189 of 281
NOTE: In addition to cooling the interior, the
air conditioning compressor also cools the
Battery. Therefore, in hot weather, the air
conditioning compressor can turn on even if
you turned it
off. This is normal because the
system
Page 190 of 281

Maintaining Tire Pressures
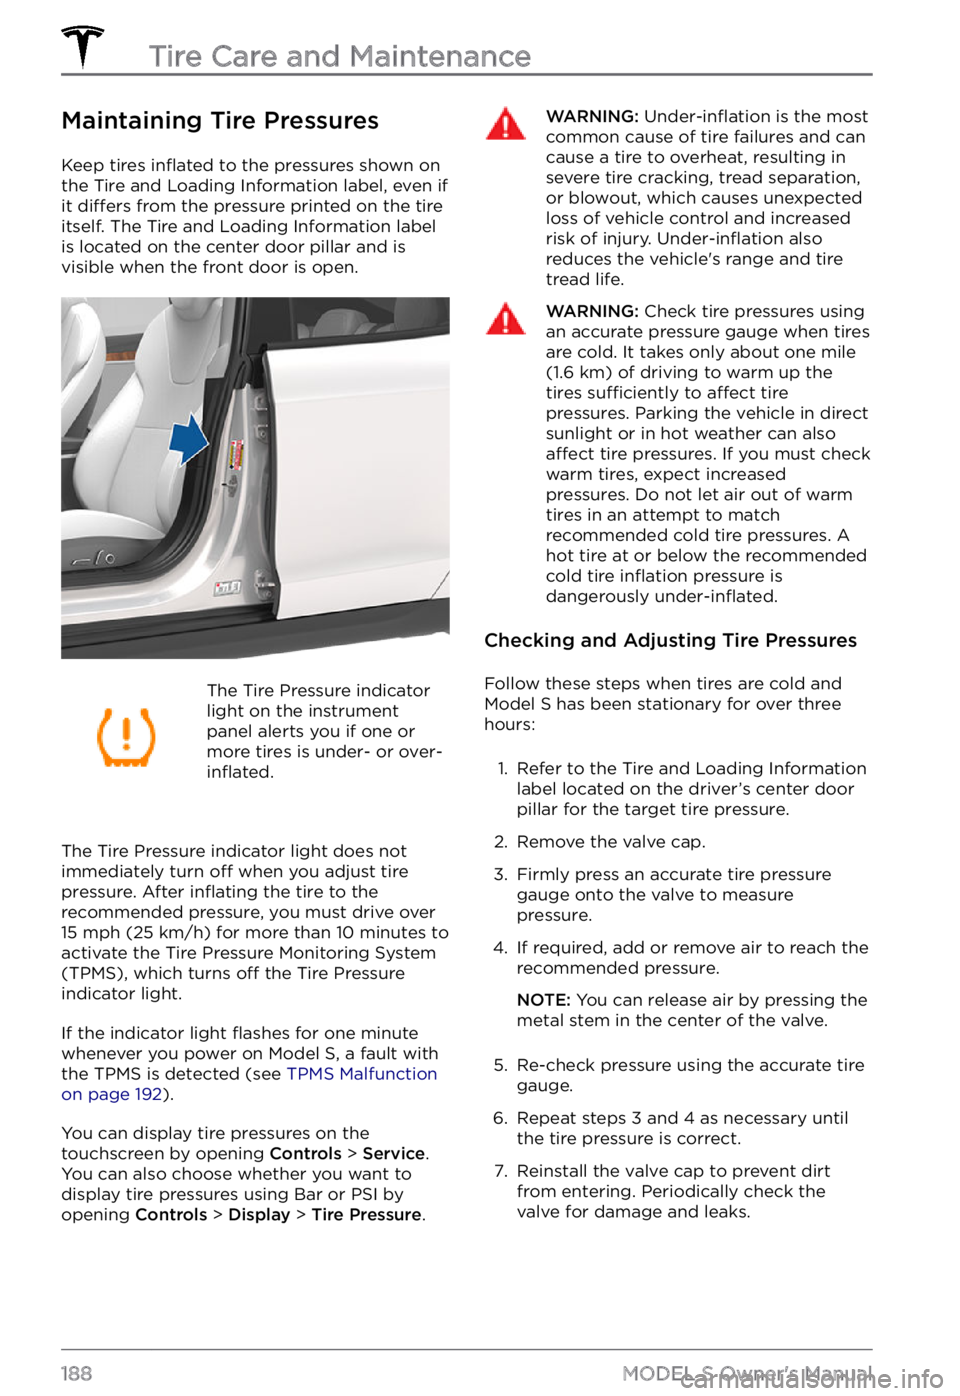
Keep tires inflated to the pressures shown on
the Tire and Loading Information label, even if
it
differs from the pressure printed on the tire
itself. The Tire and Loading Information label is located on the center door pillar and is
visible when the front door is open.
The Tire Pressure indicator
light on the instrument panel alerts you if one or
more tires is under- or over-inflated.
The Tire Pressure indicator light does not immediately turn off when you adjust tire pressure. After inflating the tire to the
recommended pressure, you must drive over
15 mph (25 km/h) for more than 10 minutes to
activate the Tire Pressure Monitoring System
(TPMS), which turns
off the Tire Pressure
indicator light.
If the indicator light flashes for one minute
whenever you power on Model S, a fault with
the TPMS is detected (see TPMS Malfunction on page 192).
You can display tire pressures on the touchscreen by opening Controls > Service.
You can also choose whether you want to
display tire pressures using Bar or PSI by opening
Controls > Display > Tire Pressure.
WARNING: Under-inflation is the most common cause of tire failures and can cause a tire to overheat, resulting in severe tire cracking, tread separation, or blowout, which causes unexpected loss of vehicle control and increased risk of injury. Under-inflation also reduces the vehicle
Trending: air condition, oil, flat tire, brake sensor, key battery, parking sensors, trunk


