TESLA MODEL S 2021 Owner´s Manual
Manufacturer: TESLA, Model Year: 2021, Model line: MODEL S, Model: TESLA MODEL S 2021Pages: 281, PDF Size: 7.63 MB
Page 161 of 281

Touch Show Suspension Data to display
detailed information about the dampers for
each wheel, including ride height,
compression and rebound values, and body accelerations.
Auto-Raising Suspension
Auto-raising suspension saves you from
manually having to raise the suspension every
time you arrive at a frequently-used location
where you have previously raised the
suspension. Whenever you raise the suspension to
High or Very High, you can
touch Always Auto-Raise at This Location to
save the location. When you return to the
saved location,
Model S raises the suspension
and the instrument panel displays a message
indicating that the suspension is being raised.
NOTE: When returning to a saved location
and driving faster than the High and Very High suspension settings allow, the
suspension does not raise until
Model S slows
down.
NOTE: After leaving a saved location, the
suspension automatically lowers. However, it
may not lower until you are driving faster than the speed threshold at which the suspension lowers.
NOTE: If Model S reaches a saved location
and the existing suspension setting is already
higher than the level that has been saved for
that location, the ride height is not adjusted.
To remove an auto-raising location
If you do not want the suspension to auto- raise at a saved location, touch the X in the
auto-raising location status message that
displays at a saved location. Doing so
removes the auto-raise location and the suspension no longer raises automatically
when you arrive at the location.
Self-Leveling
Model S equipped with air suspension
automatically self-levels, even when power is
off. To prevent damage when jacking or lifting
the vehicle, you must activate Jack mode to
disable self-leveling (press the brake pedal
and touch
Controls > Service > Jack Mode).
For more details, see Jack Mode on page 201.
Air Suspension
159Using the Touchscreen
Page 162 of 281
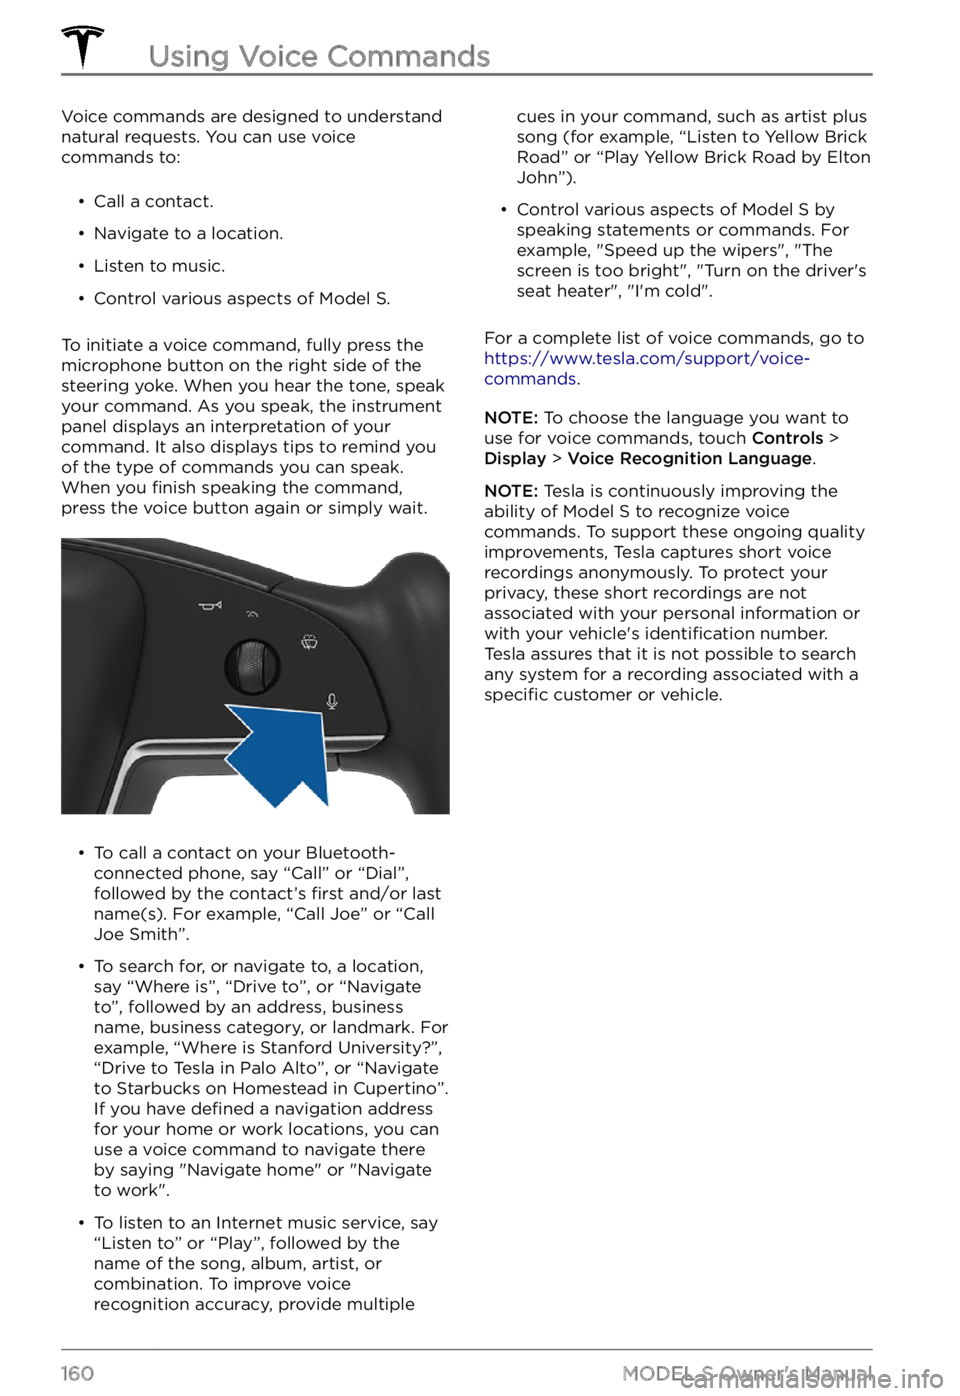
Voice commands are designed to understand
natural requests. You can use voice commands to:
Page 163 of 281
About the Security System
If Model S does not detect a key nearby and a
locked door or trunk is opened, an alarm
sounds and the headlights and turn signals
flash. To deactivate the alarm, press any
button on the key.
To manually enable or disable the alarm
system, touch Controls > Safety > Security Alarm. When enabled, Model S activates its
alarm one minute after you exit, the doors
lock, and a recognized key is no longer
detected.
A battery-backed siren sounds in situations where a locked door or trunk is opened and
Model S does not detect a key nearby (if
equipped). If you also want this siren to sound
in situations where
Model S detects motion
inside the cabin, or is moved or tilted (for
example, with a tow truck or jack), turn on the
Tilt/Intrusion setting (touch Controls > Safety > Tilt/Intrusion) (if equipped).
NOTE: If you plan to leave something that
moves inside your locked Model S, remember
to turn off Tilt/Intrusion. If this setting is on,
any motion detected inside Model S activates
the intrusion alarm.
NOTE: If Model S is in Sentry Mode (see Sentry Mode on page 162), you must disable
Sentry Mode before you can disable the
Security alarm or the Tilt/Intrusion alarm.
NOTE: The Security Alarm must be on to
enable Tilt/Intrusion.
NOTE: The Intrusion Sensor automatically
disables in situations where the climate
control system is operating when you have
left your vehicle (see
Keep Climate On, Dog Mode, and Camp Mode on page 139). To
override, you can manually turn the Intrusion
Sensor on again after choosing Keep Climate On, Dog, or Camp Mode (touch
Controls > Safety > Tilt/Intrusion).
If your Model S is equipped with the
Enhanced Anti-Theft upgrade, the horn
sounds in situations where a locked door or trunk is opened and
Model S does not detect
a key nearby. If the Tilt/Intrusion setting is on,
the horn also sounds if Model S detects
motion inside the cabin, or if the vehicle is moved or tilted (for example, with a tow truck
or jack). To turn the Tilt/Intrusion detection system on or
off, touch Controls > Safety > Tilt/Intrusion.
PIN to Drive
To increase security, you can prevent Model S from being driven until a 4-digit PIN (Personal Identification Number) is entered. To enable
this setting, touch Controls > Safety > PIN to Drive and follow the on-screen prompts to
create a driving PIN.
NOTE: When enabled, in addition to entering
the 4-digit driving PIN to drive, you must also
use it to enter Valet mode for the
first time
and create the 4-digit valet PIN that you can
use to enter and exit Valet mode. When in
Valet mode,
Model S can be driven without
the need for the valet to enter a driving PIN.
In addition, the
PIN to Drive setting is
disabled whenever Valet mode is active.
If you forget your driving PIN, or to disable PIN to Drive, return to this setting, touch the
link to enter your Tesla login credentials, then
follow the on-screen prompts.
NOTE: In the unlikely event that your
touchscreen is unresponsive, you may be
unable to enter the PIN. In this case,
first try
to restart the touchscreen (see Restarting the Touchscreen on page 52). If the touchscreen
is still unresponsive, you can still bypass PIN
to Drive by turning on Keyless Driving in the
Tesla mobile app.
Glovebox PIN
For additional security, you can protect the contents in your glovebox with a 4-digit PIN. To enable this setting, touch
Controls > Safety > Glovebox PIN and follow the on-
screen prompts. When enabled, you are
prompted to enter the PIN to open the
glovebox. To disable this setting, select the
toggle to disable and then enter the PIN.
If you forget your glovebox PIN, reset it by
entering your Tesla login credentials, then
follow the on-screen prompts.
NOTE: When you open the glovebox with
both Glovebox PIN and Valet mode enabled,
you are prompted for the glovebox PIN and taken out of Valet mode after the glovebox
opens.
Security Settings
161Using the Touchscreen
Page 164 of 281
Sentry Mode
NOTE: Depending on market region, vehicle configuration, options purchased, and software version, your vehicle may not be equipped with Sentry Mode, or the feature may not operate exactly as described.
In Sentry Mode, cameras and sensors remain
powered on and ready to record suspicious
activity whenever
Model S is locked and in
Park.
To turn Sentry Mode on or off, touch Controls > Sentry. Alternatively, you can use voice
commands, the mobile app, or you can touch
Controls > Safety > Sentry Mode. To activate
Sentry Mode using voice commands, say
"
Keep Tesla safe", "Keep my car safe", "Sentry on", or "Enable Sentry" (for details using
voice commands, see Using Voice Commands on page 160).
NOTE: Sentry Mode requires the Battery to be
at least 20% charged. If the Battery falls
below 20%, Sentry Mode turns
off and the
mobile app sends you a notification.
NOTE: Power consumption may increase
when Sentry Mode is active.
NOTE: Software updates cannot be installed
when Sentry Mode is activated.
CAUTION: Do not rely on Sentry Mode to protect Model S from all possible security threats. While it may help deter some threats, no security system can prevent all attacks.
CAUTION: Sentry Mode may not trigger the security alarm in all situations involving damage to the vehicle. The security alarm depends upon multiple factors to be triggered and may not detect all impacts to the vehicle or may not trigger the alarm in all cases.
Standby, Alert, and Alarm States
When in Sentry Mode, Model S may go
through three states depending on its
surroundings
Page 165 of 281
Location-Based Settings
You can customize Sentry Mode to
automatically activate at specific locations
where you park Model S:
Page 166 of 281

Page 167 of 281

4. In the pop-up menu, under the File
System section, select a support format
(such as exFAT, FAT 32, etc.).
NOTE: You can also name your USB flash
drive (under Volume Label).
5.
Check the Quick format box and click Start.
6.
Go back to File Explorer, click on your flash drive, and right-click to create a
folder, or select New Folder in the top
menu.
7.
Name the folder “TeslaCam” (without
quotation marks) and click Save. This
folder contains all recent and saved clips
from Sentry Mode and Dashcam.
8.
Properly eject the USB flash drive.
Once you have formatted the USB flash drive
and created the TeslaCam folder, insert it into
a USB port in Model S. Do not use the rear
USB ports
Page 168 of 281
About HomeLinkIf your vehicle is equipped
with the HomeLink
Page 169 of 281
NOTE: If you see a screen called “Train the
receiver” while programming the device,
remember that this is a time-sensitive
step. After pressing the Learn/Program/ Smart button on the device
Page 170 of 281

Model S has learned the remote control and
you can touch Continue on the touchscreen.
If the headlights do not flash: