TOYOTA 4RUNNER 2011 N280 / 5.G Owners Manual
4RUNNER 2011 N280 / 5.G
TOYOTA
TOYOTA
https://www.carmanualsonline.info/img/14/6103/w960_6103-0.png
TOYOTA 4RUNNER 2011 N280 / 5.G Owners Manual
Trending: fuses, check oil, fuel type, maintenance reset, service interval, fuel tank capacity, air conditioning
Page 451 of 680
451
3-7. Other interior features
3
Interior features
4RUNNER_U
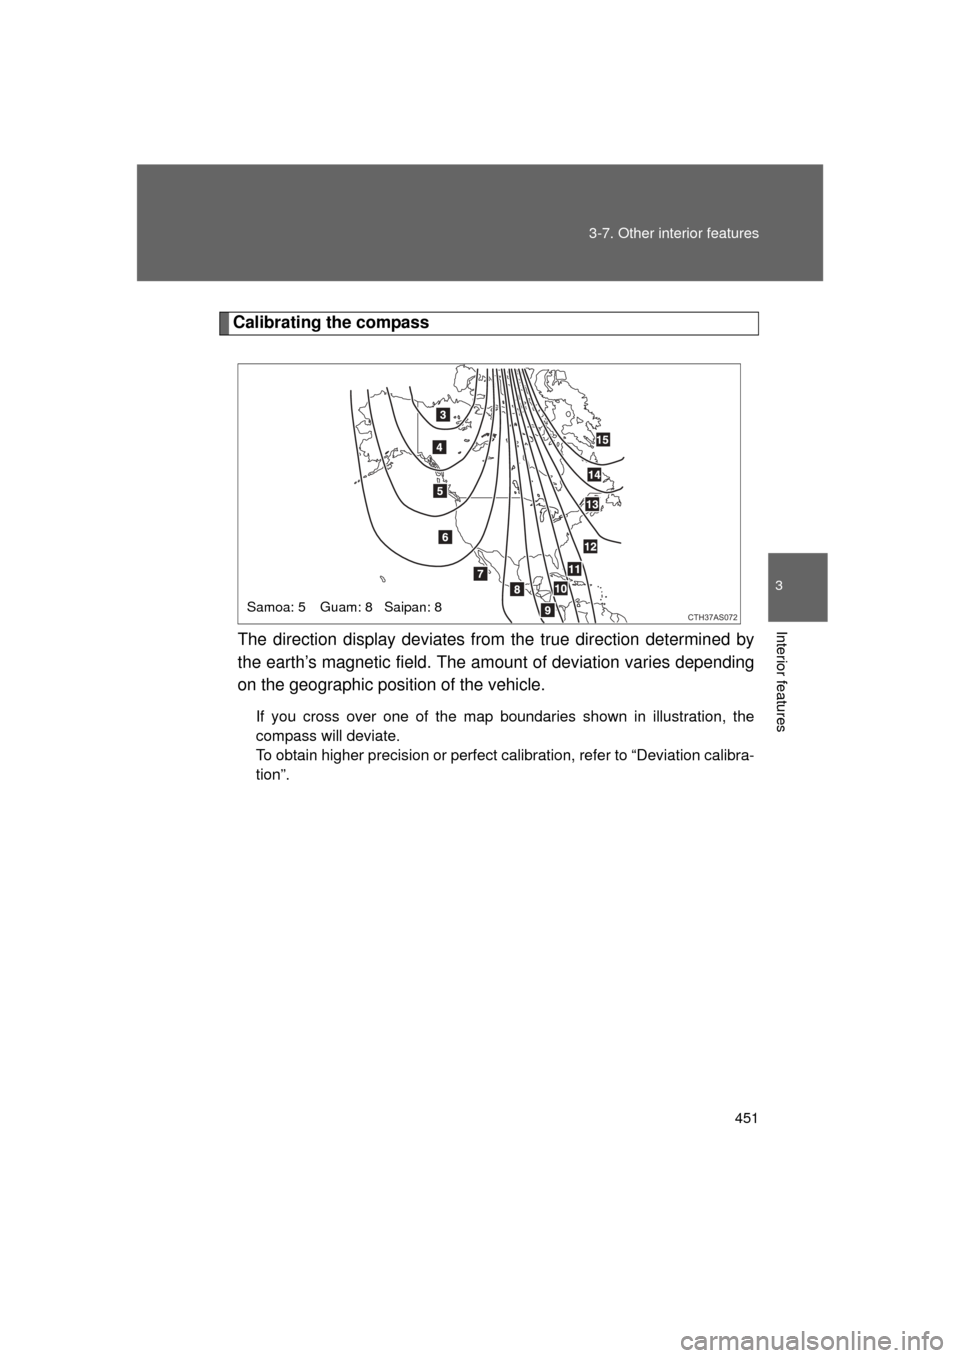
Calibrating the compass
The direction display deviates fr om the true direction determined by
the earth’s magnetic field. The amount of deviation varies depending
on the geographic position of the vehicle.
If you cross over one of the map boundaries shown in illustration, the
compass will deviate.
To obtain higher precision or perfect calibration, refer to “Deviation calibra-
tion”.
CTH37AS072Samoa: 5 Guam: 8 Saipan: 8
Page 452 of 680
452 3-7. Other interior features
4RUNNER_U
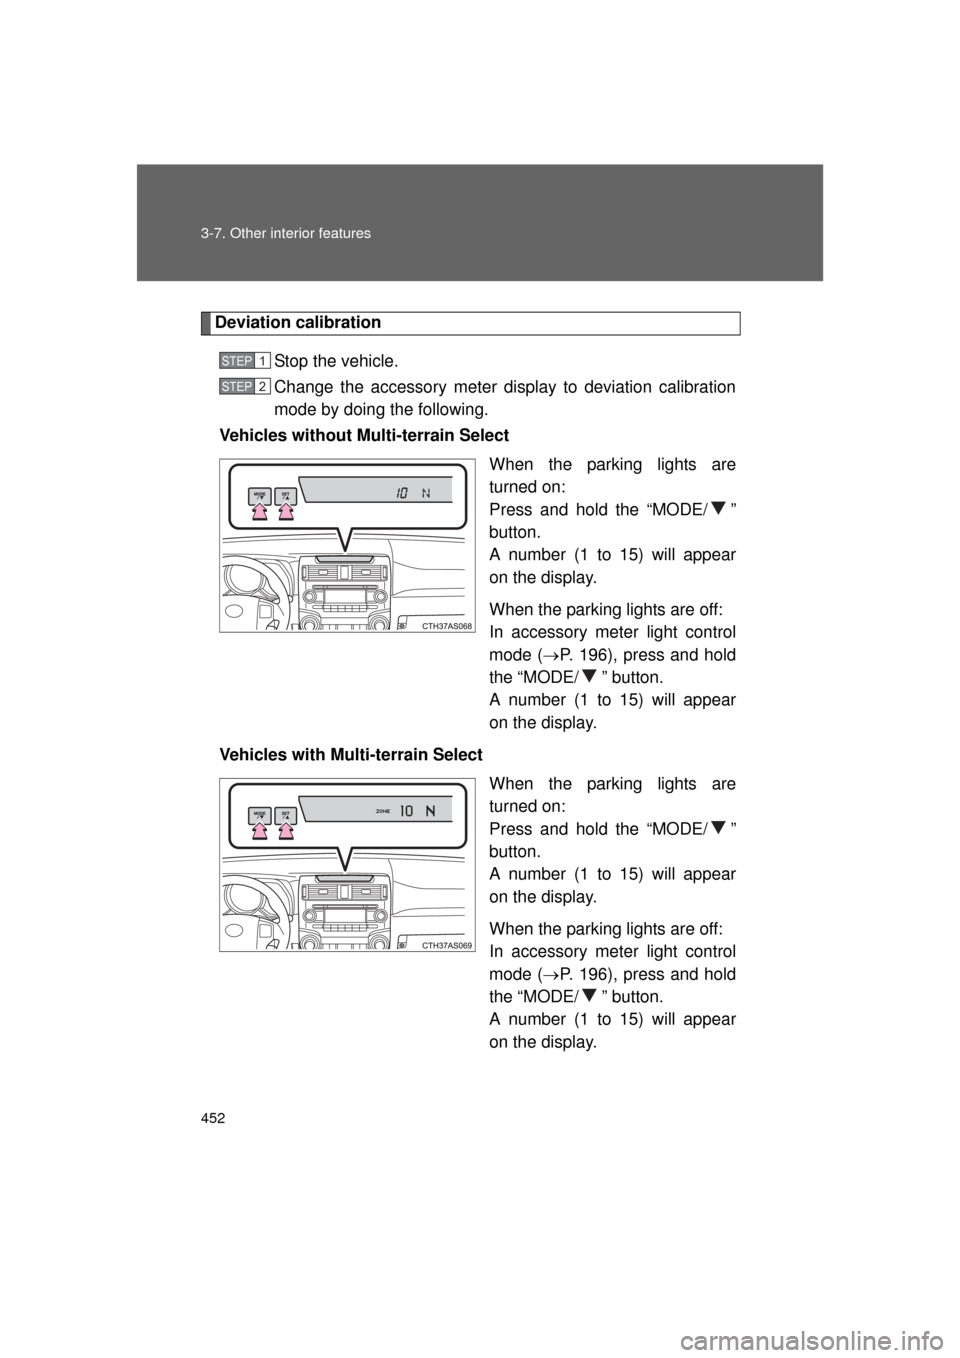
Deviation calibrationStop the vehicle.
Change the accessory meter display to deviation calibration
mode by doing the following.
Vehicles without Multi-terrain Select
When the parking lights are
turned on:
Press and hold the “MODE/ ”
button.
A number (1 to 15) will appear
on the display.
When the parking lights are off:
In accessory meter light control
mode (P. 196), press and hold
the “MODE/ ” button.
A number (1 to 15) will appear
on the display.
Vehicles with Multi-terrain Select When the parking lights are
turned on:
Press and hold the “MODE/ ”
button.
A number (1 to 15) will appear
on the display.
When the parking lights are off:
In accessory meter light control
mode (P. 196), press and hold
the “MODE/ ” button.
A number (1 to 15) will appear
on the display.
STEP 1
STEP 2
Page 453 of 680
453
3-7. Other interior features
3
Interior features
4RUNNER_U
Referring to the map above, press the “MODE/ ” or “SET/
” button to select the number of the zone you are in.
Press and hold the “SET/ ” button to confirm the number
and to exit deviation calibrati on mode. (If the button is pressed
for more than 6 seconds, th e number will automatically be
confirmed and the display returned to normal.)
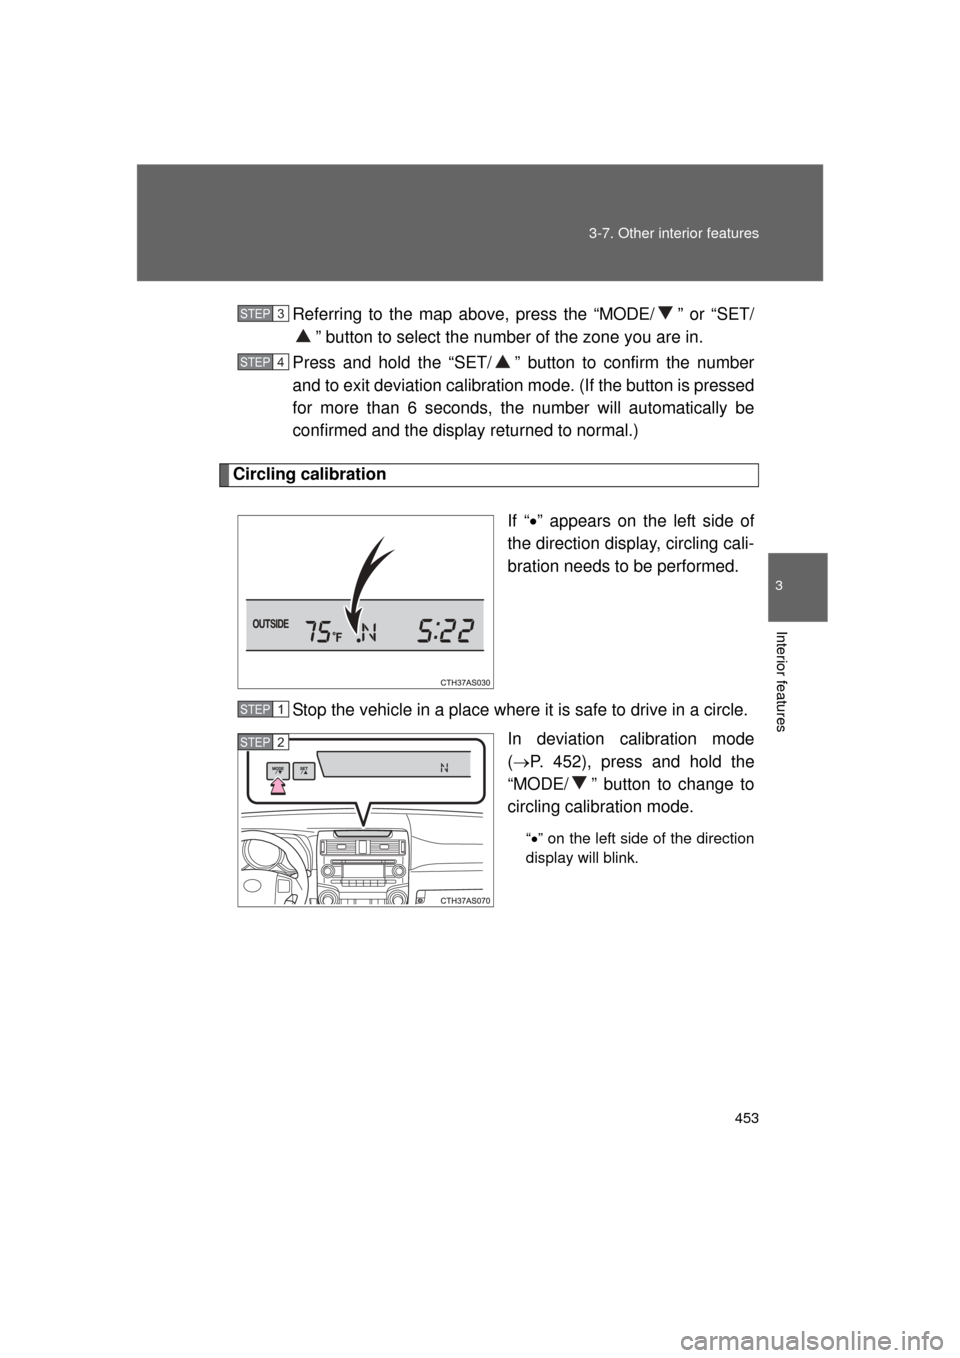
Circling calibration
If “” appears on the left side of
the direction display, circling cali-
bration needs to be performed.
Stop the vehicle in a place where it is safe to drive in a circle. In deviation calibration mode
( P. 452), press and hold the
“MODE/ ” button to change to
circling calibration mode.
“ ” on the left side of the direction
display will blink.
STEP 3
STEP 4
STEP 1
STEP 2
Page 454 of 680
454 3-7. Other interior features
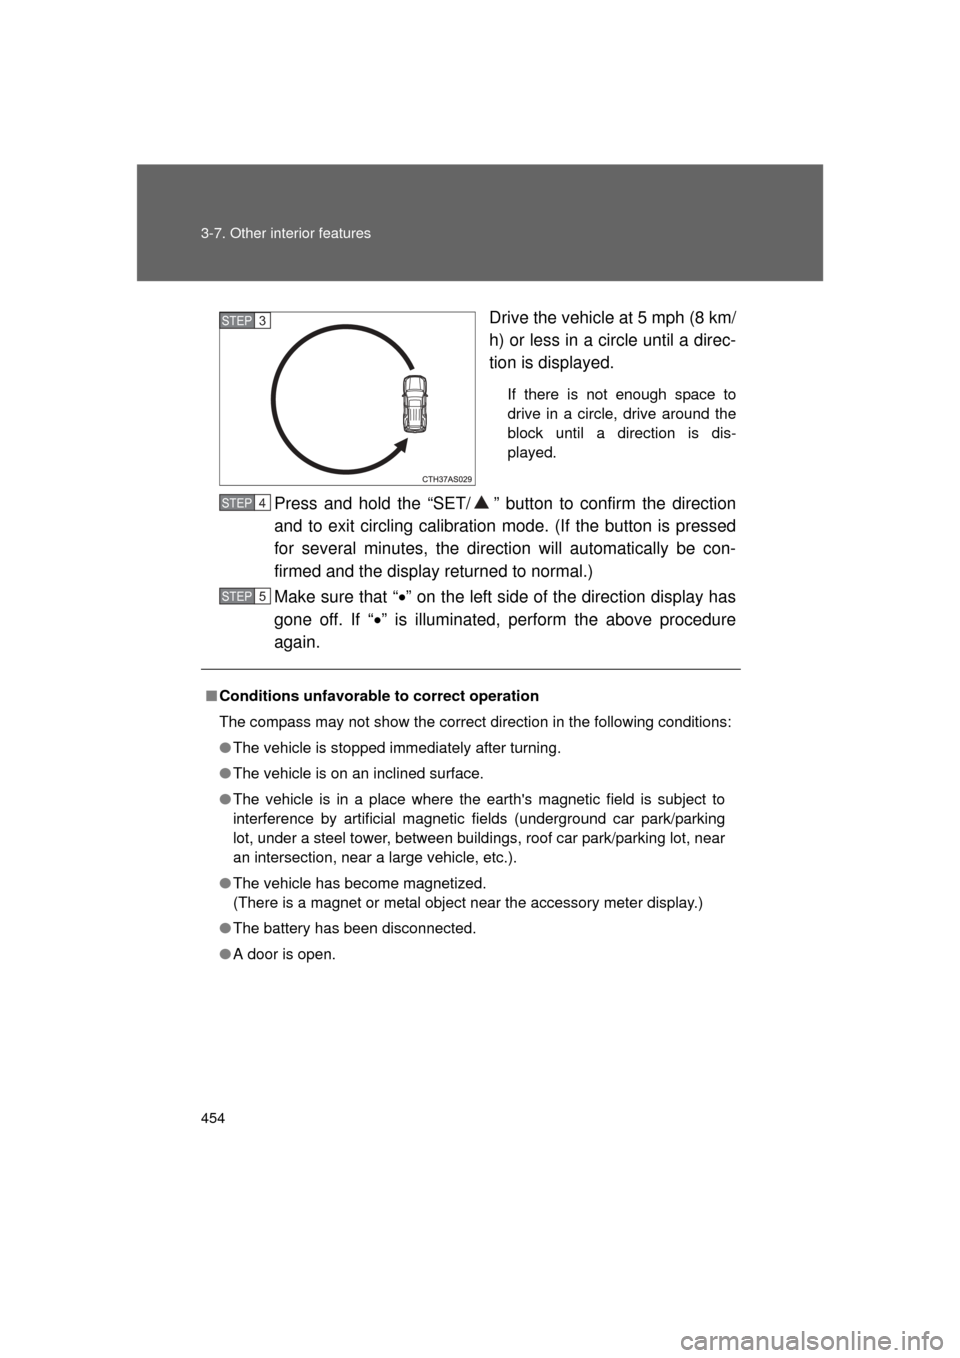
4RUNNER_UDrive the vehicle at 5 mph (8 km/
h) or less in a circle until a direc-
tion is displayed.
If there is not enough space to
drive in a circle, drive around the
block until a direction is dis-
played.
Press and hold the “SET/ ” butt
on to confirm the direction
and to exit circling calibration mode. (If the button is pressed
for several minutes, the direction will automatically be con-
firmed and the display returned to normal.)
Make sure that “ ” on the left side of the direction display has
gone off. If “ ” is illuminated, perform the above procedure
again.
STEP 3
■ Conditions unfavorable to correct operation
The compass may not show the correct direction in the following conditions:
● The vehicle is stopped immediately after turning.
● The vehicle is on an inclined surface.
● The vehicle is in a place where the earth's magnetic field is subject to
interference by artificial magnetic fields (underground car park/parking
lot, under a steel tower, between buildings, roof car park/parking lot, near
an intersection, near a large vehicle, etc.).
● The vehicle has become magnetized.
(There is a magnet or metal object near the accessory meter display.)
● The battery has been disconnected.
● A door is open.
STEP 4
STEP 5
Page 455 of 680
455
3-7. Other interior features
3
Interior features
4RUNNER_U
■
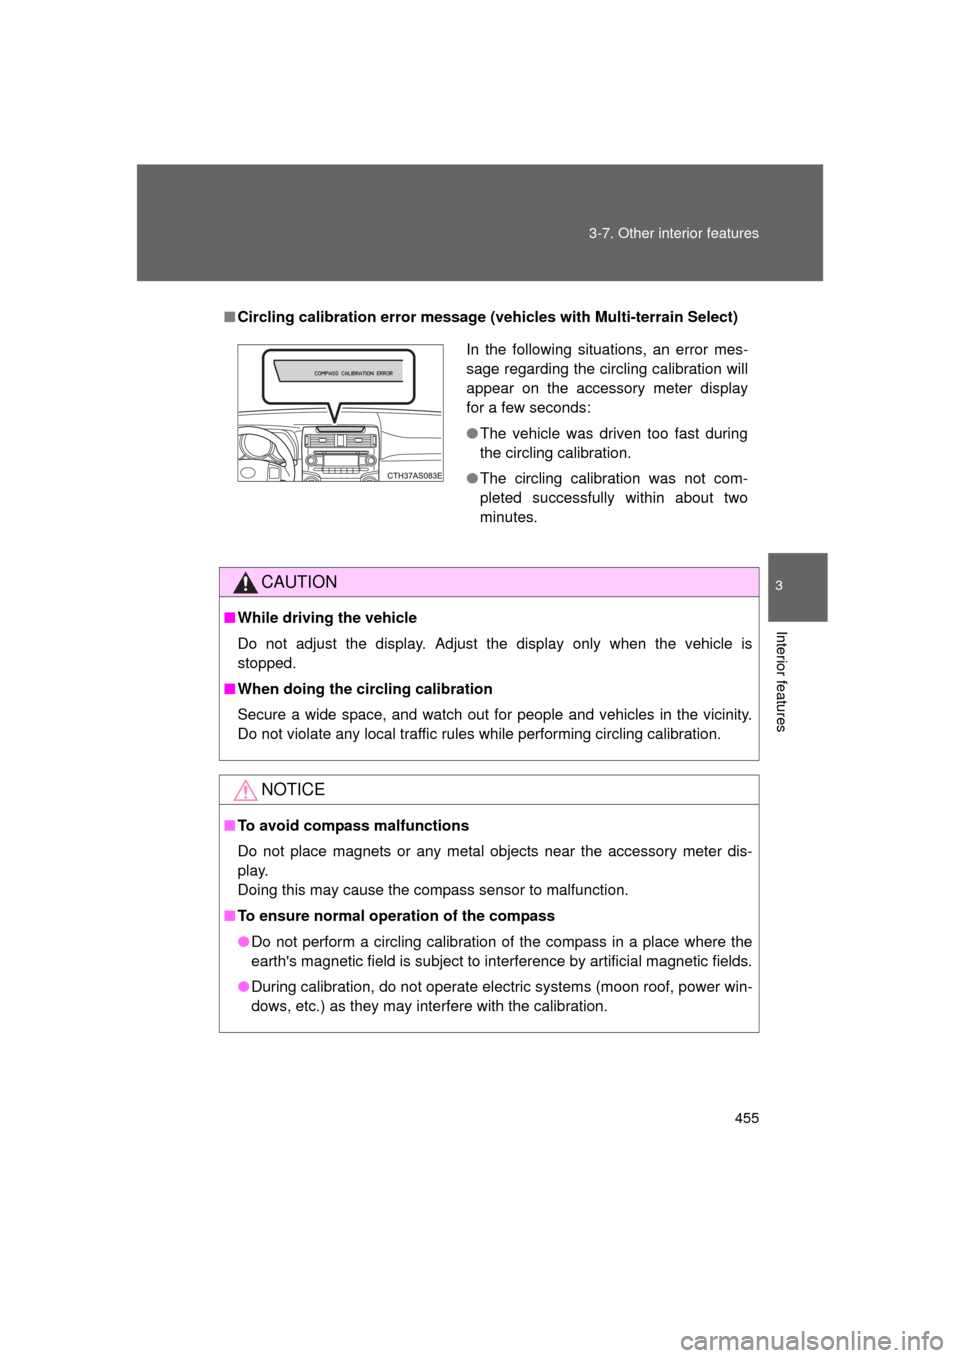
Circling calibration error message (vehicles with Multi-terrain Select)
CAUTION
■While driving the vehicle
Do not adjust the display. Adjust the display only when the vehicle is
stopped.
■ When doing the circling calibration
Secure a wide space, and watch out for people and vehicles in the vicinity.
Do not violate any local traffic rules while performing circling calibration.
NOTICE
■To avoid compass malfunctions
Do not place magnets or any metal objects near the accessory meter dis-
play.
Doing this may cause the compass sensor to malfunction.
■ To ensure normal operation of the compass
● Do not perform a circling calibration of the compass in a place where the
earth's magnetic field is subject to interference by artificial magnetic fields.
● During calibration, do not operate electric systems (moon roof, power win-
dows, etc.) as they may interfere with the calibration.
In the following situations, an error mes-
sage regarding the circling calibration will
appear on the accessory meter display
for a few seconds:
●The vehicle was driven too fast during
the circling calibration.
● The circling calibration was not com-
pleted successfully within about two
minutes.
Page 456 of 680
456
3-7. Other interior features
4RUNNER_U
Luggage compartment features
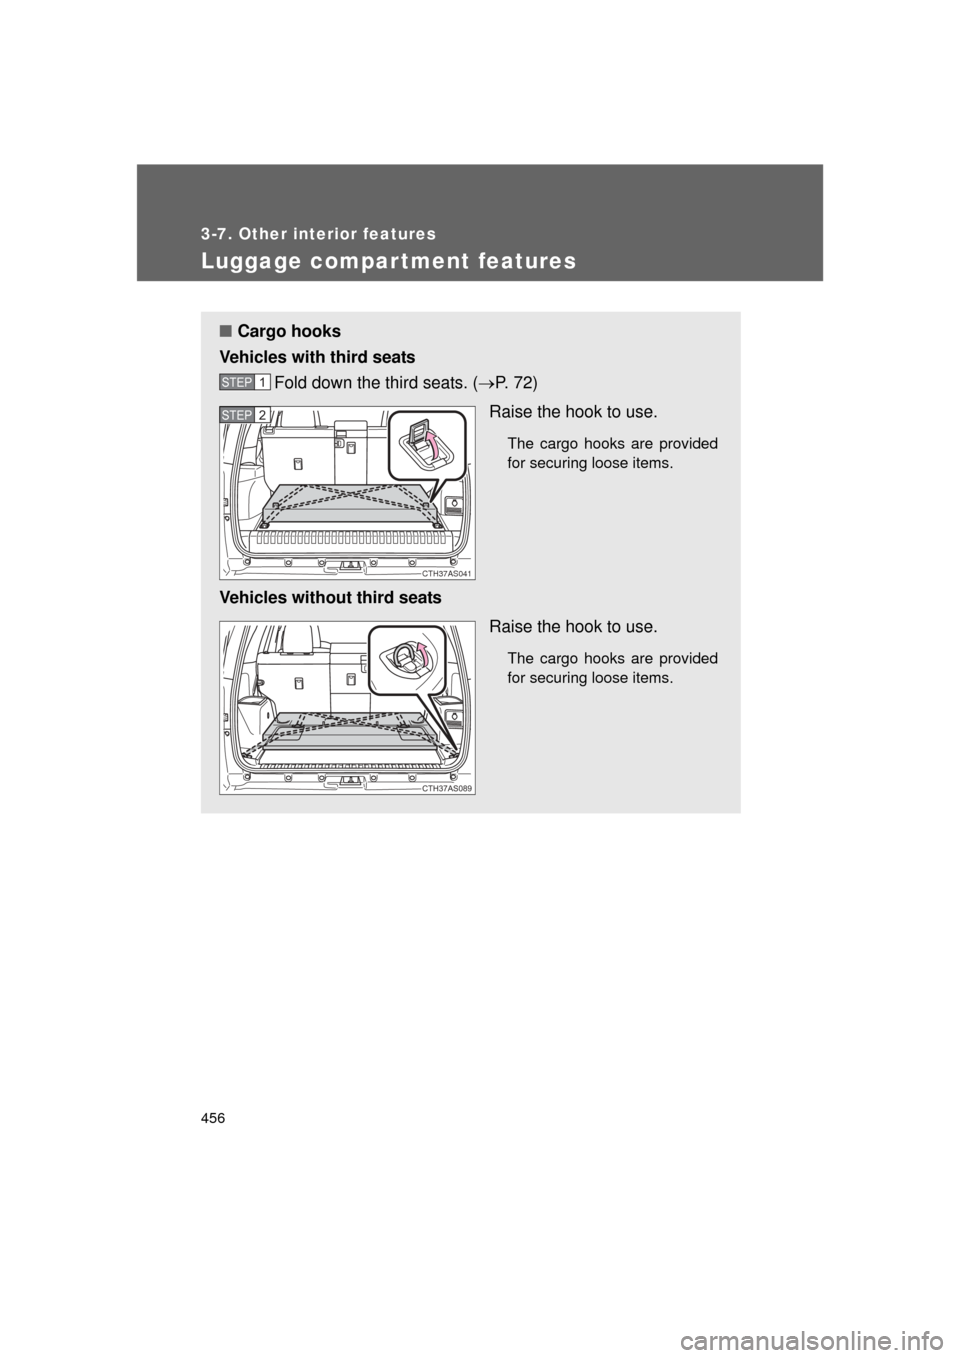
■Cargo hooks
Vehicles with third seats Fold down the third seats. ( P. 72)
Raise the hook to use.
The cargo hooks are provided
for securing loose items.
Vehicles without third seats Raise the hook to use.
The cargo hooks are provided
for securing loose items.
STEP 1
CTH37AS041
STEP 2
CTH37AS089
Page 457 of 680
457
3-7. Other interior features
3
Interior features
4RUNNER_U
■
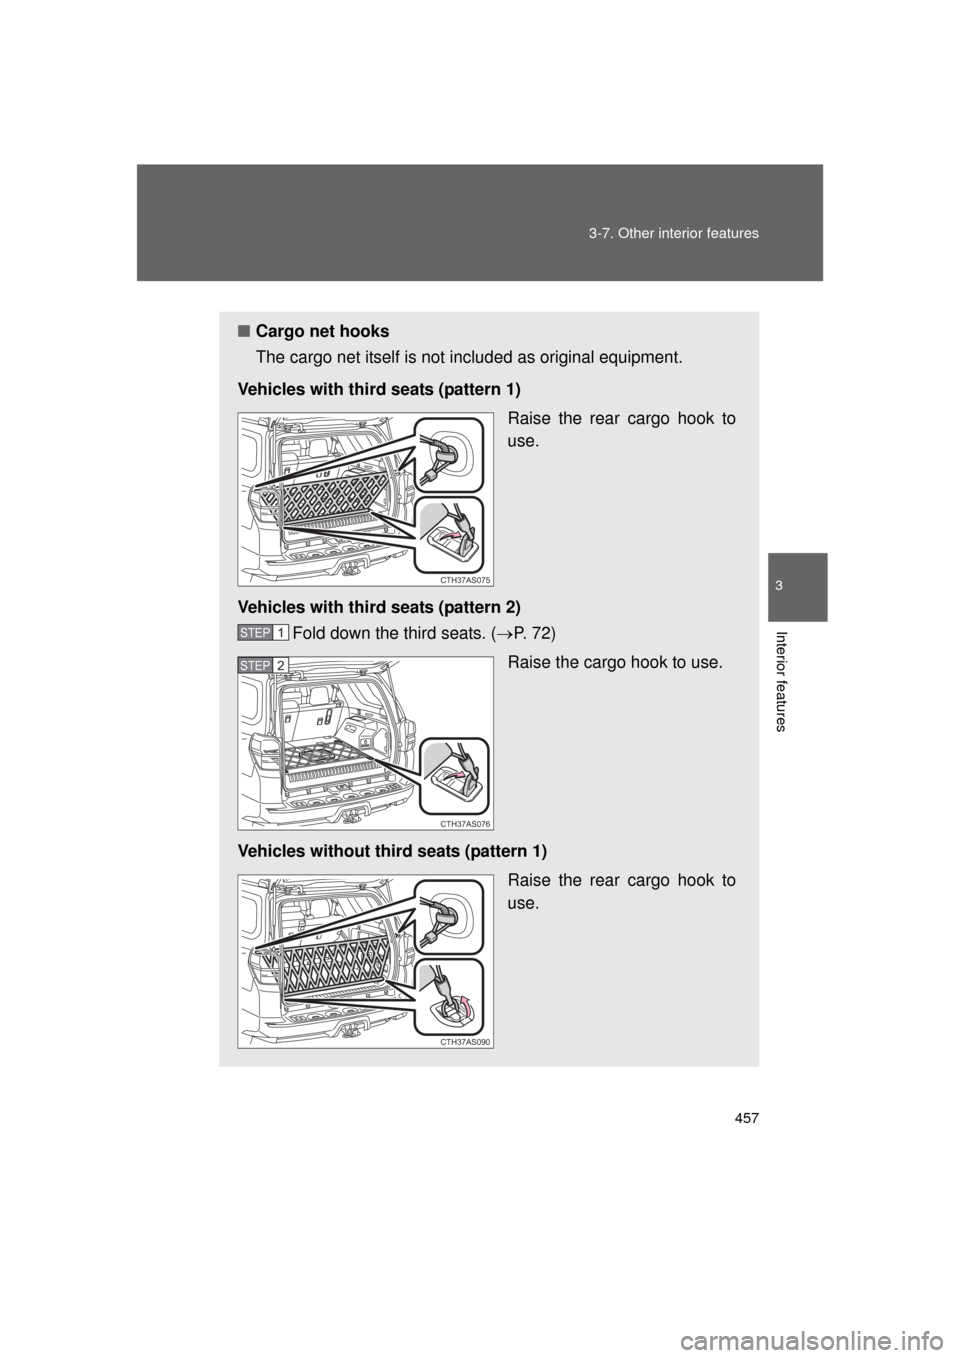
Cargo net hooks
The cargo net itself is not in cluded as original equipment.
Vehicles with third seats (pattern 1) Raise the rear cargo hook to
use.
Vehicles with third seats (pattern 2) Fold down the third seats. ( P. 72)
Raise the cargo hook to use.
Vehicles without third seats (pattern 1) Raise the rear cargo hook to
use.
CTH37AS075
STEP 1
CTH37AS076
STEP 2
CTH37AS090
Page 458 of 680
458 3-7. Other interior features
4RUNNER_U
Vehicles without third seats (pattern 2)Raise the cargo hook to use.
■ Storage compartment
Type A (if equipped)
Open the storage compart-
ment as shown.
Type B (if equipped) Open the storage compart-
ment as shown.
CTH37AS091
CTH37AS014
CTH37AS092
Page 459 of 680
459
3-7. Other interior features
3
Interior features
4RUNNER_U
■
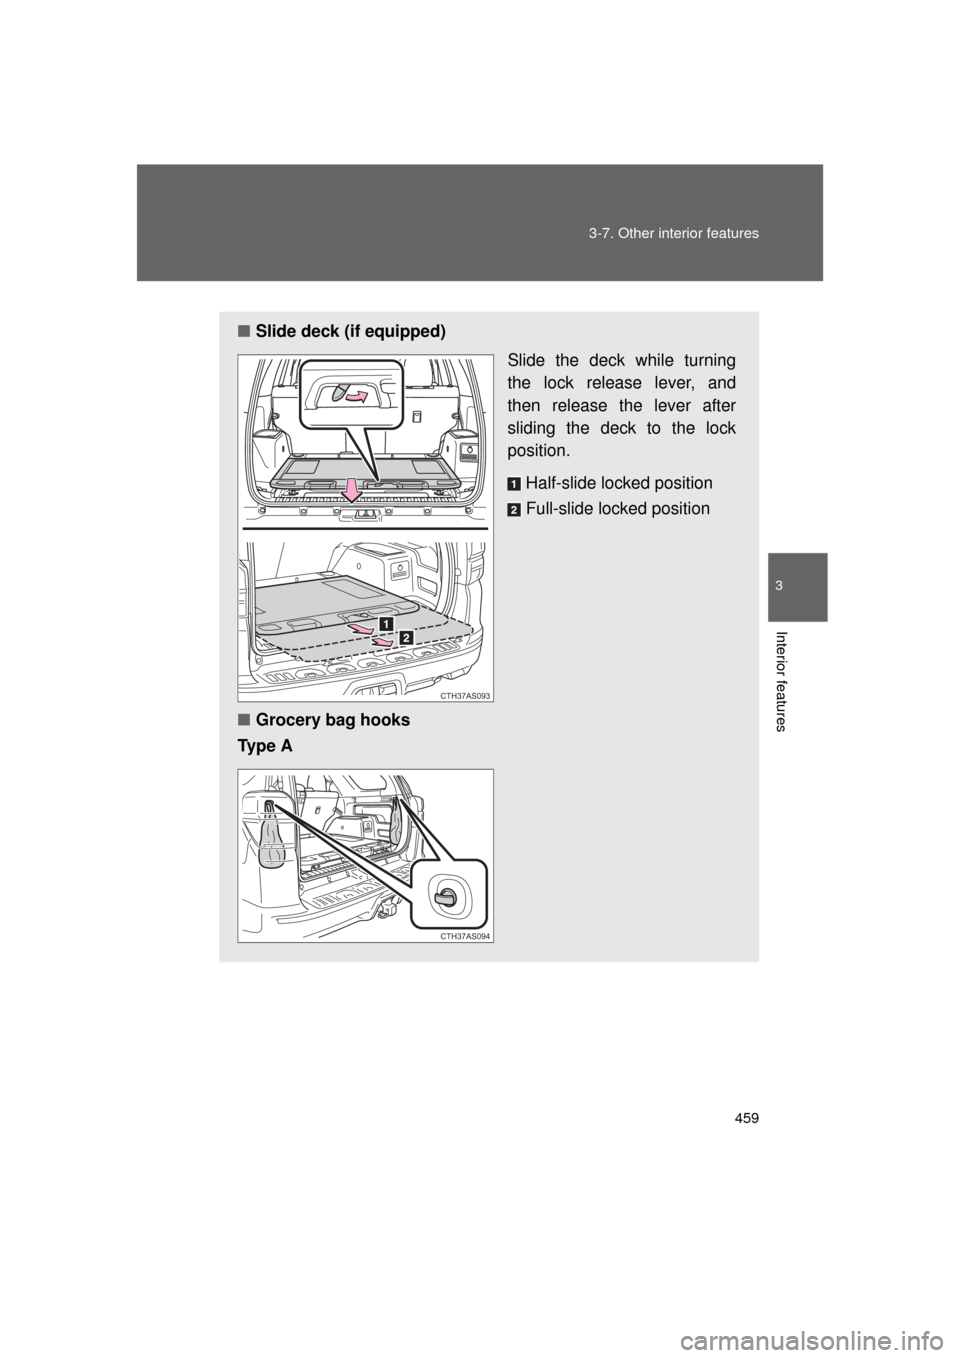
Slide deck (if equipped)
Slide the deck while turning
the lock release lever, and
then release the lever after
sliding the deck to the lock
position.
Half-slide locked position
Full-slide locked position
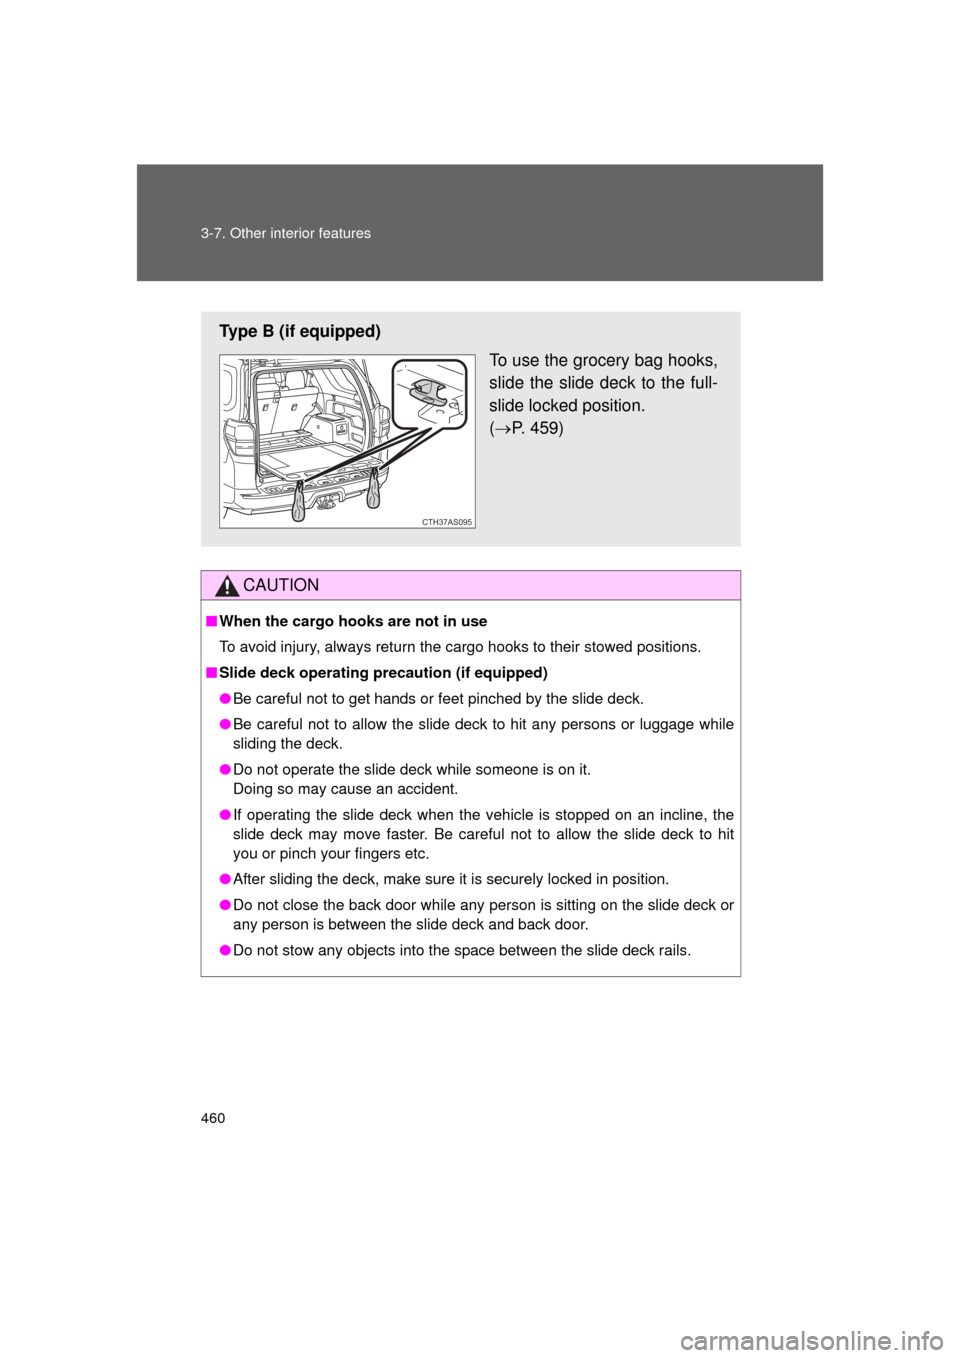
■ Grocery bag hooks
Ty p e A
CTH37AS093
CTH37AS094
Page 460 of 680
460 3-7. Other interior features
4RUNNER_U
CAUTION
■When the cargo hooks are not in use
To avoid injury, always return the cargo hooks to their stowed positions.
■ Slide deck operating precaution (if equipped)
● Be careful not to get hands or feet pinched by the slide deck.
● Be careful not to allow the slide deck to hit any persons or luggage while
sliding the deck.
● Do not operate the slide deck while someone is on it.
Doing so may cause an accident.
● If operating the slide deck when the vehicle is stopped on an incline, the
slide deck may move faster. Be careful not to allow the slide deck to hit
you or pinch your fingers etc.
● After sliding the deck, make sure it is securely locked in position.
● Do not close the back door while any person is sitting on the slide deck or
any person is between the slide deck and back door.
● Do not stow any objects into the space between the slide deck rails.
Type B (if equipped)
To use the grocery bag hooks,
slide the slide deck to the full-
slide locked position.
( P. 459)
CTH37AS095
Trending: alarm, wheel bolt torque, mirror, VSC, remote control, transmission fluid, rear view mirror
