display TOYOTA AVALON 2007 XX30 / 3.G Navigation Manual
[x] Cancel search | Manufacturer: TOYOTA, Model Year: 2007, Model line: AVALON, Model: TOYOTA AVALON 2007 XX30 / 3.GPages: 138, PDF Size: 4.82 MB
Page 17 of 138
xvii
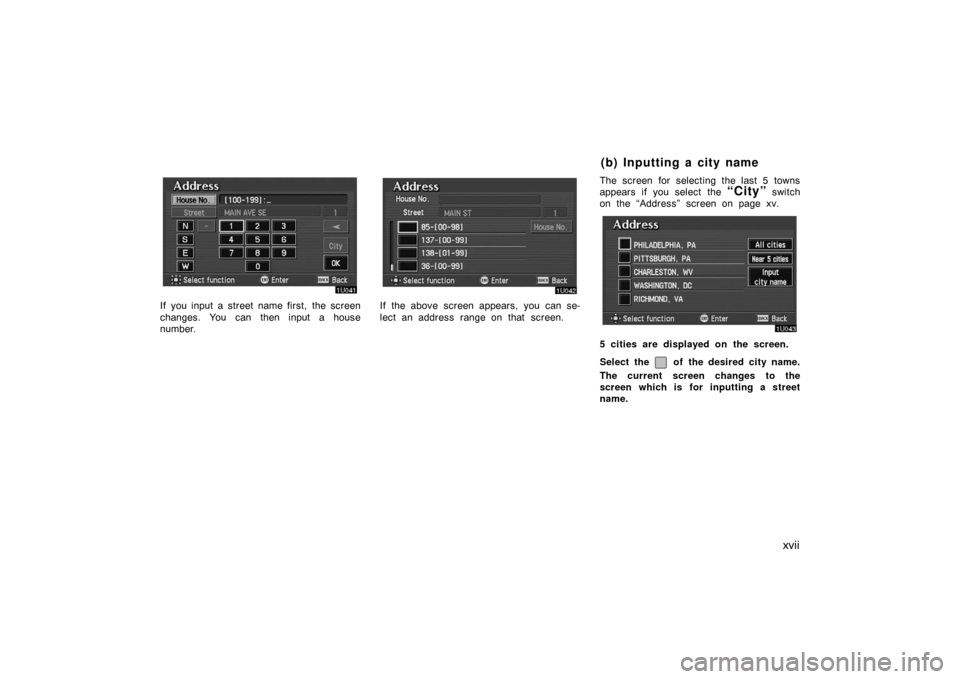
If you input a street name first, the screen
changes. You can then input a house
number.If the above screen appears, you can se-
lect an address range on that screen.The screen for selecting the last 5 towns
appears if you select the
“City” switch
on the “Address” screen on page xv.
5 cities are displayed on the screen.
Select the
of the desired city name.
The current screen changes to the
screen which is for inputting a street
name.
(b) Inputting a city name
Page 18 of 138
xviii
NOTICE
Under the initial condition, town name
will not be displayed.
“All cities”: All cities are selected.
“Near 5 cities”: 5 near cities are dis-
played. Selecting a city in the list changes
to the display to input a street name.
“Input city name”: The screen for input-
ting a city name appears.
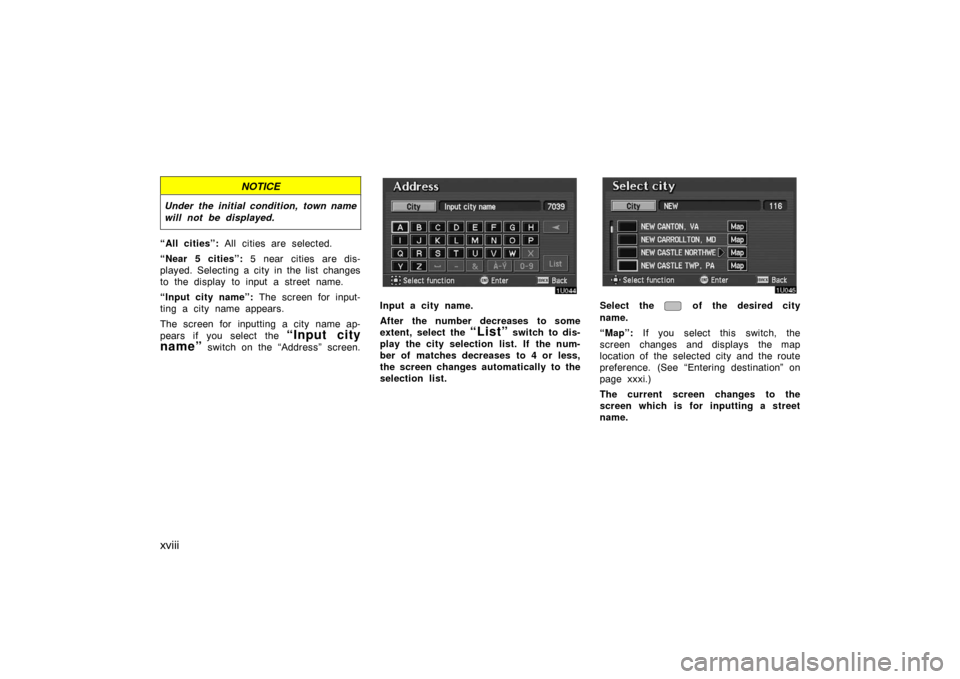
The screen for inputting a city name ap-
pears if you select the
“Input city
name”
switch on the “Address” screen.
Input a city name.
After the number decreases to some
extent, select the
“List” switch to dis-
play the city selection list. If the num-
ber of matches decreases to 4 or less,
the screen changes automatically to the
selection list.
Select the of the desired city
name.
“Map”: If you select this switch, the
screen changes and displays the map
location of the selected city and the route
preference. (See “Entering destination” on
page xxxi.)
The current screen changes to the
screen which is for inputting a street
name.
Page 19 of 138
xix
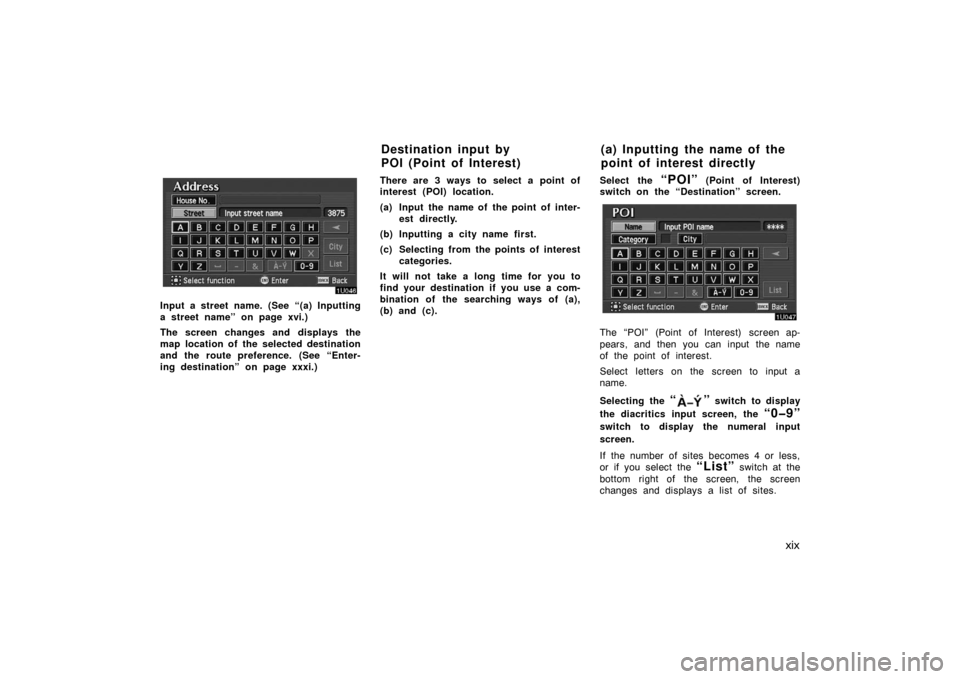
Input a street name. (See “(a) Inputting
a street name” on page xvi.)
The screen changes and displays the
map location of the selected destination
and the route preference. (See “Enter-
ing destination” on page xxxi.)There are 3 ways to select a point of
interest (POI) location.
(a) Input the name of the point of inter-
est directly.
(b) Inputting a city name first.
(c) Selecting from the points of interest
categories.
It will not take a long time for you to
find your destination if you use a com-
bination of the searching ways of (a),
(b) and (c).Select the
“POI” (Point of Interest)
switch on the “Destination” screen.
The “POI” (Point of Interest) screen ap-
pears, and then you can input the name
of the point of interest.
Select letters on the screen to input a
name.
Selecting the
“” switch to display
the diacritics input screen, the
“0�9”
switch to display the numeral input
screen.
If the number of sites becomes 4 or less,
or if you select the
“List” switch at the
bottom right of the screen, the screen
changes and displays a list of sites.
Destination input by
POI (Point of Interest)(a) Inputting the name of the
point of interest directly
Page 20 of 138
xx
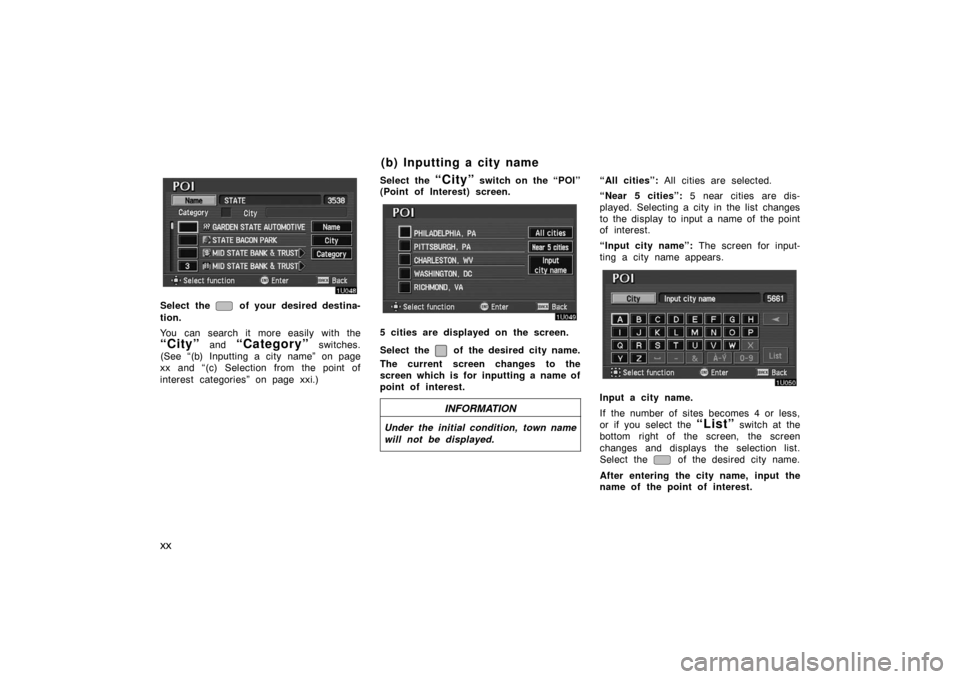
Select the of your desired destina-
tion.
You can search it more easily with the
“City” and “Category” switches.
(See “(b) Inputting a city name” on page
xx and “(c) Selection from the point of
interest categories” on page xxi.)Select the
“City” switch on the “POI”
(Point of Interest) screen.
5 cities are displayed on the screen.
Select the
of the desired city name.
The current screen changes to the
screen which is for inputting a name of
point of interest.
INFORMATION
Under the initial condition, town name
will not be displayed.
“All cities”: All cities are selected.
“Near 5 cities”: 5 near cities are dis-
played. Selecting a city in the list changes
to the display to input a name of the point
of interest.
“Input city name”: The screen for input-
ting a city name appears.
Input a city name.
If the number of sites becomes 4 or less,
or if you select the
“List” switch at the
bottom right of the screen, the screen
changes and displays the selection list.
Select the
of the desired city name.
After entering the city name, input the
name of the point of interest.
(b) Inputting a city name
Page 21 of 138
xxi
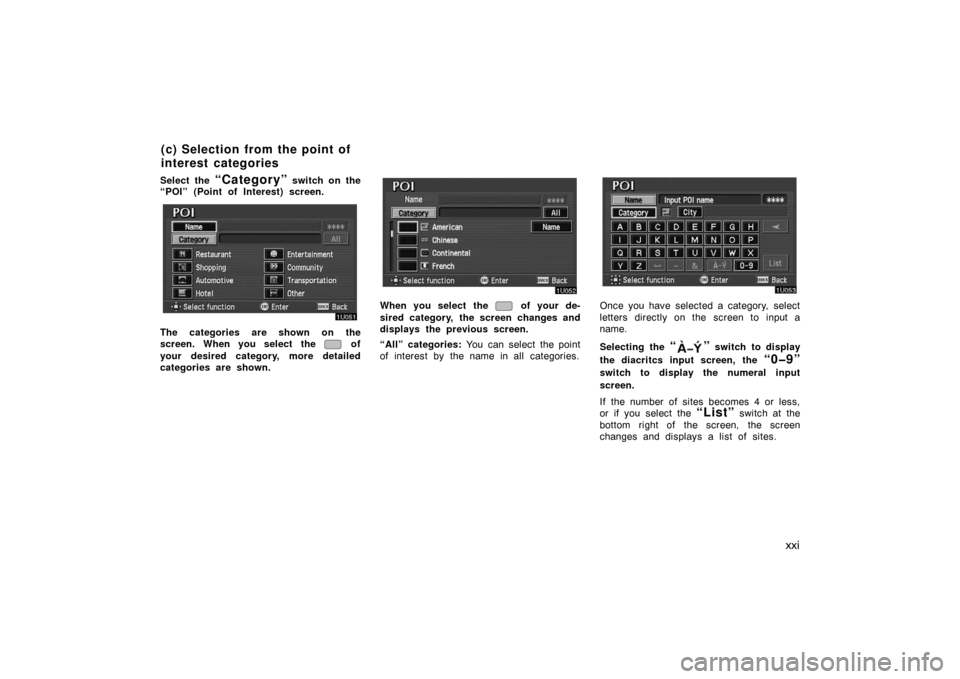
Select the “Category” switch on the
“POI” (Point of Interest) screen.
The categories are shown on the
screen. When you select the
of
your desired category, more detailed
categories are shown.
When you select the of your de-
sired category, the screen changes and
displays the previous screen.
“All” categories: You can select the point
of interest by the name in all categories.Once you have selected a category, select
letters directly on the screen to input a
name.
Selecting the
“” switch to display
the diacritcs input screen, the
“0�9”
switch to display the numeral input
screen.
If the number of sites becomes 4 or less,
or if you select the
“List” switch at the
bottom right of the screen, the screen
changes and displays a list of sites.
(c) Selection from the point of
interest categories
Page 22 of 138
xxii
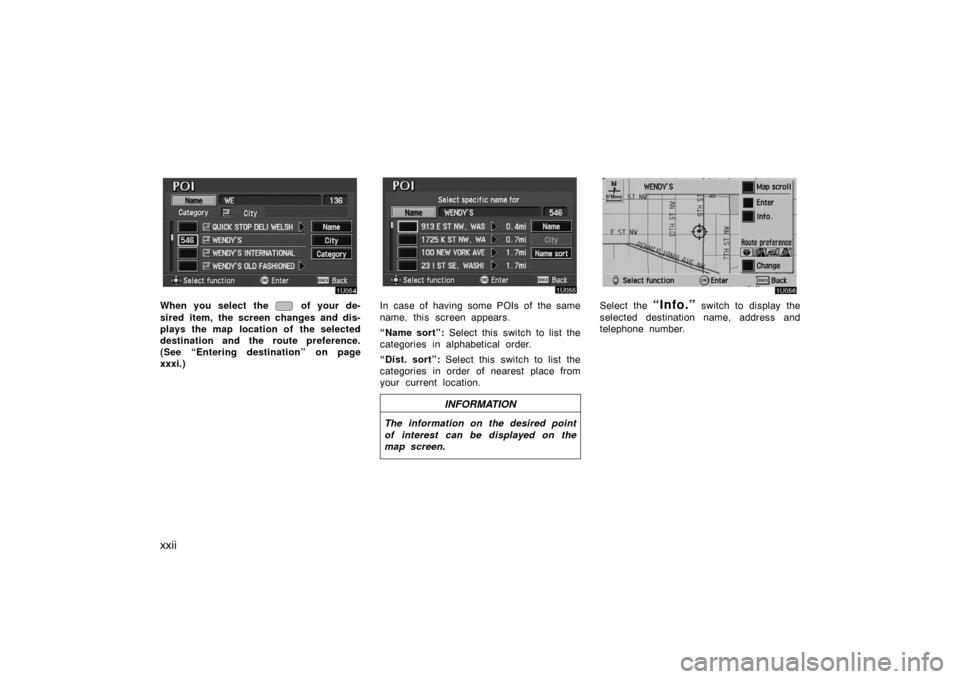
When you select the of your de-
sired item, the screen changes and dis-
plays the map location of the selected
destination and the route preference.
(See “Entering destination” on page
xxxi.)In case of having some POIs of the same
name, this screen appears.
“Name sort”: Select this switch to list the
categories in alphabetical order.
“Dist. sort”: Select this switch to list the
categories in order of nearest place from
your current location.
INFORMATION
The information on the desired point
of interest can be displayed on the
map screen.
Select the “Info.” switch to display the
selected destination name, address and
telephone number.
Page 26 of 138
xxvi
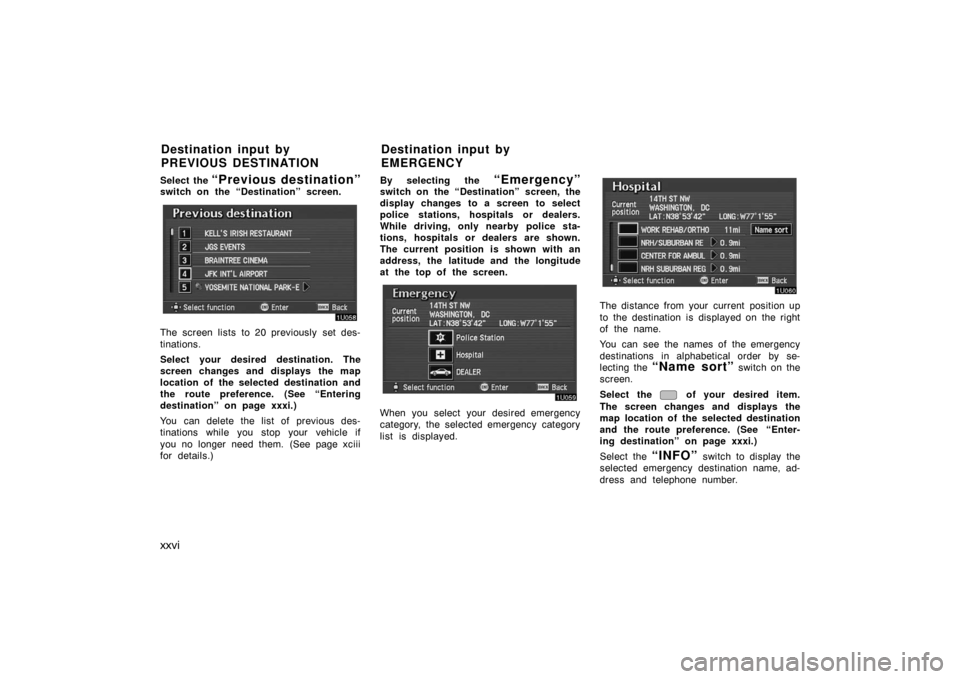
Select the “Previous destination”switch on the “Destination” screen.
The screen lists to 20 previously set des-
tinations.
Select your desired destination. The
screen changes and displays the map
location of the selected destination and
the route preference. (See “Entering
destination” on page xxxi.)
You can delete the list of previous des-
tinations while you stop your vehicle if
you no longer need them. (See page xciii
for details.)By selecting the
“Emergency”switch on the “Destination” screen, the
display changes to a screen to select
police stations, hospitals or dealers.
While driving, only nearby police sta-
tions, hospitals or dealers are shown.
The current position is shown with an
address, the latitude and the longitude
at the top of the screen.
When you select your desired emergency
category, the selected emergency category
list is displayed.
The distance from your current position up
to the destination is displayed on the right
of the name.
You can see the names of the emergency
destinations in alphabetical order by se-
lecting the
“Name sort” switch on the
screen.
Select the
of your desired item.
The screen changes and displays the
map location of the selected destination
and the route preference. (See
“Enter-
ing destination” on page xxxi.)
Select the
“INFO” switch to display the
selected emergency destination name, ad-
dress and telephone number.
Destination input by
PREVIOUS DESTINATIONDestination input by
EMERGENCY
Page 28 of 138
xxviii
EMV3111U
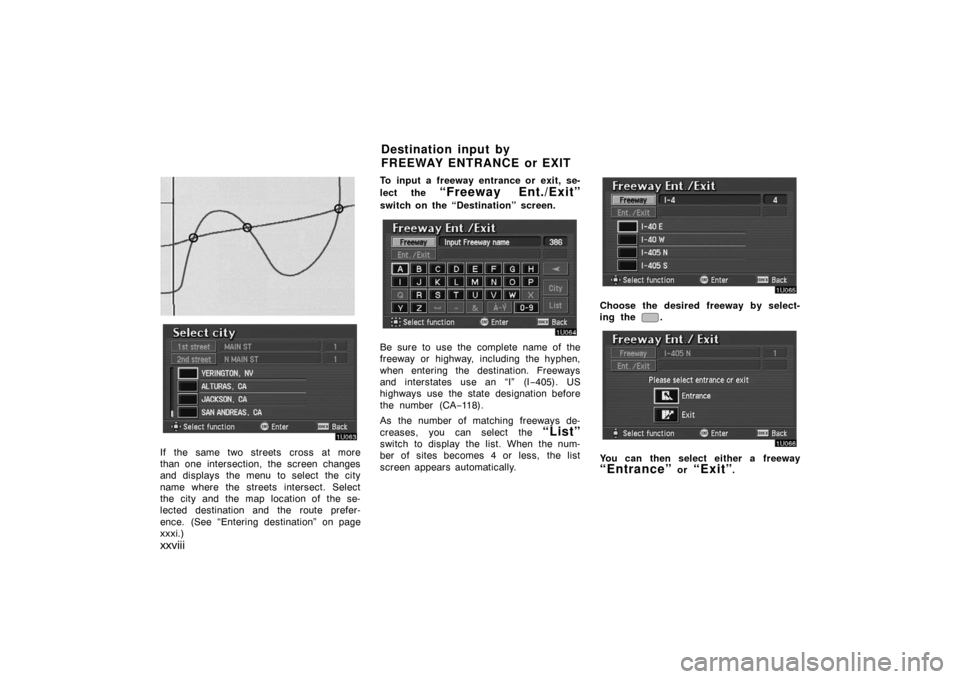
If the same two streets cross at more
than one intersection, the screen changes
and displays the menu to select the city
name where the streets intersect. Select
the city and the map location of the se-
lected destination and the route prefer-
ence. (See “Entering destination” on page
xxxi.)To input a freeway entrance or exit, se-
lect the
“Freeway Ent./Exit”
switch on the “Destination” screen.
Be sure to use the complete name of the
freeway or highway, including the hyphen,
when entering the destination. Freeways
and interstates use an “I” (I−405). US
highways use the state designation before
the number (CA−118).
As the number of matching freeways de-
creases, you can select the
“List”
switch to display the list. When the num-
ber of sites becomes 4 or less, the list
screen appears automatically.
Choose the desired freeway by select-
ing the
.
You can then select either a freeway
“Entrance” or “Exit”.
Destination input by
FREEWAY ENTRANCE or EXIT
Page 29 of 138
xxix
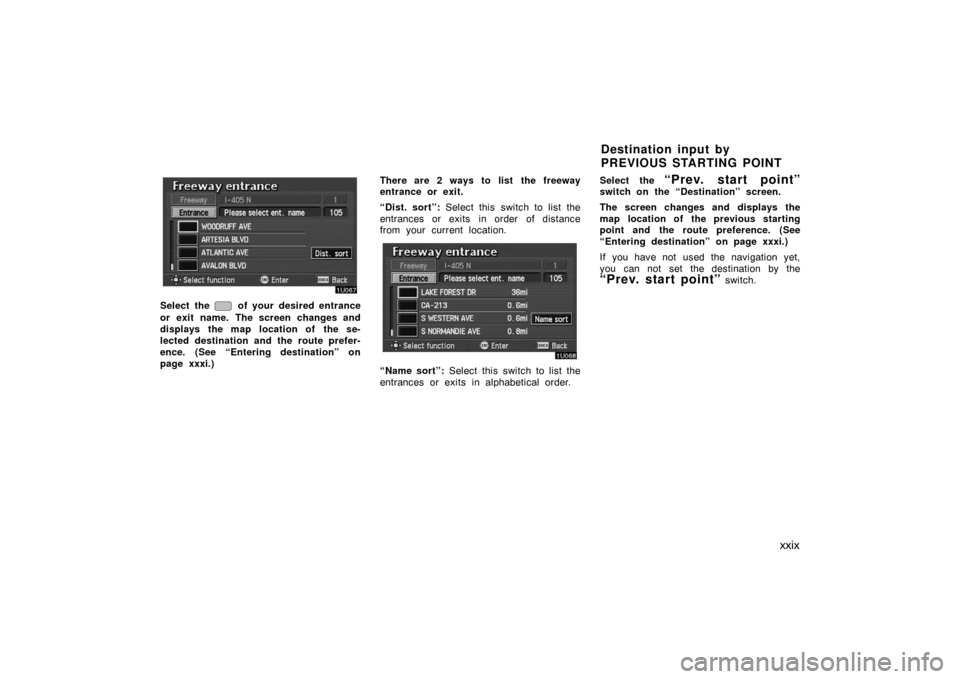
Select the of your desired entrance
or exit name. The screen changes and
displays the map location of the se-
lected destination and the route prefer-
ence. (See “Entering destination” on
page xxxi.)There are 2 ways to list the freeway
entrance or exit.
“Dist. sort”: Select this switch to list the
entrances or exits in order of distance
from your current location.
“Name sort”: Select this switch to list the
entrances or exits in alphabetical order.Select the
“Prev. start point”switch on the “Destination” screen.
The screen changes and displays the
map location of the previous starting
point and the route preference. (See
“Entering destination” on page xxxi.)
If you have not used the navigation yet,
you can not set the destination by the
“Prev. start point” switch.
Destination input by
PREVIOUS STARTING POINT
Page 30 of 138
xxx
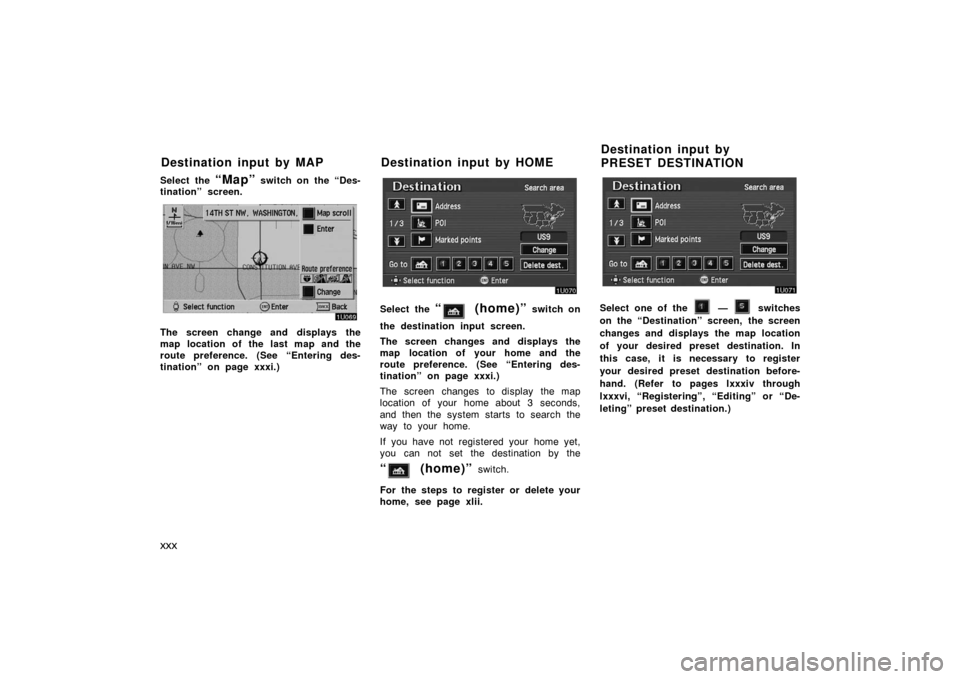
Select the “Map” switch on the “Des-
tination” screen.
The screen change and displays the
map location of the last map and the
route preference. (See “Entering des-
tination” on page xxxi.)
Select the “ (home)” switch on
the destination input screen.
The screen changes and displays the
map location of your home and the
route preference. (See “Entering des-
tination” on page xxxi.)
The screen changes to display the map
location of your home about 3 seconds,
and then the system starts to search the
way to your home.
If you have not registered your home yet,
you can not set the destination by the
“ (home)” switch.
For the steps to register or delete your
home, see page xlii.
Select one of the — switches
on the “Destination” screen, the screen
changes and displays the map location
of your desired preset destination. In
this case, it is necessary to register
your desired preset destination before-
hand. (Refer to pages lxxxiv through
lxxxvi, “Registering”, “Editing” or “De-
leting” preset destination.)
Destination input by MAP Destination input by HOMEDestination input by
PRESET DESTINATION