TOYOTA AVALON 2007 XX30 / 3.G Navigation Manual
AVALON 2007 XX30 / 3.G
TOYOTA
TOYOTA
https://www.carmanualsonline.info/img/14/6150/w960_6150-0.png
TOYOTA AVALON 2007 XX30 / 3.G Navigation Manual
Trending: oil change, fuel, maintenance schedule, brake fluid, battery, mileage, display
Page 81 of 138
lxxxi
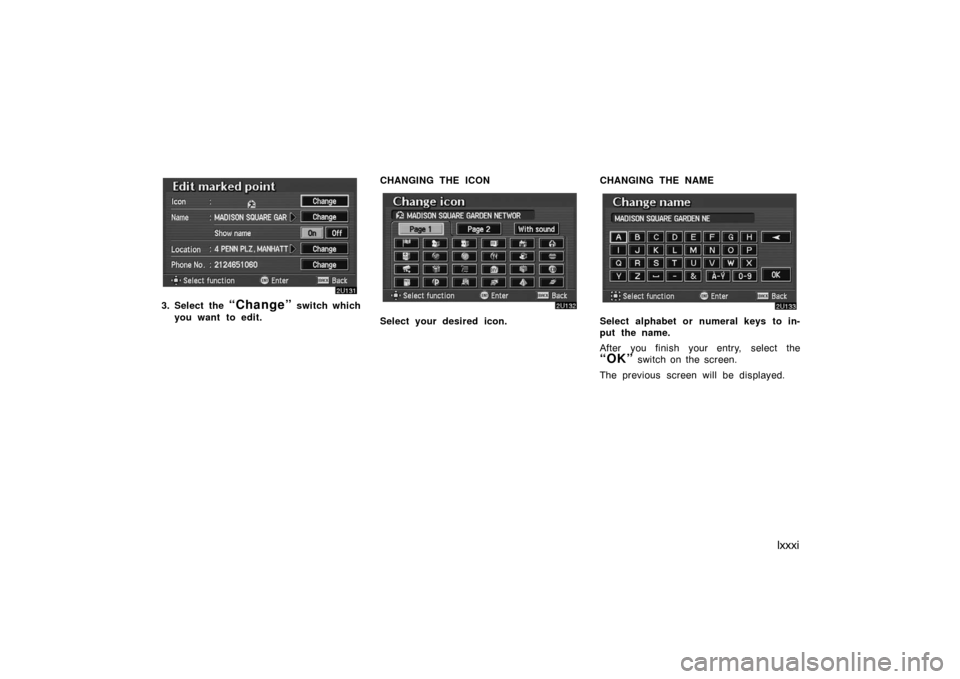
3. Select the “Change” switch which
you want to edit.CHANGING THE ICON
Select your desired icon.CHANGING THE NAMESelect alphabet or numeral keys to in-
put the name.
After you finish your entry, select the
“OK” switch on the screen.
The previous screen will be displayed.
Page 82 of 138
lxxxii
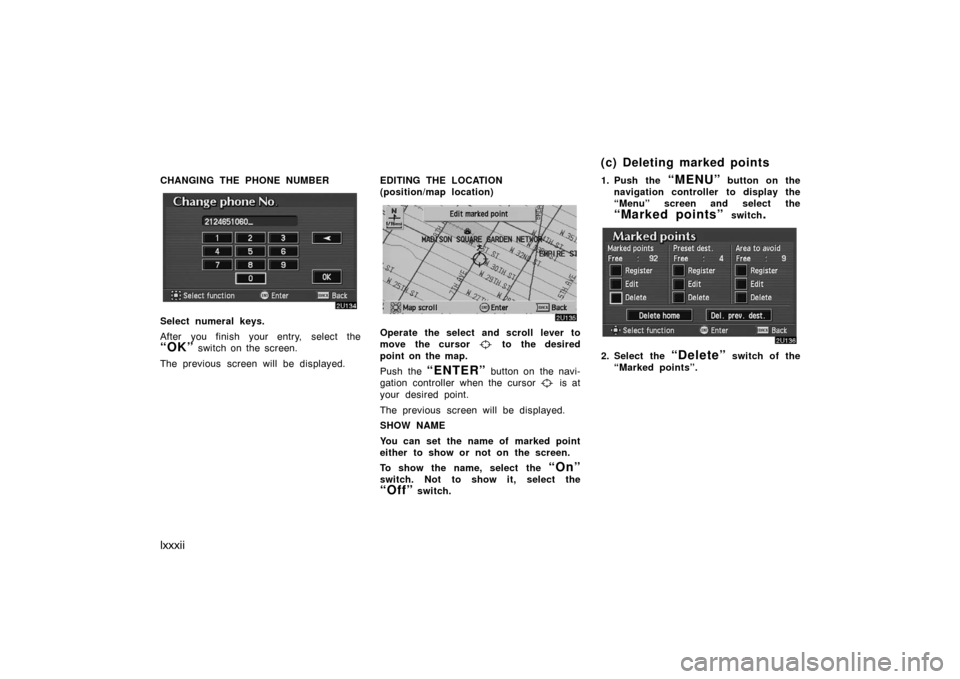
CHANGING THE PHONE NUMBER
Select numeral keys.
After you finish your entry, select the
“OK” switch on the screen.
The previous screen will be displayed.EDITING THE LOCATION
(position/map location)
Operate the select and scroll lever to
move the cursor
to the desired
point on the map.
Push the
“ENTER” button on the navi-
gation controller when the cursor
is at
your desired point.
The previous screen will be displayed.
SHOW NAME
You can set the name of marked point
either to show or not on the screen.
To show the name, select the
“On”
switch. Not to show it, select the
“Off” switch.1. Push the
“MENU” button on the
navigation controller to display the
“Menu” screen and select the
“Marked points” switch.
2. Select the “Delete” switch of the
“Marked points”.
(c) Deleting marked points
Page 83 of 138
lxxxiii
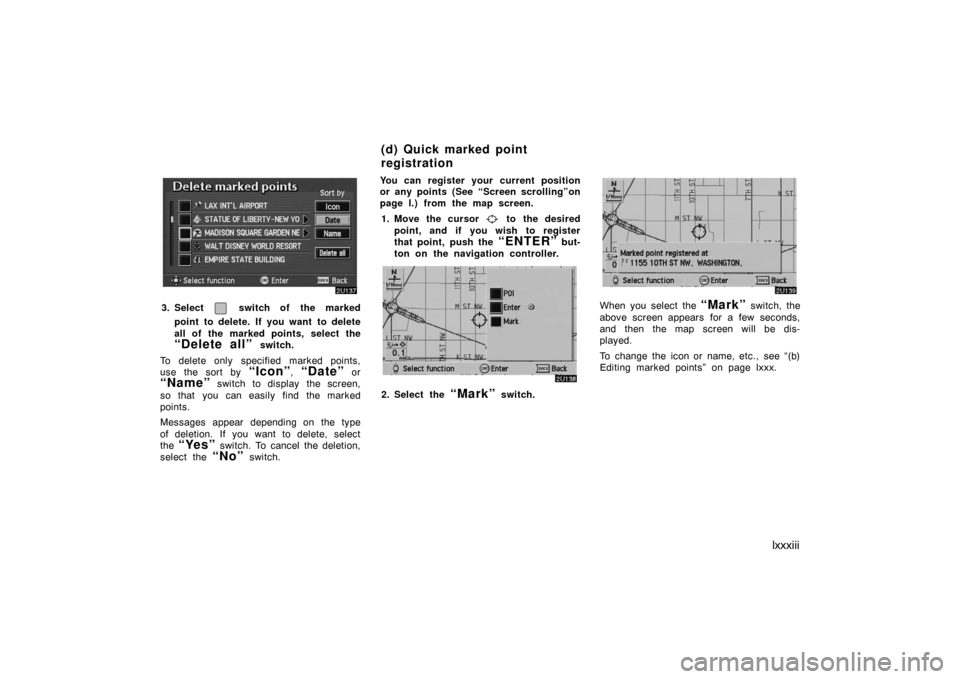
3. Select switch of the marked
point to delete. If you want to delete
all of the marked points, select the
“Delete all” switch.
To delete only specified marked points,
use the sort by
“Icon”, “Date” or
“Name” switch to display the screen,
so that you can easily find the marked
points.
Messages appear depending on the type
of deletion. If you want to delete, select
the
“Yes” switch. To cancel the deletion,
select the
“No” switch.You can register your current position
or any points (See “Screen scrolling”on
page l.) from the map screen.
1. Move the cursor
to the desired
point, and if you wish to register
that point, push the
“ENTER” but-
ton on the navigation controller.
2. Select the “Mark” switch.
When you select the “Mark” switch, the
above screen appears for a few seconds,
and then the map screen will be dis-
played.
To change the icon or name, etc., see “(b)
Editing marked points” on page lxxx.
(d) Quick marked point
registration
Page 84 of 138
lxxxiv
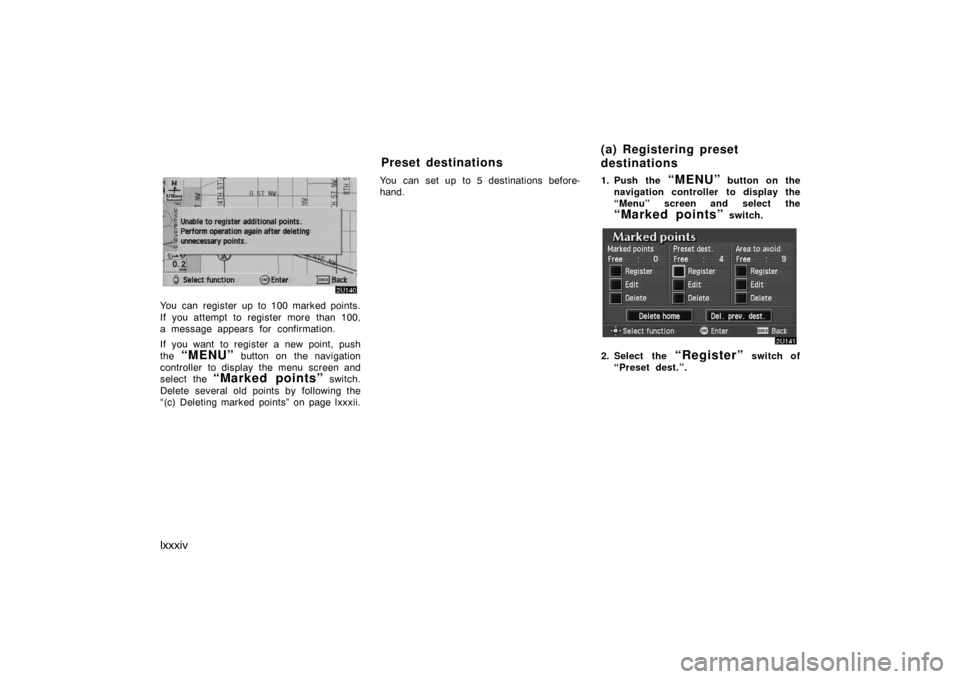
You can register up to 100 marked points.
If you attempt to register more than 100,
a message appears for confirmation.
If you want to register a new point, push
the
“MENU” button on the navigation
controller to display the menu screen and
select the
“Marked points” switch.
Delete several old points by following the
“(c) Deleting marked points” on page lxxxii.You can set up to 5 destinations before-
hand.1. Push the
“MENU” button on the
navigation controller to display the
“Menu” screen and select the
“Marked points” switch.
2. Select the “Register” switch of
“Preset dest.”.
Preset destinations(a) Registering preset
destinations
Page 85 of 138
lxxxv
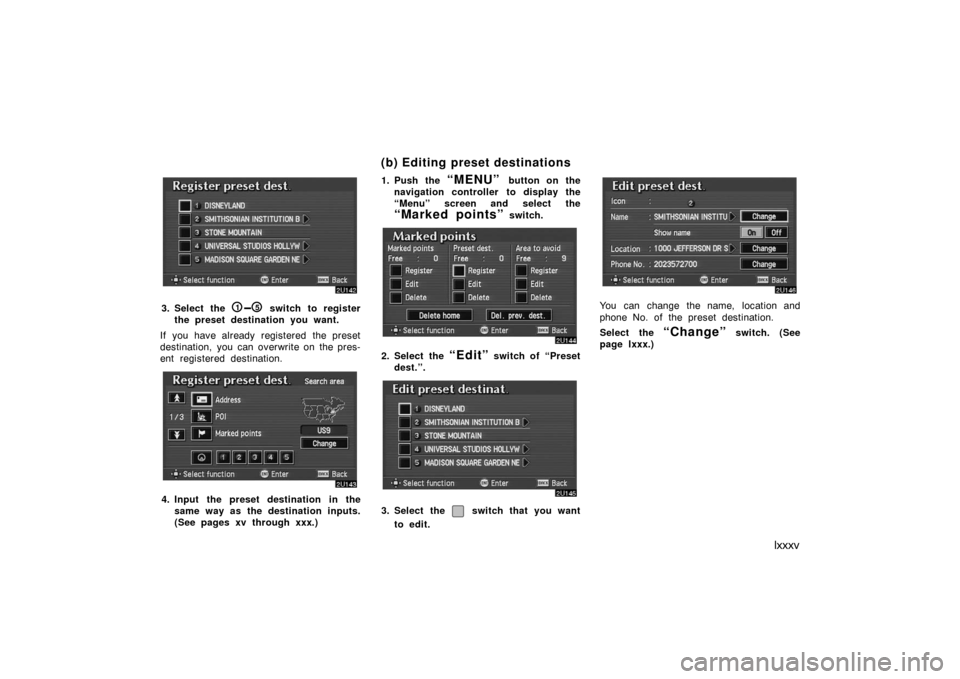
3. Select the 1�5 switch to register
the preset destination you want.
If you have already registered the preset
destination, you can overwrite on the pres-
ent registered destination.
4. Input the preset destination in the
same way as the destination inputs.
(See pages xv through xxx.)1. Push the
“MENU” button on the
navigation controller to display the
“Menu” screen and select the
“Marked points” switch.
2. Select the “Edit” switch of “Preset
dest.”.
3. Select the switch that you want
to edit.
You can change the name, location and
phone No. of the preset destination.
Select the
“Change” switch. (See
page lxxx.)
(b) Editing preset destinations
Page 86 of 138
lxxxvi
1. Push the “MENU” button on the
navigation controller to display the
“Menu” screen and select the
“Marked points” switch.
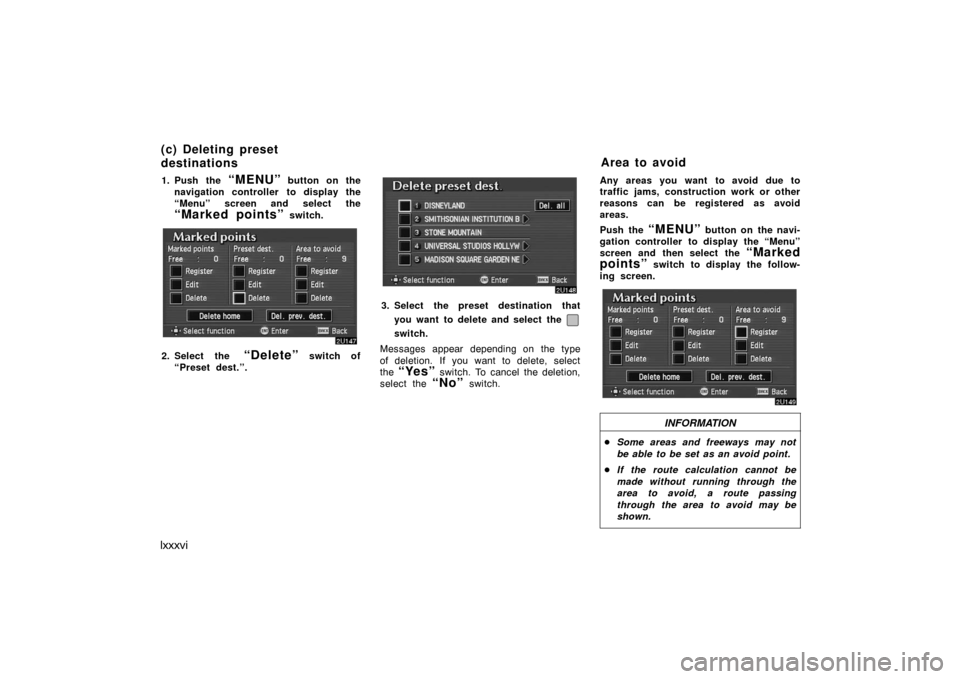
2. Select the “Delete” switch of
“Preset dest.”.
3. Select the preset destination that
you want to delete and select the
switch.
Messages appear depending on the type
of deletion. If you want to delete, select
the
“Yes” switch. To cancel the deletion,
select the
“No” switch.Any areas you want to avoid due to
traffic jams, construction work or other
reasons can be registered as avoid
areas.
Push the
“MENU” button on the navi-
gation controller to display the “Menu”
screen and then select the
“Marked
points”
switch to display the follow-
ing screen.
INFORMATION
�Some areas and freeways may not
be able to be set as an avoid point.
�If the route calculation cannot be
made without running through the
area to avoid, a route passing
through the area to avoid may be
shown.
(c) Deleting preset
destinationsArea to avoid
Page 87 of 138
lxxxvii
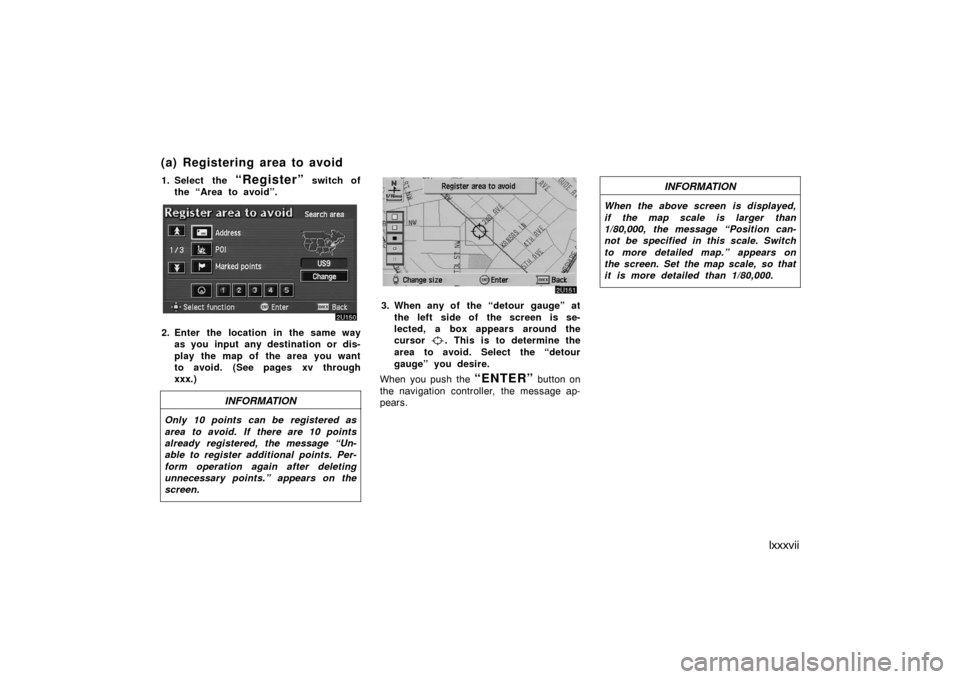
1. Select the “Register” switch of
the “Area to avoid”.
2. Enter the location in the same way
as you input any destination or dis-
play the map of the area you want
to avoid. (See pages xv through
xxx.)
INFORMATION
Only 10 points can be registered as
area to avoid. If there are 10 points
already registered, the message “Un-
able to register additional points. Per-
form operation again after deleting
unnecessary points.” appears on the
screen.
3. When any of the “detour gauge” at
the left side of the screen is se-
lected, a box appears around the
cursor
. This is to determine the
area to avoid. Select the “detour
gauge” you desire.
When you push the
“ENTER” button on
the navigation controller, the message ap-
pears.
INFORMATION
When the above screen is displayed,
if the map scale is larger than
1/80,000, the message “Position can-
not be specified in this scale. Switch
to more detailed map.” appears on
the screen. Set the map scale, so that
it is more detailed than 1/80,000.
(a) Registering area to avoid
Page 88 of 138
lxxxviii
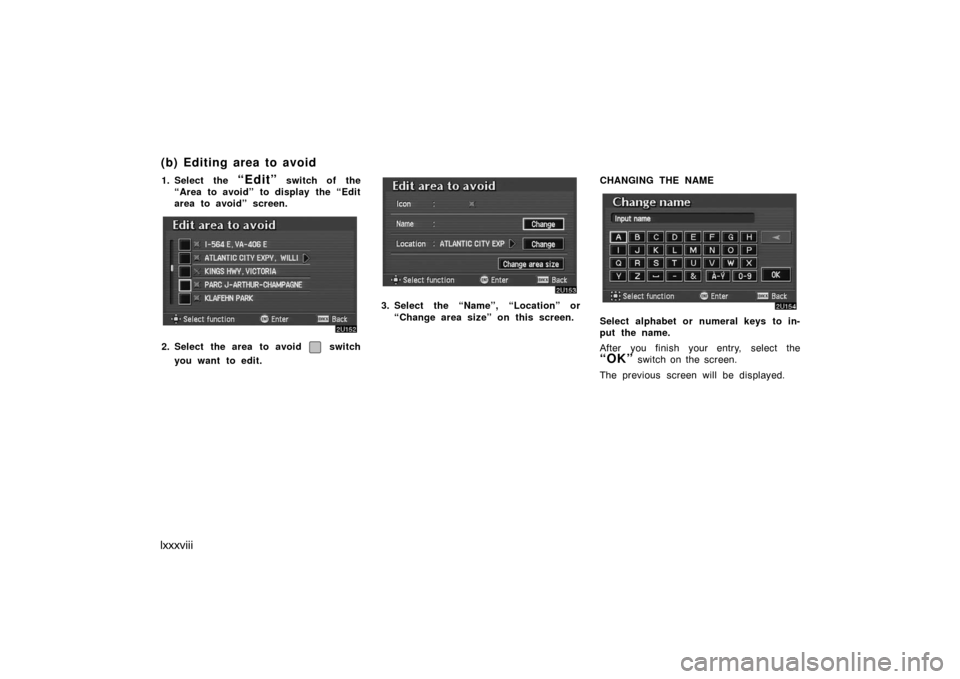
1. Select the “Edit” switch of the
“Area to avoid” to display the “Edit
area to avoid” screen.
2. Select the area to avoid switch
you want to edit.
3. Select the “Name”, “Location” or
“Change area size” on this screen.CHANGING THE NAME
Select alphabet or numeral keys to in-
put the name.
After you finish your entry, select the
“OK” switch on the screen.
The previous screen will be displayed.
(b) Editing area to avoid
Page 89 of 138
lxxxix
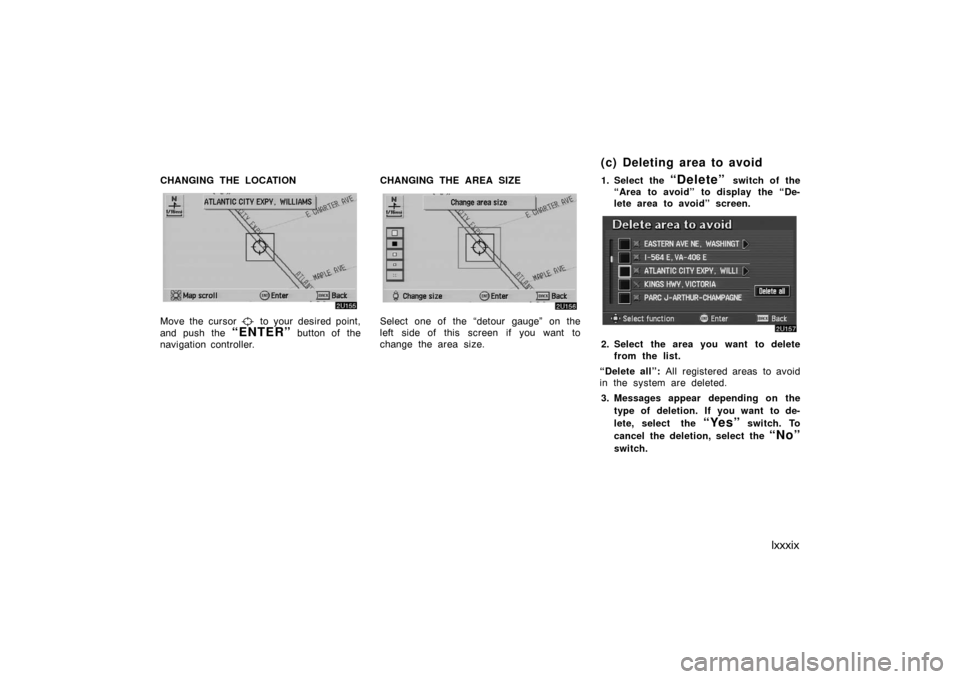
CHANGING THE LOCATION
Move the cursor to your desired point,
and push the
“ENTER” button of the
navigation controller.CHANGING THE AREA SIZE
Select one of the “detour gauge” on the
left side of this screen if you want to
change the area size.1. Select the
“Delete” switch of the
“Area to avoid” to display the “De-
lete area to avoid” screen.
2. Select the area you want to delete
from the list.
“Delete all”: All registered areas to avoid
in the system are deleted.
3. Messages appear depending on the
type of deletion. If you want to de-
lete, select the
“Yes” switch. To
cancel the deletion, select the
“No”
switch.
(c) Deleting area to avoid
Page 90 of 138
xc
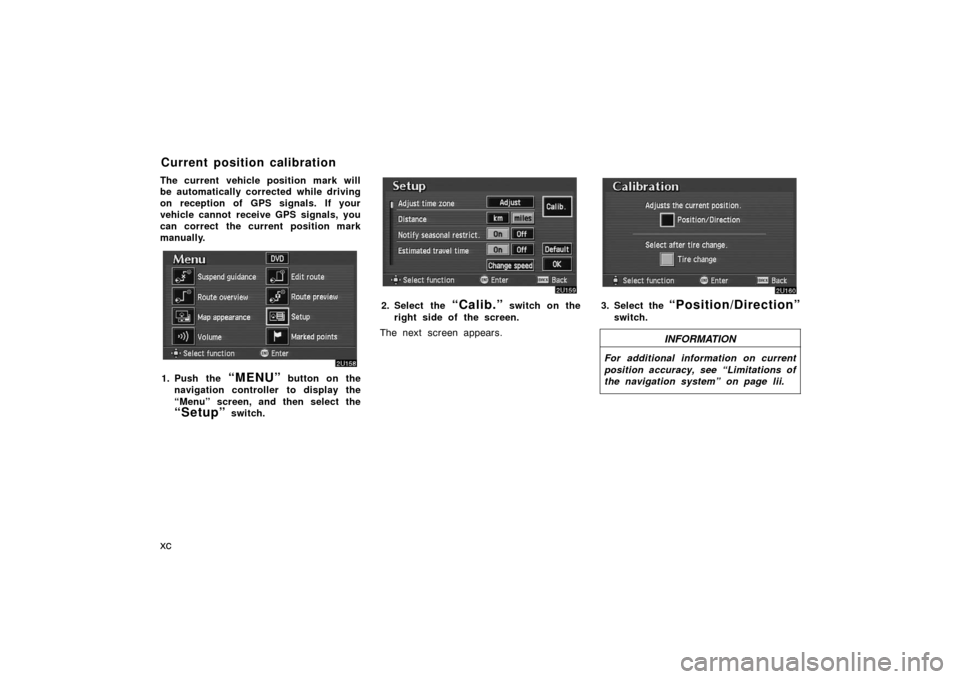
The current vehicle position mark will
be automatically corrected while driving
on reception of GPS signals. If your
vehicle cannot receive GPS signals, you
can correct the current position mark
manually.
1. Push the “MENU” button on the
navigation controller to display the
“Menu” screen, and then select the
“Setup” switch.
2. Select the “Calib.” switch on the
right side of the screen.
The next screen appears.3. Select the “Position/Direction”
switch.
INFORMATION
For additional information on current
position accuracy, see “Limitations of
the navigation system” on page lii.
Current position calibration
Trending: ignition, fuse, instrument panel, sensor, engine oil, air condition, fuel
