check engine TOYOTA AVALON 2021 (in English) Owner's Manual
[x] Cancel search | Manufacturer: TOYOTA, Model Year: 2021, Model line: AVALON, Model: TOYOTA AVALON 2021Pages: 548, PDF Size: 13.4 MB
Page 186 of 548
1864-2. Driving procedures
■Auto power off function
If the vehicle is left in ACCESSORY mode for more than 20 minutes or IGNI-
TION ON mode (with the engine is not running) for more than an hour with
the shift lever in P, the engine switch will automatically turn off. However, this
function cannot entirely prevent battery discharge. Do not leave the vehicle
with the engine switch in ACCESSORY or IGNITION ON mode for long peri-
ods of time when the engine is not running.
■Automatic engine shut off feature
●The vehicle is equipped with a feature that automatically shuts off the
engine when the shift lever is in P with the engine running for an extended
period.
●The engine will automatically shut off after approximately 1 hour if it has
been left running while the shift lever is in P.
●The timer for the automatic engine shut off feature will reset if the brake
<0053004800470044004f0003004c005600030047004800530055004800560056004800470003005200550003004c004900030057004b004800030056004b004c004900570003004f00480059004800550003004c00560003004c0051000300440003005300
520056004c0057004c00520051000300520057004b00480055[ than P.
●After the vehicle is parked, if the door is locked with the door lock switch
(P. 127) from the inside or the mechanical key (P. 463) from the outside,
the automatic engine shut off feature will be disabled. The timer for the auto-
matic engine shut off feature will be re-enabled if the driver’s door is
opened.
■Electronic key battery depletion
P. 123
■Conditions affecting operation
P. 137
■Notes for the entry function
P. 138
■If the engine does not start
●The engine immobilizer system may not have been deactivated. (P. 77)
Contact your Toyota dealer.
●Check that the shift lever is securely set in P. The engine may not start if the
shift lever is displaced out of P.
■Steering lock
After turning the engine switch off and opening and closing the doors, the
steering wheel will be locked due to the steering lock function. Operating the
engine switch again automatically cancels the steering lock.
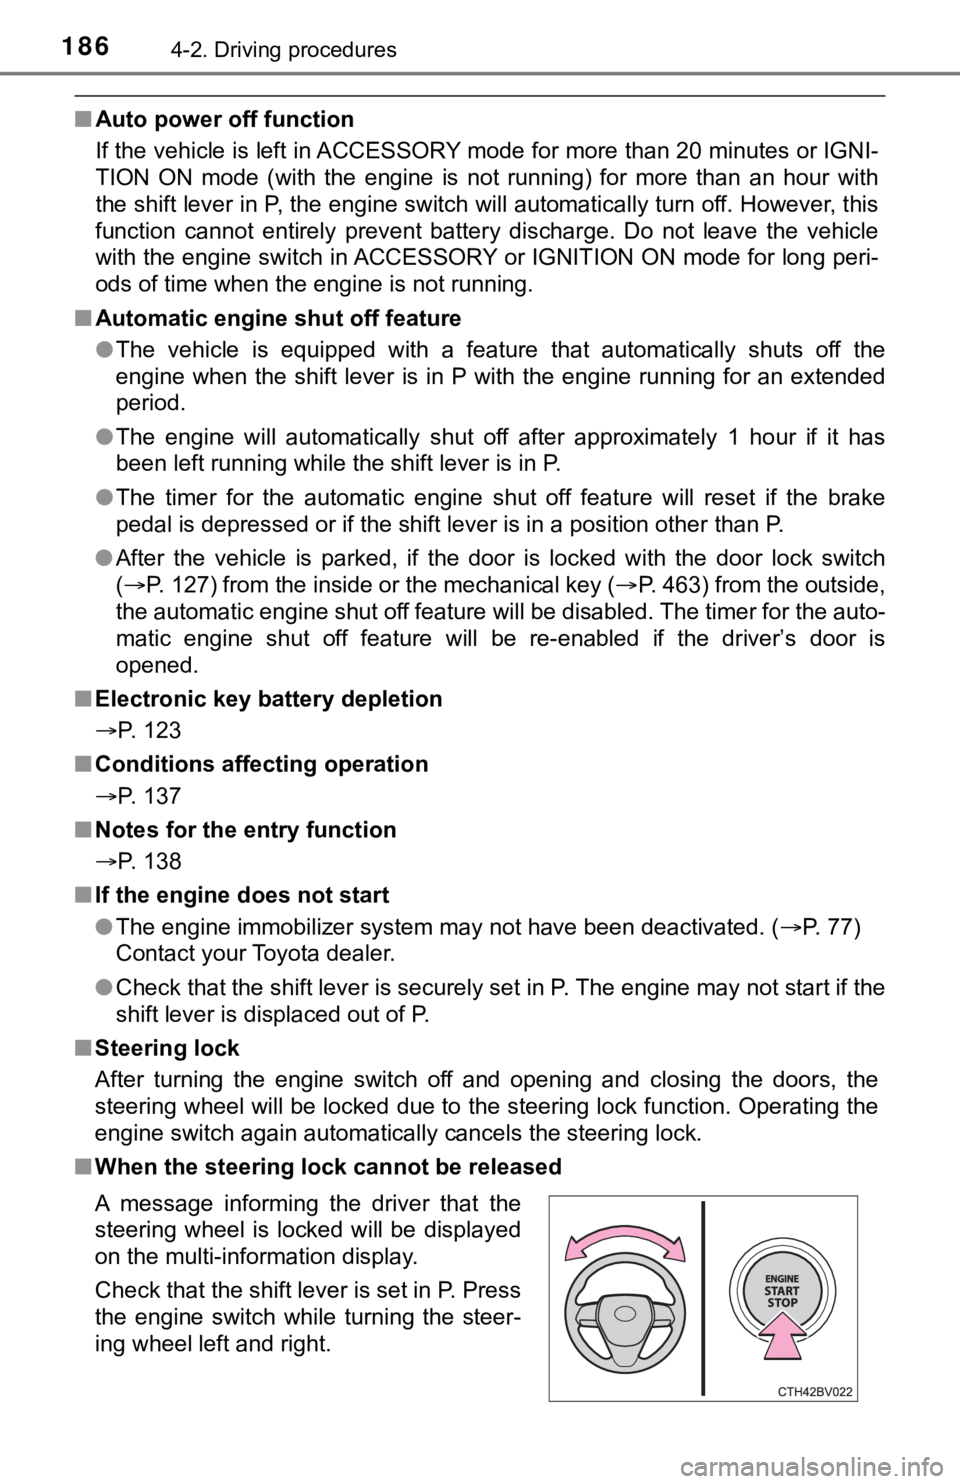
■When the steering lock cannot be released
A message informing the driver that the
steering wheel is locked will be displayed
on the multi-information display.
Check that the shift lever is set in P. Press
the engine switch while turning the steer-
ing wheel left and right.
Page 188 of 548
1884-2. Driving procedures
WARNING
■When parking
Exhaust gases include harmful carbon monoxide (CO), which is colorless
and odorless. Observe the following precautions.
Failure to do so may cause exhaust gases to enter the vehicle and may
lead to an accident caused by light-headedness, or may lead to death or a
serious health hazard.
●If the vehicle is in a poorly ventilated area or a closed area, such as a
garage, stop the engine.
●Do not leave the vehicle with the engine running for a long time. If such a
situation cannot be avoided, park the vehicle in an open space and ensure
that exhaust fumes do not enter the vehicle interior.
●Do not leave the engine running in an area with snow build-up, or where it
is snowing. If snowbanks build up around the vehicle while the engine is
running, exhaust gases may collect and enter the vehicle.
NOTICE
■To prevent battery discharge
●Do not leave the engine switch in ACCESSORY or IGNITION ON mode
for long periods of time without the engine running.
●If “ACCESSORY” or “IGNITION ON” is displayed on the multi-information
display, the engine switch is not off. Exit the vehicle after turning the
engine switch off.
●Do not stop the engine when the shift lever is in a position other than P. If
the engine is stopped in another shift lever position, the engine switch will
not be turned off but instead be turned to ACCESSORY mode. If the vehi-
cle is left in ACCESSORY mode, battery discharge may occur.
■When starting the engine
●Do not race a cold engine.
●If the engine becomes difficult to start or stalls frequently, have your vehi-
cle checked by your Toyota dealer immediately.
■Symptoms indicating a malfunction with the engine switch
If the engine switch seems to be operating somewhat differently than usual,
such as the switch sticking slightly, there may be a malfunction. Contact
your Toyota dealer immediately.
Page 193 of 548
1934-2. Driving procedures
4
Driving
■If the shift lever cannot be shifted from P
First, check whether the brake pedal is being depressed.
If the shift lever cannot be shifted even though the brake pedal is depressed
and the shift release button is pushed, there may be a problem with the shift
lock system. Have the vehicle inspected by your Toyota dealer immediately.
The following steps may be used as an emergency measure to ensure that
the shift lever can be shifted.
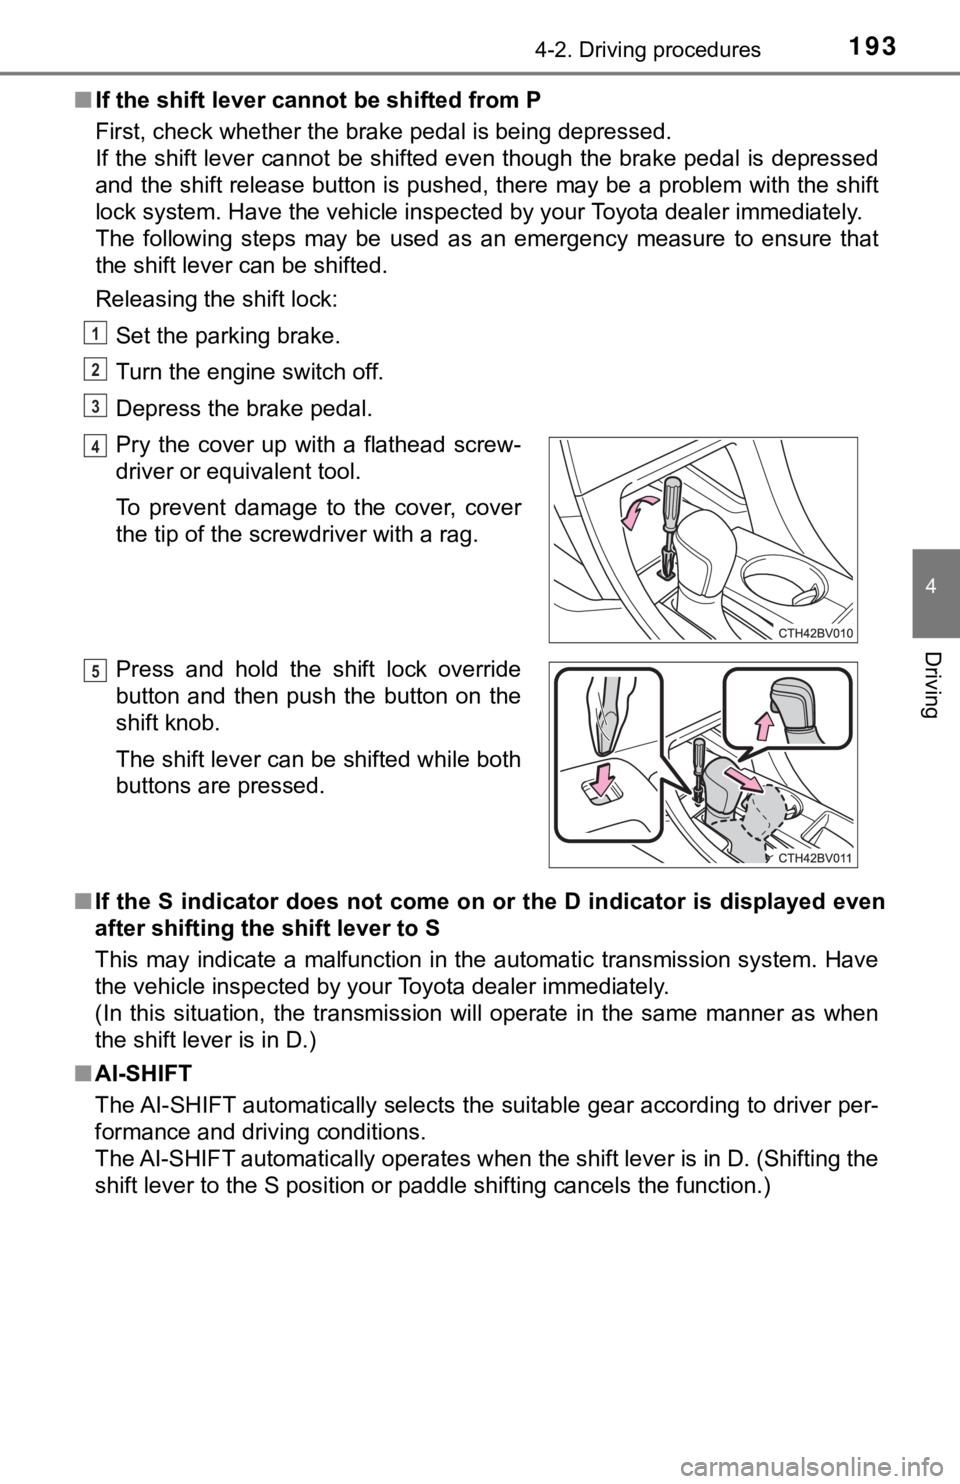
Releasing the shift lock:
Set the parking brake.
Turn the engine switch off.
Depress the brake pedal.
■If the S indicator does not come on or the D indicator is displayed even
after shifting the shift lever to S
This may indicate a malfunction in the automatic transmission system. Have
the vehicle inspected by your Toyota dealer immediately.
(In this situation, the transmission will operate in the same manner as when
the shift lever is in D.)
■AI-SHIFT
The AI-SHIFT automatically selects the suitable gear according to driver per-
formance and driving conditions.
The AI-SHIFT automatically operates when the shift lever is in D. (Shifting the
shift lever to the S position or paddle shifting cancels the function.) Pry the cover up with a flathead screw-
driver or equivalent tool.
To prevent damage to the cover, cover
the tip of the screwdriver with a rag.
Press and hold the shift lock override
button and then push the button on the
shift knob.
The shift lever can be shifted while both
buttons are pressed.
1
2
3
4
5
Page 195 of 548
1954-2. Driving procedures
4
Driving
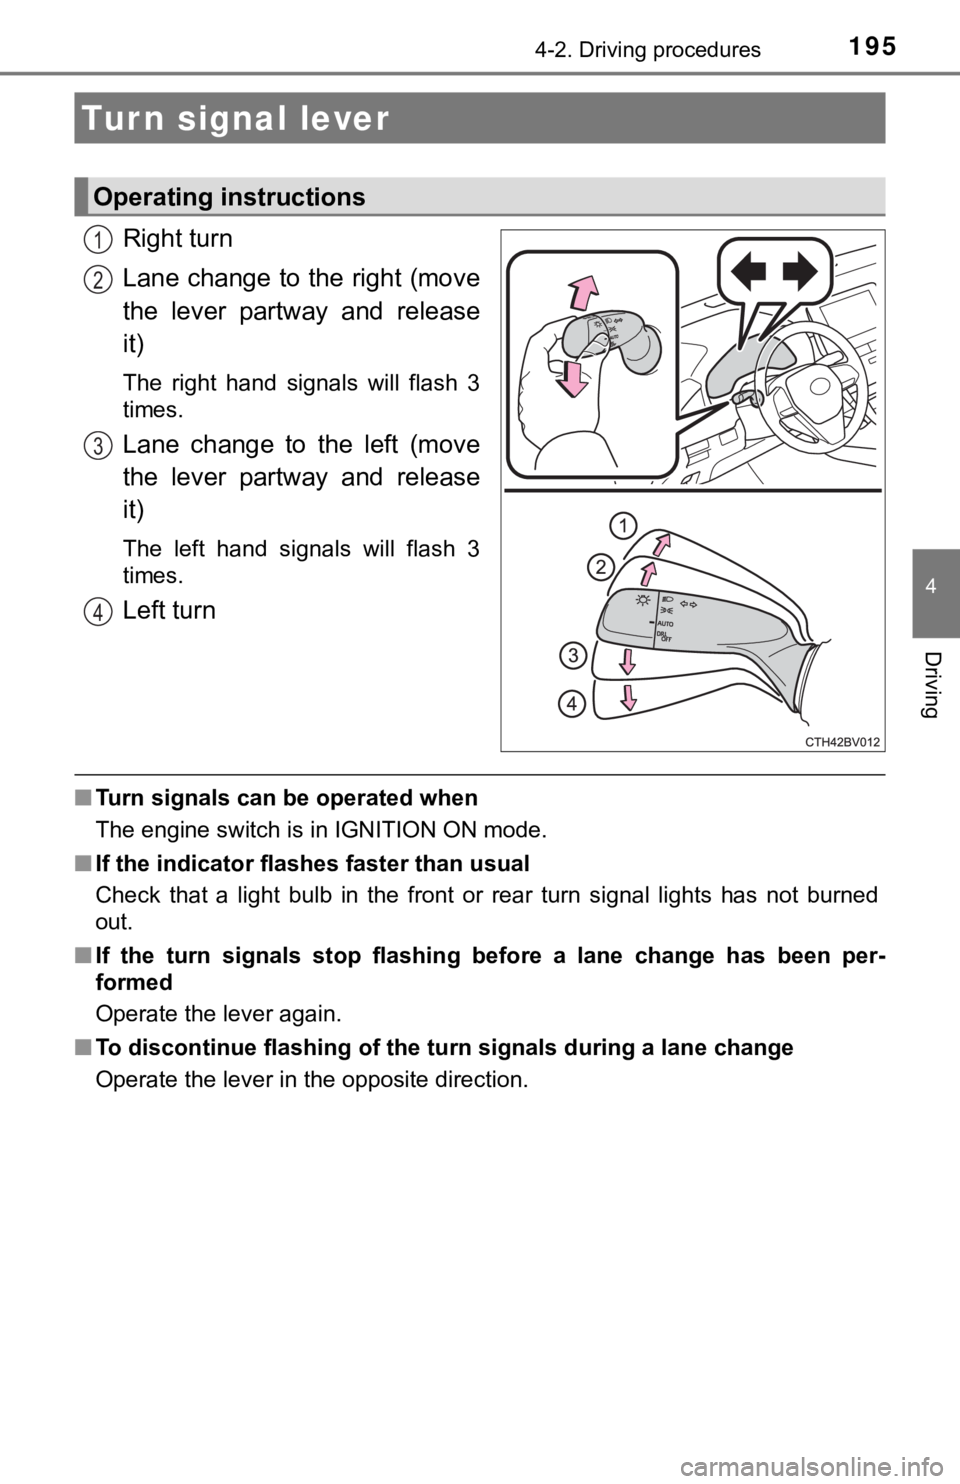
Right turn
Lane change to the right (move
the lever partway and release
it)
The right hand signals will flash 3
times.
Lane change to the left (move
the lever partway and release
it)
The left hand signals will flash 3
times.
Left turn
■Turn signals can be operated when
The engine switch is in IGNITION ON mode.
■If the indicator flashes faster than usual
Check that a light bulb in the front or rear turn signal lights has not burned
out.
■If the turn signals stop flashing before a lane change has been per-
formed
Operate the lever again.
■To discontinue flashing of the turn signals during a lane change
Operate the lever in the opposite direction.
Turn signal lever
Operating instructions
1
2
3
4
Page 211 of 548
2114-3. Operating the lights and wipers
4
Driving
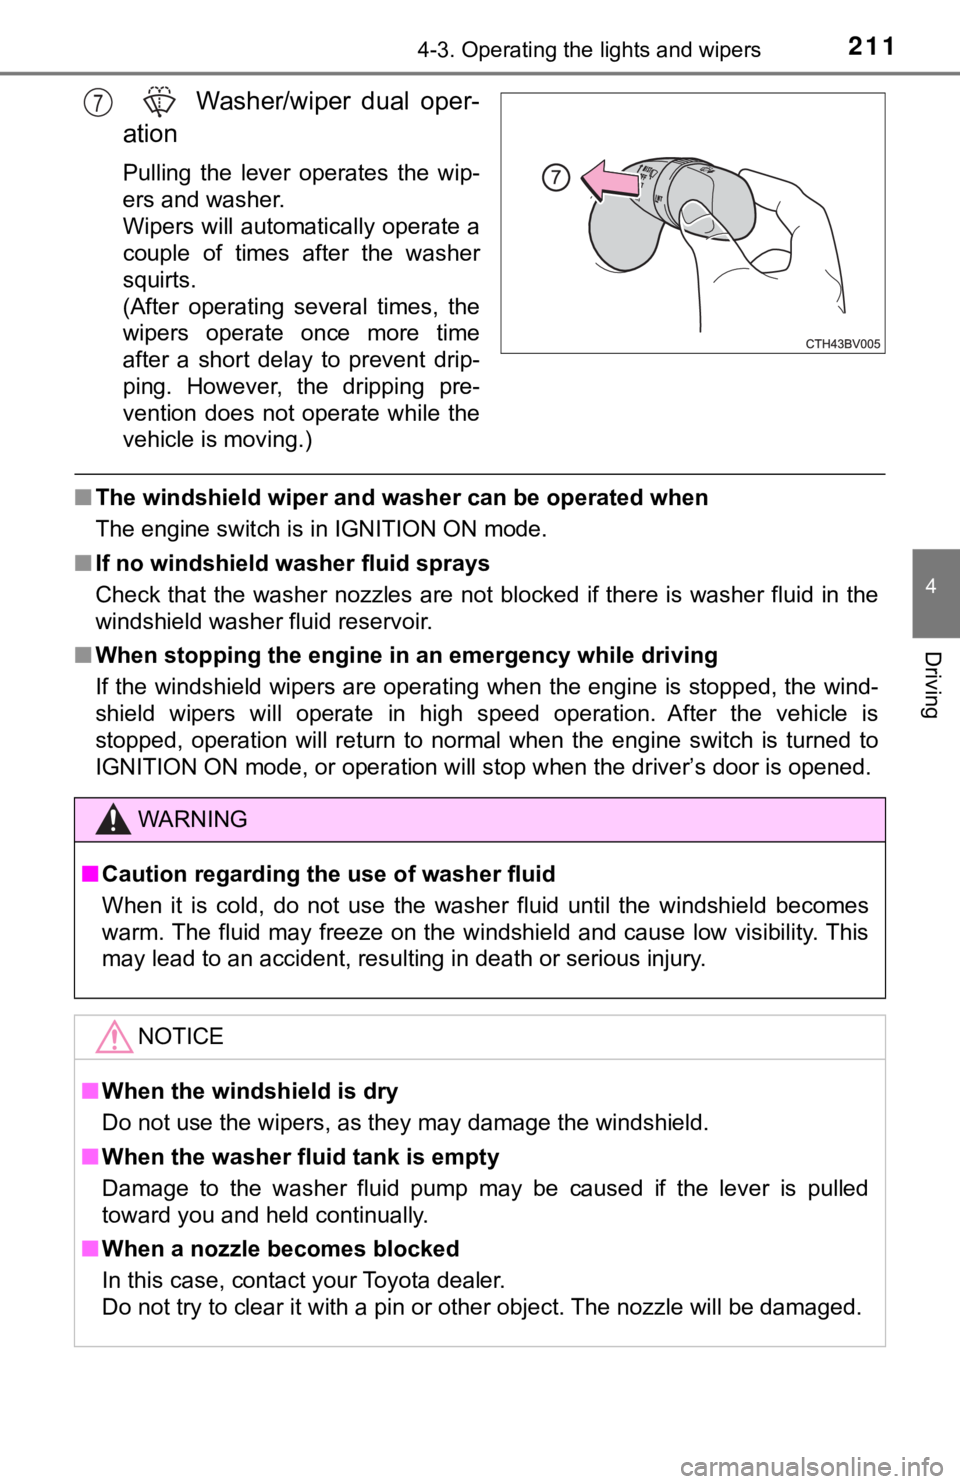
Washer/wiper dual oper-
ation
Pulling the lever operates the wip-
ers and washer.
Wipers will automatically operate a
couple of times after the washer
squirts.
(After operating several times, the
wipers operate once more time
after a short delay to prevent drip-
ping. However, the dripping pre-
vention does not operate while the
vehicle is moving.)
■The windshield wiper and washer can be operated when
The engine switch is in IGNITION ON mode.
■If no windshield washer fluid sprays
Check that the washer nozzles are not blocked if there is washer fluid in the
windshield washer fluid reservoir.
■When stopping the engine in an emergency while driving
If the windshield wipers are operating when the engine is stopped, the wind-
shield wipers will operate in high speed operation. After the vehicle is
stopped, operation will return to normal when the engine switch is turned to
<002c002a0031002c0037002c0032003100030032003100030050005200470048000f0003005200550003005200530048005500440057004c005200510003005a004c004f004f000300560057005200530003005a004b0048005100030057004b0048000300
470055004c00590048005500b6005600030047005200520055[ is opened.
7
WARNING
■Caution regarding the use of washer fluid
When it is cold, do not use the washer fluid until the windshield becomes
warm. The fluid may freeze on the windshield and cause low visibility. This
may lead to an accident, resulting in death or serious injury.
NOTICE
■When the windshield is dry
Do not use the wipers, as they may damage the windshield.
■When the washer fluid tank is empty
Damage to the washer fluid pump may be caused if the lever is pulled
toward you and held continually.
■When a nozzle becomes blocked
In this case, contact your Toyota dealer.
Do not try to clear it with a pin or other object. The nozzle will be damaged.
Page 314 of 548
3144-5. Using the driving support systems
■Secondary Collision Brake automatic cancellation
The system is automatically canceled in any of the following situations.
●The vehicle speed drops below approximately 6 mph (10 km/h)
●A certain amount of time elapses during operation
●The accelerator pedal is depressed a large amount
■Reduced effectiveness of the EPS system
The effectiveness of the EPS system is reduced to prevent the system from
overheating when there is frequent steering input over an extended period of
time. The steering wheel may feel heavy as a result.
Should this occur, refrain from excessive steering input or stop the vehicle
and turn the engine off. The EPS system should return to normal within 10
minutes.
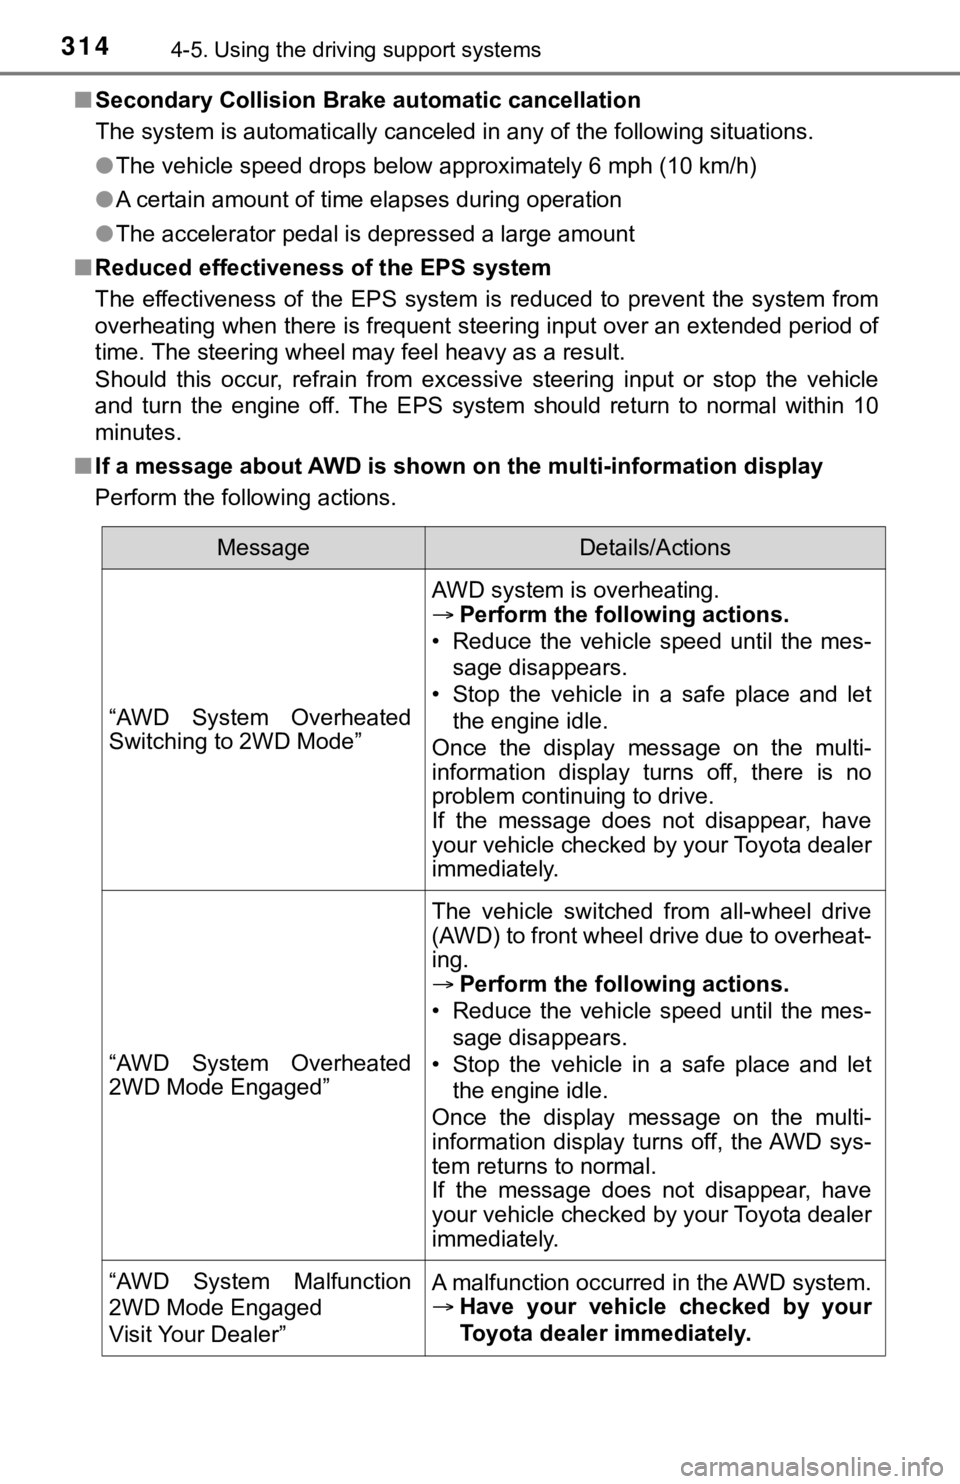
■If a message about AWD is shown on the multi-information display
Perform the following actions.
MessageDetails/Actions
“AWD System Overheated
Switching to 2WD Mode”
AWD system is overheating.
Perform the following actions.
• Reduce the vehicle speed until the mes-
sage disappears.
• Stop the vehicle in a safe place and let
the engine idle.
Once the display message on the multi-
information display turns off, there is no
problem continuing to drive.
If the message does not disappear, have
your vehicle checked by your Toyota dealer
immediately.
“AWD System Overheated
2WD Mode Engaged”
The vehicle switched from all-wheel drive
(AWD) to front wheel drive due to overheat-
ing.
Perform the following actions.
• Reduce the vehicle speed until the mes-
sage disappears.
• Stop the vehicle in a safe place and let
the engine idle.
Once the display message on the multi-
information display turns off, the AWD sys-
tem returns to normal.
If the message does not disappear, have
your vehicle checked by your Toyota dealer
immediately.
“AWD System Malfunction
2WD Mode Engaged
Visit Your Dealer”A malfunction occurred in the AWD system.
Have your vehicle checked by your
Toyota dealer immediately.
Page 317 of 548
317
4
Driving
4-6. Driving tips
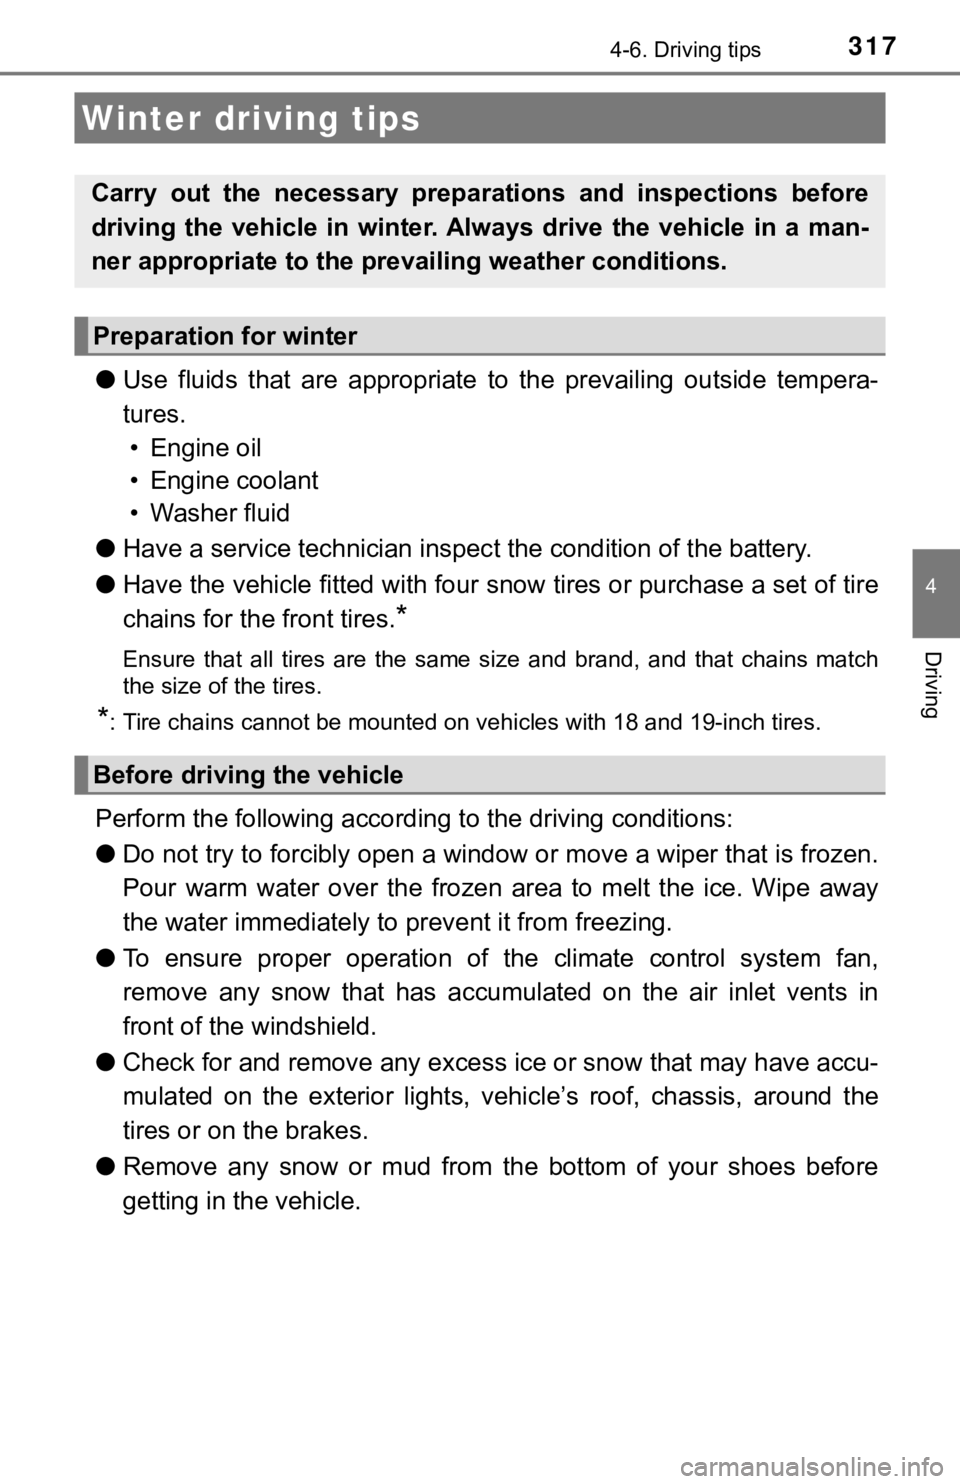
●Use fluids that are appropriate to the prevailing outside tempera-
tures.
• Engine oil
• Engine coolant
• Washer fluid
●Have a service technician inspect the condition of the battery.
●Have the vehicle fitted with four snow tires or purchase a set of tire
chains for the front tires.
*
Ensure that all tires are the same size and brand, and that chains match
the size of the tires.
*: Tire chains cannot be mounted on vehicles with 18 and 19-inch tires.
Perform the following according to the driving conditions:
●Do not try to forcibly open a window or move a wiper that is frozen.
Pour warm water over the frozen area to melt the ice. Wipe away
the water immediately to prevent it from freezing.
●To ensure proper operation of the climate control system fan,
remove any snow that has accumulated on the air inlet vents in
front of the windshield.
●Check for and remove any excess ice or snow that may have accu-
mulated on the exterior lights, vehicle’s roof, chassis, around the
tires or on the brakes.
●Remove any snow or mud from the bottom of your shoes before
getting in the vehicle.
Winter driving tips
Carry out the necessary preparations and inspections before
driving the vehicle in winter. Always drive the vehicle in a man-
ner appropriate to the prevailing weather conditions.
Preparation for winter
Before driving the vehicle
Page 319 of 548
3194-6. Driving tips
4
Driving
Regulations regarding the use of tire chains vary depending on loca-
tion and type of road. Always check local regulations before installing
chains.
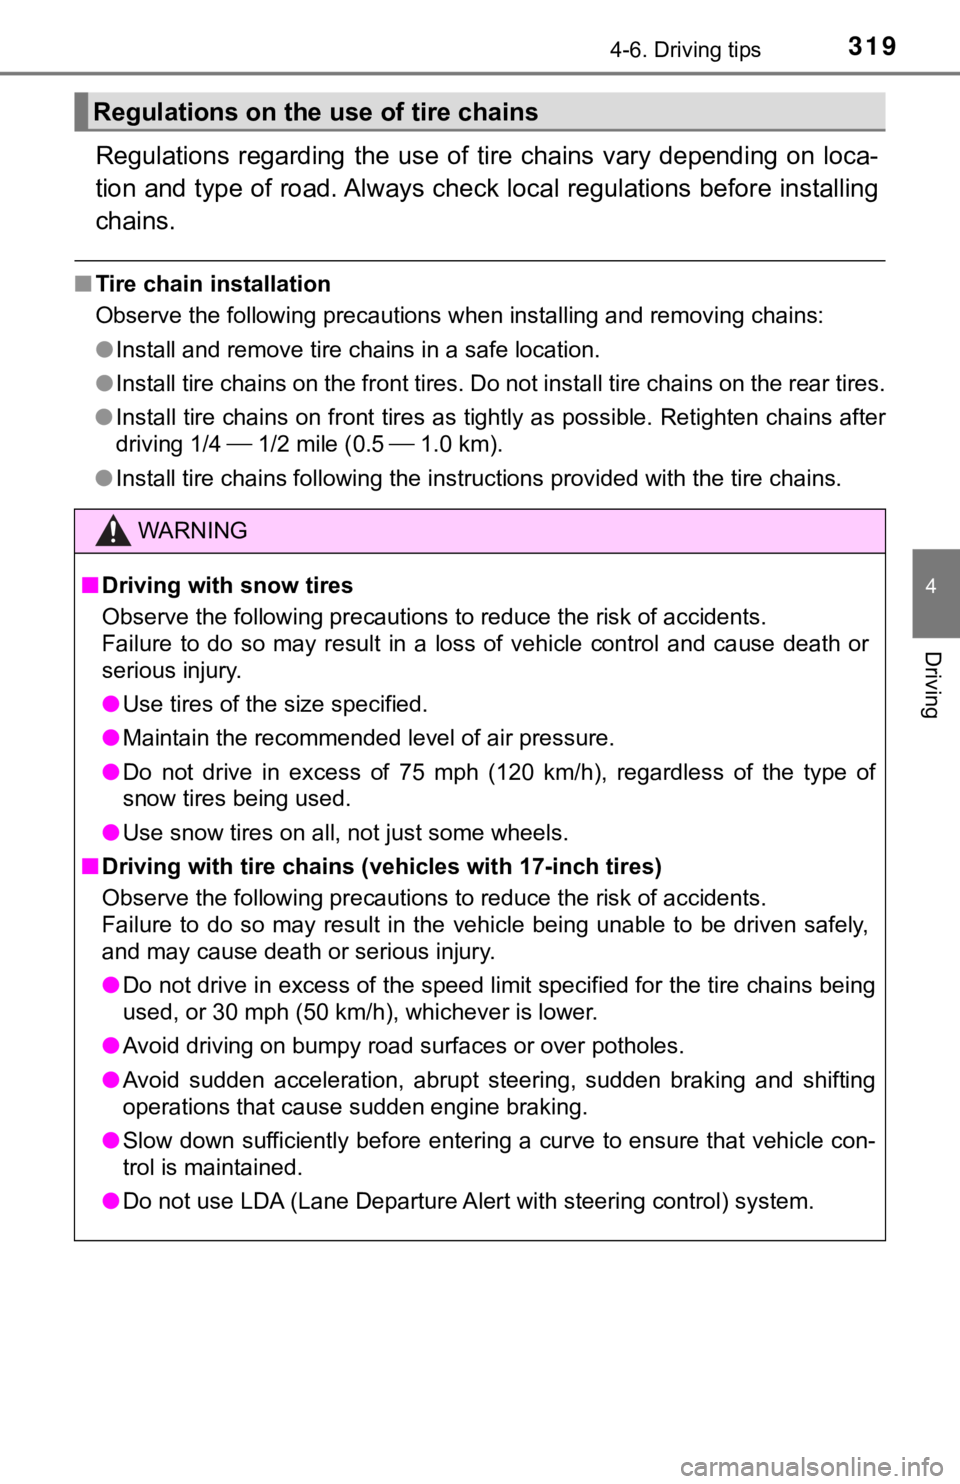
■Tire chain installation
Observe the following precautions when installing and removing chains:
●Install and remove tire chains in a safe location.
●Install tire chains on the front tires. Do not install tire chains on the rear tires.
●Install tire chains on front tires as tightly as possible. Retighten chains after
driving 1/4 1/2 mile (0.5 1.0 km).
●<002c0051005600570044004f004f00030057004c0055004800030046004b0044004c00510056000300490052004f004f0052005a004c0051004a00030057004b00480003004c0051005600570055005800460057004c005200510056000300530055005200
59004c0047004800470003005a004c0057004b00030057004b[e tire chains.
Regulations on the use of tire chains
WARNING
■Driving with snow tires
Observe the following precautions to reduce the risk of accidents.
Failure to do so may result in a loss of vehicle control and cause death or
serious injury.
●Use tires of the size specified.
●Maintain the recommended level of air pressure.
●Do not drive in excess of 75 mph (120 km/h), regardless of the type of
snow tires being used.
●Use snow tires on all, not just some wheels.
■Driving with tire chains (vehicles with 17-inch tires)
Observe the following precautions to reduce the risk of accidents.
Failure to do so may result in the vehicle being unable to be driven safely,
and may cause death or serious injury.
●Do not drive in excess of the speed limit specified for the tire chains being
used, or 30 mph (50 km/h), whichever is lower.
●Avoid driving on bumpy road surfaces or over potholes.
●Avoid sudden acceleration, abrupt steering, sudden braking and shifting
operations that cause sudden engine braking.
●Slow down sufficiently before entering a curve to ensure that vehicle con-
trol is maintained.
●Do not use LDA (Lane Departure Alert with steering control) system.
Page 349 of 548

3495-4. Other interior features
5
Interior features
■The wireless charger can be operated when
The engine switch is in ACCESSORY or IGNITION ON mode.
■Portable devices that can be charged
●Portable devices compatible with the Qi wireless charging standard can be
charged by the wireless charger. However, compatibility with all devices
<005a004b004c0046004b0003005000480048005700030057004b004800030034004c0003005a004c00550048004f00480056005600030046004b00440055004a004c0051004a0003005600570044005100470044005500470003004c005600030051005200
570003004a0058004400550044005100570048004800470011[
●The wireless charger is designed to supply low power electricity (5 W or
less) to a cellular phone, smartphone, or other portable device.
■If a cover or accessory is attached to the portable device
Do not charge a portable device if a cover or accessory which is not Qi com-
patible is attached. Depending on the type of cover and/or accessory
attached, it may not be possible to charge the portable device. If the portable
device is placed on the charging area and does not charge, remove the cover
and/or accessories.
■If interference is heard in AM radio broadcasts while charging
Turn off the wireless charger and check if the noise is reduced. If noise is
reduced, press and hold the power supply switch of the wireless charger for 2
seconds. The frequency of the wireless charger is changed and noise may be
reduced. When the frequency is changed, the operation indicator light will
blink (orange) 2 times.
■Charging precautions
●If the electronic key cannot be detected in the cabin, charging cannot be
performed. When a door is opened and closed, charging may be temporarily
suspended.
●While charging, the wireless charger and the portable device will become
warm. This is not a malfunction.
If a portable device becomes warm while charging and charging stops due
to the protection function of the portable device, wait until the portable
device cools down and charge it again.
■Sound generated during operation
When the power supply switch is turned on or while a portable device is being
identified, operation sounds may be heard. This is not a malfunction.
■Cleaning the wireless charger
P. 370
Page 365 of 548

365
6Maintenance and care
6-1. Maintenance and care
Cleaning and protecting
the vehicle exterior .......... 366
Cleaning and protecting
the vehicle interior ........... 369
6-2. Maintenance
Maintenance
requirements ................... 372
General maintenance........ 374
Emission inspection and
maintenance (I/M)
programs......................... 378
6-3. Do-it-yourself
maintenance
Do-it-yourself service
precautions ..................... 379
Hood ................................. 381
Positioning a floor jack ...... 382
Engine compartment ......... 383
Tires .................................. 394
Tire inflation pressure ....... 408
Wheels .............................. 411
Air conditioning filter.......... 413
Electronic key battery........ 415
Checking and replacing
fuses ............................... 418
Light bulbs......................... 421