lock TOYOTA AYGO 2021 User Guide
[x] Cancel search | Manufacturer: TOYOTA, Model Year: 2021, Model line: AYGO, Model: TOYOTA AYGO 2021Pages: 546, PDF Size: 81 MB
Page 33 of 546
311-1. For safe use
1
For safety and security
AYGO_OM_Europe_OM9A012E
WARNING
Observe the following precautions.
Failure to do so may result in death or serious injury.
● Do not adjust the position of the driver’s seat while driving.
Doing so could cause the driver to lose control of the vehicle.
● Do not place a cushion between the driver or passenger and the seatback.
A cushion may prevent correct posture from being achieved, and reduce
the effectiveness of the seat belt and head restraint.
● Do not place anything under the front seats.
Objects placed under the front seats may become jammed in the seat
tracks and stop the seat from locking in place. This may lead to an acci-
dent and the adjustment mechanism may also be damaged.
● Always observe the legal speed limit when driving on public roads.
● When driving over long distances, take regular breaks before you start to
feel tired.
Also, if you feel tired or sleepy while driving, do not force yourself to con-
tinue driving and take a break immediately.
Page 35 of 546
331-1. For safe use
1
For safety and security
AYGO_OM_Europe_OM9A012E
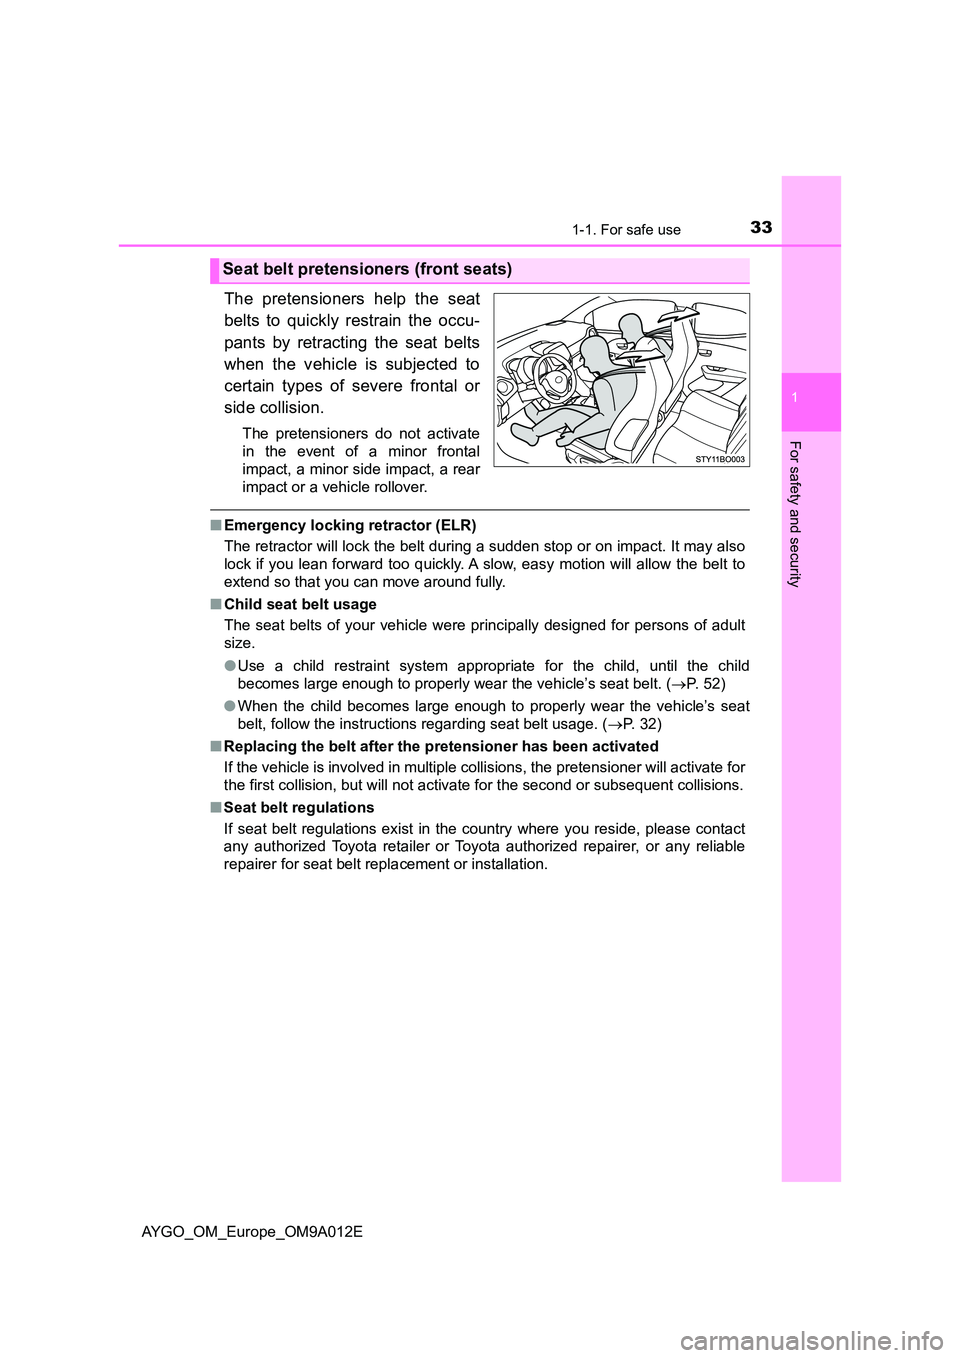
The pretensioners help the seat
belts to quickly restrain the occu-
pants by retracting the seat belts
when the vehicle is subjected to
certain types of severe frontal or
side collision.
The pretensioners do not activate
in the event of a minor frontal
impact, a minor side impact, a rear
impact or a vehicle rollover.
■ Emergency locking retractor (ELR)
The retractor will lock the belt during a sudden stop or on impact. It may also
lock if you lean forward too quickly. A slow, easy motion will allow the belt to
extend so that you can move around fully.
■ Child seat belt usage
The seat belts of your vehicle were principally designed for persons of adult
size.
● Use a child restraint system appropriate for the child, until the child
becomes large enough to properly wear the vehicle’s seat belt. ( P. 5 2 )
● When the child becomes large enough to properly wear the vehicle’s seat
belt, follow the instructions regarding seat belt usage. ( P. 32)
■ Replacing the belt after the pretensioner has been activated
If the vehicle is involved in multiple collisions, the pretensioner will activate for
the first collision, but will not activate for the second or subsequent collisions.
■ Seat belt regulations
If seat belt regulations exist in the country where you reside, please contact
any authorized Toyota retailer or Toyota authorized repairer, or any reliable
repairer for seat belt repl acement or installation.
Seat belt pretensioners (front seats)
Page 37 of 546
351-1. For safe use
1
For safety and security
AYGO_OM_Europe_OM9A012E
WARNING
■People suffering illness
Obtain medical advice and wear the seat belt in the proper way. ( P. 32)
■ When children are in the vehicle
P. 7 0
■ Seat belt pretensioners
If the pretensioner has activated, the SRS warning light will come on. In that
case, the seat belt cannot be used again and must be replaced at any
authorized Toyota retailer or Toyota authorized repairer, or any reliable
repairer.
■ Seat belt damage and wear
● Do not damage the seat belts by allowing the belt, plate, or buckle to be
jammed in the door.
● Inspect the seat belt system periodically. Check for cuts, fraying, and loose
parts. Do not use a damaged seat belt until it is replaced. Damaged seat
belts cannot protect an occupant from death or serious injury.
● Ensure that the belt and plate are locked and the belt is not twisted.
If the seat belt does not function correctly, immediately contact any autho-
rized Toyota retailer or Toyota authorized repairer, or any reliable repairer.
● Replace the seat assembly, including the belts, if your vehicle has been
involved in a serious accident, even if there is no obvious damage.
● Do not attempt to install, remove, modify, disassemble or dispose of the
seat belts. Have any necessary repairs carried out by any authorized Toy-
ota retailer or Toyota authorized repairer, or any reliable repairer. Inappro-
priate handling of the pretensioner ma y prevent it from operating properly
resulting in death or serious injury.
Page 53 of 546
511-2. Child safety
1
For safety and security
AYGO_OM_Europe_OM9A012E
Riding with children
●It is recommended that children sit in the rear seats to avoid acci-
dental contact with the shift lever, wiper switch etc.
● 5-door models: Use the rear door child-protector lock to avoid chil-
dren opening the door, accidentally, while driving. ( P. 135)
● Do not let small children operate equipment which may catch or
pinch body parts, such as the power window, hood, back door,
seats, etc.
Observe the following precautions when children are in the vehi-
cle.
Use a child restraint system appropriate for the child, until the
child becomes large enough to properly wear the vehicle’s seat
belt.
WARNING
Never leave children unattended in the vehicle, and never allow children to
have or use the key.
Children may be able to start the vehicle or shift the vehicle into neutral.
There is also a danger that children may injure themselves by playing with
the windows, the canvas top or other features of the vehicle. In addition,
heat build-up or extremely cold temperatures inside the vehicle can be fatal
to children.
Page 66 of 546
641-2. Child safety
AYGO_OM_Europe_OM9A012E
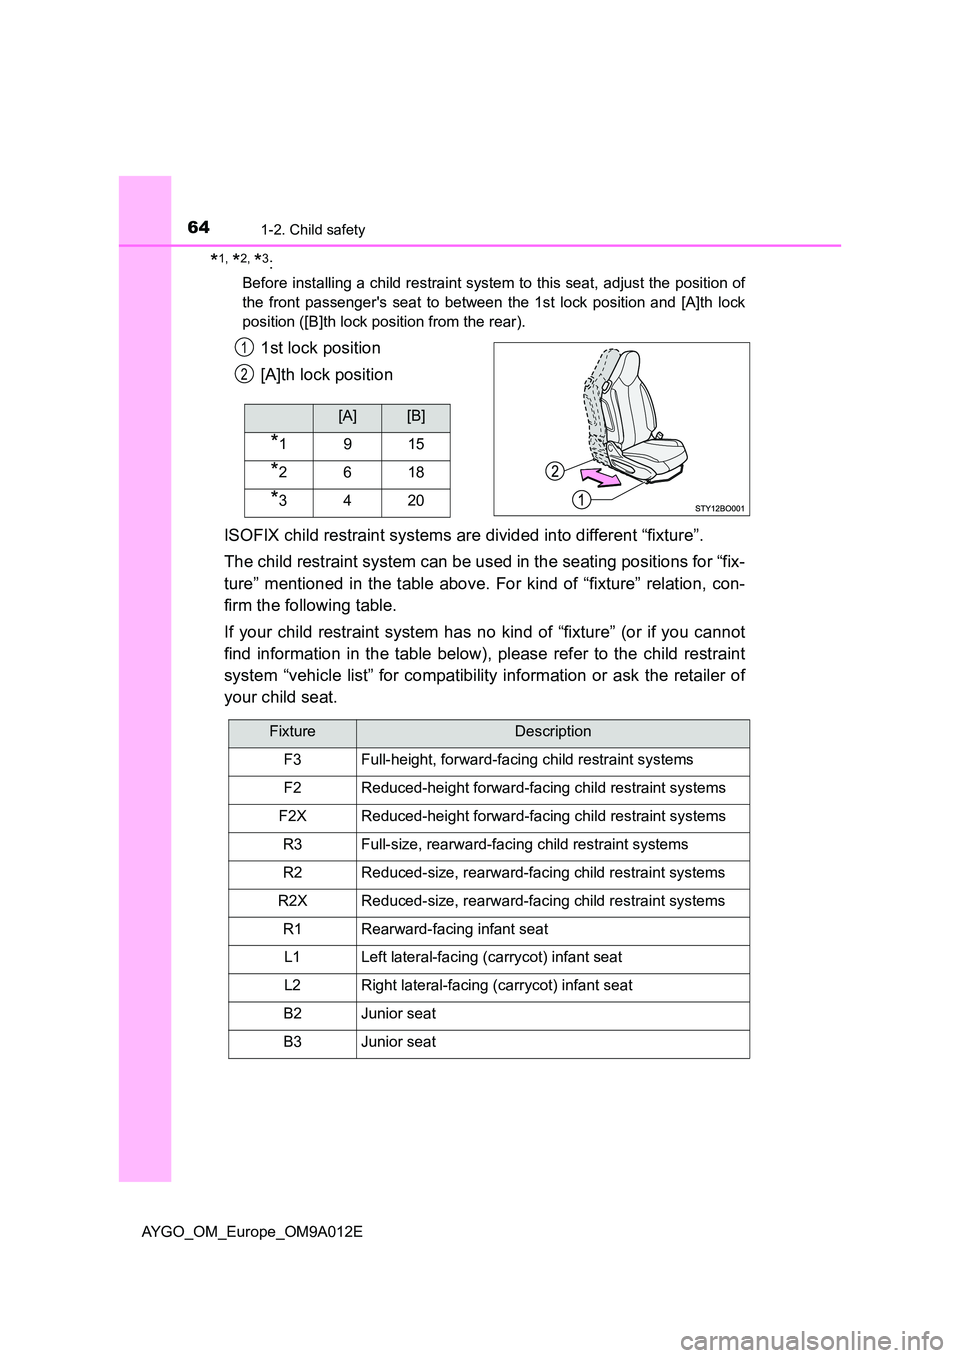
*1, *2, *3:
Before installing a child restraint system to this seat, adjust the position of
the front passenger's seat to between the 1st lock position and [A]th lock
position ([B]th lock position from the rear).
1st lock position
[A]th lock position
ISOFIX child restraint systems are divided into different “fixture”.
The child restraint system can be used in the seating positions for “fix-
ture” mentioned in the table above. For kind of “fixture” relation, con-
firm the following table.
If your child restraint system has no kind of “fixture” (or if you cannot
find information in the table below), please refer to the child restraint
system “vehicle list” for compatibility information or ask the retailer of
your child seat.
[A][B]
*1915
*2618
*3420
1
2
FixtureDescription
F3Full-height, forward-facing child restraint systems
F2Reduced-height forward-facing child restraint systems
F2XReduced-height forward-facing child restraint systems
R3Full-size, rearward-facing child restraint systems
R2Reduced-size, rearward-facing child restraint systems
R2XReduced-size, rearward-facing child restraint systems
R1Rearward-facing infant seat
L1Left lateral-facing (carrycot) infant seat
L2Right lateral-facing (carrycot) infant seat
B2Junior seat
B3Junior seat
Page 71 of 546
691-2. Child safety
1
For safety and security
AYGO_OM_Europe_OM9A012E
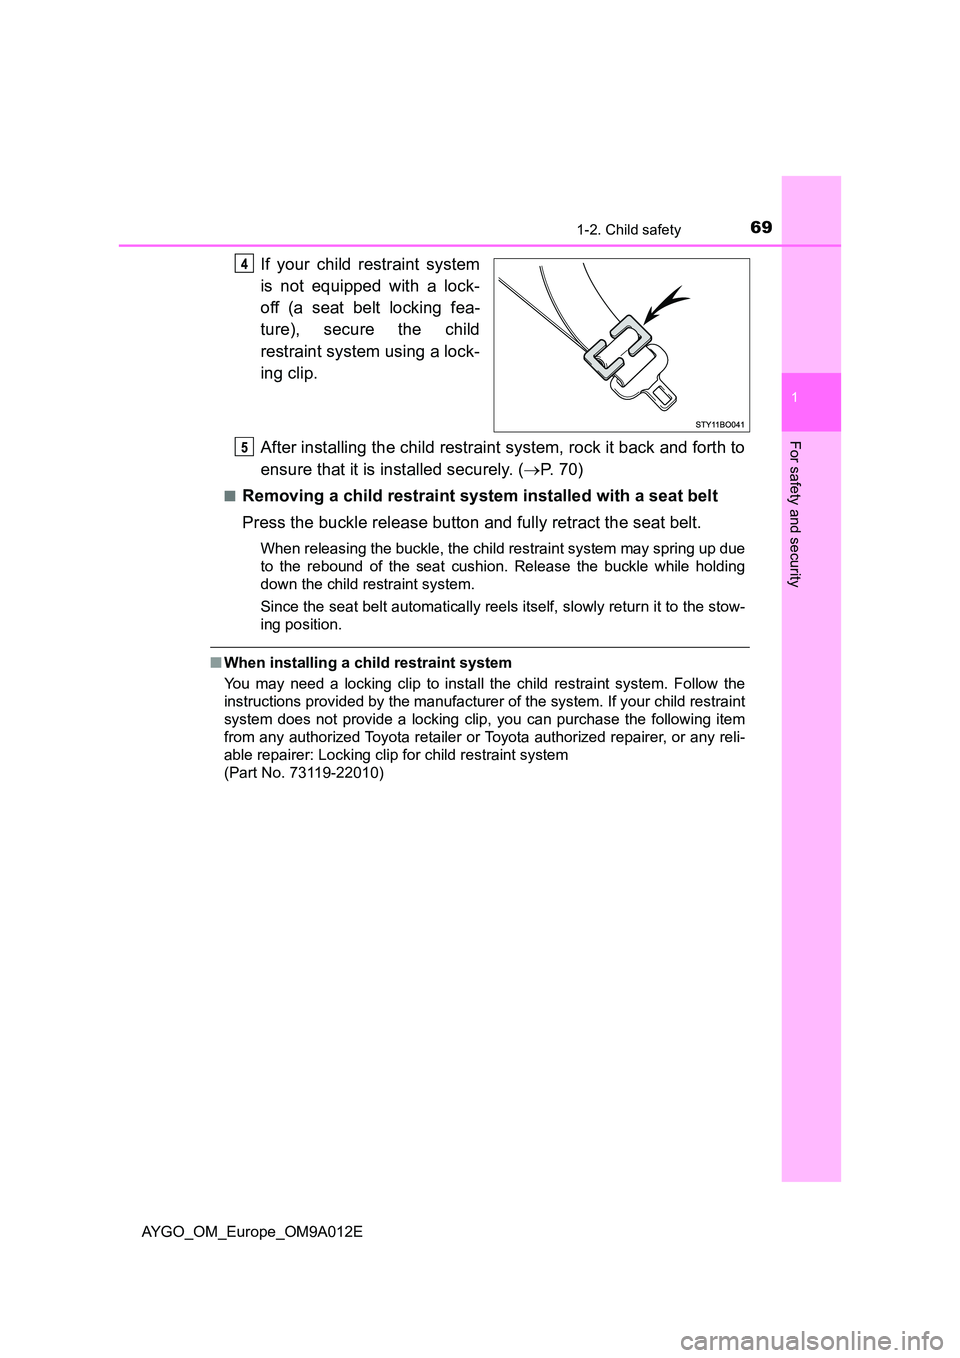
If your child restraint system
is not equipped with a lock-
off (a seat belt locking fea-
ture), secure the child
restraint system using a lock-
ing clip.
After installing the child restraint system, rock it back and forth to
ensure that it is installed securely. ( P. 7 0 )
■Removing a child restraint system installed with a seat belt
Press the buckle release button and fully retract the seat belt.
When releasing the buckle, the chil d restraint system may spring up due
to the rebound of the seat cushion. Release the buckle while holding
down the child restraint system.
Since the seat belt automatically reels itself, slowly return it to the stow-
ing position.
■ When installing a child restraint system
You may need a locking clip to install the child restraint system. Follow the
instructions provided by the manufacturer of the system. If your child restraint
system does not provide a locking clip, you can purchase the following item
from any authorized Toyota retailer or Toyota authorized repairer, or any reli-
able repairer: Locking clip for child restraint system
(Part No. 73119-22010)
Page 72 of 546
701-2. Child safety
AYGO_OM_Europe_OM9A012E
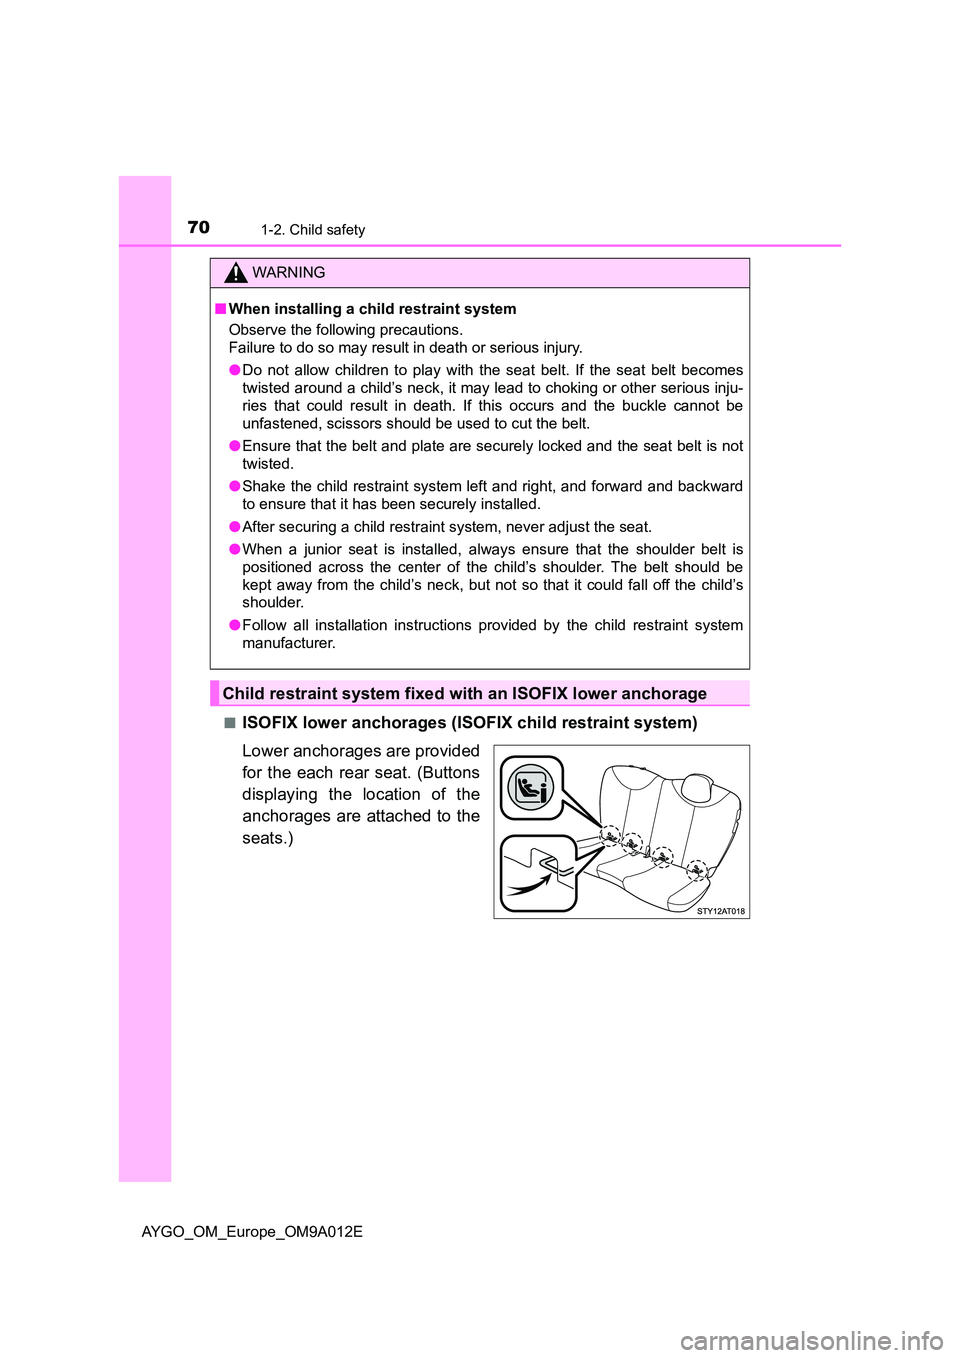
■ISOFIX lower anchorages (ISOFIX child restraint system)
Lower anchorages are provided
for the each rear seat. (Buttons
displaying the location of the
anchorages are attached to the
seats.)
WARNING
■ When installing a child restraint system
Observe the following precautions.
Failure to do so may result in death or serious injury.
● Do not allow children to play with the seat belt. If the seat belt becomes
twisted around a child’s neck, it may lead to choking or other serious inju-
ries that could result in death. If this occurs and the buckle cannot be
unfastened, scissors should be used to cut the belt.
● Ensure that the belt and plate are securely locked and the seat belt is not
twisted.
● Shake the child restraint system left and right, and forward and backward
to ensure that it has been securely installed.
● After securing a child restraint system, never adjust the seat.
● When a junior seat is installed, always ensure that the shoulder belt is
positioned across the center of the child’s shoulder. The belt should be
kept away from the child’s neck, but not so that it could fall off the child’s
shoulder.
● Follow all installation instructions provided by the child restraint system
manufacturer.
Child restraint system fixed with an ISOFIX lower anchorage
Page 77 of 546
75
1
1-3. Theft deterrent system
For safety and security
AYGO_OM_Europe_OM9A012E
Engine immobilizer system
Vehicles without a smart entry & start system
The system begins operating after the engine switch is turned from
the “ON” to the “LOCK” position.
The system is canceled after the registered key has been inserted into
the engine switch and turned to the “ON” position.
Vehicles with a smart entry & start system
The system begins operating after the engine switch has been turned
off.
The system is canceled after the engine switch has been turned to
IGNITION ON mode.
■ System maintenance
The vehicle has a maintenance-free type engine immobilizer system.
■ Conditions that may cause the system to malfunction
● If the grip portion of the key is in contact with a metallic object
● If the key is in close proximity to or touching a key to the security system
(key with a built-in transponder chip) of another vehicle
The vehicle’s keys have built-in transponder chips that prevent
the engine from starting if a key has not been previously regis-
tered in the vehicle’s on-board computer.
Never leave the keys inside the vehicle when you leave the vehi-
cle.
This system is designed to help prevent vehicle theft but does
not guarantee absolute security against all vehicle thefts.
Page 102 of 546
1002. Instrument cluster
AYGO_OM_Europe_OM9A012E
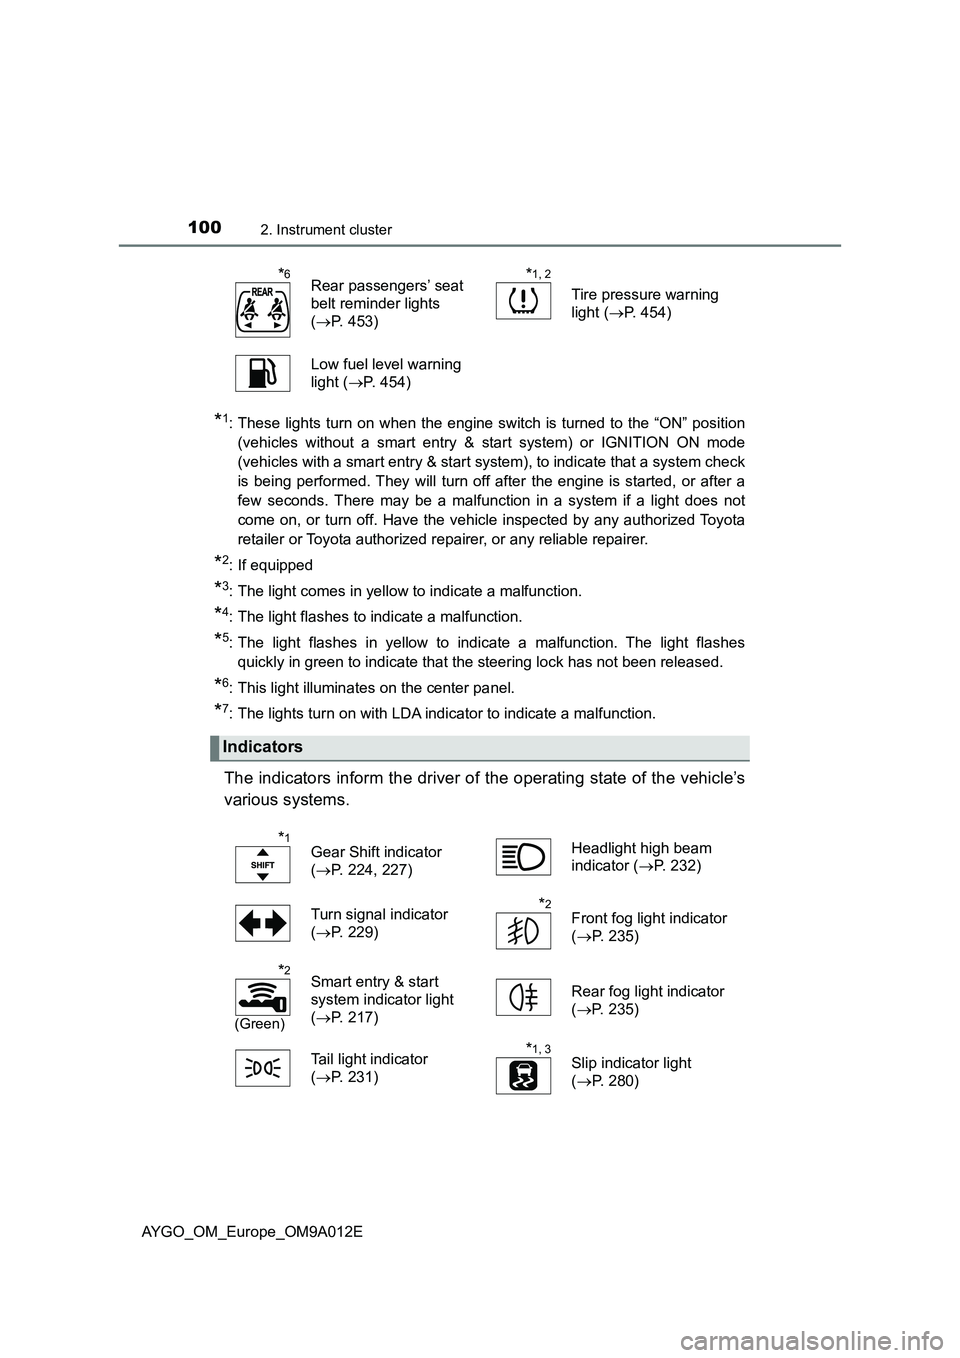
*1: These lights turn on when the engine switch is turned to the “ON” position
(vehicles without a smart entry & start system) or IGNITION ON mode
(vehicles with a smart entry & start system), to indicate that a system check
is being performed. They will turn off after the engine is started, or after a
few seconds. There may be a malfunction in a system if a light does not
come on, or turn off. Have the vehicle inspected by any authorized Toyota
retailer or Toyota authorized repairer, or any reliable repairer.
*2: If equipped
*3: The light comes in yellow to indicate a malfunction.
*4: The light flashes to indicate a malfunction.
*5: The light flashes in yellow to indicate a malfunction. The light flashes
quickly in green to indicate that the steering lock has not been released.
*6: This light illuminates on the center panel.
*7: The lights turn on with LDA indicator to indicate a malfunction.
The indicators inform the driver of the operating state of the vehicle’s
various systems.
*6Rear passengers’ seat
belt reminder lights
(P. 453)*1, 2
Tire pressure warning
light (P. 454)
Low fuel level warning
light (P. 454)
Indicators
*1Gear Shift indicator
(P. 224, 227)Headlight high beam
indicator (P. 232)
Turn signal indicator
(P. 229)
*2Front fog light indicator
(P. 235)
*2
(Green)
Smart entry & start
system indicator light
(P. 217)Rear fog light indicator
(P. 235)
Tail light indicator
(P. 231)
*1, 3Slip indicator light
(P. 280)
Page 108 of 546
1062. Instrument cluster
AYGO_OM_Europe_OM9A012E■
Trip meters “A” and “B”
Displays the distance the vehicle has been driven since the meter
was last reset. Trip meters “A” and “B” can be used to record and
display different distances independently.
Push and holding one of the “DISP” buttons will reset the trip meter that
is currently displayed.
■
Stop & Start system operation time (if equipped)
●Displays the amount of time the engine was stopped due to oper-
ation of the Stop & Start system during the current trip.
Vehicles without a smart entry & start system: From the engine switch in
the “ON” position to the engine switch in the “LOCK” position.
Vehicles with a smart entry & start system: From the engine switch in
IGNITION ON mode to the engine switch off.
●When the Stop & Start system is operating, the presently dis-
played screen is interrupted and the Stop & Start system opera-
tion time automatically displayed.
• Push one of the “DISP” buttons to return to the previous screen.
• The automatically displayed function of the Stop & Start system oper-
ation time activated or deactivated switch over method. (P. 108)
■
Stop & Start system total operation time (if equipped)
Displays the total amount of time that the engine has been stopped
due to operation of the Stop & Start system since the system was
last reset.
Push and hold one of the “DISP” buttons to reset.
■Outside temperature (vehicles with a multi-mode manual
transmission)
Displays the outside temperature. (
P. 375)
■Current fuel consumption
Displays the current rate of fuel consumption.