TOYOTA AYGO 2021 Owners Manual
AYGO 2021
TOYOTA
TOYOTA
https://www.carmanualsonline.info/img/14/59674/w960_59674-0.png
TOYOTA AYGO 2021 Owners Manual
Trending: service indicator, fuel type, navigation, flat tire, spark plugs, automatic transmission, child seat
Page 461 of 546
4598-2. Steps to take in an emergency
8
When trouble arises
AYGO_OM_Europe_OM9A012E
If you have a flat tire (vehicles without a
spare tire)
Your vehicle is not equipped with a spare tire, but instead is
equipped with an emergency tire puncture repair kit.
A puncture caused by a nail or screw passing through the tire
tread can be repaired temporarily with the emergency tire punc-
ture repair kit.
WARNING
■ If you have a flat tire
Do not continue driving with a flat tire.
Driving even a short distance with a flat tire can damage the tire and the
wheel beyond repair, which could result in an accident.
Driving with a flat tire may cause a circumferential groove on the side wall.
In such a case, the tire may explode when using a repair kit.
Page 462 of 546

4608-2. Steps to take in an emergency
AYGO_OM_Europe_OM9A012E
●Stop the vehicle in a safe place on a hard, flat surface.
● Set the parking brake.
● Shift the shift lever to N.
● Stop the engine.
● Turn on the emergency flashers. (P. 438)
● Check the degree of the tire damage.
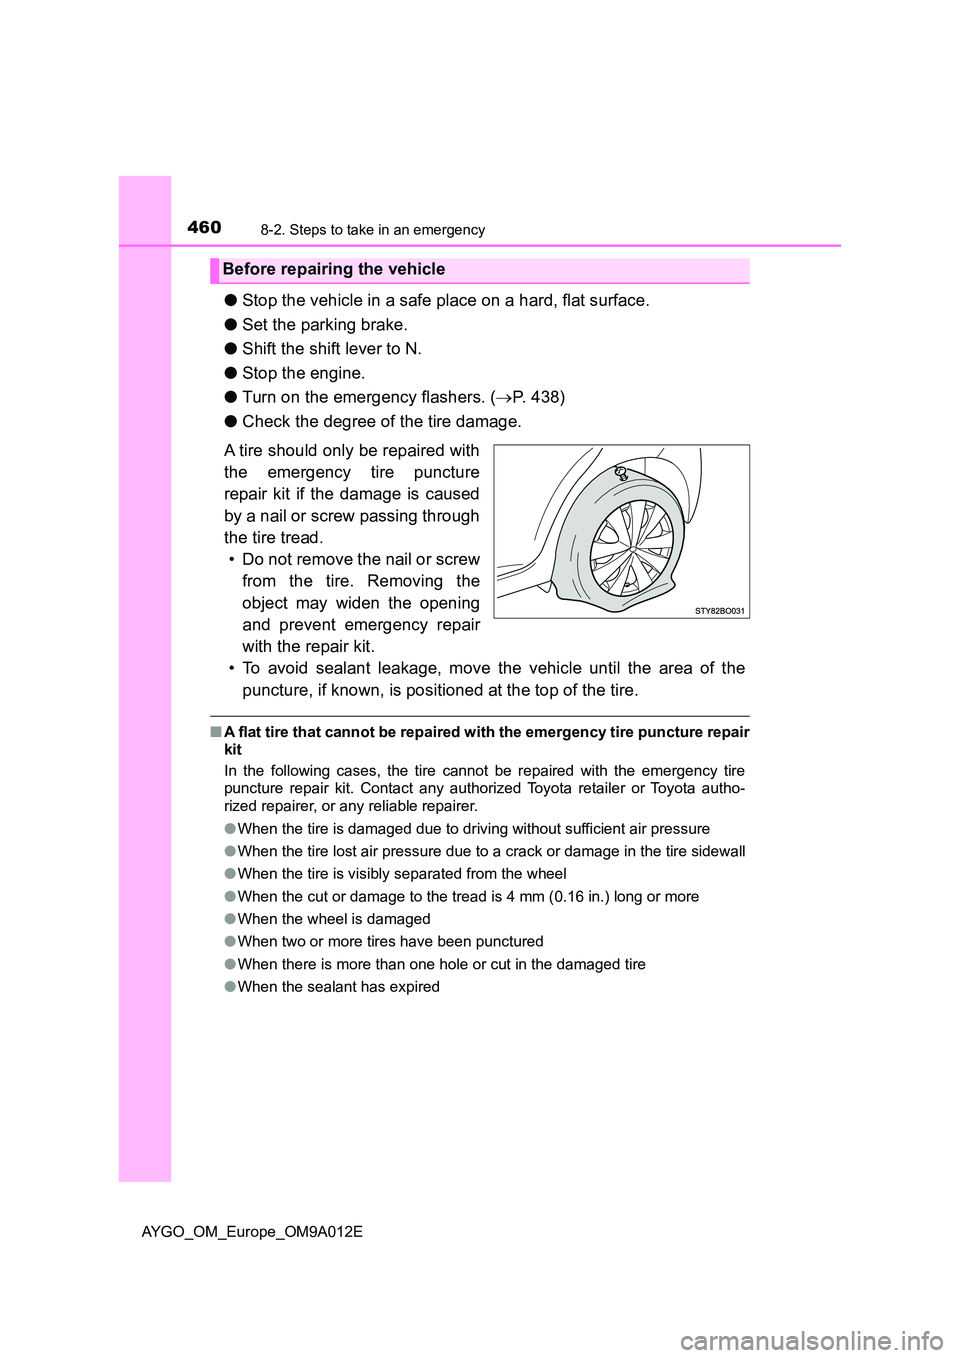
A tire should only be repaired with
the emergency tire puncture
repair kit if the damage is caused
by a nail or screw passing through
the tire tread.
• Do not remove the nail or screw
from the tire. Removing the
object may widen the opening
and prevent emergency repair
with the repair kit.
• To avoid sealant leakage, move the vehicle until the area of the
puncture, if known, is positioned at the top of the tire.
■ A flat tire that cannot be repaired with the emergency tire puncture repair
kit
In the following cases, the tire c annot be repaired with the emergency tire
puncture repair kit. Contact any authorized Toyota retailer or Toyota autho-
rized repairer, or any reliable repairer.
● When the tire is damaged due to driving without sufficient air pressure
● When the tire lost air pressure due to a crack or damage in the tire sidewall
● When the tire is visibly separated from the wheel
● When the cut or damage to the tread is 4 mm (0.16 in.) long or more
● When the wheel is damaged
● When two or more tires have been punctured
● When there is more than one hole or cut in the damaged tire
● When the sealant has expired
Before repairing the vehicle
Page 463 of 546
4618-2. Steps to take in an emergency
8
When trouble arises
AYGO_OM_Europe_OM9A012E
*: Use of the jack (P. 486)
A jack can be purchased at any authorized Toyota retailer or Toyota autho-
rized repairer, or any reliable repairer.
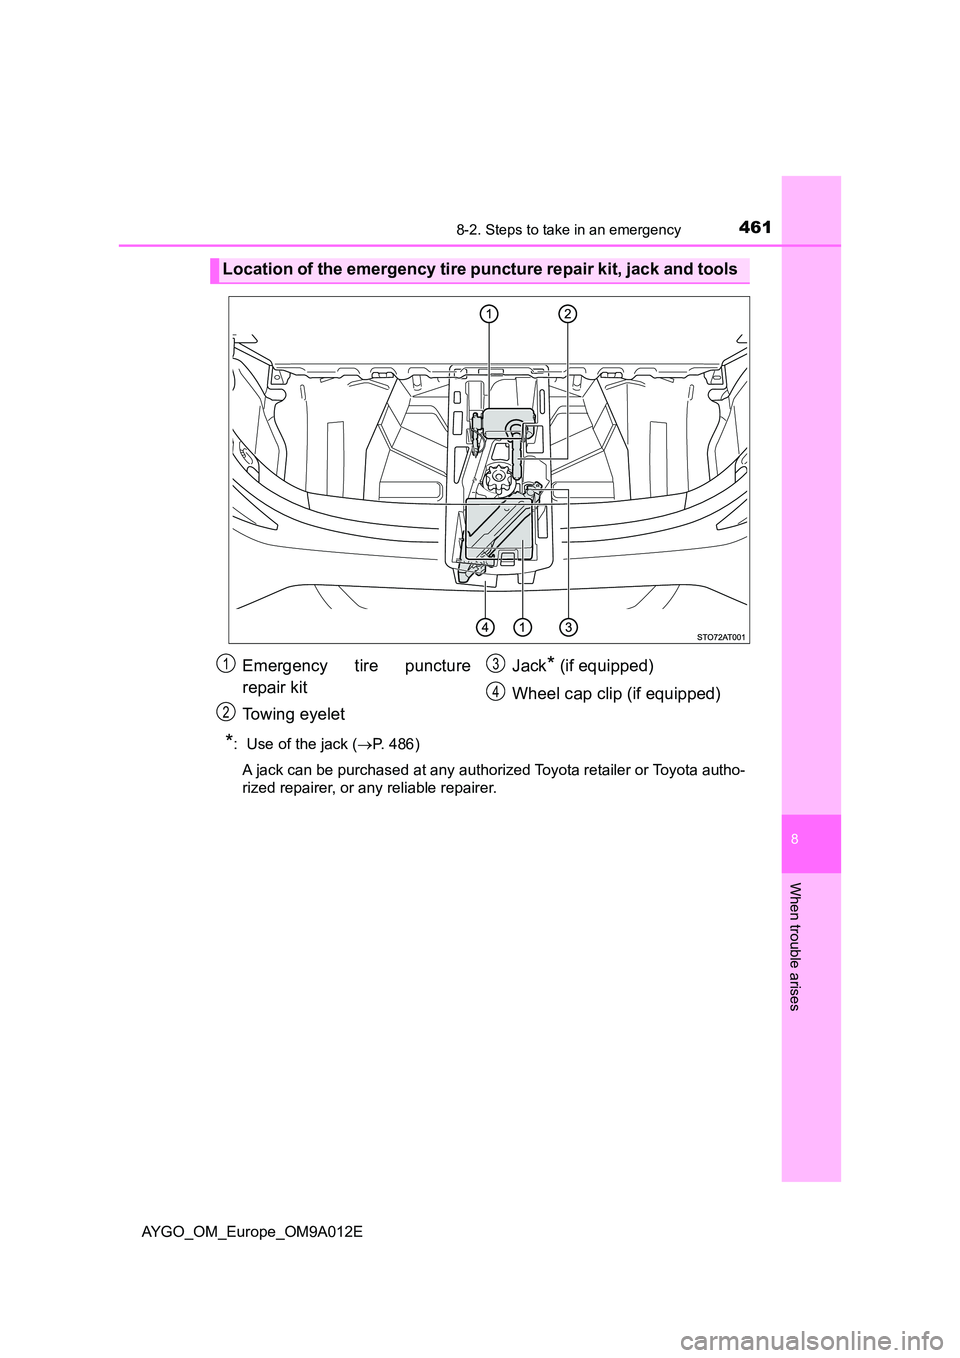
Location of the emergency tire puncture repair kit, jack and tools
Emergency tire puncture
repair kit
Towing eyelet
Jack* (if equipped)
Wheel cap clip (if equipped)
1
2
3
4
Page 464 of 546
4628-2. Steps to take in an emergency
AYGO_OM_Europe_OM9A012E
Ty pe A
Emergency tire puncture repair kit components
Nozzle
Hose
Compressor switch
Air pressure gauge
Pressure release button
Power plug
Stickers
1
2
3
4
5
6
7
Page 465 of 546
4638-2. Steps to take in an emergency
8
When trouble arises
AYGO_OM_Europe_OM9A012E
Ty pe B
Nozzle
Hose
Power plug
Air pressure gauge
Pressure release button
Compressor switch
Stickers
1
2
3
4
5
6
7
Page 466 of 546
4648-2. Steps to take in an emergency
AYGO_OM_Europe_OM9A012E
Remove the luggage floor
cover.
Take out the emergency tire
puncture repair kit.
Taking out the emergency tire puncture repair kit
Page 467 of 546
4658-2. Steps to take in an emergency
8
When trouble arises
AYGO_OM_Europe_OM9A012E
Ty pe A
Take out the repair kit from the tool box.
When taking out the bottle from the orig inal bag, do not tear or discard the
bag.
Attach the 2 stickers as shown.
Remove any dirt and moisture from
the wheel before attaching the
label. If it is impossible to attach
the label, make sure to tell any
authorized Toyota retailer or Toyota
authorized repairer, or any reliable
repairer when you have them
repair and replace the tire that
sealant is injected.
Remove the valve cap from the
valve of the punctured tire.
Remove the cap from the noz-
zle.
Emergency repair method
Page 468 of 546
4668-2. Steps to take in an emergency
AYGO_OM_Europe_OM9A012E
Connect the nozzle to the
valve.
Screw the end of the nozzle clock-
wise as far as possible.
The bottle should hang vertically
without contacting the ground. If
the bottle does not hang vertically,
move the vehicle so that the tire
valve is located properly.
Remove the cap from the bot-
tle.
Pull the hose out from the com-
pressor.
Connect the bottle to the com-
pressor.
Screw the end of the nozzle clock-
wise as far as possible.
Page 469 of 546
4678-2. Steps to take in an emergency
8
When trouble arises
AYGO_OM_Europe_OM9A012E
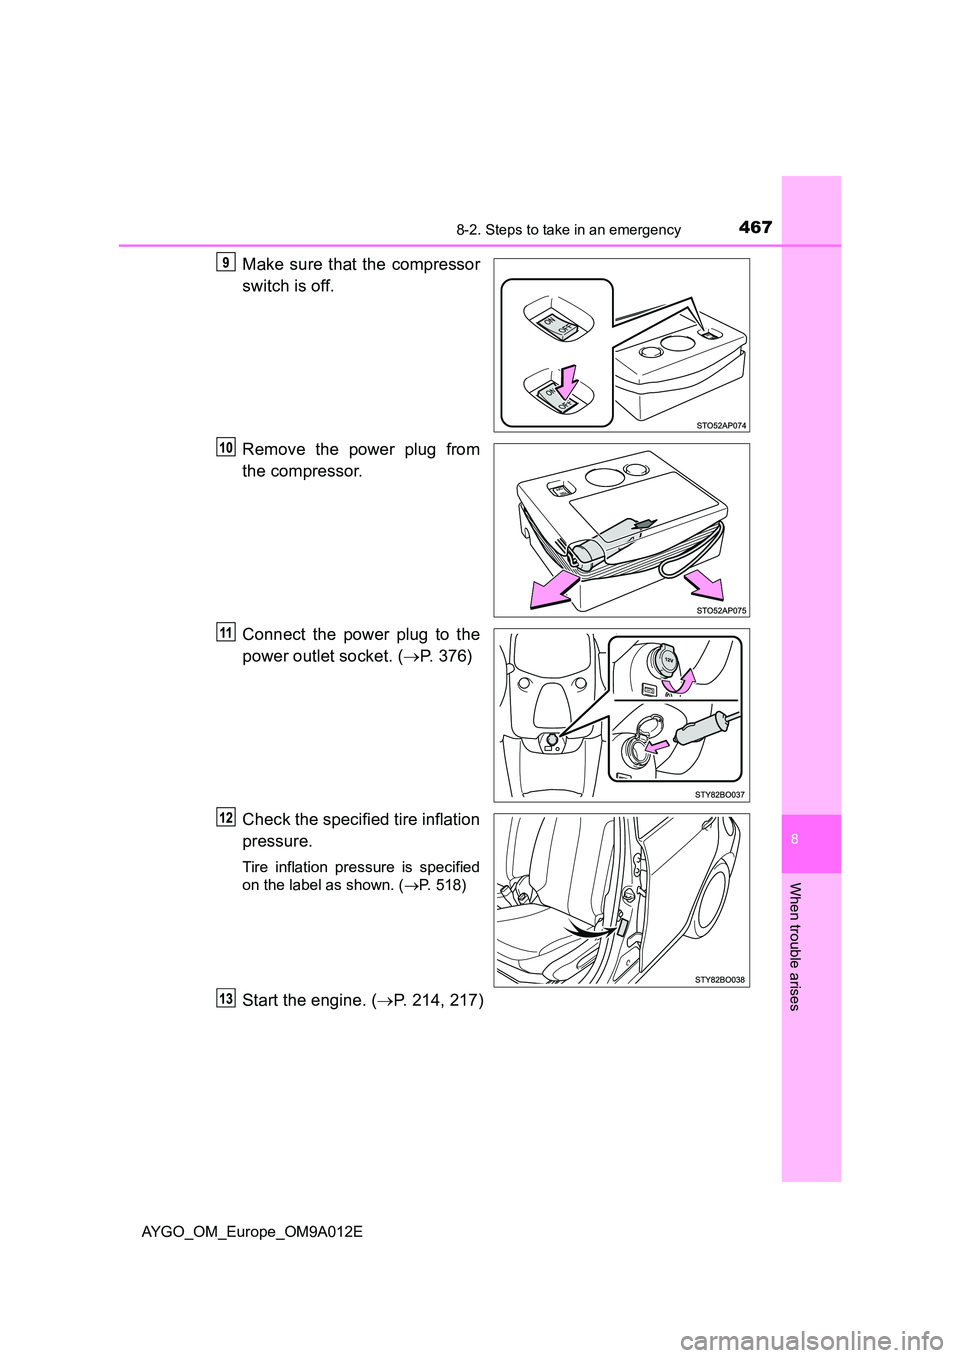
Make sure that the compressor
switch is off.
Remove the power plug from
the compressor.
Connect the power plug to the
power outlet socket. ( P. 376)
Check the specified tire inflation
pressure.
Tire inflation pressure is specified
on the label as shown. ( P. 518)
Start the engine. (P. 214, 217)
Page 470 of 546
4688-2. Steps to take in an emergency
AYGO_OM_Europe_OM9A012E
To inject the sealant and inflate
the tire, turn the compressor
switch on.
Inflate the tire until the specified
air pressure is reached.
The sealant will be injected
and the pressure will surge
and then gradually
decrease.
The air pressure gauge will
display the actual tire infla-
tion pressure about 1 minute
(5 minutes at low tempera-
ture) after the switch is
turned on.
Inflate to specified air pres-
sure.
• If the tire inflation pressure is still lower than the specified point after
inflation for 35 minutes with the switch on, the tire is too damaged to
be repaired. Turn the compressor switch off and contact any autho-
rized Toyota retailer or Toyota authorized repairer, or any reliable
repairer.
• If the tire inflation pressure exceeds the specified air pressure, let out
some air to adjust the tire inflation pressure. ( P. 477, 518)
1
2
3
Trending: oil type, tires, load capacity, power steering, hood open, wheel, engine oil capacity


