check engine TOYOTA AYGO X 2022 Owners Manual (in English)
[x] Cancel search | Manufacturer: TOYOTA, Model Year: 2022, Model line: AYGO X, Model: TOYOTA AYGO X 2022Pages: 494, PDF Size: 92.53 MB
Page 6 of 494
4
Owner's Manual_Europe_M99V08_en
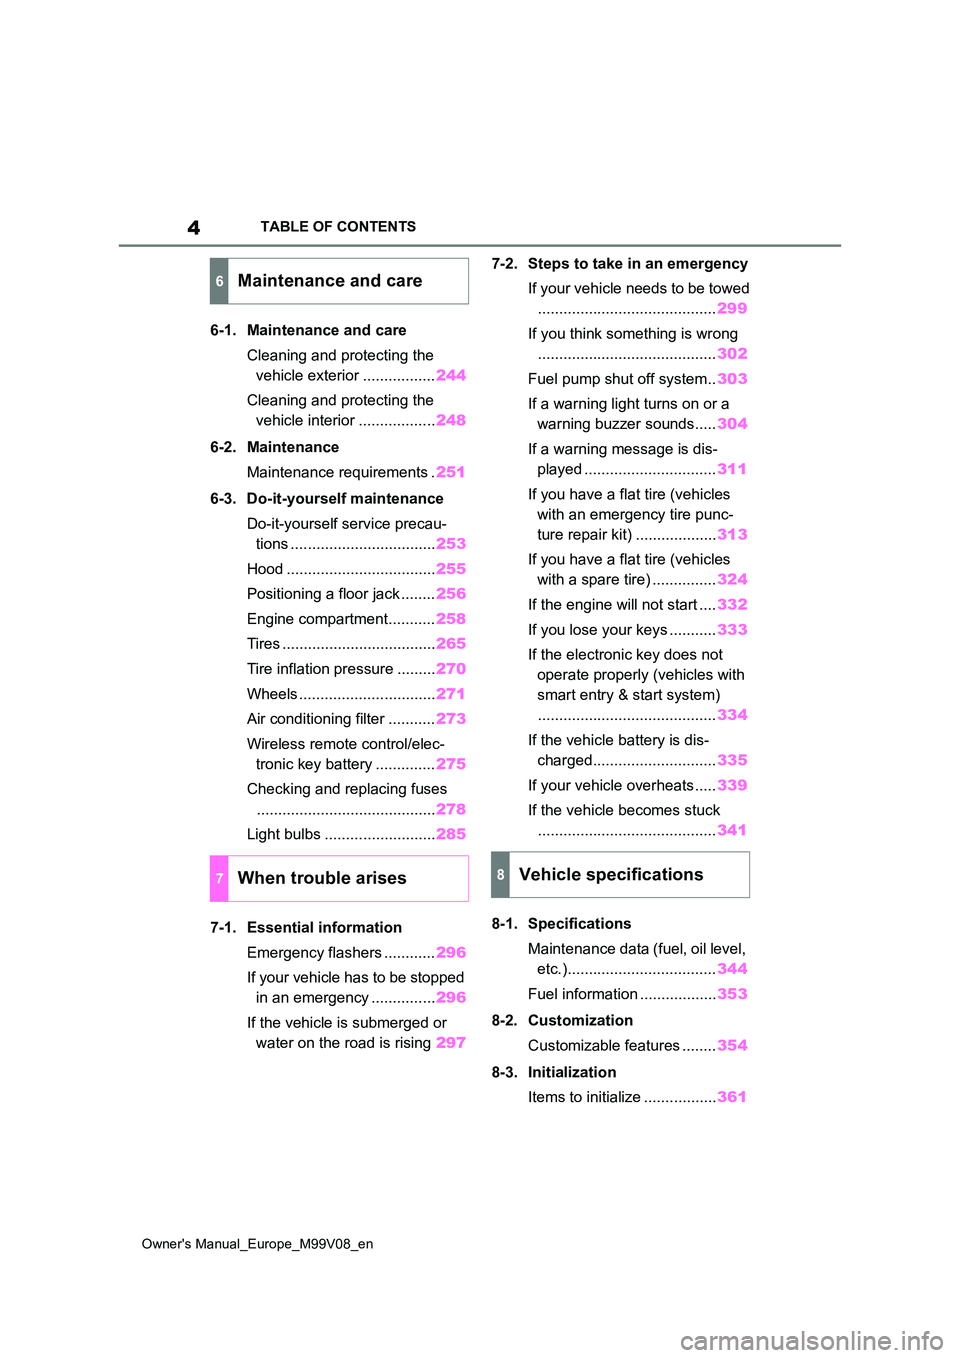
TABLE OF CONTENTS
6-1. Maintenance and care
Cleaning and protecting the
vehicle exterior ................. 244
Cleaning and protecting the
vehicle interior .................. 248
6-2. Maintenance
Maintenance requirements . 251
6-3. Do-it-yourself maintenance
Do-it-yourself service precau-
tions .................................. 253
Hood ................................... 255
Positioning a floor jack ........ 256
Engine compartment........... 258
Tires .................................... 265
Tire inflation pressure ......... 270
Wheels ................................ 271
Air conditioning filter ........... 273
Wireless remote control/elec-
tronic key battery .............. 275
Checking and replacing fuses
.......................................... 278
Light bulbs .......................... 285
7-1. Essential information
Emergency flashers ............ 296
If your vehicle has to be stopped
in an emergency ............... 296
If the vehicle is submerged or
water on the road is rising 297
7-2. Steps to take in an emergency
If your vehicle needs to be towed
.......................................... 299
If you think something is wrong
.......................................... 302
Fuel pump shut off system.. 303
If a warning light turns on or a
warning buzzer sounds..... 304
If a warning message is dis-
played ............................... 311
If you have a flat tire (vehicles
with an emergency tire punc-
ture repair kit) ................... 313
If you have a flat tire (vehicles
with a spare tire) ............... 324
If the engine will not start .... 332
If you lose your keys ........... 333
If the electronic key does not
operate properly (vehicles with
smart entry & start system)
.......................................... 334
If the vehicle battery is dis-
charged............................. 335
If your vehicle overheats ..... 339
If the vehicle becomes stuck
.......................................... 341
8-1. Specifications
Maintenance data (fuel, oil level,
etc.)................................... 344
Fuel information .................. 353
8-2. Customization
Customizable features ........ 354
8-3. Initialization
Items to initialize ................. 361
6Maintenance and care
7When trouble arises8Vehicle specifications
Page 15 of 494
13
Owner's Manual_Europe_M99V08_en
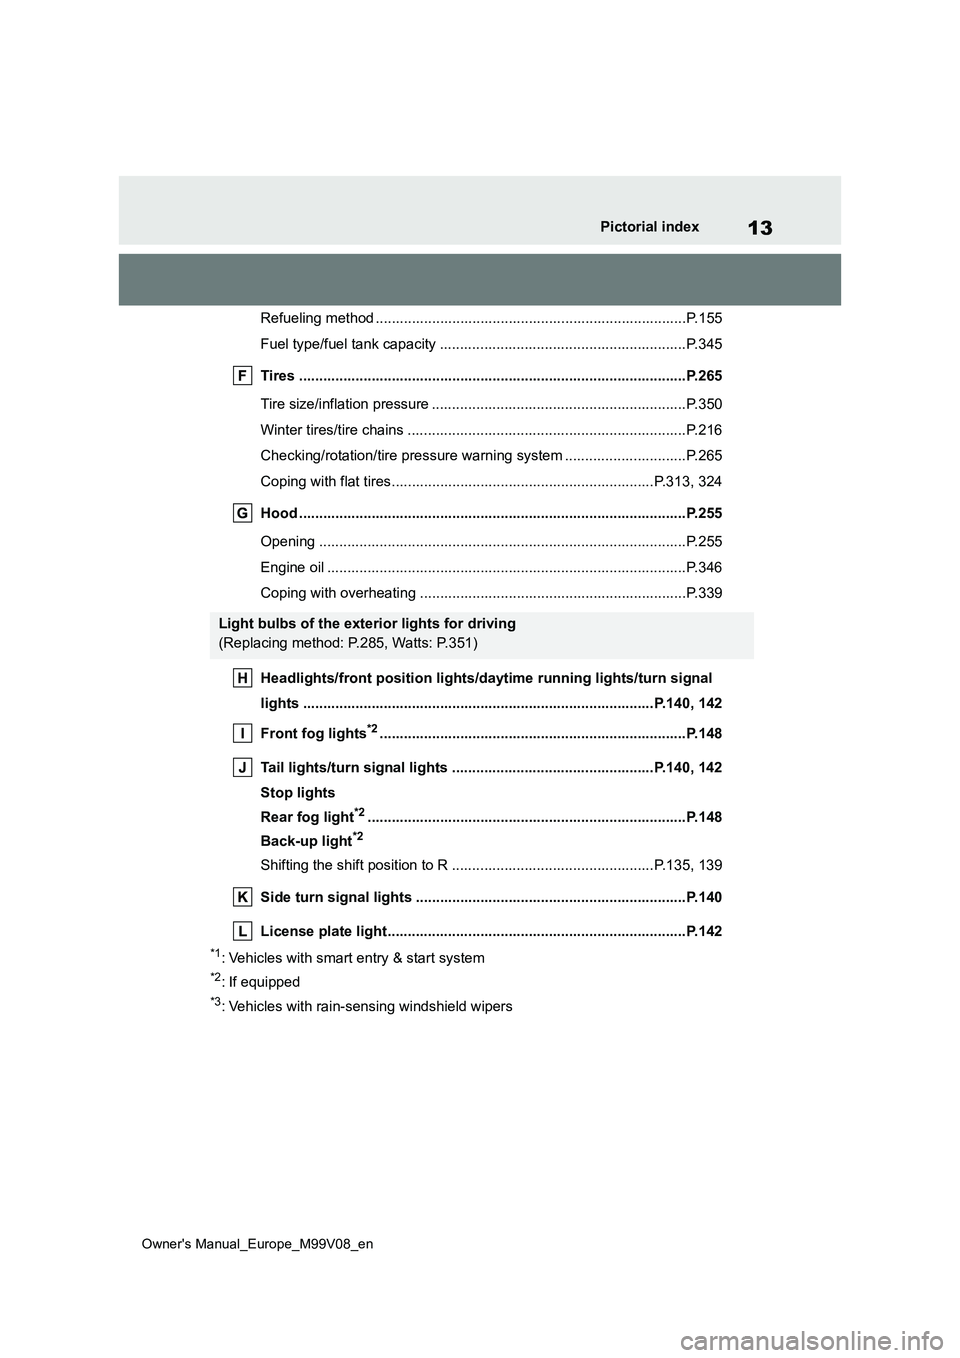
Pictorial index
Refueling method .............................................................................P.155
Fuel type/fuel tank capacity ................................... ..........................P.345
Tires .......................................................... ......................................P.265
Tire size/inflation pressure ................................... ............................P.350
Winter tires/tire chains ....................................... ..............................P.216
Checking/rotation/tire pressure warning system ................. .............P.265
Coping with flat tires......................................... ........................P.313, 324
Hood ........................................................... .....................................P.255
Opening ........................................................ ...................................P.255
Engine oil ..................................................... ....................................P.346
Coping with overheating ........................................ ..........................P.339
Headlights/front position lights/daytime running lights/turn si gnal
lights ......................................................... ..............................P.140, 142
Front fog lights*2............................................................... .............P.148
Tail lights/turn signal lights ................................. .................P.140, 142
Stop lights
Rear fog light*2............................................................... ................P.148
Back-up light*2
Shifting the shift position to R ............................... ...................P.135, 139
Side turn signal lights ........................................ ...........................P.140
License plate light............................................ ..............................P.142
*1: Vehicles with smart entry & start system
*2: If equipped
*3: Vehicles with rain-sensing windshield wipers
Light bulbs of the exterior lights for driving
(Replacing method: P.285, Watts: P.351)
Page 79 of 494
77
2
Owner's Manual_Europe_M99V08_en
2-1. Instrument cluster
Vehicle status information and indicators
*1: These lights come on when the
engine switch is turned to ON to indi-
cate that a system check is being
performed. They will turn off after the
engine is started, or after a few sec-
onds. There may be a malfunction in
a system if the lights do not come
on, or turn off. Have the vehicle
inspected by any authorized Toyota
retailer or Toyota authorized repairer,
or any reliable repairer.
*2: This light illuminates on the multi-
information display.
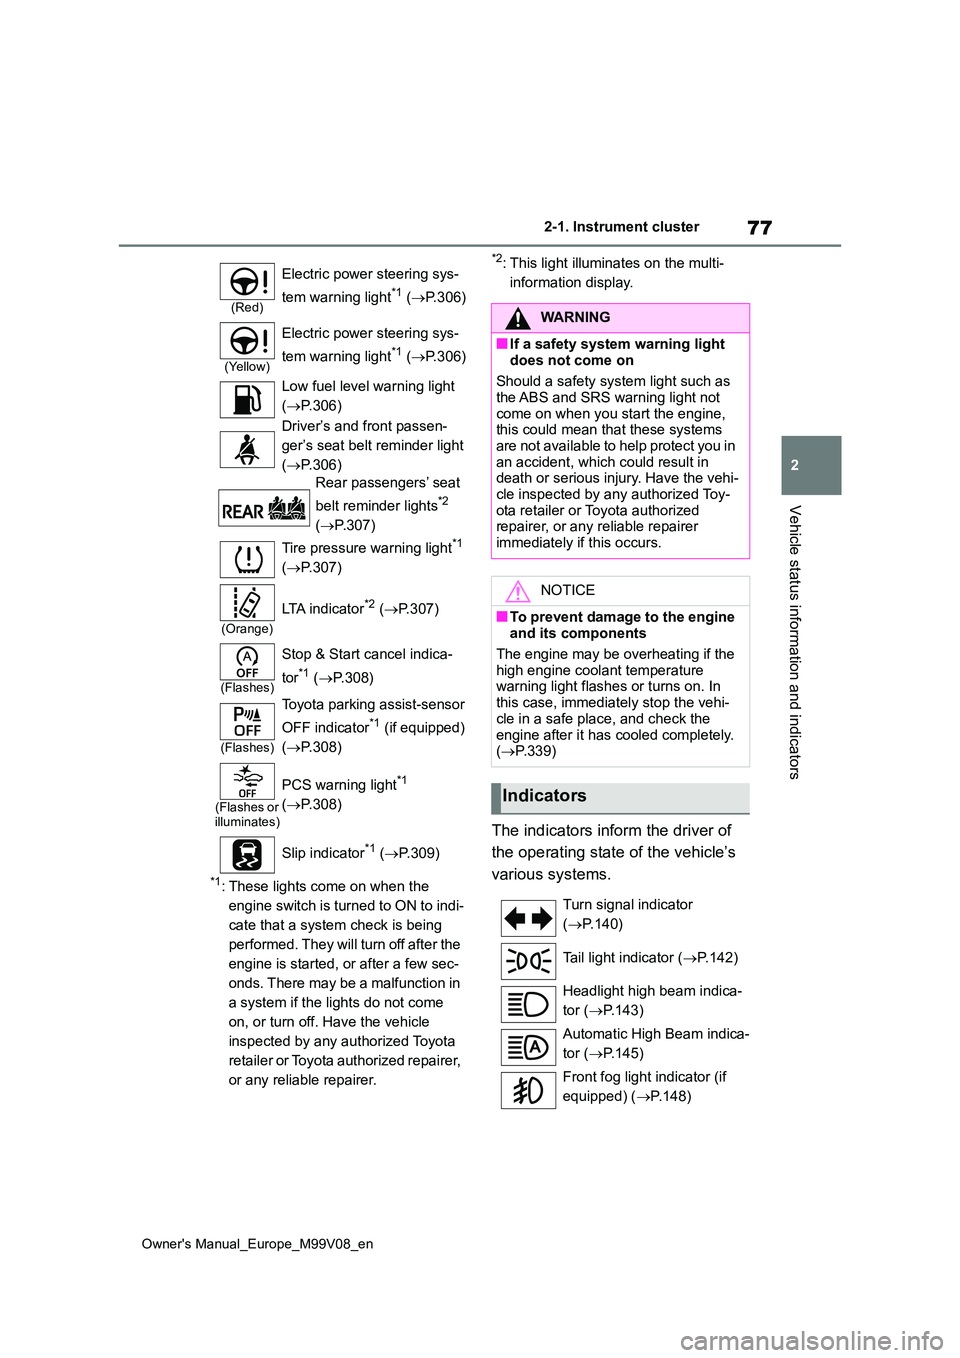
The indicators inform the driver of
the operating state of the vehicle’s
various systems.
(Red)
Electric power steering sys-
tem warning light*1 ( P.306)
(Yellow)
Electric power steering sys-
tem warning light*1 ( P.306)
Low fuel level warning light
( P.306)
Driver’s and front passen-
ger’s seat belt reminder light
( P.306)
Rear passengers’ seat
belt reminder lights*2
( P.307)
Tire pressure warning light*1
( P.307)
(Orange)
LTA indicator*2 (P.307)
(Flashes)
Stop & Start cancel indica-
tor*1 ( P.308)
(Flashes)
Toyota parking assist-sensor
OFF indicator*1 (if equipped)
( P.308)
(Flashes or illuminates)
PCS warning light*1
( P.308)
Slip indicator*1 ( P.309)
WARNING
■If a safety system warning light
does not come on
Should a safety system light such as the ABS and SRS warning light not
come on when you start the engine, this could mean that these systems are not available to help protect you in
an accident, which could result in death or serious injury. Have the vehi-cle inspected by any authorized Toy-
ota retailer or Toyota authorized repairer, or any reliable repairer immediately if this occurs.
NOTICE
■To prevent damage to the engine and its components
The engine may be overheating if the high engine coolant temperature warning light flashes or turns on. In
this case, immediately stop the vehi- cle in a safe place, and check the
engine after it has cooled completely. ( P.339)
Indicators
Turn signal indicator
( P.140)
Tail light indicator ( P.142)
Headlight high beam indica-
tor ( P.143)
Automatic High Beam indica-
tor ( P.145)
Front fog light indicator (if
equipped) ( P.148)
Page 80 of 494
78
Owner's Manual_Europe_M99V08_en
2-1. Instrument cluster
*1: These lights come on when the
engine switch is turned to ON to indi-
cate that a system check is being
performed. They will turn off after the
engine is started, or after a few sec-
onds. There may be a malfunction in
a system if the lights do not come
on, or turn off. Have the vehicle
inspected by any authorized Toyota
retailer or Toyota authorized repairer,
or any reliable repairer.
*2: This light comes on when the system
is turned off.
*3: This light illuminates on the multi-
information display.
*4: Depending on the operating condi-
tion, the color and illuminating/flash-
ing state of the light change.
*5: When the outside temperature is
approximately 3°C (37°F) or lower,
this indicator will flash for approxi-
mately 10 seconds, then stay on.
*6: This light illuminates on the center
panel.
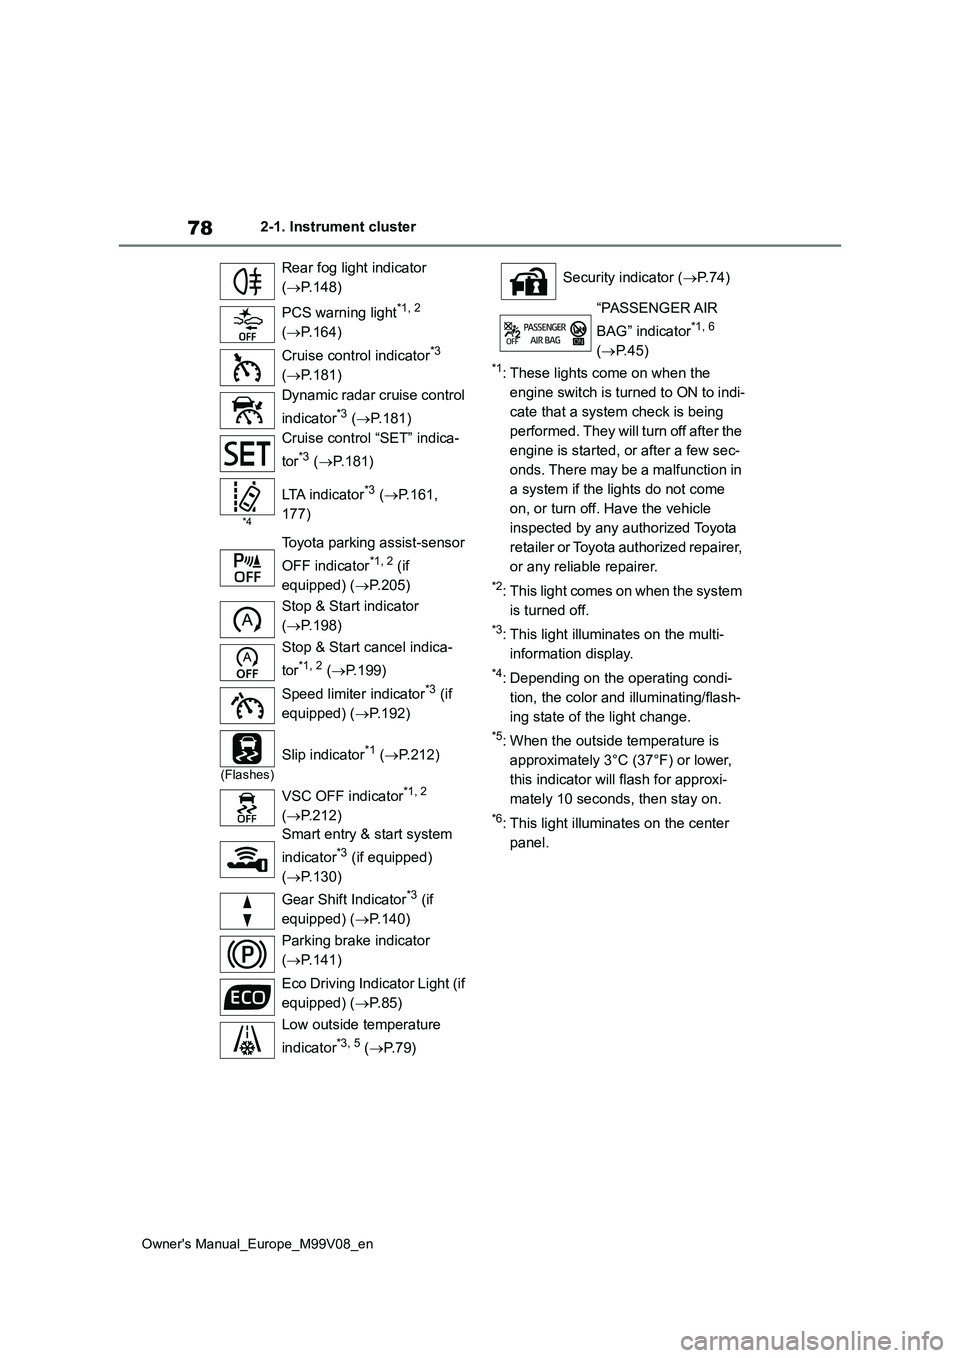
Rear fog light indicator
( P.148)
PCS warning light*1, 2
( P.164)
Cruise control indicator*3
( P.181)
Dynamic radar cruise control
indicator*3 ( P.181)
Cruise control “SET” indica-
tor*3 ( P.181)
*4
LTA indicator*3 (P.161,
177)
Toyota parking assist-sensor
OFF indicator*1, 2 (if
equipped) ( P.205)
Stop & Start indicator
( P.198)
Stop & Start cancel indica-
tor*1, 2 ( P.199)
Speed limiter indicator*3 (if
equipped) ( P.192)
(Flashes)
Slip indicator*1 (P.212)
VSC OFF indicator*1, 2
( P.212)
Smart entry & start system
indicator*3 (if equipped)
( P.130)
Gear Shift Indicator*3 (if
equipped) ( P.140)
Parking brake indicator
( P.141)
Eco Driving Indicator Light (if
equipped) ( P. 8 5 )
Low outside temperature
indicator*3, 5 ( P. 7 9 )
Security indicator (P. 7 4 )
“PASSENGER AIR
BAG” indicator*1, 6
( P.45)
Page 95 of 494
93
3
Owner's Manual_Europe_M99V08_en
3-1. Key information
Before driving
battery when necessary. (P.275)
• The wireless remote control does not operate.• The detection area becomes smaller.
■Key battery depletion (vehicles
with smart entry & start system)
●The standard battery life is 1 to 2
years.
●If the battery becomes low, an alarm
will sound in the cabin and a message will be shown on the multi-information display when the engine is stopped.
●To reduce key battery depletion when the electronic key is to not be used for
long periods of time, set the electronic key to the battery-saving mode. ( P.103)
●As the electronic key always receives radio waves, the battery will become
depleted even if the electronic key is not used. The following symptoms indicate that the electronic key battery
may be depleted. Replace the battery when necessary. ( P.275) • The smart entry & start system or the
wireless remote control does not oper- ate.• The detection area becomes smaller.
• The LED indicator on the key surface does not turn on.
●To avoid serious deterioration, do not leave the electronic key within 1 m (3 ft.) of the following electrical appli-
ances that produce a magnetic field: •TVs• Personal computers
• Cellular phones, cordless phones and battery chargers• Recharging cellular phones or cord-
less phones • Table lamps• Induction cookers
●If the electronic key is near the vehicle for longer than necessary, even if the
smart entry & start system is not oper- ated, the key battery may become depleted faster than normal.
■Replacing the battery
P. 2 7 5
■If “A New Key has been Registered
Contact Your Dealer for Details” is shown on the multi-information display (vehicles with smart entry &
start system)
This message will be displayed each time the driver’s door is opened when
the doors are unlocked from the outside for approximately 10 days after a new electronic key has been registered.
If this message is displayed but you have not had a new electronic key regis-tered, ask any authorized Toyota retailer
or Toyota authorized repairer, or any reli- able repairer to check if an unknown electronic key (other than those in your
possession) has been registered.
■If a wrong key is used (on some models)
The key cylinder rotates freely, isolated
from the internal mechanism.
NOTICE
■To prevent key damage
●Do not drop the keys, subject them
to strong shocks or bend them.
●Do not expose the keys to high
temperatures for long periods of time.
●Do not get the keys wet or wash them in an ultrasonic washer etc.
●Vehicles with smart entry & start system: Do not attach metallic or magnetic materials to the keys or
place the keys close to such materi- als.
●Do not disassemble the keys.
●Do not attach a sticker or anything
else to the surface of the key.
Page 106 of 494
104
Owner's Manual_Europe_M99V08_en
3-2. Opening, closing and locking the doors
wireless key that emits radio waves
• Personal computers or personal digi- tal assistants (PDAs)• Digital audio players
• Portable game systems
●If window tint with a metallic content or
metallic objects are attached to the rear window
●When the electronic key is placed near a battery charger or electronic devices
●When the vehicle is parked in a pay parking spot where radio waves are
emitted
If the doors cannot be locked/unlocked using the smart entry & start system,
lock/unlock the doors by performing any of the following:
●Bring the electronic key close to either front door handle and operate the entry function.
●Operate the wireless remote control.
If the doors cannot be locked/unlocked
using the above methods, use the mechanical key. ( P.334)
If the engine cannot be started using the
smart entry & start system refer to P.334.
■Note for the entry function
●Even when the electronic key is within the effective range (detection areas), the system may not operate properly
in the following cases: • The electronic key is too close to the window or outside door handle, near
the ground, or in a high place when the doors are locked or unlocked.• The electronic key is on the instru-
ment panel, luggage cover or floor, or glove box when the engine is started or engine switch modes are changed.
●Do not leave the electronic key on top of the instrument panel when exiting
the vehicle. Depending on the radio wave reception conditions, it may be detected by the antenna outside the
cabin and the door will become lock- able from the outside, possibly trap-
ping the electronic key inside the
vehicle.
●As long as the electronic key is within
the effective range, the doors may be locked or unlocked by anyone. How-ever, only the doors detecting the
electronic key can be used to unlock the vehicle.
●Even if the electronic key is not inside the vehicle, it may be possible to start the engine if the electronic key is near
the window.
●If the wireless remote control is used
to lock the doors when the electronic key is near the vehicle, there is a pos-sibility that the door may not be
unlocked by the entry function. (Use the wireless remote control to unlock the doors.)
●If the door handle becomes wet while the electronic key is within the effec-
tive range, the door may lock and unlock repeatedly. In that case, follow the following correction procedures to
wash the vehicle: • Place the electronic key in a location 2 m (6 ft.) or more away from the vehi-
cle. (Take care to ensure that the key is not stolen.)• Set the electronic key to battery-sav-
ing mode to disable the smart entry & start system. ( P.103)
■Note for the unlocking function
●There are cases when pulling the door handle while pressing the Lock/Unlock button that the door will
not unlock. In those cases, after returning the door handle to the origi-nal position, press the Lock/Unlock
button once again and check that the doors unlock before pulling the door handle.
●If there is another electronic key in the detection area, it may take slightly lon-
ger for the doors to unlock after the Lock/Unlock button is pressed.
■When the vehicle is not driven for extended periods
●To prevent theft of the vehicle, do not
Page 116 of 494
114
Owner's Manual_Europe_M99V08_en
3-5. Opening, closing the windows and canvas top
3-5.Opening, closing the windows an d c anva s top
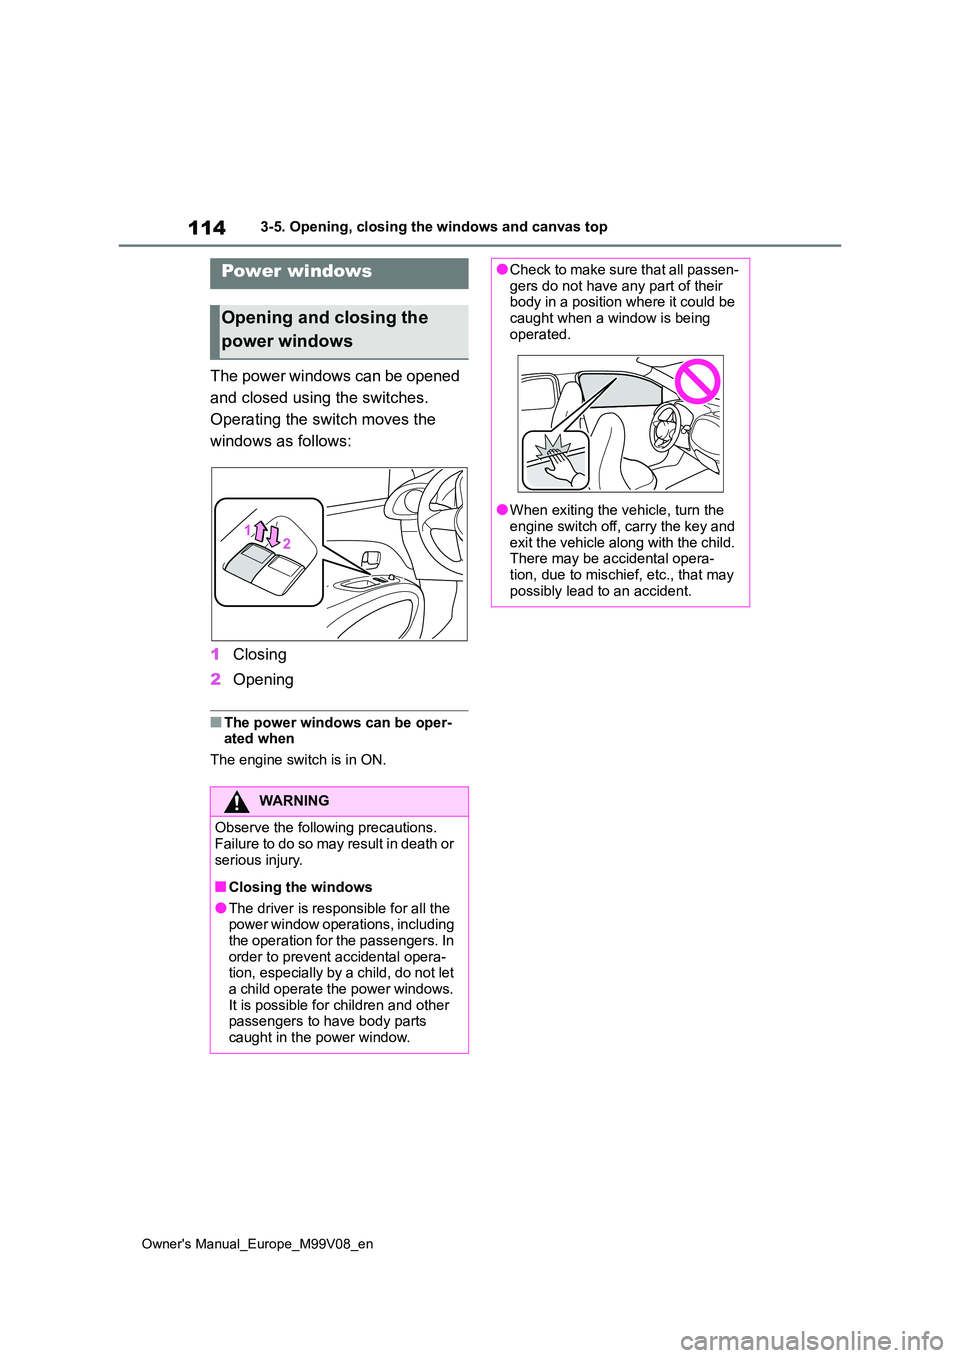
The power windows can be opened
and closed using the switches.
Operating the switch moves the
windows as follows:
1 Closing
2 Opening
■The power windows can be oper- ated when
The engine switch is in ON.
Power windows
Opening and closing the
power windows
WARNING
Observe the following precautions. Failure to do so may result in death or
serious injury.
■Closing the windows
●The driver is responsible for all the power window operations, including the operation for the passengers. In
order to prevent accidental opera- tion, especially by a child, do not let a child operate the power windows.
It is possible for children and other passengers to have body parts caught in the power window.
●Check to make sure that all passen-gers do not have any part of their body in a position where it could be
caught when a window is being operated.
●When exiting the vehicle, turn the
engine switch off, carry the key and exit the vehicle along with the child. There may be accidental opera-
tion, due to mischief, etc., that may possibly lead to an accident.
Page 118 of 494
116
Owner's Manual_Europe_M99V08_en
3-5. Opening, closing the windows and canvas top
*: If equipped
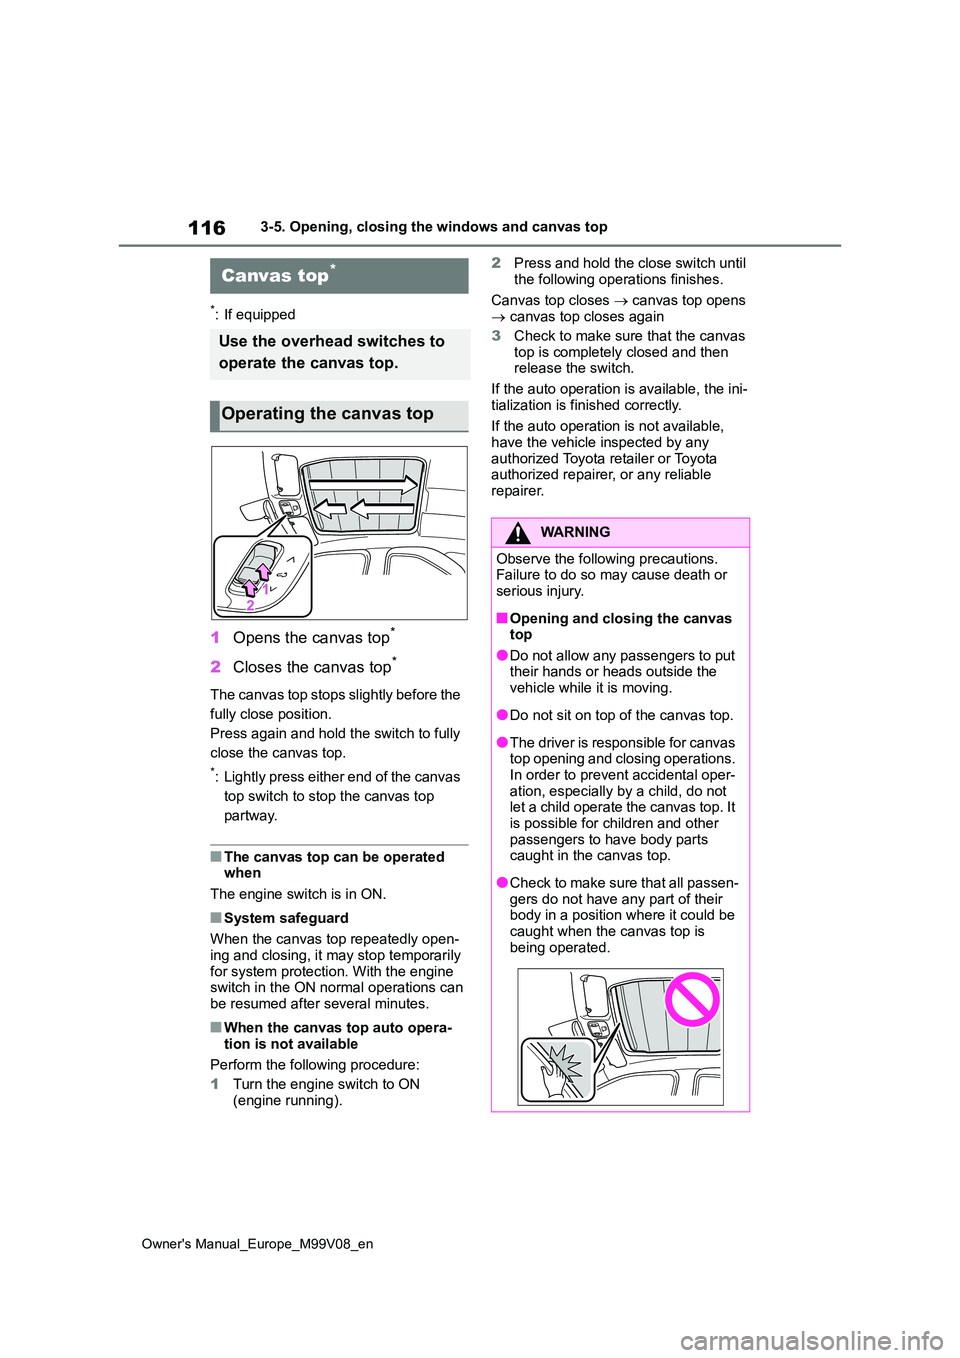
1Opens the canvas top*
2Closes the canvas top*
The canvas top stops slightly before the
fully close position.
Press again and hold the switch to fully
close the canvas top.
*: Lightly press either end of the canvas
top switch to stop the canvas top
partway.
■The canvas top can be operated when
The engine switch is in ON.
■System safeguard
When the canvas top repeatedly open- ing and closing, it may stop temporarily
for system protection. With the engine switch in the ON normal operations can be resumed after several minutes.
■When the canvas top auto opera-
tion is not available
Perform the following procedure:
1 Turn the engine switch to ON (engine running).
2 Press and hold the close switch until
the following operations finishes.
Canvas top closes canvas top opens canvas top closes again
3 Check to make sure that the canvas
top is completely closed and then release the switch.
If the auto operation is available, the ini-
tialization is finished correctly.
If the auto operation is not available, have the vehicle inspected by any
authorized Toyota retailer or Toyota authorized repairer, or any reliable repairer.
Canvas top*
Use the overhead switches to
operate the canvas top.
Operating the canvas top
WARNING
Observe the following precautions. Failure to do so may cause death or serious injury.
■Opening and closing the canvas top
●Do not allow any passengers to put their hands or heads outside the vehicle while it is moving.
●Do not sit on top of the canvas top.
●The driver is responsible for canvas top opening and closing operations. In order to prevent accidental oper-
ation, especially by a child, do not let a child operate the canvas top. It is possible for children and other
passengers to have body parts caught in the canvas top.
●Check to make sure that all passen-gers do not have any part of their body in a position where it could be
caught when the canvas top is being operated.
Page 122 of 494
120
Owner's Manual_Europe_M99V08_en
4-1. Before driving
4-1.Before driv in g
■Starting the engine
129, 130
■Driving
Multidrive
1 With the brake pedal depressed,
shift the shift lever to D.
( P.135)
2 Release the parking brake.
( P.141)
3 Gradually release the brake
pedal and gently depress the
accelerator pedal to accelerate
the vehicle.
Manual transmission
1 While depressing the clutch
pedal, shift the shift lever to 1.
( P.139)
2 Release the parking brake.
( P.141)
3 Gradually release the clutch
pedal. At the same time, gently
depress the accelerator pedal to
accelerate the vehicle.
■Stopping
Multidrive
1 With the shift lever in D, depress
the brake pedal.
If the Stop & Start system is enabled,
depressing the brake pedal will stop the engine. ( P.198)
2If necessary, set the parking
brake.
If the vehicle is to be stopped for an extended period of time, shift the shift lever to P. ( P.135)
Manual transmission
1 While depressing the clutch
pedal, depress the brake pedal.
2 If necessary, set the parking
brake.
If the vehicle is to be stopped for an
extended period of time, shift the shift lever to N. ( P.139)
If the Stop & Start system is enabled,
shifting the shift lever to N and releas- ing the clutch pedal will stop the engine. ( P.198)
■Parking the vehicle
Multidrive
1 With the shift lever in D, depress
the brake pedal to stop the vehi-
cle completely.
2 Set the parking brake (P.141),
and shift the shift lever to P.
( P.135)
Check the parking brake indicator is
illuminated.
3 Turn the engine switch to OFF
to stop the engine.
4 Slowly release the brake pedal.
5 Lock the door, making sure that
you have the key on your per-
son.
If parking on a hill, block the wheels as
needed.
Driving the vehicle
The following procedures
should be observed to ensure
safe driving:
Driving procedure
Page 123 of 494
121
4
Owner's Manual_Europe_M99V08_en
4-1. Before driving
Driving
Manual transmission
1 While depressing the clutch
pedal, depress the brake pedal.
2 Set the parking brake. (P.141)
Check that the parking brake indicator
is illuminated.
3 Shift the shift lever to N.
( P.139)
If parking on a hill, shift the shift lever to
1 or R and block the wheels as needed.
4 Turn the engine switch to OFF
to stop the engine.
5 Slowly release the brake pedal.
6 Lock the door, making sure that
you have the key on your per-
son.
■Starting off on a steep uphill
Multidrive
1 Make sure that the parking
brake is set and shift the shift
lever to D.
2 Gently depress the accelerator
pedal.
3 Release the parking brake.
Manual transmission
1 Make sure that the parking
brake is set and shift the shift
lever to 1.
2 Lightly depress the accelerator
pedal at the same time as grad-
ually releasing the clutch pedal.
3 Release the parking brake.
■Driving in the rain
●Drive carefully when it is raining, because visibility will be reduced, the
windows may become fogged-up, and
the road will be slippery.
●Drive carefully when it starts to rain,
because the road surface will be especially slippery.
●Refrain from high speeds when driv-ing on an expressway in the rain, because there may be a layer of water
between the tires and the road sur- face, preventing the steering and brakes from operating properly.
■Engine speed while driving (vehi-
cles with Multidrive)
In the following conditions, the engine speed may become high while driving.
This is due to automatic up-shifting con- trol or down-shifting implementation to meet driving conditions. It does not indi-
cate sudden acceleration.
●The vehicle is judged to be driving
uphill or downhill
●When the accelerator pedal is
released
●When the brake pedal is depressed
while power mode is selected
■Restraining the engine output (Brake Override System)
●When the accelerator and brake ped-als are depressed at the same time, the engine output may be restrained.
●A warning message is displayed on the multi-information display while the
system is operating.
■Breaking in your new Toyota
To extend the life of the vehicle, observ- ing the following precautions is recom-
mended:
●For the first 300 km (186 miles):
Avoid sudden stops.
●For the first 1000 km (621 miles): • Do not drive at extremely high
speeds. • Avoid sudden acceleration.• Do not drive continuously in low
gears. • Do not drive at a constant speed for