Setting TOYOTA BZ4X 2022 Owners Manual (in English)
[x] Cancel search | Manufacturer: TOYOTA, Model Year: 2022, Model line: BZ4X, Model: TOYOTA BZ4X 2022Pages: 674, PDF Size: 120.02 MB
Page 5 of 674
3
Owners Manual_Europe_M42D76_en
TABLE OF CONTENTS
1
6
5
4
3
2
8
7
9
Smart entry & start system . 203
4-3. Adjusting the seats
Front seats .......................... 208
Rear seats .......................... 209
Head restraints ................... 211
4-4. Adjusting the steering wheel
and mirrors
Steering wheel .................... 215
Inside rear view mirror ........ 216
Outside rear view mirrors.... 217
4-5. Opening, closing the windows
Power windows ................... 219
4-6. Favorite settings
Driving position memory ..... 222
My Settings ......................... 226
5-1. Before driving
Driving the vehicle .............. 229
Cargo and luggage ............. 235
Trailer towing ...................... 237
5-2. Driving procedures
Power (ignition) switch ........ 243
Transmission....................... 247
Turn signal lever ................. 253
Parking brake...................... 254
Brake Hold .......................... 257
5-3. Operating the lights and wip-
ers
Headlight switch.................. 259
AHS (Adaptive High-beam Sys-
tem) .................................. 262
AHB (Automatic High Beam)
.......................................... 265
Fog light switch ................... 268
Windshield wipers and washer
.......................................... 269
5Driving
Page 78 of 674

76
Owners Manual_Europe_M42D76_en
1-4. Theft deterrent system
*: If equipped
■Setting
Turn the power switch off, have all
the passengers exit the vehicle and
ensure that all the doors are closed.
Using the entry function:
Touch the sensor area on the out-
side door handle twice within 5 sec-
onds.
Using the wireless remote control:
Press twice within 5 seconds.
■Canceling
Using the entry function: Hold the
outside door handle.
Using the wireless remote control:
Press .
Double locking system*
Unauthorized access to the
vehicle is prevented by dis-
abling the door unlocking
function from both the interior
and exterior of the vehicle.
Vehicles employing this sys-
tem have labels on the side
window of both front doors.
Setting/canceling the double
locking system
WARNING
■Double locking system precau- tion
Never activate the double locking sys- tem when there are people in the vehicle, because all the doors cannot
be opened from inside the vehicle.
Page 79 of 674
77
1
Owners Manual_Europe_M42D76_en
1-4. Theft deterrent system
For safety and security
*: If equipped
■Items to check before locking
the vehicle
To prevent unexpected triggering of
the alarm and vehicle theft, make
sure of the following.
Nobody is in the vehicle.
The windows are closed before
the alarm is set.
No valuables or other personal
items are left in the vehicle.
■Setting
Close the doors and hood, and lock
all the doors using the entry func-
tion or wireless remote control. The
system will be set automatically
after 30 seconds.
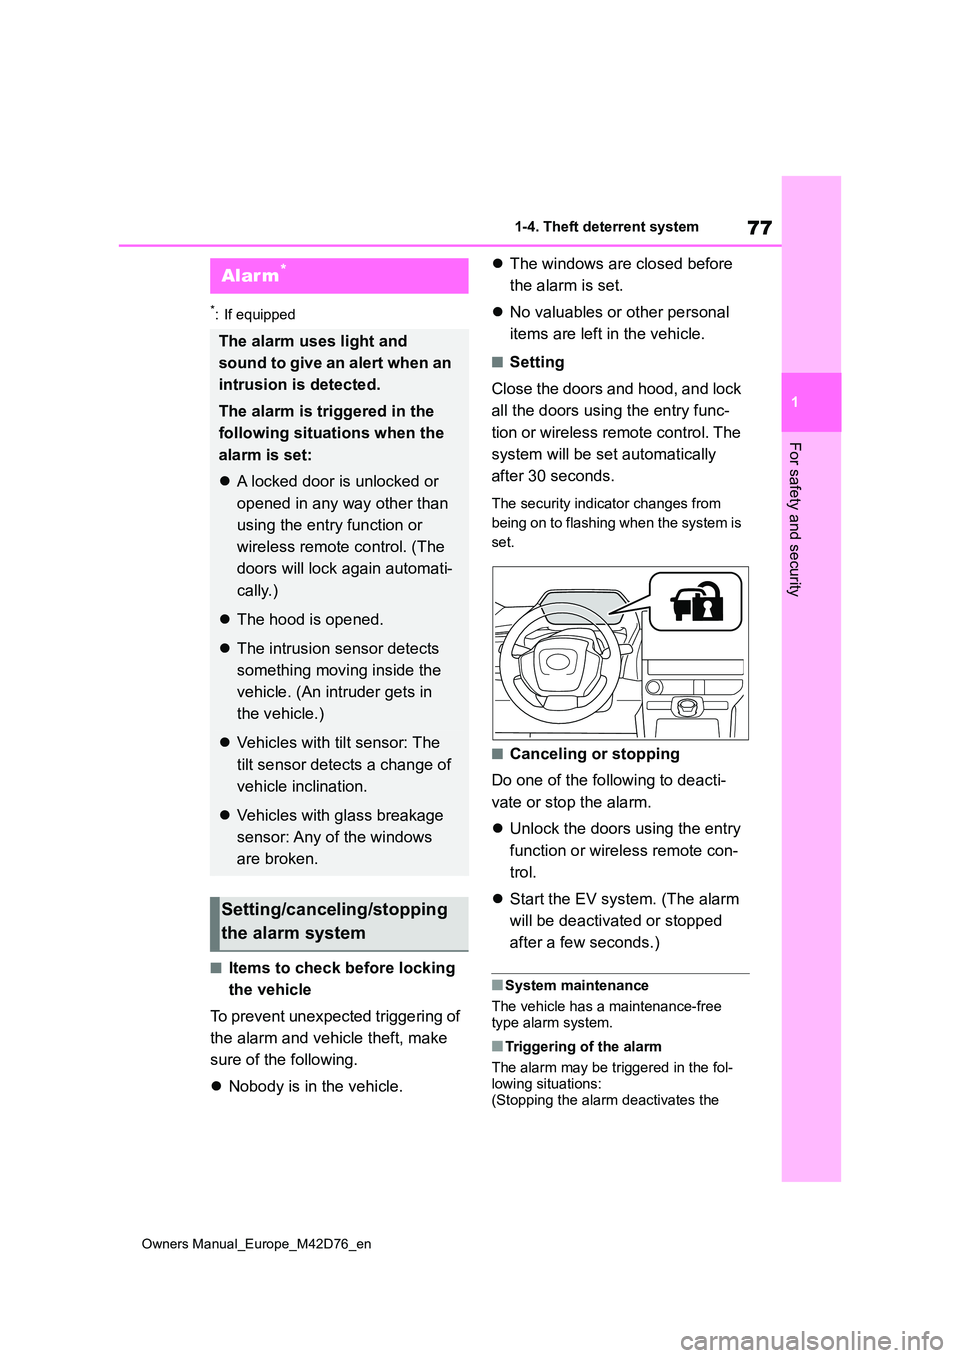
The security indicator changes from
being on to flashing when the system is
set.
■Canceling or stopping
Do one of the following to deacti-
vate or stop the alarm.
Unlock the doors using the entry
function or wireless remote con-
trol.
Start the EV system. (The alarm
will be deactivated or stopped
after a few seconds.)
■System maintenance
The vehicle has a maintenance-free type alarm system.
■Triggering of the alarm
The alarm may be triggered in the fol-
lowing situations: (Stopping the alarm deactivates the
Alarm*
The alarm uses light and
sound to give an alert when an
intrusion is detected.
The alarm is triggered in the
following situations when the
alarm is set:
A locked door is unlocked or
opened in any way other than
using the entry function or
wireless remote control. (The
doors will lock again automati-
cally.)
The hood is opened.
The intrusion sensor detects
something moving inside the
vehicle. (An intruder gets in
the vehicle.)
Vehicles with tilt sensor: The
tilt sensor detects a change of
vehicle inclination.
Vehicles with glass breakage
sensor: Any of the windows
are broken.
Setting/canceling/stopping
the alarm system
Page 80 of 674
78
Owners Manual_Europe_M42D76_en
1-4. Theft deterrent system
alarm system.)
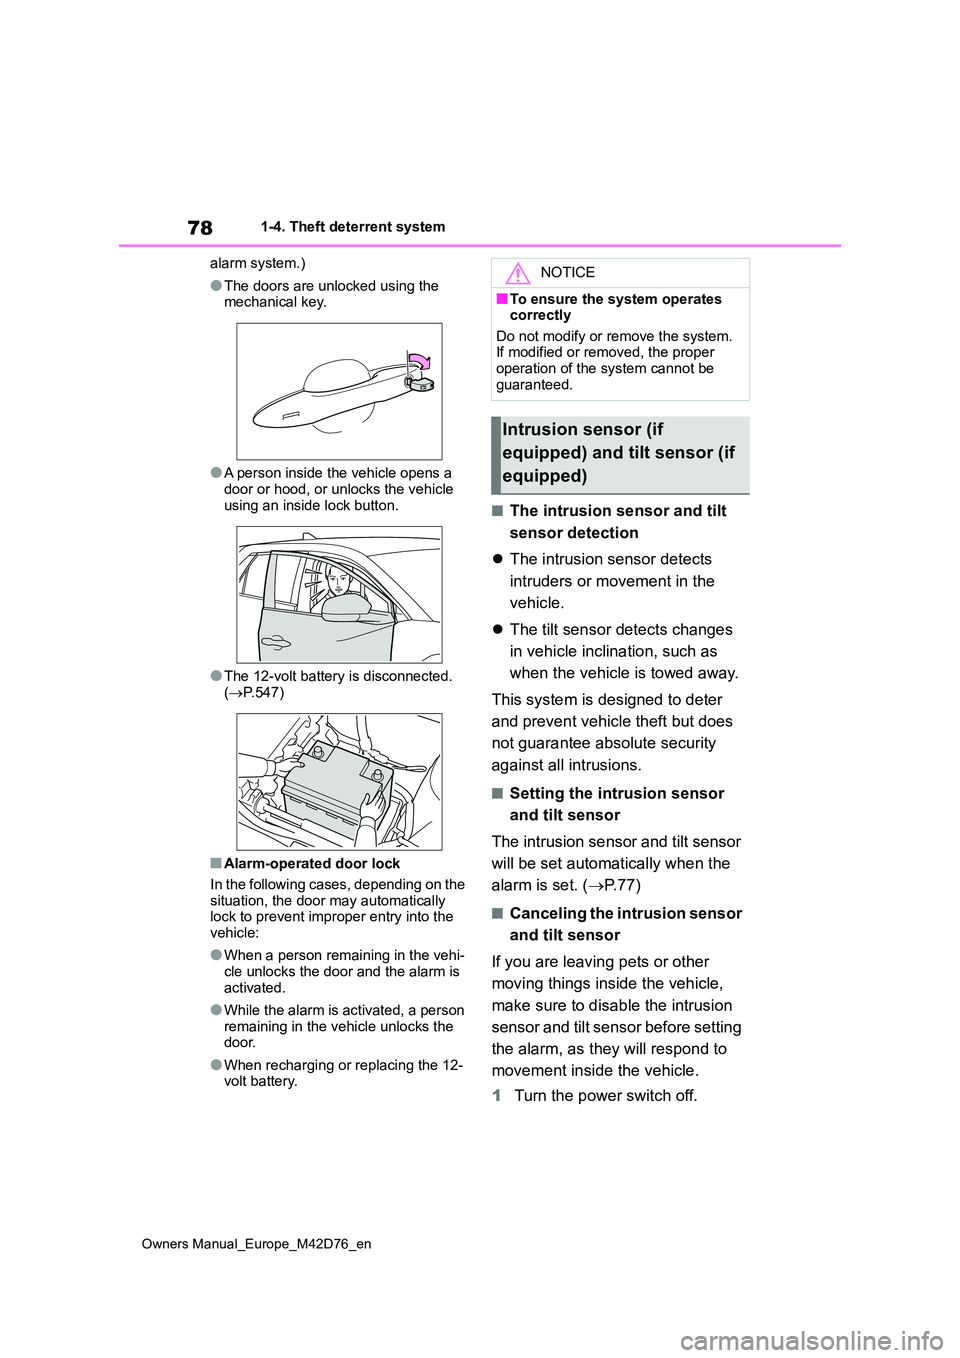
●The doors are unlocked using the mechanical key.
●A person inside the vehicle opens a door or hood, or unlocks the vehicle
using an inside lock button.
●The 12-volt battery is disconnected.
( P.547)
■Alarm-operated door lock
In the following cases, depending on the situation, the door may automatically lock to prevent improper entry into the
vehicle:
●When a person remaining in the vehi-
cle unlocks the door and the alarm is activated.
●While the alarm is activated, a person remaining in the vehicle unlocks the door.
●When recharging or replacing the 12-volt battery.
■The intrusion sensor and tilt
sensor detection
The intrusion sensor detects
intruders or movement in the
vehicle.
The tilt sensor detects changes
in vehicle inclination, such as
when the vehicle is towed away.
This system is designed to deter
and prevent vehicle theft but does
not guarantee absolute security
against all intrusions.
■Setting the intrusion sensor
and tilt sensor
The intrusion sensor and tilt sensor
will be set automatically when the
alarm is set. ( P. 7 7 )
■Canceling the intrusion sensor
and tilt sensor
If you are leaving pets or other
moving things inside the vehicle,
make sure to disable the intrusion
sensor and tilt sensor before setting
the alarm, as they will respond to
movement inside the vehicle.
1 Turn the power switch off.
NOTICE
■To ensure the system operates correctly
Do not modify or remove the system. If modified or removed, the proper operation of the system cannot be
guaranteed.
Intrusion sensor (if
equipped) and tilt sensor (if
equipped)
Page 114 of 674
112
Owners Manual_Europe_M42D76_en
2-2. Charging
Connect to an AC 220 V - 240 V
socket with a Residual Current
Circuit-Breaker (RCCB) and a
circuit breaker. Use of a 13A indi-
vidual circuit is strongly recom-
mended to ensure AC charging
cable will operate properly.
We strongly recommend that you
use an exclusive connection
from the junction box for
charging. If you connect on a
socket that is on a shared circuit,
and other electrical appliances
are used on other sockets on the
same circuit, then the circuit
breaker might trip.*
Ensure that the junction box is
equipped with a Residual Cur-
rent Circuit-Breaker (RCCB). If it
is not, have one installed by a
duly qualified professional.
When charging outdoors, make
sure to connect to a rain-tight
socket that is certified for outdoor
use. Checking Residual Current
Circuit-Breaker (RCCB) opera-
tion before its use is recom-
mended.
• Check whether there are any local
BEV-charging regulations in place,
and adhere to them.
*: For detailed information, consult an
electrician.
■The charging environment
For safe charging, the following charging equipment and settings are recommended.
●Rain-tight socket
When charging outdoors, connect the
plug to a rain-tight socket, and ensure
that the plug remains waterproof while
the plug is connected.
●Dedicated circuit • To reduce the risk of fire, connect only to an at least 13A branch circuit with
an over-current protection. • To reduce the risk of electric shock when working with the plug, connect
to a socket that has a Residual Cur- rent Circuit-Breaker (RCCB) installed.
●Remote switch
Allows the electricity from the socket to
be interrupted by operating a switch,
thus allowing safe removal and insertion
of the plug on rainy days.
Power sources that can
be used
An external power source that
fulfills the follo wing criteria is
necessary for charging this
vehicle.
Confirm this before charging.
WARNING
■Warnings for electrical faults
Make sure to observe the precautions
in this Owner’s Manual when charging the vehicle.
Failure to use a power source that ful-
fills the requirements, or failure to observe the regulations while charging could lead to an accident,
possibly resulting in death or serious injury.
Power sources
Page 116 of 674
114
Owners Manual_Europe_M42D76_en
2-2. Charging
■AC charging (P.121)
This is a charging method used
when charging from an AC socket
with the AC charging cable or
charging that uses AC charger.
By setting charging schedule, it is also
possible to charge at the desired date
and time. ( P.134)
■DC charging (P.129)
This charging method uses a DC
charger that complies with IEC
61851 and IEC 62196. The traction
battery can be charged in a shorter
time than AC charging.
IEC is an abbreviation for an inter-
national standard established by
the International Electrotechnical
Commission.
■Solar charging system*
( P.148)
*: If equipped
In certain conditions, when the
vehicle is parked, the traction bat-
tery can be charged by using elec-
tricity generated by the solar panel
equipped to the roof of the vehicle.
This vehicle is equipped with sev-
eral functions that are linked with
charging.
■My Room Mode ( P.145)
When the charging cable is con-
nected to the vehicle, electrical
components such as the air condi-
tioning system and audio system
can be used by the power supply
from an external power source*.
*: Depending on the situation, electricity
of the traction battery may be con-
sumed.
■Traction battery heater
When the outside temperature is
low and the charging cable is con-
nected to the vehicle, this function
automatically warms the traction
battery until it reaches or exceeds a
certain temperature.
The operation of this function is
stopped automatically when the
charging cable is disconnected
or if the charging cable is left
connected to the vehicle for
approximately 3 days.
When the charging schedule is
used ( P.134), this function will
operate according to the sched-
ule settings.
■Traction battery warming con-
trol
This control operates after the
charging cable remains connected
to the vehicle for approximately 3
Charging methods
The following methods can be
used to charge the traction
battery.
Types of charging methods
Charging-linked functions
Page 117 of 674
115
2
Owners Manual_Europe_M42D76_en
2-2. Charging
Electric Vehicle system
days and the traction battery heater
automatically stops. It automatically
insulates the traction battery in
extremely low temperatures.
This control stops 31 days after
the charging cable is connected,
even if it is still connected to the
vehicle.
When this control operates,
charging schedule settings are
ignored and charging starts
immediately.
■Traction battery cooler
When the traction battery is hot and
the AC charging cable is connected
to the vehicle, this function cools
the traction battery to protect it.
The function may operate when
continuously driving at high speeds
such as driving on highways or
freeways, or during DC charging.
■Using My Room Mode during DC charging
P. 1 4 6
■Traction battery heater
●Traction battery heater may operate when charging is not being performed.
●When Traction battery heater is oper-ating, the charging indicator will illumi-
nate.
●When Traction battery heater is oper-
ating during charging, the charging may take longer than normal.
●The remaining charge of the traction battery declines when the traction bat-tery heater operates, it might be nec-
essary to recharge the traction battery again in order to supplement the remaining charge.
■Traction battery cooler
●For AC charging: Traction battery cooler settings can be changed on the
multi-information display. ( P.115)
●The charging indicator will illuminate
when the traction battery cooler is on standby or operating.
●When the charge level of the traction battery is low, the traction battery cooler may not operate, even if the
temperature of the traction battery is high.
●When the following conditions are met while the traction battery cooler is operating, the cooling operation will
stop. • The hood is opened• The power switch is turned to ACC or
ON. • The shift position is changed to any position other than P
• The Remote Air Conditioning System is operated ( P.427) • The remaining charge of the traction
battery drops below a certain amount
●The traction battery cooler operates
using power supplied by the traction battery and an external power source.• While the traction battery cooler is
operating, the charge of the traction battery will increase and decrease within a certain range, and will not
increase as during AC charging. • When the traction battery cooler oper-ates, charger will recognize it as the
battery being charged. If this function operates while a charger which charges a charging fee is connected
to the vehicle, AC charging fees will apply.
■Changing of the traction battery cooler setting
Setting can be changed on the
multi-information display.
Use the meter control switches
( P.176) and select “Vehicle Settings”, “Charging Settings”, “Battery Cooler”, and change the setting.
Page 121 of 674
119
2
Owners Manual_Europe_M42D76_en
2-2. Charging
Electric Vehicle system
Before charging, always check the
following items.
The parking brake is applied.
( P.254)
The power switch is turned to
OFF. ( P.243)
Lights such as the headlights,
emergency flashers and interior
lights, etc., are turned off.
If these light switches are turned on,
then these features will consume elec-
tricity, and charging time will increase.
Before charging, make sure that
each part of the AC charging cable
is in good condition. ( P.106)
■During charging
●The charging starting time may differ
depending on the state of the vehicle, but this does not indicate a malfunc-
tion.
●During charging, sounds may be
heard from near the traction battery in accordance with the operation of the air conditioning system or “Battery
Cooler” ( P.115).
●During and after charging, the motor
compartment and its surrounding area in which the onboard traction battery charger is installed may get warm.
●The surface of the CCID (Charging Circuit Interrupting Device) may
become hot, but this does not indicate a malfunction.
●Depending on radio wave conditions,
interference may be heard on the
radio.
■When charging using a public charging facility
●When charging using a public charging facility, check the setting of the charging schedule function.
• When the charging schedule is regis- tered, temporarily turn off the function or turn “Charge Now” on. ( P.134)
• When the charging schedule is set to on, charging will not start even if the AC charging cable is connected. Also,
charging fee may occur due to con- nection of the AC charging cable.
■Capacity reduction of the traction battery
The capacity of the traction battery will decline gradually when the traction bat-tery is in use. The rate at which it
declines will differ in accordance with environmental conditions and the way in which the vehicle is used. Observing the
following can help suppress the decline in the traction battery capacity.
●Avoid parking the vehicle in high tem-perature areas, under direct sunlight when the traction battery is fully
charged.
●Avoid accelerating and decelerating
frequently and suddenly.
●Avoid frequent driving at high speed.
●Use the charging schedule function as much as possible in order to fully
charged the traction battery before starting off. ( P.134)
●Avoid frequent DC charging
Also, if the capacity of the traction bat-
tery capacity reduces, the distance that
can be driven decreases. However,
vehicle performance does not signifi-
cantly become worse.
■When the remaining charge of the traction battery is low after charging
In the following situations, the remaining charge of the traction battery after
Confirm the following before
charging
Inspecting the AC charging
cable
Page 122 of 674
120
Owners Manual_Europe_M42D76_en
2-2. Charging
charging completes may be less than
normal in order to protect the traction battery (the driving range after the bat-
tery is fully charged may be shorter).*
●Charging is performed when the out- side temperature is low or high
●Charging is performed immediately after high-load driving or in extreme
heat
In any other situation, if the remaining
charge of the traction battery is signifi-
cantly lower than normal after charging
completes, have the vehicle inspected
by any authorized Toyota retailer or
Toyota authorized repairer, or any reli-
able repairer.
*: When this occurs, even if the remain-
ing charge display of the traction bat-
tery shows that it is fully charged, the
remaining charge rapidly decreases
faster than normal.
■When the charging amount sent to the traction battery decreases
When the amount of power supplied by
the charger is low or operation of the battery heater, etc., reduces the charging power sent to the traction bat-
tery, the charging amount sent to the traction battery may decrease.
■Charging time may increase
In the following situations, charging time
may become longer than normal:
●In very hot or very cold temperatures.
●When the traction battery becomes hot, such as immediately after high-
load driving.
●The vehicle is consuming a lot of elec-
tricity, for example, when the head- lights are on, etc.
●When using “My Room Mode”. ( P.145)
●There is a power outage during charging.
●There is an interruption in the electri-cal supply.
●There is a drop in the voltage of exter-
nal power source.
●The charge in the 12-volt battery is
low, for example due to the vehicle being left unused for a long period of time.
●When the upper limit of charging cur-rent is changed in the charging cur-
rent setting of the vehicle ( P.124)
●When the battery heater operates.
( P. 1 1 5 )
●When the “Battery Cooler” is operated
before charging. ( P. 1 1 5 )
●When the plug generates heat due to
a loose socket connection, etc.
●When adjusting the power supply with
the charger.
●When frequently and repeatedly using
DC charging.
●When selecting “DC charging power”
setting other than “MAX”.
●When the temperature of charging-
related parts is high.
■Charging electricity
This vehicle can be charged up to approximately 7 kW.
However, depending on the used char- ger or AC charging cable, charging elec-tricity may be limited.
Page 126 of 674
124
Owners Manual_Europe_M42D76_en
2-2. Charging
■Safety function
Charging will not start when the charging connector is not locked.
If the charging indicator does not illumi-
nate even when the charging connector is inserted, remove and reinsert the con-nector, and then check that the charging
indicator of the charging port illuminates.
■Charging time may increase
P. 1 2 0
■Charging at a public charging sta- tion with authentication function
When a door is unlocked during charging, the charging connector is unlocked and charging will be stopped.
In this case, the charging station authentication is canceled and charging may not be able to restart. Reconnect
the charging connector and perform authentication for the charging station.
■When your circuit breaker trips during charging
The upper limit of the charging current can be changed on the multi-information display or multimedia.
●Setting operations on multi-informa-tion display
1 Press or of the meter control
switches to select .
2 Press or of the meter control
switches to select “Vehicle Settings”,
and then press and hold .
3 Press or of the meter control
switches to select “Charging Set-
tings”, and then press .
The “Charging Settings” screen will be displayed.
4 Press or of the meter control
switches to select “Charging Cur-
rent”, and then press .
The “Charging Current” screen will be
displayed.
5 Press or of the meter control
switches to select “16A” or “8A” and
then press .
●Setting operations on multimedia
1 Select .
2 Select “Vehicle customize”.
3 Select “Charging”.
4 Select “Charging current”.
5 Select “16A” or “8A”.
The maximum charging current is lim-
ited to less than or equal to the selected
current.*
If the breaker still trips while charging,
even after changing the upper limit of the charging current, check if the con-nected power source meets the speci-
fied charging conditions. ( P.112)*: Restricting the charging current will
lengthen the charging time.
■Changing the “Charging Limit” set- tings
The upper limit of the charge capacity
can be changed on the multi-information display or multimedia.
The selected upper limit value is com-
mon to AC charging and DC charging.
●Setting operations on multi-informa-
tion display
1 Press or of the meter control
switches to select .
2 Press or of the meter control
switches to select “Vehicle Settings”,
and then press and hold .
3 Press or of the meter control
switches to select “Charging Set-
tings”, and then press .