belt TOYOTA C-HR 2022 Service Manual
[x] Cancel search | Manufacturer: TOYOTA, Model Year: 2022, Model line: C-HR, Model: TOYOTA C-HR 2022Pages: 818, PDF Size: 113.75 MB
Page 162 of 818
1602. Instrument cluster
C-HR_HV_OM_Europe_OM10720E
*1: These lights turn on when the power switch is turned to ON mode to indi-
cate that a system check is being performed. They will turn off after the
hybrid system is on, or after a few seconds. There may be a mal function in
a system if a light does not come on, or if the lights do not t urn off. Have
the vehicle inspected by any authorized Toyota retailer or Toyo ta autho-
rized repairer, or any reliable repairer.
*2: The light flashes to indicate a malfunction.
*3: The light comes on to indicate a malfunction.
*4: The light flashes or illuminates to indicate a malfunction.
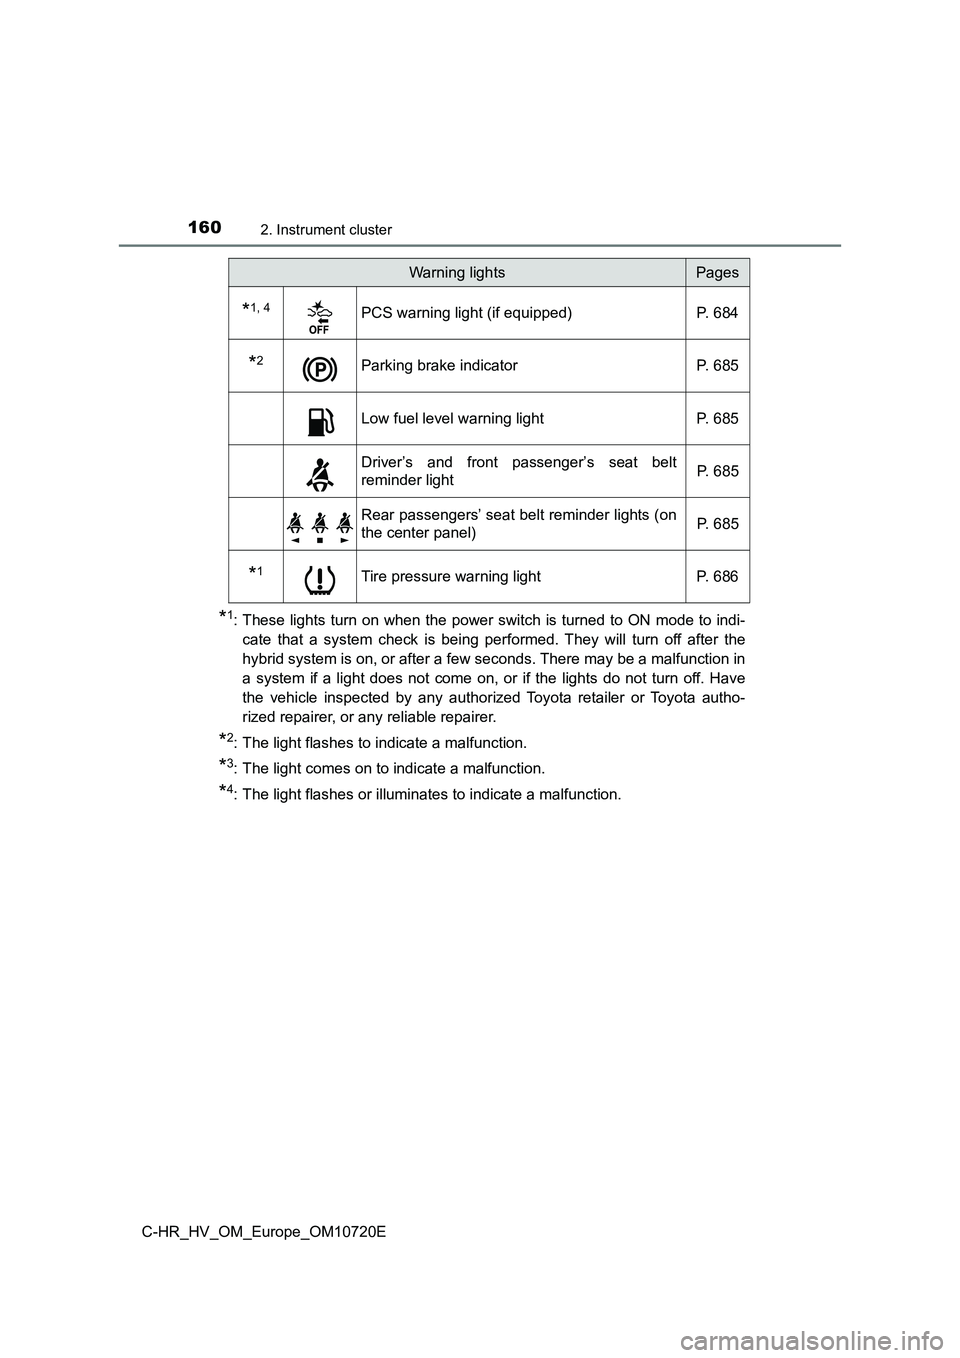
*1, 4PCS warning light (if equipped) P. 684
*2Parking brake indicator P. 685
Low fuel level warning light P. 685
Driver’s and front passenger’s seat belt
reminder light P. 6 8 5
Rear passengers’ seat belt reminder lights (on
the center panel) P. 6 8 5
*1Tire pressure warning light P. 686
Warning lightsPages
Page 265 of 818
2633-3. Adjusting the seats
3
Operation of each component
C-HR_HV_OM_Europe_OM10720E
WARNING
■When adjusting the seat position
● Take care when adjusting the seat position to ensure that other passen-
gers are not injured by the moving seat.
● Do not put your hands under the seat or near the moving parts to avoid
injury.
Fingers or hands may become jammed in the seat mechanism.
● Make sure to leave enough space around the feet so they do not get stuck.
■ Seat adjustment
● Be careful that the seat does not hit passengers or luggage.
● To reduce the risk of sliding under the lap belt during a collision, do not
recline the seat more than necessary.
If the seat is too reclined, the lap belt may slide past the hi ps and apply
restraint forces directly to the abdomen, or your neck may cont act the
shoulder belt, increasing the risk of death or serious injury i n the event of
an accident.
Adjustments should not be made while driving as the seat may un expect-
edly move and cause the driver to lose control of the vehicle.
● Manual seat only: After adjusting the seat, make sure that the seat is
locked in position.
Page 266 of 818
2643-3. Adjusting the seats
C-HR_HV_OM_Europe_OM10720E
Rear seats
Park the vehicle in a safe place.
Apply the parking brake firmly and shift the shift lever to P. (P. 315)
Adjust the position of the front seat and the angle of the seatback.
(P. 262)
Depending on the position of the front seat, if the seatback is folded back-
ward, it may interfere with the operation of the rear seat.
Lower the head restraint of the rear seat. (P. 266)
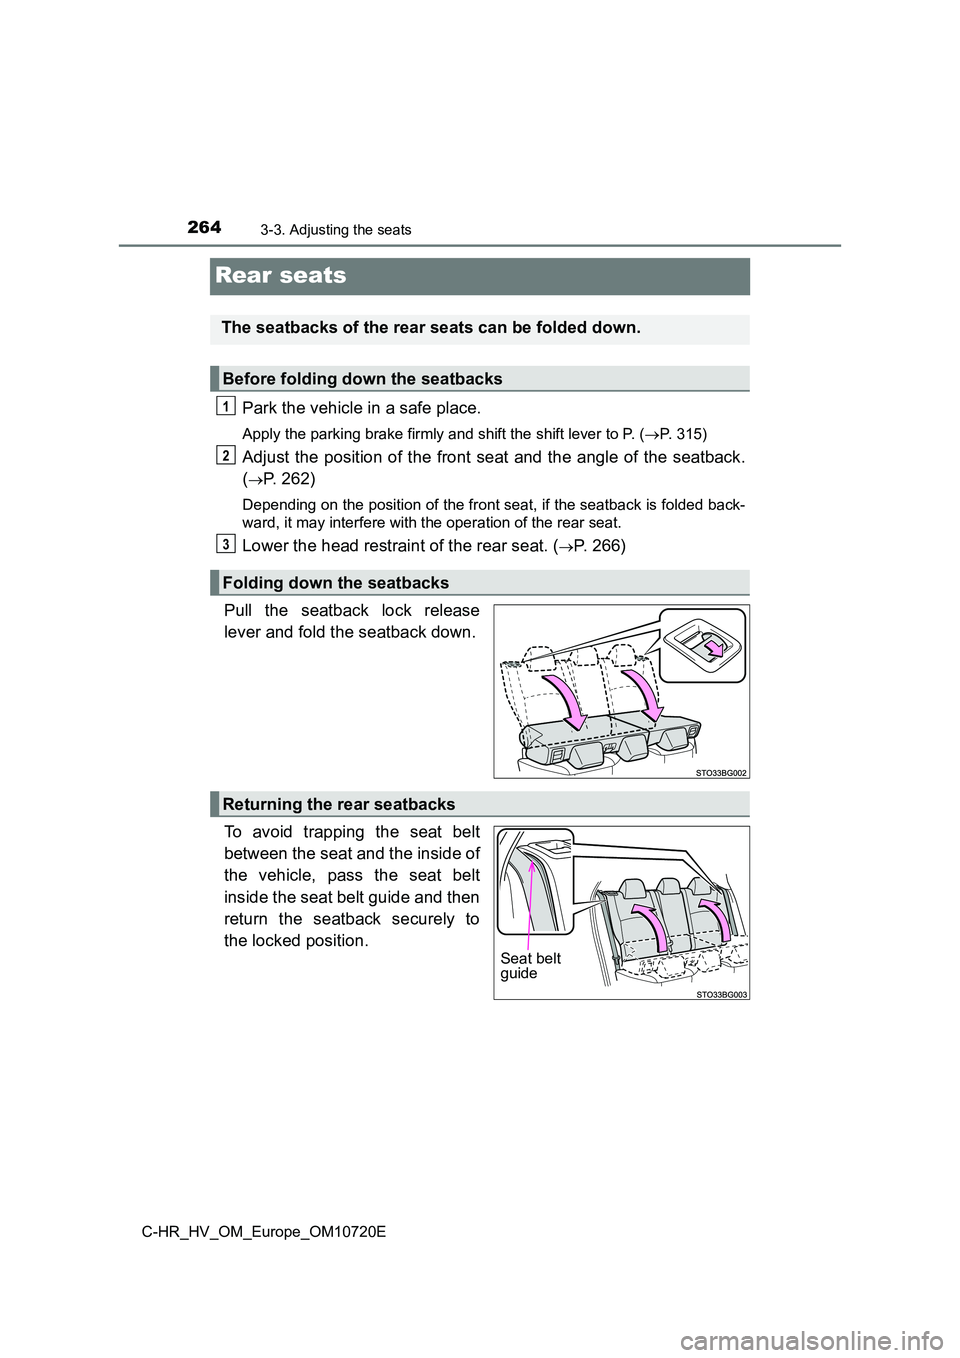
Pull the seatback lock release
lever and fold the seatback down.
To avoid trapping the seat belt
between the seat and the inside of
the vehicle, pass the seat belt
inside the seat belt guide and then
return the seatback securely to
the locked position.
The seatbacks of the rear seats can be folded down.
Before folding down the seatbacks
Folding down the seatbacks
1
2
3
Returning the rear seatbacks
Seat belt guide
Page 267 of 818
2653-3. Adjusting the seats
3
Operation of each component
C-HR_HV_OM_Europe_OM10720E
WARNING
Observe the following precautions. Failure to do so may result in death or
serious injury.
■ When folding the rear seatbacks down
● Do not fold the seatbacks down while driving.
● Stop the vehicle on level ground, set the parking brake and shift the shift
lever to P.
● Do not allow anyone to sit on a folded seatback or in the luggage compart-
ment while driving.
● Do not allow children to enter the luggage compartment.
● Do not allow anyone to sit on the rear center seat if the rear right seat is
folded down, as the seat belt buckle for the rear center seat b elt is then
concealed under the folded seat and cannot be used.
● Be careful not to get your hand caught when folding the rear seatbacks.
● Adjust the position of the front seats before folding down the rear seat-
backs so that the front seats do not interfere with the rear se atbacks when
folding down the rear seatbacks.
■ After returning the rear seatback to the upright position
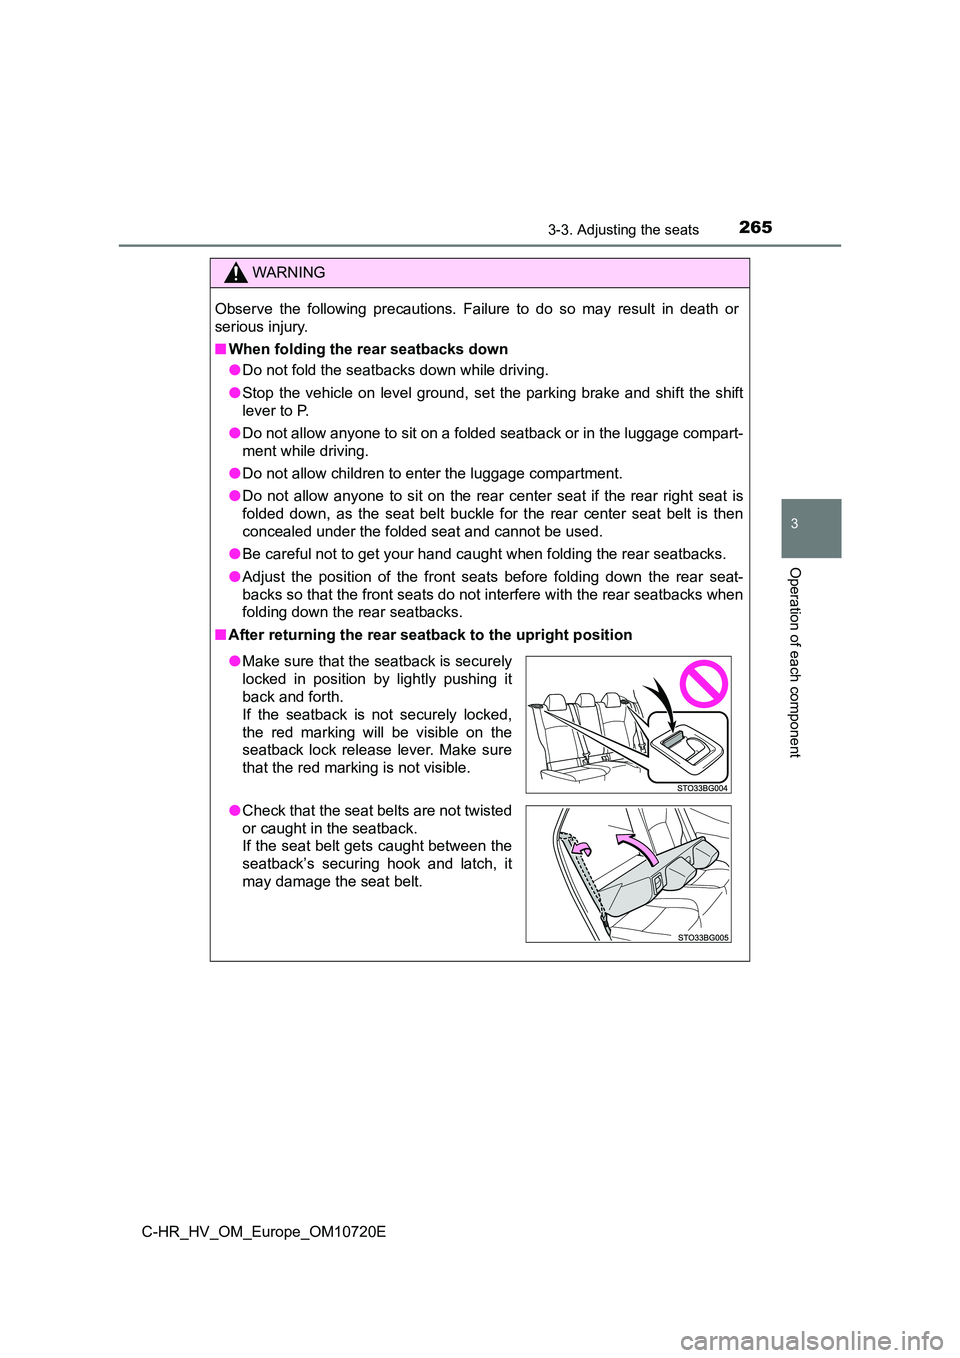
●Make sure that the seatback is securely
locked in position by lightly pushing it
back and forth.
If the seatback is not securely locked,
the red marking will be visible on the
seatback lock release lever. Make sure
that the red marking is not visible.
● Check that the seat belts are not twisted
or caught in the seatback.
If the seat belt gets caught between the
seatback’s securing hook and latch, it
may damage the seat belt.
Page 297 of 818
295
4
4-1. Before driving
Driving
C-HR_HV_OM_Europe_OM10720E
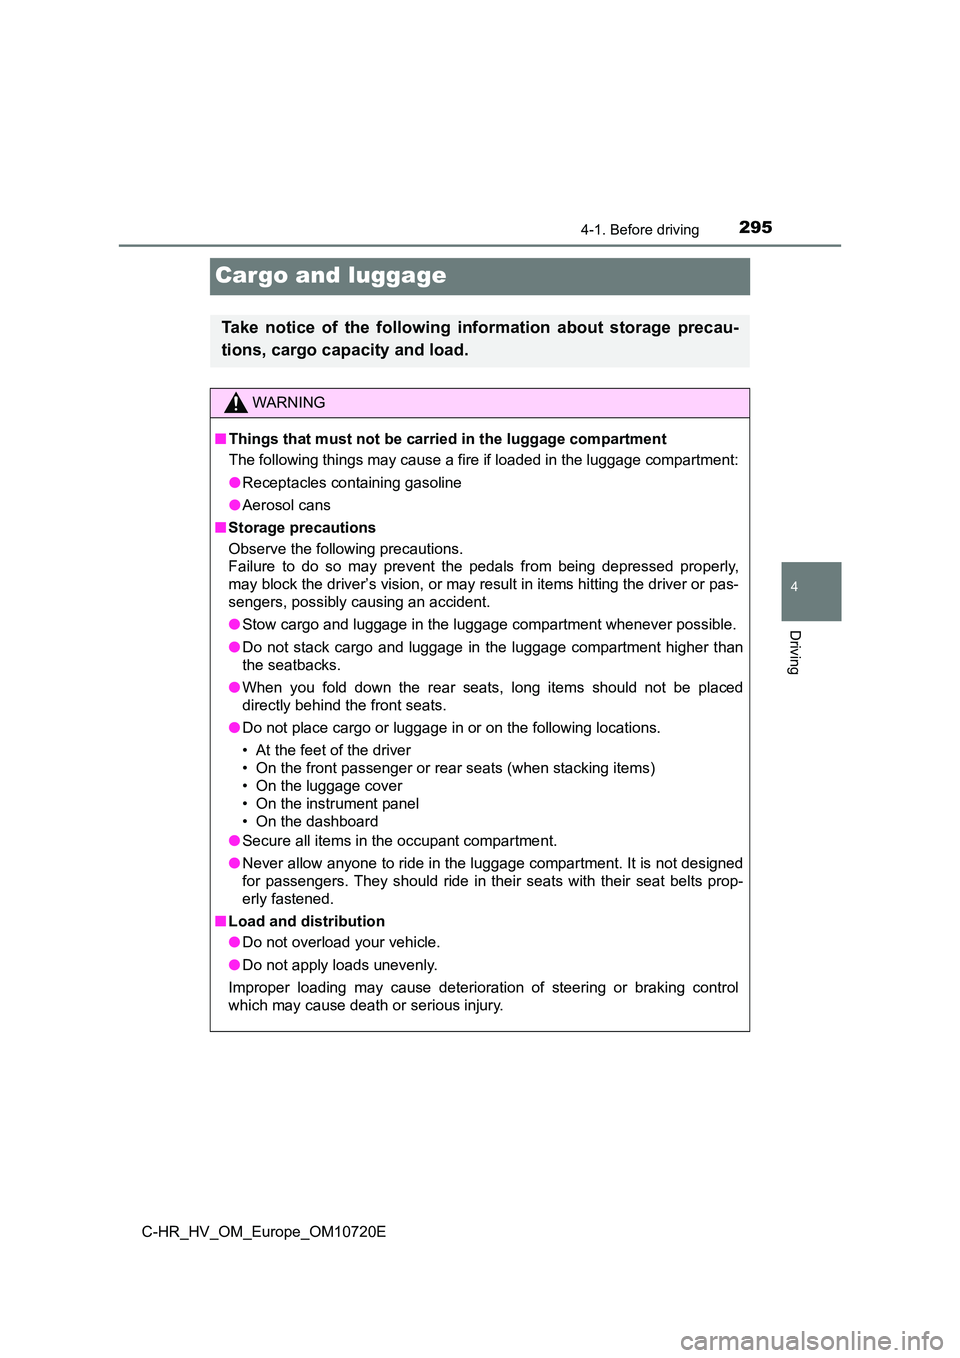
Cargo and luggage
Take notice of the following information about storage precau-
tions, cargo capacity and load.
WARNING
■ Things that must not be carried in the luggage compartment
The following things may cause a fire if loaded in the luggage compartment:
● Receptacles containing gasoline
● Aerosol cans
■ Storage precautions
Observe the following precautions.
Failure to do so may prevent the pedals from being depressed pr operly,
may block the driver’s vision, or may result in items hitting t he driver or pas-
sengers, possibly causing an accident.
● Stow cargo and luggage in the luggage compartment whenever possible.
● Do not stack cargo and luggage in the luggage compartment higher than
the seatbacks.
● When you fold down the rear seats, long items should not be placed
directly behind the front seats.
● Do not place cargo or luggage in or on the following locations.
• At the feet of the driver
• On the front passenger or rear seats (when stacking items)
• On the luggage cover
• On the instrument panel
• On the dashboard
● Secure all items in the occupant compartment.
● Never allow anyone to ride in the luggage compartment. It is not designed
for passengers. They should ride in their seats with their seat belts prop-
erly fastened.
■ Load and distribution
● Do not overload your vehicle.
● Do not apply loads unevenly.
Improper loading may cause deterioration of steering or braking control
which may cause death or serious injury.
Page 329 of 818
3274-2. Driving procedures
4
Driving
C-HR_HV_OM_Europe_OM10720E
■Parking brake operation
● When the power switch is not in ON mode, the parking brake cannot be
released using the parking brake switch.
● When the power switch is not in the ON mode, automatic mode (automatic
brake setting and releasing) is not available.
■ Automatic release function
The parking brake is automatically released when slowly depress the acceler-
ator pedal.
The parking brake will be released automatically under the foll owing condi-
tions:
● The driver’s door is closed.
● The driver’s seatbelt is fastened.
● Shift the shift lever is in a forward or reverse position.
● The malfunction indicator lamp or brake system warning light is not illumi-
nated.
If the automatic release function does not operate, manually re lease the park-
ing brake.
■ If “EPB Frequently Operated, Wait a Minute.” is displayed on the
multi-information display
If the parking brake is operated repeatedly over a short period of time, the
system may restrict operation to prevent overheating. If this h appens, refrain
from operating the parking brake. Normal operation will return after about 1
minute.
■ If “EPB Activation Incomplete.” or “EPB Unavailable” is displayed on the
multi-information display
Operate the parking brake switch. If the message does not disap pear after
operating the switch several times, the system may be malfuncti oning. Have
the vehicle inspected by any authorized Toyota retailer or Toyo ta authorized
repairer, or any reliabl e repairer immediately.
■ Parking brake operation sound
When the parking brake operates, a motor sound (whirring sound) may be
heard. This does not indicate a malfunction.
Page 332 of 818
3304-2. Driving procedures
C-HR_HV_OM_Europe_OM10720E
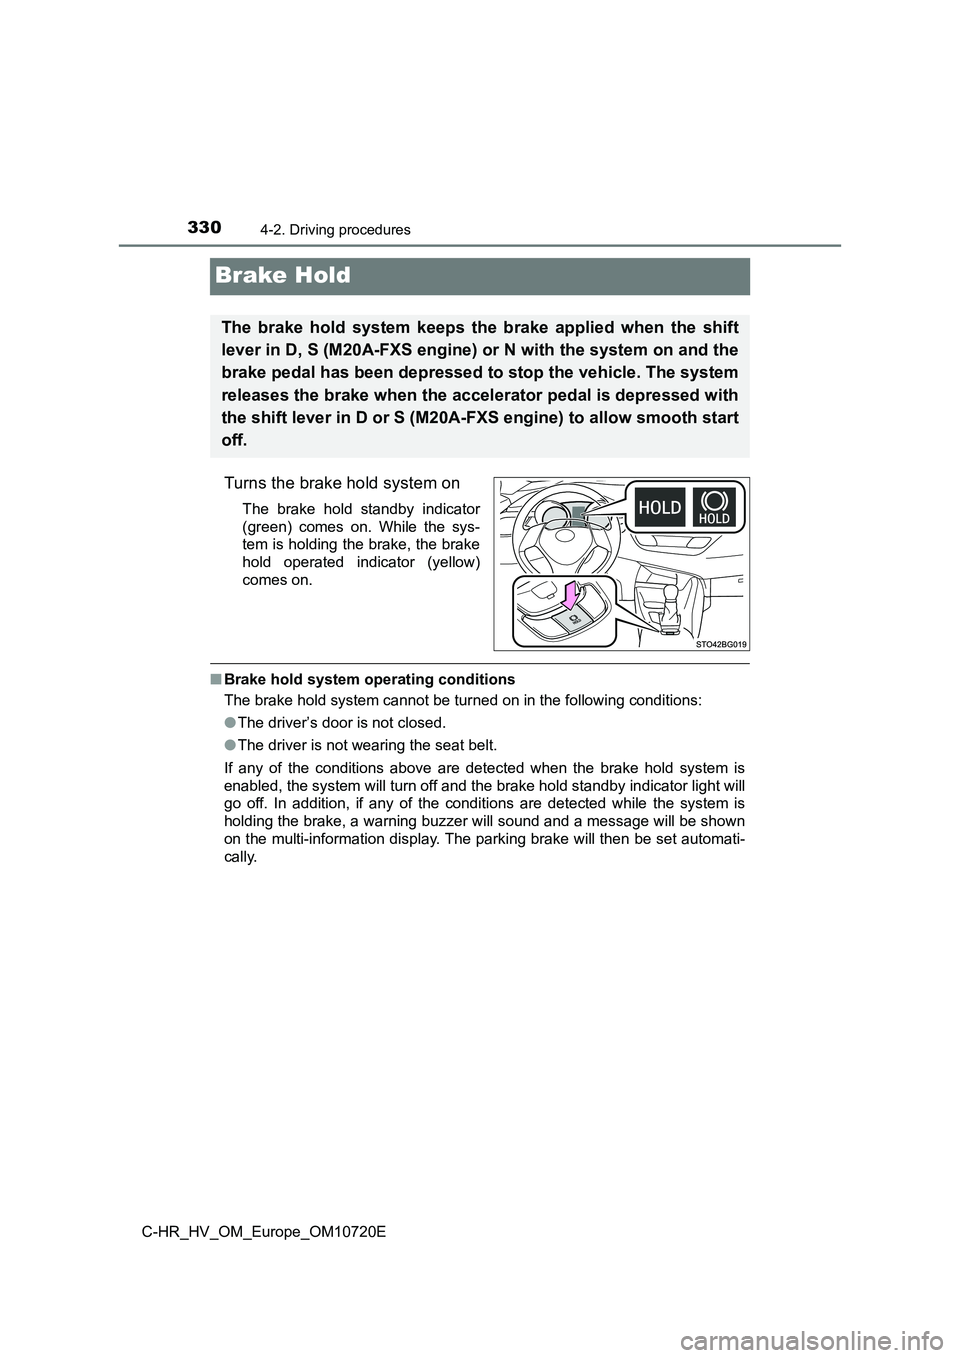
Brake Hold
Turns the brake hold system on
The brake hold standby indicator
(green) comes on. While the sys-
tem is holding the brake, the brake
hold operated indicator (yellow)
comes on.
■ Brake hold system operating conditions
The brake hold system cannot be turned on in the following cond itions:
● The driver’s door is not closed.
● The driver is not wearing the seat belt.
If any of the conditions above are detected when the brake hold system is
enabled, the system will turn off and the brake hold standby in dicator light will
go off. In addition, if any of the conditions are detected whil e the system is
holding the brake, a warning buzzer will sound and a message wi ll be shown
on the multi-information display. The parking brake will then b e set automati-
cally.
The brake hold system keeps the brake applied when the shift
lever in D, S (M20A-FXS engine) or N with the system on and the
brake pedal has been depressed to stop the vehicle. The system
releases the brake when the accelerator pedal is depressed with
the shift lever in D or S (M20A-FXS engine) to allow smooth sta rt
off.
Page 333 of 818
3314-2. Driving procedures
4
Driving
C-HR_HV_OM_Europe_OM10720E
■ Brake hold function
● If the brake pedal is left released for a period of about 3 minutes after the
system has started holding the brake, the parking brake will be set automat-
ically. In this case, a warning buzzer sounds and a message is shown on the
multi-information display.
● To turn the system off while the system is holding the brake, firmly depress
the brake pedal and press the button again.
● The brake hold function may not hold the vehicle when the vehicle is on a
steep incline. In this situation, it may be necessary for the d river to apply the
brakes. A warning buzzer will sound and the multi-information d isplay will
inform the driver of this situation. If a warning message is sh own on the
multi-information display, read the message and follow the inst ructions.
■ When the parking brake is set automatically while the system is holding
the brakes
Perform any of the following operations to release the parking brake.
● Depress the accelerator pedal. (The parking brake will not be released auto-
matically if the seat belt is not fastened.)
● Operate the parking brake switch with the brake pedal depressed. Make
sure that the parking brake indicator light goes off. ( P. 325)
■ When an inspection at your Toyota dealer is necessary
When the brake hold standby indicator (green) does not illumina te even when
the brake hold switch is pressed with the brake hold system ope rating condi-
tions met, the system may be malfunctioning. Have the vehicle i nspected at
any authorized Toyota retailer or Toyota authorized repairer, o r any reliable
repairer.
■ If “Brake Hold Fault Depress Brake to Deactivate Visit Your Dealer” is
displayed on the multi-information display
The system may be malfunctioning. Have the vehicle inspected by contact
any authorized Toyota retailer or Toyota authorized repairer, o r any reliable
repairer immediately.
■ Warning messages and buzzers
Warning messages and buzzers are used to indicate a system malf unction or
to inform the driver of the need for caution. If a warning mess age is shown on
the multi-information display, read the message and follow the instructions.
■ If the brake hold operated indicator flashes
P. 685
Page 425 of 818
4234-5. Using the driving support systems
4
Driving
C-HR_HV_OM_Europe_OM10720E
■Dynamic radar cruise control with full-speed range can be set when
● The shift lever is in D.
● The desired set speed can be set when the vehicle speed is approximately
30 km/h (20 mph) or more.
(However, when the vehicle speed is set while driving at below approxi-
mately 30 km/h [20 mph], the set speed will be set to approxima tely 30 km/h
[20 mph].)
■ Accelerating after setting the vehicle speed
The vehicle can accelerate by operating the accelerator pedal. After acceler-
ating, the set speed resumes. However, during vehicle-to-vehicl e distance
control mode, the vehicle speed may decrease below the set spee d in order
to maintain the distance to the preceding vehicle.
■ When the vehicle stops while follow-up cruising
● Pushing the lever up while the vehicle ahead stops will resume follow-up
cruising if the vehicle ahead starts off within approximately 3 seconds after
the lever is pushed up.
● If the vehicle ahead starts off within 3 seconds after your vehicle stops, fol-
low-up cruising will be resumed.
■ Automatic cancelation of vehicle-to-vehicle distance control mode
Vehicle-to-vehicle distance control mode is automatically cance led in the fol-
lowing situations:
● VSC is activated.
● TRC is activated for a period of time.
● When the VSC or TRC system is turned off.
● The sensor cannot detect correctly because it is covered in some way.
● Pre-collision braking is activated.
● The parking brake is operated.
● The vehicle is stopped by system control on a steep incline.
● The following are detected when the vehicle has been stopped by system
control:
• The driver is not wearing a seat belt.
• The driver’s door is opened.
• The vehicle has been stopped for about 3 minutes.
If vehicle-to-vehicle distance control mode is automatically ca nceled for any
reasons other than the above, there may be a malfunction in the system.
Contact any authorized Toyota retailer or Toyota authorized rep airer, or any
reliable repairer.
Page 589 of 818
5876-1. Maintenance and care
6
Maintenance and care
C-HR_HV_OM_Europe_OM10720E
●Brush the surfaces using a soft brush.
Do not brush hard as doing so may cause damage.
● Wipe the surfaces clean with a soft cloth that has been dampened
in cold or lukewarm water and squeezed out.
● Allow the artificial leather (Alcantara®*) to dry in a shaded and ven-
tilated area.
*: “Alcantara®” is a registered trademark of Alcantara S.p.A.
■ Caring for leather areas
Toyota recommends cleaning the interior of the vehicle at least twice a year to
maintain the quality of the vehicle’s interior.
■ Shampooing the carpets
There are several commercial foaming-type cleaners available. U se a sponge
or brush to apply the foam. Rub in overlapping circles. Do not use water.
Wipe dirty surfaces and let them dry. Excellent results are obt ained by keep-
ing the carpet as dry as possible.
■ Seat belts
Clean with mild soap and lukewarm water using a cloth or sponge . Also
check the belts periodically for excessive wear, fraying or cut s.
Cleaning the artificial leather (Alcantara®*) areas (if equipped)