TOYOTA CAMRY 2018 Accessories, Audio & Navigation (in English)
Manufacturer: TOYOTA, Model Year: 2018, Model line: CAMRY, Model: TOYOTA CAMRY 2018Pages: 340, PDF Size: 7.43 MB
Page 71 of 340
3
71
4
5
6
7
8
9
1
2
3
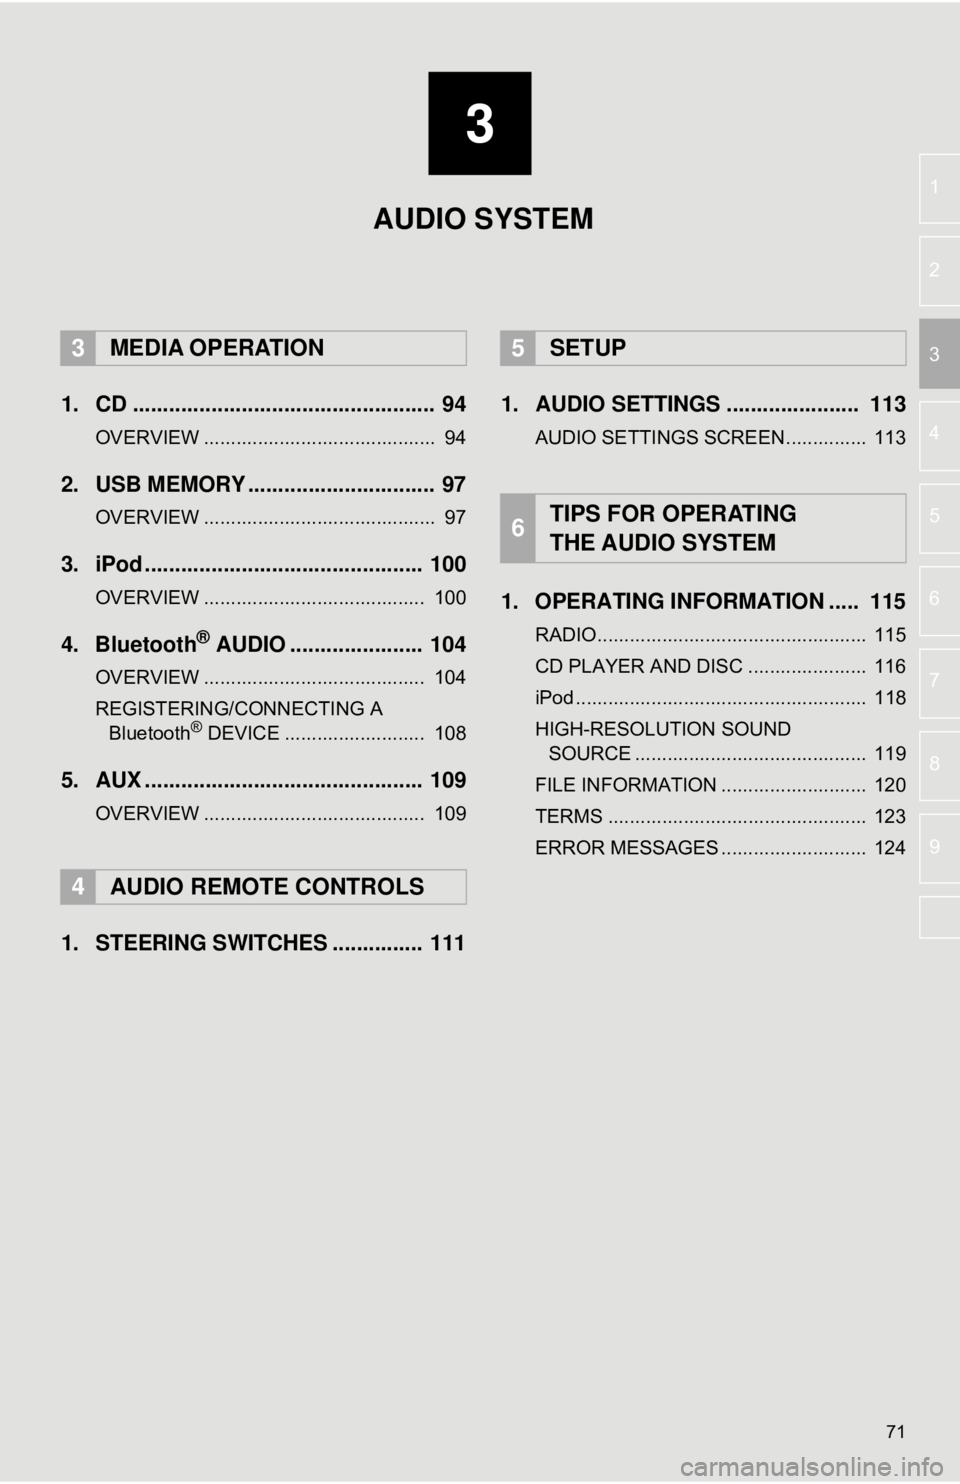
1. CD .................................................. 94
OVERVIEW ........................................... 94
2. USB MEMORY ............................... 97
OVERVIEW ........................................... 97
3. iPod .............................................. 100
OVERVIEW ......................................... 100
4. Bluetooth® AUDIO ...................... 104
OVERVIEW ......................................... 104
REGISTERING/CONNECTING A Bluetooth
® DEVICE .......................... 108
5. AUX .............................................. 109
OVERVIEW ......................................... 109
1. STEERING SWITCHES ............... 111 1. AUDIO SETTINGS ...................... 113
AUDIO SETTINGS SCREEN............... 113
1. OPERATING INFORMATION ..... 115
RADIO.................................................. 115
CD PLAYER AND DISC ...................... 116
iPod ...................................................... 118
HIGH-RESOLUTION SOUND
SOURCE ........................................... 119
FILE INFORMATION ........................... 120
TERMS ................................................ 123
ERROR MESSAGES ........................... 124
3MEDIA OPERATION
4AUDIO REMOTE CONTROLS
5SETUP
6TIPS FOR OPERATING
THE AUDIO SYSTEM
AUDIO SYSTEM
Page 72 of 340
72
1. BASIC OPERATION
1. QUICK REFERENCE
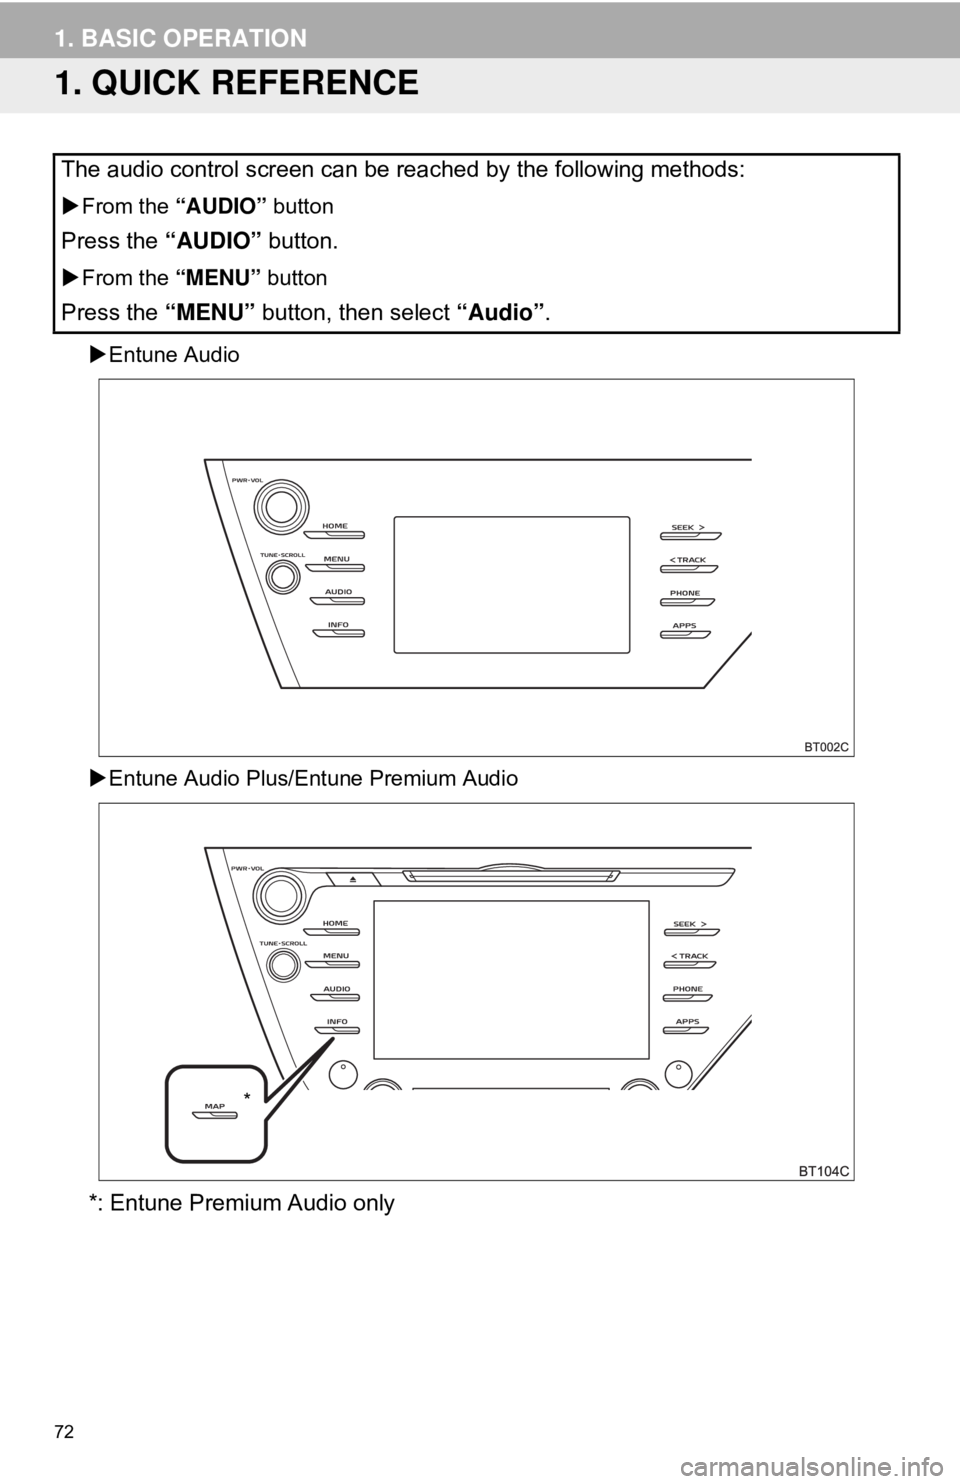
Entune Audio
Entune Audio Plus/Entune Premium Audio
*: Entune Premium Audio only
The audio control screen can be reached by the following methods:
From the “AUDIO” button
Press the “AUDIO” button.
From the “MENU” button
Press the “MENU” button, then select “Audio”.
*
Page 73 of 340
73
1. BASIC OPERATION
AUDIO SYSTEM
3
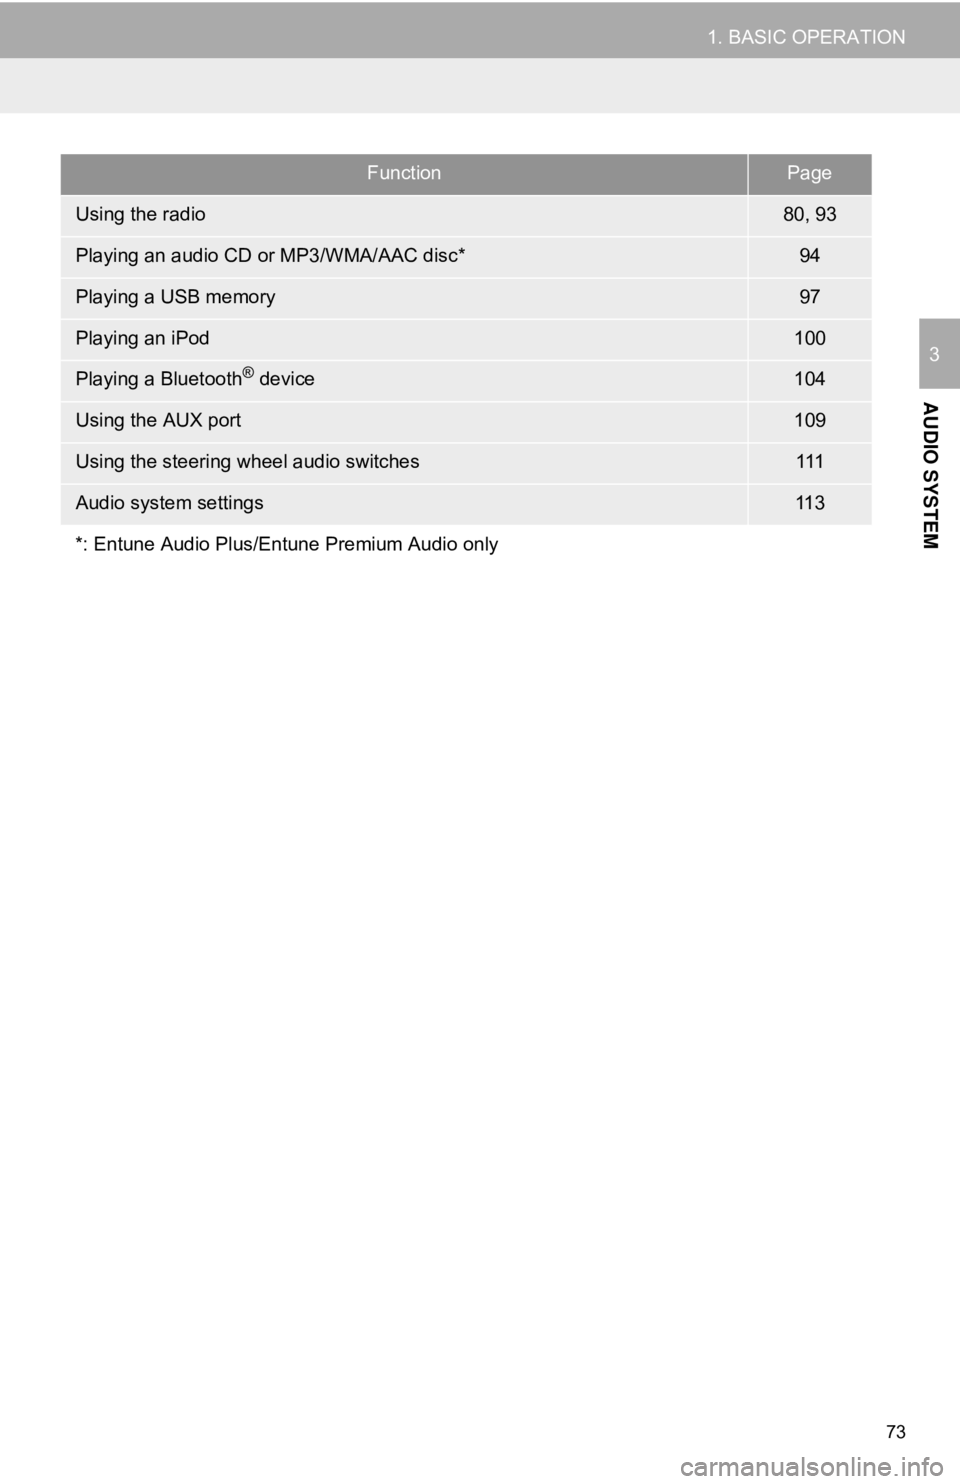
FunctionPage
Using the radio80, 93
Playing an audio CD or MP3/WMA/AAC disc*94
Playing a USB memory97
Playing an iPod100
Playing a Bluetooth® device104
Using the AUX port109
Using the steering wheel audio switches111
Audio system settings11 3
*: Entune Audio Plus/Entune Premium Audio only
Page 74 of 340
74
1. BASIC OPERATION
2. SOME BASICS
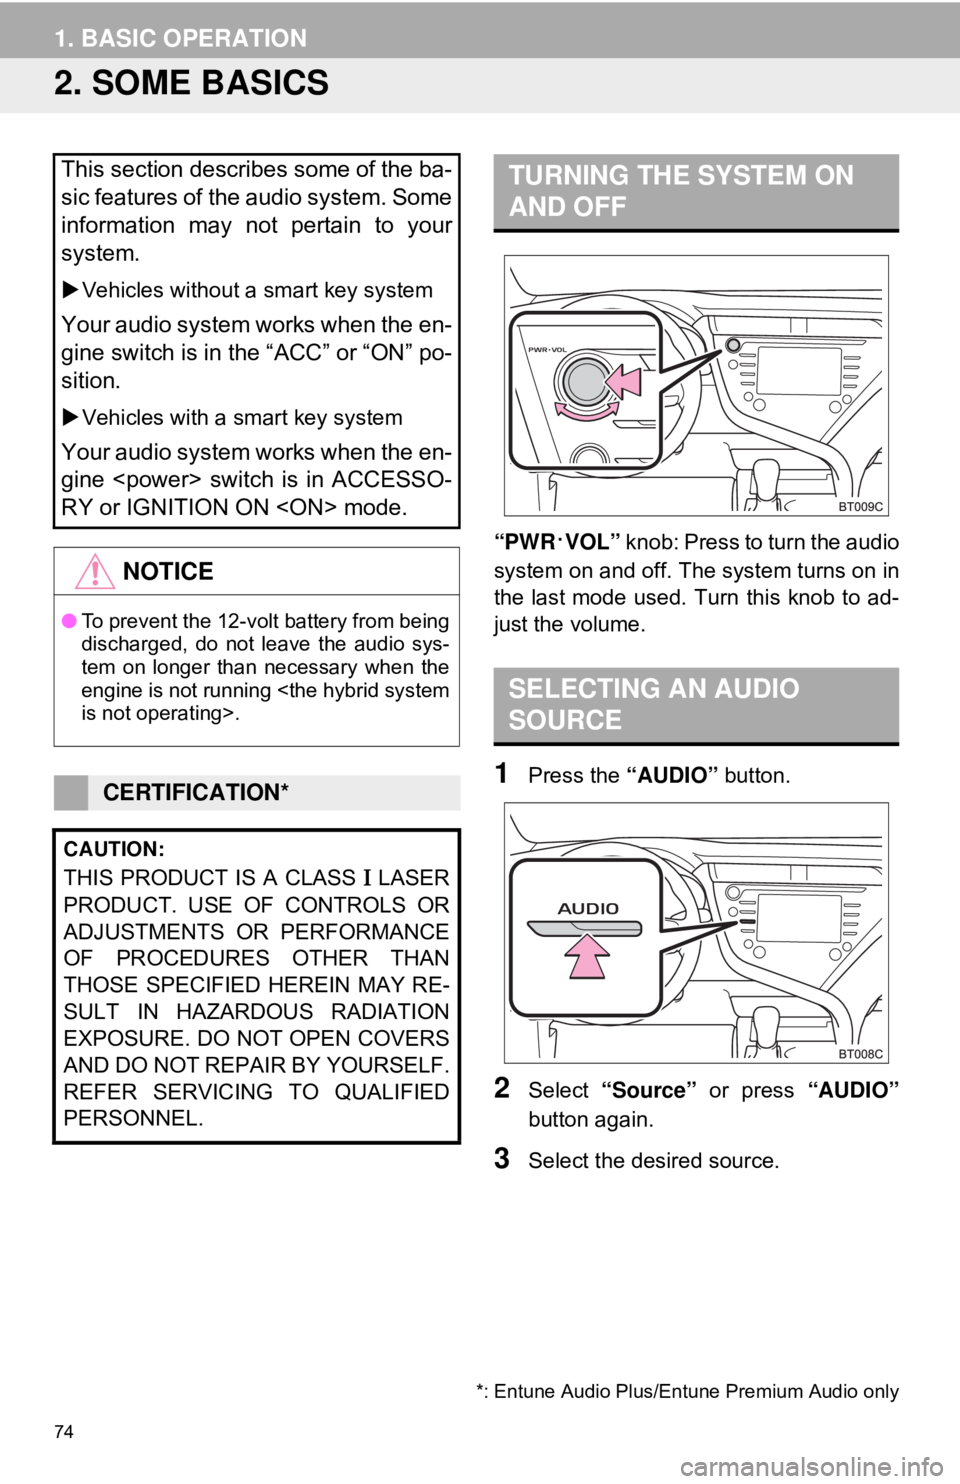
“PWR·VOL” knob: Press to turn the audio
system on and off. Th e system turns on in
the last mode used. Turn this knob to ad-
just the volume.
1Press the “AUDIO” button.
2Select “Source” or press “AUDIO”
button again.
3Select the desired source.
This section describes some of the ba-
sic features of the audio system. Some
information may not pertain to your
system.
Vehicles without a smart key system
Your audio system works when the en-
gine switch is in the “ACC” or “ON” po-
sition.
Vehicles with a smart key system
Your audio system works when the en-
gine
RY or IGNITION ON
NOTICE
● To prevent the 12-volt battery from being
discharged, do not leave the audio sys-
tem on longer than necessary when the
engine is not running
CERTIFICATION*
CAUTION:
THIS PRODUCT IS A CLASS Ι LASER
PRODUCT. USE OF CONTROLS OR
ADJUSTMENTS OR PERFORMANCE
OF PROCEDURES OTHER THAN
THOSE SPECIFIED HEREIN MAY RE-
SULT IN HAZARDOUS RADIATION
EXPOSURE. DO NOT OPEN COVERS
AND DO NOT REPAI R BY YOURSELF.
REFER SERVICING TO QUALIFIED
PERSONNEL.
*: Entune Audio Plus/Entune Premium Audio only
TURNING THE SYSTEM ON
AND OFF
SELECTING AN AUDIO
SOURCE
Page 75 of 340
75
1. BASIC OPERATION
AUDIO SYSTEM
3
1Display the audio source selection
screen. (→P.74)
2Select “Reorder” .
3Select the desired audio source then
or to reorder.
4Select “OK”.
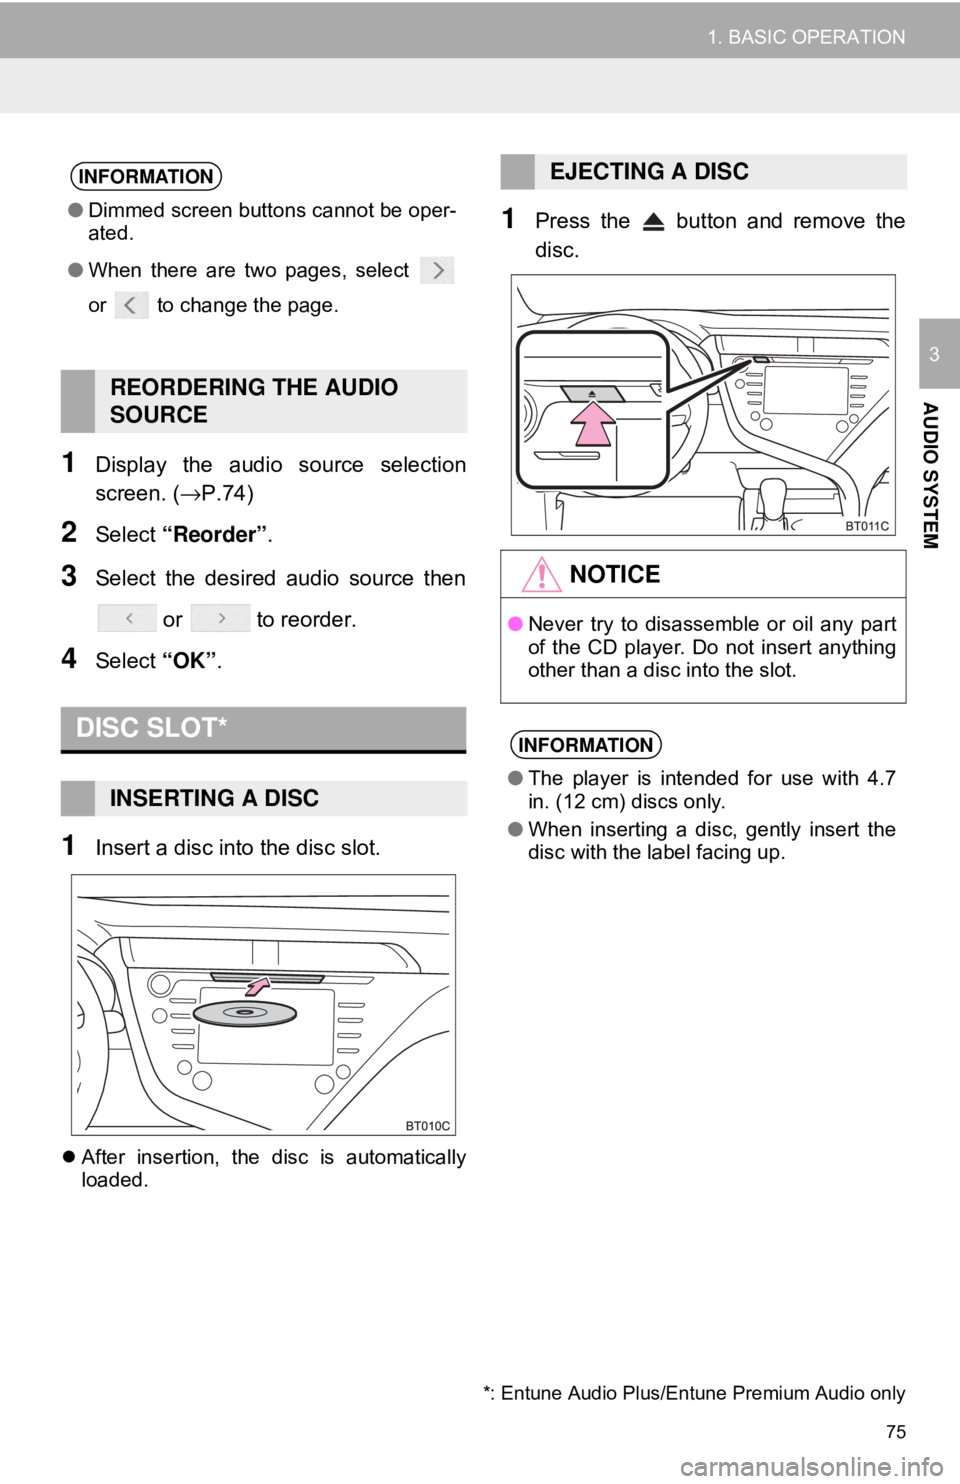
1Insert a disc into the disc slot.
After insertion, the disc is automatically
loaded.
1Press the button and remove the
disc.
INFORMATION
●Dimmed screen buttons cannot be oper-
ated.
● When there are two pages, select
or to change the page.
REORDERING THE AUDIO
SOURCE
DISC SLOT*
INSERTING A DISC
EJECTING A DISC
NOTICE
●Never try to disassemble or oil any part
of the CD player. Do not insert anything
other than a disc into the slot.
INFORMATION
●The player is intended for use with 4.7
in. (12 cm) discs only.
● When inserting a disc, gently insert the
disc with the label facing up.
*: Entune Audio Plus/Entune Premium Audio only
Page 76 of 340
76
1. BASIC OPERATION
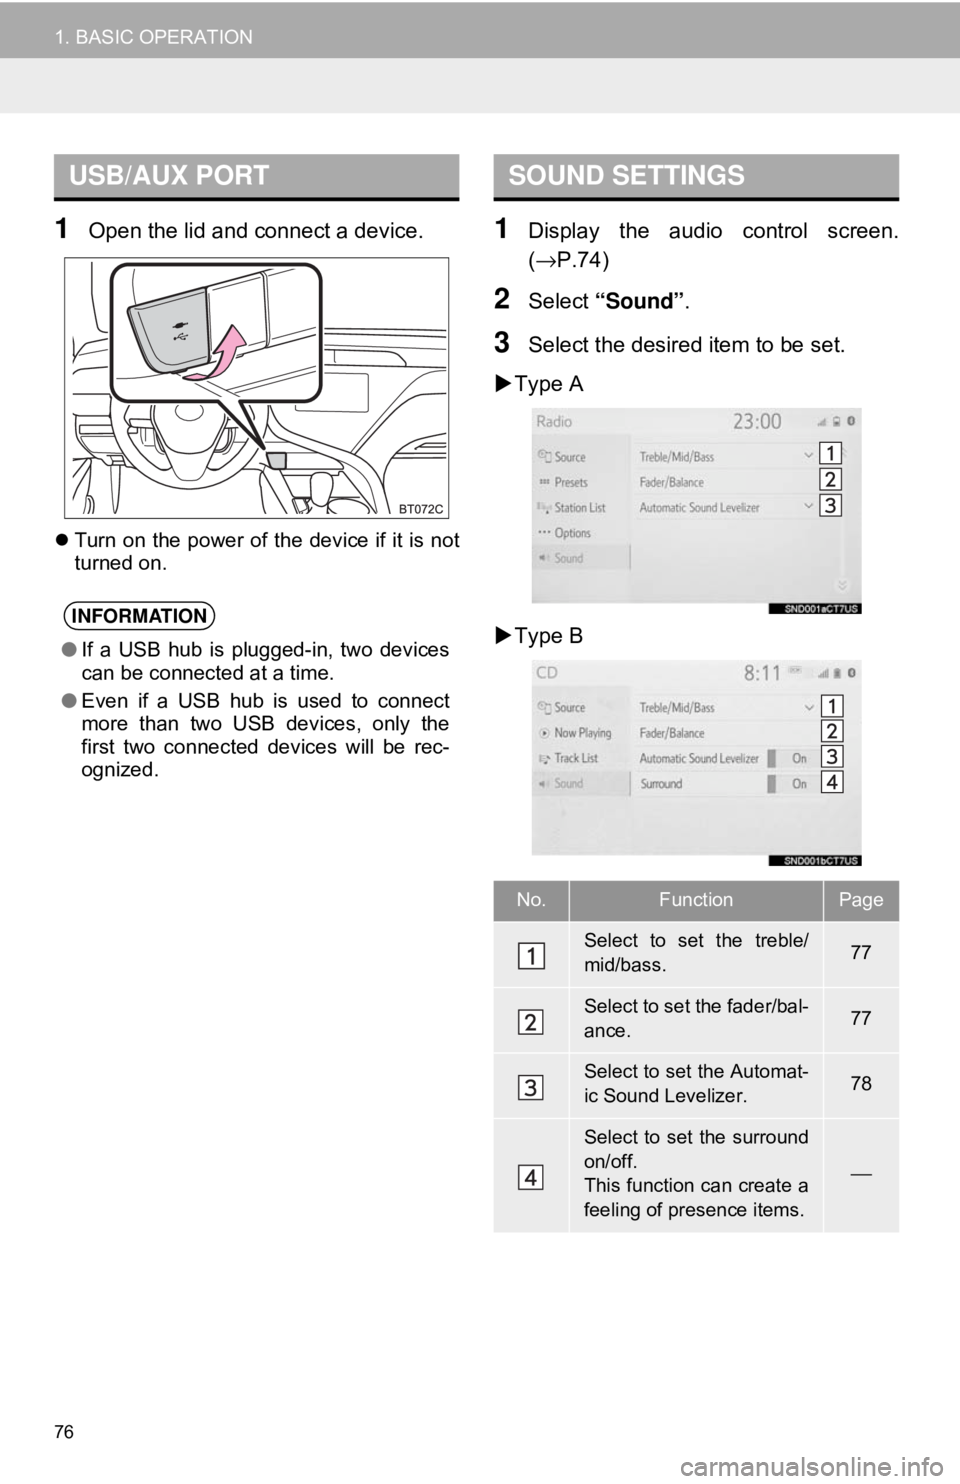
1Open the lid and connect a device.
Turn on the power of the device if it is not
turned on.
1Display the audio control screen.
(→ P.74)
2Select “Sound” .
3Select the desired item to be set.
Type A
Type B
USB/AUX PORT
INFORMATION
● If a USB hub is plugged-in, two devices
can be connected at a time.
● Even if a USB hub is used to connect
more than two USB devices, only the
first two connected devices will be rec-
ognized.
SOUND SETTINGS
No.FunctionPage
Select to set the treble/
mid/bass.77
Select to set the fader/bal-
ance.77
Select to set the Automat-
ic Sound Levelizer.78
Select to set the surround
on/off.
This function can create a
feeling of presence items.
⎯
Page 77 of 340
77
1. BASIC OPERATION
AUDIO SYSTEM
3
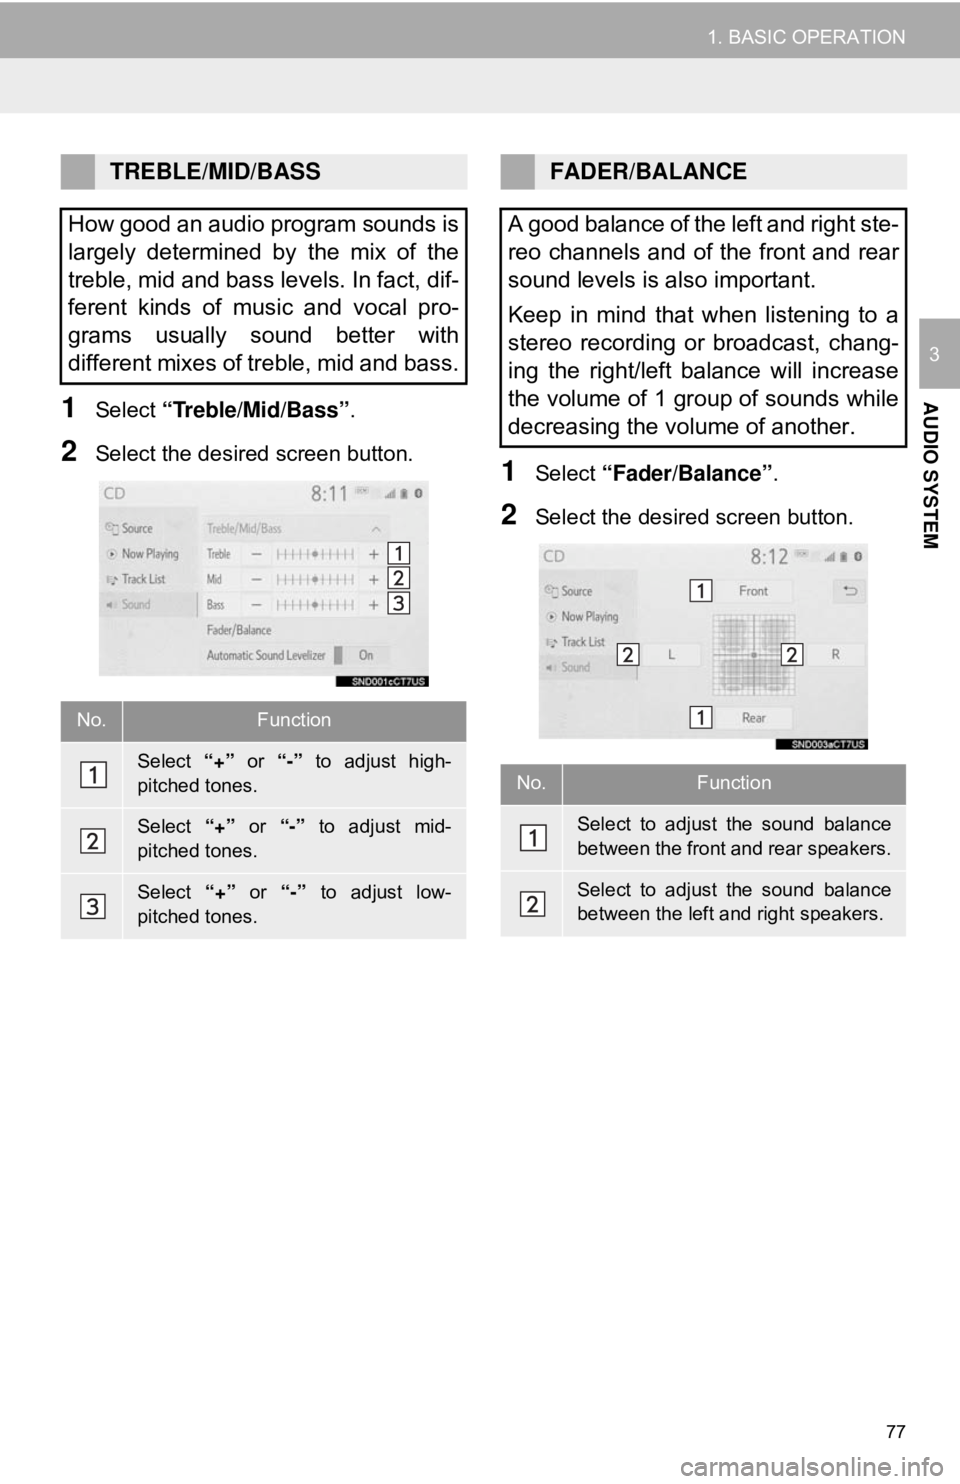
1Select “Treble/Mid/Bass” .
2Select the desired screen button.1Select “Fader/Balance” .
2Select the desired screen button.
TREBLE/MID/BASS
How good an audio program sounds is
largely determined by the mix of the
treble, mid and bass levels. In fact, dif-
ferent kinds of music and vocal pro-
grams usually sound better with
different mixes of treble, mid and bass.
No.Function
Select “+” or “-” to adjust high-
pitched tones.
Select “+” or “-” to adjust mid-
pitched tones.
Select “+” or “-” to adjust low-
pitched tones.
FADER/BALANCE
A good balance of the left and right ste-
reo channels and of the front and rear
sound levels is also important.
Keep in mind that when listening to a
stereo recording or broadcast, chang-
ing the right/left balance will increase
the volume of 1 group of sounds while
decreasing the volume of another.
No.Function
Select to adjust the sound balance
between the front and rear speakers.
Select to adjust the sound balance
between the left and right speakers.
Page 78 of 340
78
1. BASIC OPERATION
Type A
1Select “Automatic Sound Levelizer” .
2Select “High”, “Mid”, “Low”, or
“Off” .
Type B
1Select “Automatic Sound Levelizer” .
2Select to set the Automatic Sound Lev-
elizer on/off.
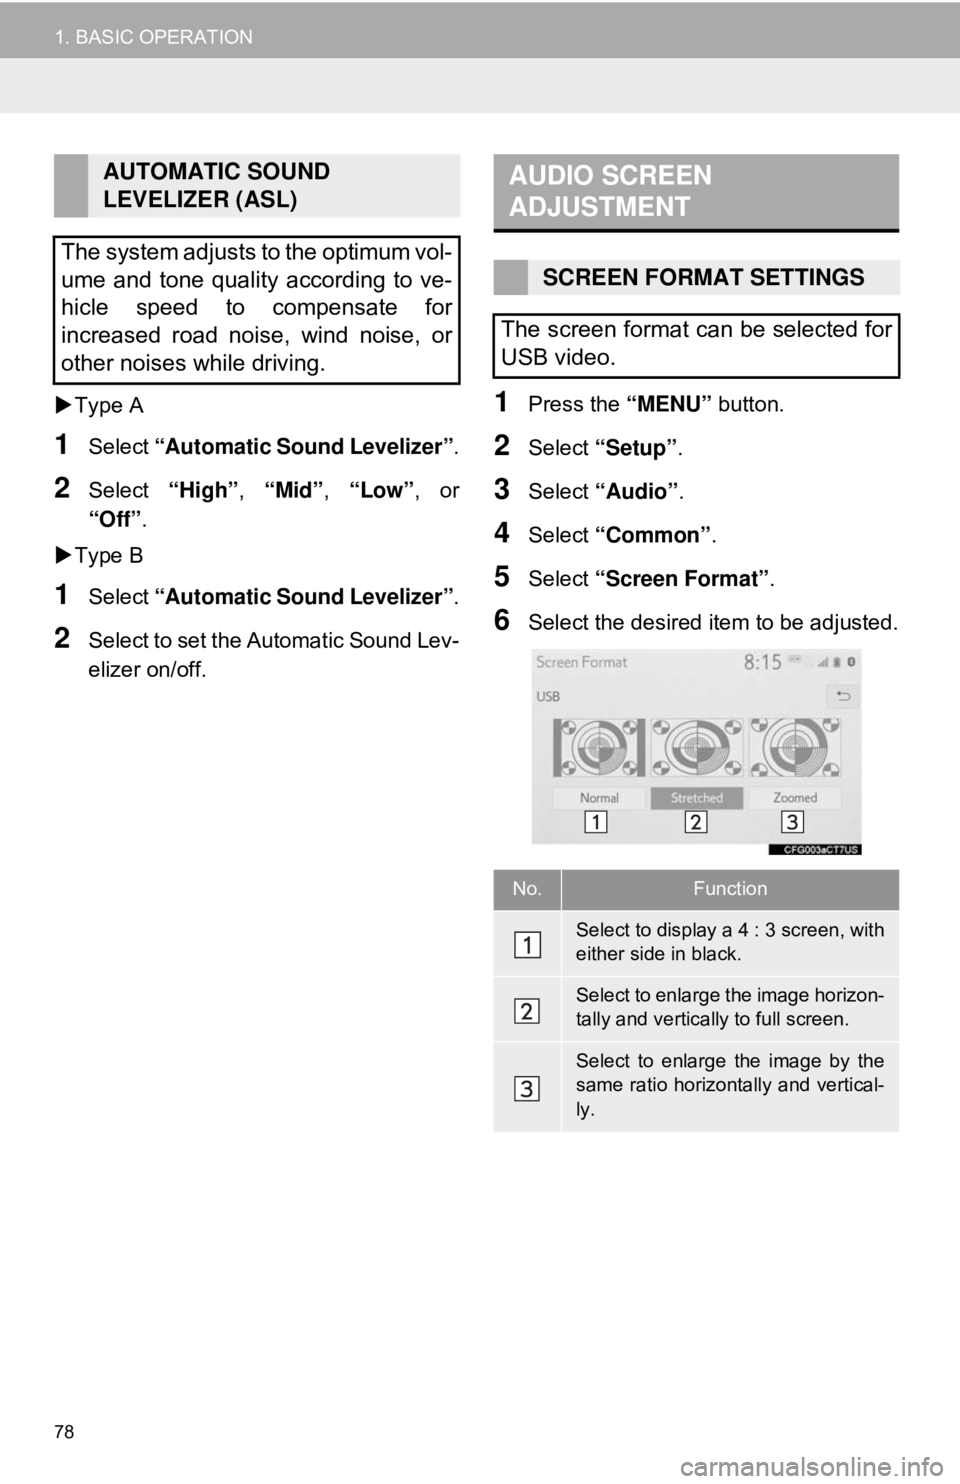
1Press the “MENU” button.
2Select “Setup”.
3Select “Audio” .
4Select “Common” .
5Select “Screen Format” .
6Select the desired item to be adjusted.
AUTOMATIC SOUND
LEVELIZER (ASL)
The system adjusts to the optimum vol-
ume and tone quality according to ve-
hicle speed to compensate for
increased road noise, wind noise, or
other noises while driving.AUDIO SCREEN
ADJUSTMENT
SCREEN FORMAT SETTINGS
The screen format can be selected for
USB video.
No.Function
Select to display a 4 : 3 screen, with
either side in black.
Select to enlarge the image horizon-
tally and vertically to full screen.
Select to enlarge the image by the
same ratio horizontally and vertical-
ly.
Page 79 of 340
79
1. BASIC OPERATION
AUDIO SYSTEM
3
1Press the “MENU” button.
2Select “Setup” .
3Select “Audio” .
4Select “Common” .
5Select “Display” .
6Select the desired item to be adjusted.
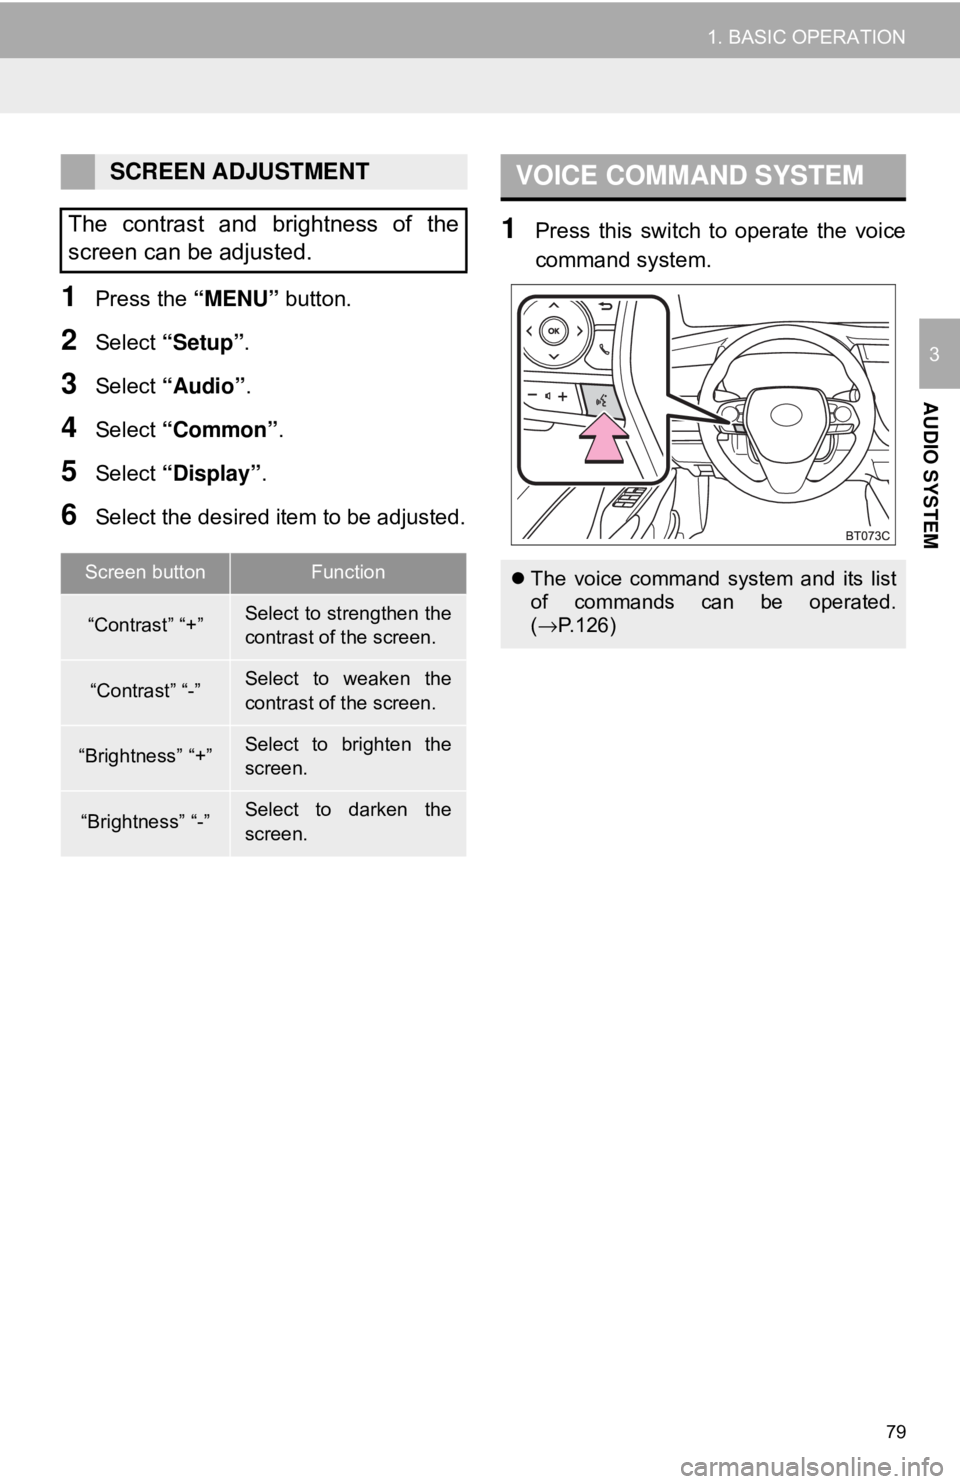
1Press this switch to operate the voice
command system.
SCREEN ADJUSTMENT
The contrast and brightness of the
screen can be adjusted.
Screen buttonFunction
“Contrast” “+”Select to strengthen the
contrast of the screen.
“Contrast” “-”Select to weaken the
contrast of the screen.
“Brightness” “+”Select to brighten the
screen.
“Brightness” “-”Select to darken the
screen.
VOICE COMMAND SYSTEM
The voice command system and its list
of commands can be operated.
(→ P.126)
Page 80 of 340
80
2. RADIO OPERATION
1. AM/FM/SiriusXM (SXM)* RADIO
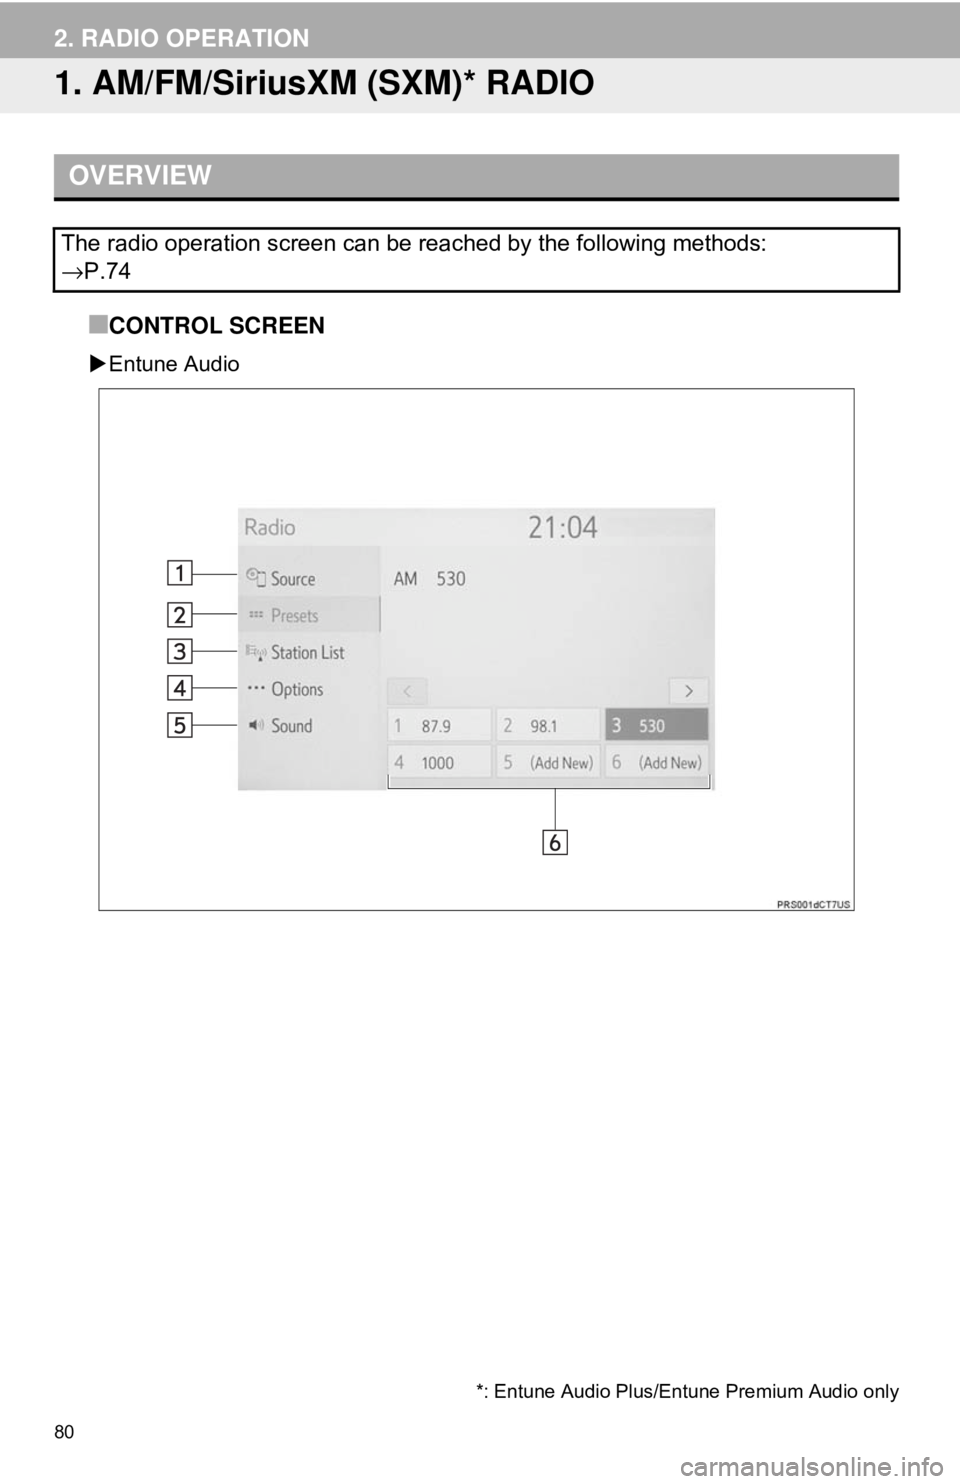
■CONTROL SCREEN
Entune Audio
OVERVIEW
The radio operation screen can be reached by the following methods:
→P.74
*: Entune Audio Plus/Entune Premium Audio only