check engine TOYOTA CAMRY 2021 Accessories, Audio & Navigation (in English)
[x] Cancel search | Manufacturer: TOYOTA, Model Year: 2021, Model line: CAMRY, Model: TOYOTA CAMRY 2021Pages: 324, PDF Size: 10.46 MB
Page 28 of 324
282-1. Basic information before operation
CAMRY_CAMRY HV(TMMK)_Navi_(U)
2-1.Basic information before operation
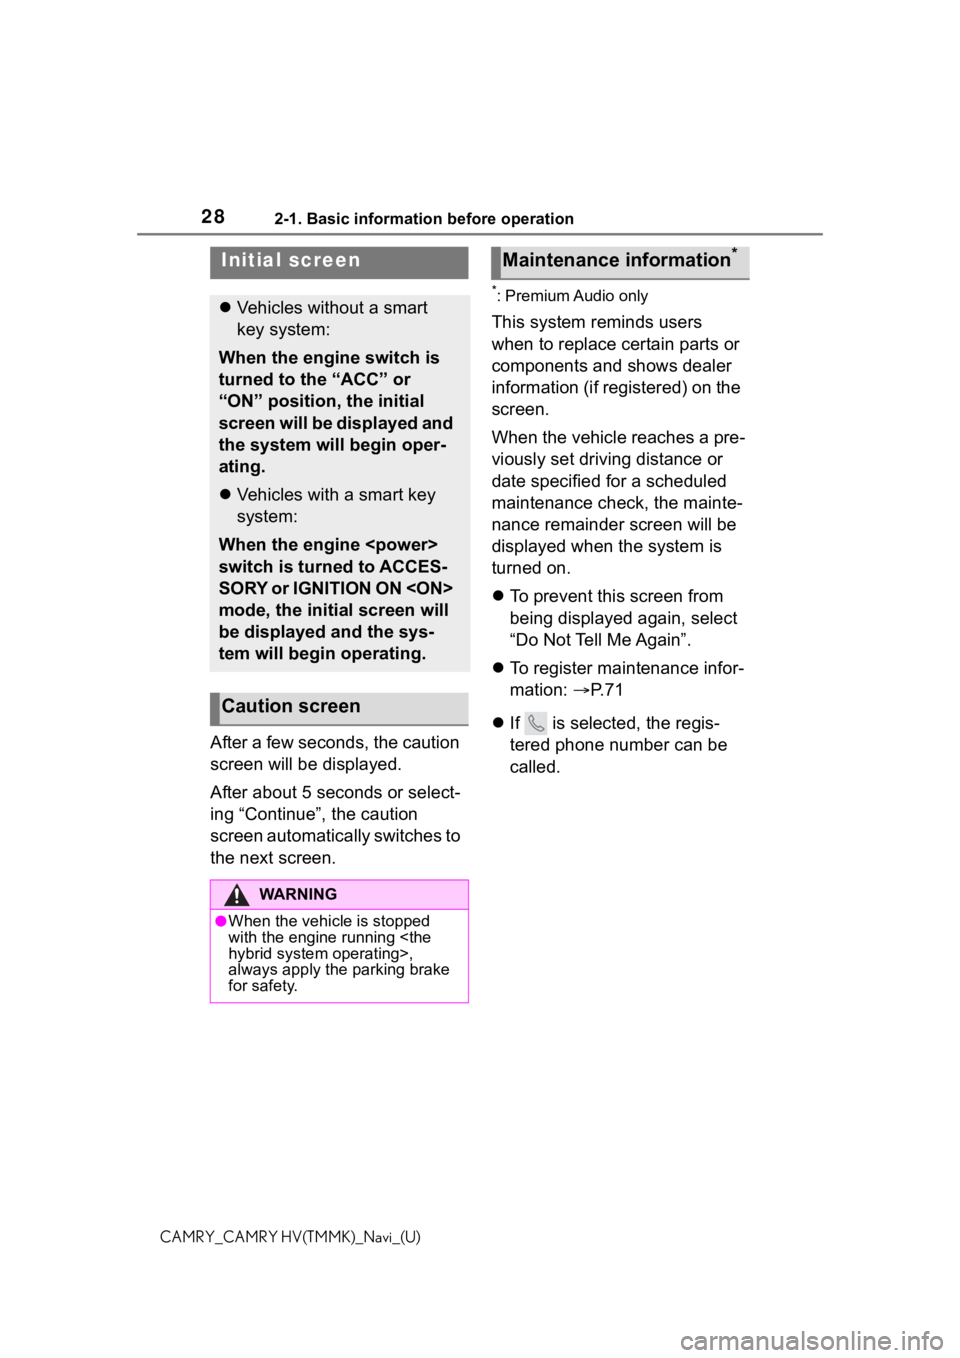
After a few seconds, the caution
screen will be displayed.
After about 5 seconds or select-
ing “Continue”, the caution
screen automatically switches to
the next screen.
*: Premium Audio only
This system reminds users
when to replace certain parts or
components and shows dealer
information (if registered) on the
screen.
When the vehicle reaches a pre-
viously set driving distance or
date specified for a scheduled
maintenance check, the mainte-
nance remainder screen will be
displayed when the system is
turned on.
To prevent this screen from
being displayed again, select
“Do Not Tell Me Again”.
To register maintenance infor-
mation: P. 7 1
If is selected, the regis-
tered phone number can be
called.
Initial screen
Vehicles without a smart
key system:
When the engine switch is
turned to the “ACC” or
“ON” position, the initial
screen will be displayed and
the system will begin oper-
ating.
Vehicles with a smart key
system:
When the engine
switch is turned to ACCES-
SORY or IGNITION ON
mode, the initial screen will
be displayed and the sys-
tem will begin operating.
Caution screen
WA R N I N G
●When the vehicle is stopped
with the engine running
always apply the parking brake
for safety.
Maintenance information*
Page 45 of 324
452-2. Connectivity settings
2
Basic function
CAMRY_CAMRY HV(TMMK)_Navi_(U)
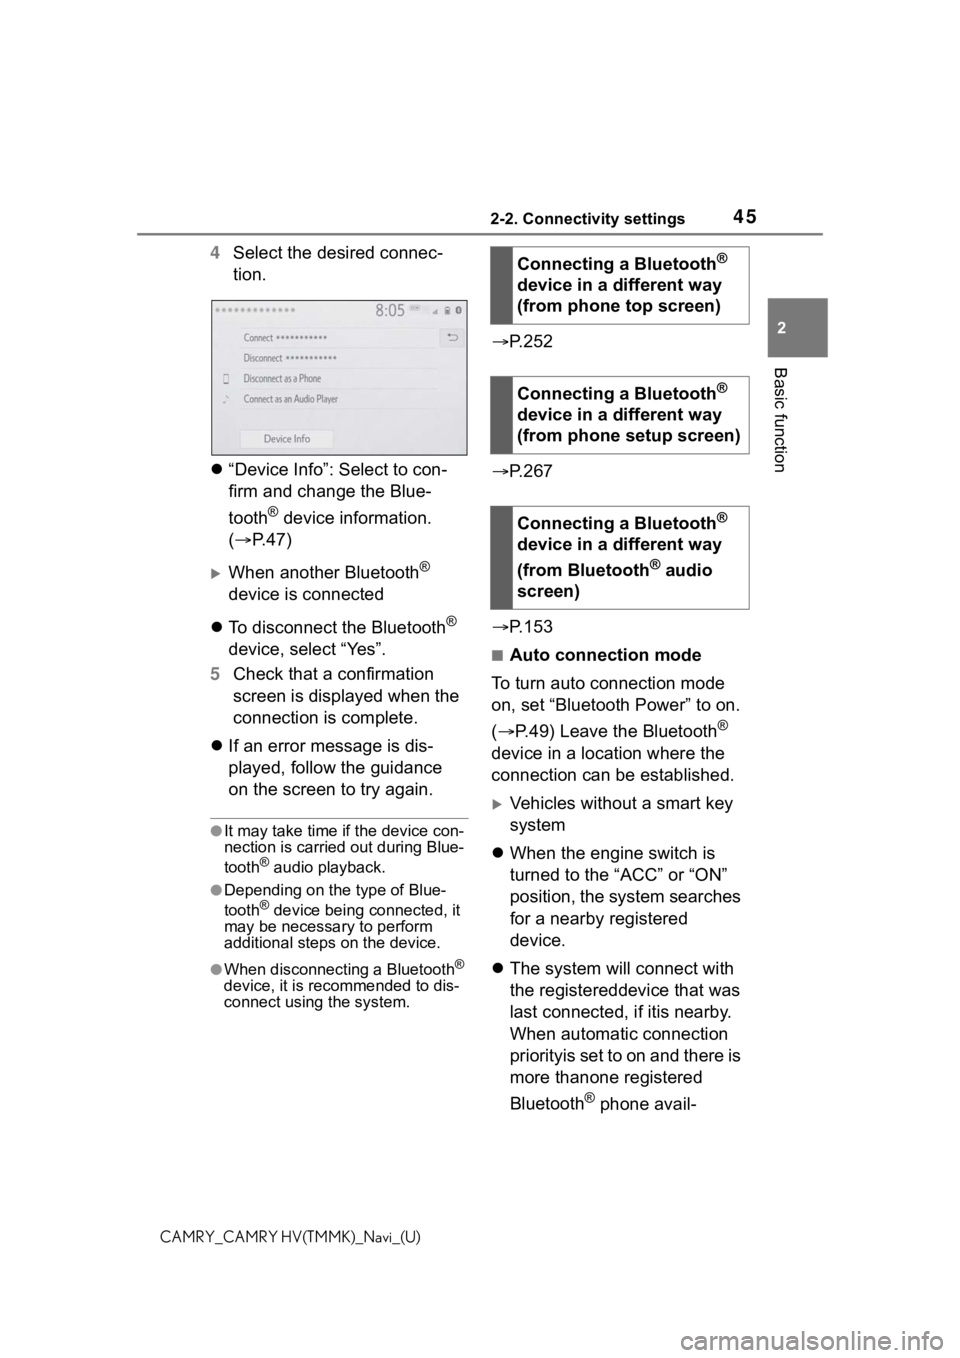
4Select the desired connec-
tion.
“Device Info”: Select to con-
firm and change the Blue-
tooth
® device information.
( P. 4 7 )
When another Bluetooth®
device is connected
To disconnect the Bluetooth
®
device, select “Yes”.
5 Check that a confirmation
screen is displayed when the
connection is complete.
If an error message is dis-
played, follow the guidance
on the screen to try again.
●It may take time if the device con-
nection is carried out during Blue-
tooth
® audio playback.
●Depending on the type of Blue-
tooth® device being connected, it
may be necessary to perform
additional steps on the device.
●When disconnecting a Bluetooth®
device, it is recommended to dis-
connect using the system.
P.252
P.267
P.153
■Auto connection mode
To turn auto connection mode
on, set “Bluetooth Power” to on.
( P.49) Leave the Bluetooth
®
device in a location where the
connection can be established.
Vehicles without a smart key
system
When the engine switch is
turned to the “ACC” or “ON”
position, the system searches
for a nearby registered
device.
The system will connect with
the registereddevice that was
last connected, if itis nearby.
When automatic connection
priorityis set to on and there is
more thanone registered
Bluetooth
® phone avail-
Connecting a Bluetooth®
device in a different way
(from phone top screen)
Connecting a Bluetooth
®
device in a different way
(from phone setup screen)
Connecting a Bluetooth
®
device in a different way
(from Bluetooth
® audio
screen)
Page 187 of 324
1877-1. Rear view monitor system
7
Peripheral monitoring system
CAMRY_CAMRY HV(TMMK)_Navi_(U)
Vehicles without a smart key
system
The rear view monitor system
screen will be displayed if the
shift lever is shifted to the “R”
position while the engine switch
is in the “ON” position.
Vehicles with a smart key sys-
tem
The rear view monitor system
screen will be displayed if the
shift lever is shifted to the “R”
position while the engine
ON
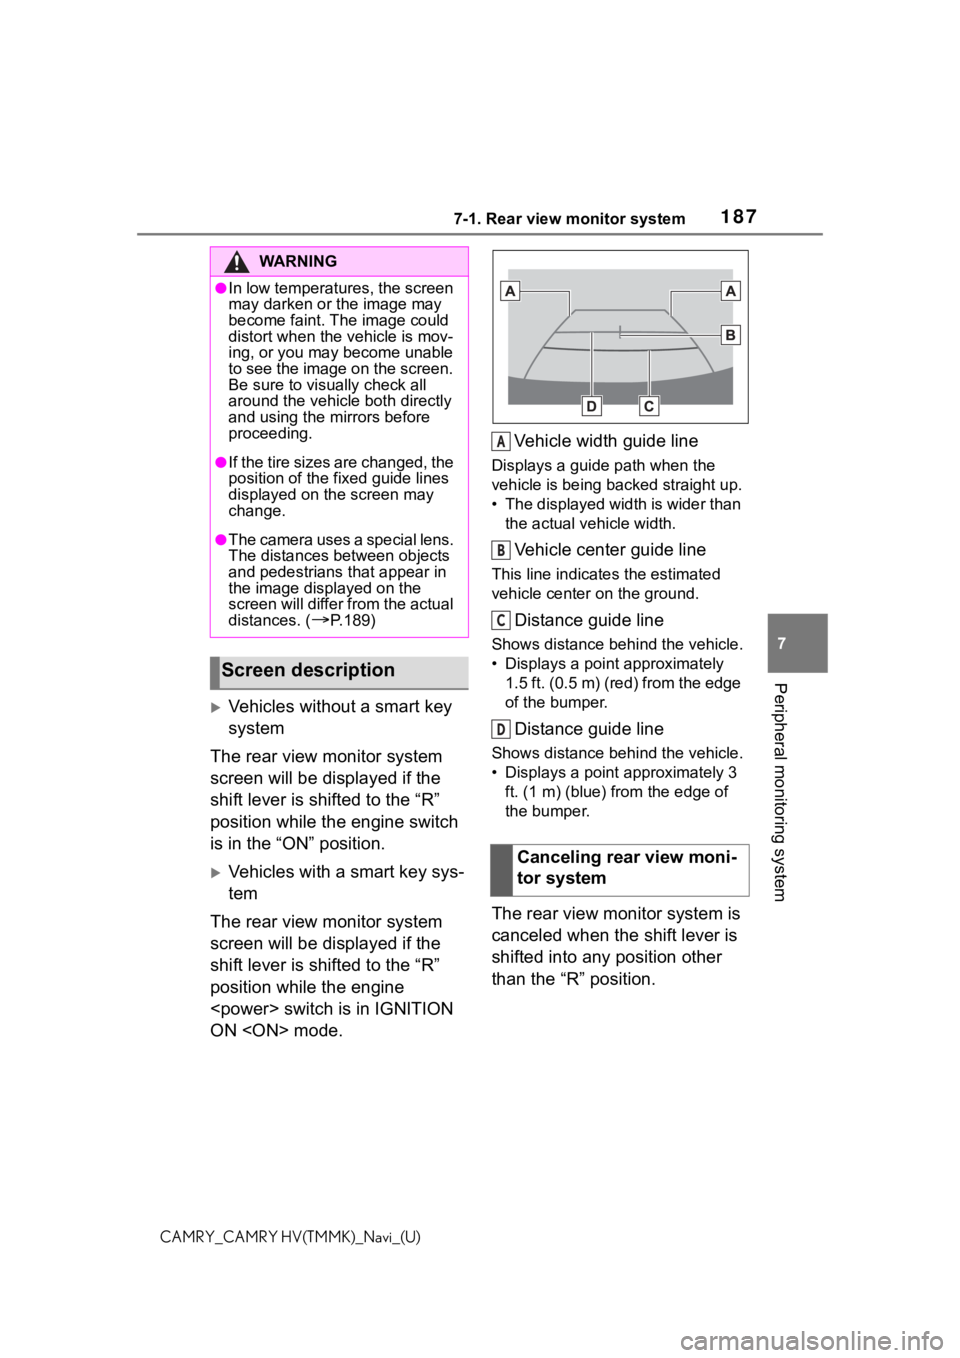
Displays a guide path when the
vehicle is being backed straight up.
• The displayed width is wider than
the actual veh icle width.
Vehicle center guide line
This line indicates the estimated
vehicle center on the ground.
Distance guide line
Shows distance behind the vehicle.
• Displays a point approximately
1.5 ft. (0.5 m) (red) from the edge
of the bumper.
Distance guide line
Shows distance behind the vehicle.
• Displays a point approximately 3 ft. (1 m) (blue) fr om the edge of
the bumper.
The rear view monitor system is
canceled when the shift lever is
shifted into any position other
than the “R” position.
WA R N I N G
●In low temperatures, the screen
may darken or the image may
become faint. The image could
distort when the vehicle is mov-
ing, or you may become unable
to see the image on the screen.
Be sure to visually check all
around the vehicle both directly
and using the mirrors before
proceeding.
●If the tire sizes are changed, the
position of the fixed guide lines
displayed on the screen may
change.
●The camera uses a special lens.
The distances between objects
and pedestrians that appear in
the image displayed on the
screen will differ from the actual
distances. (
P.189)
Screen description
Canceling rear view moni-
tor system
A
B
C
D
Page 196 of 324
1967-2. Toyota parking assist monitor
CAMRY_CAMRY HV(TMMK)_Navi_(U)
Vehicles without a smart key
system
The parking assist monitor
screen will be displayed if the
shift lever is shifted to the “R”
position while the engine switch
is in the “ON” position.
Vehicles with a smart key sys-
tem
The parking assist monitor
screen will be displayed if the
shift lever is shifted to the “R”
position while the engine
ON
Each time the display mode
switching button is selected, the
mode will change as follows:
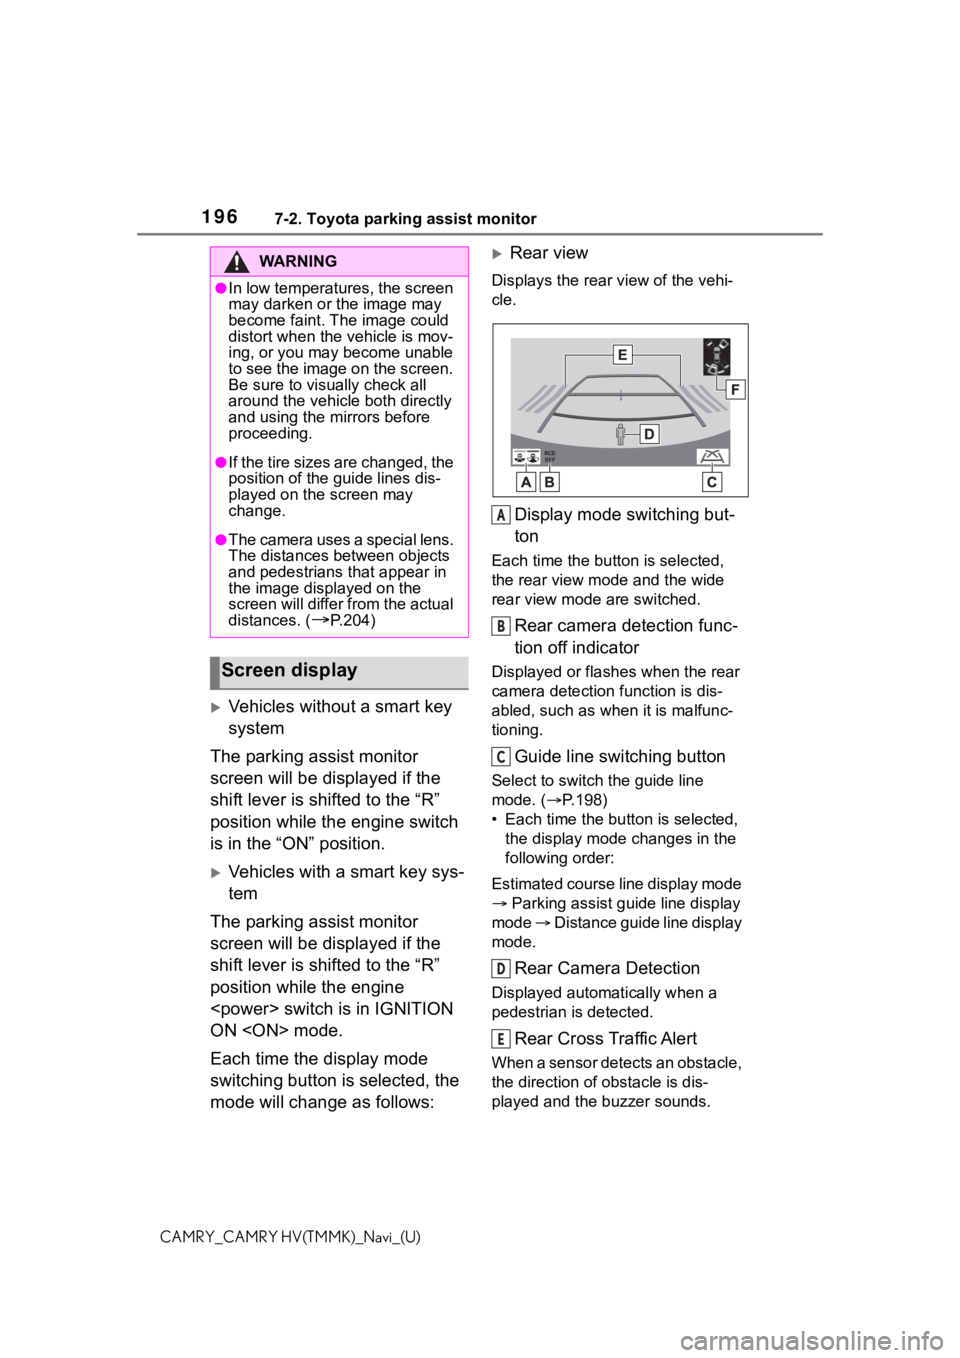
Rear view
Displays the rear v iew of the vehi-
cle.
Display mode switching but-
ton
Each time the button is selected,
the rear view mode and the wide
rear view mode are switched.
Rear camera detection func-
tion off indicator
Displayed or flashes when the rear
camera detection function is dis-
abled, such as when it is malfunc-
tioning.
Guide line switching button
Select to switch the guide line
mode. ( P.198)
• Each time the bu tton is selected,
the display mode changes in the
following order:
Estimated course line display mode
Parking assist guide line display
mode Distance guide line display
mode.
Rear Camera Detection
Displayed automatically when a
pedestrian is detected.
Rear Cross Traffic Alert
When a sensor detects an obstacle,
the direction of obstacle is dis-
played and the buzzer sounds.
WA R N I N G
●In low temperatures, the screen
may darken or the image may
become faint. The image could
distort when the vehicle is mov-
ing, or you may become unable
to see the image on the screen.
Be sure to visually check all
around the vehicle both directly
and using the mirrors before
proceeding.
●If the tire sizes are changed, the
position of the guide lines dis-
played on the screen may
change.
●The camera uses a special lens.
The distances between objects
and pedestrians that appear in
the image displayed on the
screen will differ from the actual
distances. (
P.204)
Screen display
A
B
C
D
E
Page 210 of 324
2107-3. Panoramic view monitor
CAMRY_CAMRY HV(TMMK)_Navi_(U)
7-3.Panoramic view monitor
*: If equipped
●The screen illustra tions used in
this text are intended as exam-
ples, and may differ from the
image that is actually displayed on the screen.
The panoramic view monitor is a
supplemental device intended to
assist the driver when checking
around the vehicle. When using,
be sure to visually check all
around the vehicle both directly
and using the mirrors before
proceeding. If you do not, you
may hit another vehicle or possi-
bly cause an accident.
Pay attention to the following
precautions when using the
panoramic view monitor.
Panoramic view moni-
tor*
Panoramic view monitor
assists the driver in viewing
the surroundings, when
operating at low speeds, by
combining the front, side
and rear cameras and dis-
playing a complete vehicle
overhead image on the
screen.
Vehicles without a smart
key system
When you press the camera
switch or shift the shift lever
to the “R” position while the
engine switch is in “ON”
position, the panoramic
view monitor operates.
Vehicles with a smart key
system
When you press the camera
switch or shift the shift lever
to the “R” position while the
engine
IGNITION ON
the panoramic view monitor
operates.
The monitor displays vari-
ous views of the position
and surroundings of the
vehicle.
Driving precautions
WA R N I N G
●Never depend on the panoramic
view monitor entirely. The
image and the position of the
guide lines displayed on the
screen may differ from the
actual state. Use caution just as
you would when driving any
other vehicle.
●Always make sure to check all
around the vehicle with your
own eyes when driving.
●Never drive while looking only at
the screen as the image on the
screen is different from actual
conditions. If you are driving
while looking only at the screen,
you may hit a person or an
object, resulting in an accident.
When driving, be sure to check
the vehicle’s surroundings with
your own eyes and the vehicle’s
mirrors.
Page 272 of 324
2728-2. Setup
CAMRY_CAMRY HV(TMMK)_Navi_(U)
Backed-up contact data
(“vCard” formatted) can be
transferred from USB device or
Bluetooth
® phone to this sys-
tem.
1 Connect a USB device.
( P.131)
2 Select “Transfer Contacts
from Device”.
3 Select “From USB”.
4 Select “USB 1” or “USB 2”
when the multiple USB
devices are connected. If a
USB device is connected,
skip this procedure.
5 Select “Replace Contacts” or
“Add Contact”. If the contact
is not registered, skip this
procedure.
“Replace Contacts”: Select to trans-
fer the contact fro m the connected
USB device or Bluetooth
® phone
and replace the current one.
“Add Contact”: Select to transfer
the desired contact data from the
connected USB device or Blue-
tooth
® phone to add to the current
one.
6 Select a desired file from
vCard file list.
7 Check that a confirmation
screen is displayed when the
operation is complete.
●Depending on the type of Blue-
tooth® phone used and number of
files, it may take time to display
vCard file lists and download con- tacts.
●Downloading may not complete
correctly in the
following cases:
• If the engine
• If the USB device or Bluetooth
®
phone is removed before down-
loading is complete.
New contact data can be regis-
tered.
Up to 4 numbers per person can
be registered. For PBAP com-
patible Bluetooth
® phones, this
function is available when “Auto-
matic Transfer” is set to off.
( P.270)
1 Select “New Contact”.
2 Enter the name and select
“OK”.
3 Enter the phone number and
select “OK”.
4 Select the phone type for the
phone number.
5 To add another number to
this contact, select “Yes”.
■Registering a new contact
in a different way (from the
call history screen)
1 Display the phone top
screen. ( P.250)
2 Select “History” and select a
contact not yet registered in
the contact list.
3 Select “Add to Contacts”.
From USB device
Registering a new contact
to the contacts list