TOYOTA CELICA 1987 Service Repair Manual
CELICA 1987
TOYOTA
TOYOTA
https://www.carmanualsonline.info/img/14/57451/w960_57451-0.png
TOYOTA CELICA 1987 Service Repair Manual
Trending: low oil pressure, radiator cap, ground clearance, turn signal, gas mileage, fuel cap, automatic transmission
Page 341 of 346
iURBOGHA
-_
t/- \\ll\, LL
. ..-.. ., . . a.^” ,...
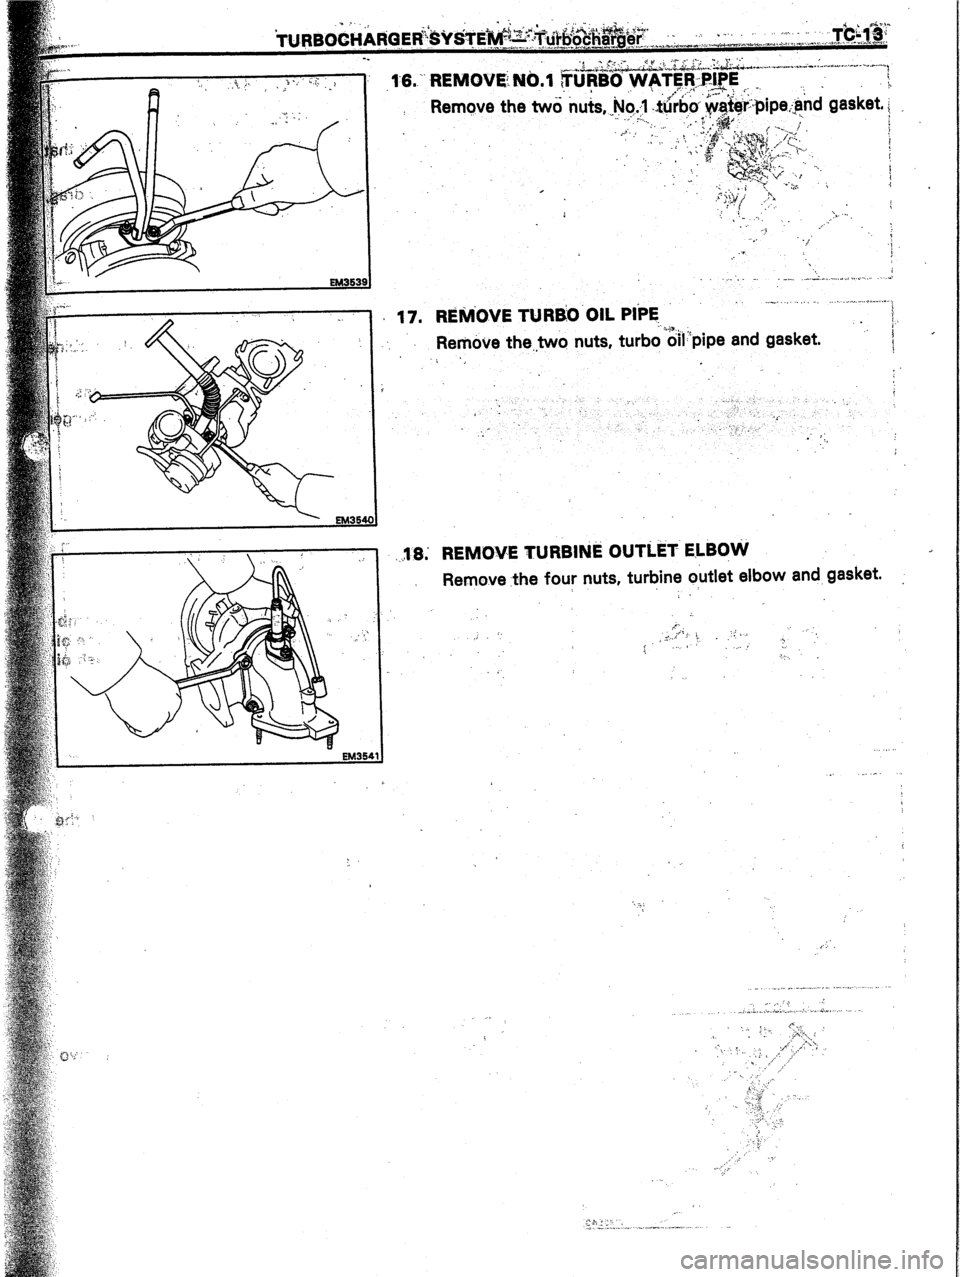
Remove the..two nuts, turbo d/l:‘pipe and
gasket.
1 ‘i
‘.
: .
:
_..r.
-,
_
:.
36; REMOVE TURBINE OUTLET ELBOVi’
Remove
the four nuts, turbine outlet elbow and gasket.
, ..
.’
. ..I
‘)
.,. ,. _.. . , ,.
,.,, = - ,- 5 I
c -_.. ” ,. “._ _^
Page 342 of 346
tc-14 TURBOCHARGER SYSTEM -’ Turbocharger
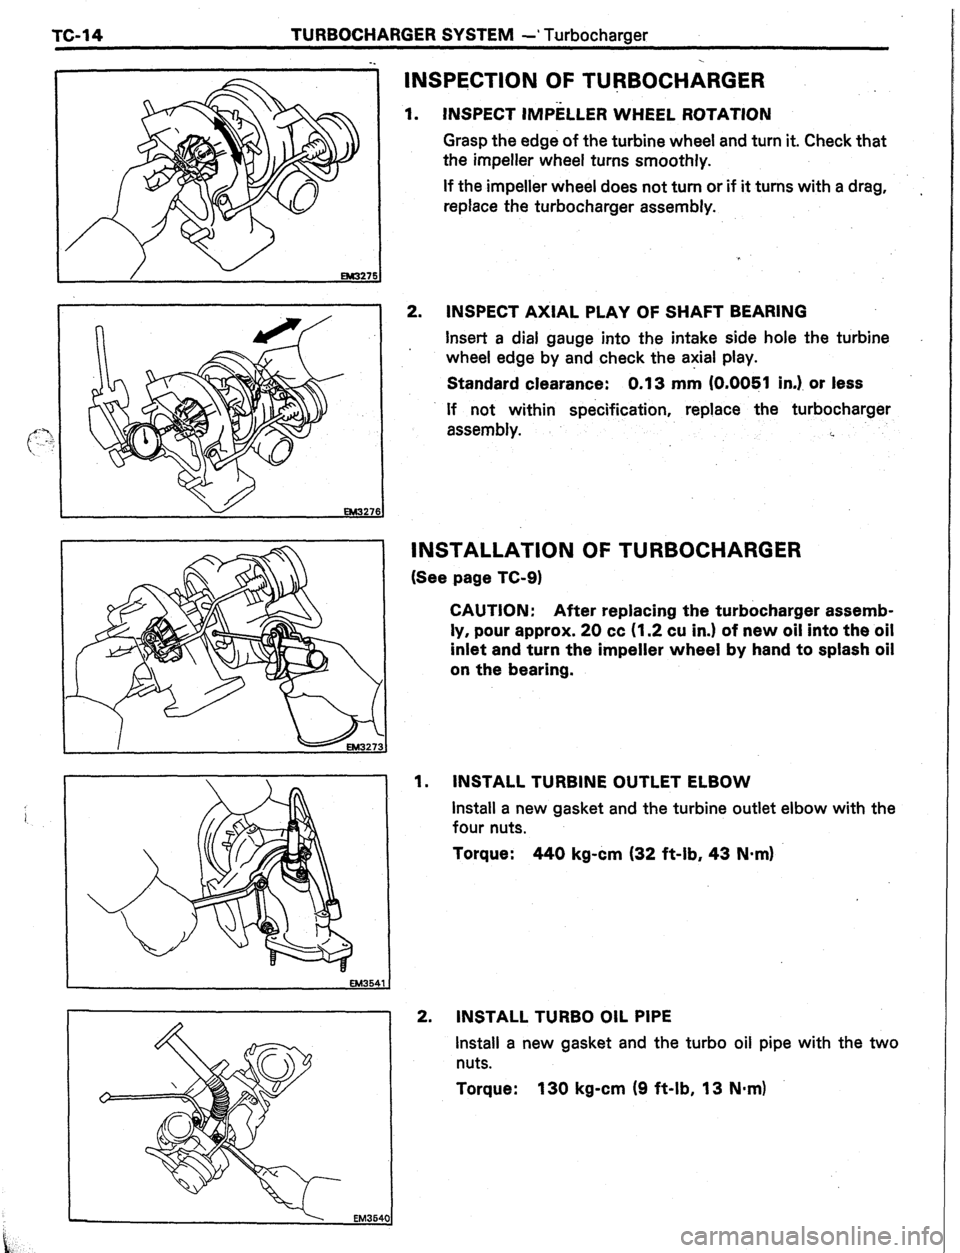
INSPECTION OF TURBOCHARGER
INSPECT IMPELLER WHEEL ROTATION 1.
Grasp the edge of the turbine wheel and turn it. Check that
the impeller wheel turns smoothly.
If the impeller wheel does not turn or if it turns with a drag,
replace the turbocharger assembly. ,
2.
INSPECT AXIAL PLAY OF SHAFT BEARING
Insert a dial gauge into the intake side hole the turbine
wheel edge by and check the axial play.
Standard clearance: 0.13 mm (O.OOBl in.). or less
If not within specification, replace the turbocharger
assembly.
i.
v
EM32761
INSTALLATION OF TURBOCHARGER
(See page TC-9)
CAUTION: After replacing the turbocharger assemb-
ly, pour approx. 20 cc (1.2 cu in.) of new oil into the oil
inlet and turn the impeller wheel by hand to splash oil
on the bearing.
1. INSTALL TURBINE OUTLET ELBOW
install a new gasket and the turbine outlet elbow with the
four nuts.
Torque: 440 kg-cm (32 ft-lb, 43 N-m) i
2.
INSTALL TURBO OIL PIPE
Install a new gasket and the turbo oil pipe with the two
nuts.
Torque: 130 kg-cm (9 ft-lb, 13 N.m)
Page 343 of 346
SYSTEM -
Turbocharger
TC-15
3.
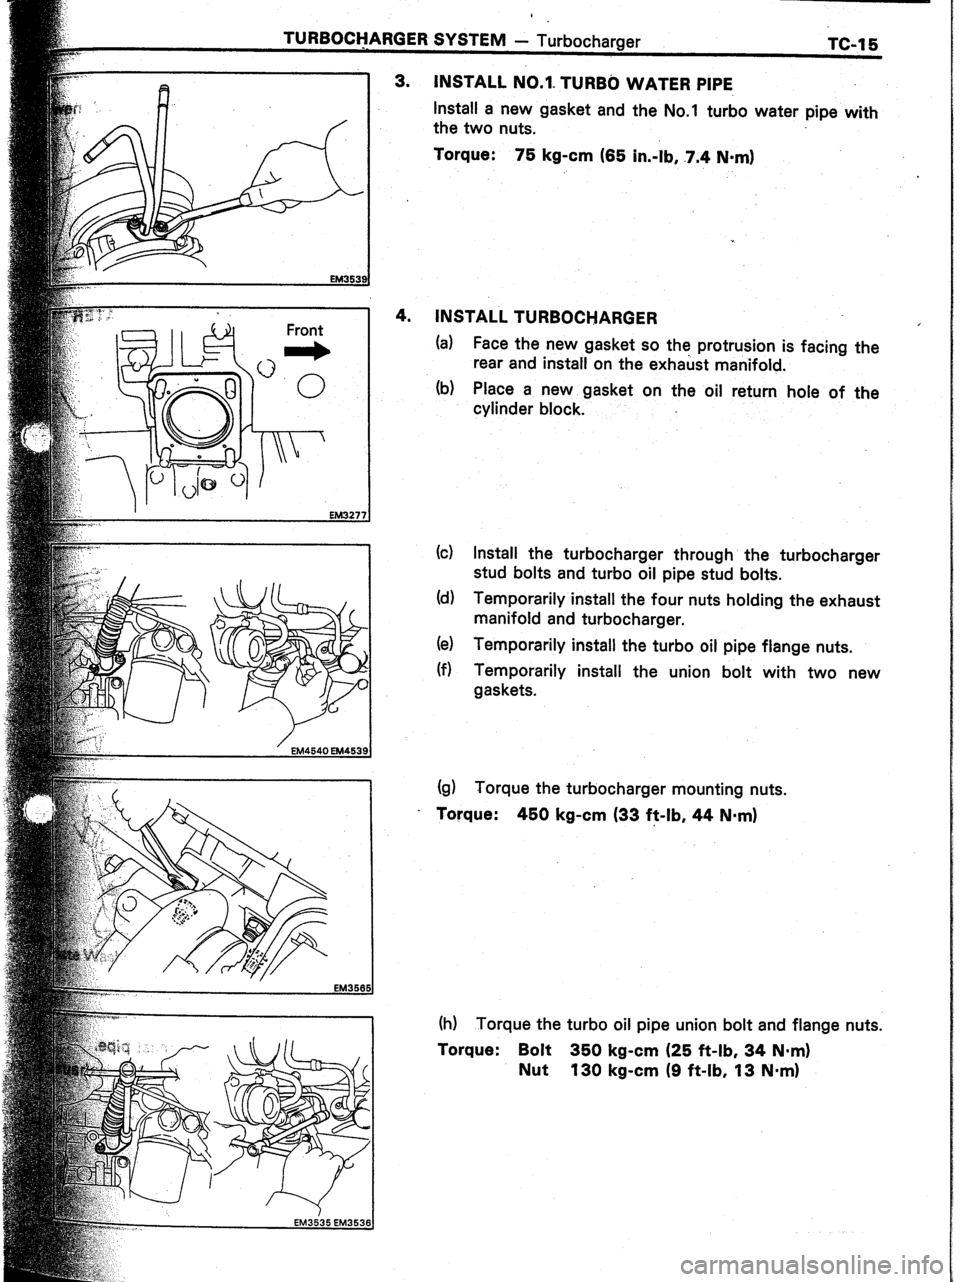
INSTALL NO.l. TURBO WATER PIPE
Install a new gasket and the No.1 turbo water pipe with
the two nuts.
Torque: 75 kg-cm (65 in.-lb, .7.4 Nom)
4.
INSTALL TURBOCHARGER
(a) Face the new gasket so the protrusion is facing the
rear and install on the exhaust manifold.
(b) Place a new gasket on the oil return hole of the
cylinder block.
(c) Install the turbocharger through the turbocharger
stud bolts and turbo oil pipe stud bolts.
(d) Temporarily install the four nuts holding the exhaust
manifold and turbocharger.
(e) Temporarily install the turbo oil pipe flange nuts.
(f) %rk;;Trily install the union bolt with two new
(g) Torque the turbocharger mounting nuts.
. Torque: 450 kg-cm (33 f?-lb, 44 N-m)
(h) Torque the turbo oil pipe union bolt and flange nuts.
Torque:
Bolt 350 kg-cm (25 ft-lb, 34 N-m)
Nut 130 kg-cm (9 ft-lb, 13 N-m)
Page 344 of 346
TURBOCHARGER SYSTEM - Turbocharaer
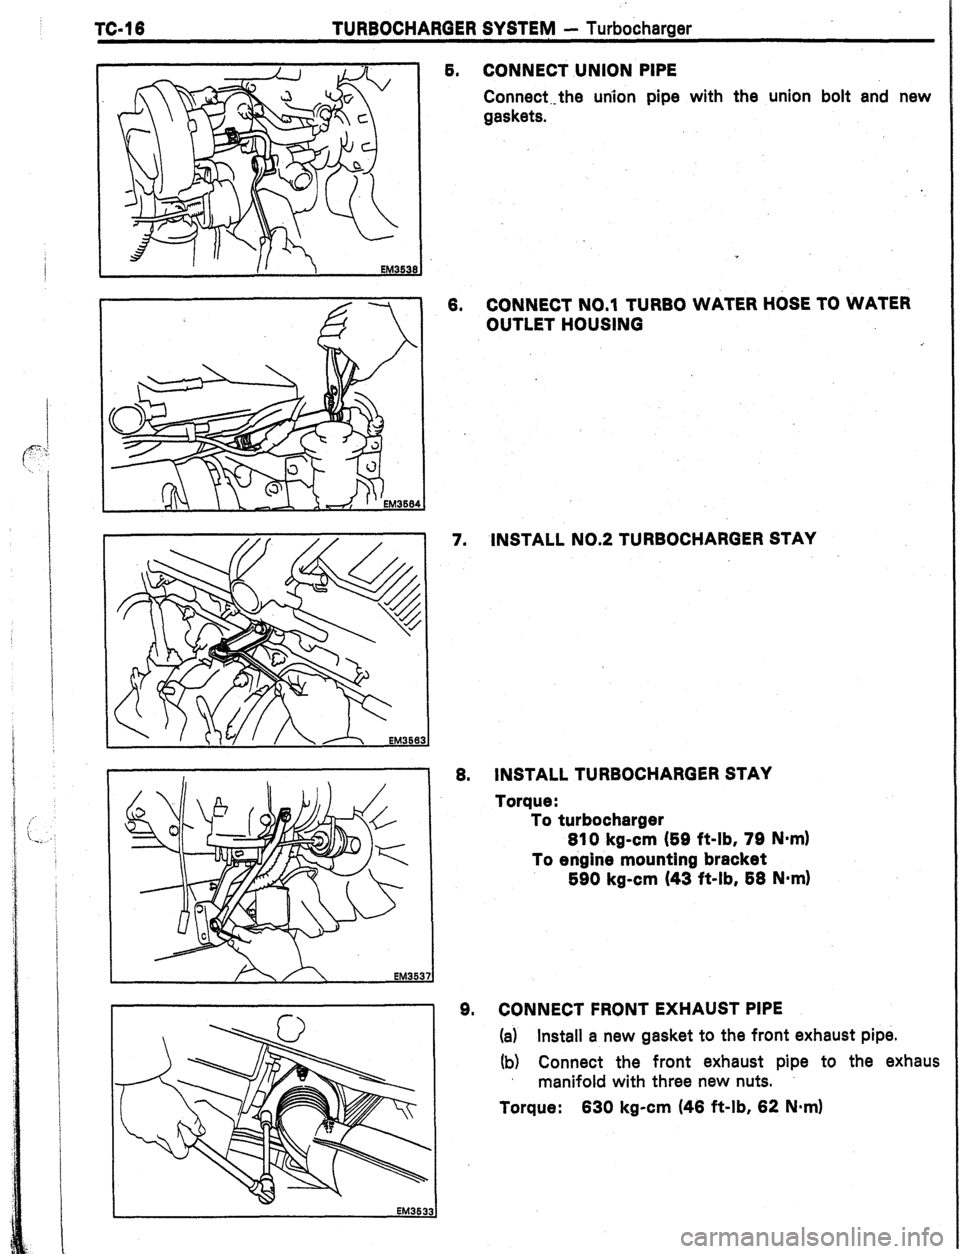
6. CONNECT UNION PIPE
Connect--the uriion pipe with the union bolt and new
gaskets.
’
6-i
6. CONNECT NO.1 TURBO WATER HOSE TO WATER
OUTLET HOUSING
7. INSTALL NO.2 TURBOCHARGER STAY
8. INSTALL TURBOCHARGER STAY
Torque:
To turbocharger
810 kg-cm (59 ft-lb, 70 N-m)
To engine mounting bracket
680 kg-cm (43 ft-lb, 68 N-m)
9. CONNECT FRONT EXHAUST PIPE
(a) Install a new gasket to the front exhaust pipe.
(b) Connect the front exhaust pipe to the exhaus
manifold with three new nuts.
Torque: 630 kg-cm (46 ft-lb, 62 Nem)
Page 345 of 346
8 SYS
NTEM - - Turbocharger
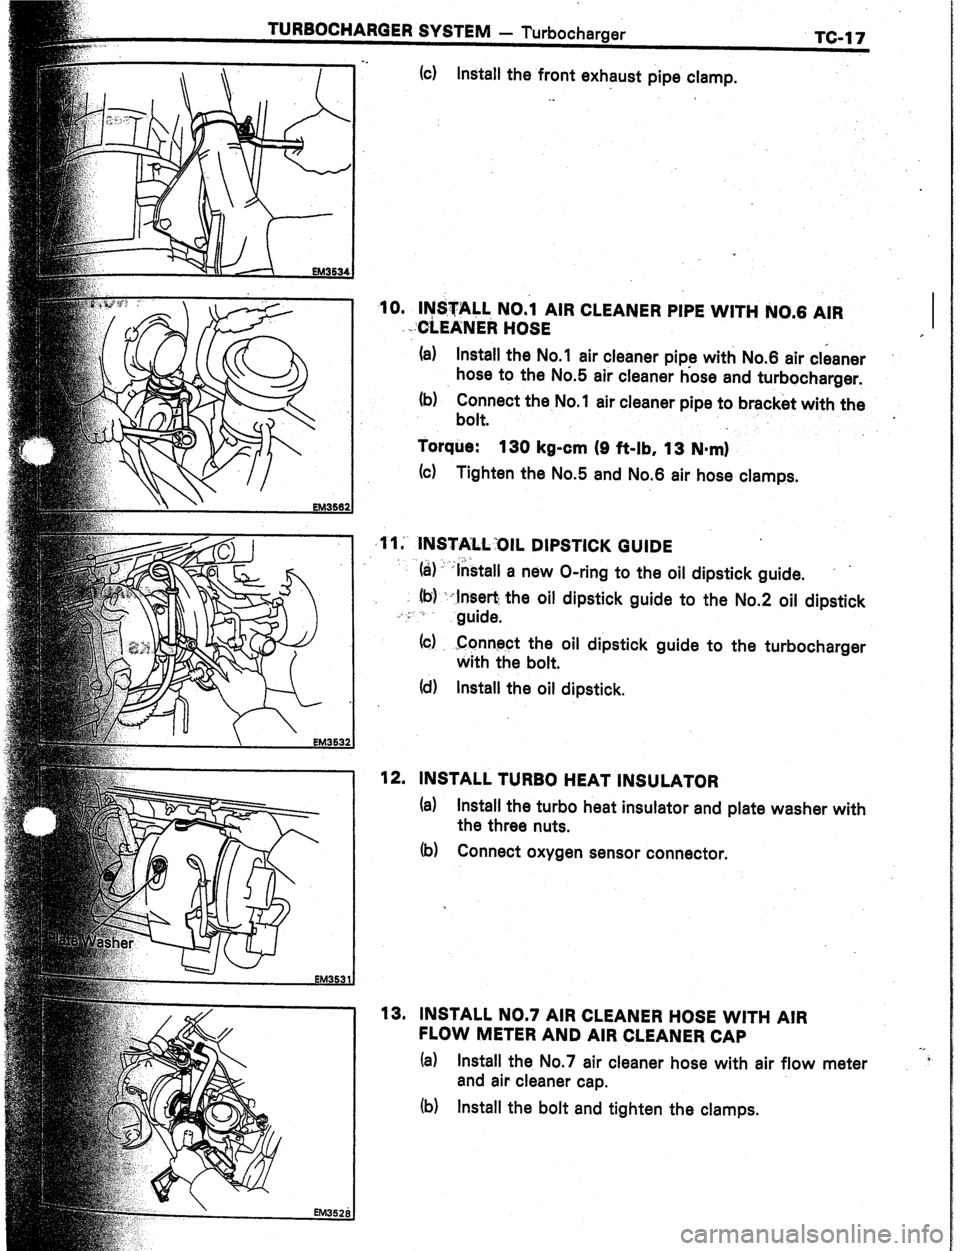
(cl Install
the front exhaust pipe
clamp. TC-17
10. Ih$TA& NO.1 AIR CLEANER PIPE WITH NO.6 AIR
.-GLEANER HOSE I
.
(a)
Install the No.1 air cleaner pipe with No.6 air cleaner
hose to the No.5 air cleaner hose and turbocharger.
(b) Connect the No.1 air cleaner pipe to bracket with the
bolt.
Torque:
130 kg-cm (9 ft-lb, 13 N-m)
(c) Tighten the No.5 and No.6 air hose clamps.
11 i INSTALL “OIL DIPSTICK GUIDE
‘(a) ‘.‘lnstall a new O-ring to the oil dipstick guide.
lb) ,-insert the oil dipstick guide to the No.2 oil dipstick
: ‘/
guide.
(c) Connect the oil dipstick guide to the turbocharger
with the bolt.
(d) Install the oil dipstick.
12. INSTALL TURBO HEAT INSULATOR
(a) Install the turbo heat insulator and plate washer with
the three nuts.
(b) Connect oxygen sensor connector.
13. INSTALL NO.7 AIR CLEANER HOSE WITH AIR
FLOW METER AND AIR CLEANER CAP
(a) Install the No.7 air cleaner hose with air flow meter
and air cleaner cap.
(b) Install the bolt and tighten the clamps.
Page 346 of 346
ms1’8
TURBOCHARGER SYSTElk - Turbokharger
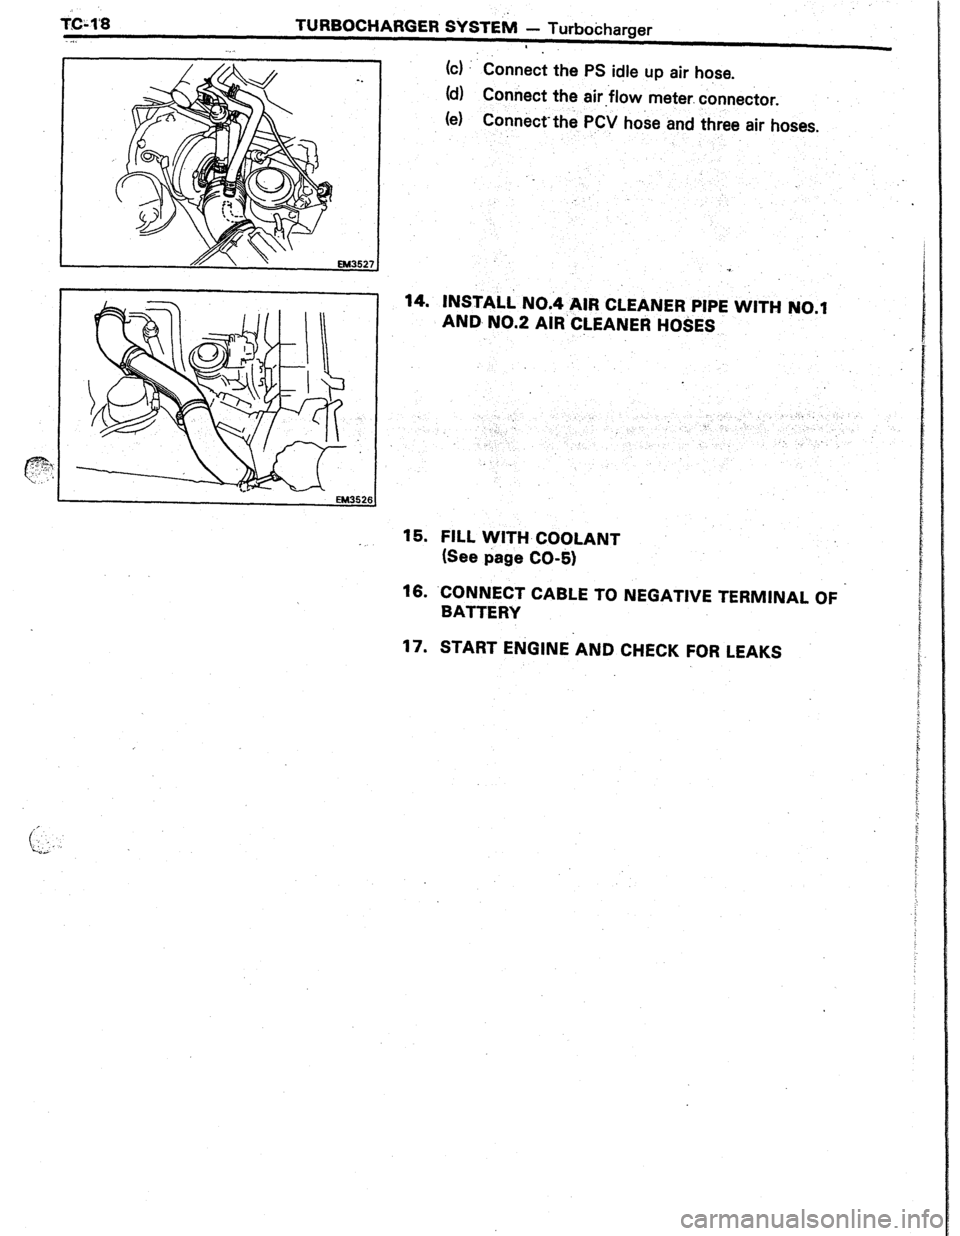
(c) Connect the PS idle up air hose.
(d) Connect the air.flow meter. connector.
(e)
Conn&t.thk PCV hose and three air hoses.
14. INSTALL NO.4 AIR CLEANER PIPE WITH NO.1
AND NO.2 AIR’CLEANER HOSES
15. FILL WITH COOLANT
(See page CO-5)
16. CX;hXi CABLE TO NEGATIVE TERMINAL OF
17. START ENGINE AND CHECK FOR LEAKS
Trending: compression ratio, coolant level, glove box, fuse, wheel torque, engine, coolant
