TOYOTA COROLLA 2020 Owners Manual (in English)
Manufacturer: TOYOTA, Model Year: 2020, Model line: COROLLA, Model: TOYOTA COROLLA 2020Pages: 588, PDF Size: 13.49 MB
Page 451 of 588
4517-3. Do-it-yourself maintenance
COROLLA_U
7
Maintenance and care
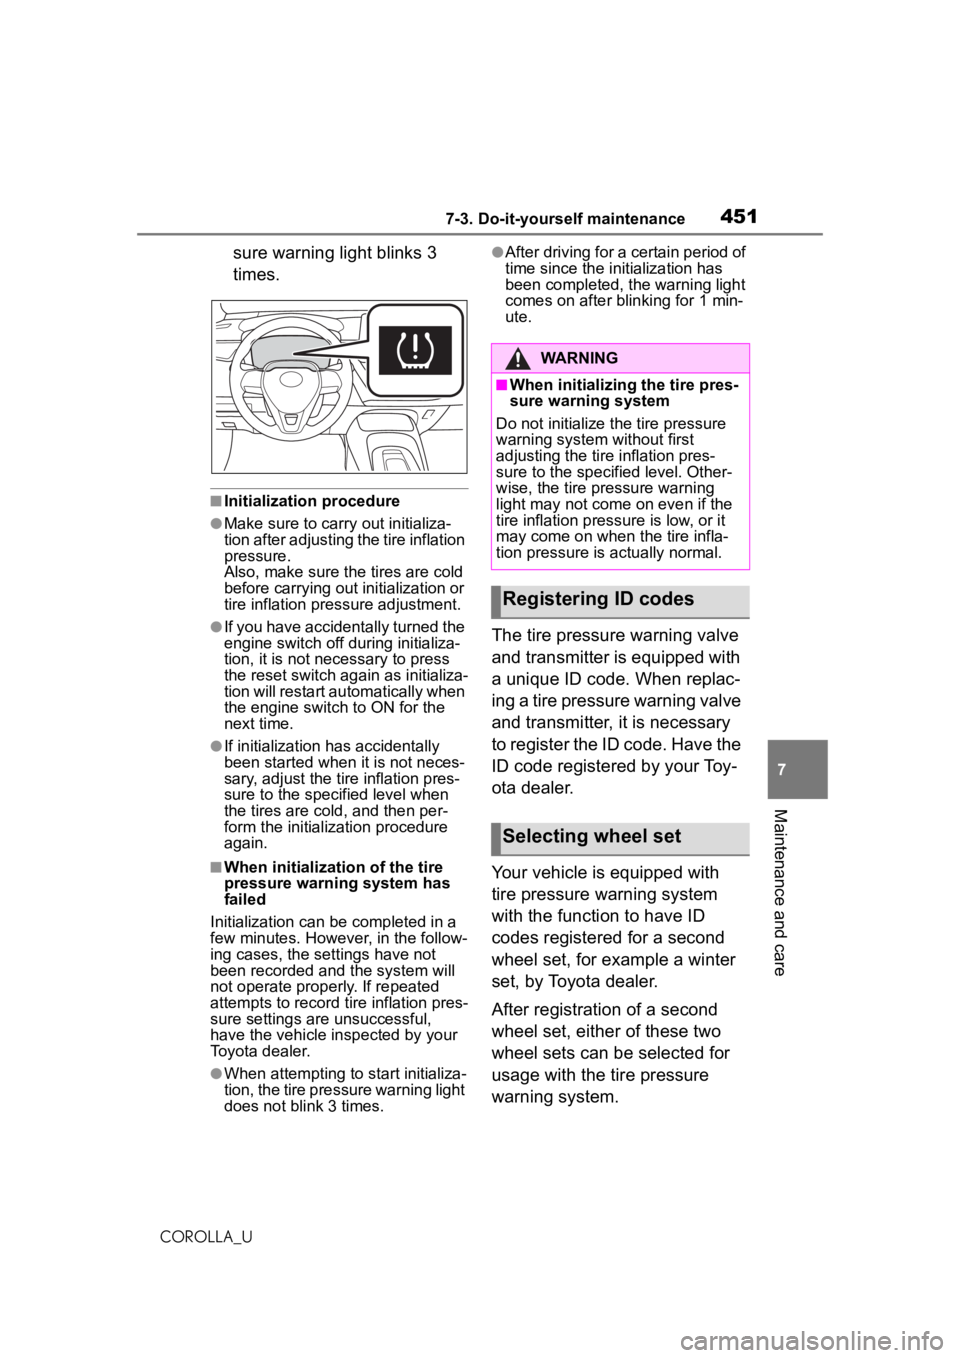
sure warning light blinks 3
times.
■Initialization procedure
●Make sure to carry out initializa-
tion after adjusting the tire inflation
pressure.
Also, make sure the tires are cold
before carrying ou t initialization or
tire inflation pressure adjustment.
●If you have accidentally turned the
engine switch off during initializa-
tion, it is not necessary to press
the reset switch again as initializa-
tion will restart aut omatically when
the engine switch to ON for the
next time.
●If initialization has accidentally
been started when it is not neces-
sary, adjust the tire inflation pres-
sure to the specified level when
the tires are cold, and then per-
form the initialization procedure
again.
■When initialization of the tire
pressure warning system has
failed
Initialization can be completed in a
few minutes. However, in the follow-
ing cases, the settings have not
been recorded and the system will
not operate properly. If repeated
attempts to record tire inflation pres-
sure settings are unsuccessful,
have the vehicle inspected by your
Toyota dealer.
●When attempting to start initializa-
tion, the tire pressure warning light
does not blink 3 times.
●After driving for a certain period of
time since the initialization has
been completed, the warning light
comes on after blinking for 1 min-
ute.
The tire pressure warning valve
and transmitter is equipped with
a unique ID code. When replac-
ing a tire pressure warning valve
and transmitter, it is necessary
to register the ID code. Have the
ID code registered by your Toy-
ota dealer.
Your vehicle is equipped with
tire pressure warning system
with the function to have ID
codes registered for a second
wheel set, for example a winter
set, by Toyota dealer.
After registration of a second
wheel set, either of these two
wheel sets can be selected for
usage with the tire pressure
warning system.
WARNING
■When initializing the tire pres-
sure warning system
Do not initialize the tire pressure
warning system without first
adjusting the tire inflation pres-
sure to the specified level. Other-
wise, the tire pressure warning
light may not come on even if the
tire inflation pressure is low, or it
may come on when the tire infla-
tion pressure is actually normal.
Registering ID codes
Selecting wheel set
Page 452 of 588
4527-3. Do-it-yourself maintenance
COROLLA_U
■Operating conditions for
the function
This function will perform the
change of wheel set only if a
second wheel set has been
registered. If no second wheel
set has been registered, no
change will be made when
selecting this function in the
menu.
Only a change between both
registered wheel set is possi-
ble, mixing between these
wheel sets is not supported.
■How to change between
wheel sets
1 Have the vehicle fitted with
the preferred wheel set.
2 Press or of the meter
control switch to select .
3 Press or to select
“Vehicle Settings” and then
press .
4 Press or to select
“TPWS” and then press .
5 Press or to select
“Change Wheel”. Then press
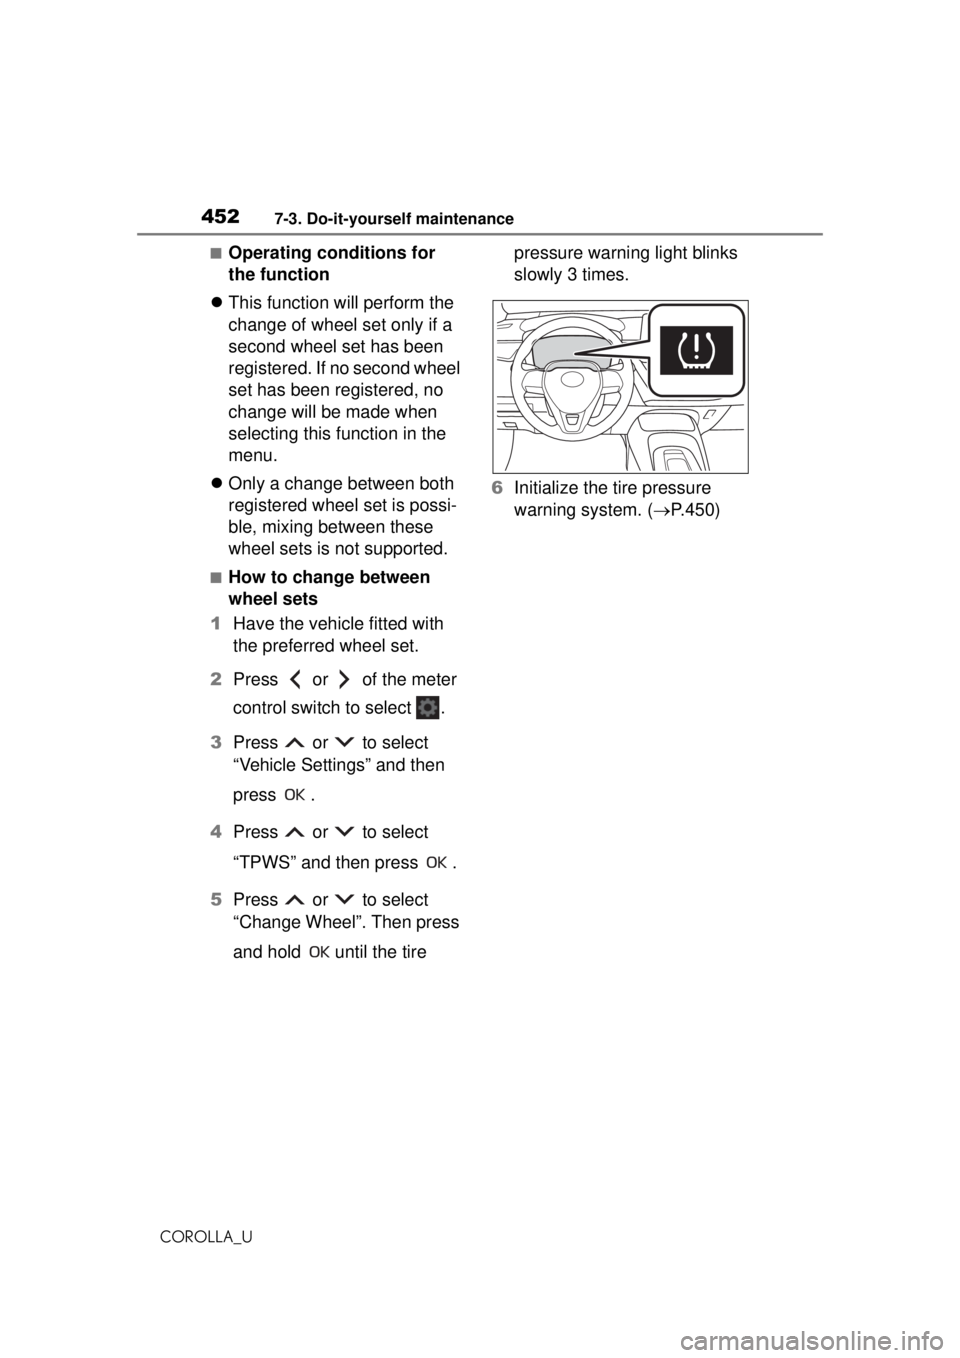
and hold until the tire pressure warning light blinks
slowly 3 times.
6 Initialize the tire pressure
warning system. ( P.450)
Page 453 of 588
4537-3. Do-it-yourself maintenance
COROLLA_U
7
Maintenance and care
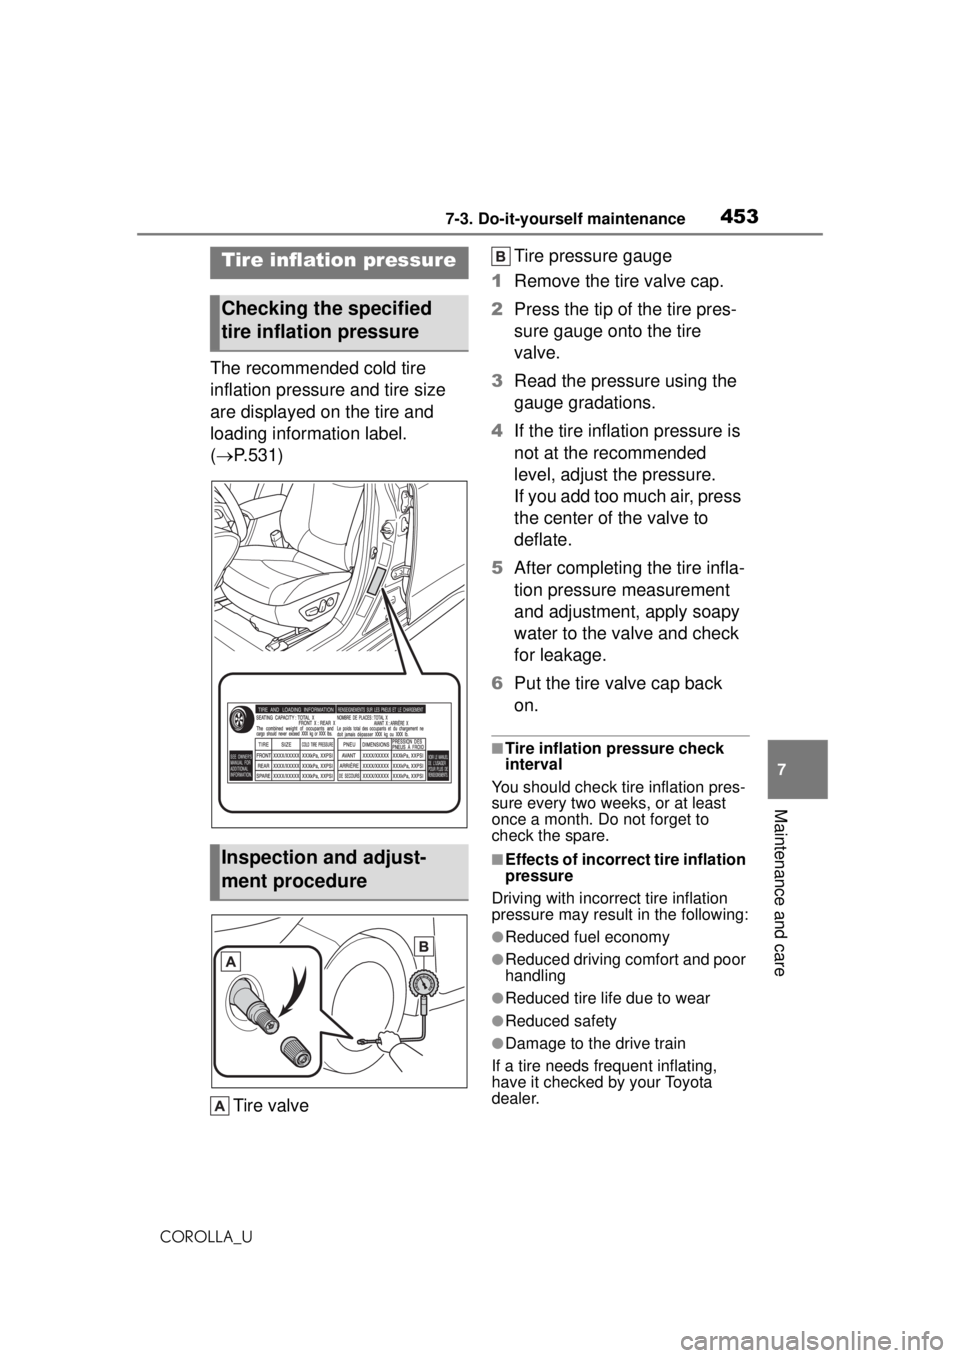
The recommended cold tire
inflation pressure and tire size
are displayed on the tire and
loading information label.
( P.531)
Tire valve Tire pressure gauge
1 Remove the tire valve cap.
2 Press the tip of the tire pres-
sure gauge onto the tire
valve.
3 Read the pressure using the
gauge gradations.
4 If the tire inflation pressure is
not at the recommended
level, adjust the pressure.
If you add too much air, press
the center of the valve to
deflate.
5 After completing the tire infla-
tion pressure measurement
and adjustment, apply soapy
water to the valve and check
for leakage.
6 Put the tire valve cap back
on.
■Tire inflation pressure check
interval
You should check tire inflation pres-
sure every two weeks, or at least
once a month. Do not forget to
check the spare.
■Effects of incorrect tire inflation
pressure
Driving with incorrect tire inflation
pressure may result in the following:
●Reduced fuel economy
●Reduced driving comfort and poor
handling
●Reduced tire life due to wear
●Reduced safety
●Damage to the drive train
If a tire needs frequent inflating,
have it checked by your Toyota
dealer.
Tire inflation pressure
Checking the specified
tire inflation pressure
Inspection and adjust-
ment procedure
Page 454 of 588
4547-3. Do-it-yourself maintenance
COROLLA_U
■Instructions for checking tire
inflation pressure
When checking tire inflation pres-
sure, observe the following:
●Check only when the tires are
cold.
If your vehicle has been parked for
at least 3 hours or has not been
driven for more than 1 mile or 1.5
km, you will get an accurate cold
tire inflation pressure reading.
●Always use a tire pressure gauge.
It is difficult to judge if a tire is
properly inflated based only on its
appearance.
●It is normal for the tire inflation
pressure to be higher after driving
as heat is generated in the tire. Do
not reduce tire inflation pressure
after driving.
●Never exceed the vehicle capacity
weight.
Passengers and luggage weight
should be placed so that the vehi-
cle is balanced.
WARNING
■Proper inflation is critical to
save tire performance
Keep your tires properly inflated.
If the tires are not properly
inflated, the following conditions
may occur which could lead to an
accident resulting in death or seri-
ous injury:
●Excessive wear
●Uneven wear
●Poor handling
●Possibility of blowouts resulting
from overheated tires
●Air leaking from between tire
and wheel
●Wheel deformation and/or tire
damage
●Greater possibility of tire dam-
age while driving (due to road
hazards, expansion joints,
sharp edges in the road, etc.)
NOTICE
■When inspecting and adjust-
ing tire inflation pressure
Be sure to put the tire valve caps
back on.
If a valve cap is not installed, dirt
or moisture may get into the valve
and cause an air leak, resulting in
decreased tire inflation pressure.
Page 455 of 588
4557-3. Do-it-yourself maintenance
COROLLA_U
7
Maintenance and care
When replacing wheels, care
should be taken to ensure that
they are equivalent to those
removed in load capacity, diam-
eter, rim width and inset
*.
Replacement wheels are avail-
able at your Toyota dealer.
*: Conventionally referred to as off- set.
Toyota does not recommend
using the following:
Wheels of different sizes or
types
Used wheels
Bent wheels that have been
straightened
■When replacing wheels (vehi-
cles with a tire pressure warn-
ing system)
The wheels of your vehicle are
equipped with tire pressure warning
valves and transmitters that allow
the tire pressure warning system to
provide advance warning in the
event of a loss in tire inflation pres-
sure. Whenever wheels are
replaced, the tire pressure warning
valves and transmitters must be
installed. ( P.449)
Wheels
If a wheel is bent, cracked or
heavily corroded, it should
be replaced. Otherwise, the
tire may separate from the
wheel or cause a loss of
handling control.
Wheel selection
WARNING
■When replacing wheels
●Do not use wheels that are a dif-
ferent size from those recom-
mended in the Owner’s Manual,
as this may result in a loss of
handling control.
●Never use an inner tube in a
leaking wheel which is designed
for a tubeless tire.
Doing so may result in an acci-
dent, causing death or serious
injury.
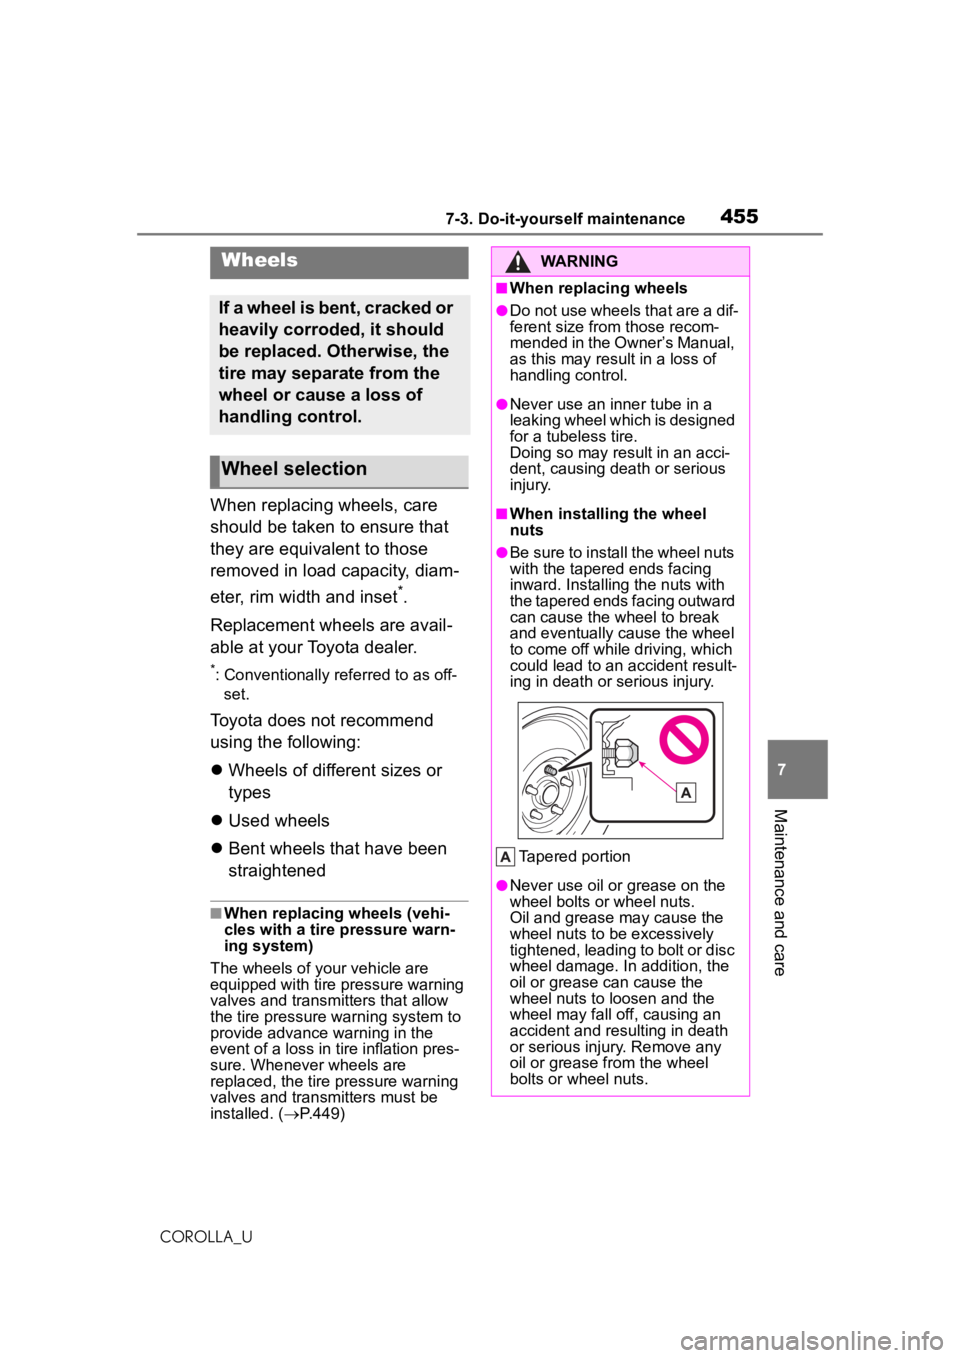
■When installing the wheel
nuts
●Be sure to install the wheel nuts
with the tapered ends facing
inward. Installing the nuts with
the tapered ends facing outward
can cause the wheel to break
and eventually cause the wheel
to come off while driving, which
could lead to an accident result-
ing in death or serious injury.
Tapered portion
●Never use oil or grease on the
wheel bolts or wheel nuts.
Oil and grease may cause the
wheel nuts to be excessively
tightened, leading to bolt or disc
wheel damage. In addition, the
oil or grease can cause the
wheel nuts to loosen and the
wheel may fall off, causing an
accident and resulting in death
or serious injury. Remove any
oil or grease from the wheel
bolts or wheel nuts.
Page 456 of 588
4567-3. Do-it-yourself maintenance
COROLLA_U
Use only Toyota wheel nuts
and wheel nut wrenches
designed for use with your
aluminum wheels.
When rotating, repairing or
changing your tires, check
that the wheel nuts are still
tight after driving 1000 miles
(1600 km).
Be careful not to damage the aluminum wheels when using
tire chains.
Use only Toyota genuine bal-
ance weights or equivalent
and a plastic or rubber ham-
mer when balancing your
wheels.
WARNING
■Use of defective wheels pro-
hibited
Do not use cracked or deformed
wheels. Doing so could cause the
tire to leak air during driving, pos-
sibly causing an accident.
NOTICE
■Replacing tire pressure warn-
ing valves and transmitters
(vehicles with a tire pressure
warning system)
●Because tire repair or replace-
ment may affect the tire pres-
sure warning valves and
transmitters, make sure to have
tires serviced by your Toyota
dealer or other qualified service
shop. In addition, make sure to
purchase your tire pressure
warning valves and transmit-
ters at your Toyota dealer.
●Ensure that only genuine Toyota
wheels are used on your vehi-
cle.
Tire pressure warning valves
and transmitters may not work
properly with non-genuine
wheels.
Aluminum wheel precau-
tions (if equipped)
Page 457 of 588
4577-3. Do-it-yourself maintenance
COROLLA_U
7
Maintenance and care
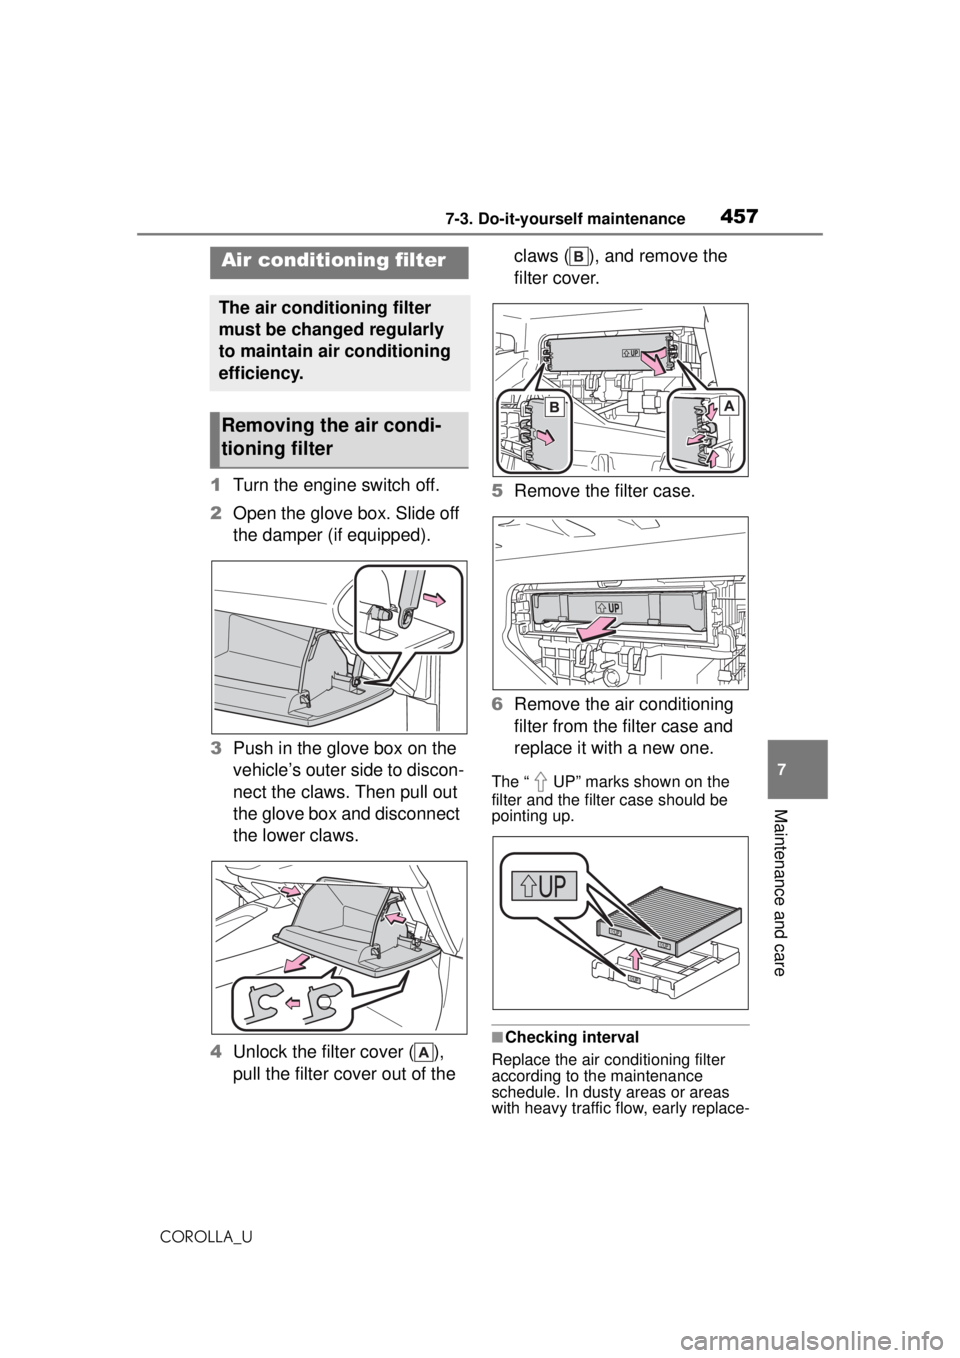
1 Turn the engine switch off.
2 Open the glove box. Slide off
the damper (if equipped).
3 Push in the glove box on the
vehicle’s outer side to discon-
nect the claws. Then pull out
the glove box and disconnect
the lower claws.
4 Unlock the filter cover ( ),
pull the filter cover out of the claws ( ), and remove the
filter cover.
5 Remove the filter case.
6 Remove the air conditioning
filter from the filter case and
replace it with a new one.
The “ UP” marks shown on the
filter and the filter case should be
pointing up.
■Checking interval
Replace the air conditioning filter
according to the maintenance
schedule. In dusty areas or areas
with heavy traffic flow, early replace-
Air condition ing filter
The air conditioning filter
must be changed regularly
to maintain air conditioning
efficiency.
Removing the air condi-
tioning filter
Page 458 of 588
4587-3. Do-it-yourself maintenance
COROLLA_Ument may be required. (For sched-
uled maintenance information,
please refer to the “Scheduled
Maintenance Guide” or “Owner’s
Manual Supplement”.)
■If air flow from the vents
decreases dramatically
The filter may be clogged. Check
the filter and replace if necessary.*: If equipped
■If the key battery is depleted
The following symptoms may occur:
●The smart key system (if
equipped) and wireless remote
control will not function properly.
●The operational range will be
reduced.
Flathead screwdriver
Small flathead screwdriver
Lithium battery CR2032
■Use a CR2032 lithium battery
●Batteries can be purchased at
your Toyota dealer, local electrical
appliance shops or camera stores.
●Replace only with the same or
equivalent type recommended by
the manufacturer.
●Dispose of used batteries accord-
ing to local laws.
NOTICE
■When using the air condition-
ing system
Make sure that a filter is always
installed.
Using the air conditioning system
without a filter may cause damage
to the system.
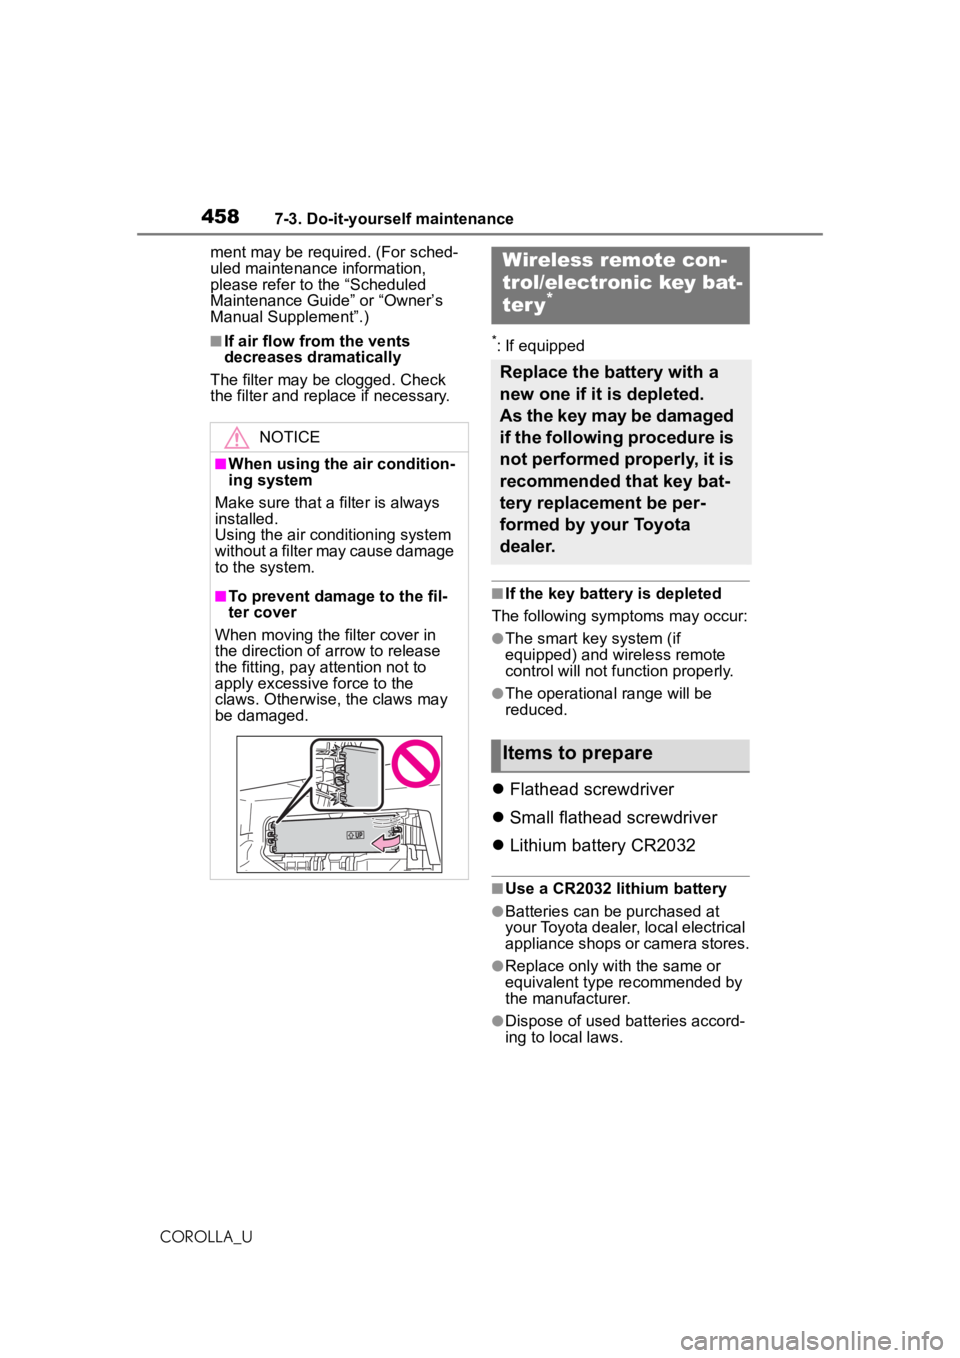
■To prevent damage to the fil-
ter cover
When moving the filter cover in
the direction of arrow to release
the fitting, pay attention not to
apply excessive force to the
claws. Otherwise, the claws may
be damaged.
Wireless remote con-
trol/electronic key bat-
ter y
*
Replace the battery with a
new one if it is depleted.
As the key may be damaged
if the following procedure is
not performed properly, it is
recommended that key bat-
tery replacement be per-
formed by your Toyota
dealer.
Items to prepare
Page 459 of 588
4597-3. Do-it-yourself maintenance
COROLLA_U
7
Maintenance and care
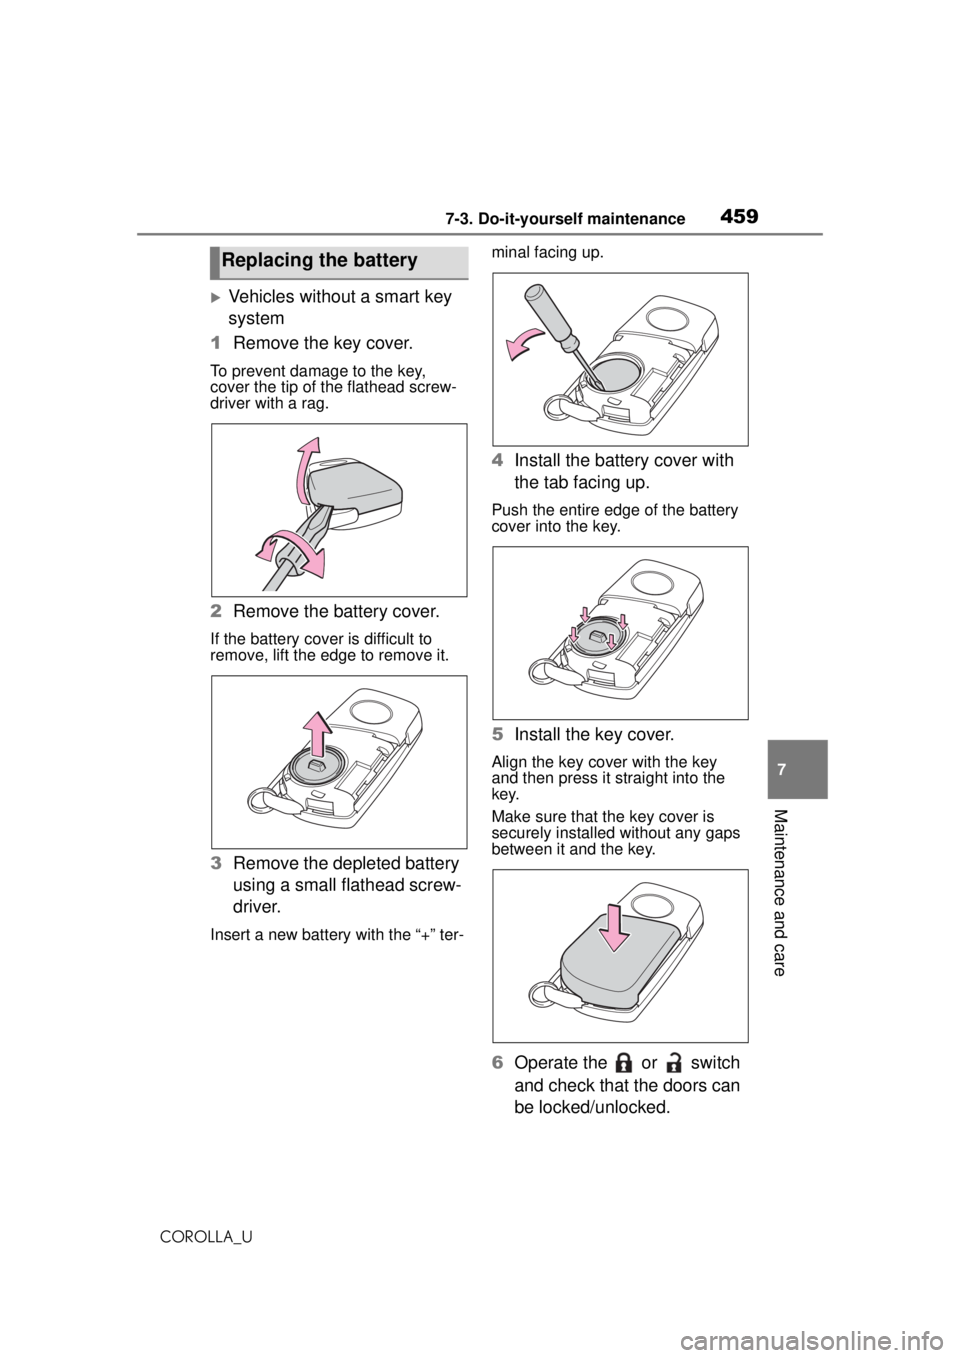
Vehicles without a smart key
system
1 Remove the key cover.
To prevent damage to the key,
cover the tip of the flathead screw-
driver with a rag.
2Remove the battery cover.
If the battery cover is difficult to
remove, lift the edge to remove it.
3Remove the depleted battery
using a small flathead screw-
driver.
Insert a new battery with the “+” ter- minal facing up.
4
Install the battery cover with
the tab facing up.
Push the entire edge of the battery
cover into the key.
5Install the key cover.
Align the key cover with the key
and then press it straight into the
key.
Make sure that the key cover is
securely installed without any gaps
between it and the key.
6Operate the or switch
and check that the doors can
be locked/unlocked.
Replacing the battery
Page 460 of 588
4607-3. Do-it-yourself maintenance
COROLLA_U
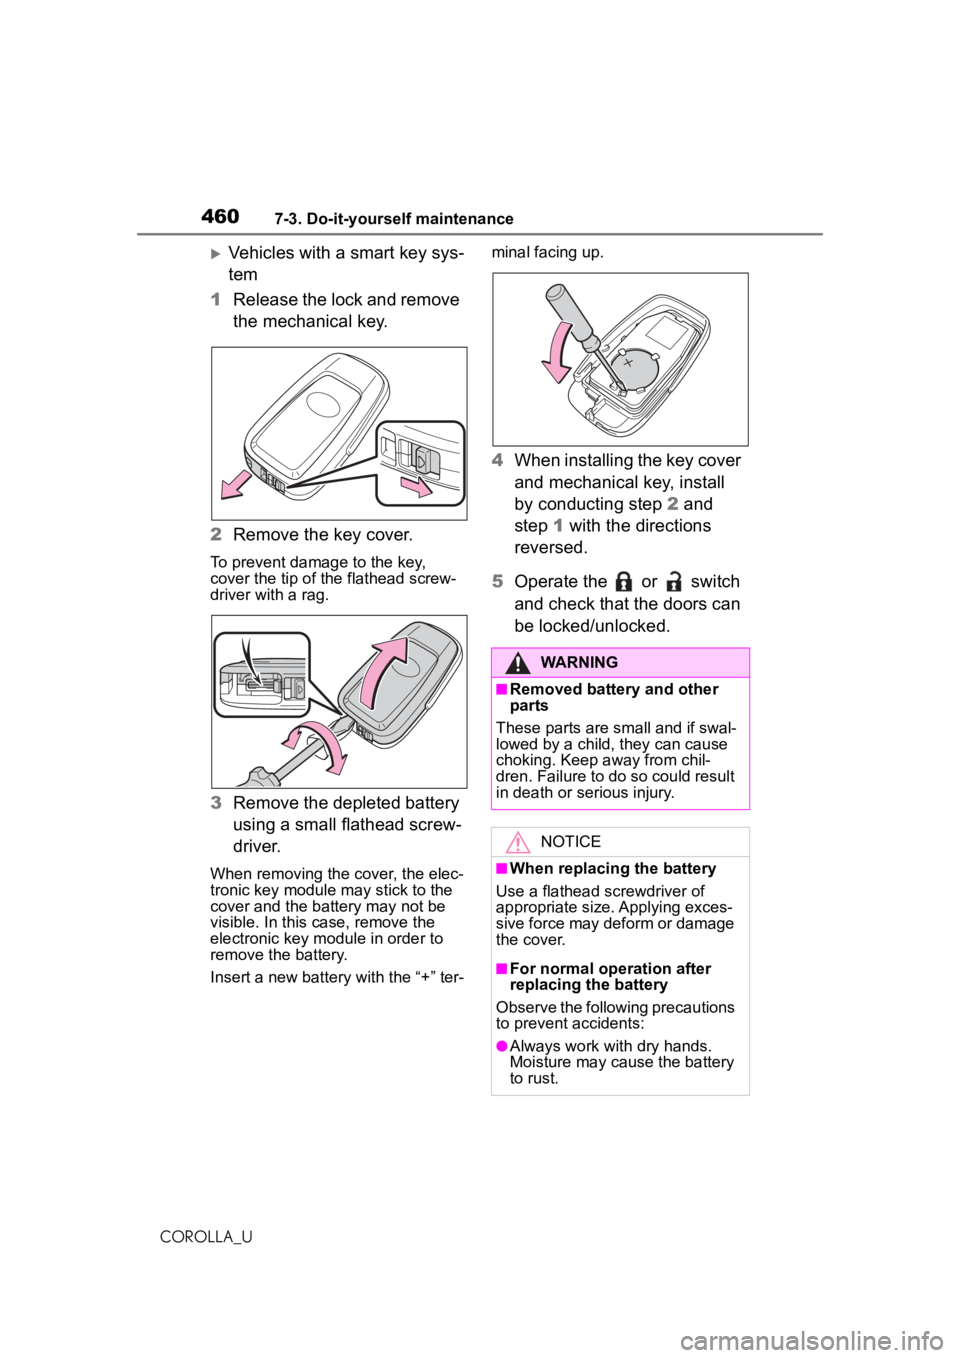
Vehicles with a smart key sys-
tem
1 Release the lock and remove
the mechanical key.
2 Remove the key cover.
To prevent damage to the key,
cover the tip of the flathead screw-
driver with a rag.
3Remove the depleted battery
using a small flathead screw-
driver.
When removing the cover, the elec-
tronic key module may stick to the
cover and the battery may not be
visible. In this case, remove the
electronic key module in order to
remove the battery.
Insert a new battery with the “+” ter- minal facing up.
4
When installing the key cover
and mechanical key, install
by conducting step 2 and
step 1 with the directions
reversed.
5 Operate the or switch
and check that the doors can
be locked/unlocked.
WARNING
■Removed battery and other
parts
These parts are small and if swal-
lowed by a child, they can cause
choking. Keep away from chil-
dren. Failure to do so could result
in death or serious injury.
NOTICE
■When replacing the battery
Use a flathead screwdriver of
appropriate size. Applying exces-
sive force may deform or damage
the cover.
■For normal operation after
replacing the battery
Observe the following precautions
to prevent accidents:
●Always work with dry hands.
Moisture may cause the battery
to rust.