TOYOTA COROLLA HATCHBACK 2021 Owners Manual (in English)
Manufacturer: TOYOTA, Model Year: 2021, Model line: COROLLA HATCHBACK, Model: TOYOTA COROLLA HATCHBACK 2021Pages: 576, PDF Size: 12.73 MB
Page 251 of 576
2514-6. Driving tips
COROLLA H/B_U
4
Driving
4-6.Driving tips
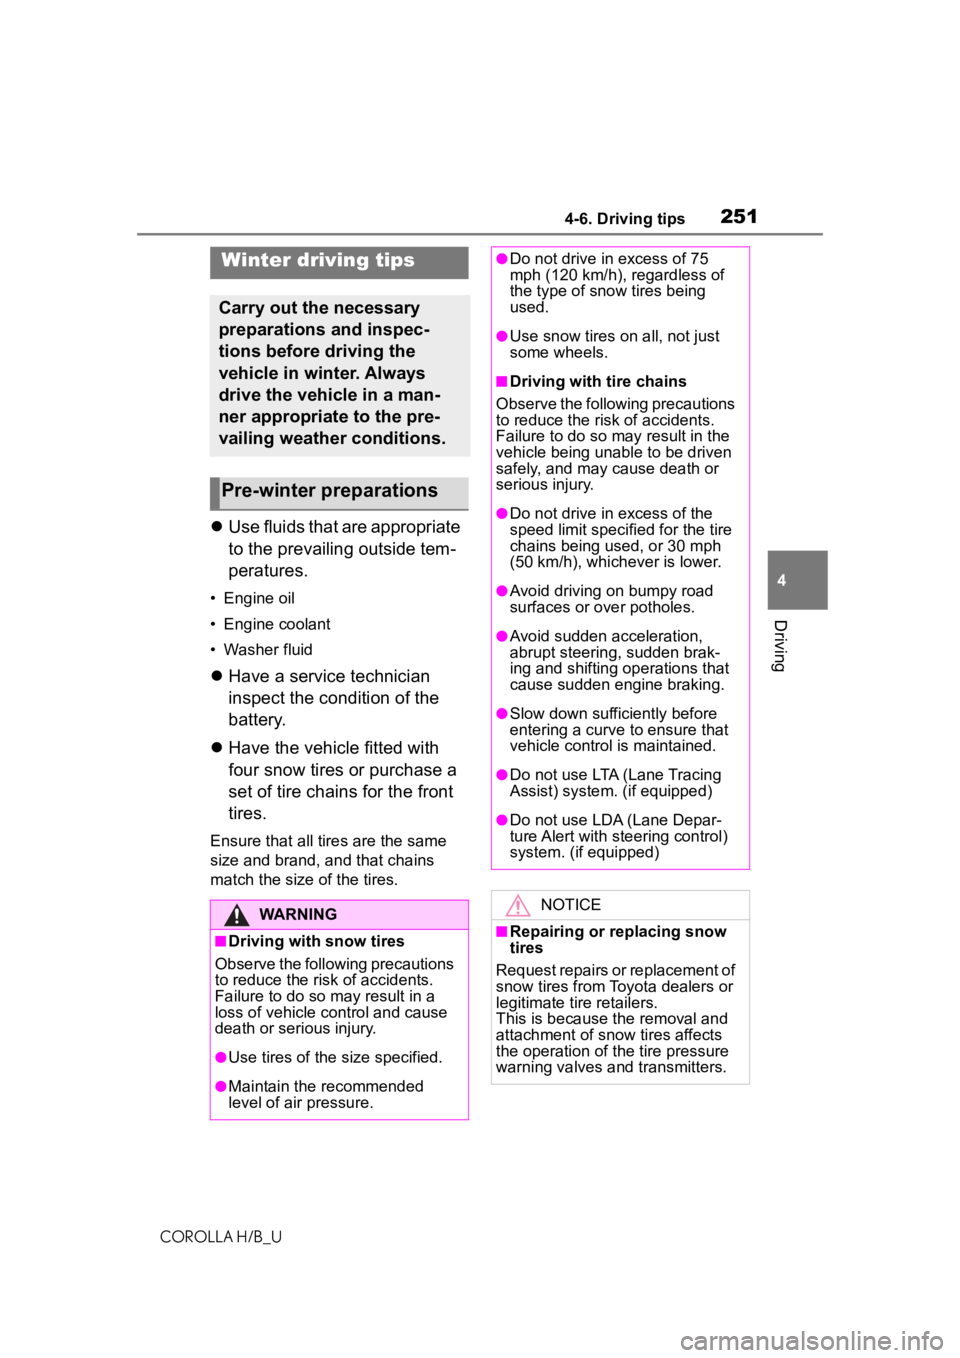
Use fluids that are appropriate
to the prevailing outside tem-
peratures.
• Engine oil
• Engine coolant
• Washer fluid
Have a service technician
inspect the condition of the
battery.
Have the vehicle fitted with
four snow tires or purchase a
set of tire chains for the front
tires.
Ensure that all tires are the same
size and brand, and that chains
match the size of the tires.
Winter driving tips
Carry out the necessary
preparations and inspec-
tions before driving the
vehicle in winter. Always
drive the vehicle in a man-
ner appropriate to the pre-
vailing weather conditions.
Pre-winter preparations
WARNING
■Driving with snow tires
Observe the following precautions
to reduce the risk of accidents.
Failure to do so may result in a
loss of vehicle control and cause
death or serious injury.
●Use tires of the size specified.
●Maintain the recommended
level of air pressure.
●Do not drive in excess of 75
mph (120 km/h), regardless of
the type of snow tires being
used.
●Use snow tires on all, not just
some wheels.
■Driving with tire chains
Observe the following precautions
to reduce the risk of accidents.
Failure to do so may result in the
vehicle being unable to be driven
safely, and may cause death or
serious injury.
●Do not drive in excess of the
speed limit specified for the tire
chains being used, or 30 mph
(50 km/h), whichever is lower.
●Avoid driving on bumpy road
surfaces or over potholes.
●Avoid sudden acceleration,
abrupt steering, sudden brak-
ing and shifting operations that
cause sudden engine braking.
●Slow down sufficiently before
entering a curve to ensure that
vehicle control is maintained.
●Do not use LTA (Lane Tracing
Assist) system. (if equipped)
●Do not use LDA (Lane Depar-
ture Alert with steering control)
system. (if equipped)
NOTICE
■Repairing or replacing snow
tires
Request repairs or replacement of
snow tires from Toyota dealers or
legitimate tire retailers.
This is because the removal and
attachment of snow tires affects
the operation of the tire pressure
warning valves and transmitters.
Page 252 of 576
2524-6. Driving tips
COROLLA H/B_U
Perform the following according
to the driving conditions:
Do not try to forcibly open a
window or move a wiper that
is frozen. Pour warm water
over the frozen area to melt
the ice. Wipe away the water
immediately to prevent it from
freezing.
To ensure proper operation of
the climate control system
fan, remove any snow that
has accumulated on the air
inlet vents in front of the wind-
shield.
Check for and remove any
excess ice or snow that may
have accumulated on the
exterior lights, vehicle’s roof,
chassis, around the tires or on
the brakes.
Remove any snow or mud
from the bottom of your shoes
before getting in the vehicle.
Accelerate the vehicle slowly,
keep a safe distance between
you and the vehicle ahead, and
drive at a reduced speed suit-
able to road conditions.
Park the vehicle and shift the
shift lever to P (continuously variable transmission), or 1 or
R (manual transmission)
without setting the parking
brake. The parking brake may
freeze up, preventing it from
being released. If the vehicle
is parked without setting the
parking brake, make sure to
block the wheels.
Failure to do so may be dan-
gerous because it may cause
the vehicle to move unexpect-
edly, possibly leading to an
accident.
Vehicles with a continuously
variable transmission: If the
vehicle is parked without set-
ting the parking brake, con-
firm that the shift lever cannot
be moved out of P
*.
*: The shift lever will be locked if it is
attempted to be sh ifted from P to
any other position without
depressing the brake pedal. If the
shift lever can be shifted from P,
there may be a problem with the
shift lock system. Have the vehi-
cle inspected by your Toyota
dealer immediately.
Use the correct tire chain size
when mounting the tire chains.
Chain size is regulated for each
tire size.
Before driving the vehicle
When driving the vehicle
When parking the vehicle
Selecting tire chains
Page 253 of 576
![TOYOTA COROLLA HATCHBACK 2021 Owners Manual (in English) 2534-6. Driving tips
COROLLA H/B_U
4
Driving
Side chain (0.12 in. [3 mm] in
diameter)
Side chain (0.39 in. [10 mm]
in width)
Side chain (1.18 in. [30 mm]
in length)
Cross chain (0.16 in. [4 mm]
in TOYOTA COROLLA HATCHBACK 2021 Owners Manual (in English) 2534-6. Driving tips
COROLLA H/B_U
4
Driving
Side chain (0.12 in. [3 mm] in
diameter)
Side chain (0.39 in. [10 mm]
in width)
Side chain (1.18 in. [30 mm]
in length)
Cross chain (0.16 in. [4 mm]
in](/img/14/42522/w960_42522-252.png)
2534-6. Driving tips
COROLLA H/B_U
4
Driving
Side chain (0.12 in. [3 mm] in
diameter)
Side chain (0.39 in. [10 mm]
in width)
Side chain (1.18 in. [30 mm]
in length)
Cross chain (0.16 in. [4 mm]
in diameter)
Cross chain (0.55 in. [14 mm]
in width)
Cross chain (0.98 in. [25 mm]
in length)
Regulations regarding the use
of tire chains vary depending on
location and type of road.
Always check local regulations
before installing chains.
■Tire chain installation
Observe the following precautions
when installing and removing
chains:
●Install and remove tire chains in a
safe location.
●Install tire chains on the front tires
only. Do not install tire chains on
the rear tires.
●Install tire chains on the front tires
as tightly as possible. Retighten
chains after driving 1/4 1/2 mile
(0.5 1.0 km).
●Install tire chains following the
instructions provid ed with the tire
chains.
Regulations on the use of
tire chains
NOTICE
■Fitting tire chains
The tire pressure warning valves
and transmitters may not function
correctly when tire chains are fit-
ted.
Page 254 of 576

2544-6. Driving tips
COROLLA H/B_U
Page 255 of 576
255
COROLLA H/B_U
5
5
Audio
Audio
.5-1. Basic functionButtons overview......... 257
Menu screen ............... 259
Status icon .................. 260
“Setup” screen ............ 262
5-2. Basic information before operation
Initial screen ................ 263
Touch screen............... 264
Home screen............... 266
Entering letters and num- bers/list screen operation
.................................. 267
Screen adjustment ...... 270
Linking multi-information display and the system
.................................. 271
5-3. Connectivity settings Registering/Connecting a Bluetooth
® device ..... 272
Setting Bluetooth
® details
.................................. 277
Wi-Fi
® Hotspot ............ 284
Apple CarPlay/ Android Auto.............. 289
5-4. Other settings General settings .......... 296
Voice settings .............. 300
Vehicle settings ........... 3015-5. Using the audio/visual
system
Quick reference ........... 303
Some basics................ 304
5-6. Radio operation
AM/FM/SiriusXM
® Satellite
Radio ......................... 308
Internet radio ............... 313
5-7. Media operation USB memory ............... 314
iPod/iPhone (Apple Car- Play) .......................... 316
Android Auto................ 319
Bluetooth
® audio ......... 320
5-8. Audio/visual remote con- trols
Steering switches ........ 324
5-9. Audio settings Setup ........................... 326
5-10.Tips for operating the audio/visual system
Operating information.. 327
5-11.Voice command system operation
Voice command system .................................. 339
Command list .............. 342
5-12.Mobile Assistant opera- tion
Mobile Assistant .......... 346
Page 256 of 576

256
COROLLA H/B_U
5-13.Phone operation(Hands-free system for
cellular phones)
Quick reference........... 348
Some basics ............... 349
Placing a call using the Bluetooth
® hands-free sys-
tem ............................ 353
Receiving a call using the Bluetooth
® hands-free sys-
tem ............................ 356
Talking on the Bluetooth
®
hands-free system..... 357
Bluetooth
® phone message
function...................... 359
5-14.Phone settings Setup........................... 364
5-15.What to do if... (Blue- tooth
®)
Troubleshooting .......... 374
5-16.Connected Services Over- view
Functional overview .... 378
Type A: Function achieved by using a smart phone or
DCM .......................... 379
Type B: Function achieved by using DCM and the sys-
tem ............................ 382
Type C: Function achieved by using DCM............ 383Type D: Function achieved
by using DCM and a
smartphone ............... 384
5-17.Connected Services Operation
Toyota apps ................. 385
5-18.Toyota apps settings Setup ........................... 389
5Audio
Page 257 of 576
2575-1. Basic function
COROLLA H/B_U
5
Audio
5-1.Basic function
*: If equipped
Audio Plus/Premium Audio
Owners of this system should refer to the “NAVIGATION AND MUL-
TIMEDIA SYSTEM OWNER’S MANUAL”.
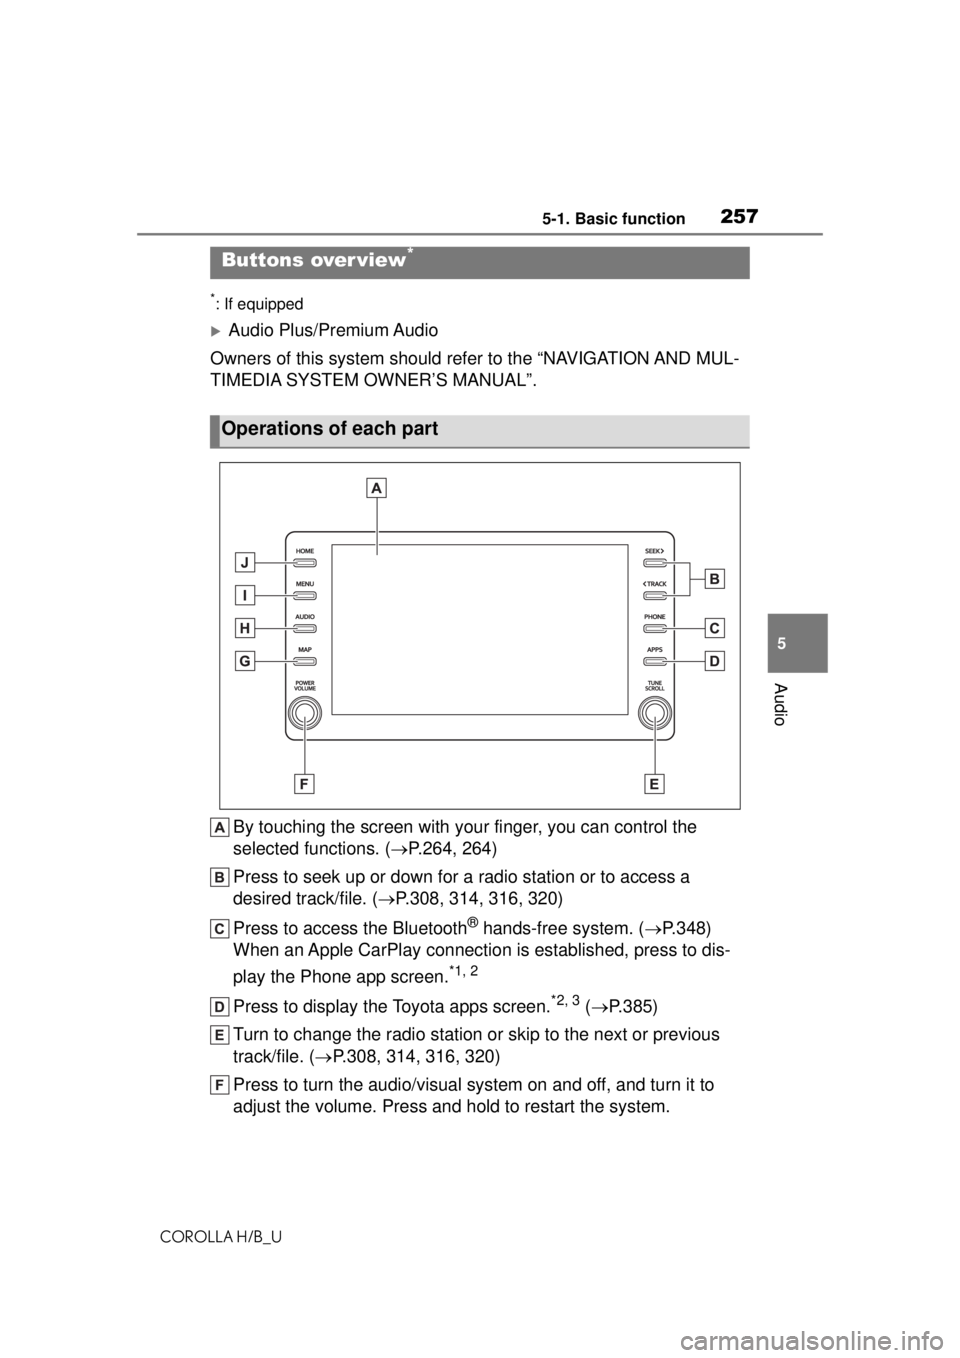
By touching the screen with your finger, you can control the
selected functions. ( P.264, 264)
Press to seek up or down for a radio station or to access a
desired track/file. ( P.308, 314, 316, 320)
Press to access the Bluetooth
® hands-free system. ( P.348)
When an Apple CarPlay connection is established, press to dis-
play the Phone app screen.
*1, 2
Press to display the Toyota apps screen.*2, 3 ( P.385)
Turn to change the radio station or skip to the next or previous
track/file. ( P.308, 314, 316, 320)
Press to turn the audio/visual system on and off, and turn it to
adjust the volume. Press and hold to restart the system.
Buttons over view*
Operations of each part
Page 258 of 576
2585-1. Basic function
COROLLA H/B_U
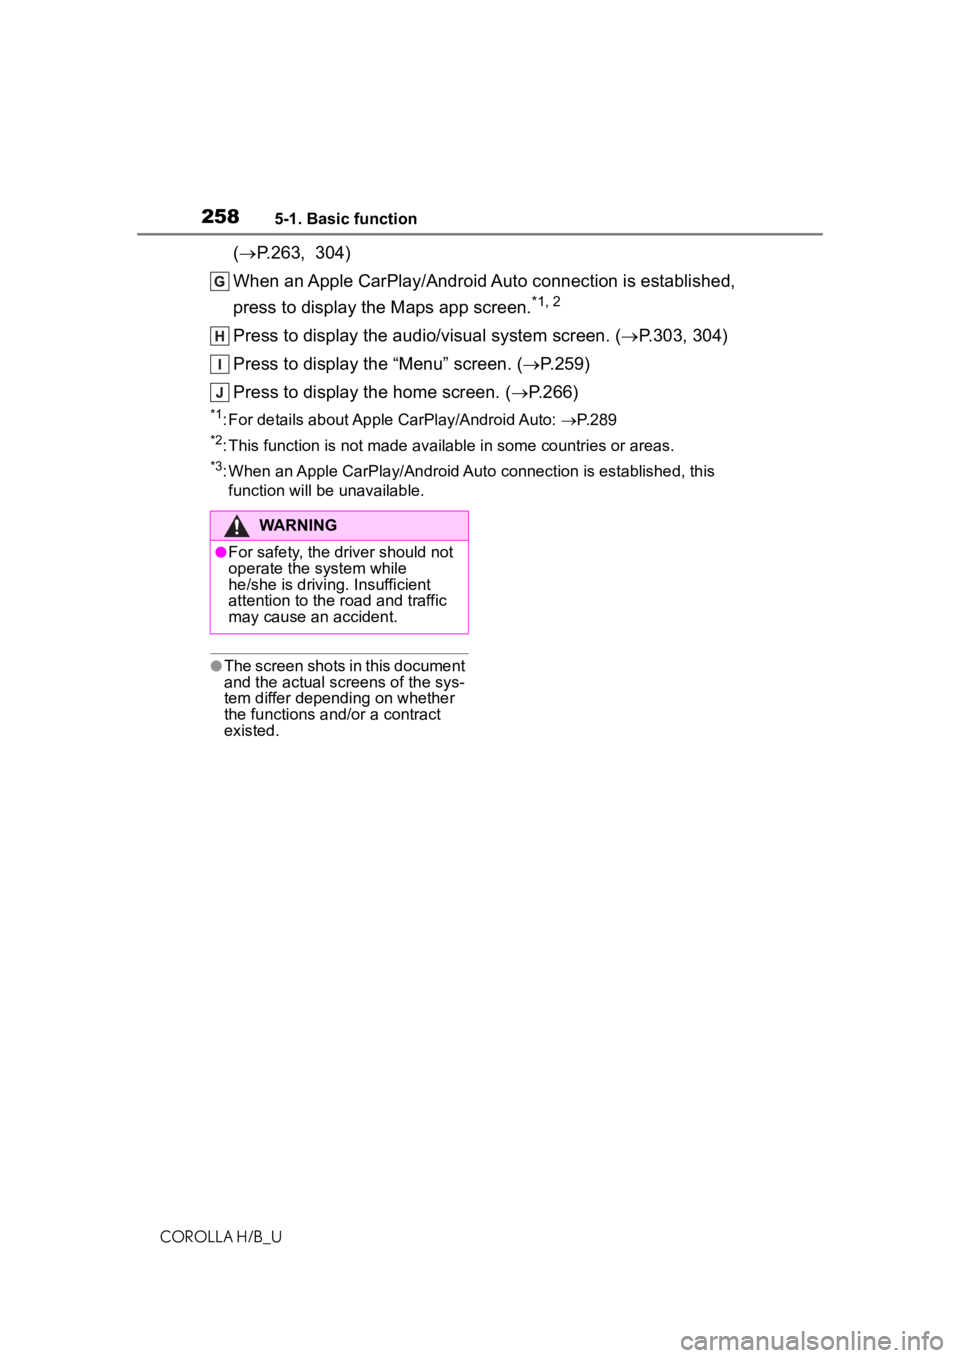
(P.263, 304)
When an Apple CarPlay/Android Auto connection is estab
lished,
p
ress to display the Maps app screen.
*1, 2
Press to display the audio/ visual system screen. (P.303, 304)
Press to display the “Menu” screen. ( P.259)
Press to display the home screen. ( P.266)
*1: For details about Apple CarPlay/Android Auto: P. 2 8 9
*2: This function is not made available in some countries or areas.
*3: When an Apple CarPlay/Android Auto connection is established, this
function
will be unavailable.
●The screen shots in this documentand the actual screens of the sys-
tem differ depending on whether
the functions and/ or a contra
ctexiste
d.
WARNING
●For safety, the driver should notoperate the system while
he/she is driving. Insuff
icient
atte
ntion to the road and traf
ficmay
cause an accident.
Page 259 of 576
2595-1. Basic function
COROLLA H/B_U
5
Audio
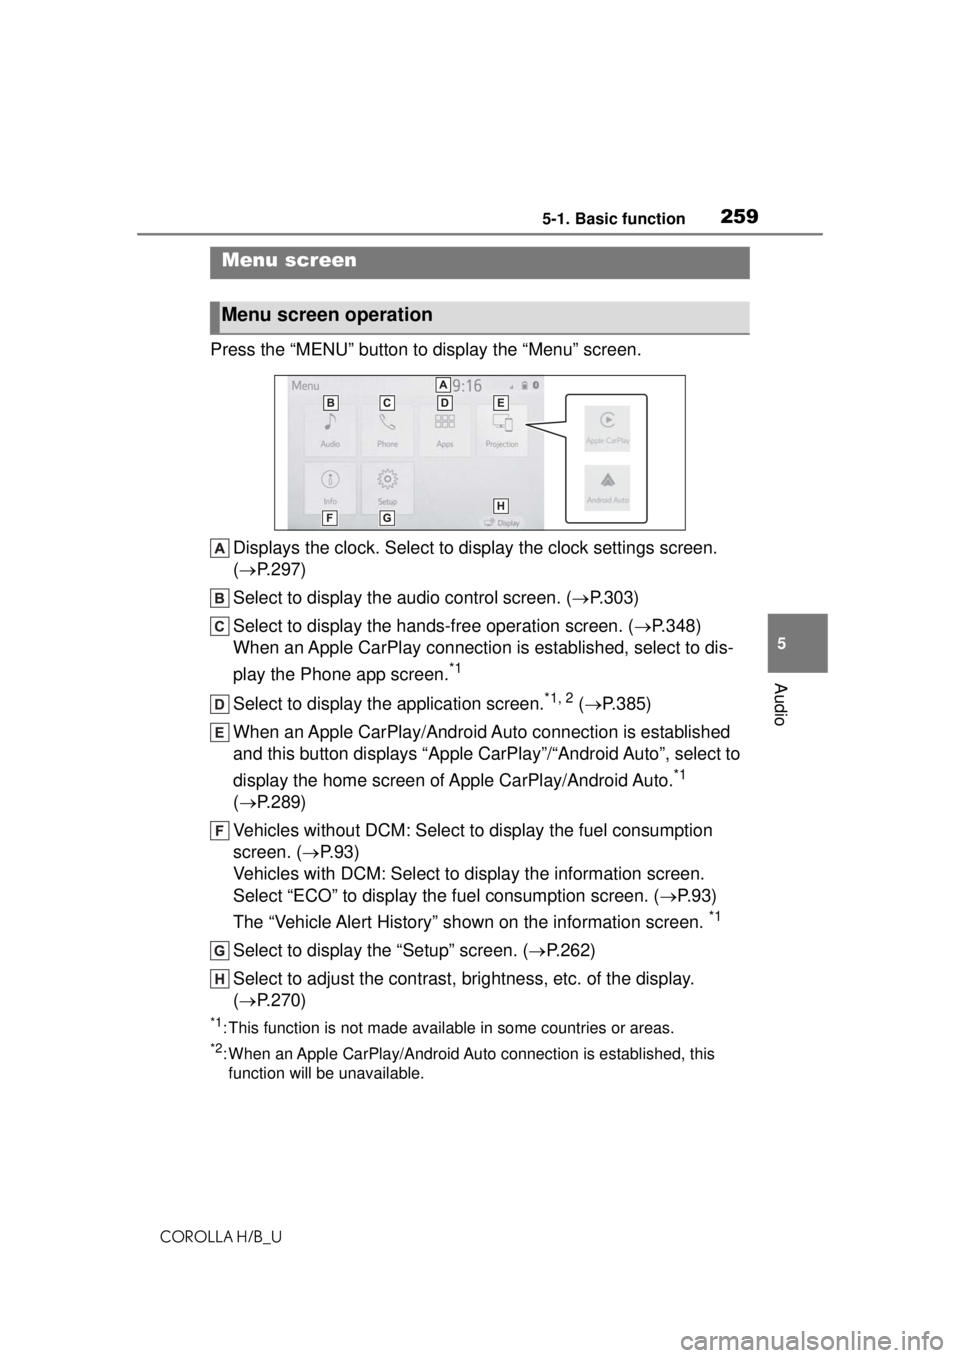
Press the “MENU” button to display the “Menu” screen. Displays the clock. Select to display the clock settings screen.
( P.297)
Select to display the audio control screen. ( P.303)
Select to display the hands-free operation screen. ( P.348)
When an Apple CarPlay connection is established, select to dis-
play the Phone app screen.
*1
Select to display the application screen.*1, 2 ( P.385)
When an Apple CarPlay/Android Auto connection is established
and this button displays “Apple CarPlay”/“Android Auto”, select to
display the home screen of Apple CarPlay/Android Auto.
*1
( P.289)
Vehicles without DCM: Select to display the fuel consumption
screen. ( P.93)
Vehicles with DCM: Select to display the information screen.
Select “ECO” to display the fuel consumption screen. ( P.93)
The “Vehicle Alert History” shown on the information screen.
*1
Select to display the “Setup” screen. ( P.262)
Select to adjust the contrast, brightness, etc. of the display.
( P.270)
*1: This function is not made available in some countries or areas.
*2: When an Apple CarPlay/Android Auto connection is established, this
function will be unavailable.
Menu screen
Menu screen operation
Page 260 of 576
2605-1. Basic function
COROLLA H/B_U
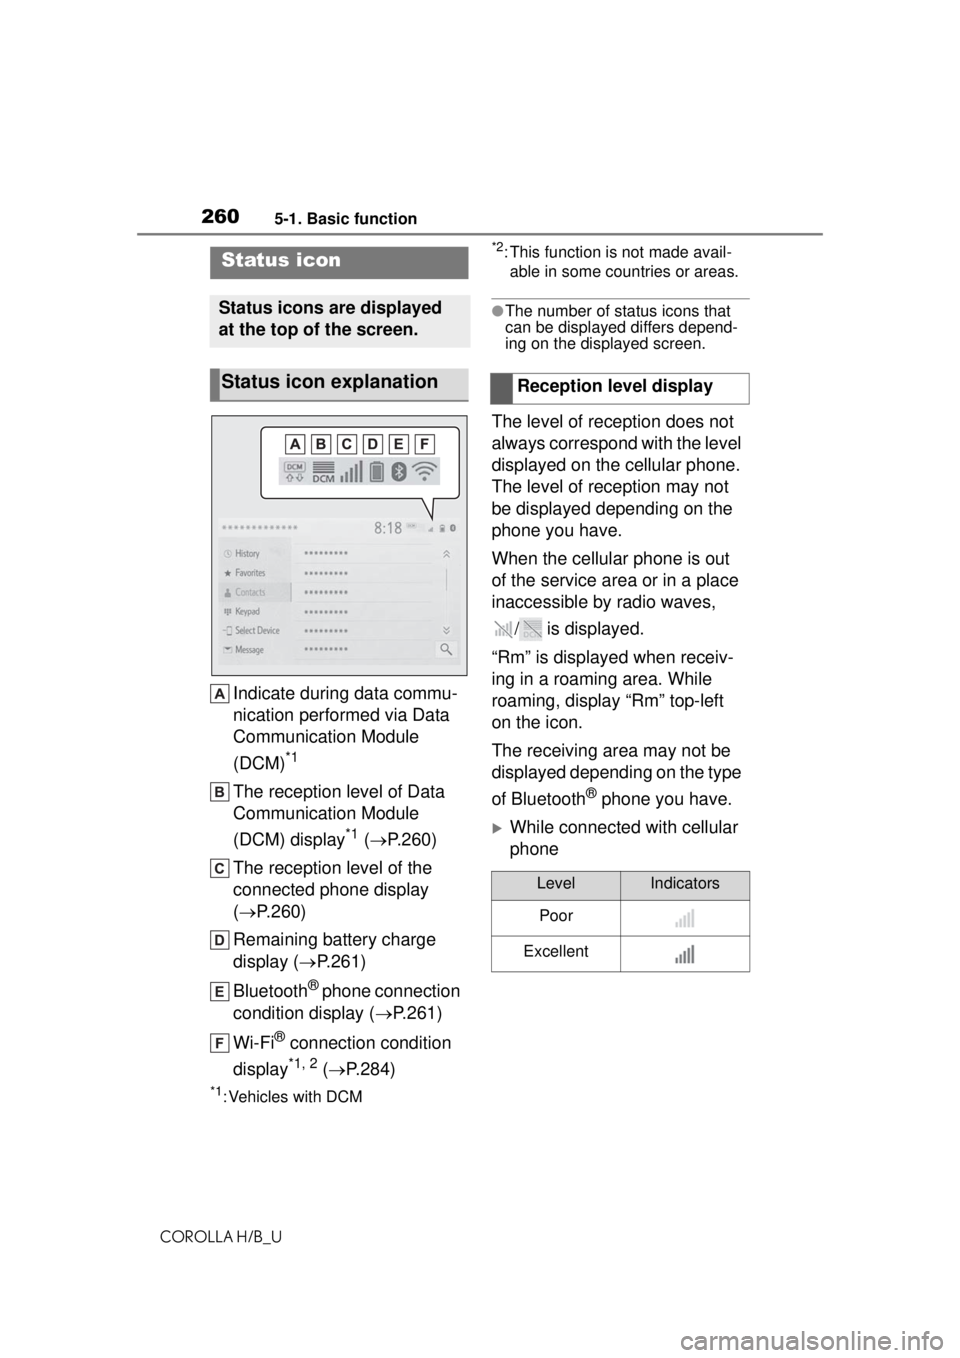
Indicate during data commu-
nication performed via Data
Communication Module
(DCM)
*1
The reception level of Data
Communication Module
(DCM) display
*1 ( P.260)
The reception level of the
connected phone display
( P.260)
Remaining battery charge
display ( P.261)
Bluetooth
® phone connection
condition display ( P.261)
Wi-Fi
® connection condition
display
*1, 2 ( P.284)
*1: Vehicles with DCM
*2: This function is not made avail-
able in some countries or areas.
●The number of status icons that
can be displayed differs depend-
ing on the displayed screen.
The level of reception does not
always correspond with the level
displayed on the cellular phone.
The level of reception may not
be displayed depending on the
phone you have.
When the cellular phone is out
of the service area or in a place
inaccessible by radio waves,
/ is displayed.
“Rm” is displayed when receiv-
ing in a roaming area. While
roaming, display “Rm” top-left
on the icon.
The receiving area may not be
displayed depending on the type
of Bluetooth
® phone you have.
While connected with cellular
phone
Status icon
Status icons are displayed
at the top of the screen.
Status icon explanationReception level display
LevelIndicators
Poor
Excellent