buttons TOYOTA HIGHLANDER 2014 XU50 / 3.G Navigation Manual
[x] Cancel search | Manufacturer: TOYOTA, Model Year: 2014, Model line: HIGHLANDER, Model: TOYOTA HIGHLANDER 2014 XU50 / 3.GPages: 356, PDF Size: 28.61 MB
Page 5 of 356
5
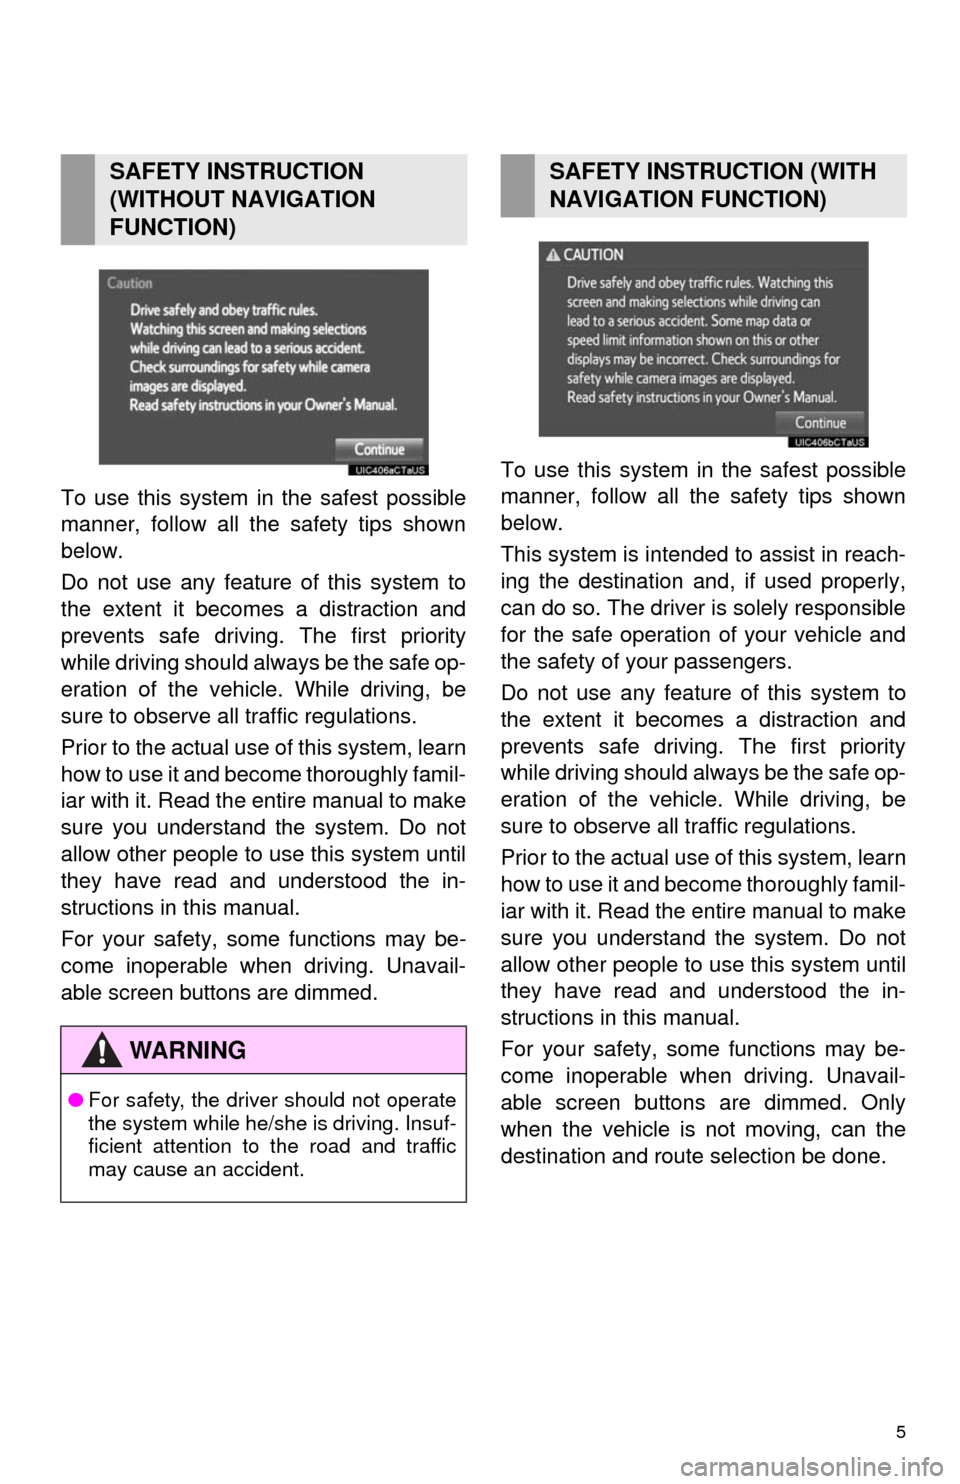
To use this system in the safest possible
manner, follow all the safety tips shown
below.
Do not use any feature of this system to
the extent it becomes a distraction and
prevents safe driving. The first priority
while driving should always be the safe op-
eration of the vehicle. While driving, be
sure to observe all traffic regulations.
Prior to the actual use of this system, learn
how to use it and become thoroughly famil-
iar with it. Read the entire manual to make
sure you understand the system. Do not
allow other people to use this system until
they have read and understood the in-
structions in this manual.
For your safety, some functions may be-
come inoperable when driving. Unavail-
able screen buttons are dimmed.To use this system in the safest possible
manner, follow all the safety tips shown
below.
This system is intended to assist in reach-
ing the destination and, if used properly,
can do so. The driver is solely responsible
for the safe operation of your vehicle and
the safety of your passengers.
Do not use any feature of this system to
the extent it becomes a distraction and
prevents safe driving. The first priority
while driving should always be the safe op-
eration of the vehicle. While driving, be
sure to observe all traffic regulations.
Prior to the actual use of this system, learn
how to use it and become thoroughly famil-
iar with it. Read the entire manual to make
sure you understand the system. Do not
allow other people to use this system until
they have read and understood the in-
structions in this manual.
For your safety, some functions may be-
come inoperable when driving. Unavail-
able screen buttons are dimmed. Only
when the vehicle is not moving, can the
destination and route selection be done.
SAFETY INSTRUCTION
(WITHOUT NAVIGATION
FUNCTION)
WA R N I N G
●For safety, the driver should not operate
the system while he/she is driving. Insuf-
ficient attention to the road and traffic
may cause an accident.
SAFETY INSTRUCTION (WITH
NAVIGATION FUNCTION)
Page 8 of 356

TABLE OF CONTENTS
8
1. BASIC FUNCTION........................... 12
OVERVIEW BUTTONS ......................... 12
“Apps” SCREEN .................................... 14
HOME SCREEN .................................... 16
“Setup” SCREEN ................................... 20
2. QUICK REFERENCE....................... 20
REGISTERING HOME .......................... 22
3. NAVIGATION OPERATION ............ 22
REGISTERING PRESET
DESTINATIONS .................................. 24
OPERATION FLOW:
GUIDING THE ROUTE ....................... 26
SETTING HOME AS THE
DESTINATION .................................... 27
4. FUNCTION INDEX ........................... 28
FUNCTION INDEX ................................ 28
1. BASIC INFORMATION
BEFORE OPERATION .................. 32
INITIAL SCREEN ................................... 32
CAPACITIVE TOUCH SWITCHES ........ 34
TOUCH SCREEN GESTURES .............. 35
TOUCH SCREEN OPERATION ............ 36
HOME SCREEN OPERATION .............. 37
ENTERING LETTERS AND NUMBERS/
LIST SCREEN OPERATION ............... 38
SCREEN ADJUSTMENT ....................... 41
2. Bluetooth® SETTINGS ................... 43
REGISTERING/CONNECTING
Bluetooth® DEVICE ............................. 43
SETTING Bluetooth® DETAILS ............. 49
3. OTHER SETTINGS ......................... 57
GENERAL SETTINGS ........................... 57
VOICE SETTINGS ................................. 63
DRIVER SETTINGS ............................... 64
MAINTENANCE ..................................... 65
1. BASIC OPERATION ....................... 72
QUICK REFERENCE ............................. 72
SOME BASICS....................................... 74
2. RADIO OPERATION ....................... 81
AM/FM RADIO ....................................... 81
XM Satellite Radio .................................. 91
INTERNET RADIO ................................. 97
3. MEDIA OPERATION ....................... 98
CD .......................................................... 98
USB MEMORY ..................................... 101
iPod ...................................................... 105
Bluetooth
® AUDIO................................ 109
AUX ...................................................... 114
VTR ...................................................... 116
1QUICK GUIDE2BASIC FUNCTION
3AUDIO/VISUAL SYSTEM
Page 11 of 356
1
11
1
2
3
4
5
6
7
8
9
1. OVERVIEW BUTTONS ................. 12
2. “Apps” SCREEN .......................... 14
3. HOME SCREEN ............................ 16
STATUS DISPLAY................................. 18
1. “Setup” SCREEN ......................... 20
1. REGISTERING HOME .................. 22
2. REGISTERING PRESET
DESTINATIONS .......................... 24
3. OPERATION FLOW:
GUIDING THE ROUTE................ 26
4. SETTING HOME AS THE
DESTINATION ............................ 27
1. FUNCTION INDEX ........................ 28
1BASIC FUNCTION
2QUICK REFERENCE
3NAVIGATION OPERATION
4FUNCTION INDEX
QUICK GUIDE
Page 12 of 356
12
1. BASIC FUNCTION
1. OVERVIEW BUTTONS
Page 16 of 356
16
1. BASIC FUNCTION
3. HOME SCREEN
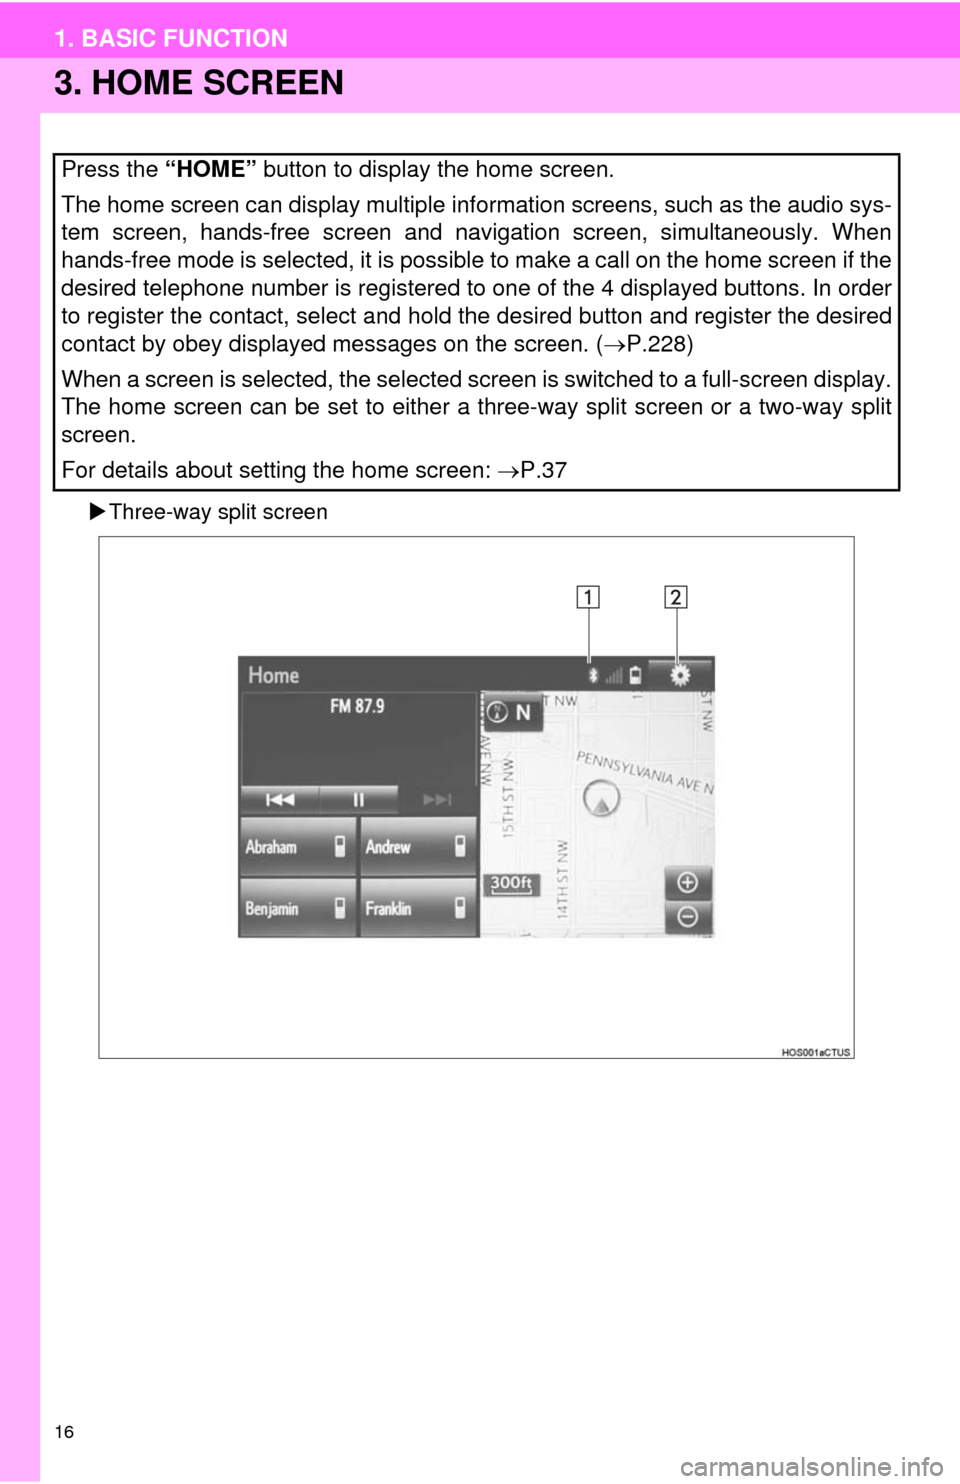
Three-way split screen
Press the “HOME” button to display the home screen.
The home screen can display multiple information screens, such as the audio sys-
tem screen, hands-free screen and navigation screen, simultaneously. When
hands-free mode is selected, it is possible to make a call on the home screen if the
desired telephone number is registered to one of the 4 displayed buttons. In order
to register the contact, select and hold the desired button and register the desired
contact by obey displayed messages on the screen. (P.228)
When a screen is selected, the selected screen is switched to a full-screen display.
The home screen can be set to either a three-way split screen or a two-way split
screen.
For details about setting the home screen: P.37
Page 24 of 356
24
3. NAVIGATION OPERATION
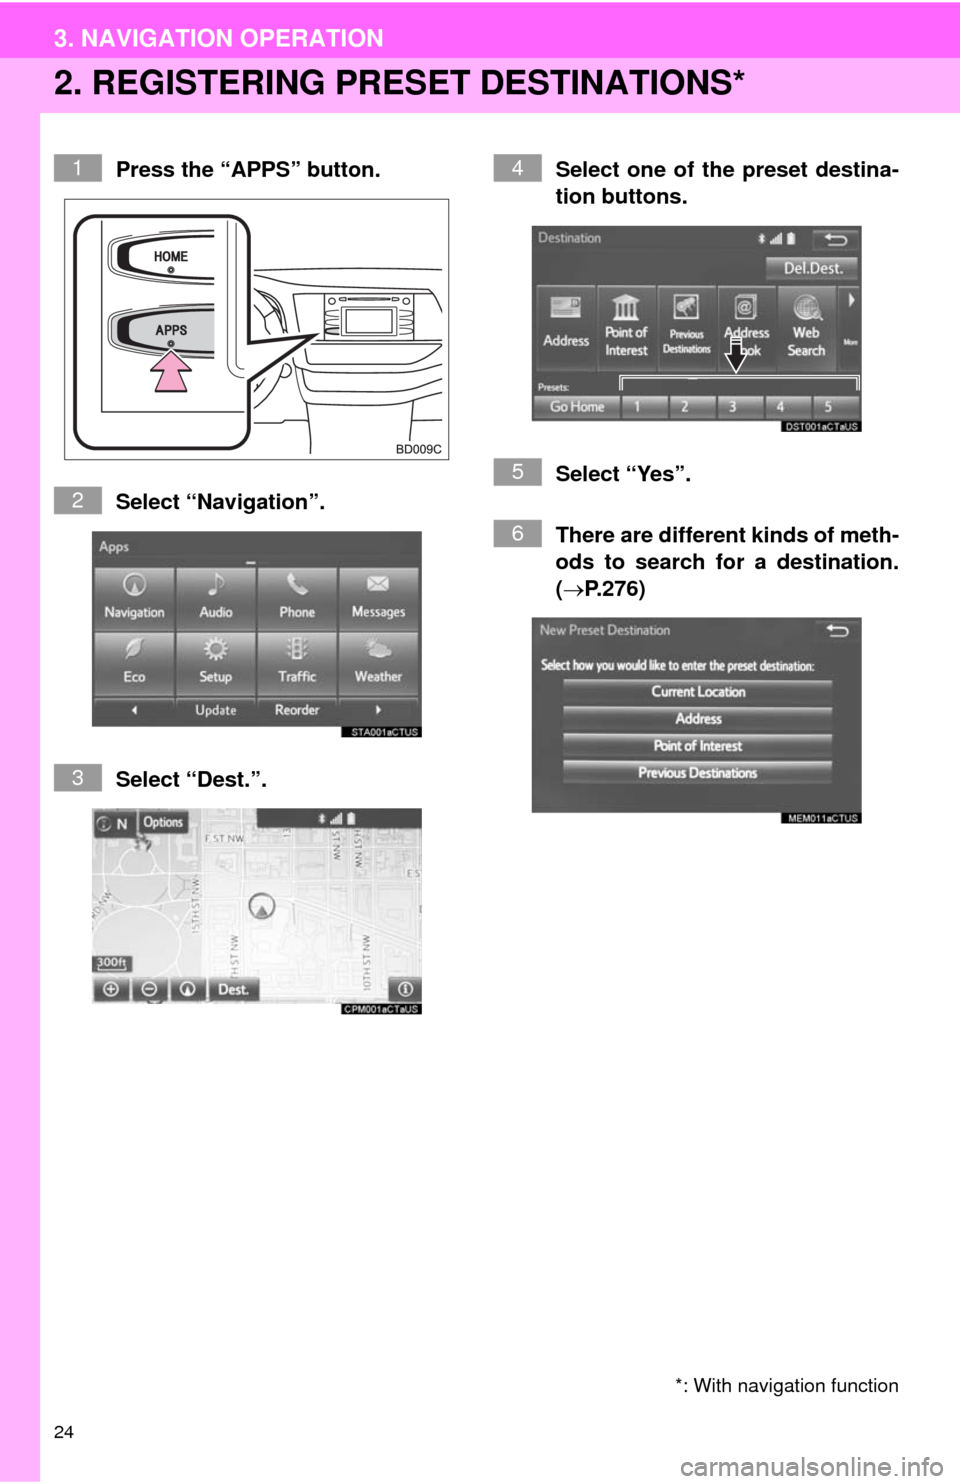
2. REGISTERING PRESET DESTINATIONS*
Press the “APPS” button.
Select “Navigation”.
Select “Dest.”.Select one of the preset destina-
tion buttons.
Select “Yes”.
There are different kinds of meth-
ods to search for a destination.
(P.276)
*: With navigation function
1
2
3
4
5
6
Page 36 of 356
36
1. BASIC INFORMATION BEFORE OPERATION
4. TOUCH SCREEN OPERATION
This system is operated mainly by the
buttons on the screen. (Referred to as
screen buttons in this manual.)
When a screen button is touched, a
beep sounds. (To set the beep sound,
see page 57.)
NOTICE
●To prevent damaging the screen, lightly
touch the screen buttons with your fin-
ger.
●Do not use objects other than your finger
to touch the screen.
●Wipe off fingerprints using a glass clean-
ing cloth. Do not use chemical cleaners
to clean the screen, as they may dam-
age the touch screen.
INFORMATION
●If the system does not respond to touch-
ing a screen button, move your finger
away from the screen and then touch it
again.
●Dimmed screen buttons cannot be oper-
ated.
●The displayed image may become
darker and moving images may be
slightly distorted when the screen is
cold.
●In extremely cold conditions, the map
may not be displayed and the data input
by a user may be deleted. Also, the
screen buttons may be harder than
usual to depress.
●When you look at the screen through
polarized material such as polarized
sunglasses, the screen may be dark and
hard to see. If so, look at the screen
from different angles, adjust the screen
settings on the “Display Settings” screen
or take off your sunglasses.
Page 40 of 356
40
1. BASIC INFORMATION BEFORE OPERATION
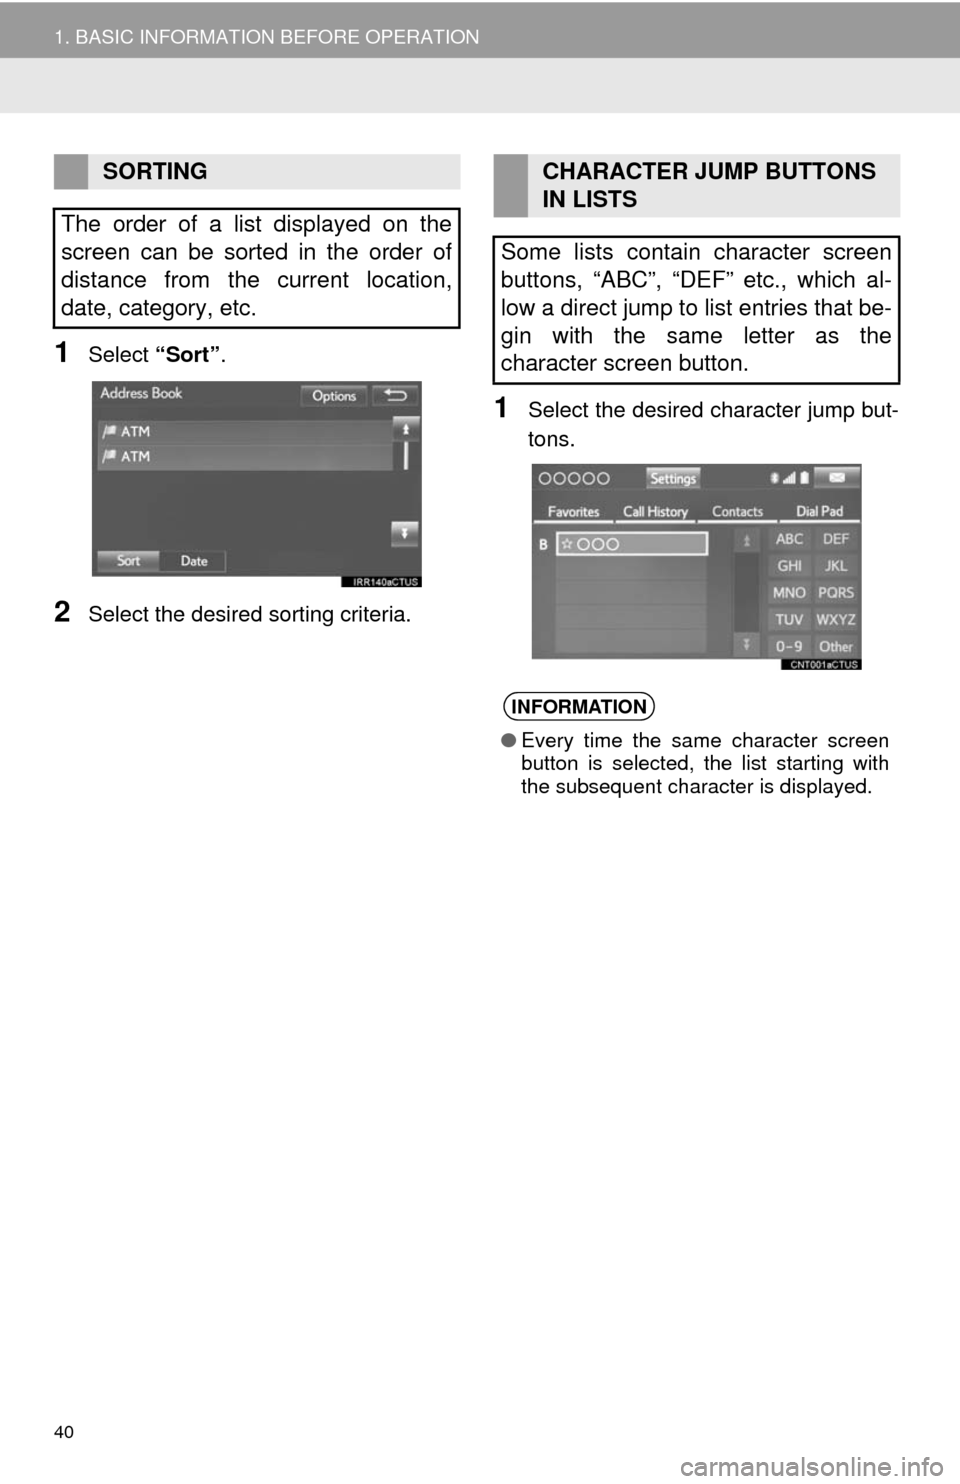
1Select “Sort”.
2Select the desired sorting criteria.
1Select the desired character jump but-
tons.
SORTING
The order of a list displayed on the
screen can be sorted in the order of
distance from the current location,
date, category, etc.CHARACTER JUMP BUTTONS
IN LISTS
Some lists contain character screen
buttons, “ABC”, “DEF” etc., which al-
low a direct jump to list entries that be-
gin with the same letter as the
character screen button.
INFORMATION
●Every time the same character screen
button is selected, the list starting with
the subsequent character is displayed.
Page 74 of 356
74
1. BASIC OPERATION
2. SOME BASICS
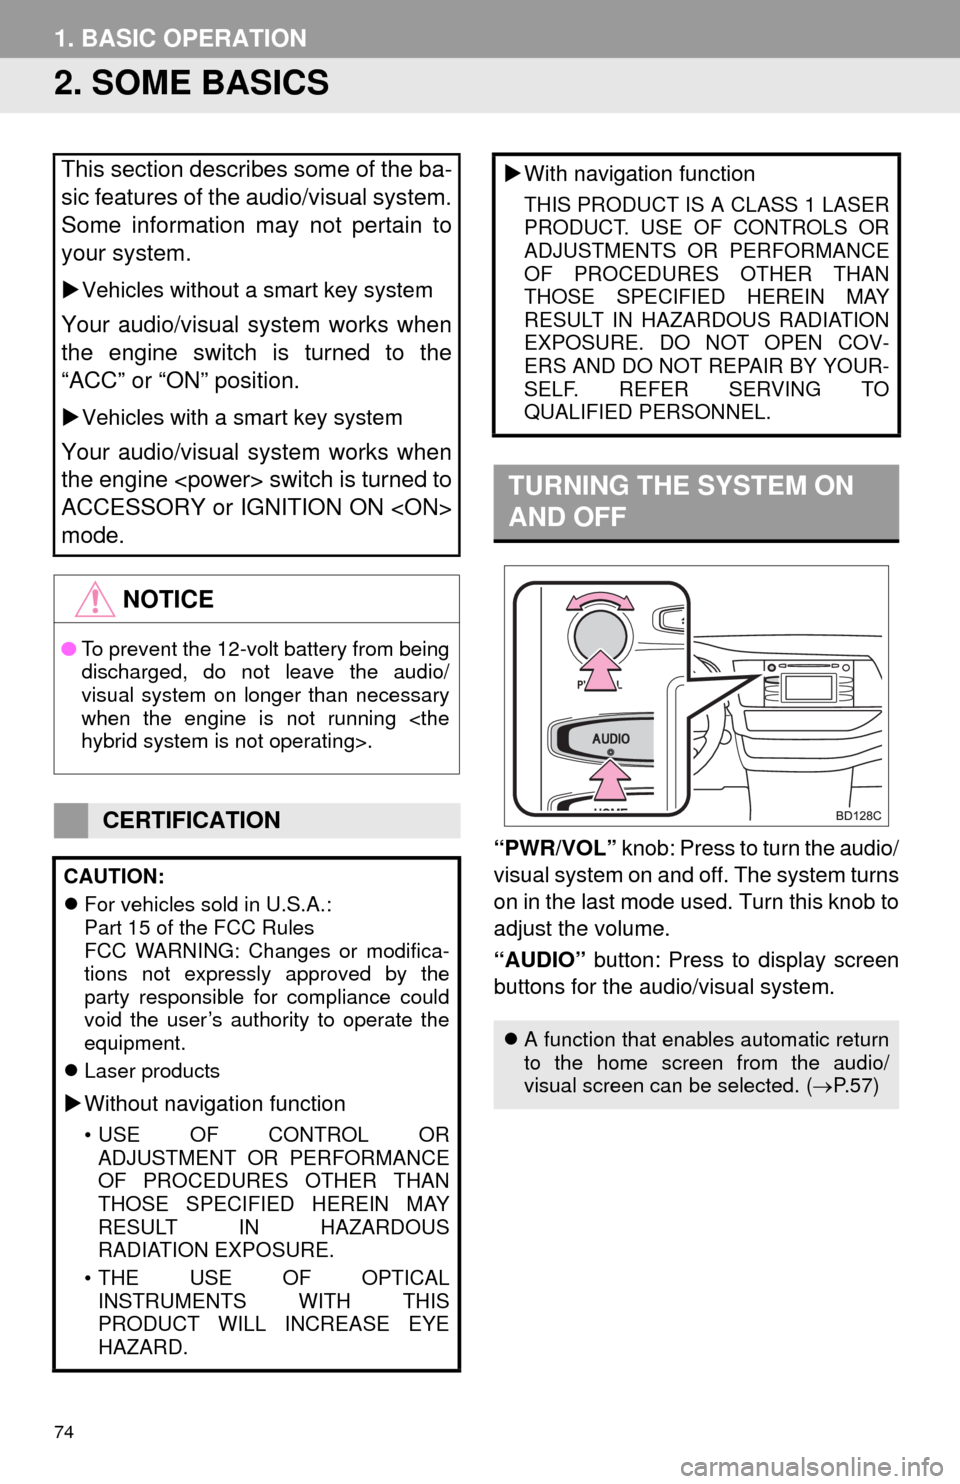
“PWR/VOL” knob: Press to turn the audio/
visual system on and off. The system turns
on in the last mode used. Turn this knob to
adjust the volume.
“AUDIO” button: Press to display screen
buttons for the audio/visual system.
This section describes some of the ba-
sic features of the audio/visual system.
Some information may not pertain to
your system.
Vehicles without a smart key system
Your audio/visual system works when
the engine switch is turned to the
“ACC” or “ON” position.
Vehicles with a smart key system
Your audio/visual system works when
the engine
ACCESSORY or IGNITION ON
mode.
NOTICE
●To prevent the 12-volt battery from being
discharged, do not leave the audio/
visual system on longer than necessary
when the engine is not running
CERTIFICATION
CAUTION:
For vehicles sold in U.S.A.:
Part 15 of the FCC Rules
FCC WARNING: Changes or modifica-
tions not expressly approved by the
party responsible for compliance could
void the user’s authority to operate the
equipment.
Laser products
Without navigation function
• USE OF CONTROL OR
ADJUSTMENT OR PERFORMANCE
OF PROCEDURES OTHER THAN
THOSE SPECIFIED HEREIN MAY
RESULT IN HAZARDOUS
RADIATION EXPOSURE.
• THE USE OF OPTICAL
INSTRUMENTS WITH THIS
PRODUCT WILL INCREASE EYE
HAZARD.
With navigation function
THIS PRODUCT IS A CLASS 1 LASER
PRODUCT. USE OF CONTROLS OR
ADJUSTMENTS OR PERFORMANCE
OF PROCEDURES OTHER THAN
THOSE SPECIFIED HEREIN MAY
RESULT IN HAZARDOUS RADIATION
EXPOSURE. DO NOT OPEN COV-
ERS AND DO NOT REPAIR BY YOUR-
SELF. REFER SERVING TO
QUALIFIED PERSONNEL.
TURNING THE SYSTEM ON
AND OFF
A function that enables automatic return
to the home screen from the audio/
visual screen can be selected. (P.57)
Page 75 of 356
75
1. BASIC OPERATION
3
AUDIO/VISUAL SYSTEM
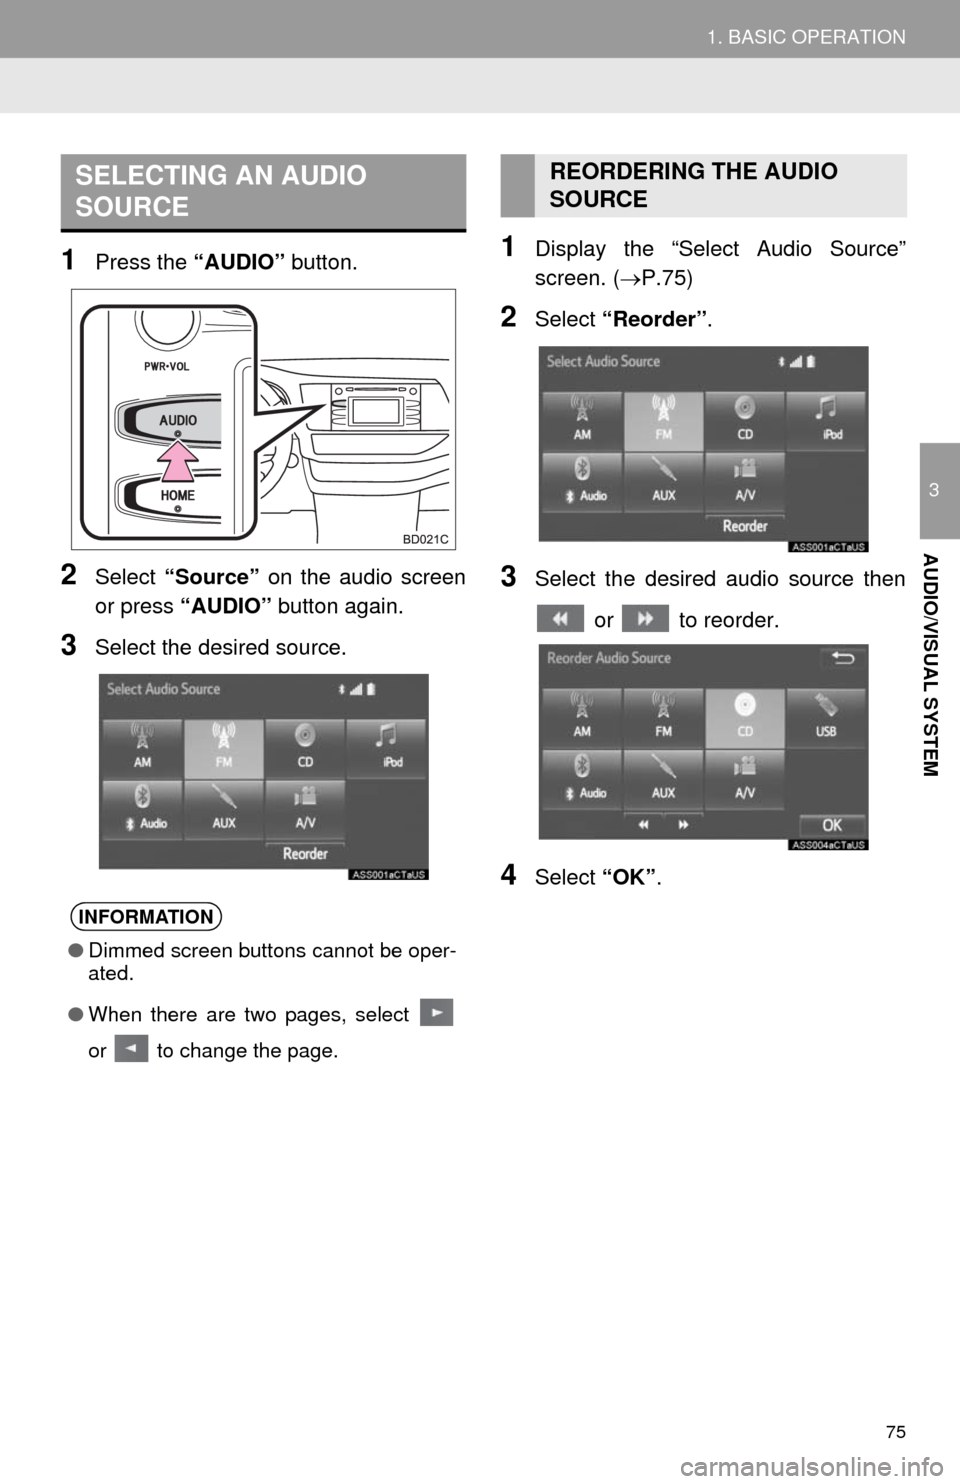
1Press the “AUDIO” button.
2Select “Source” on the audio screen
or press “AUDIO” button again.
3Select the desired source.
1Display the “Select Audio Source”
screen. (P.75)
2Select “Reorder”.
3Select the desired audio source then
or to reorder.
4Select “OK”.
SELECTING AN AUDIO
SOURCE
INFORMATION
●Dimmed screen buttons cannot be oper-
ated.
●When there are two pages, select
or to change the page.
REORDERING THE AUDIO
SOURCE