steering wheel adjustment TOYOTA HIGHLANDER 2020 Owners Manual (in English)
[x] Cancel search | Manufacturer: TOYOTA, Model Year: 2020, Model line: HIGHLANDER, Model: TOYOTA HIGHLANDER 2020Pages: 560, PDF Size: 14.42 MB
Page 145 of 560
1453-3. Adjusting the seats
HIGHLANDER_U
3
Before driving
ten.
■Seat positions that can be
memorized
The adjusted positions other than
the position adjusted by lumbar sup-
port switch can be recorded.
■In order to correctly use the
driving position memory func-
tion
If a seat position is already in the
furthest possible position and the
seat is operated in the same direc-
tion, the recorded position may be
slightly different when it is recalled.
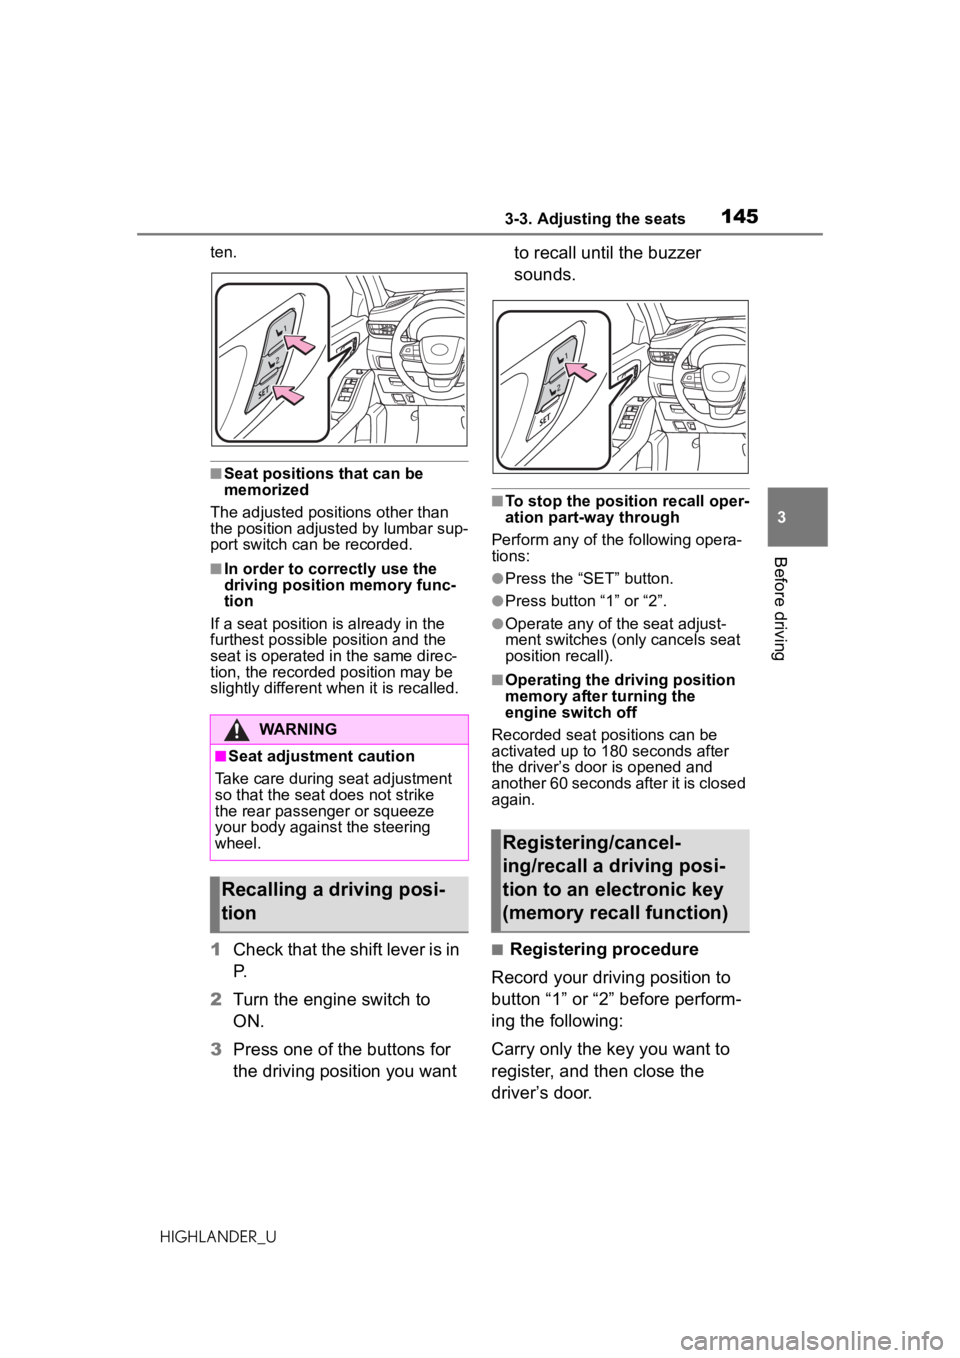
1 Check that the shift lever is in
P.
2 Turn the engine switch to
ON.
3 Press one of the buttons for
the driving position you want to recall until the buzzer
sounds.
■To stop the position recall oper-
ation part-way through
Perform any of the following opera-
tions:
●Press the “SET” button.
●Press button “1” or “2”.
●Operate any of the seat adjust-
ment switches (only cancels seat
position recall).
■Operating the driving position
memory after turning the
engine switch off
Recorded seat positions can be
activated up to 180 seconds after
the driver’s door is opened and
another 60 seconds after it is closed
again.
■Registering procedure
Record your driving position to
button “1” or “2” before perform-
ing the following:
Carry only the key you want to
register, and then close the
driver’s door.
WARNING
■Seat adjustment caution
Take care during seat adjustment
so that the seat does not strike
the rear passenger or squeeze
your body against the steering
wheel.
Recalling a driving posi-
tion
Registering/cancel-
ing/recall a driving posi-
tion to an electronic key
(memory recall function)
Page 150 of 560
1503-4. Adjusting the steering wheel and mirrors
HIGHLANDER_U
3-4.Adjusting the steering wheel and mirrors
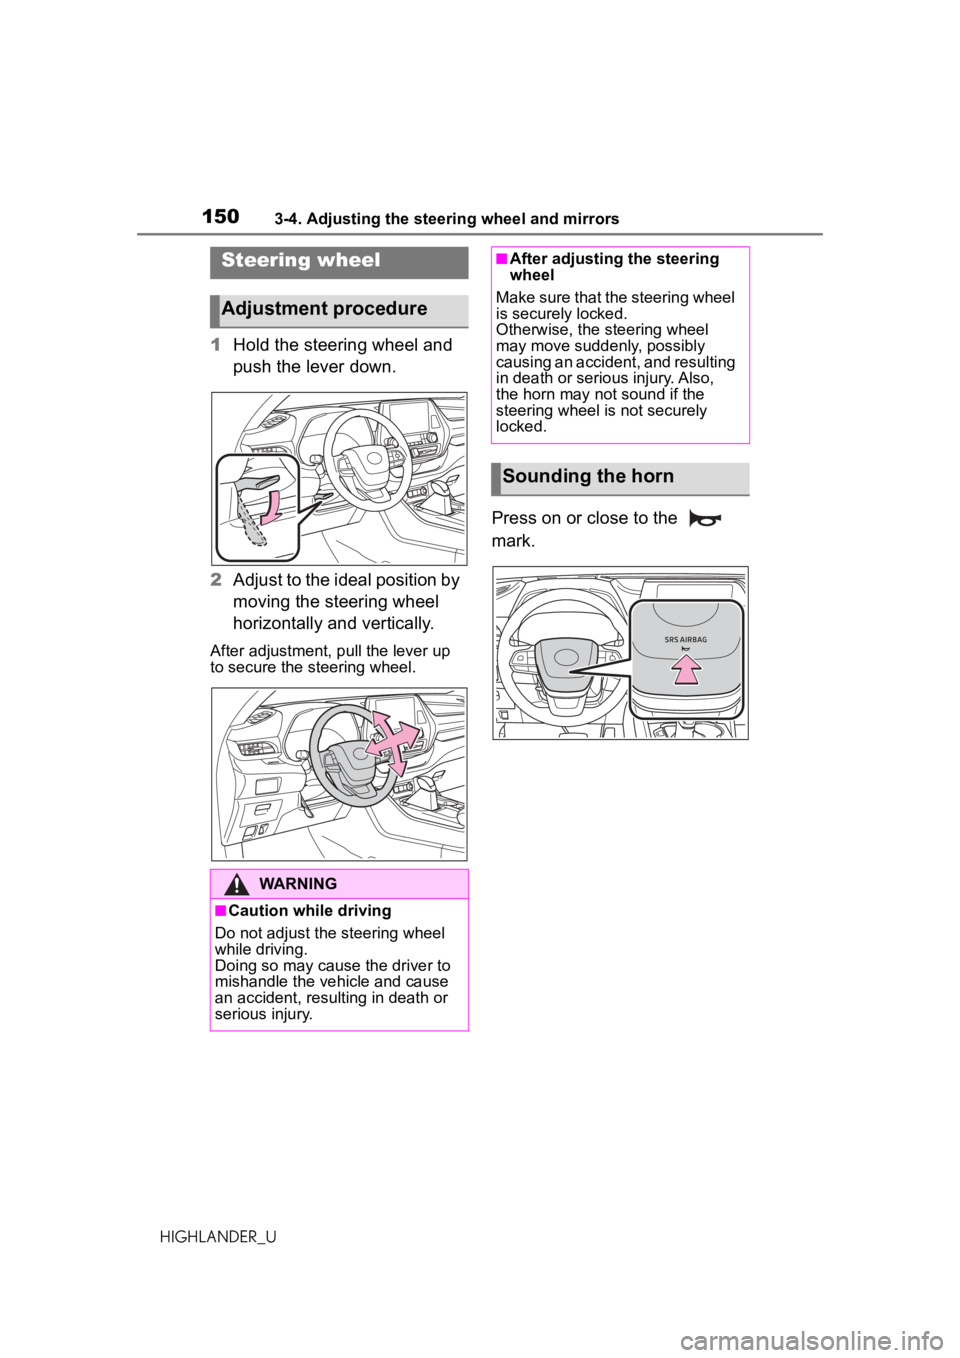
1Hold the steering wheel and
push the lever down.
2 Adjust to the ideal position by
moving the steering wheel
horizontally and vertically.
After adjustment, pull the lever up
to secure the steering wheel.
Press on or close to the
mark.
Steering wheel
Adjustment procedure
WARNING
■Caution while driving
Do not adjust the steering wheel
while driving.
Doing so may cause the driver to
mishandle the vehicle and cause
an accident, resulting in death or
serious injury.
■After adjusting the steeringw heel
Make sure that the steering wheel
is securely locked.
Otherwise, the steering wheel
may move suddenly, possibly
causing an accident, and resulting
in death or serious injury. Also,
the horn may not sound if the
steering wheel is not securely
locked.
Sounding the horn
Page 154 of 560
1543-4. Adjusting the steering wheel and mirrors
HIGHLANDER_Uclosed.
●If the display is difficult to see due
to reflected light, close the sun-
shade for the moon roof or the
electronic sunshade for the pan-
oramic moon roof.
●Any of the following conditions
may occur when driving in the
dark, such as at night. None of
them indicates that a malfunction
has occurred.
• Colors of objects in the displayed image may differ from their actual
color.
• Depending on the height of the lights of the vehicle behind, the
area around the vehicle may
appear white and blurry.
• Automatic image adjustment for
brighter surrounding image may
cause flickering.
If it is difficult to see the displayed
image or flickering bothers you,
change to optical mirror mode.
●The Digital Rearview Mirror may
become hot while it is in digital
mirror mode.
This is not a malfunction.
●Depending on your physical con-
dition or age, it may take longer
than usual to focus on the dis-
played image. In this case,
change to optical mirror mode.
●Do not let passengers stare at the
displayed image when the vehicle
is being driven, as doing so may
cause motion sickness.
■When the system malfunctions
If the symbol shown in the illustra-
tion is displayed when using the
Digital Rearview Mirror in digital mir-
ror mode, the system may be mal-
functioning. The symbol will
disappear in a few seconds. Oper-
ate the lever, change to optical mir-
ror mode and have the vehicle
inspected by your Toyota dealer.
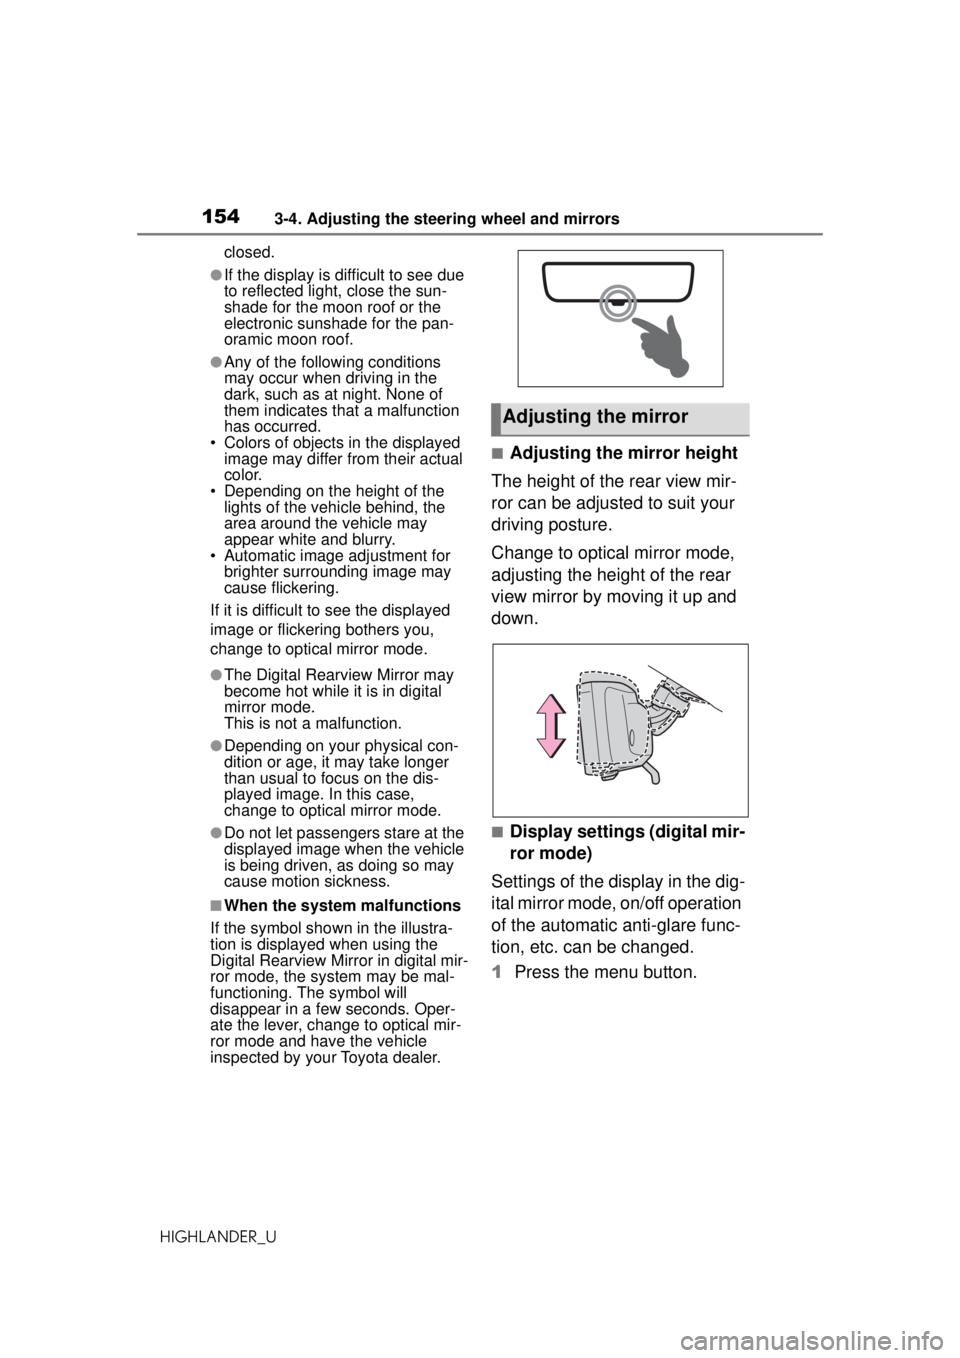
■Adjusting the mirror height
The height of the rear view mir-
ror can be adjusted to suit your
driving posture.
Change to optical mirror mode,
adjusting the height of the rear
view mirror by moving it up and
down.
■Display settings (digital mir-
ror mode)
Settings of the display in the dig-
ital mirror mode, on/off operation
of the automatic anti-glare func-
tion, etc. can be changed.
1 Press the menu button.
Adjusting the mirror
Page 162 of 560
1623-4. Adjusting the steering wheel and mirrors
HIGHLANDER_U
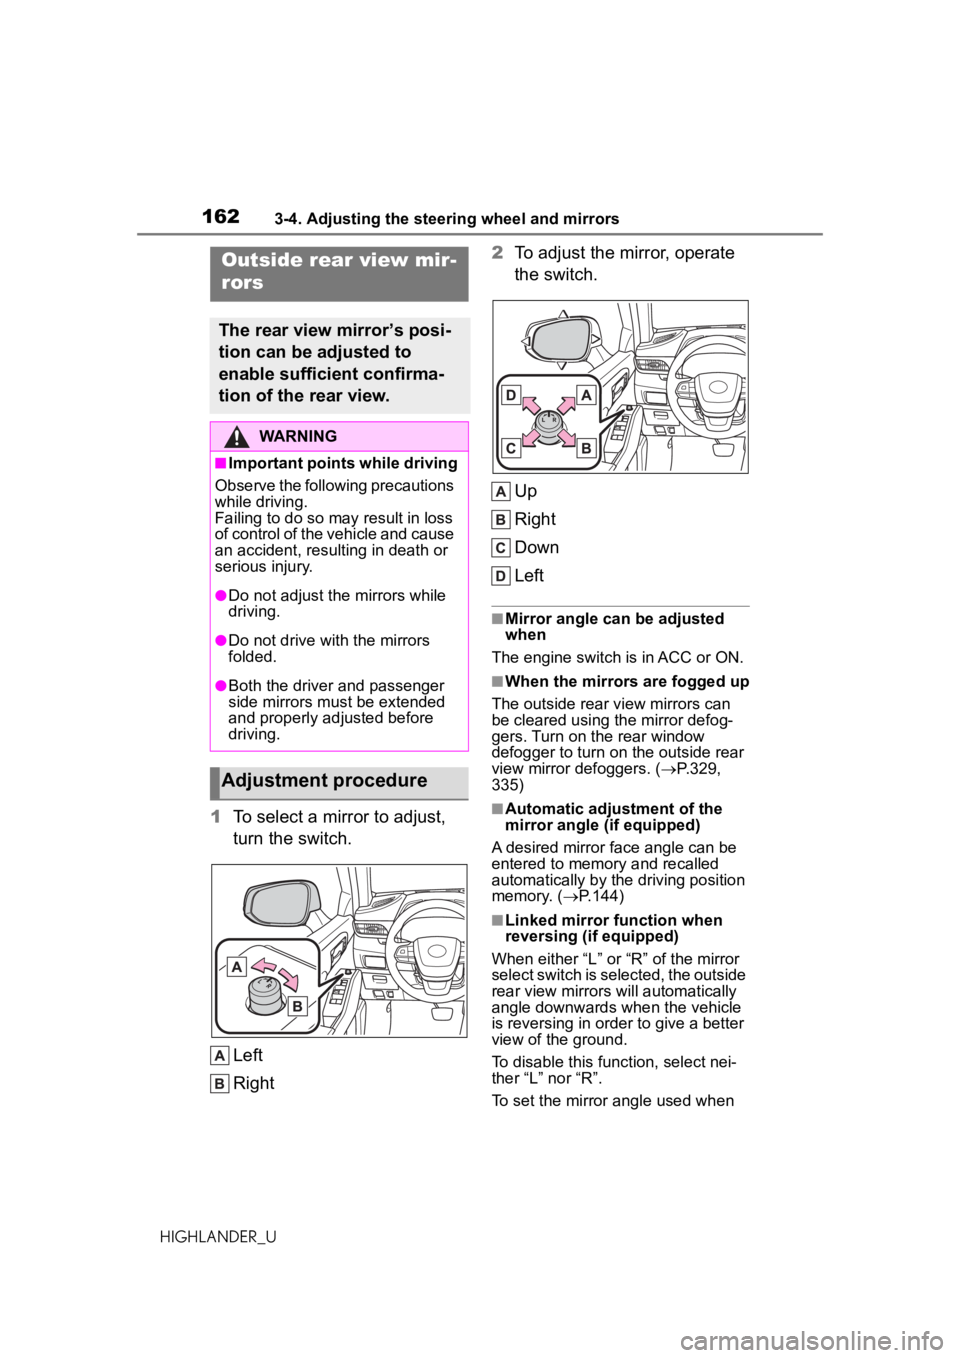
1To select a mirror to adjust,
turn the switch.
Left
Right 2
To adjust the mirror, operate
the switch.
Up
Right
Down
Left
■Mirror angle can be adjusted
when
The engine switch is in ACC or ON.
■When the mirrors are fogged up
The outside rear view mirrors can
be cleared using the mirror defog-
gers. Turn on the rear window
defogger to turn on the outside rear
view mirror defoggers. ( P.329,
335)
■Automatic adjustment of the
mirror angle (if equipped)
A desired mirror face angle can be
entered to memory and recalled
automatically by the driving position
memory. ( P.144)
■Linked mirror function when
reversing (if equipped)
When either “L” or “R” of the mirror
select switch is selected, the outside
rear view mirrors will automatically
angle downwards when the vehicle
is reversing in order to give a better
view of the ground.
To disable this function, select nei-
ther “L” nor “R”.
To set the mirror angle used when
Outside rear view mir-
rors
The rear view mirror’s posi-
tion can be adjusted to
enable sufficient confirma-
tion of the rear view.
WARNING
■Important points while driving
Observe the following precautions
while driving.
Failing to do so may result in loss
of control of the vehicle and cause
an accident, resulting in death or
serious injury.
●Do not adjust the mirrors while
driving.
●Do not drive with the mirrors
folded.
●Both the driver and passenger
side mirrors must be extended
and properly adjusted before
driving.
Adjustment procedure
Page 163 of 560
1633-4. Adjusting the steering wheel and mirrors
HIGHLANDER_U
3
Before driving
the vehicle is reversing, adjust the
mirror angle at a desired position
with the shift lever in R.
The adjusted angle will be memo-
rized and the mirror will automati-
cally tilt to the memorized angle
whenever the shift lever is shifted to
R from next time.
The memorized downward tilt posi-
tion of the mirror is linked to the nor-
mal position (angle adjusted with
the shift lever in other than R).
Therefore, if the normal position is
changed after adjustment, the tilt
position will also change.
When the normal position is
changed, readjust the angle in
reversing.
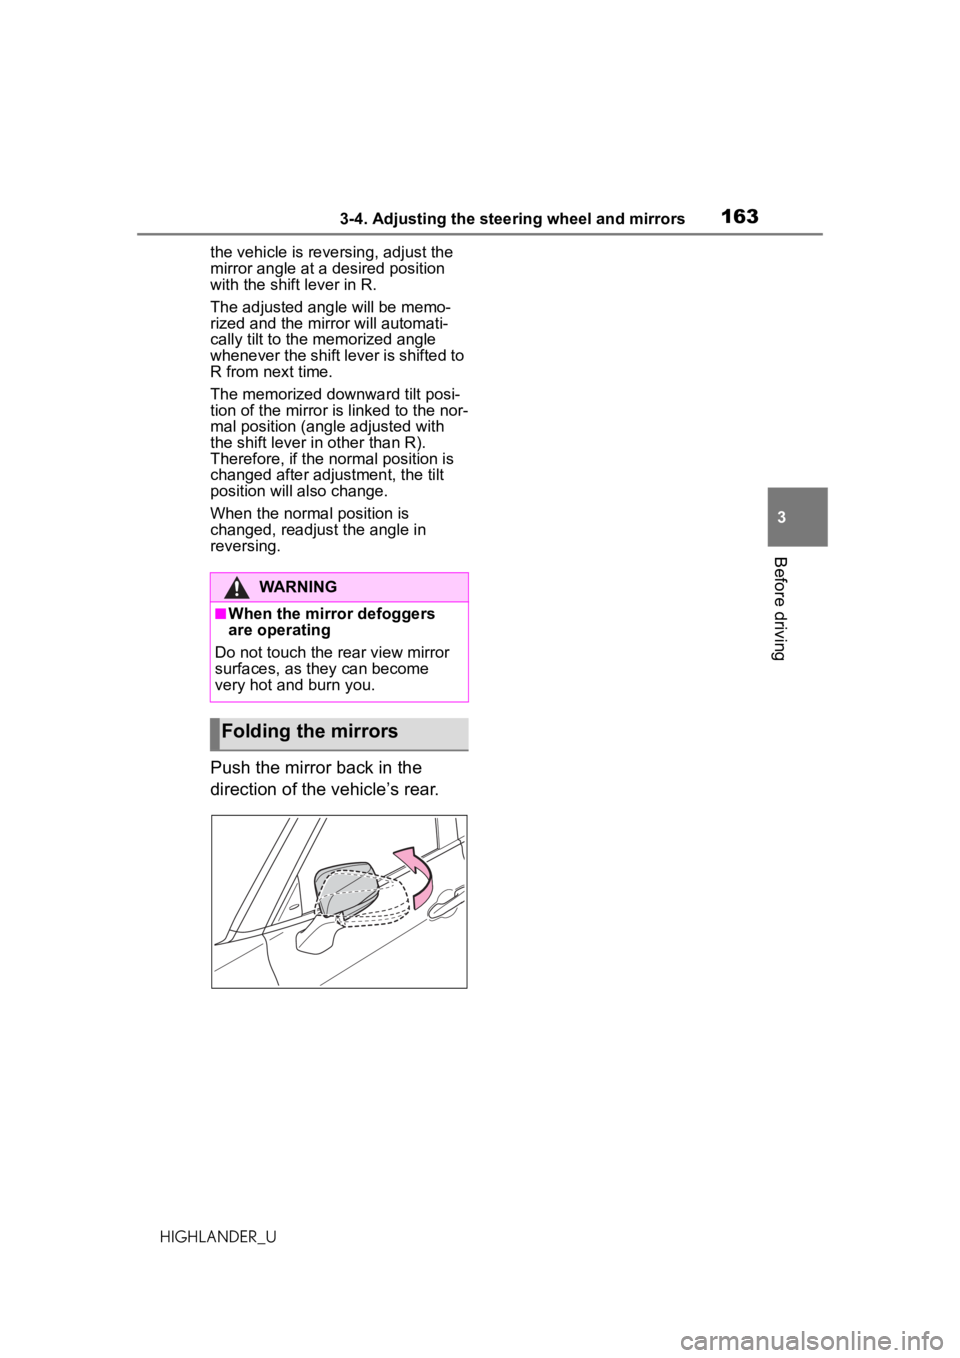
Push the mirror back in the
direction of the vehicle’s rear.
WARNING
■When the mirror defoggers
are
operating
Do not touch the rear view mirror
surfaces, as they can become
very hot and burn you.
Folding the mirrors
Page 448 of 560
4487-2. Steps to take in an emergency
HIGHLANDER_U
A driver must be in the vehicle to
steer and operate the brakes.
The vehicle’s wheels, drive train,
axles, steering and brakes must
be in good condition.
Fluid leaks under the vehicle
(Water dripping from the air
conditioning after use is nor-
mal.)
Flat-looking tires or uneven
tire wear
Engine coolant temperature
gauge needle continually
points higher than normal
Changes in exhaust sound
Excessive tire squeal when
cornering
Strange noises related to the
suspension system
Pinging or other noises
related to the engine
Engine missing, stumbling or
running roughly
Appreciable loss of power
Vehicle pulls heavily to one
NOTICE
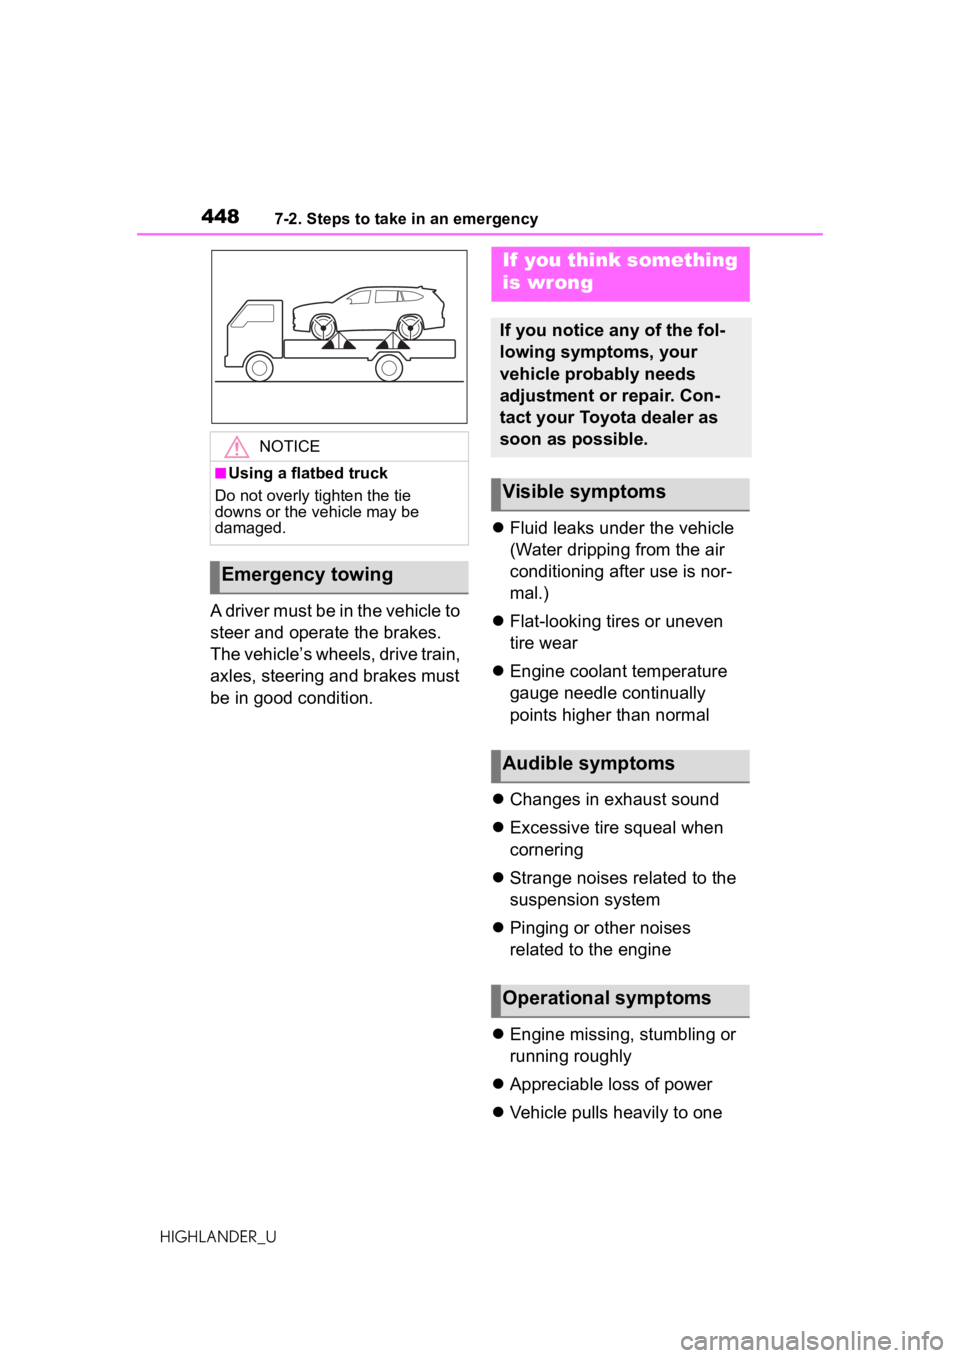
■Using a flatbed truck
Do not overly tighten the tie
downs or the vehicle may be
damaged.
Emergency towing
If you think something
is wrong
If you notice any of the fol-
lowing symptoms, your
vehicle probably needs
adjustment or repair. Con-
tact your Toyota dealer as
soon as possible.
Visible symptoms
Audible symptoms
Operational symptoms
Page 459 of 560
4597-2. Steps to take in an emergency
HIGHLANDER_U
7
When trouble arises
WARNING
■When the electric power
steering system warning light
comes on
When the light comes on yellow,
the assist to the power steering is
restricted. When the light comes
on red, the assist to the power
steering is lost and handling oper-
ations of the steering wheel
become extremely heavy.
When steering wheel operations
are heavier than usual, grip the
steering wheel firmly and operate
it using more force than usual.
■If the tire pressure warning
light comes on
Be sure to observe the following
precautions.
Failure to do so could cause a
loss of vehicle control and result
in death or serious injury.
●Stop your vehicle in a safe place
as soon as possible. Adjust the
tire inflation pressure immedi-
ately.
●Vehicles with a compact spare
tire: If the tire pressure warning
light comes on even after tire
inflation pressure adjustment, it
is probable that you have a flat
tire. Check the tires. If a tire is
flat, change it with the spare tire
and have the flat tire repaired by
the nearest Toyota dealer.
●Avoid abrupt maneuvering and
braking.
If the vehicle tires deteriorate,
you could lose control of the
steering wheel or the brakes.
■If a blowout or sudden air
leakage should occur
The tire pressure warning system
may not activate immediately.
■Maintenance of the tires
Each tire, includ ing the spare (if
provided), should be checked
monthly when cold and inflated to
the inflation pressure recom-
mended by the vehicle manufac-
turer on the vehicle placard or tire
inflation pressure label (tire and
load information label). (If your
vehicle has tires of a different size
than the size indicated on the
vehicle placard or tire inflation
pressure label [tire and load infor-
mation label], you should deter-
mine the proper tire inflation
pressure for those tires.)
As an added safety feature, your
vehicle has been equipped with a
tire pressure monitoring system
(TPMS-tire pres sure warning sys-
tem) that illuminates a low tire
pressure telltale (tire pressure
warning light) when one or more
of your tires is significantly
under-inflated. Accordingly, when
the low tire pressure telltale (tire
pressure warning light) illumi-
nates, you should stop and check
your tires as soon as possible,
and inflate them to the proper
pressure. Driving on a signifi-
cantly under-inflated tire causes
the tire to overheat and can lead
to tire failure. Under-inflation also
reduces fuel efficiency and tire
tread life, and may affect the vehi-
cle’s handling and stopping ability.
Please note that the TPMS (tire
pressure warning system) is not a
substitute for proper tire mainte-
nance, and it is the driver’s
responsibility to maintain correct
tire pressure, even if under-infla-
tion has not reached the level to
trigger illumination of the TPMS
low tire pressure telltale (tire pres-
sure warning light).
Page 554 of 560

554Alphabetical Index
HIGHLANDER_U
Pregnant women, proper seat belt use................................. 25
Reminder light and buzzer ... 453
Seat belt extender .................. 26
Seat belt pretensioners .......... 30
SRS warning light................. 451
Seat heaters ............................ 352
Seat position memory ............ 144
Seat ventilators ...................... 352
Seating capacity ..................... 187
Seats Adjustment ........................... 138
Adjustment precautions........ 138
Child seats/child restraint system installation ............................ 48
Cleaning ............................... 391
Driving position memory....... 144
Head restraints ..................... 147
Properly sitting in the seat ...... 23
Seat heaters ......................... 352
Seat position memory .......... 144
Seat ventilators .................... 352
Sensor Automatic headlight system . 215
Automatic High Beam system........................................... 217
Digital Rearview Mirror ......... 156
Inside rear view mirror.......... 152
Intuitive parking assist .......... 276
LTA (Lane Tracing Assist) ..... 241
Parking Support Brake function (rear-crossing vehicles) ...... 302
Parking Support Brake function (static objects) .................... 297
Radar sensor................ 227, 272
Rain-sensing windshield wipers ........................................... 222
RCTA .................................... 285
Service reminder message .... 395
Shift lever Automatic transmission ........ 204 If the shift lever cannot be shifted
from P .................................206
Shift lever light........................355
Shift lock system ....................205
Shopping bag hooks ..............363
Side airbags ..............................32
Side doors Door lock .............................. 115
Side marker lights Light switch...........................214
Replacing light bulbs ............432
Side mirrors Adjustment ...........................162
BSM (Blind Sport Monitor) ....270
Heaters .................329, 335, 339
Linked mirror function when reversing.............................162
Mirror position memory.........144
RCTA function.......................284
Side turn signal lights Replacing light bulbs ............432
Turn signal lever ...................208
Side windows ..........................164
Smart key system Antenna location...................131
Entry functions.............. 115, 121
Starting the engine ...............200
Snow mode switch .................310
Snow tires ...............................319
Spare tire .................................464 Storage location ...................465
Spark plug ...............................497
Specifications .........................492
Speedometer .............................79
Sport mode..............................306
Steering lock Column lock releas e .............200
Steering lock system warning message .............................200
Steering wheel Adjustment ...........................150
Heated steering wheel..........352