mirror TOYOTA HILUX 2023 Owner's Manual
[x] Cancel search | Manufacturer: TOYOTA, Model Year: 2023, Model line: HILUX, Model: TOYOTA HILUX 2023Pages: 810, PDF Size: 131.54 MB
Page 219 of 810
2174-1. Before driving
4
Driving
HILUX_OM_OM0K789E_(EE)
■Tire information
● Increase the tire inflation pressure to 20.0 kPa (0.2 kgf/cm2 or bar, 3 psi)
greater than the recommended value when towing. ( P. 640)
● Increase the air pressure of the trailer tires in accordance with the total
trailer weight and according to the values recommended by the manufac-
turer of your trailer.
■ Tr a i l e r l i g h ts
Check that the turn signal lights and stoplights are operating correctly every
time you hitch up the trailer. Direct ly wiring up to your vehicle may damage
the electrical system and stop the lights from functioning correctly.
■ When towing a trailer
Disable the following systems, as the systems may not operate properly.
● LDA (Lane Departure Alert With Yaw Assist Function) (If equipped)
( P. 283)
● Dynamic radar cruise control (If equipped) (P. 300)
● Cruise control (If equipped) (P. 316)
● Toyota parking assist-sensor (If equipped) (P. 320)
■ Break-in schedule
Toyota recommends that vehicles fitted with new power train components
should not be used for towing trailers for the first 800 km (500 miles).
■ Safety checks before towing
● Check that the maximum load limit for the towing hitch/bracket and hitch ball
is not exceeded. Bear in mind that the coupling weight of the trailer will add
to the load exerted on the vehicle. Also make sure that the total load exerted
on the vehicle is within the range of the weight limits. ( P. 215)
● Ensure that the trailer load is secure.
● Supplementary outside rear view mirrors should be added to the vehicle if
the traffic behind cannot be clearly seen with standard mirrors. Adjust the
extending arms of these mirrors on both sides of the vehicle so that they
always provide maximum visibility of the road behind.
■ Maintenance
● Maintenance must be performed more frequently when using the vehicle for
towing due to the greater weight burden placed on the vehicle compared to
normal driving.
● Retighten all bolts securing the hitching ball and bracket after towing for
approximately 1000 km (600 miles).
Page 271 of 810
2694-5. Using the driving support systems
4
Driving
HILUX_OM_OM0K789E_(EE)
WARNING
●Replace the windshield if it is damaged or cracked.
After replacing the windshield, the front camera must be recalibrated. Con-
tact any authorized Toyota retailer or Toyota authorized repairer, or any
reliable repairer for details.
● Do not allow liquids to contact the front camera.
● Do not allow bright lights to shine into the front camera.
● Do not dirty or damage the front camera.
When cleaning the inside of the windshi eld, do not allow glass cleaner to
contact the lens of the front camera. Also, do not touch the lens.
If the lens is dirty or damaged, contact any authorized Toyota retailer or
Toyota authorized repairer, or any reliable repairer.
● Do not subject the front camera to a strong impact.
● Do not change the installation position or direction of the front camera or
remove it.
● Do not disassemble the front camera.
● Do not modify any components of the vehicle around the front camera
(inside rear view mirror, etc.) or ceiling.
● Do not attach any accessories to the hood, front grille or front bumper that
may obstruct the front camera. Contact any authorized Toyota retailer or
Toyota authorized repairer, or any reliable repairer for details.
● If a surfboard or other long object is to be mounted on the roof, make sure
that it will not obstruct the front camera.
● Do not modify the headlights or other lights.
Page 435 of 810
433
6Interior features
HILUX_OM_OM0K789E_(EE)
6-1. Using the air conditioning
system and defogger
Manual air conditioning
system ............................. 434
Automatic air conditioning
system ............................. 441
Heated steering wheel/
seat heaters ..................... 450
6-2. Using the interior lights
Interior lights list ................. 453
• Personal/interior light
main switch.................... 454
• Personal/interior
lights .............................. 454
• Interior light.................... 454
6-3. Using the storage features
List of storage features ...... 456
• Glove box ...................... 457
• Console box .................. 457
• Cup holders ................... 458
• Bottle holders ................ 459
• Auxiliary boxes .............. 460
Luggage compartment
features............................ 463
6-4. Using the other interior
features
Other interior features ........ 464
• Sun visors...................... 464
• Vanity mirror .................. 464
• Clock ............................. 465
• Power outlets................. 466
• Grocery bag hooks ........ 468
• Coat hooks .................... 469
• Armrest .......................... 469
Using the steering wheel
audio switches ................. 470
Page 437 of 810
4356-1. Using the air conditioning system and defogger
6
Interior features
HILUX_OM_OM0K789E_(EE)
■Switching between outside air and recirculated air modes
Move the outside/recirculated air mode lever.
The mode switches between (introduces air from outside the vehi-
cle) and (recycles air inside the vehicle) each time the lever is
moved.
■Defogging the windshield (vehicles with )
Set to position.
Set the outside/recirculated air mode lever to outside air mode if recircu-
lated air mode is used.
Perform the following operations accordingly:
● To adjust the fan speed, turn .
● To adjust the temperature setting, turn .
● If the dehumidification function is not operating, press to
operate the dehumidification function.
To defog the windshield and the side windows early, turn the air
flow and temperature up.
■Defogging the rear window and outside rear view mirrors (if
equipped)
Defoggers are used to defog the rear window, and to remove rain-
drops, dew and frost from the outside rear view mirrors.
Press (vehicles with rear window defogger), (vehicles
with rear window defogger and windshield wiper de-icer) or
(vehicles with rear window defogger, outside rear view mirror defog-
gers and windshield wiper de-icer).
The indicator illuminates on the switch when the defoggers are on.
The defoggers will automatically turn off after approximately 15 minutes.
Other functions
1
2
Page 442 of 810
4406-1. Using the air conditioning system and defogger
HILUX_OM_OM0K789E_(EE)
WARNING
■To prevent the windshield from fogging up
● Do not set to during cool air operation in extremely humid
weather. The difference between the temperature of the outside air and
that of the windshield can cause the outer surface of the windshield to fog
up, blocking your vision.
■ To prevent burns
● Vehicles with outside rear view mirror defoggers: Do not touch the rear
view mirror surfaces when the outsi de rear view mirror defoggers are on.
● Vehicles with windshield wiper de-icer: Do not touch the glass at lower part
of the windshield or the side of the front pillars when the windshield wiper
de-icer is on.
NOTICE
■ To prevent battery discharge
Do not leave the air conditioning syst em on longer than necessary when the
engine is not running.
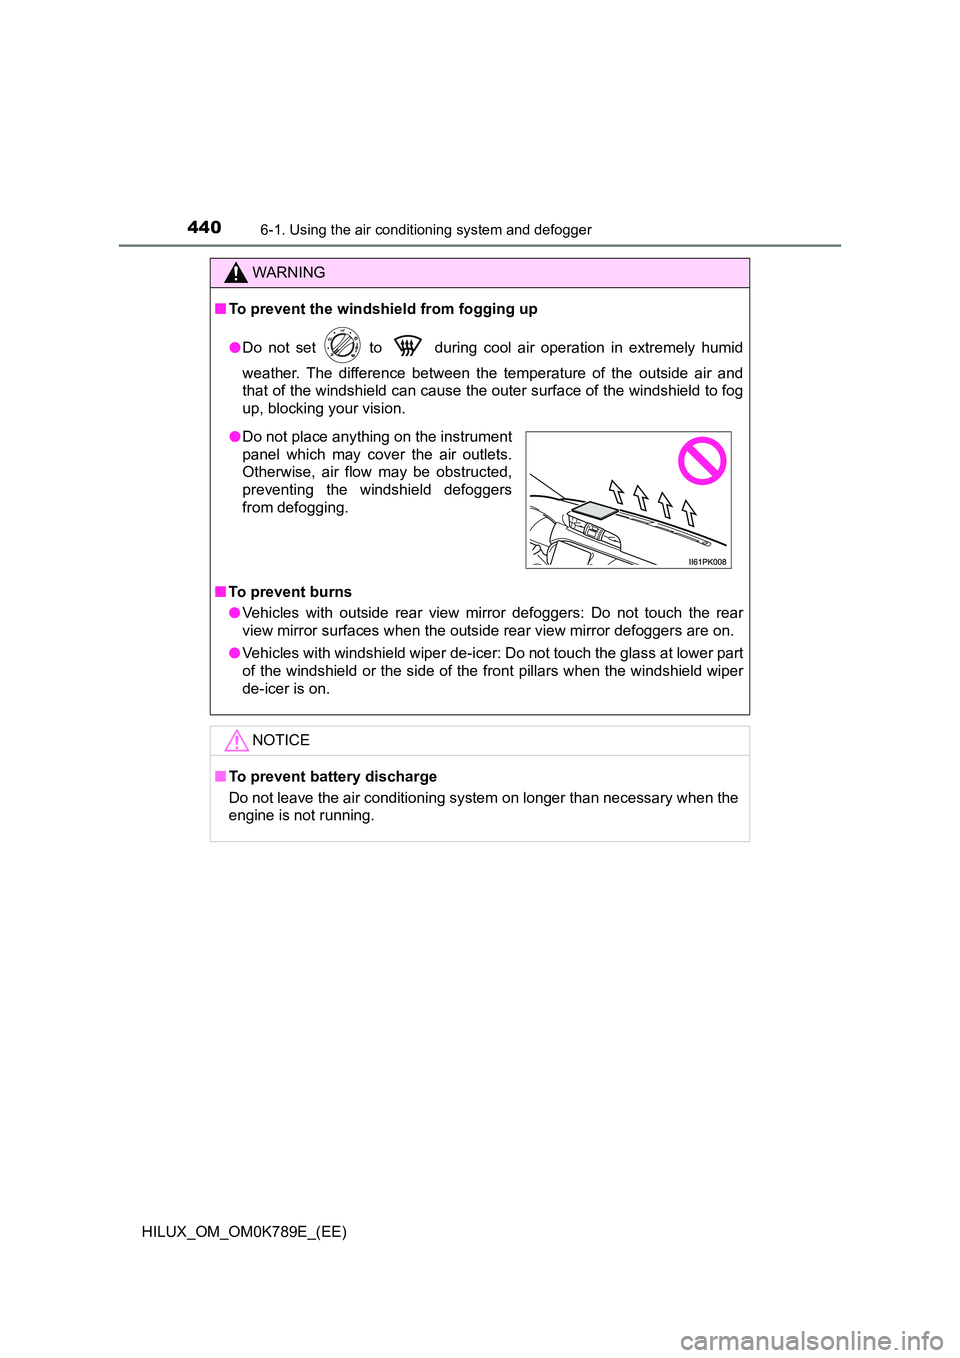
● Do not place anything on the instrument
panel which may cover the air outlets.
Otherwise, air flow may be obstructed,
preventing the windshield defoggers
from defogging.
Page 446 of 810
4446-1. Using the air conditioning system and defogger
HILUX_OM_OM0K789E_(EE)
■Defogging the rear window and outside rear view mirrors (if
equipped)
Defoggers are used to defog the rear window, and to remove rain-
drops, dew and frost from the outside rear view mirrors.
Press (vehicles with rear window defogger), (vehicles
with rear window defogger and outside rear view mirror defoggers),
(vehicles with rear window defogger and windshield wiper de-
icer) or (vehicles with rear window defogger, outside rear view
mirror defoggers and windshield wiper de-icer).
The indicator illuminates on the switch when the defoggers are on.
The defoggers will automatically turn off after approximately 15 to 60
minutes.
■Windshield wiper de-icer (if equipped)
This feature is used to prevent ice from building up on the wind-
shield and wiper blades.
Press or .
The indicator illuminates on the sw itch when the windshield wiper de-
icer is on.
The windshield wiper de-icer will automatically turn off after approxi-
mately 15 to 60 minutes.
■Power heater (if equipped)
This feature is used to heat the engine coolant, speed up warming
of the cab in cold weather, and keep the cab warm.
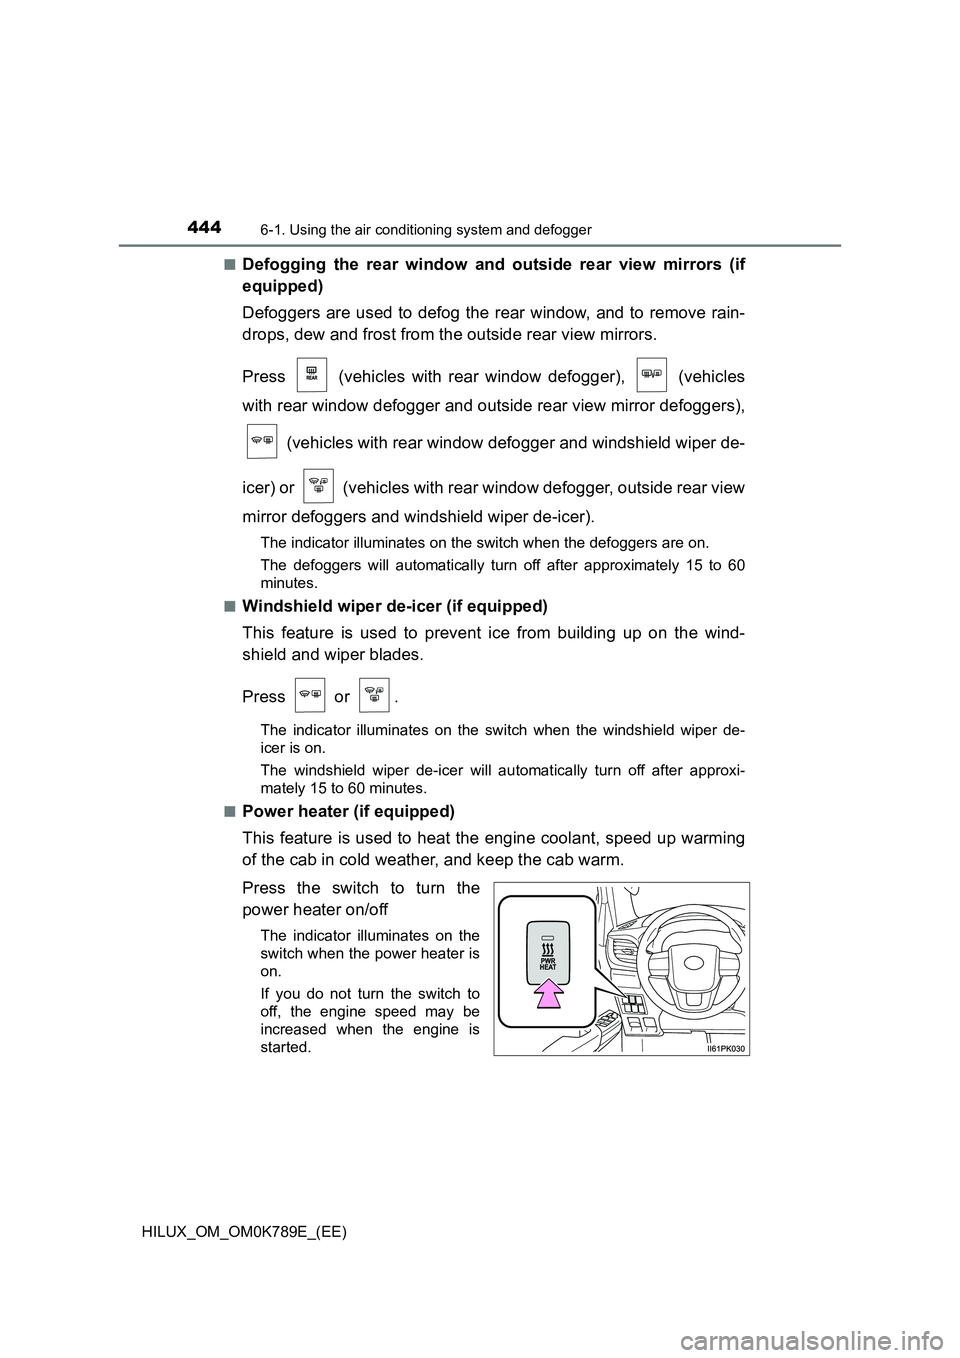
Press the switch to turn the
power heater on/off
The indicator illuminates on the
switch when the power heater is
on.
If you do not turn the switch to
off, the engine speed may be
increased when the engine is
started.
Page 451 of 810
4496-1. Using the air conditioning system and defogger
6
Interior features
HILUX_OM_OM0K789E_(EE)
WARNING
■To prevent the windshield from fogging up
● Do not use during cool air operation in extremely humid weather. The
difference between the temperature of the outside air and that of the wind-
shield can cause the outer surface of the windshield to fog up, blocking
your vision.
■ To prevent burns
● Vehicles with outside rear view mirror defoggers: Do not touch the rear
view mirror surfaces when the outsi de rear view mirror defoggers are on.
● Vehicles with windshield wiper de-icer: Do not touch the glass at lower part
of the windshield or the side of the front pillars when the windshield wiper
de-icer is on.
NOTICE
■ To prevent battery discharge
Do not leave the air conditioning syst em on longer than necessary when the
engine is not running.
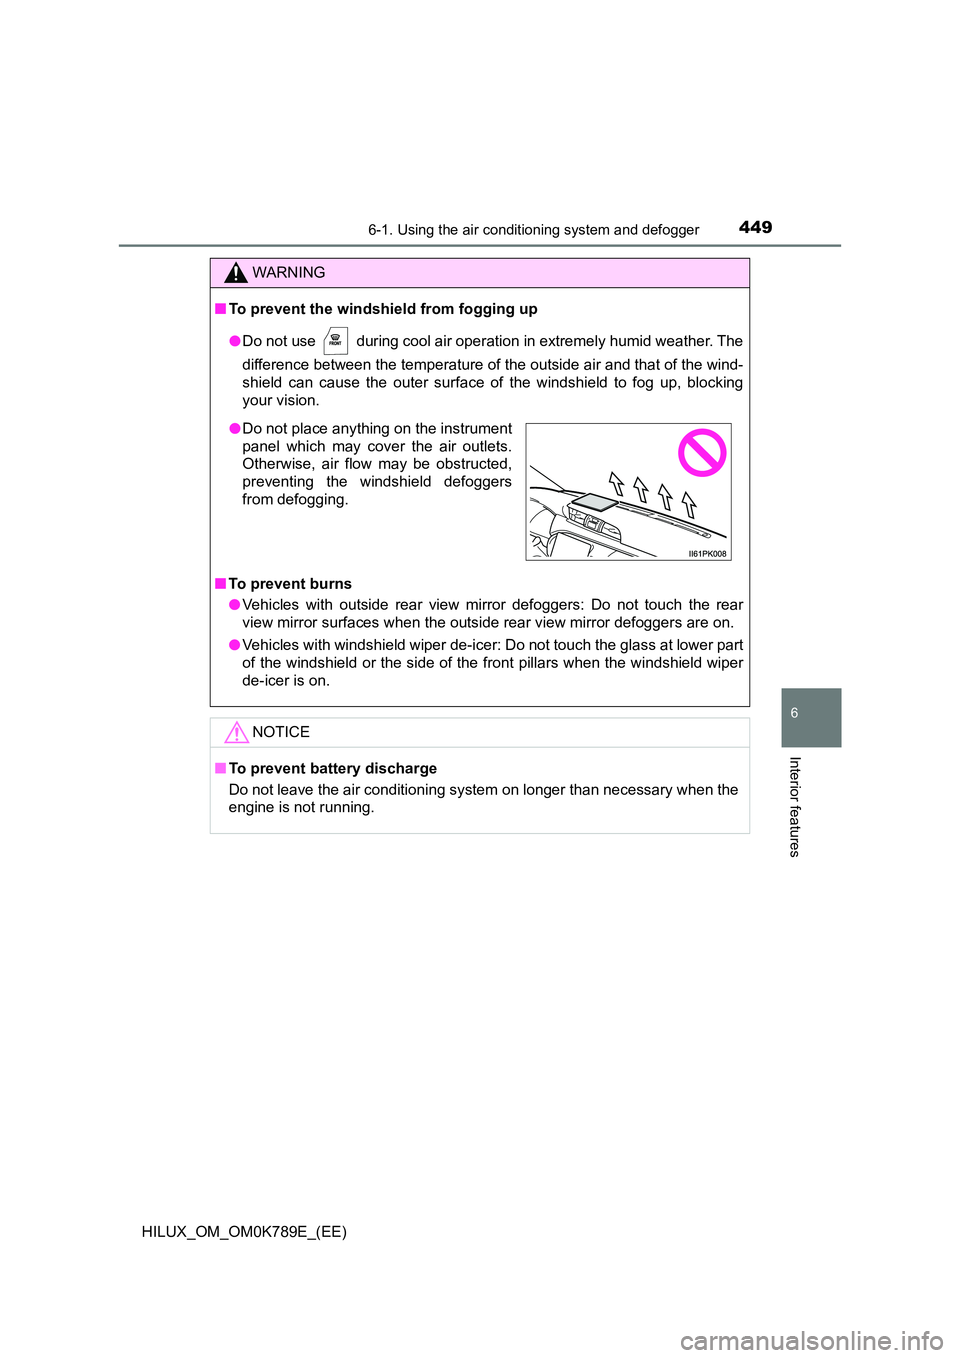
● Do not place anything on the instrument
panel which may cover the air outlets.
Otherwise, air flow may be obstructed,
preventing the windshield defoggers
from defogging.
Page 466 of 810
4646-4. Using the other interior features
HILUX_OM_OM0K789E_(EE)
Other interior features
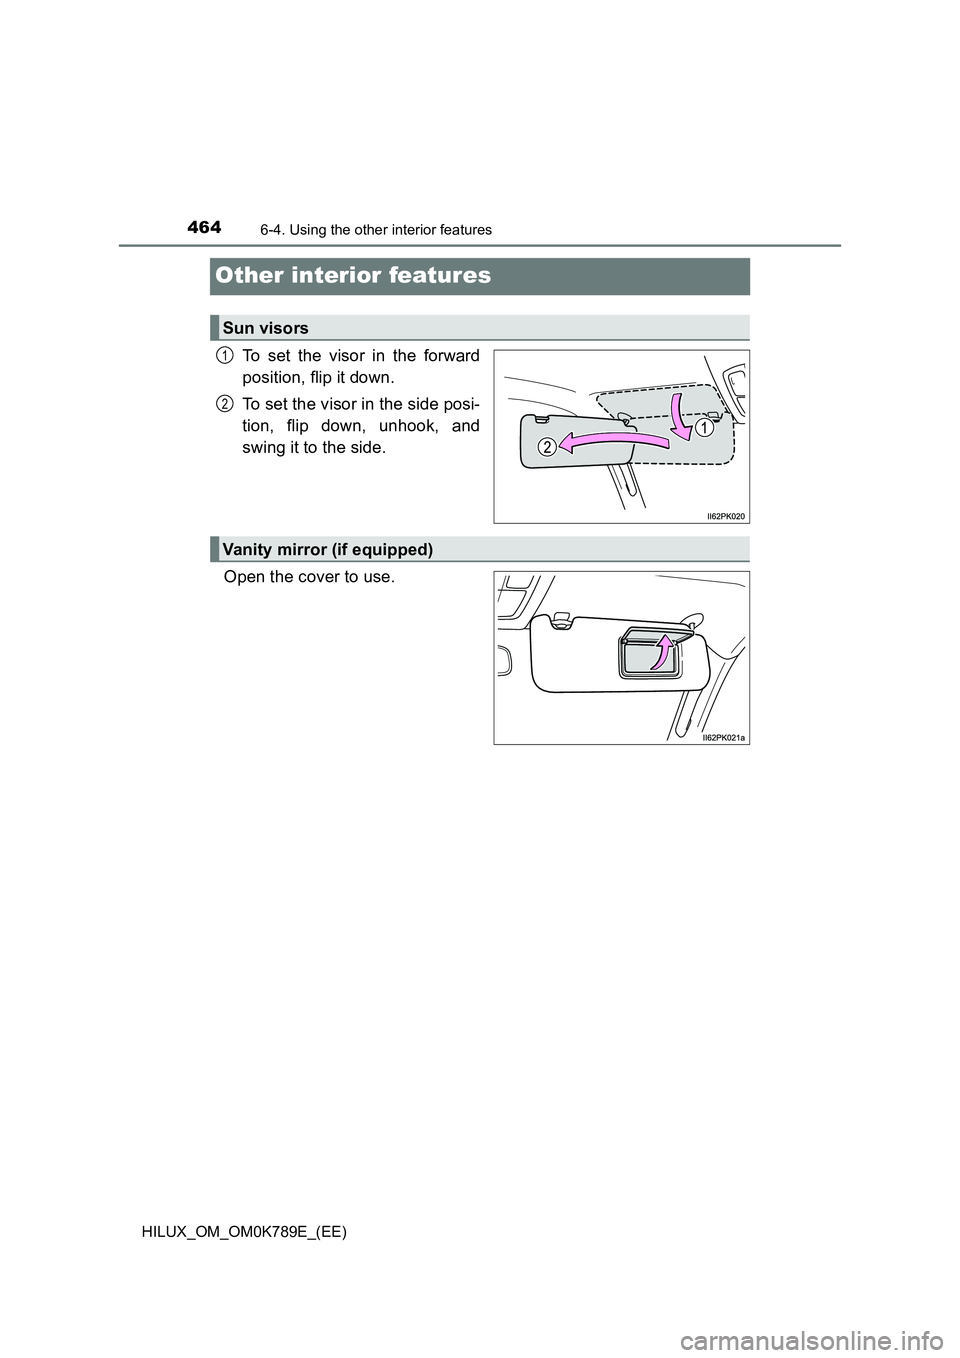
To set the visor in the forward
position, flip it down.
To set the visor in the side posi-
tion, flip down, unhook, and
swing it to the side.
Open the cover to use.
Sun visors
1
2
Vanity mirror (if equipped)
Page 474 of 810
4727-1. Maintenance and care
HILUX_OM_OM0K789E_(EE)
Cleaning and protecting the vehicle
exterior
● Working from top to bottom, liberally apply water to the vehicle
body, wheel wells and underside of the vehicle to remove any dirt
and dust.
● Wash the vehicle body using a sponge or soft cloth, such as a
chamois.
● For hard-to-remove marks, use car wash soap and rinse thoroughly
with water.
● Wipe away any water.
● Wax the vehicle when the waterproof coating deteriorates.
If water does not bead on a clean surface, apply wax when the vehicle
body is cool.
■ Automatic car washes
● Fold the mirrors and remove the antenna (vehicles with short pole antenna)
before washing the vehicle. Start washing from the front of the vehicle.
Make sure to re-install the antenna and extend the mirrors before driving.
● Brushes used in automatic car washes may scratch the vehicle surface,
parts (wheel, etc.) and harm your vehicle’s paint.
■ High pressure car washes
As water may enter the cabin, do not bring the nozzle tip near the gaps
around the doors or perimeter of the wi ndows, or spray these areas continu-
ously.
Perform the following to protect the vehicle and maintain it in
prime condition:
Page 547 of 810
5457-3. Do-it-yourself maintenance
HILUX_OM_OM0K789E_(EE)
7
Maintenance and care
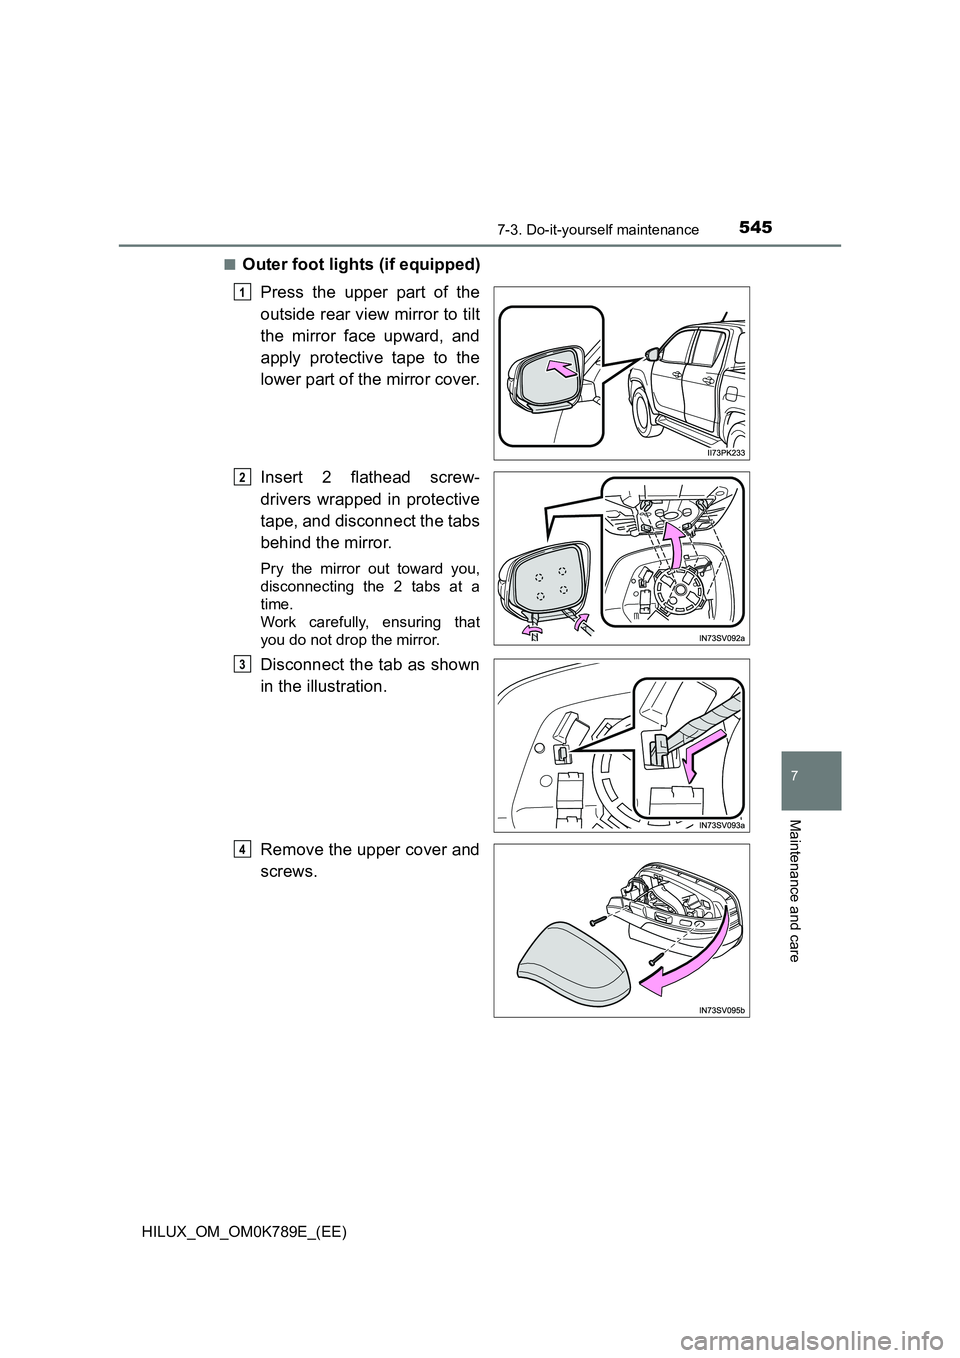
■Outer foot lights (if equipped)
Press the upper part of the
outside rear view mirror to tilt
the mirror face upward, and
apply protective tape to the
lower part of the mirror cover.
Insert 2 flathead screw-
drivers wrapped in protective
tape, and disconnect the tabs
behind the mirror.
Pry the mirror out toward you,
disconnecting the 2 tabs at a
time.
Work carefully, ensuring that
you do not drop the mirror.
Disconnect the tab as shown
in the illustration.
Remove the upper cover and
screws.
1
2
3
4