TOYOTA LAND CRUISER 2011 J200 Owners Manual
LAND CRUISER 2011 J200
TOYOTA
TOYOTA
https://www.carmanualsonline.info/img/14/6492/w960_6492-0.png
TOYOTA LAND CRUISER 2011 J200 Owners Manual
Trending: homelink, tire pressure, service indicator, wheelbase, check engine, low beam, fuse
Page 401 of 608
401
3-7. Other interior features
3
Interior features
L/C200_U (OM60F74U)
Seat heaters
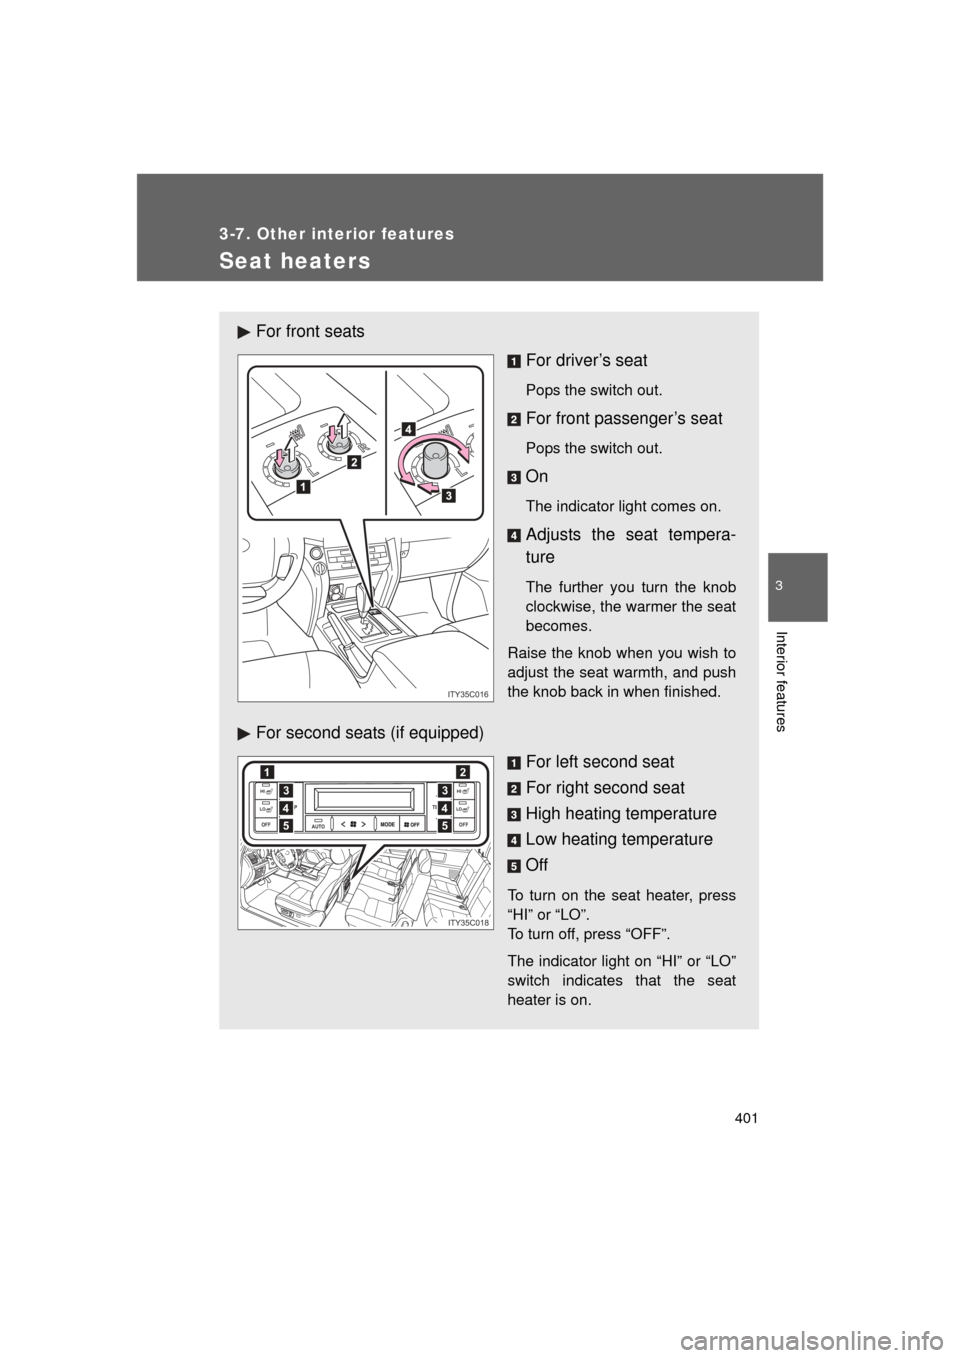
For front seatsFor driver’s seat
Pops the switch out.
For front passenger’s seat
Pops the switch out.
On
The indicator light comes on.
Adjusts the seat tempera-
ture
The further you turn the knob
clockwise, the warmer the seat
becomes.
Raise the knob when you wish to
adjust the seat warmth, and push
the knob back in when finished.
For second seats (if equipped) For left second seat
For right second seat
High heating temperature
Low heating temperature
Off
To turn on the seat heater, press
“HI” or “LO”.
To turn off, press “OFF”.
The indicator light on “HI” or “LO”
switch indicates that the seat
heater is on.
L
R
L
ITY35C016
AUTO
TEMP
OFF TEMP
HI
LOOFF
HI
LO4
12
3
5
4
3
5
ITY35C018
Page 402 of 608
402 3-7. Other interior features
L/C200_U (OM60F74U)
■The seat heaters can be used when
The “ENGINE START STOP” switch is in IGNITION ON mode.
CAUTION
■Burns
● Use caution when seating the following persons in a seat with the seat
heater on to avoid the possibility of burns:
• Babies, small children, the elderly, the sick and the disabled
• Persons with sensitive skin
• Persons who are fatigued
• Persons who have taken alcohol or drugs that induce sleep (sleeping
drugs, cold remedies, etc.)
● Do not cover the seat with anything when using the seat heater.
Using the seat heater with a blanket or cushion increases the temperature
of the seat and may lead to overheating.
● Do not use the seat heater more than necessary. Doing so may cause
minor burns or overheating.
NOTICE
■To prevent seat heater damage
Do not put unevenly weighted objects on the seat and do not stick sharp
objects (needles, nails, etc.) into the seat.
■ To prevent battery discharge
Turn the switches off when the engine is not running.
Page 403 of 608
403
3-7. Other interior features
3
Interior features
L/C200_U (OM60F74U)
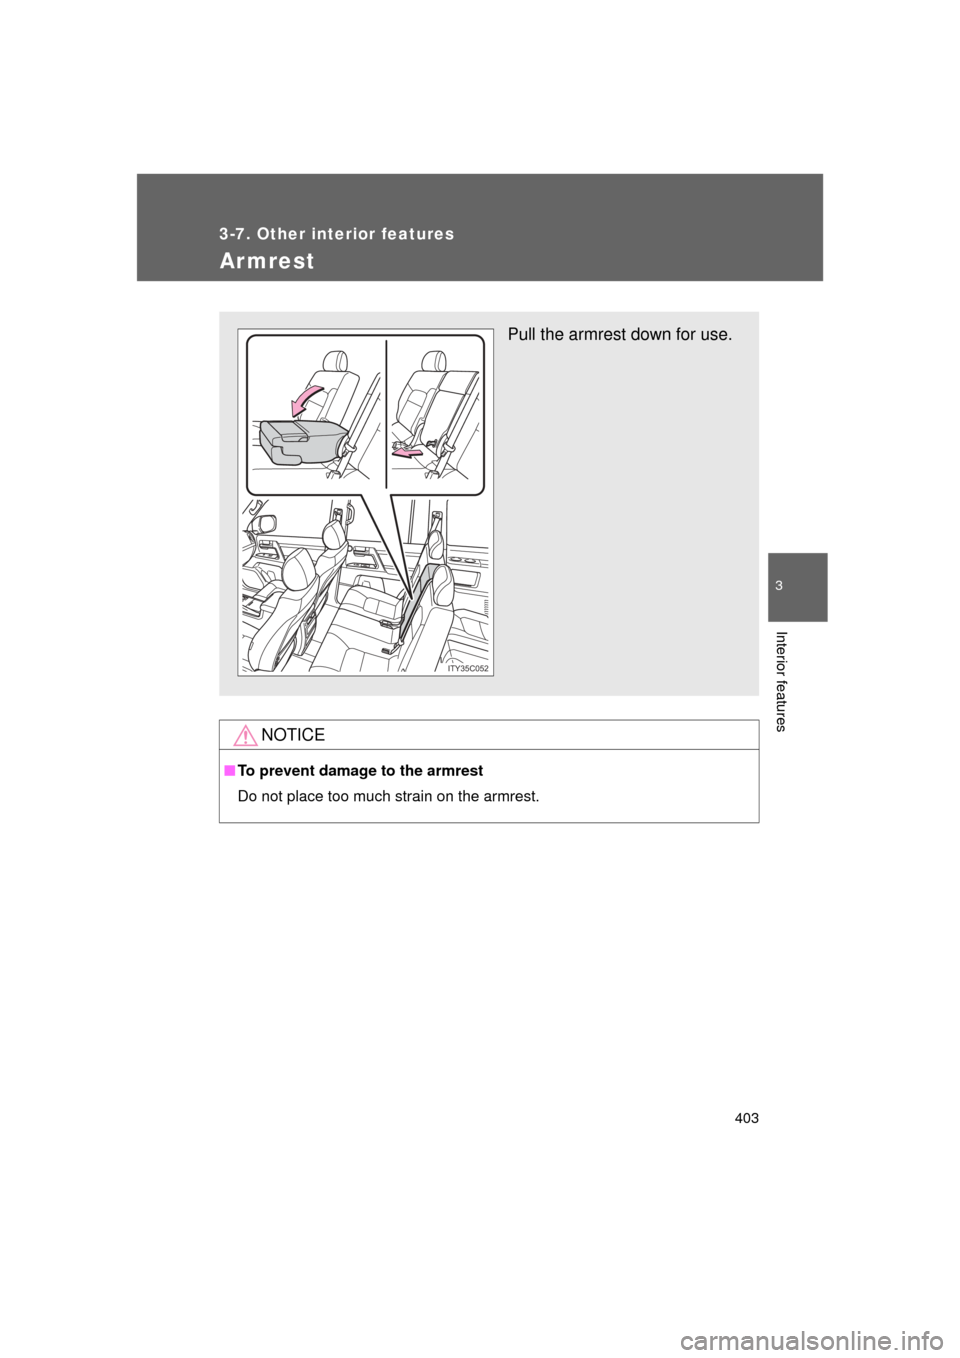
Armrest
NOTICE
■To prevent damage to the armrest
Do not place too much strain on the armrest.
Pull the armrest down for use.
ITY35C052
Page 404 of 608
404
3-7. Other interior features
L/C200_U (OM60F74U)
Floor mats
CAUTION
Observe the following precautions.
Failure to do so may cause the driver’s floor mat to slip, possibly interfering
with the pedals while driving. An unexpectedly high speed may result or it may
become difficult to stop the vehicle, leading to a serious accident.
■When installing the driver’s floor mat
● Do not use floor mats designed for other models or different model year
vehicles, even if they are Toyota Genuine floor mats.
● Only use floor mats designed for the driver’s seat.
● Always install the floor mat securely using the retaining hooks (clips) pro-
vided.
● Do not use two or more floor mats on top of each other.
● Do not place the floor mat bottom-side up or upside-down.
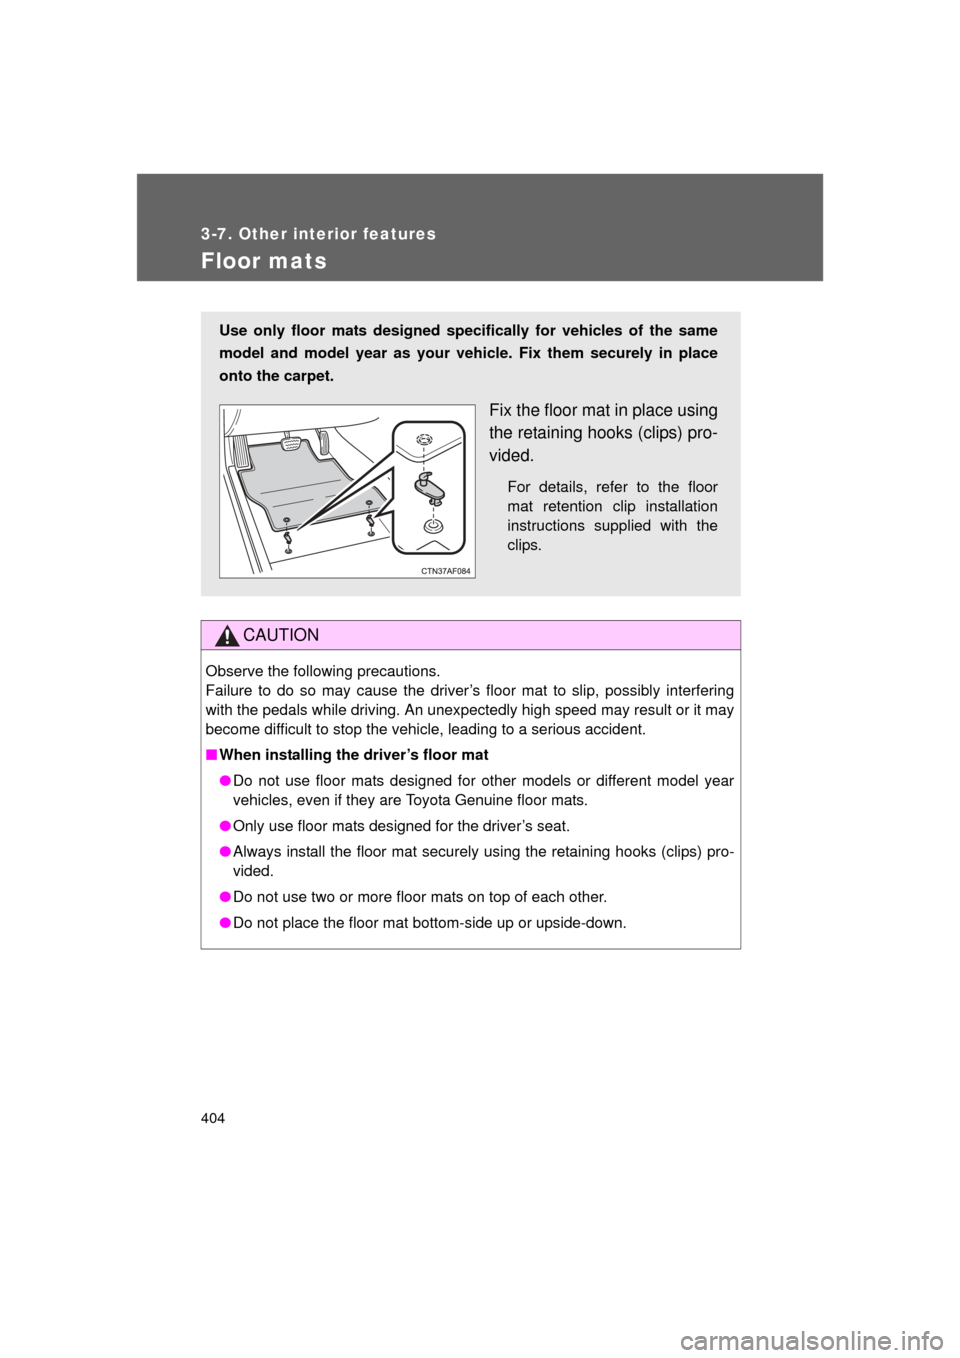
Use only floor mats designed specifically for vehicles of the same
model and model year as your vehic le. Fix them securely in place
onto the carpet.
Fix the floor mat in place using
the retaining hooks (clips) pro-
vided.
For details, refer to the floor
mat retention clip installation
instructions supplied with the
clips.
Page 405 of 608
405
3-7. Other interior features
3
Interior features
L/C200_U (OM60F74U)
CAUTION
■
Before driving
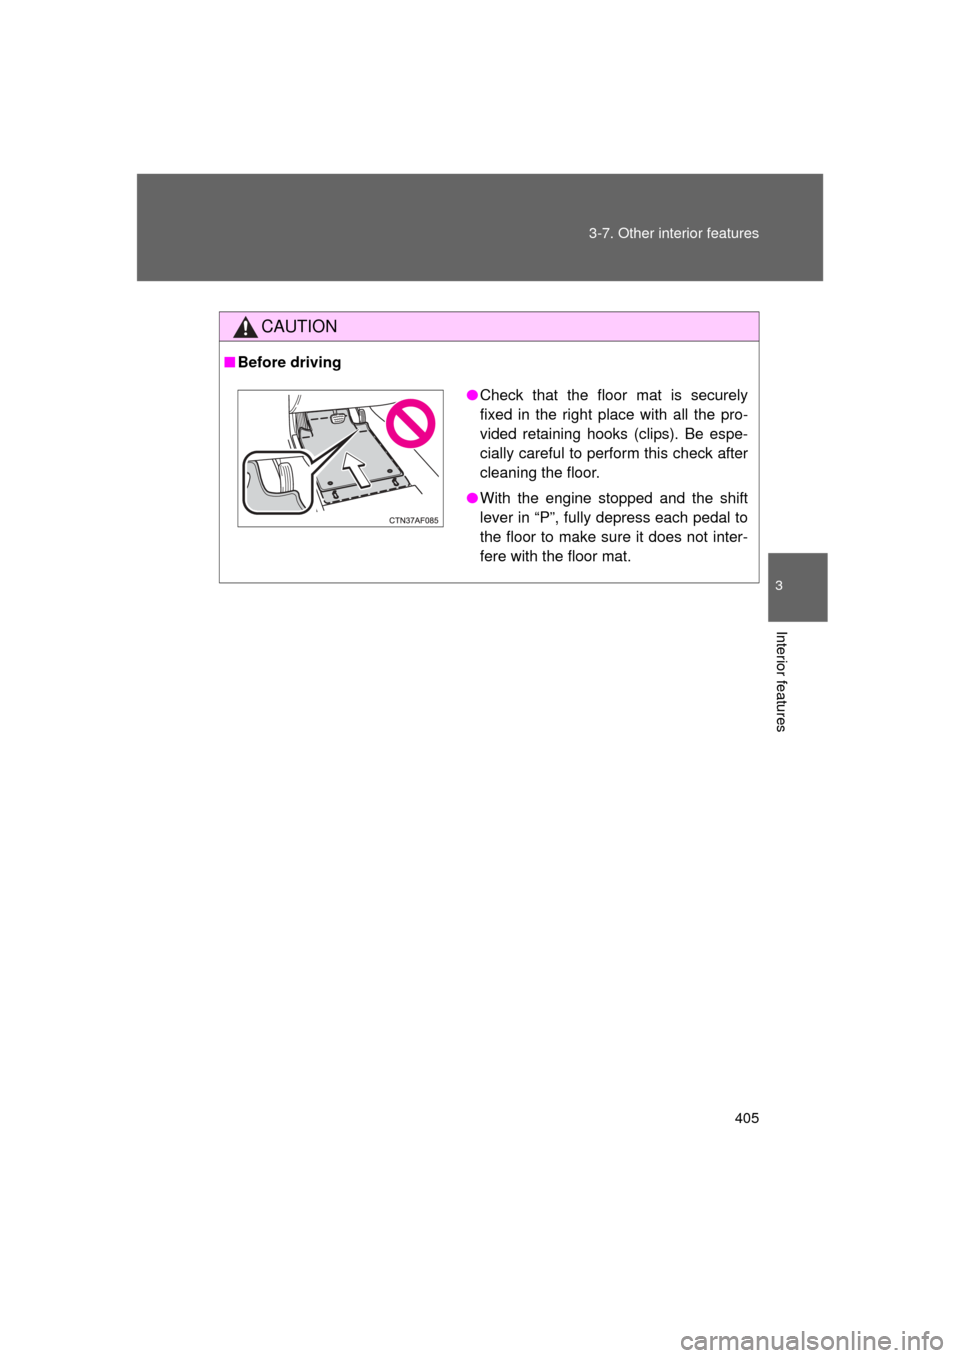
●Check that the floor mat is securely
fixed in the right place with all the pro-
vided retaining hooks (clips). Be espe-
cially careful to perform this check after
cleaning the floor.
● With the engine stopped and the shift
lever in “P”, fully depress each pedal to
the floor to make sure it does not inter-
fere with the floor mat.
Page 406 of 608
406
3-7. Other interior features
L/C200_U (OM60F74U)
Luggage compartment features
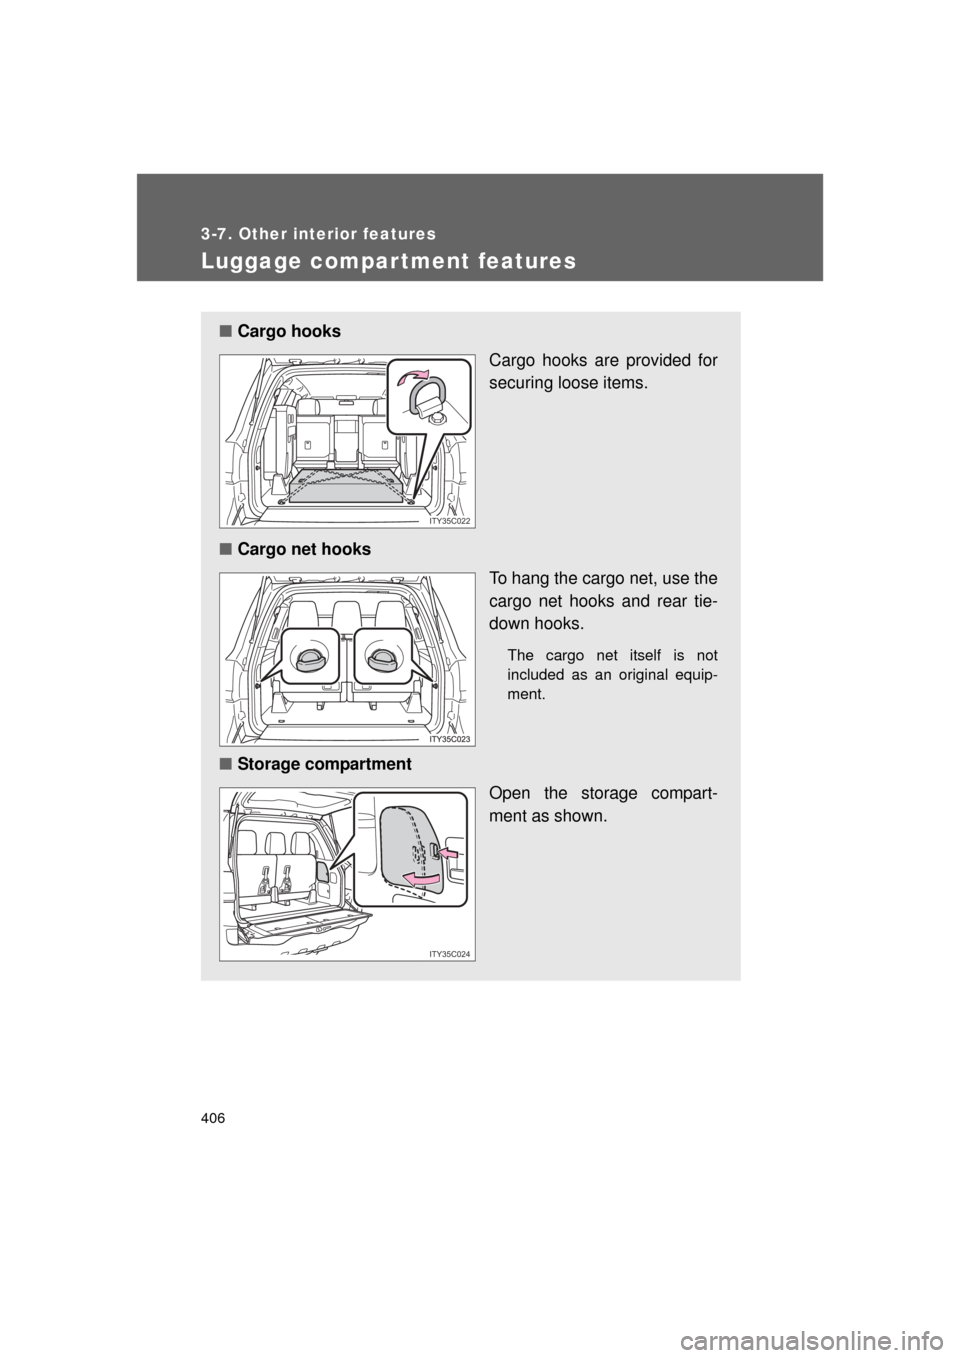
■Cargo hooks
Cargo hooks are provided for
securing loose items.
■ Cargo net hooks
To hang the cargo net, use the
cargo net hooks and rear tie-
down hooks.
The cargo net itself is not
included as an original equip-
ment.
■Storage compartment
Open the storage compart-
ment as shown.
ITY35C022
ITY35C024
Page 407 of 608
407
3-7. Other interior features
3
Interior features
L/C200_U (OM60F74U)
CAUTION
■
When the cargo hooks are not in use
To avoid injury, always return the cargo hooks to their positions when they
are not in use.
NOTICE
■To prevent damage to the cargo net hooks
Avoid hanging things other than a cargo net on it.
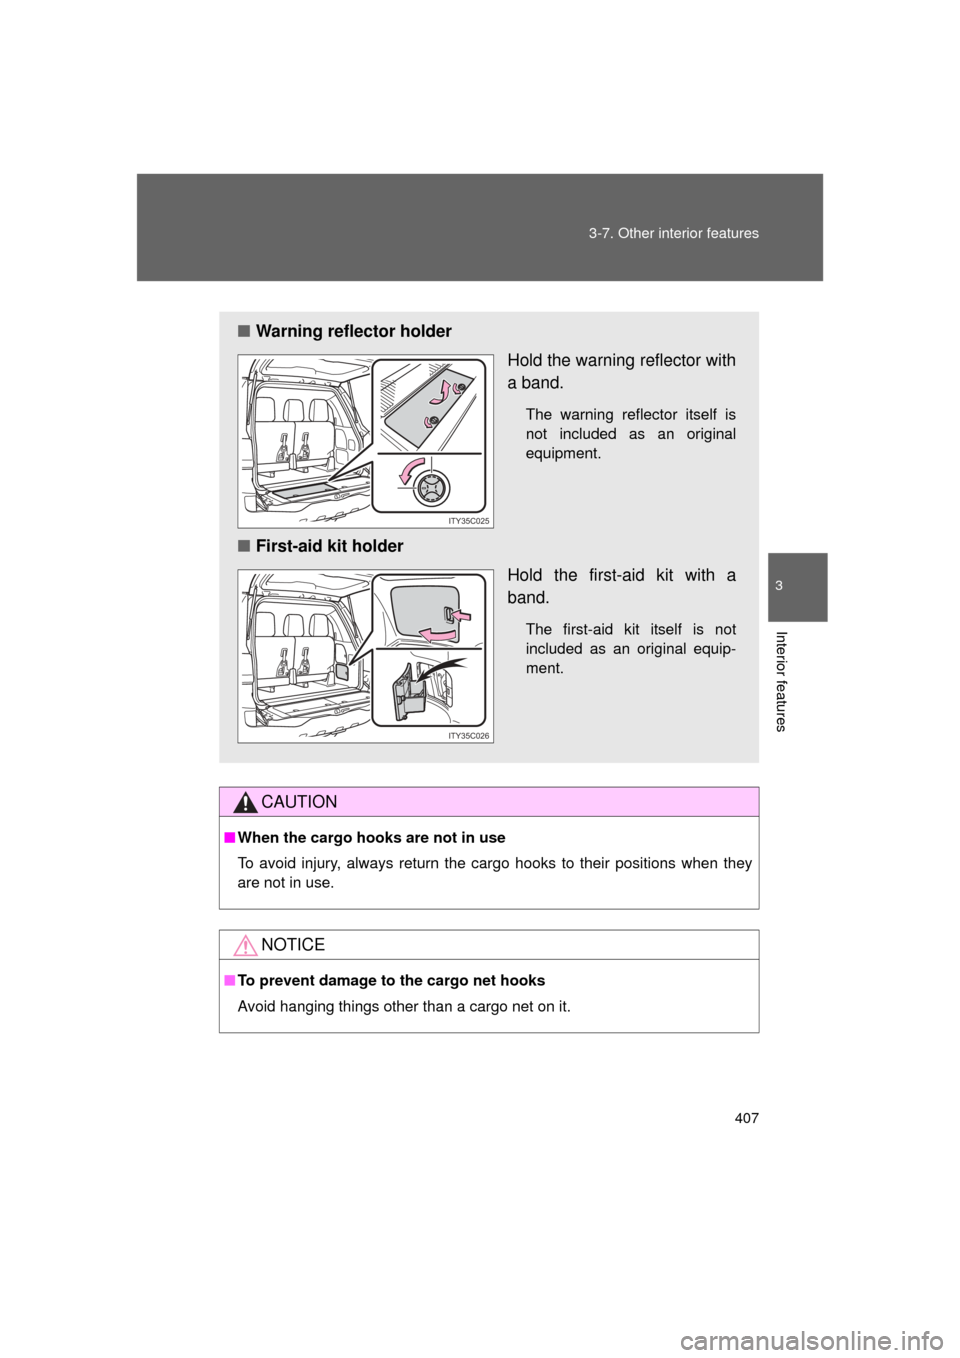
■ Warning reflector holder
Hold the warning reflector with
a band.
The warning reflector itself is
not included as an original
equipment.
■First-aid kit holder
Hold the first-aid kit with a
band.
The first-aid kit itself is not
included as an original equip-
ment.
ITY35C025
ITY35C026
Page 408 of 608
408
3-7. Other interior features
L/C200_U (OM60F74U)
Garage door opener
The garage door opener (HomeLink Universal Transceiver) is manufac-
tured under license from HomeLink.
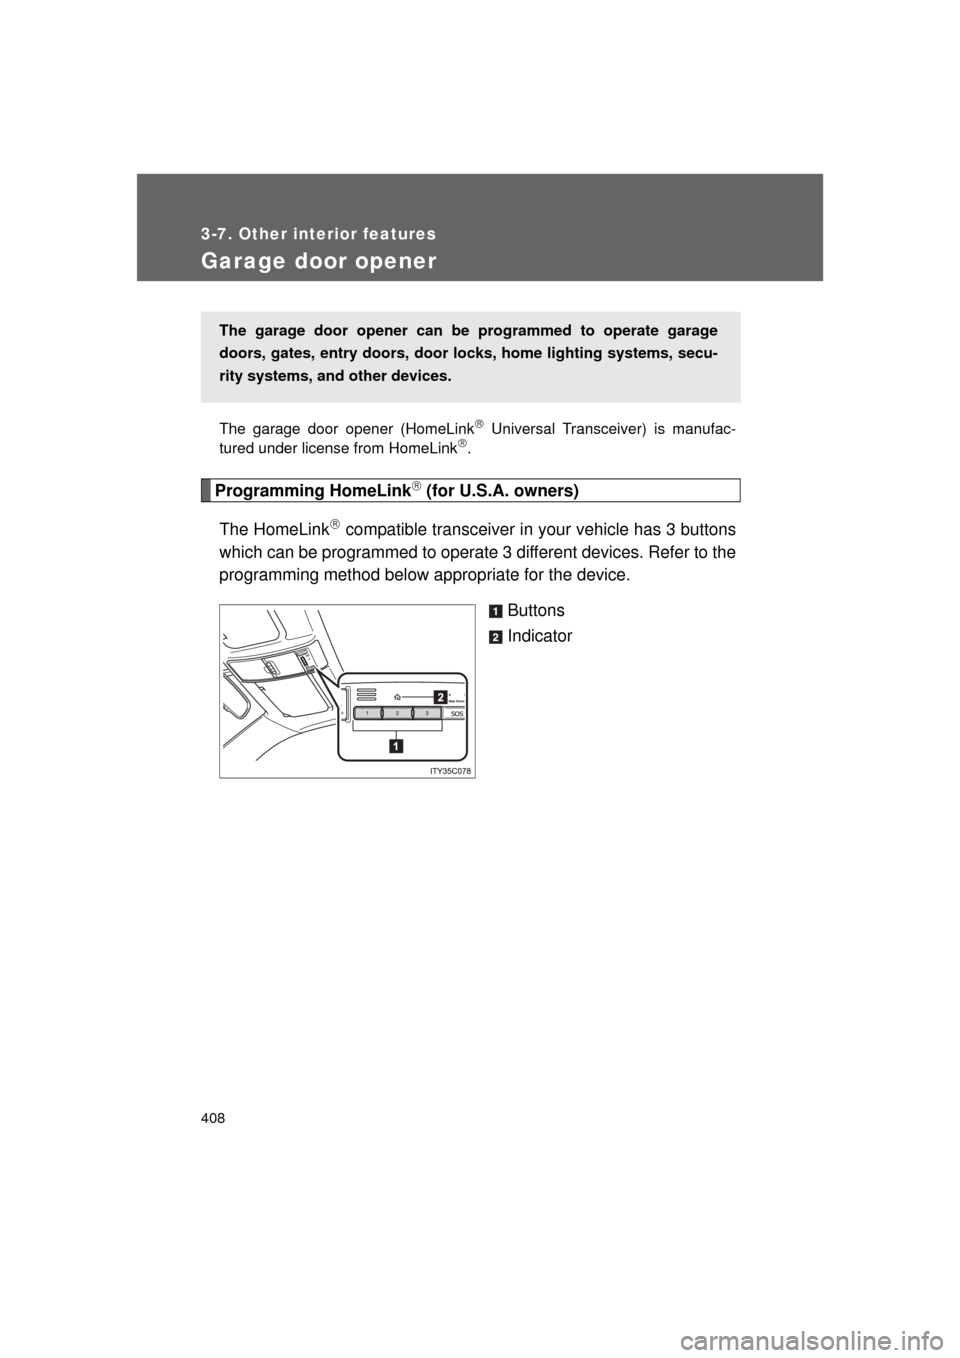
Programming HomeLink (for U.S.A. owners)
The HomeLink
compatible transceiver in your vehicle has 3 buttons
which can be programmed to operate 3 different devices. Refer to the
programming method below appropriate for the device.
Buttons
Indicator
The garage door opener can be programmed to operate garage
doors, gates, entry doors, door locks, hom e lighting systems, secu-
rity systems, and other devices.
Page 409 of 608
409
3-7. Other interior features
3
Interior features
L/C200_U (OM60F74U)
■
Programming HomeLink
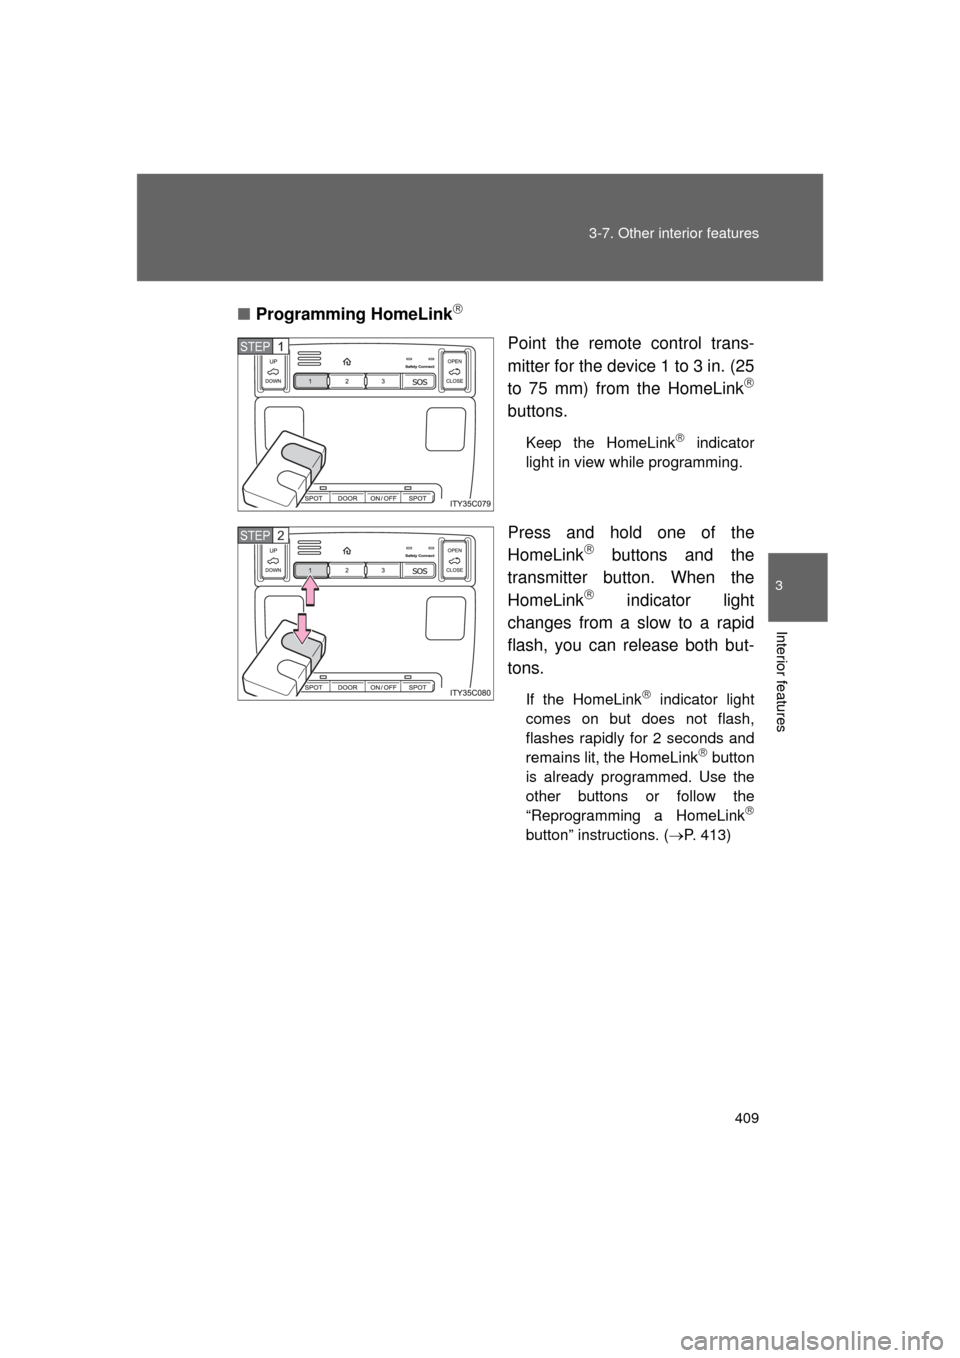
Point the remote control trans-
mitter for the device 1 to 3 in. (25
to 75 mm) from the HomeLink
buttons.
Keep the HomeLink indicator
light in view while programming.
Press and hold one of the
HomeLink buttons and the
transmitter button. When the
HomeLink
indicator light
changes from a slow to a rapid
flash, you can release both but-
tons.
If the HomeLink indicator light
comes on but does not flash,
flashes rapidly for 2 seconds and
remains lit, the HomeLink
button
is already programmed. Use the
other buttons or follow the
“Reprogramming a HomeLink
button” instructions. ( P. 413)
STEP1
STEP2
Page 410 of 608
410 3-7. Other interior features
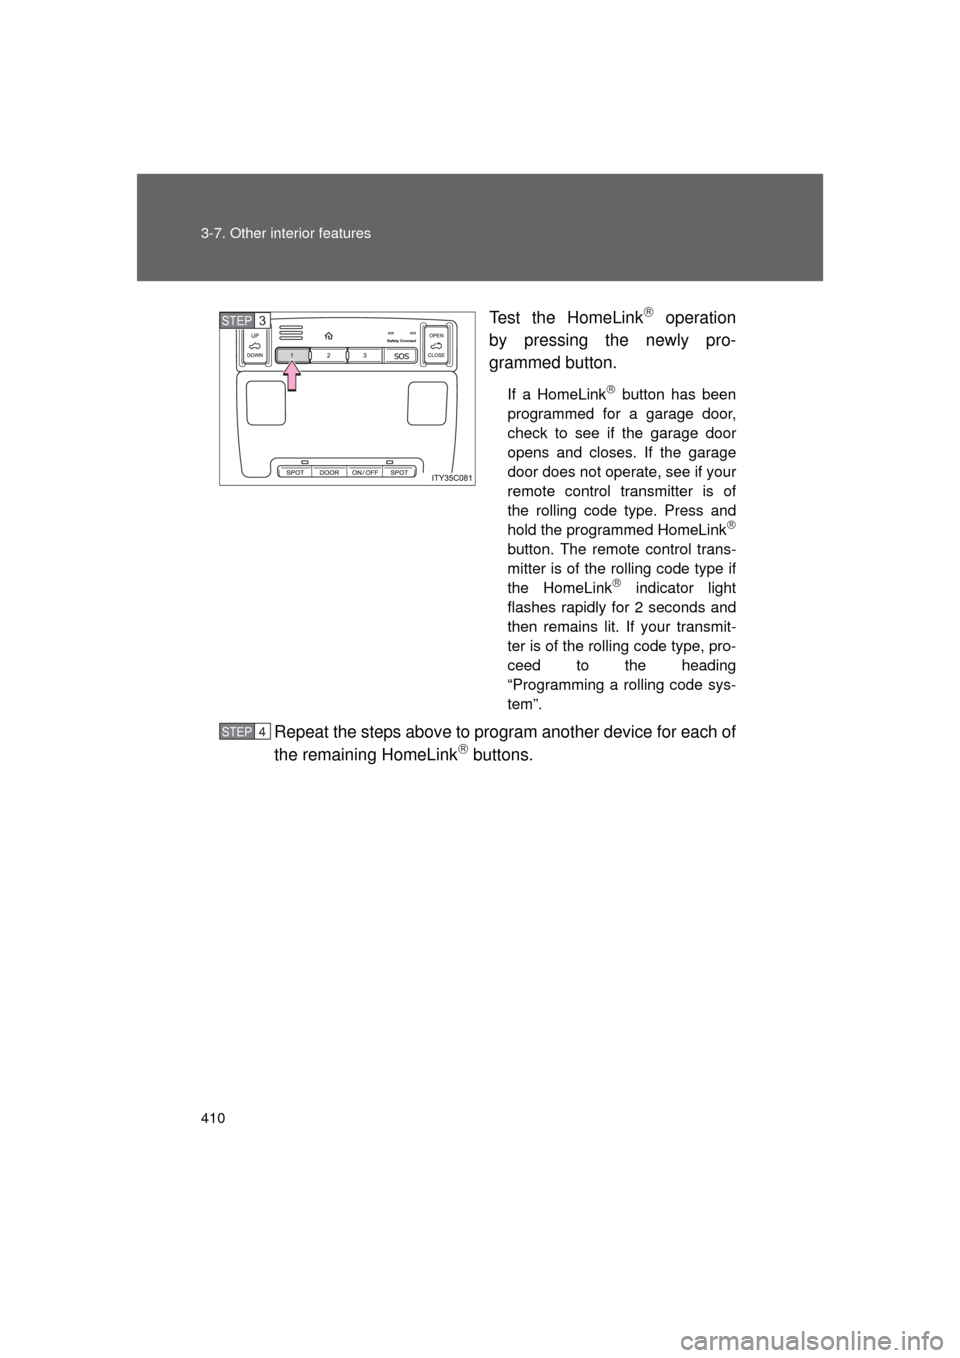
L/C200_U (OM60F74U)Test the HomeLink
operation
by pressing the newly pro-
grammed button.
If a HomeLink button has been
programmed for a garage door,
check to see if the garage door
opens and closes. If the garage
door does not operate, see if your
remote control transmitter is of
the rolling code type. Press and
hold the programmed HomeLink
button. The remote control trans-
mitter is of the rolling code type if
the HomeLink
indicator light
flashes rapidly for 2 seconds and
then remains lit. If your transmit-
ter is of the rolling code type, pro-
ceed to the heading
“Programming a rolling code sys-
tem”.
Repeat the steps above to program another device for each of
the remaining HomeLink buttons.
STEP3
STEP4
Trending: display, Hot, phone, bluetooth, key battery, tire pressure reset, weight
