TOYOTA MATRIX 2014 E140 / 2.G Owners Manual
MATRIX 2014 E140 / 2.G
TOYOTA
TOYOTA
https://www.carmanualsonline.info/img/14/6547/w960_6547-0.png
TOYOTA MATRIX 2014 E140 / 2.G Owners Manual
Trending: change time, run flat, fuel additives, weight, AUX, open hood, buttons
Page 271 of 500
271
3-4. Using the hand
s-free phone system (for cellular phone)
3
Interior features
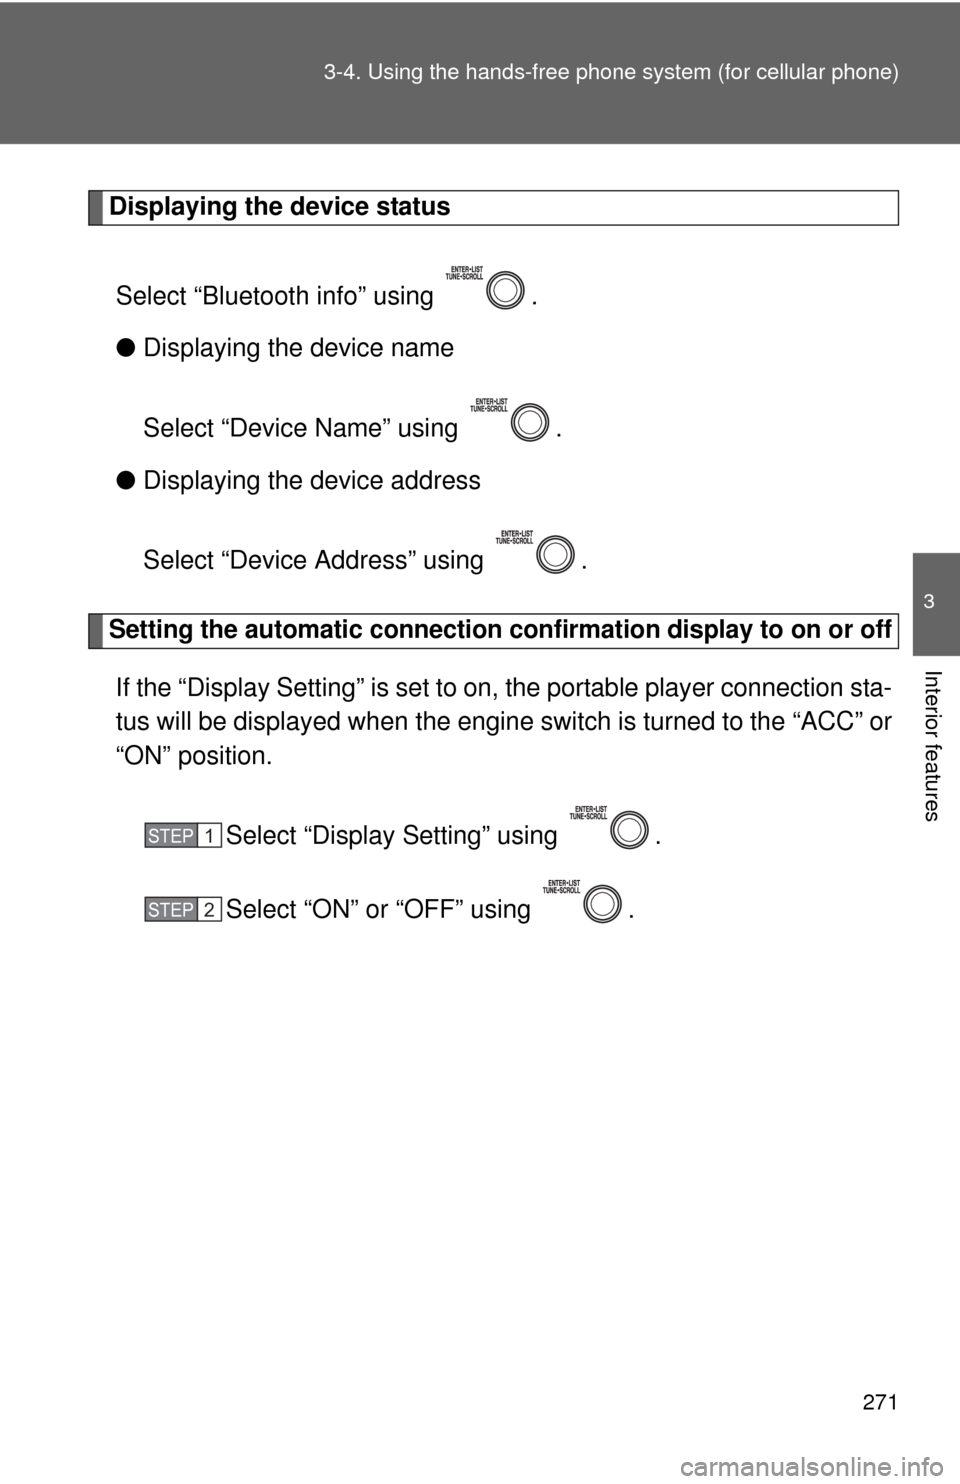
Displaying the device status
Select “Bluetooth info” using .
● Displaying the device name
Select “Device Name” using .
● Displaying the device address
Select “Device Address” using .
Setting the automatic connection conf irmation display to on or off
If the “Display Setting” is set to on, the portable player connection sta-
tus will be displayed when the engine switch is turned to the “ACC” or
“ON” position.
Select “Display Setting” using .
Select “ON” or “OFF” using .
STEP1
STEP2
Page 272 of 500
272 3-4. Using the hands-free phone system (for cellular phone)
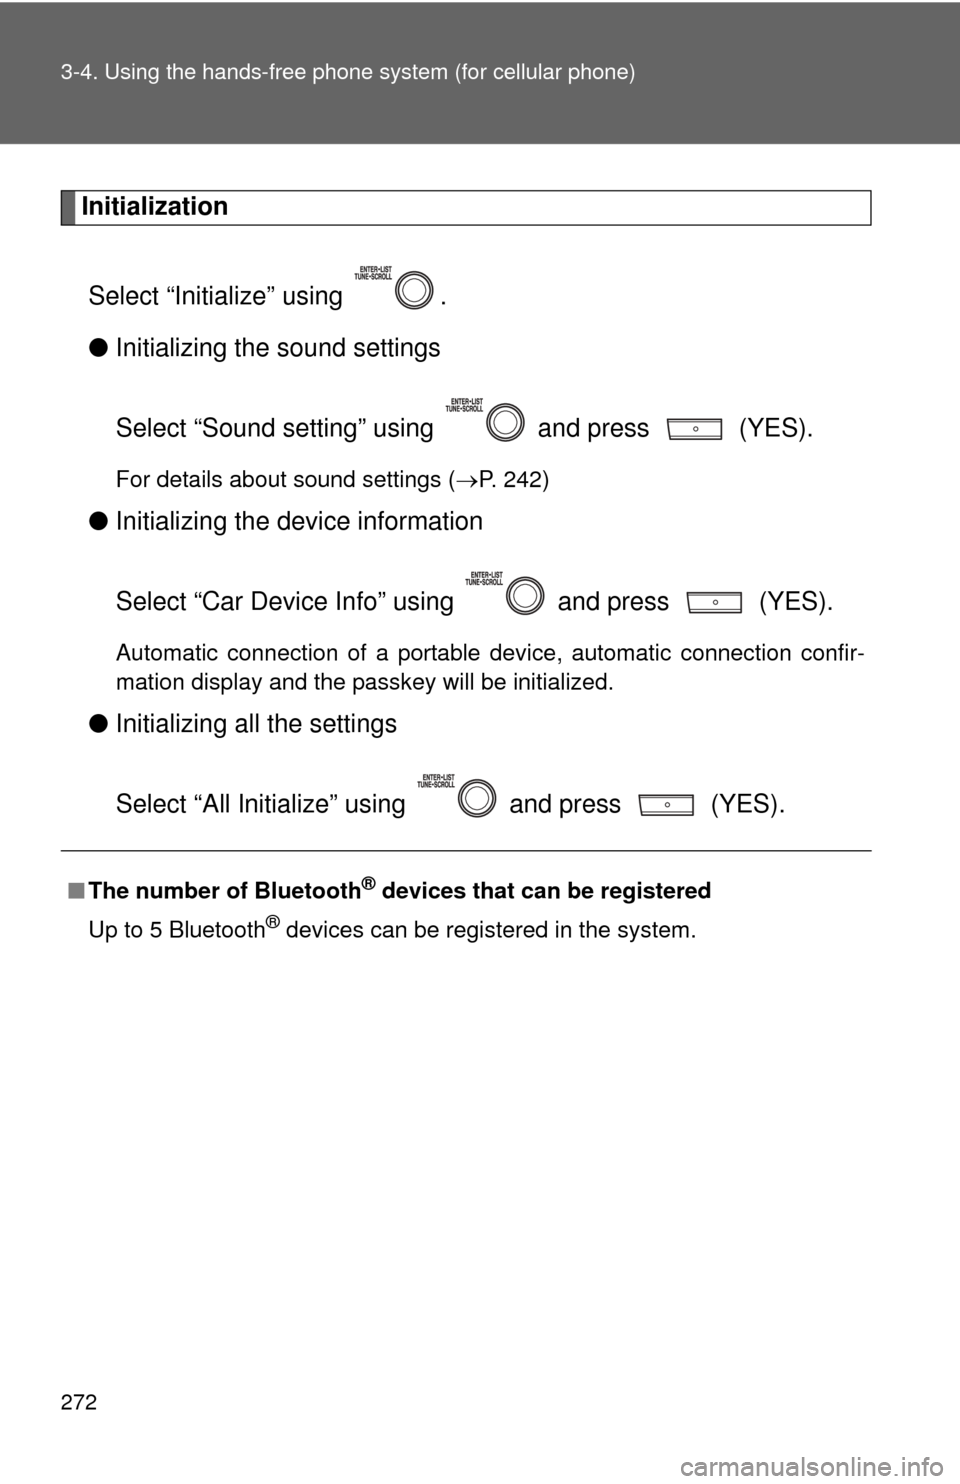
Initialization
Select “Initialize” using .
● Initializing the sound settings
Select “Sound setting” using and press (YES).
For details about sound settings ( P. 242)
●Initializing the device information
Select “Car Device Info” using and press (YES).
Automatic connection of a portable device, automatic connection confir-
mation display and the passkey will be initialized.
●Initializing a ll the settings
Select “All Initialize” using and press (YES).
■The number of Bluetooth® devices that can be registered
Up to 5 Bluetooth
® devices can be registered in the system.
Page 273 of 500
273
3-4. Using the hands-free phone system (for cellular phone)
3
Interior features
Using the “SET UP” menu (“Phone” menu)
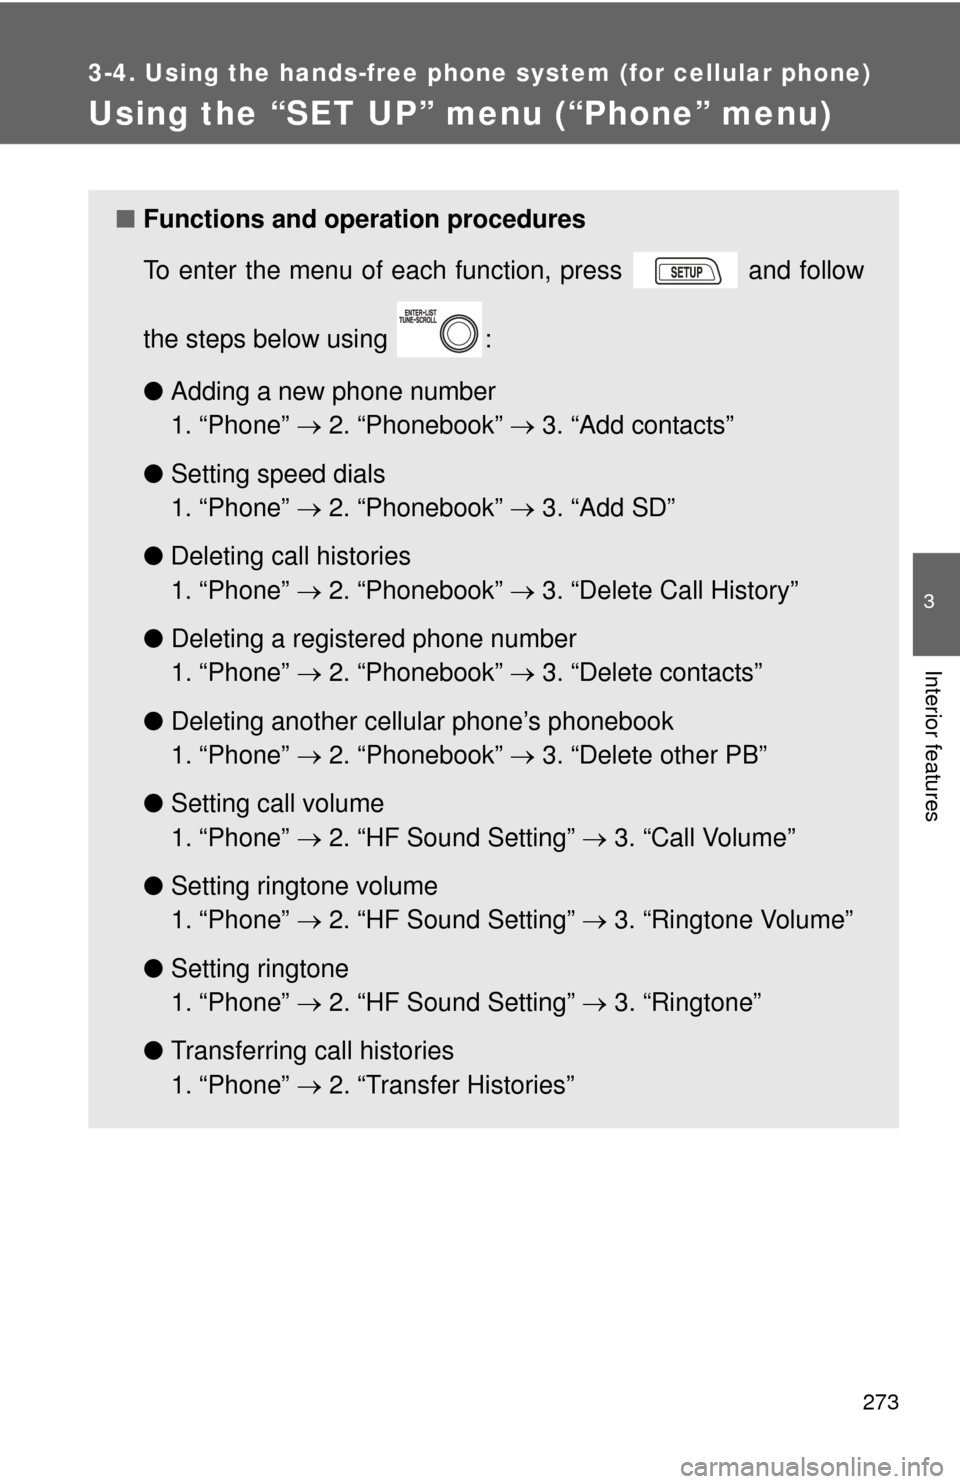
■Functions and operation procedures
To enter the menu of each function, press and follow
the steps below using :
●Adding a new phone number
1. “Phone” 2. “Phonebook” 3. “Add contacts”
● Setting speed dials
1. “Phone” 2. “Phonebook” 3. “Add SD”
● Deleting call histories
1. “Phone” 2. “Phonebook” 3. “Delete Call History”
● Deleting a registered phone number
1. “Phone” 2. “Phonebook” 3. “Delete contacts”
● Deleting another cellular phone’s phonebook
1. “Phone” 2. “Phonebook” 3. “Delete other PB”
● Setting call volume
1. “Phone” 2. “HF Sound Setting” 3. “Call Volume”
● Setting ringtone volume
1. “Phone” 2. “HF Sound Setting” 3. “Ringtone Volume”
● Setting ringtone
1. “Phone” 2. “HF Sound Setting” 3. “Ringtone”
● Transferring call histories
1. “Phone” 2. “Transfer Histories”
Page 274 of 500
274 3-4. Using the hands-free phone system (for cellular phone)
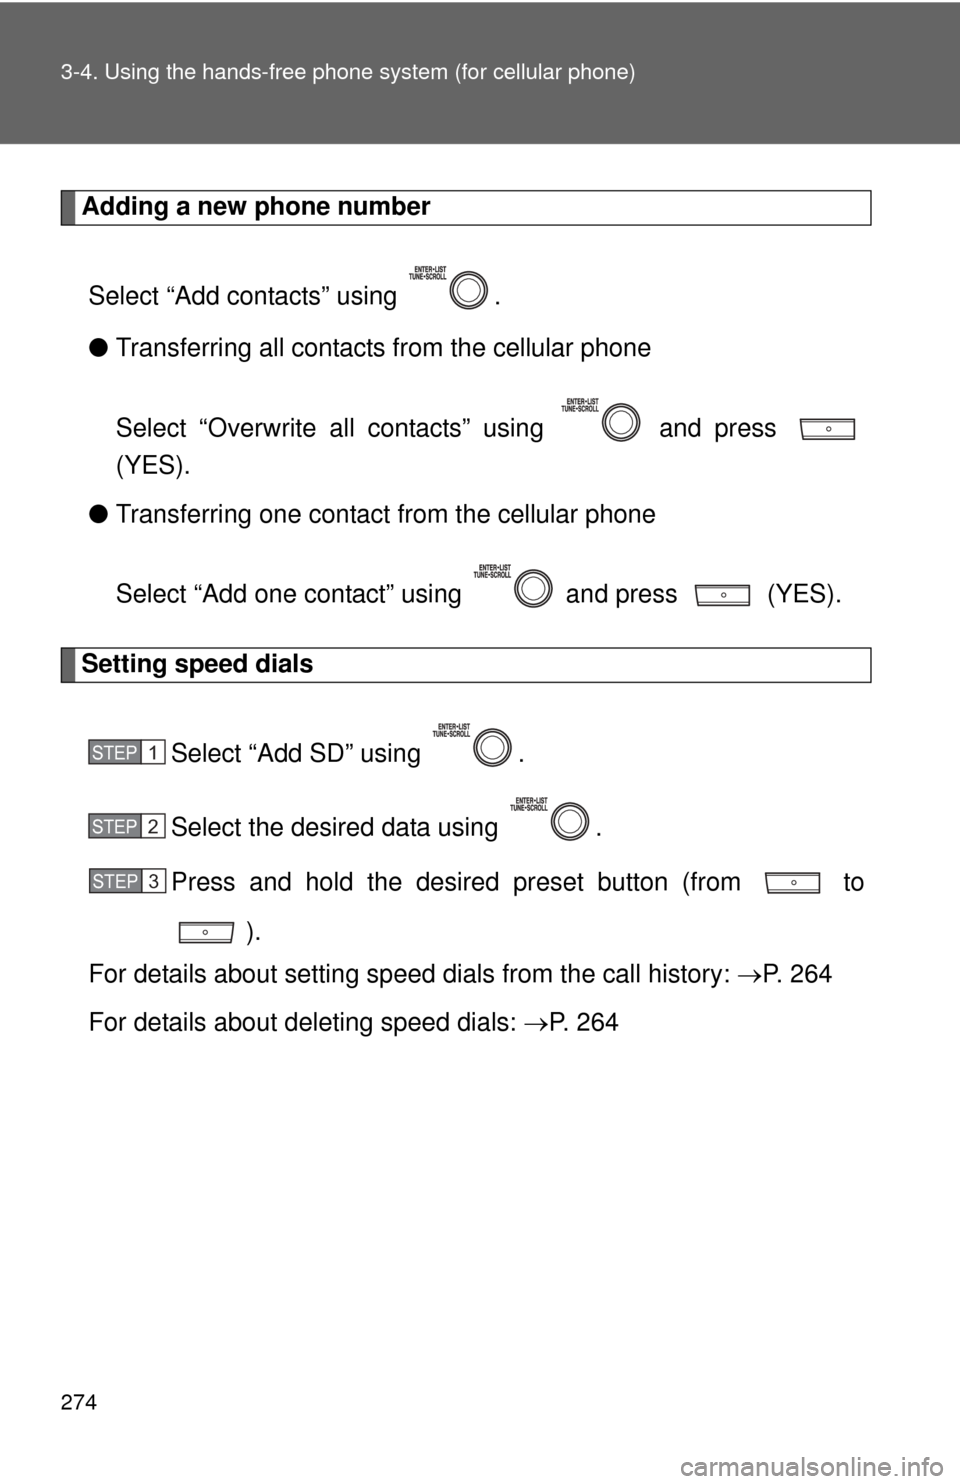
Adding a new phone number
Select “Add contacts” using .
● Transferring all contacts from the cellular phone
Select “Overwrite all contacts” using and press
(YES).
● Transferring one contact from the cellular phone
Select “Add one contact” using and press (YES).
Setting speed dials
Select “Add SD” using .
Select the desired data using .
Press and hold the desired preset button (from to
).
For details about setting speed dials from the call history: P. 2 6 4
For details about deleting speed dials: P. 2 6 4
STEP1
STEP2
STEP3
Page 275 of 500
275
3-4. Using the hand
s-free phone system (for cellular phone)
3
Interior features
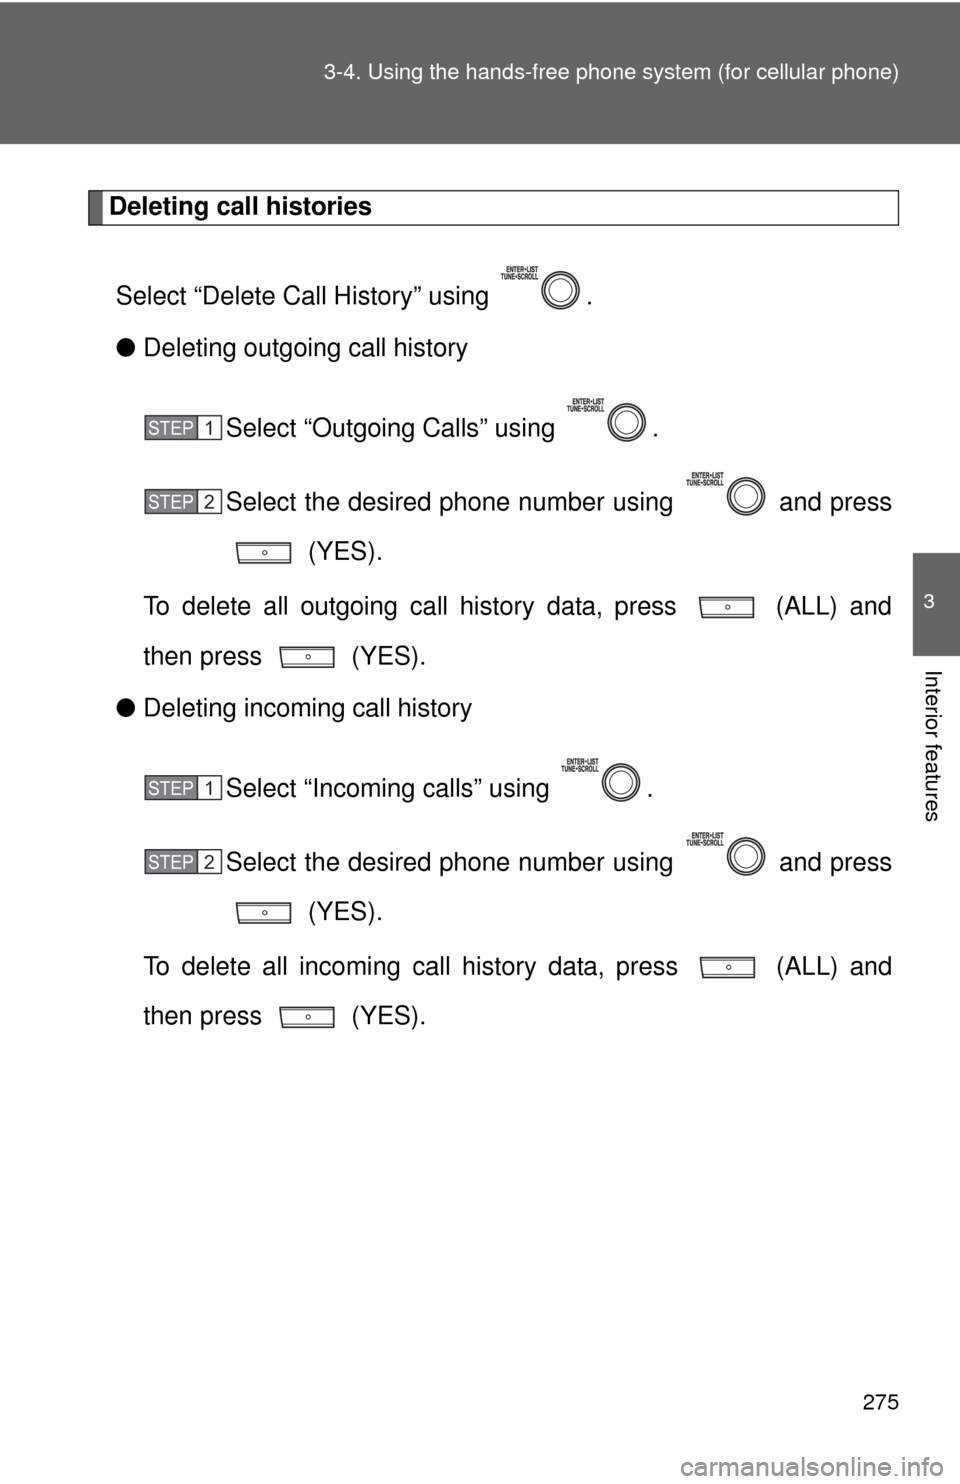
Deleting call histories
Select “Delete Call History” using .
● Deleting outgoing call history
Select “Outgoing Calls” using .
Select the desired phone number using and press (YES).
To delete all outgoing call history data, press (ALL) and
then press (YES).
● Deleting incoming call history
Select “Incoming calls” using .
Select the desired phone number using and press (YES).
To delete all incoming call history data, press (ALL) and
then press (YES).
STEP1
STEP2
STEP1
STEP2
Page 276 of 500
276 3-4. Using the hands-free phone system (for cellular phone)
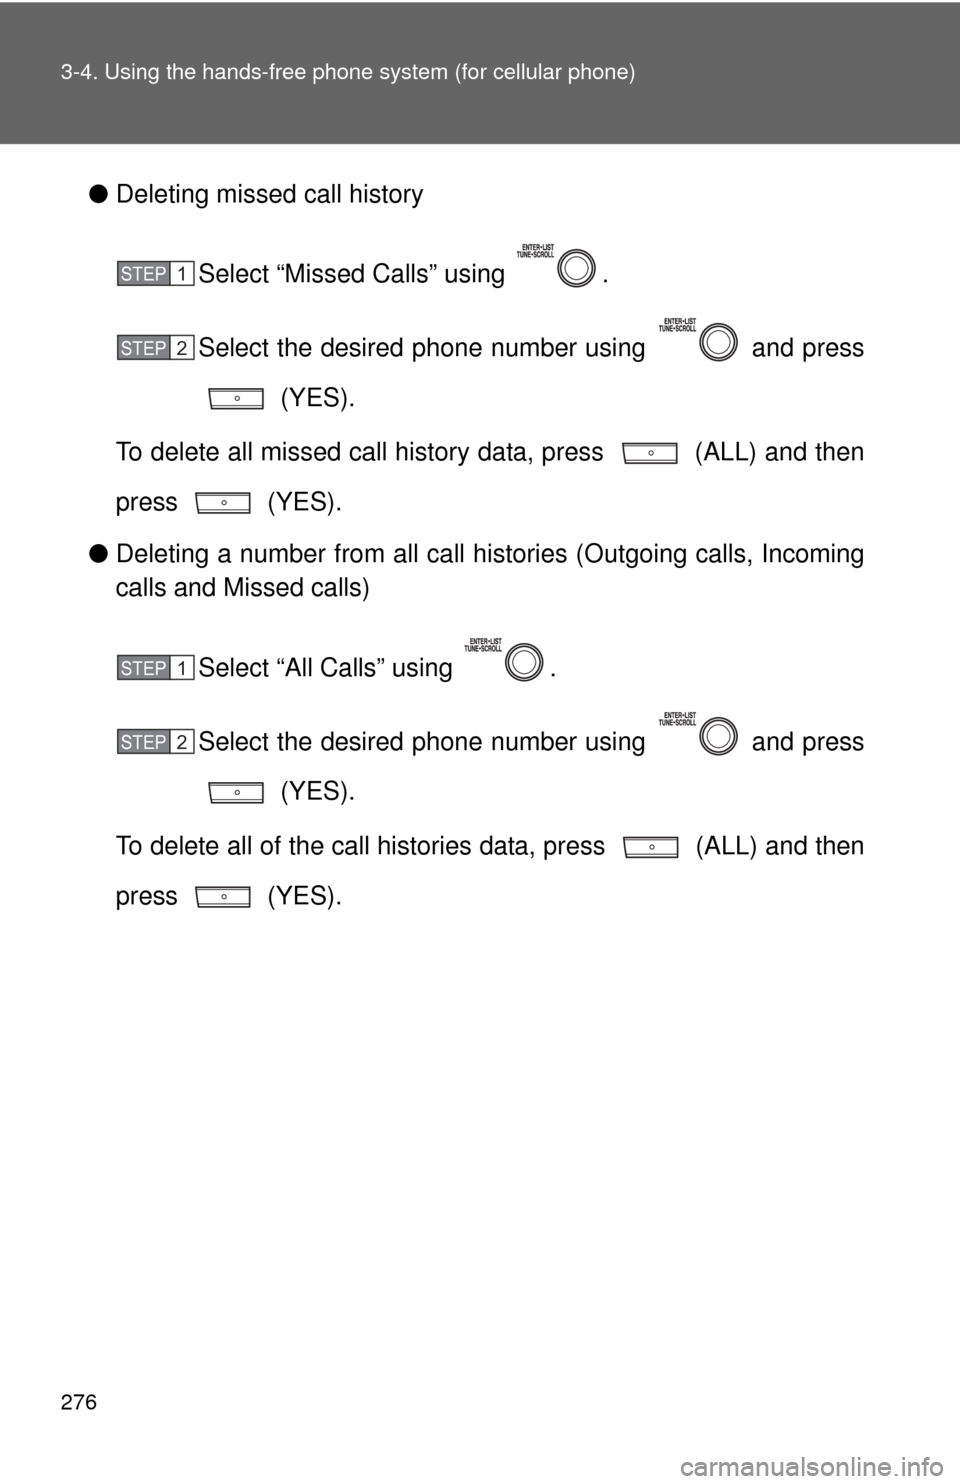
●Deleting missed call history
Select “Missed Calls” using .
Select the desired phone number using and press (YES).
To delete all missed call history data, press (ALL) and then
press (YES).
● Deleting a number from all call histories (Outgoing calls, Incoming
calls and Missed calls)
Select “All Calls” using .
Select the desired phone number using and press (YES).
To delete all of the call histories data, press (ALL) and then
press (YES).
STEP1
STEP2
STEP1
STEP2
Page 277 of 500
277
3-4. Using the hand
s-free phone system (for cellular phone)
3
Interior features
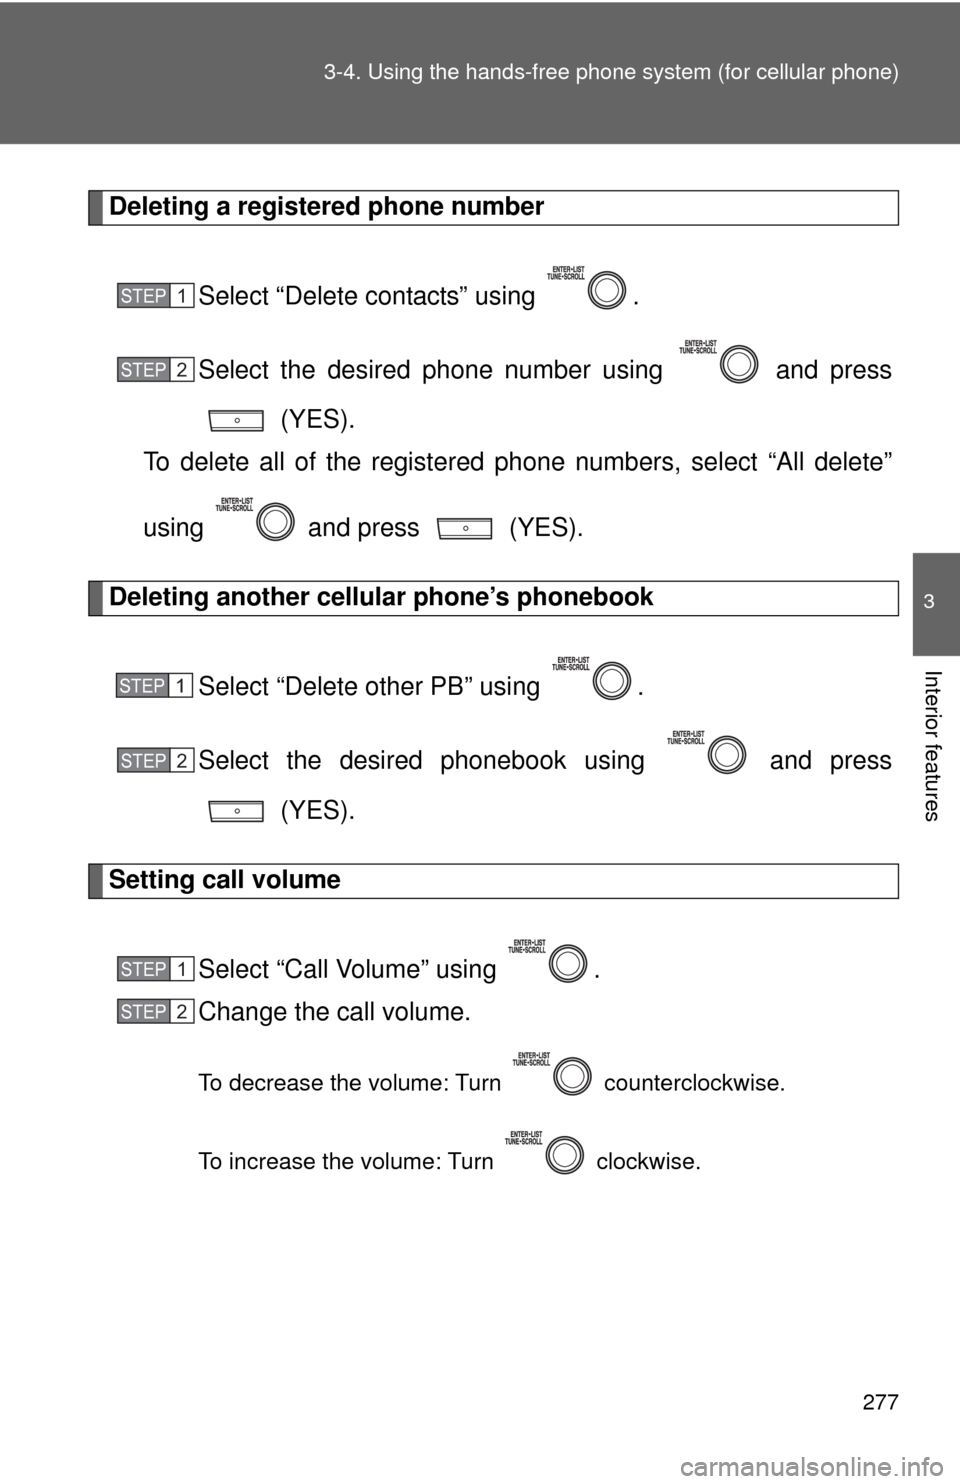
Deleting a registered phone number
Select “Delete contacts” using .
Select the desired phone number using and press (YES).
To delete all of the registered phone numbers, select “All delete”
using and press (YES).
Deleting another cellular phone’s phonebook
Select “Delete other PB” using .
Select the desired phonebook using and press (YES).
Setting call volume
Select “Call Volume” using .
Change the call volume.
To decrease the volume: Turn counterclockwise.
To increase the volume: Turn clockwise.
STEP1
STEP2
STEP1
STEP2
STEP1
STEP2
Page 278 of 500
278 3-4. Using the hands-free phone system (for cellular phone)
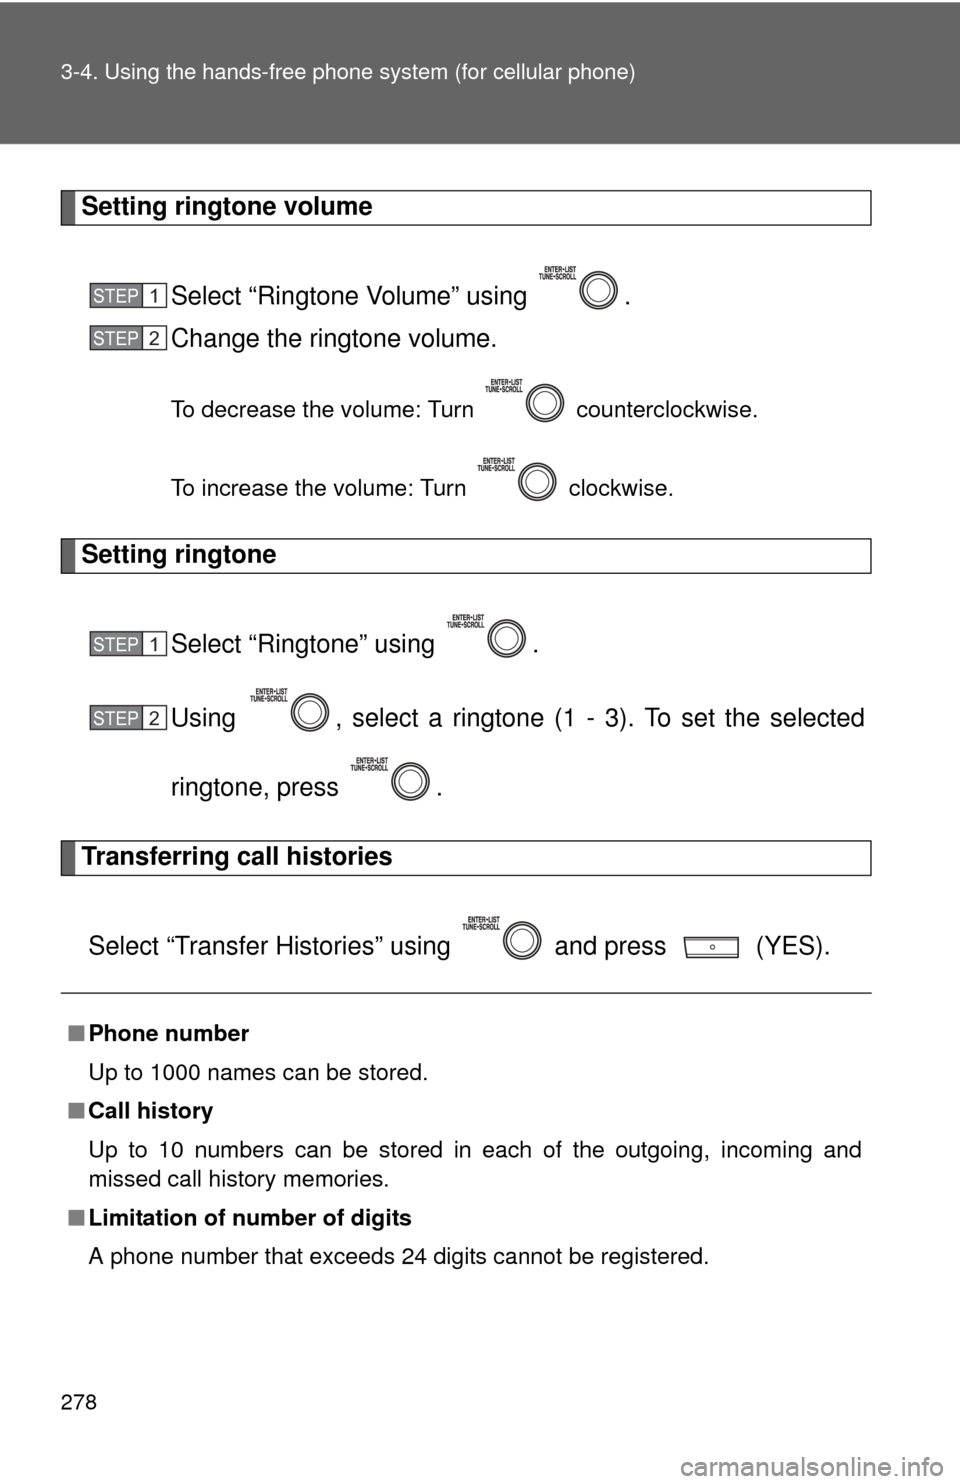
Setting ringtone volume
Select “Ringtone Volume” using .
Change the ringtone volume.
To decrease the volume: Turn counterclockwise.
To increase the volume: Turn clockwise.
Setting ringtone
Select “Ringtone” using .
Using , select a ringtone (1 - 3). To set the selected
ringtone, press .
Transferring call histories
Select “Transfer Histories” using and press (YES).
■ Phone number
Up to 1000 names can be stored.
■ Call history
Up to 10 numbers can be stored in each of the outgoing, incoming and
missed call history memories.
■ Limitation of number of digits
A phone number that exceeds 24 digits cannot be registered.
STEP1
STEP2
STEP1
STEP2
Page 279 of 500
279
3
Interior features
3-5. Using the interior lights
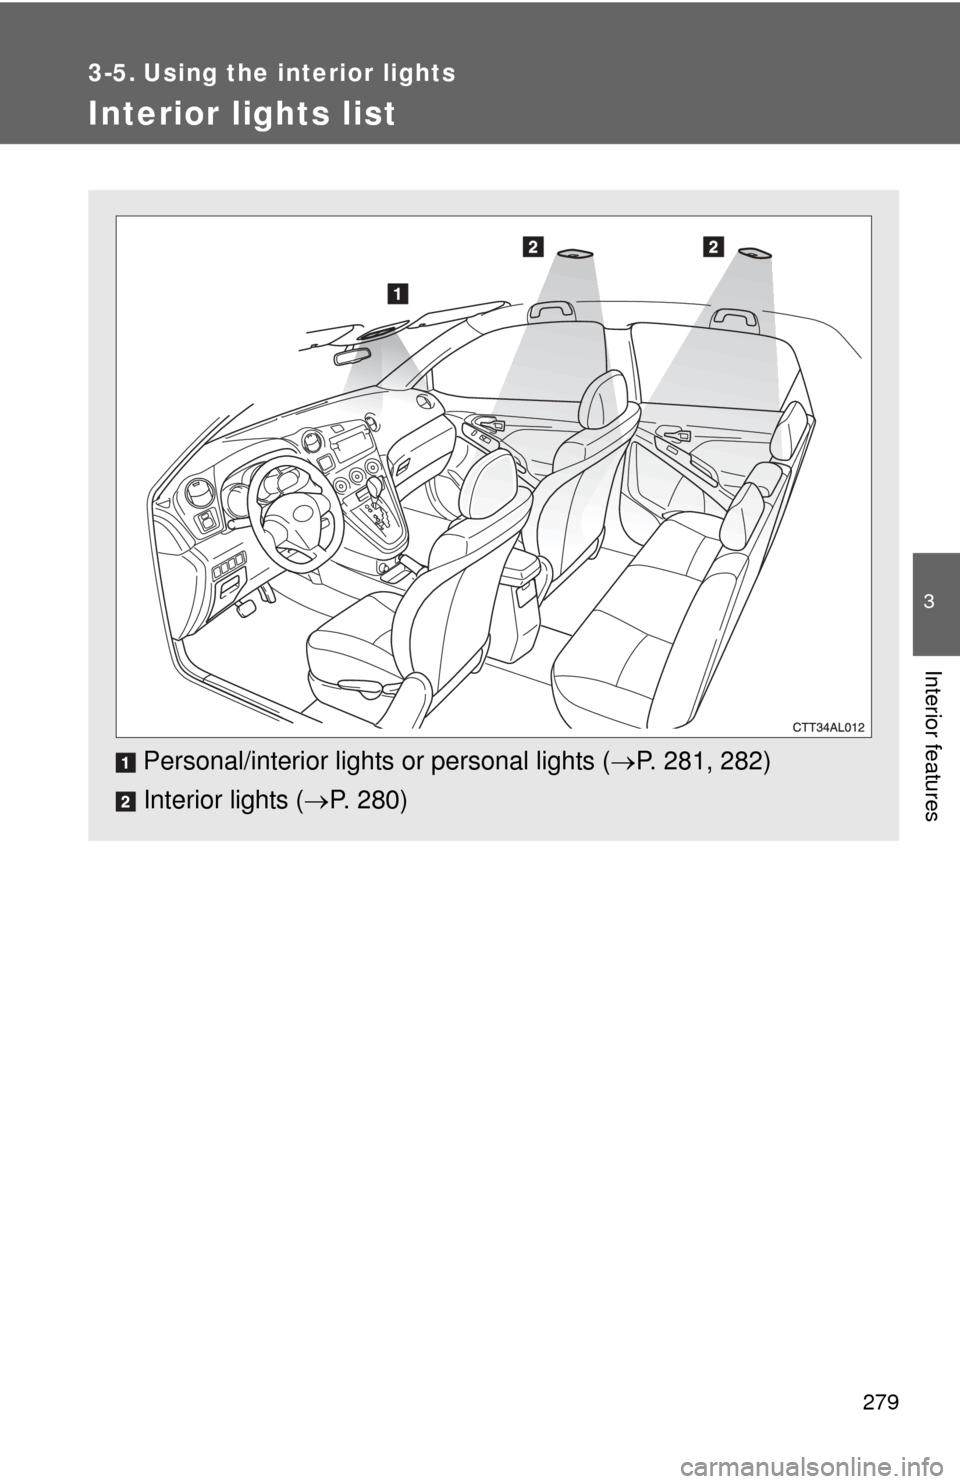
Interior lights list
Personal/interior lights or personal lights (P. 281, 282)
Interior lights ( P. 280)
Page 280 of 500
280 3-5. Using the interior lights
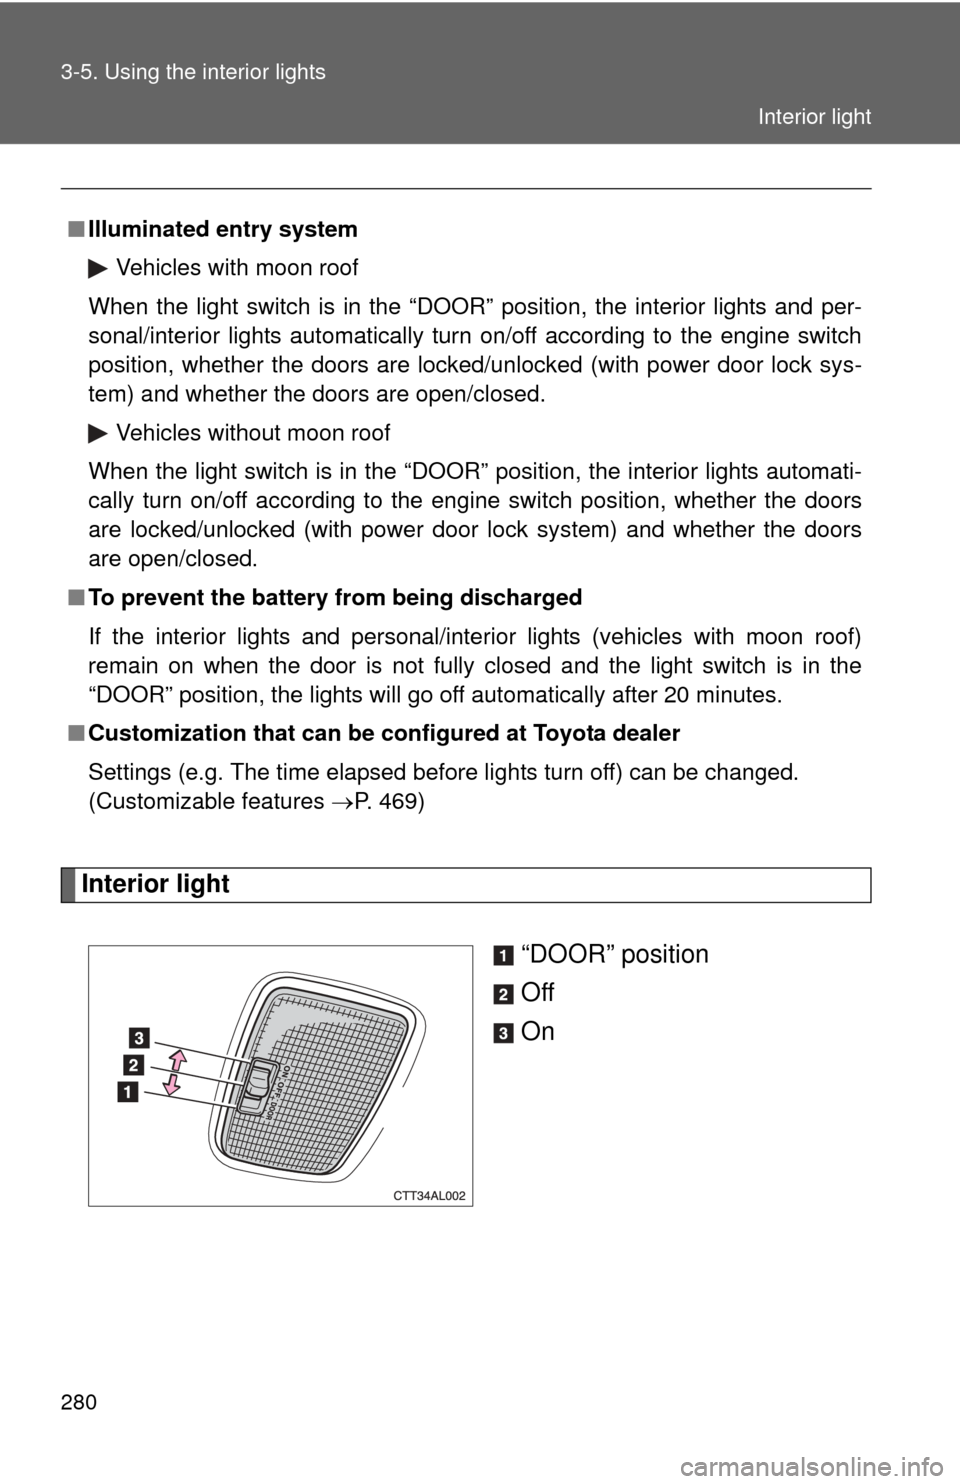
Interior light“DOOR” position
Off
On
■Illuminated entry system
Vehicles with moon roof
When the light switch is in the “DOOR” position, the interior lights and per-
sonal/interior lights automatically turn on/off according to the engine switch
position, whether the doors are locked/unlocked (with power door lock sys-
tem) and whether the doors are open/closed.
Vehicles without moon roof
When the light switch is in the “DOOR” position, the interior lights automati-
cally turn on/off according to the engine switch position, whether the doors
are locked/unlocked (with power door lock system) and whether the doors
are open/closed.
■ To prevent the battery from being discharged
If the interior lights and personal/interior lights (vehicles with moon roof)
remain on when the door is not fully closed and the light switch is in the
“DOOR” position, the lights will go off automatically after 20 minutes.
■ Customization that can be co nfigured at Toyota dealer
Settings (e.g. The time elapsed before lights turn off) can be changed.
(Customizable features P. 469)
Interior light
Trending: belt, key, fuel reserve, wheelbase, service interval, auxiliary battery, climate control
