display TOYOTA MIRAI 2020 Accessories, Audio & Navigation (in English)
[x] Cancel search | Manufacturer: TOYOTA, Model Year: 2020, Model line: MIRAI, Model: TOYOTA MIRAI 2020Pages: 288, PDF Size: 7.9 MB
Page 243 of 288
243
5. SETUP
NAVIGATION SYSTEM
8
MIRAI_Navi_USA_OM62074U_20MY
2. TRAFFIC SETTINGS*
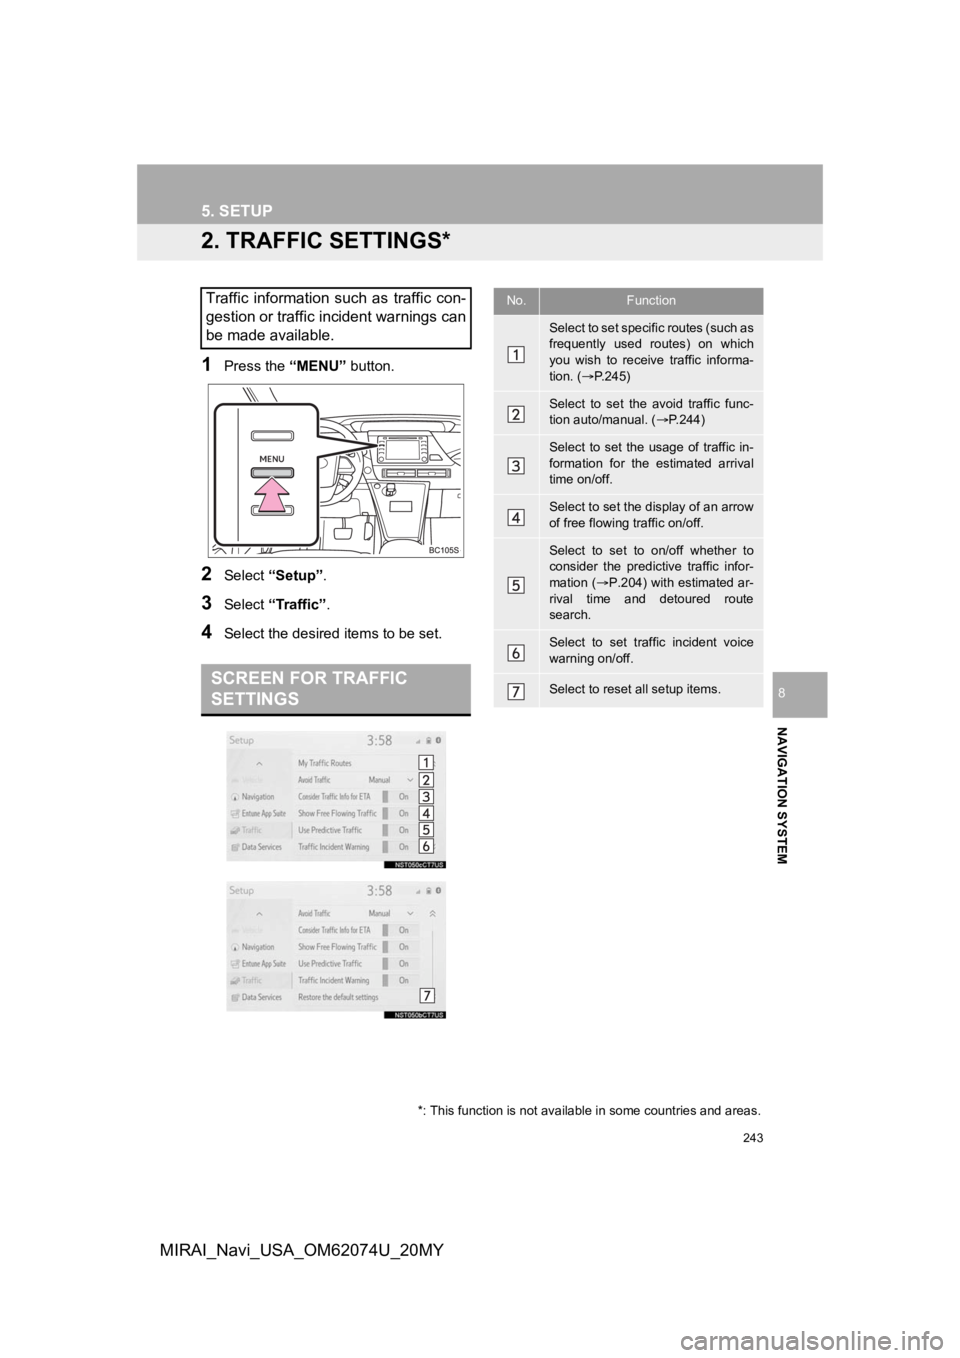
1Press the “MENU” button.
2Select “Setup” .
3Select “Traffic” .
4Select the desired items to be set.
Traffic information such as traffic con-
gestion or traffic incident warnings can
be made available.
SCREEN FOR TRAFFIC
SETTINGS
No.Function
Select to set specific routes (such as
frequently used routes) on which
you wish to receive traffic informa-
tion. (P.245)
Select to set the avoid traffic func-
tion auto/manual. ( P.244)
Select to set the usage of traffic in-
formation for the estimated arrival
time on/off.
Select to set the display of an arrow
of free flowing traffic on/off.
Select to set to on/off whether to
consider the predictive traffic infor-
mation ( P.204) with estimated ar-
rival time and detoured route
search.
Select to set traffic incident voice
warning on/off.
Select to reset all setup items.
*: This function is not available in some countries and areas.
Page 244 of 288
244
5. SETUP
MIRAI_Navi_USA_OM62074U_20MY
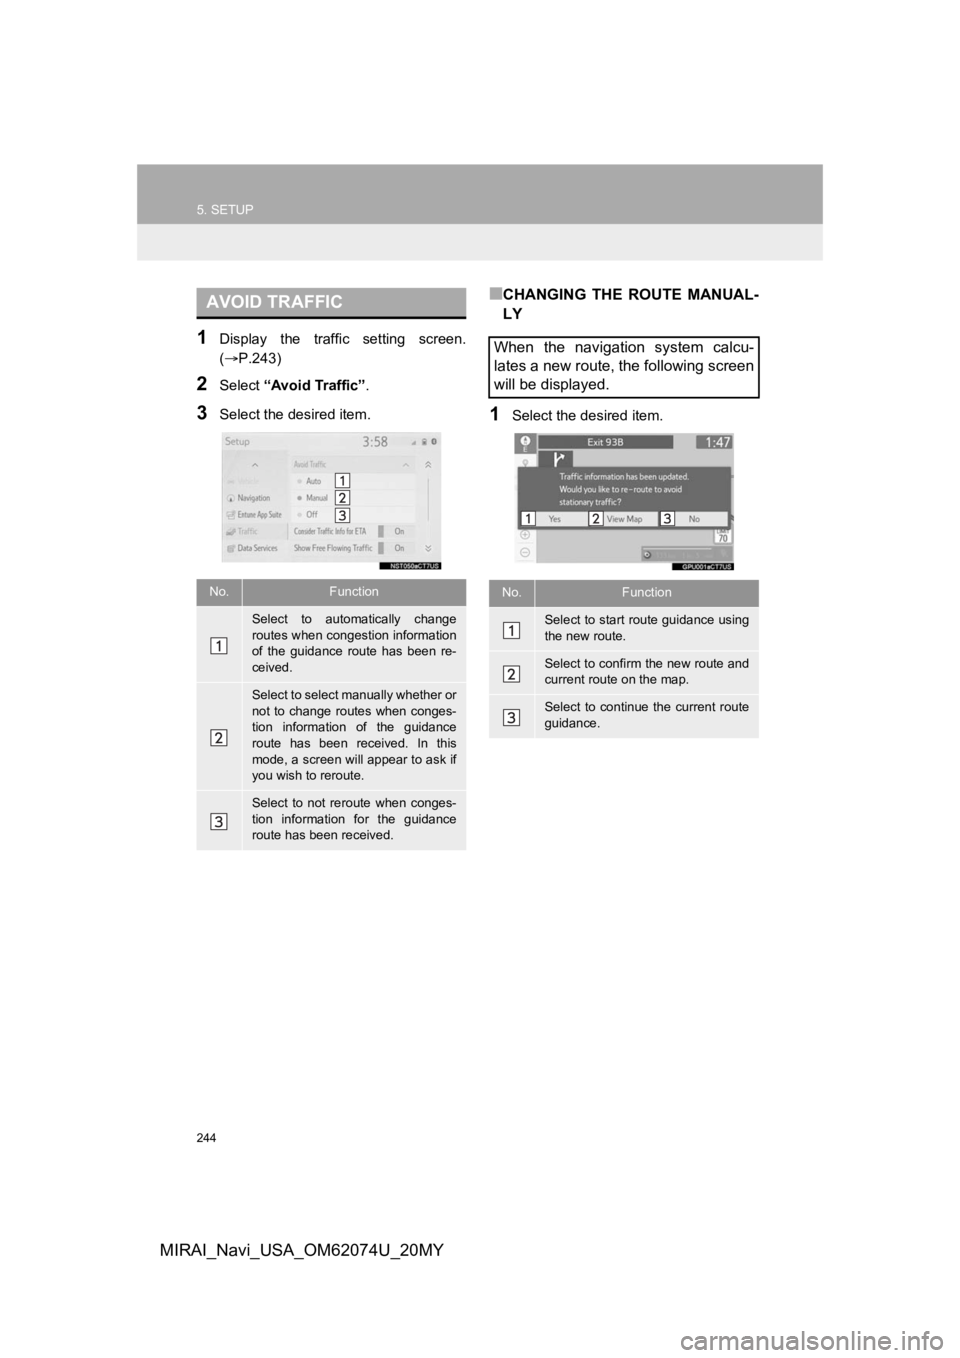
1Display the traffic setting screen.
(P.243)
2Select “Avoid Traffic” .
3Select the desired item.
■CHANGING THE ROUTE MANUAL-
LY
1Select the desired item.
AVOID TRAFFIC
No.Function
Select to automatically change
routes when congestion information
of the guidance route has been re-
ceived.
Select to select manually whether or
not to change routes when conges-
tion information of the guidance
route has been received. In this
mode, a screen will appear to ask if
you wish to reroute.
Select to not reroute when conges-
tion information for the guidance
route has been received.
When the navigation system calcu-
lates a new route, the following screen
will be displayed.
No.Function
Select to start route guidance using
the new route.
Select to confirm the new route and
current route on the map.
Select to continue the current route
guidance.
Page 245 of 288
245
5. SETUP
NAVIGATION SYSTEM
8
MIRAI_Navi_USA_OM62074U_20MY
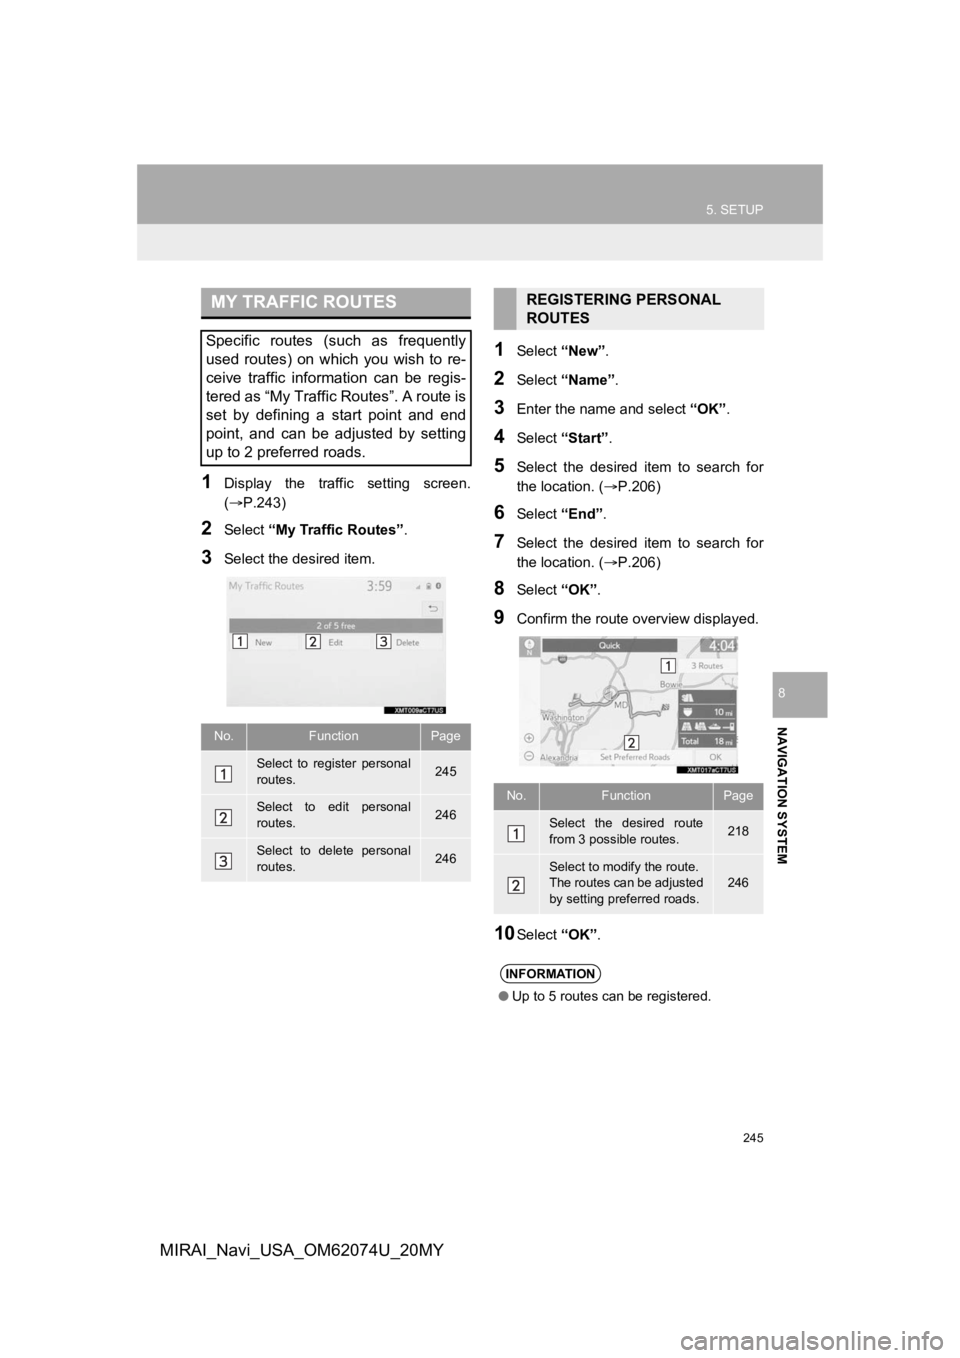
1Display the traffic setting screen.
(P.243)
2Select “My Traffic Routes” .
3Select the desired item.
1Select “New”.
2Select “Name” .
3Enter the name and select “OK”.
4Select “Start” .
5Select the desired item to search for
the location. ( P.206)
6Select “End”.
7Select the desired item to search for
the location. ( P.206)
8Select “OK”.
9Confirm the route overview displayed.
10Select “OK”.
MY TRAFFIC ROUTES
Specific routes (such as frequently
used routes) on which you wish to re-
ceive traffic information can be regis-
tered as “My Traffic Routes”. A route is
set by defining a start point and end
point, and can be adjusted by setting
up to 2 preferred roads.
No.FunctionPage
Select to register personal
routes.245
Select to edit personal
routes.246
Select to delete personal
routes.246
REGISTERING PERSONAL
ROUTES
No.FunctionPage
Select the desired route
from 3 possible routes.218
Select to modify the route.
The routes can be adjusted
by setting preferred roads.
246
INFORMATION
●Up to 5 routes can be registered.
Page 250 of 288
250
6. TIPS FOR THE NAVIGATION SYSTEM
MIRAI_Navi_USA_OM62074U_20MY
Accurate current position may not be
shown in the following cases:
• When driving on a small angled Y-
shaped road.
• When driving on a winding road.
• When driving on a slippery road such as in sand, gravel, snow, etc.
• When driving on a long straight road.
• When freeway and surface streets run in parallel.
• After moving by ferry or vehicle carrier.
• When a long route is searched during high speed driving.
• When driving without setting the current position calibration correctly.
• After repeating a change of direction by going forward and backward, or turning
on a turntable in a parking lot.
• When leaving a covered parking lot or parking garage.
• When a roof carrier is installed.
• When driving with tire chains installed.
• When the tires are worn.
• After replacing a tire or tires.
• When using tires that are smaller or larger than the factory specifications.
• When the tire pressure in any of the 4
tires is not correct.
Inappropriate route guidance may occur in
the following cases:
• When turning at an intersection off the
designated route guidance.
• If you set more than 1 destination but skip any of them, auto reroute will dis-
play a route returning to the destination
on the previous route.
• When turning at an intersection for which there is no route guidance.
• When passing through an intersection for which there is no route guidance.
• During auto reroute, the route guidance
may not be available for the next turn to
the right or left.
• During high speed driving, it may take a long time for auto reroute to operate. In
auto reroute, a detour route may be
shown.
• After auto reroute, the route may not be changed.
• If an unnecessary U-turn is shown or announced.
• If a location has multiple names and the
system announces 1 or more of them.
• When a route cannot be searched.
• If the route to your destination includes
gravel, unpaved roads or alleys, the
route guidance may not be shown.
• Your destination point might be shown
on the opposite side of the street.
• When a portion of the route has regula- tions prohibiting the entry of the vehicle
that vary by time or season or other rea-
sons.
• The road and map data stored in the
navigation system may not be complete
or may not be the latest version.
If the vehicle cannot receive GPS sig-
nals, the current position can be
adjusted manually. For information on
setting the current position calibration:
P. 2 4 1
After replacing a tire: P. 2 4 2
INFORMATION
● This navigation system uses tire turning
data and is designed to work with fac-
tory-specified tires for the vehicle.
Installing tires that are larger or smaller
than the originally equipped diameter
may cause inaccurate display of the cur-
rent position. The tire pressure also
affects the diameter of the tires, so make
sure that the tire pressure of all 4 tires is
correct.
Page 251 of 288
251
6. TIPS FOR THE NAVIGATION SYSTEM
NAVIGATION SYSTEM
8
MIRAI_Navi_USA_OM62074U_20MY
2. MAP DATABASE VERSION AND COVERED AREA
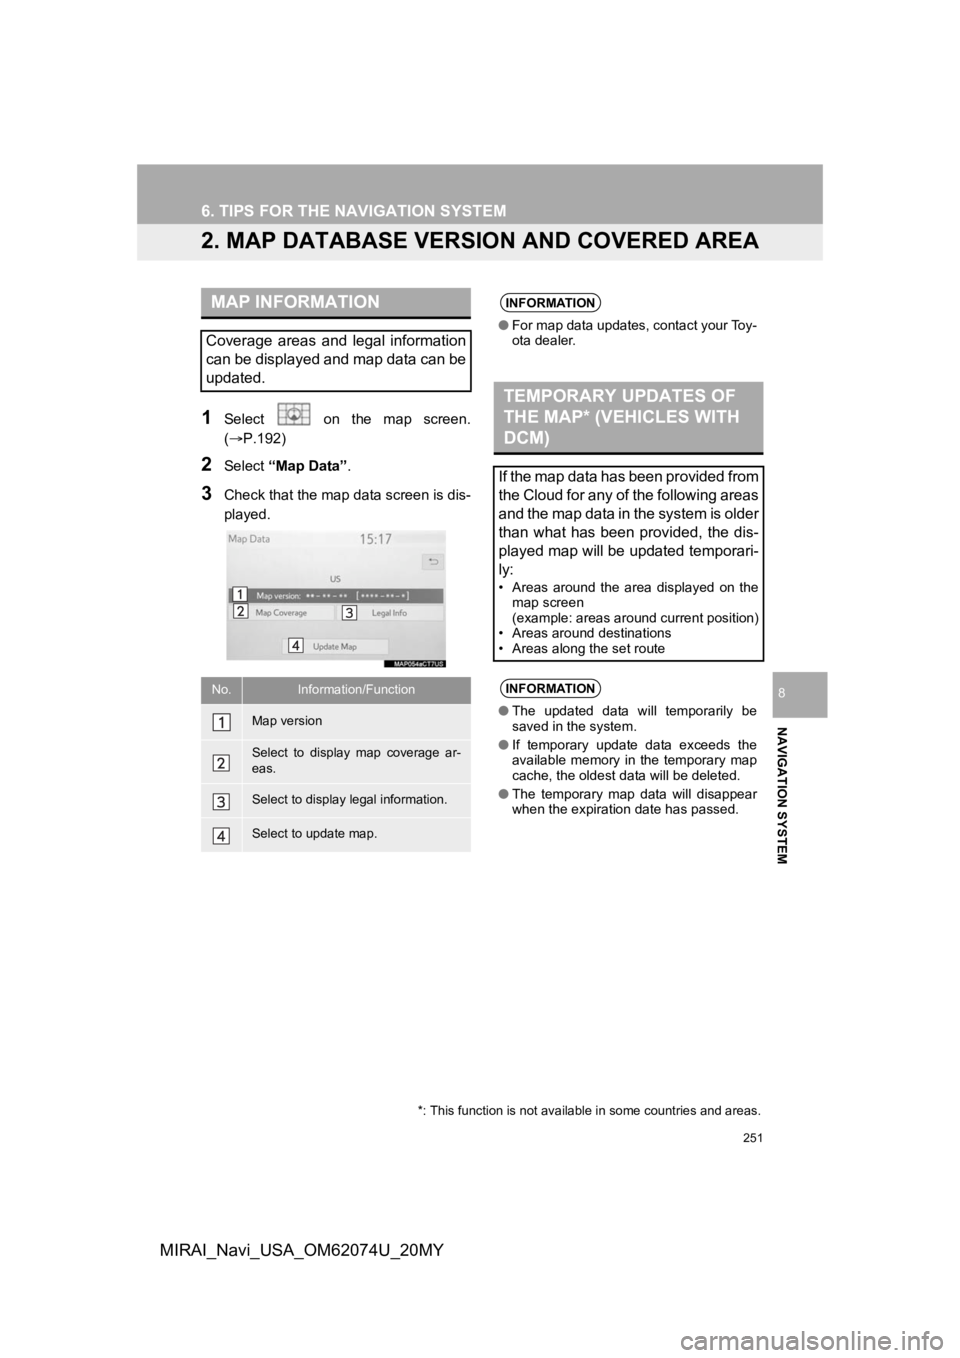
1Select on the map screen.
(P.192)
2Select “Map Data” .
3Check that the map data screen is dis-
played.
MAP INFORMATION
Coverage areas and legal information
can be displayed and map data can be
updated.
No.Information/Function
Map version
Select to display map coverage ar-
eas.
Select to display legal information.
Select to update map.
INFORMATION
●For map data updates, contact your Toy-
ota dealer.
TEMPORARY UPDATES OF
THE MAP* (VEHICLES WITH
DCM)
If the map data has been provided from
the Cloud for any of the following areas
and the map data in the system is older
than what has been provided, the dis-
played map will be updated temporari-
ly:
• Areas around the area displayed on the
map screen
(example: areas around current position)
• Areas around destinations
• Areas along the set route
INFORMATION
● The updated data will temporarily be
saved in the system.
● If temporary update data exceeds the
available memory in the temporary map
cache, the oldest data will be deleted.
● The temporary map data will disappear
when the expiration date has passed.
*: This function is not available in some countries and areas.
Page 255 of 288
255
1. CONNECTED SERVICES-OVERVIEW
CONNECTED SERVICES
9
MIRAI_Navi_USA_OM62074U_20MY
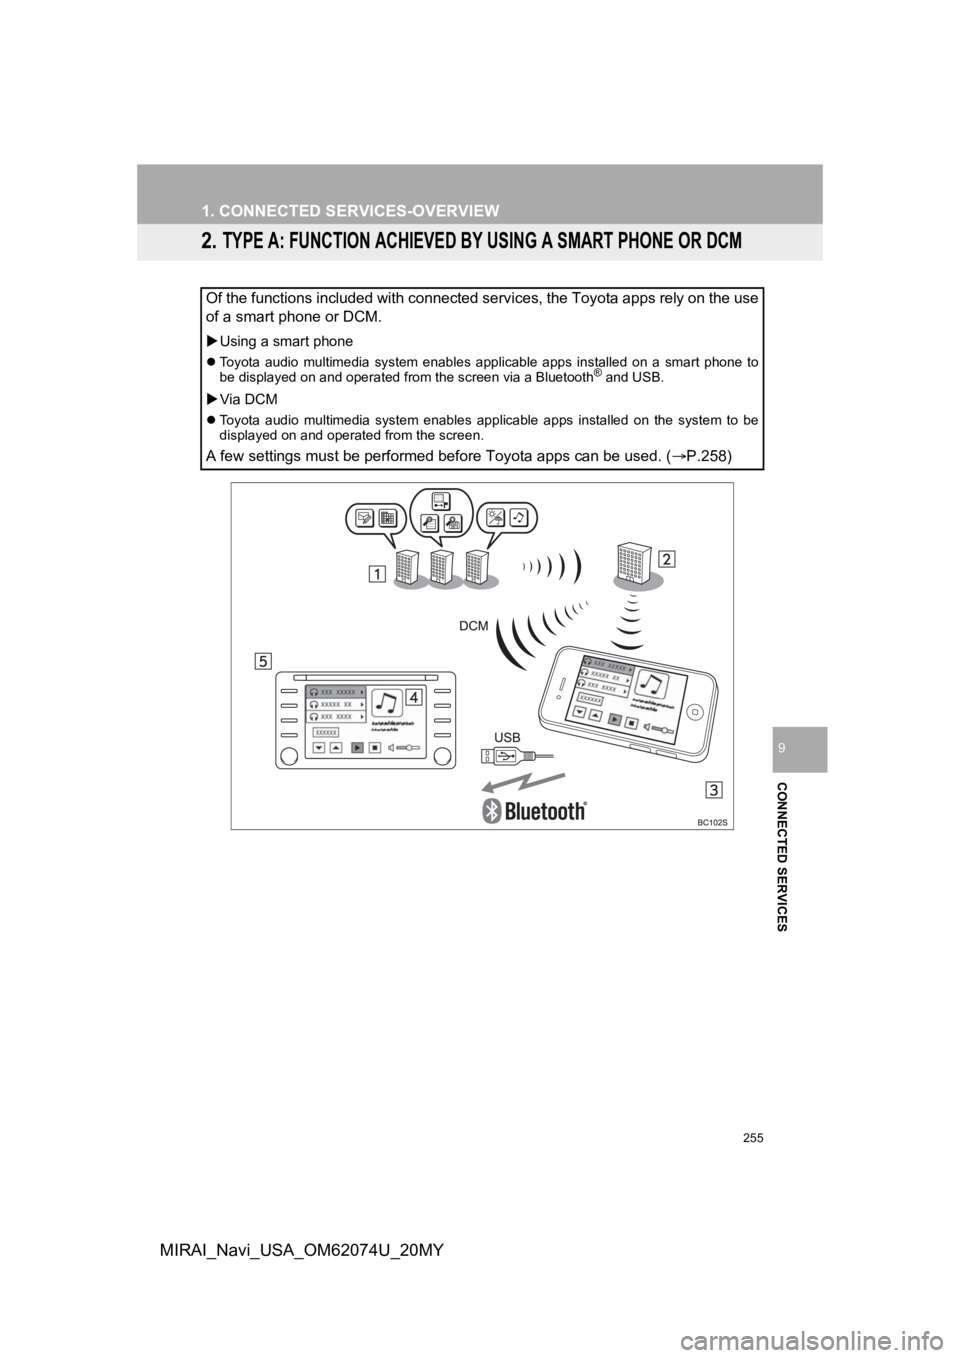
2. TYPE A: FUNCTION ACHIEVED BY USING A SMART PHONE OR DCM
Of the functions included with connected services, the Toyota apps rely on the use
of a smart phone or DCM.
Using a smart phone
Toyota audio multimedia system enables applicable apps installe d on a smart phone to
be displayed on and operated from the screen via a Bluetooth® and USB.
Via DCM
Toyota audio multimedia system enables applicable apps installed on the system to be
displayed on and operated from the screen.
A few settings must be performed before Toyota apps can be used . (P.258)
Page 256 of 288
256
1. CONNECTED SERVICES-OVERVIEW
MIRAI_Navi_USA_OM62074U_20MY
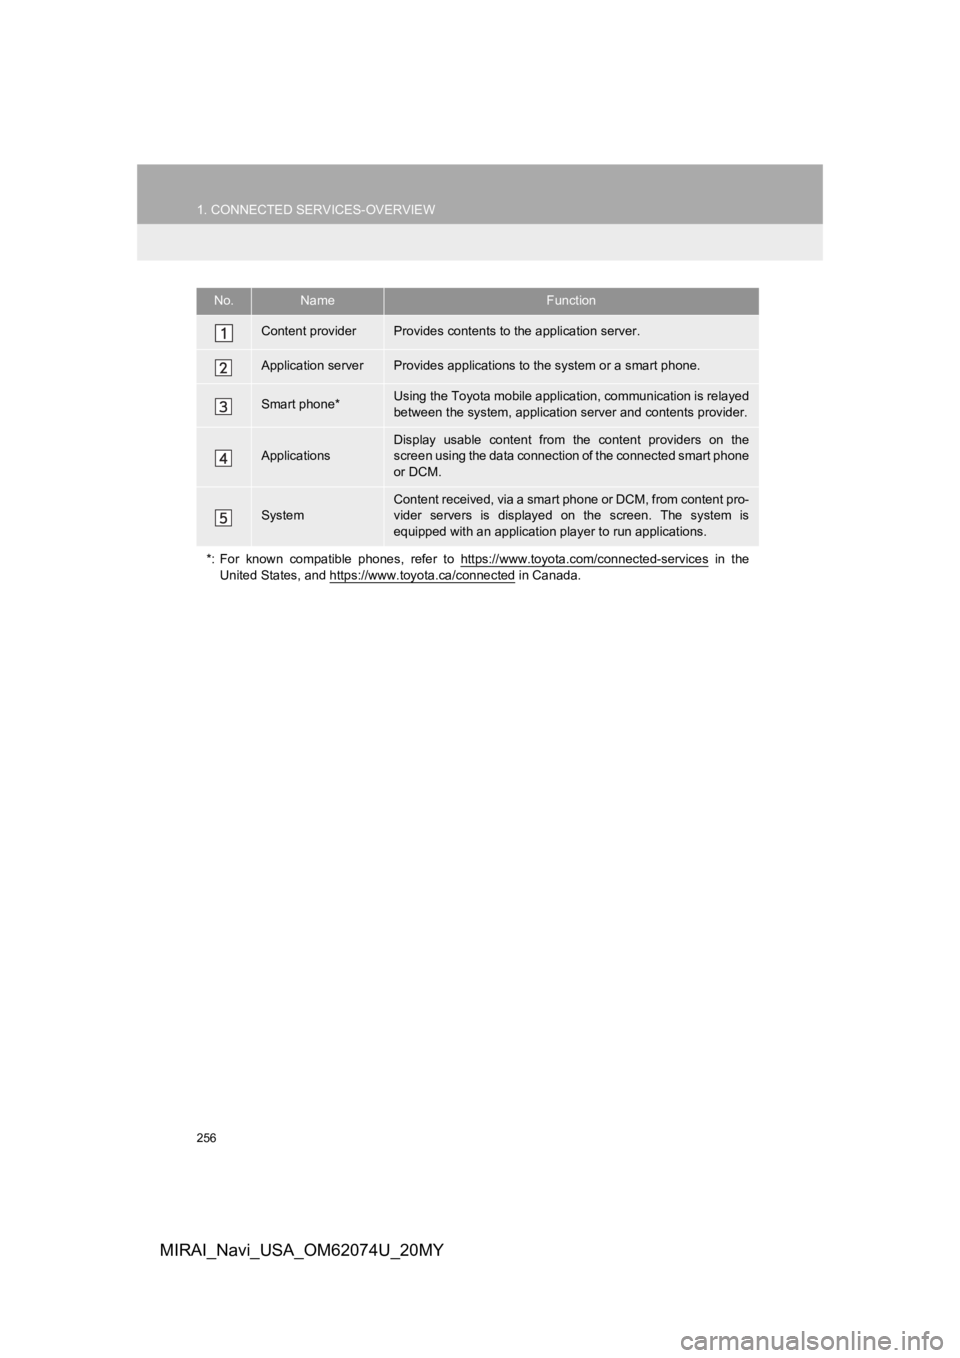
No.NameFunction
Content providerProvides contents to the application server.
Application serverProvides applications to the system or a smart phone.
Smart phone*Using the Toyota mobile application, communication is relayed
between the system, application server and contents provider.
Applications
Display usable content from the content providers on the
screen using the data connection of the connected smart phone
or DCM.
SystemContent received, via a smart phone or DCM, from content pro-
vider servers is displayed on the screen. The system is
equipped with an application player to run applications.
*: For known compatible phones, refer to https://www.toyota.com/ connected-services
in the
United States, and https://www.toyota.ca/connected
in Canada.
Page 264 of 288
264
MIRAI_Navi_USA_OM62074U_20MY
2. CONNECTED SERVICES OPERATION
1. Toyota Apps
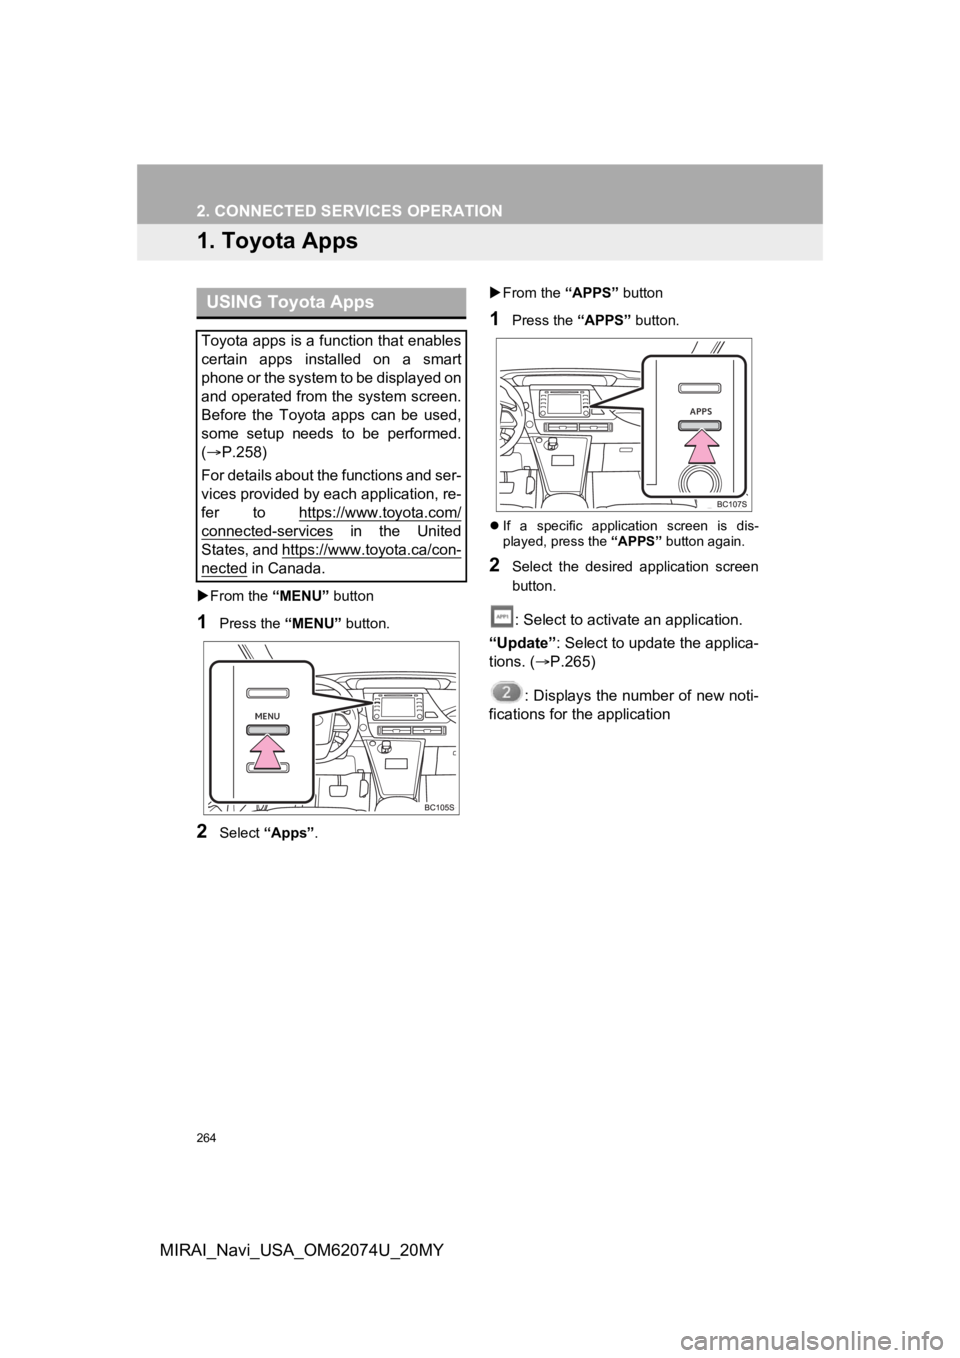
From the “MENU” button
1Press the “MENU” button.
2Select “Apps” .
From the “APPS” button
1Press the “APPS” button.
If a specific application screen is dis-
played, press the “APPS” button again.
2Select the desired application screen
button.
: Select to activate an application.
“Update”: Select to update the applica-
tions. ( P.265)
: Displays the number of new noti-
fications for the application
USING Toyota Apps
Toyota apps is a function that enables
certain apps installed on a smart
phone or the system to be displayed on
and operated from the system screen.
Before the Toyota apps can be used,
some setup needs to be performed.
( P.258)
For details about the functions and ser-
vices provided by each application, re-
fer to https://www.toyota.com/
connected-services in the United
States, and https://www.toyota.ca/con-
nected in Canada.
Page 265 of 288
265
2. CONNECTED SERVICES OPERATION
CONNECTED SERVICES
9
MIRAI_Navi_USA_OM62074U_20MY
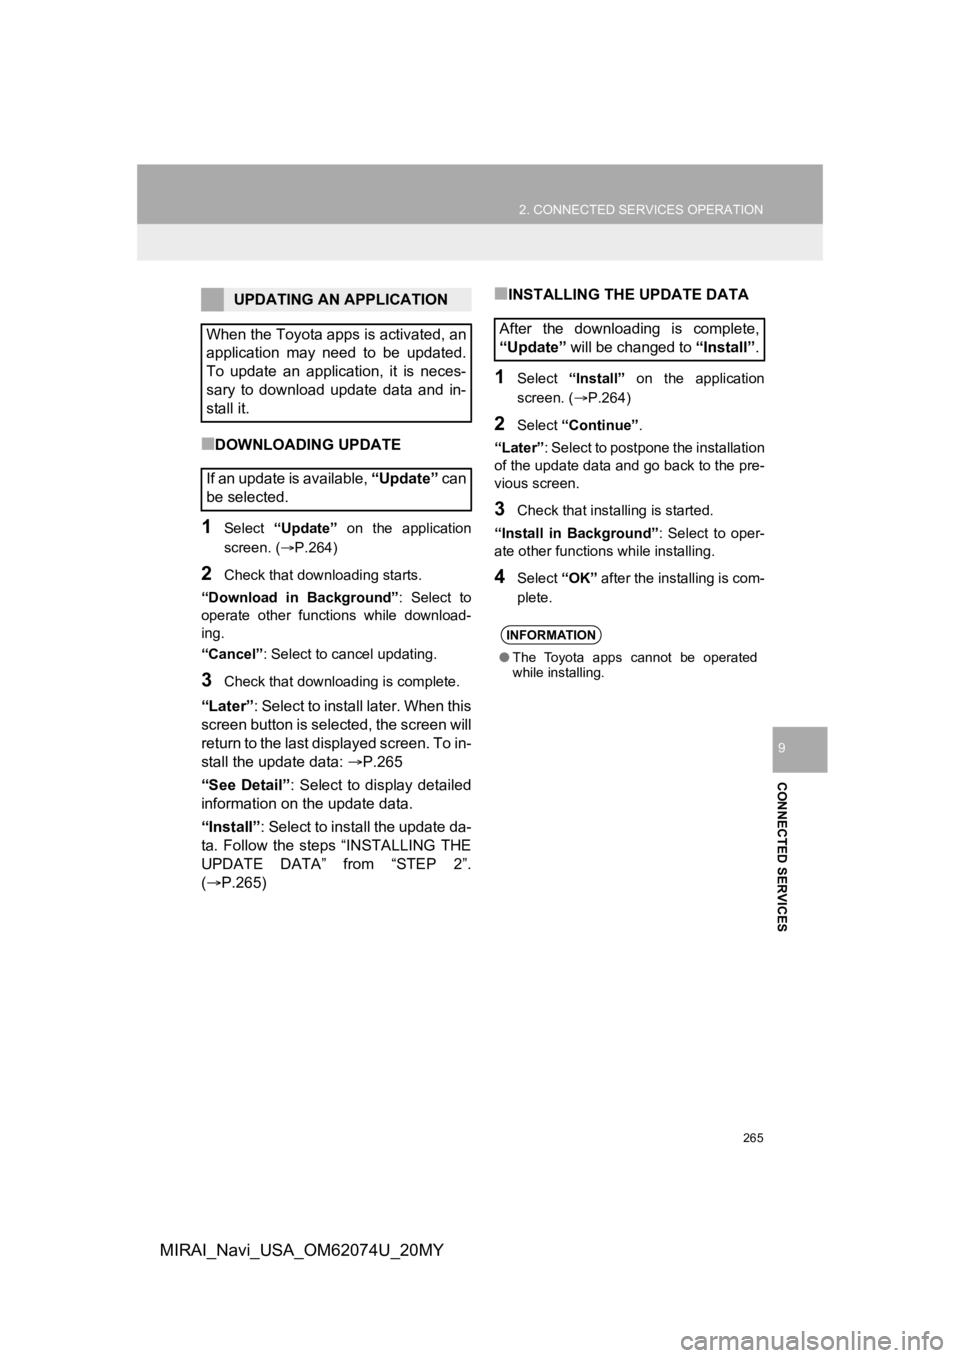
■DOWNLOADING UPDATE
1Select “Update” on the application
screen. ( P.264)
2Check that downloading starts.
“Download in Background” : Select to
operate other functions while download-
ing.
“Cancel” : Select to cancel updating.
3Check that downloading is complete.
“Later”: Select to install later. When this
screen button is selected, the screen will
return to the last displayed screen. To in-
stall the update data: P.265
“See Detail”: Select to display detailed
information on the update data.
“Install”: Select to install the update da-
ta. Follow the steps “INSTALLING THE
UPDATE DATA” from “STEP 2”.
( P.265)
■INSTALLING THE UPDATE DATA
1Select “Install” on the application
screen. ( P.264)
2Select “Continue” .
“Later” : Select to postpone the installation
of the update data and go back to the pre-
vious screen.
3Check that install ing is started.
“Install in Background” : Select to oper-
ate other functions while installing.
4Select “OK” after the installing is com-
plete.
UPDATING AN APPLICATION
When the Toyota apps is activated, an
application may need to be updated.
To update an application, it is neces-
sary to download update data and in-
stall it.
If an update is available, “Update” c a n
be selected.
After the downloading is complete,
“Update” will be changed to “Install”.
INFORMATION
●The Toyota apps cannot be operated
while installing.
Page 267 of 288
267
2. CONNECTED SERVICES OPERATION
CONNECTED SERVICES
9
MIRAI_Navi_USA_OM62074U_20MY
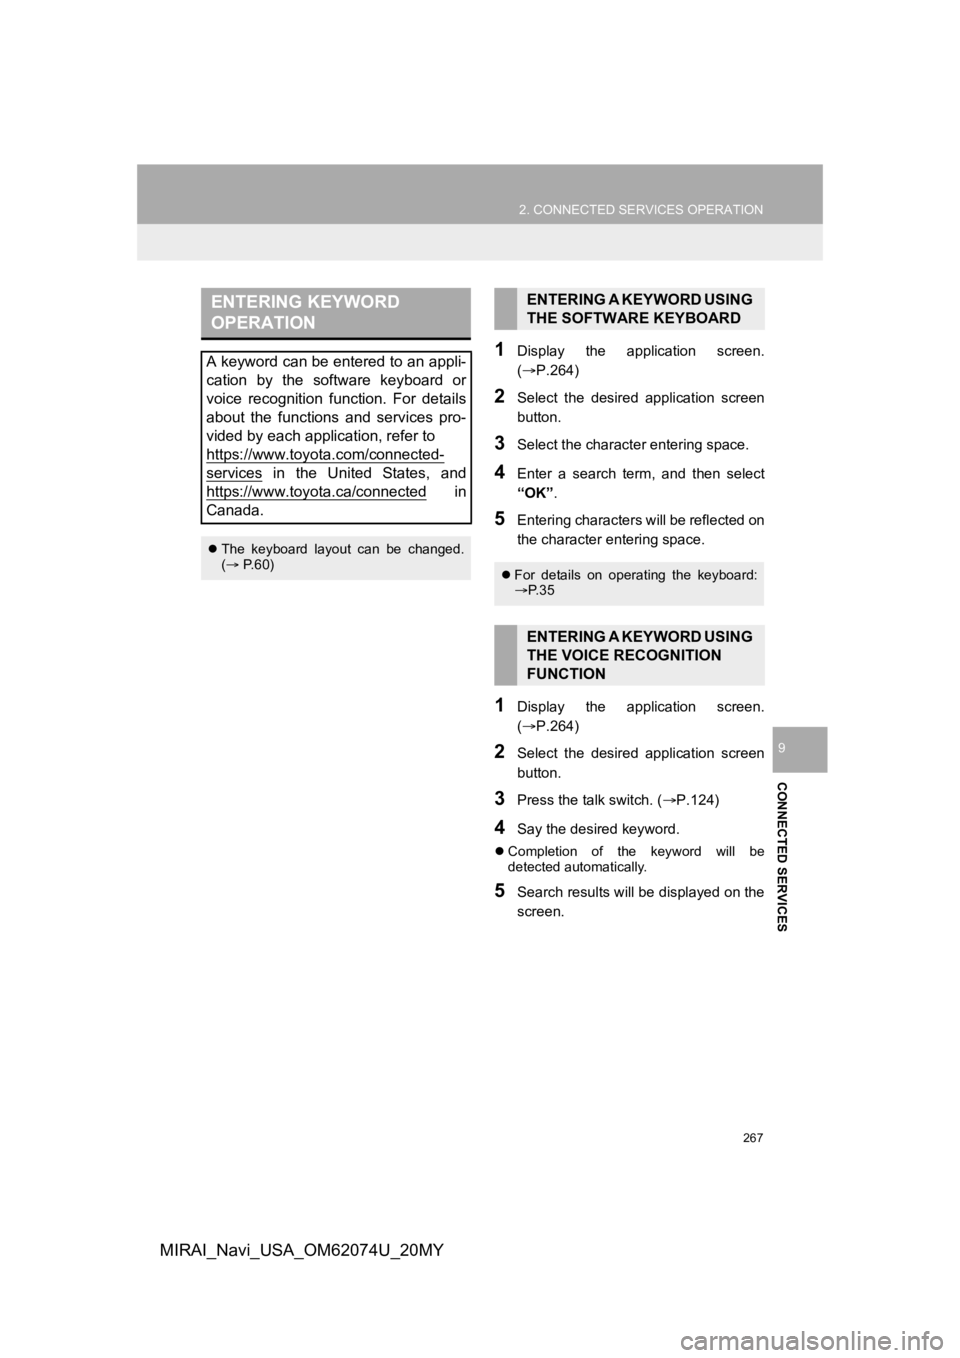
1Display the application screen.
(P.264)
2Select the desired application screen
button.
3Select the character entering space.
4Enter a search term, and then select
“OK”.
5Entering characters will be reflected on
the character entering space.
1Display the application screen.
(P.264)
2Select the desired application screen
button.
3Press the talk switch. ( P.124)
4Say the desired keyword.
Completion of the keyword will be
detected automatically.
5Search results will be displayed on the
screen.
ENTERING KEYWORD
OPERATION
A keyword can be entered to an appli-
cation by the software keyboard or
voice recognition function. For details
about the functions and services pro-
vided by each application, refer to
https://www.toyota.com/connected-
services in the United States, and
https://www.toyota.ca/connected
in
Canada.
The keyboard layout can be changed.
( P.60)
ENTERING A KEYWORD USING
THE SOFTWARE KEYBOARD
For details on operating the keyboard:
P. 3 5
ENTERING A KEYWORD USING
THE VOICE RECOGNITION
FUNCTION