tire pressure TOYOTA MIRAI 2022 Owner's Guide
[x] Cancel search | Manufacturer: TOYOTA, Model Year: 2022, Model line: MIRAI, Model: TOYOTA MIRAI 2022Pages: 556, PDF Size: 17.34 MB
Page 451 of 556
4518-2. Steps to take in an emergency
Owners Manual_USA_M62084_en
8
When trouble arises■Warning messages
The warning messages explained
below may differ from the actual
messages according to operation
conditions and vehicle specifica-
tions.
■Warning buzzer
A buzzer may sound when a mes-
sage is displayed.
In some cases, the buzzer may not
be heard due to being in a noisy
location or audio sound.
WARNING
Your vehicle has also been
equipped with a TPMS (tire pres-
sure warning system) malfunc-
tion indicator to indicate when the
system is not opera ting properly.
The TPMS (tire pressure warning
system) malfunction indicator is
combined with the low tire pres-
sure telltale (tire pressure warning
light). When the system detects a
malfunction, the telltale will flash
for approximately one minute and
then remain continuously illumi-
nated. This sequence will con-
tinue upon subsequent vehicle
start-ups as long as the malfunc-
tion exists. When the malfunction
indicator is illuminated, the sys-
tem may not be able to detect or
signal low tire pressure as
intended.
TPMS (tire pressure warning sys-
tem) malfunctions may occur for a
variety of reasons, including the
installation of replacement or
alternate tires or wheels on the
vehicle that prevent the TPMS
(tire pressure warning system)
from functioning properly. Always
check the TPMS (tire pressure
warning system) malfunction tell-
tale after replacing one or more
tires or wheels on your vehicle to
ensure that the r eplacement or
alternate tires and wheels allow
the TPMS (tire pressure warning
system) to continue to function
properly.
NOTICE
■To ensure the tire pressure
warning system operates
properly
Do not install tires with different
specifications or makers, as the
tire pressure warning system may
not operate properly.
If a war ning message
is displayed
The multi-information dis-
play shows warnings for
system malfunctions and
incorrectly performed oper-
ations, and messages that
indicate a need for mainte-
nance. When a message is
displayed, perform the
appropriate corrective
action for the message.
If a warning message is dis-
played again after the
appropriate actions have
been performed, contact
your Toyota dealer.
Additionally, if a warning
light comes on or flashes at
the same time that a warn-
ing message is displayed,
take the appropriate correc-
tive action for the warning
light. ( P.441)
Page 457 of 556

4578-2. Steps to take in an emergency
Owners Manual_USA_M62084_en
8
When trouble arises
Sticker
Compressor Power plug
Air pressure gauge
Compressor switch
■Note for checking the emer-
gency tire puncture repair kit
Check the sealant expiry date occa-
sionally.
The expiry date is shown on the bot-
tle. Do not use sealant whose expiry
date has already passed. Other-
wise, repairs conducted using the
emergency tire puncture repair kit
may not be performed properly.
■Emergency tire puncture repair
kit
●The emergency tire puncture
repair kit is for filling the car tire
with air.
●The sealant has a limited life
span. The expiry date is marked
on the bottle. The sealant should
be replaced before the expiry
date. Contact your Toyota dealer
for replacement.
●The sealant stored in the emer-
gency tire puncture repair kit can
be used only once to temporarily
repair a single tire. If the sealant
has been used and needs to be
replaced, purchase a new bottle at
your Toyota dealer. The compres-
sor is reusable.
●The sealant can be used when the
outside temperature is from -22°F
(-30°C) to 140°F (60°C).
●The kit is exclusi vely designed for
size and type of ti res originally
installed on your vehicle. Do not
use it for tires that a different size
than the original ones, or for any
other purposes.
●If the sealant gets on your clothes,
it may stain.
●If the sealant adhe res to a wheel
or the surface of the vehicle body,
the stain may not be removable if
it is not cleaned at once. Immedi-
ately wipe away the sealant with a
wet cloth.
●During operation of the repair kit,
a loud operation noise is pro-
duced. This does not indicate a
malfunction.
●Do not use to check or to adjust
the tire pressure.
WARNING
■Caution while driving
●Store the repair kit in the lug-
gage compartment.
Injuries may result in the event
of an accident or sudden brak-
ing.
●The repair kit is exclusively only
for your vehicle.
Do not use repair kit on other
vehicles, which could lead to an
accident causing death or seri-
ous injury.
●Do not use repair kit for tires
that are differen t size than the
original ones, or for any other
purpose. If the tires have not
been completely repaired, it
could lead to an accident caus-
ing death or serious injury.
Page 460 of 556

4608-2. Steps to take in an emergency
Owners Manual_USA_M62084_enthe upper end of the notch.
10
Attach the sticker provided
with the tire puncture repair
kit to a position easily seen
from the driver’s seat.
11 Check the specified tire infla-
tion pressure.
Tire inflation pressure is specified
on the label on the driver’s side pil-
lar as shown. ( P.487)
12Start the fuel cell system.
( P.172)
13To inject the sealant and inflate the tire, turn the com-
pressor switch on.
14Inflate the tire until the speci- fied air pressure is reached.
The sealant will be injected
and the pressure will spike to
between 44 psi (300 kPa, 3.0
kgf/cm
2 or bar) and 58 psi
(400 kPa, 4.0 kgf/cm
2 or bar),
then gradually decrease.
Page 461 of 556

4618-2. Steps to take in an emergency
Owners Manual_USA_M62084_en
8
When trouble arises
The air pressure gauge will
display the actual tire inflation
pressure about 1 to 5 min-
utes after the switch is turned
on.
Turn the compressor switch
off and then check the tire
inflation pressure. Being care-
ful not to over inflate, check
and repeat the inflation proce-
dure until the specified tire
inflation pressure is reached.
The tire can be inflated for
about 5 to 20 minutes
(depending on the outside
temperature). If the tire infla-
tion pressure is still lower than
the specified point after infla-
tion for 25 minutes, the tire is
too damaged to be repaired.
Turn the compressor switch
off and contact your Toyota
dealer.
If the tire inflation pressure
exceeds the specified air
pressure, let out some air to
adjust the tire inflation pres-
sure. ( P.462, 487)
15 With the compressor switch
off, disconnect the hose from
the valve on the tire and then
pull out the power plug from
the power outlet socket.
Some sealant may leak when the
hose is removed.
16 Install the valve cap onto the
valve of the emergency
repaired tire. 17Attach the air release cap to
the end of the hose.
If the air release cap is not
attached, the sealant may leak and
the vehicle may get dirty.
18Temporarily store the bottle in the luggage compartment
while it is connected to the
compressor.
19To spread the liquid sealant evenly within the tire, imme-
diately drive safely for about
3 miles (5 km) below 50 mph
(80 km/h).
20After driving, stop your vehi- cle in a safe place on a hard,
flat surface and reconnect
the repair kit.
Remove the air release cap from
the hose before reconnecting the
Page 462 of 556

4628-2. Steps to take in an emergency
Owners Manual_USA_M62084_enhose.
21
Turn the compressor switch
on and wait for several sec-
onds, then turn it off. Check
the tire inflation pressure.
If the tire inflation pressure is
under 19 psi (130 kPa, 1.3
kgf/cm
2 or bar): The puncture
cannot be repaired. Contact
your Toyota dealer.
If the tire inflation pressure is
19 psi (130 kPa, 1.3 kgf/cm
2
or bar) or higher, but less
than the specified air pres-
sure: Proceed to step 22.
If the tire inflation pressure is
the specified air pressure
( P.487): Proceed to step
23.
22 Turn the compressor switch
on to inflate the tire until the specified air pressure is
reached. Drive for about 3
miles (5 km) and then per-
form step
20.
23Attach the air release cap to the end of the hose.
If the air release cap is not
attached, the sealant may leak and
the vehicle may get dirty.
24Store the bottle in the lug-gage compartment while it is
connected to the compres-
sor.
25Taking precautions to avoid sudden braking, sudden
acceleration and sharp turns,
drive carefully at under 50
mph (80 km/h) to the nearest
Toyota dealer that is less
than 62 miles (100 km) away
for tire repair or replacement.
When having the tire repaired or
replaced, make sure to tell the Toy-
ota dealer that the sealant is
injected.
■If the tire is in flated to more
than the specifi ed air pressure
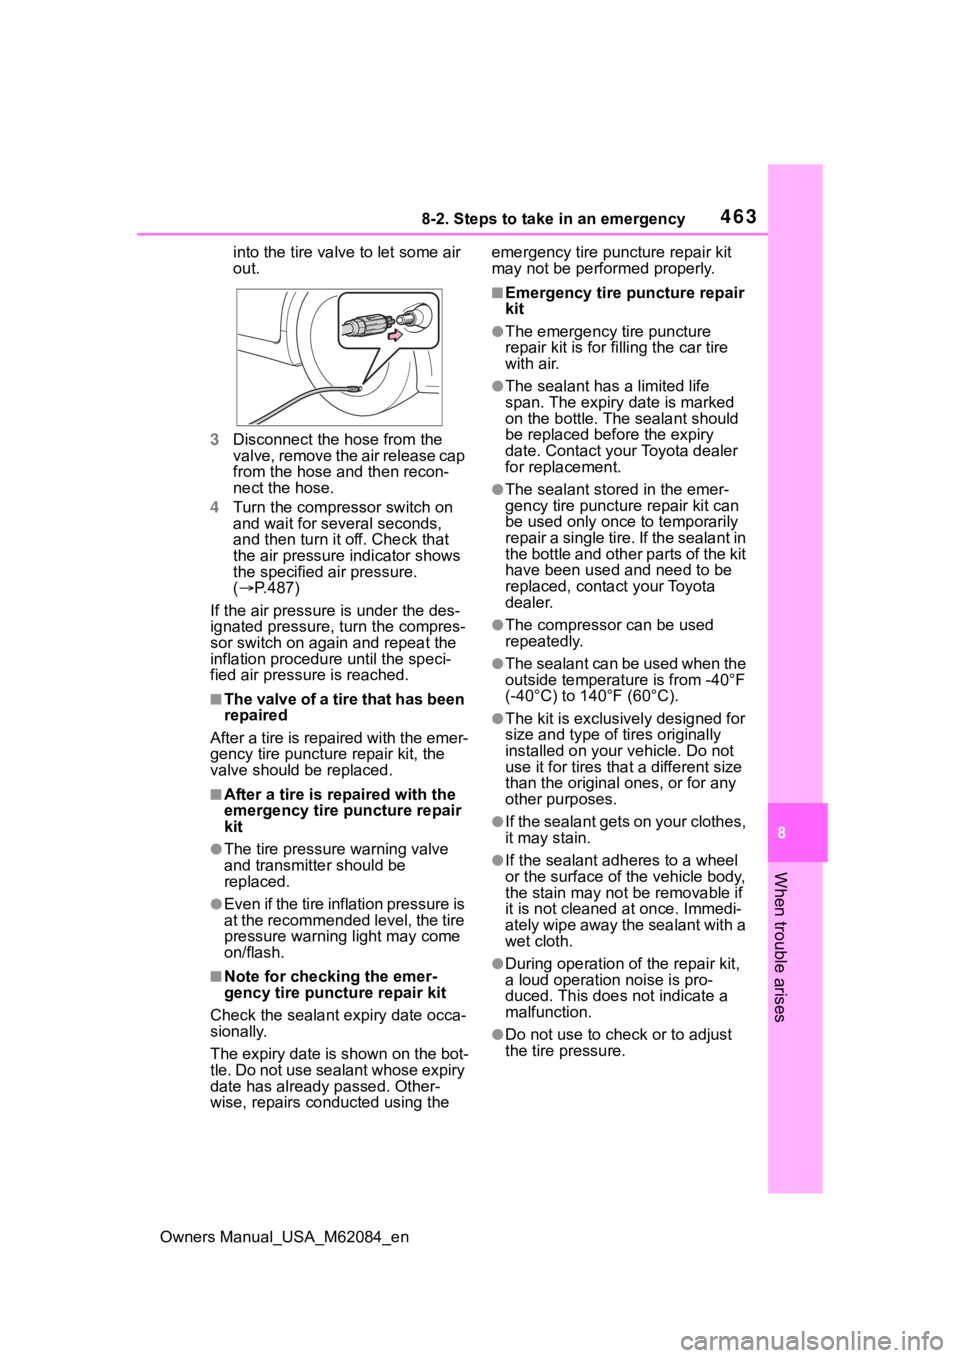
1 Disconnect the hose from the
valve.
2 Install the air release cap to the
end of the hose and push the
protrusion on the air release cap
Page 463 of 556
4638-2. Steps to take in an emergency
Owners Manual_USA_M62084_en
8
When trouble arises
into the tire valve to let some air
out.
3 Disconnect the hose from the
valve, remove the air release cap
from the hose and then recon-
nect the hose.
4 Turn the compressor switch on
and wait for several seconds,
and then turn i t off. Check that
the air pressure indicator shows
the specified air pressure.
( P.487)
If the air pressure is under the des-
ignated pressure, turn the compres-
sor switch on again and repeat the
inflation procedure until the speci-
fied air pressure is reached.
■The valve of a tire that has been
repaired
After a tire is repaired with the emer-
gency tire puncture repair kit, the
valve should be replaced.
■After a tire is repaired with the
emergency tire puncture repair
kit
●The tire pressure warning valve
and transmitter should be
replaced.
●Even if the tire inflation pressure is
at the recommended level, the tire
pressure warning light may come
on/flash.
■Note for checking the emer-
gency tire puncture repair kit
Check the sealant expiry date occa-
sionally.
The expiry date is shown on the bot-
tle. Do not use sealant whose expiry
date has already passed. Other-
wise, repairs conducted using the emergency tire puncture repair kit
may not be performed properly.
■Emergency tire puncture repair
kit
●The emergency tire puncture
repair kit is for f
illing the car tire
with air.
●The sealant has a limited life
span. The expiry date is marked
on the bottle. The sealant should
be replaced before the expiry
date. Contact your Toyota dealer
for replacement.
●The sealant stored in the emer-
gency tire puncture repair kit can
be used only once to temporarily
repair a single tire. If the sealant in
the bottle and other parts of the kit
have been used and need to be
replaced, contact your Toyota
dealer.
●The compressor can be used
repeatedly.
●The sealant can be used when the
outside temperature is from -40°F
(-40°C) to 140°F (60°C).
●The kit is exclusi vely designed for
size and type of ti res originally
installed on your vehicle. Do not
use it for tires tha t a different size
than the original ones, or for any
other purposes.
●If the sealant gets on your clothes,
it may stain.
●If the sealant adhe res to a wheel
or the surface of the vehicle body,
the stain may not be removable if
it is not cleaned at once. Immedi-
ately wipe away the sealant with a
wet cloth.
●During operation of the repair kit,
a loud operation noise is pro-
duced. This does not indicate a
malfunction.
●Do not use to check or to adjust
the tire pressure.
Page 464 of 556
4648-2. Steps to take in an emergency
Owners Manual_USA_M62084_en
WARNING
■Do not drive the vehicle with
a flat tire
Do not continue driving with a flat
tire.
Driving even a short distance with
a flat tire can damage the tire and
the wheel beyond repair.
Driving with a flat tire may cause a
circumferential groove on the side
wall. In such a case, the tire may
explode when using a repair kit.
■When fixing the flat tire
●Stop your vehicle in a safe and
flat area.
●Do not touch the wheels or the
area around the brakes immedi-
ately after the vehicle has been
driven.
After the vehicle has been
driven, the wheels and the area
around the brakes may be
extremely hot. Touching these
areas with hands , feet or other
body parts may result in burns.
●Connect the valve and hose
securely with the tire installed
on the vehicle. If the hose is not
properly connected to the valve,
air leakage may occur as seal-
ant may be sprayed out.
●If the hose comes off the valve
while inflating the tire, there is a
risk that the hose will move
abruptly due to air pressure.
●After inflation of the tire has
completed, the sealant may
splatter when the hose is dis-
connected or some air is let out
of the tire.
●Follow the operation procedure
to repair the tire. If the proce-
dures not followed, the sealant
may spray out.
●Keep back from the tire while it
is being repaired, as there is a
chance of it bursting while the
repair operation is being per-
formed. If you notice any cracks
or deformation of the tire, turn
off the compressor switch and
stop the repair operation imme-
diately.
●The repair kit may overheat if
operated for a long period of
time. Do not operate the repair
kit continuously for more than
40 minutes.
●Parts of the re pair kit become
hot during operation. Be careful
handling the repair kit during
and after operation. Do not
touch the metal part connecting
the bottle and the compressor. It
will be extremely hot.
●Do not attach the vehicle speed
warning sticker to an area other
than the one indicated. If the
sticker is attached to an area
where an SRS airbag is located,
such as the pad of the steering
wheel, it may prevent the SRS
airbag from operating properly.
■Driving to spread the liquid
sealant evenly
Observe the following precautions
to reduce the risk of accidents.
Failing to do so may result in a
loss of vehicle control and cause
death or serious injury.
●Drive the vehicle carefully at a
low speed. Be especially careful
when turning and cornering.
●If the vehicle does not drive
straight or you feel a pull
through the steering wheel, stop
the vehicle and check the fol-
lowing.
• Tire condition. The tire may have separated from the wheel.
Page 487 of 556
4879-1. Specifications
Owners Manual_USA_M62084_en
9
Vehicle specifications
the brake system warning light is not illuminated when the fuel cell sys-
tem is operating. (If the brake system warning light is illuminated, refer to
P.441.)
*2: Make sure to confirm that the brake warning light (yellow) doe s not illumi-
nate. (If the brake warning light illuminates, refer to P.441.)
19-inch tires
20-inch tires
Steering
Free playLess than 1.2 in. (30 mm)
Tires and wheels
Tire size235/55R19 101V
Tire inflation pressure
(Recommended cold tire
inflation pressure)Front: 33 psi (230 kPa, 2.3 kgf/cm2 or bar)
Rear: 33 psi (230 kPa, 2.3 kgf/cm
2 or bar)
Wheel size19 8J
Wheel nut torque103 ft•lbf (140 N•m, 14.3 kgf•m)
Tire size245/45ZR20 103Y
Tire inflation pressure
(Recommended cold tire
inflation pressure)Front: 33 psi (230 kPa, 2.3 kgf/cm2 or bar)
Rear: 33 psi (230 kPa, 2.3 kgf/cm
2 or bar)
Wheel size20 8 1/2J
Wheel nut torque103 ft•lbf (140 N•m, 14.3 kgf•m)
Page 488 of 556

4889-1. Specifications
Owners Manual_USA_M62084_en
Tire size (P.489)
DOT and Tire Identification Number (TIN) ( P.489)
Location of treadwear indicators ( P.403)
Tire ply composition and materials
Plies are layers of rubber-coat ed parallel cords. Cords are the strands
which form the pl ies in a tire.
Radial tires or bias-ply tires
A radial tire has “RADIAL” on the sidewall. A tire not marked “ RADIAL” is a
bias-ply tire.
TUBELESS or TUBE TYPE
A tubeless tire does not have a tube and air is directly put into the tire. A
tube type tire has a tube inside t he tire and the tube maintains the air pres-
sure.
Load limit at maximum cold tire inflation pressure (P.403)
Maximum cold tire inflation pressure ( P.487)
This means the pressure to w hich a tire may be inflated.
Uniform tire quality grading
For details, see “Uniform Tire Quality Grading” that follows.
Summer tires or all season tires ( P.403)
Tire information
Typical tire symbols
Page 492 of 556

4929-1. Specifications
Owners Manual_USA_M62084_enheat buildup and possible tire fail- ure.
Glossary of tire terminology
Tire related termMeaning
Cold tire inflation pressure
Tire pressure when the vehicle has been
parked for three hours or more, or has not
been driven more than
1 mile or 1.5 km
under that condition
Maximum inflation pressure
The maximum cold inf lated pressure to
which a tire may be inflated, shown on the
sidewall of the tire
Recommended inflation pres-
sureCold tire inflation pressure recommended
by a manufacturer
Accessory weight
The combined weight (in excess of those
standard items which may be replaced) of
transmission, power steering, power
brakes, power windows, power seats,
radio and heater, to the extent that these
items are available as factory-installed
equipment (whether installed or not)
Curb weight
The weight of a moto r vehicle with stan-
dard equipment, including the maximum
capacity of fuel, oil and coolant, and if so
equipped, air conditioning and additional
weight optional engine
Maximum loaded vehicle
weight
The sum of:
(a) Curb weight
(b) Accessory weight
(c) Vehicle capacity weight
(d) Production options weight
Normal occupant weight
150 lb. (68 kg) times the number of occu-
pants specified in the second column of
Ta b l e 1
* that follows
Occupant distribution
Distribution of occupants in a vehicle as
specified in the third column of Table 1
*
below