change time TOYOTA PRIUS 2020 Owners Manual (in English)
[x] Cancel search | Manufacturer: TOYOTA, Model Year: 2020, Model line: PRIUS, Model: TOYOTA PRIUS 2020Pages: 728, PDF Size: 15.79 MB
Page 8 of 728
8
PRIUS_OM_OM47D44U_(U)
For your infor mation
Please note that this manual applies to all models and explains all equipment,
including options. Therefore, you may find some explanations fo r equipment
not installed on your vehicle.
All specifications provided in this manual are current at the t ime of printing.
However, because of the Toyota policy of continual product improvement, we
reserve the right to make changes at any time without notice.
Depending on specifications, the vehicle shown in the illustrat ions may differ
from your vehicle in terms of color and equipment.
Approximately five hours after the hybrid system is turned off, you may hear
sound coming from under the vehicle for several minutes. This i s the sound of
a fuel evaporation leakage check and, it does not indicate a ma lfunction.
A wide variety of non-genuine spare parts and accessories for T oyota vehi-
cles are currently available in the market. You should know tha t Toyota does
not warrant these products and is not responsible for their per formance,
repair, or replacement, or for any damage they may cause to, or adverse
effect they may have on, your Toyota vehicle.
This vehicle should not be modified with non-genuine Toyota pro ducts. Modi-
fication with non-genuine Toyota products could affect its perf ormance, safety
or durability, and may even violate governmental regulations. In addition,
damage or performance problems resulting from the modification may not be
covered under warranty.
Main Owner’s Manual
Noise from under vehicle after turning off the hybrid system
Accessories, spare parts and m odification of your Toyota
Page 85 of 728
851-4. Hybrid system
PRIUS_OM_OM47D44U_(U)
1
For safety and security
■Regenerative braking
In the following situations, kinetic energy is converted to electric energy and
deceleration force can be obtained in conjunction with the rech arging of the
hybrid battery (traction battery).
● The accelerator pedal is released while driving with the shift position in D or
B.
● The brake pedal is depressed while driving with the shift posit ion in D or B.
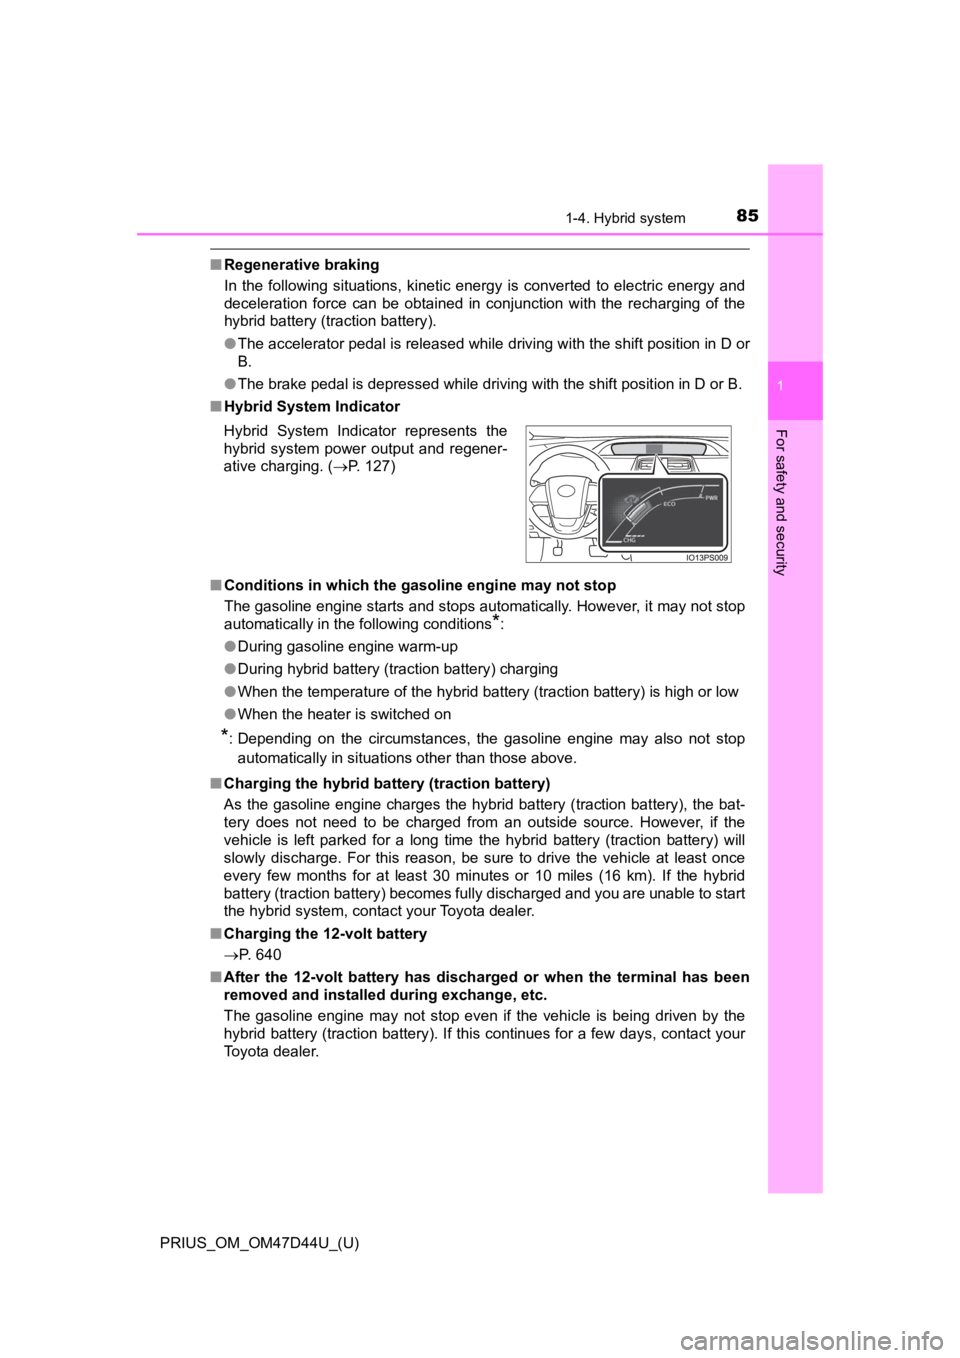
■ Hybrid System Indicator
■ Conditions in which the gasoline engine may not stop
The gasoline engine starts and stops automatically. However, it may not stop
automatically in the following conditions
*:
● During gasoline engine warm-up
● During hybrid battery (traction battery) charging
● When the temperature of the hybrid battery (traction battery) is high or low
● When the heater is switched on
*: Depending on the circumstances, the gasoline engine may also not stop
automatically in situations other than those above.
■ Charging the hybrid batt ery (traction battery)
As the gasoline engine charges the hybrid battery (traction bat tery), the bat-
tery does not need to be charged from an outside source. Howeve r, i f t h e
vehicle is left parked for a long time the hybrid battery (trac tion battery) will
slowly discharge. For this reason, be sure to drive the vehicle at least once
every few months for at least 30 minutes or 10 miles (16 km). I f the hybrid
battery (traction battery) becomes fully discharged and you are unable to start
the hybrid system, contact your Toyota dealer.
■ Charging the 12-volt battery
P. 640
■ After the 12-volt battery has discharged or when the terminal h as been
removed and installed during exchange, etc.
The gasoline engine may not stop even if the vehicle is being driven by the
hybrid battery (traction battery). If this continues for a few days, contact your
Toyota dealer. Hybrid System Indicator represents the
hybrid system power output and regener-
ative charging. ( P. 127)
Page 99 of 728
PRIUS_OM_OM47D44U_(U)
992. Instrument cluster
2
Instrument cluster
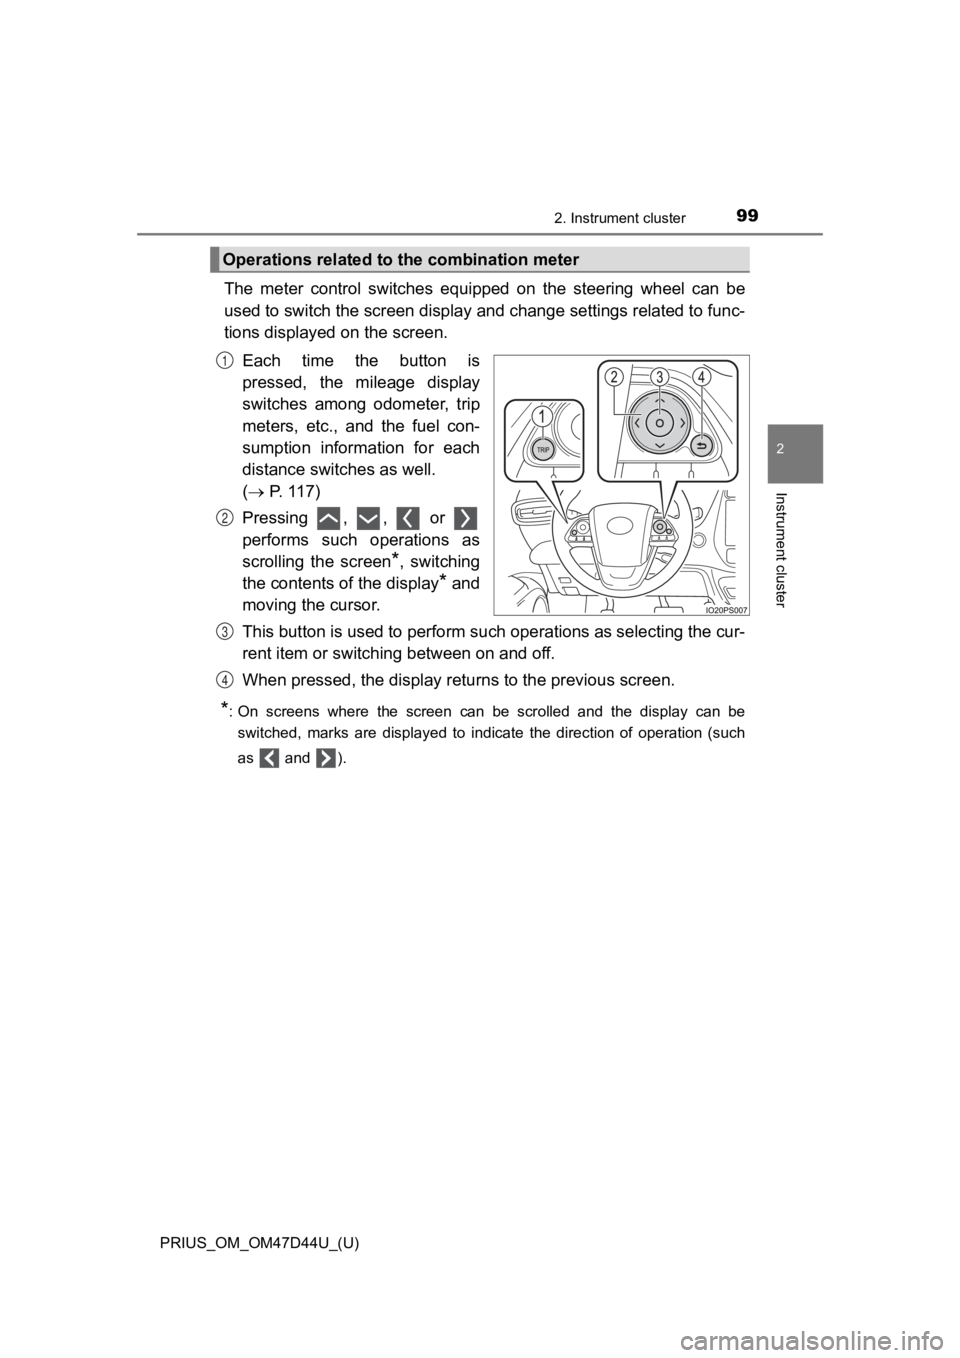
The meter control switches equipped on the steering wheel can be
used to switch the screen displa y and change settings related to func-
tions displayed on the screen.
Each time the button is
pressed, the mileage display
switches among odometer, trip
meters, etc., and the fuel con-
sumption information for each
distance switches as well.
( P. 117)
Pressing , , or
performs such operations as
scrolling the screen
*, switching
the contents of the display
* and
moving the cursor.
This button is used to perform s uch operations as selecting the cur-
rent item or switching between on and off.
When pressed, the display returns to the previous screen.
*: On screens where the screen can be scrolled and the display ca n be
switched, marks are displayed to indicate the direction of oper ation (such
as and ).
Operations related to the combination meter
1
2
3
4
Page 100 of 728
100
PRIUS_OM_OM47D44U_(U)
2. Instrument cluster
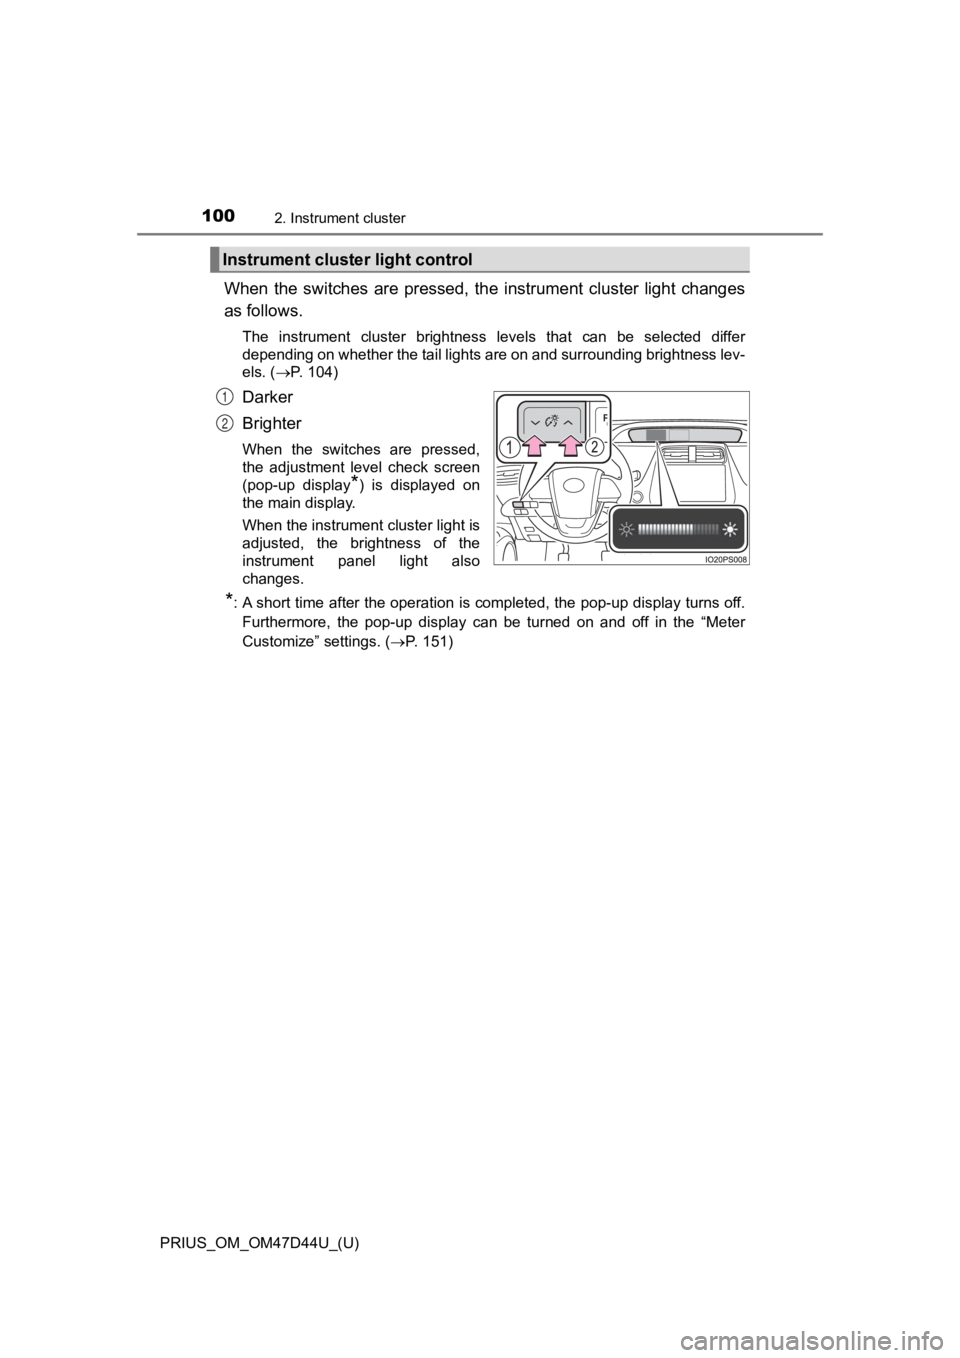
When the switches are pressed, the instrument cluster light changes
as follows.
The instrument cluster brightness levels that can be selected differ
depending on whether the tail lights are on and surrounding bri ghtness lev-
els. ( P. 104)
Darker
Brighter
When the switches are pressed,
the adjustment level check screen
(pop-up display
*) is displayed on
the main display.
When the instrument cluster light is
adjusted, the brightness of the
instrument panel light also
changes.
*: A short time after the operation is completed, the pop-up disp lay turns off.
Furthermore, the pop-up display can be turned on and off in the “Meter
Customize” settings. ( P. 151)
Instrument cluster light control
1
2
Page 103 of 728
PRIUS_OM_OM47D44U_(U)
1032. Instrument cluster
2
Instrument cluster
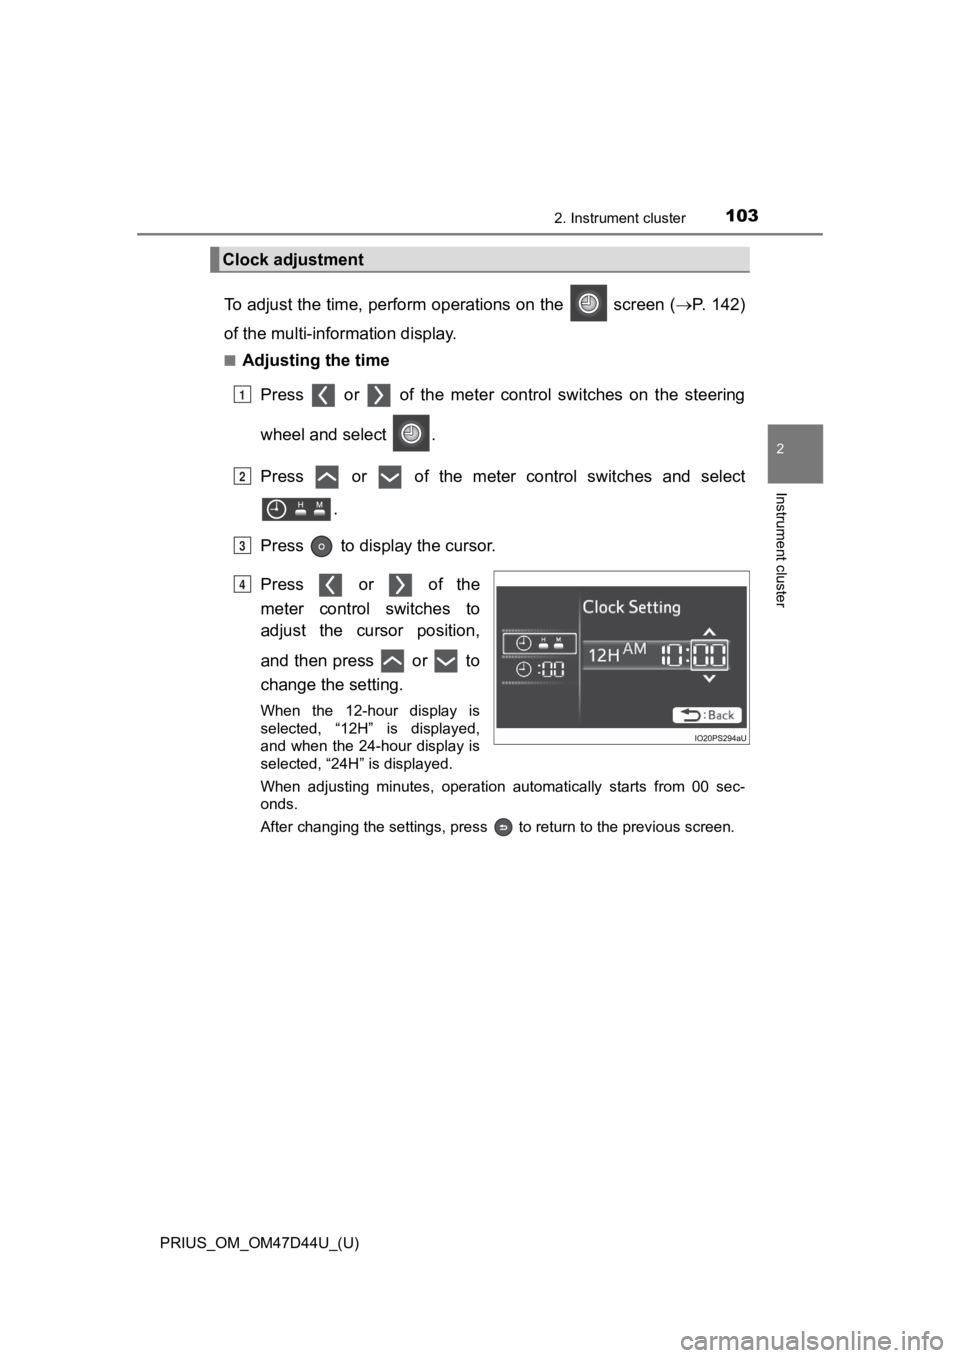
To adjust the time, perform operations on the screen (P. 1 4 2 )
of the multi-information display.
■Adjusting the time
Press or of the meter cont rol switches on the steering
wheel and select .
Press or of the meter control switches and select .
Press to display the cursor.
Press or of the
meter control switches to
adjust the cursor position,
and then press or to
change the setting.
When the 12-hour display is
selected, “12H” is displayed,
and when the 24-hour display is
selected, “24H” is displayed.
When adjusting minutes, operation automatically starts from 00 sec-
onds.
After changing the settings, press to return to the previous s creen.
Clock adjustment
1
2
3
4
Page 105 of 728
PRIUS_OM_OM47D44U_(U)
1052. Instrument cluster
2
Instrument cluster
■When disconnecting and reconnecting 12-volt battery terminals
The settings of the clock will be reset.
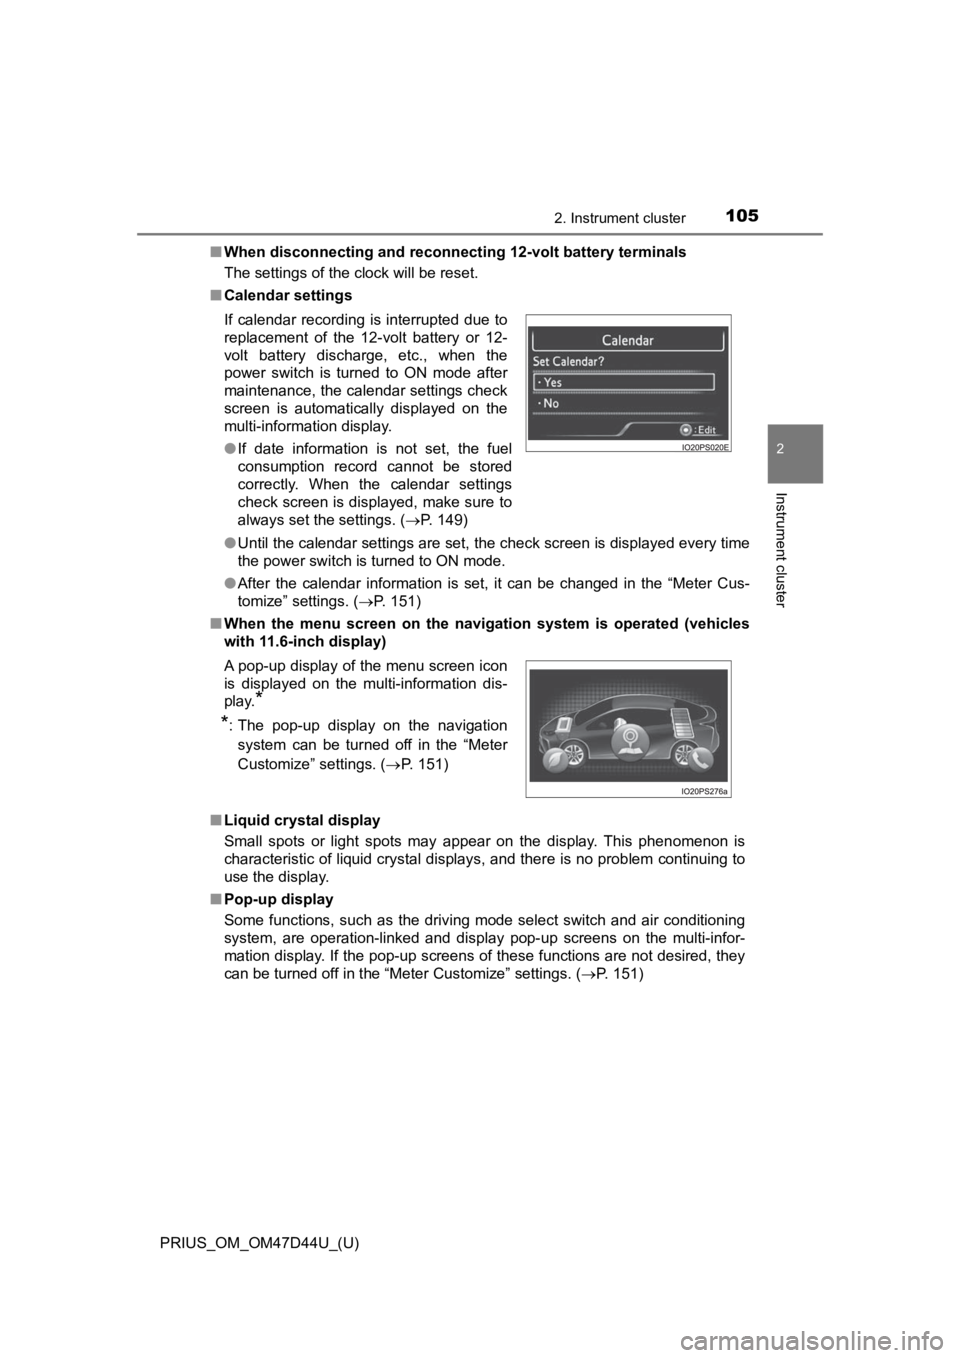
■ Calendar settings
●Until the calendar settings are set, the check screen is displa yed every time
the power switch is turned to ON mode.
● After the calendar information is set, it can be changed in the “Meter Cus-
tomize” settings. ( P. 151)
■ When the menu screen on the navi gation system is operated (vehicles
with 11.6-inch display)
■ Liquid crystal display
Small spots or light spots may appear on the display. This phen omenon is
characteristic of liquid crystal displays, and there is no prob lem continuing to
use the display.
■ Pop-up display
Some functions, such as the driving mode select switch and air conditioning
system, are operation-linked and display pop-up screens on the multi-infor-
mation display. If the pop-up screens of these functions are not desired, they
can be turned off in the “Meter Customize” settings. ( P. 151)
If calendar recording is interrupted due to
replacement of the 12-volt battery or 12-
volt battery discharge, etc., when the
power switch is turned to ON mode after
maintenance, the calendar settings check
screen is automatically displayed on the
multi-information display.
●
If date information is not set, the fuel
consumption record cannot be stored
correctly. When the calendar settings
check screen is displayed, make sure to
always set the settings. ( P. 149)
A pop-up display of the menu screen icon
is displayed on the multi-information dis-
play.
*
*
: The pop-up display on the navigation
system can be turned off in the “Meter
Customize” settings. ( P. 151)
Page 117 of 728
PRIUS_OM_OM47D44U_(U)
1172. Instrument cluster
2
Instrument cluster
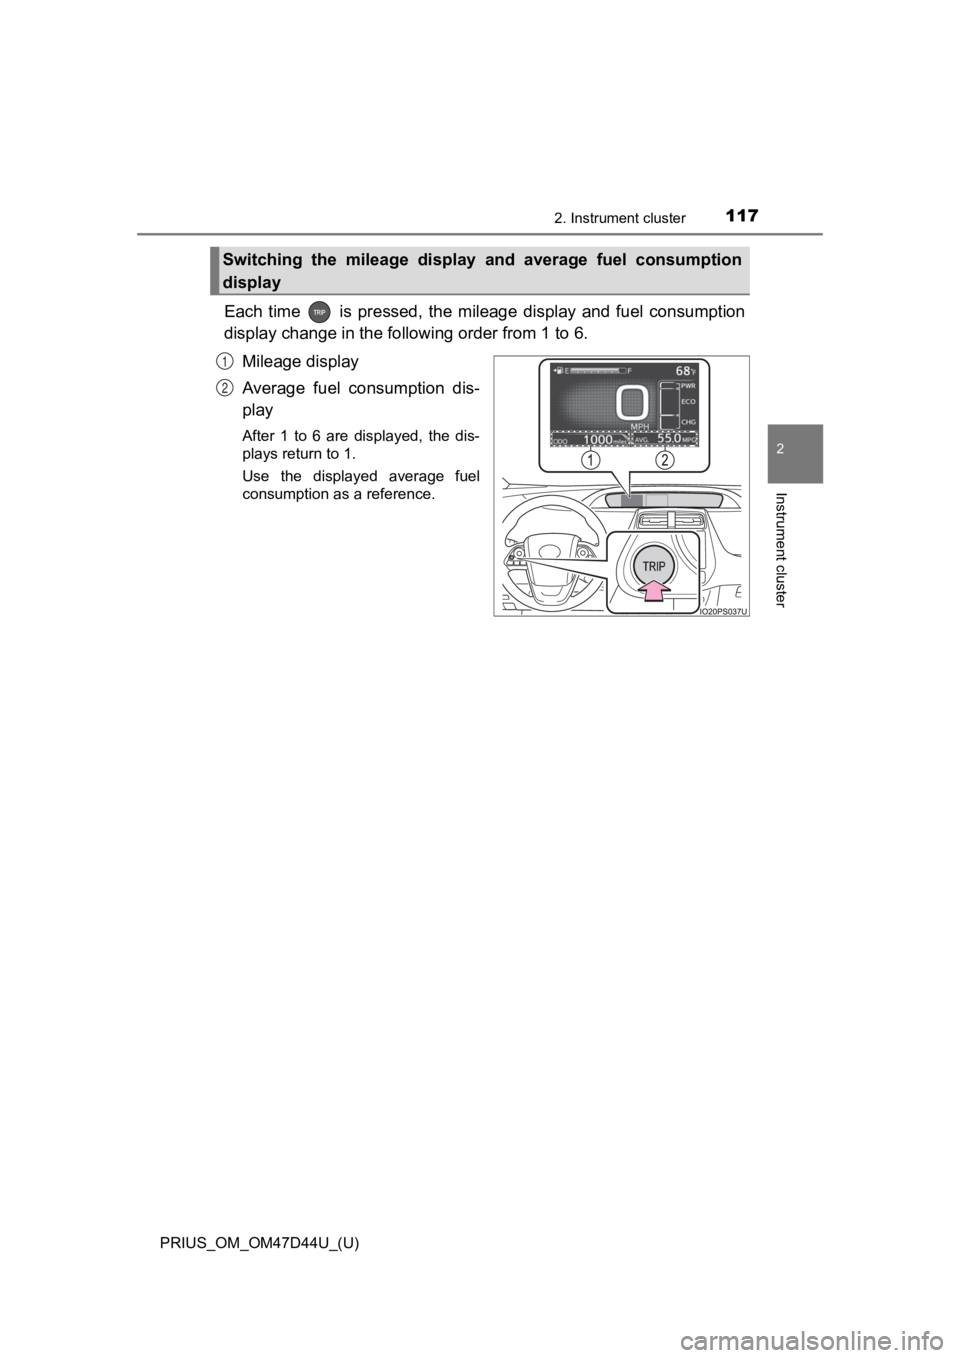
Each time is pressed, the mileage display and fuel consumption
display change in the following order from 1 to 6.
Mileage display
Average fuel consumption dis-
play
After 1 to 6 are displayed, the dis-
plays return to 1.
Use the displayed average fuel
consumption as a reference.
Switching the mileage display and average fuel consumption
display
1
2
Page 135 of 728
PRIUS_OM_OM47D44U_(U)
1352. Instrument cluster
2
Instrument cluster
◆“Drive Monitor”
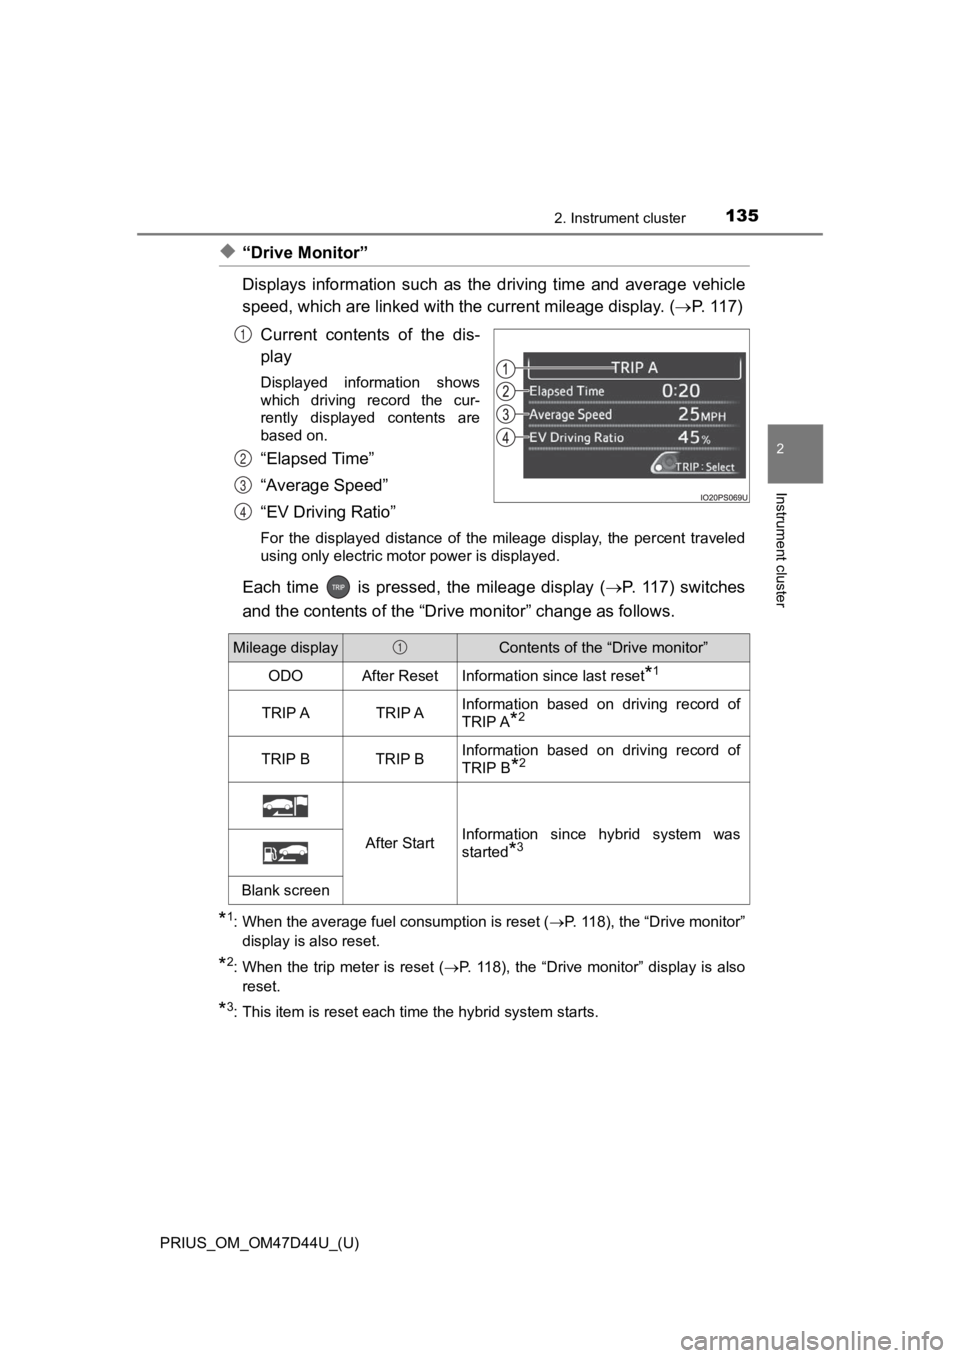
Displays information such as the driving time and average vehicle
speed, which are linked with the current mileage display. ( P. 117)
Current contents of the dis-
play
Displayed information shows
which driving record the cur-
rently displayed contents are
based on.
“Elapsed Time”
“Average Speed”
“EV Driving Ratio”
For the displayed distance of the mileage display, the percent traveled
using only electric motor power is displayed.
Each time is pressed, the mileage display ( P. 11 7 ) s w i t c h e s
and the contents of the “Dri ve monitor” change as follows.
*1: When the average fuel consumption is reset ( P. 118), the “Drive monitor”
display is also reset.
*2: When the trip meter is reset ( P. 118), the “Drive monitor” display is also
reset.
*3: This item is reset each time the hybrid system starts.
1
2
3
4
Mileage displayContents of the “Drive monitor”
ODOAfter ResetInformation since last reset*1
TRIP ATRIP AInformation based on driving record of
TRIP A
*2
TRIP BTRIP BInformation based on driving record of
TRIP B
*2
After StartInformation since hybrid system was
started
*3
Blank screen
1
Page 149 of 728
PRIUS_OM_OM47D44U_(U)
1492. Instrument cluster
2
Instrument cluster
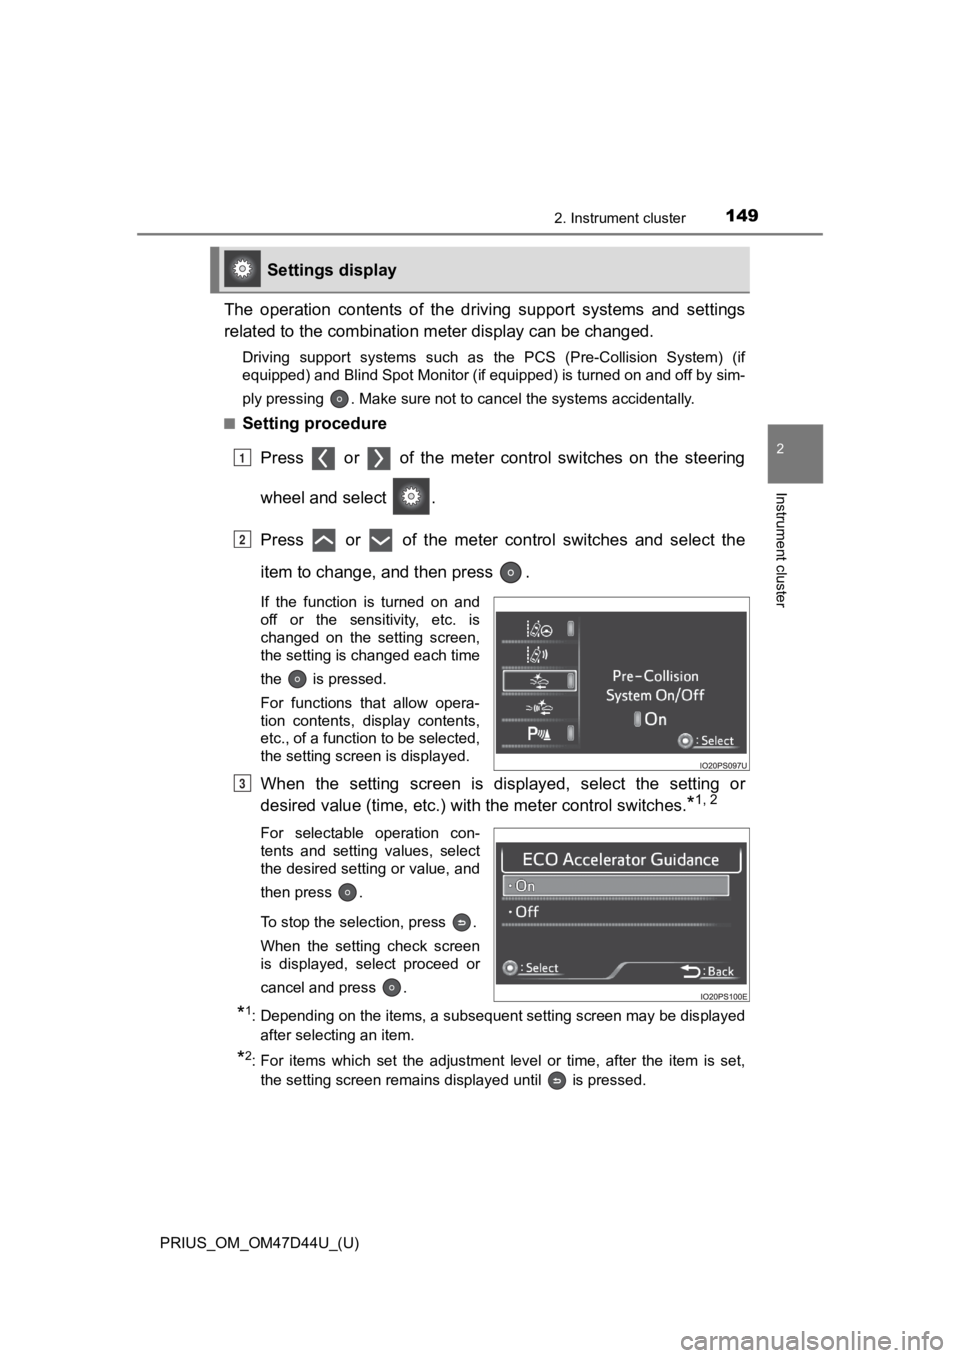
The operation contents of the driving support systems and settings
related to the com bination meter disp lay can be changed.
Driving support systems such as the PCS (Pre-Collision System) (if
equipped) and Blind Spot Monitor (if equipped) is turned on and off by sim-
ply pressing . Make sure not to cancel the systems accidentally .
■
Setting procedure
Press or of the meter cont rol switches on the steering
wheel and select .
Press or of the meter control switches and select the
item to change, and then press .
If the function is turned on and
off or the sensitivity, etc. is
changed on the setting screen,
the setting is changed each time
the is pressed.
For functions that allow opera-
tion contents, display contents,
etc., of a function to be selected,
the setting screen is displayed.
When the setting screen is displayed, select the setting or
desired value (time, etc.) wit h the meter control switches.
*1, 2
For selectable operation con-
tents and setting values, select
the desired setting or value, and
then press .
To stop the selection, press .
When the setting check screen
is displayed, select proceed or
cancel and press .
*1: Depending on the items, a subsequent setting screen may be dis played
after selecting an item.
*2: For items which set the adjustment level or time, after the it em is set,
the setting screen remains displayed until is pressed.
Settings display
1
2
3
Page 185 of 728
PRIUS_OM_OM47D44U_(U)
1853-2. Opening, closing and locking the doors
3
Operation of each component
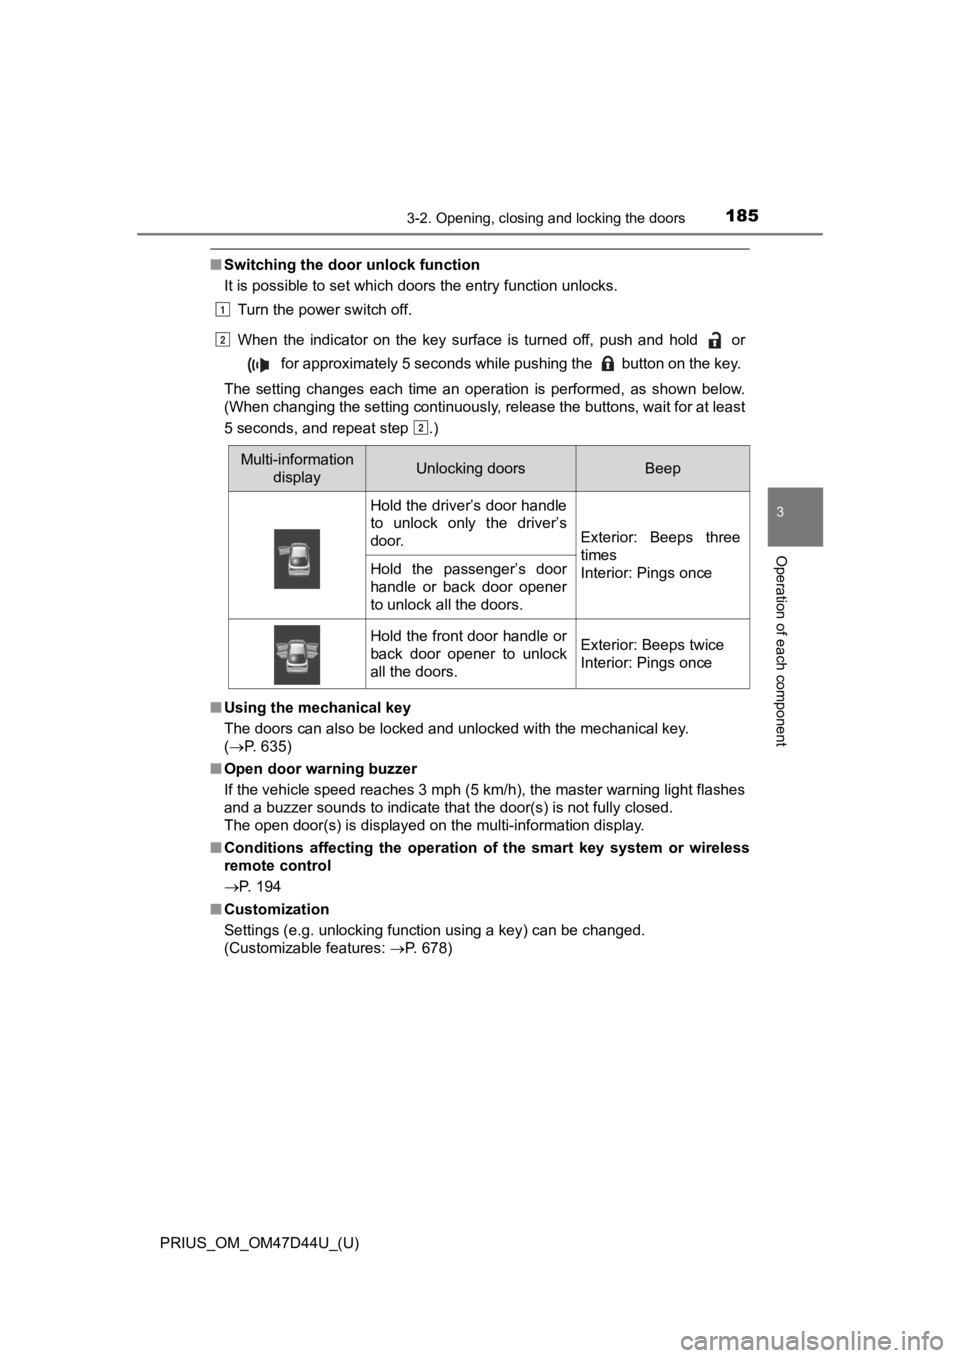
■Switching the door unlock function
It is possible to set which doors the entry function unlocks.
Turn the power switch off.
When the indicator on the key surface is turned off, push and h old or
for approximately 5 seconds while pushing the button on the k ey.
The setting changes each time an operation is performed, as sho wn below.
(When changing the setting continuously, release the buttons, w ait for at least
5 seconds, and repeat step .)
■ Using the mechanical key
The doors can also be locked and unlocked with the mechanical k ey.
( P. 635)
■ Open door warning buzzer
If the vehicle speed reaches 3 mph (5 km/h), the master warning light flashes
and a buzzer sounds to indicate that the door(s) is not fully c losed.
The open door(s) is displayed on the multi-information display.
■ Conditions affecting the operation of the smart key system or w ireless
remote control
P. 194
■ Customization
Settings (e.g. unlocking function using a key) can be changed.
(Customizable features: P. 678)
Multi-information
displayUnlocking doorsBeep
Hold the driver’s door handle
to unlock only the driver’s
door.
Exterior: Beeps three
times
Interior: Pings once
Hold the passenger’s door
handle or back door opener
to unlock all the doors.
Hold the front door handle or
back door opener to unlock
all the doors.Exterior: Beeps twice
Interior: Pings once
1
2
2