TOYOTA PRIUS PLUG-IN 2014 Owners Manual
PRIUS PLUG-IN 2014
TOYOTA
TOYOTA
https://www.carmanualsonline.info/img/14/58480/w960_58480-0.png
TOYOTA PRIUS PLUG-IN 2014 Owners Manual
Trending: spare wheel, oil, brake sensor, ground clearance, fuel cap release, coolant reservoir, set clock
Page 611 of 724
572
5-2. Steps to take in an emergency
PRIUS PHV_OM_OM47856U_(U)
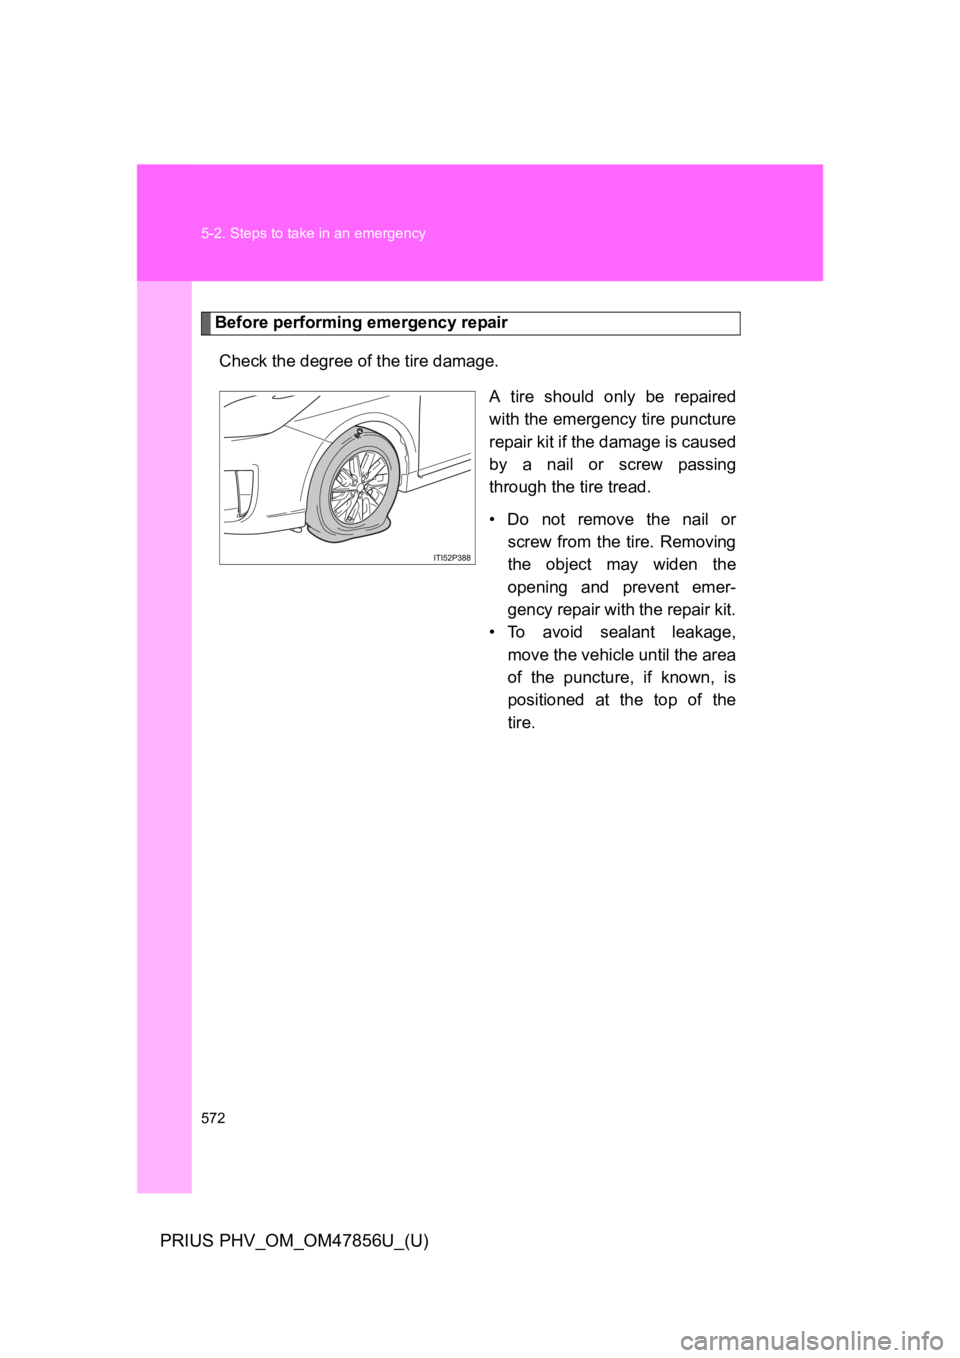
Before performing emergency repair
Check the degree of the tire damage.
A tire should only be repaired
with the emergency tire puncture
repair kit if the damage is caused
by a nail or screw passing
through the tire tread.
•Do not remove the nail or
screw from the tire. Removing
the object may widen the
opening and prevent emer-
gency repair with the repair kit.
•To avoid sealant leakage,
move the vehicle until the area
of the puncture, if known, is
positioned at the top of the
tire.
Page 612 of 724
5
When trouble arises
573
5-2. Steps to take in an emergency
PRIUS PHV_OM_OM47856U_(U)
■In the following cases, the tire cannot be repaired with the emer-
gency tire puncture repair kit. Contact your Toyota dealer.
●When the tire is damaged due to driving without sufficient air pres-
sure
●When there are any cracks or damage at any location on the tire,
such as on the side wall, except the tread
●When the tire is visibly separated from the wheel
●When the cut or damage to the tread is 0.16 in. (4 mm) long or more
●When the wheel is damaged
●When two or more tires have been punctured
●When more than 2 sharp objects such as nails or screws have
passed through the tread on a single tire
●When the sealant has expired
Page 613 of 724
574
5-2. Steps to take in an emergency
PRIUS PHV_OM_OM47856U_(U)
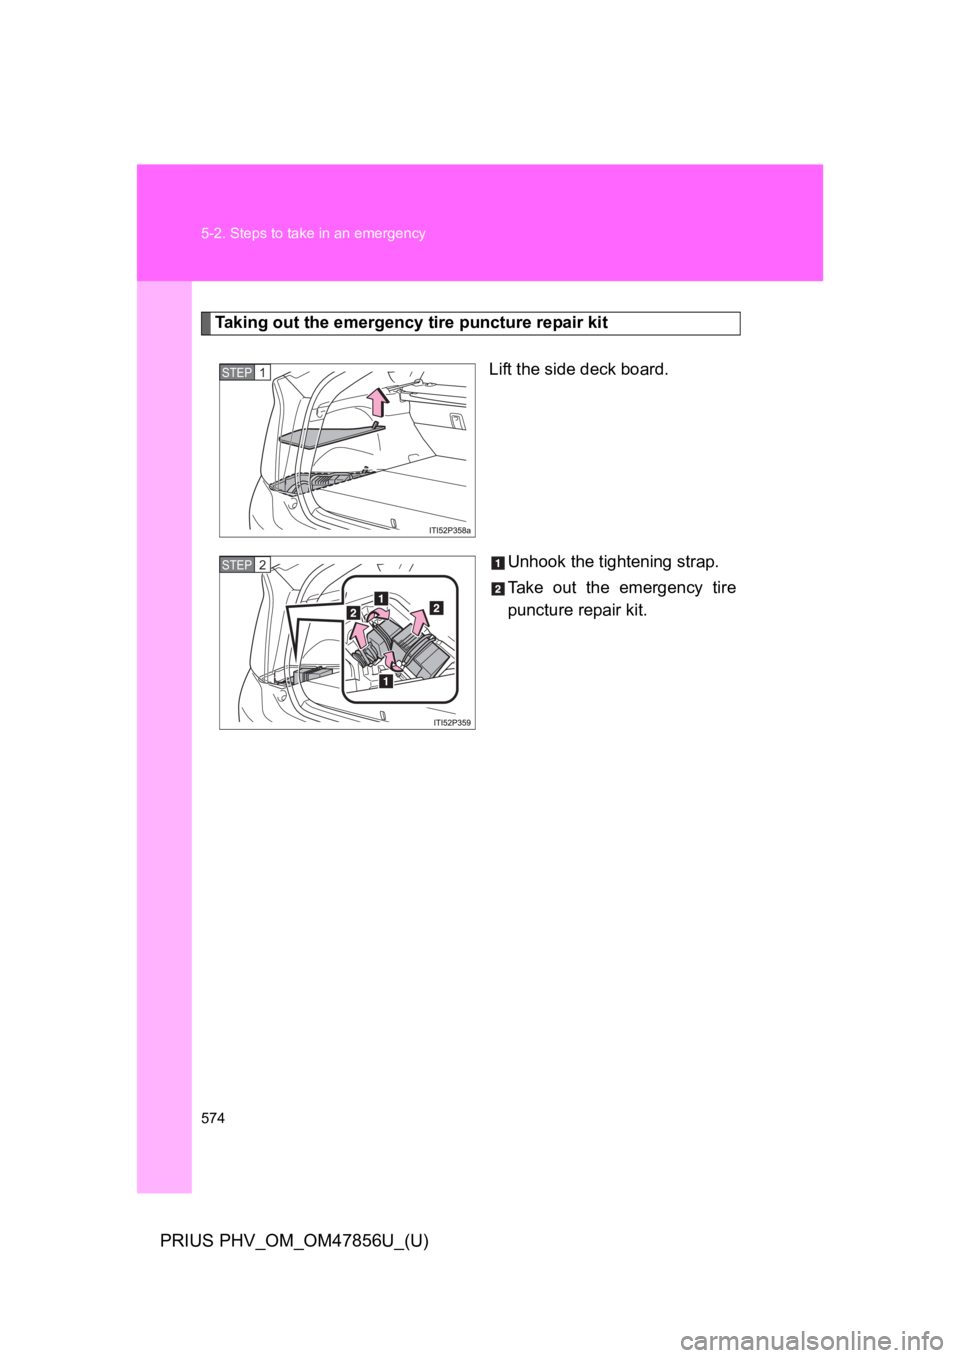
Ta k i n g o u t t h e e m e r g e n c y t i r e p u n c t u r e r e pa i r k i t
Lift the side deck board.
Unhook the tightening strap.
Ta k e o u t t h e e m e r g e n c y t i r e
puncture repair kit.
STEP 1
STEP 2
Page 614 of 724
5
When trouble arises
575
5-2. Steps to take in an emergency
PRIUS PHV_OM_OM47856U_(U)
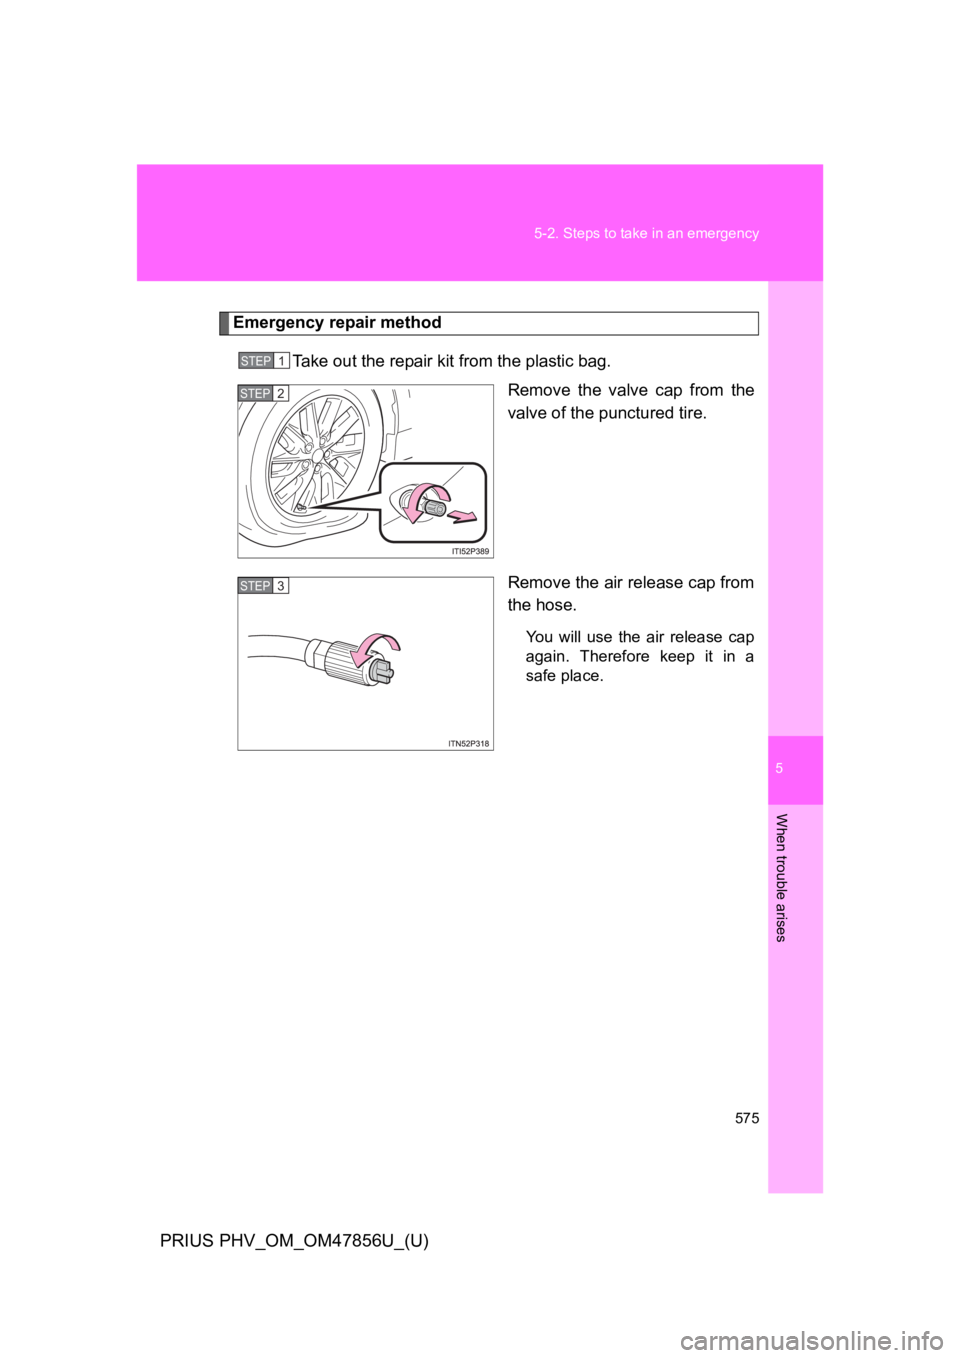
Emergency repair method
Ta k e o u t t h e r e p a i r k i t f r o m t h e p l a s t i c b a g .
Remove the valve cap from the
valve of the punctured tire.
Remove the air release cap from
the hose.
Yo u w i l l u s e t h e a i r r e l e a s e c a p
again. Therefore keep it in a
safe place.
STEP 1
STEP 2
STEP 3
Page 615 of 724
576
5-2. Steps to take in an emergency
PRIUS PHV_OM_OM47856U_(U)
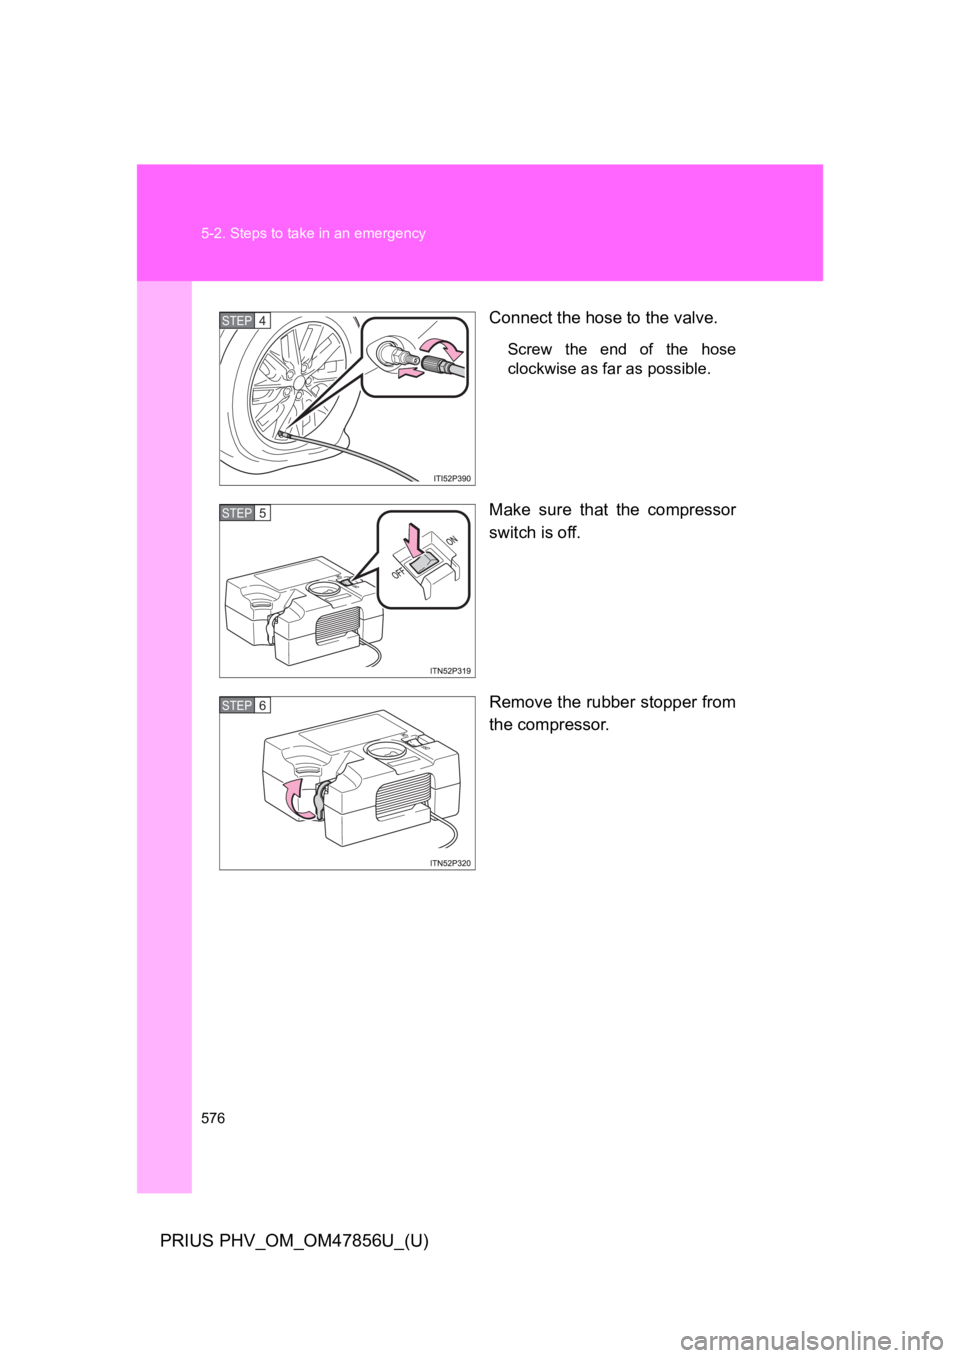
Connect the hose to the valve.
Screw the end of the hose
clockwise as far as possible.
Make sure that the compressor
switch is off.
Remove the rubber stopper from
the compressor.
STEP 4
STEP 5
STEP 6
Page 616 of 724
5
When trouble arises
577
5-2. Steps to take in an emergency
PRIUS PHV_OM_OM47856U_(U)
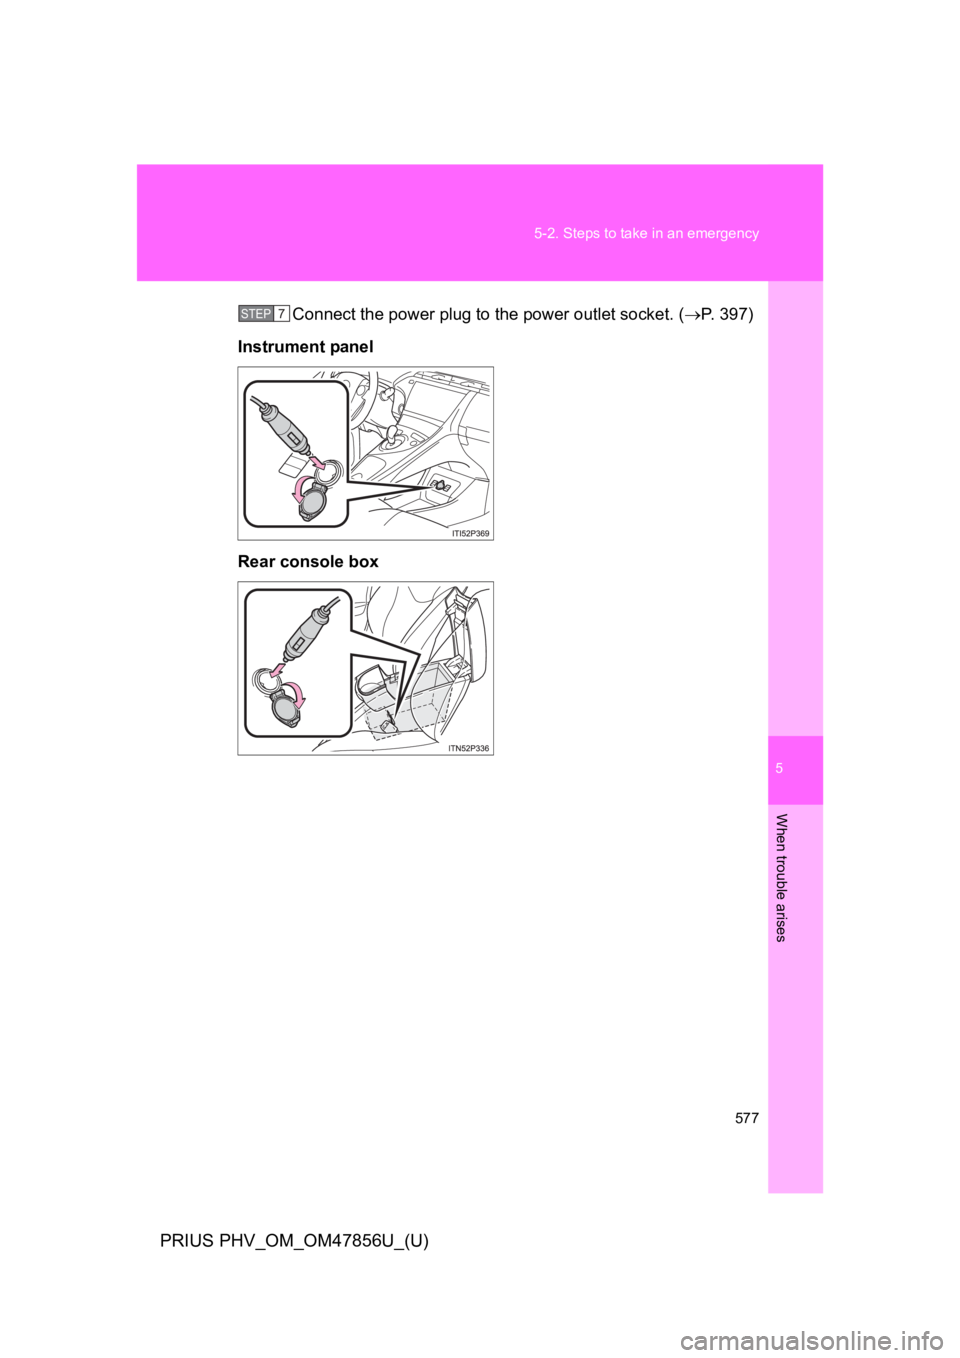
Connect the power plug to the power outlet socket. (→P. 3 9 7 )
Instrument panel
Rear console box
STEP7
Page 617 of 724
578
5-2. Steps to take in an emergency
PRIUS PHV_OM_OM47856U_(U)
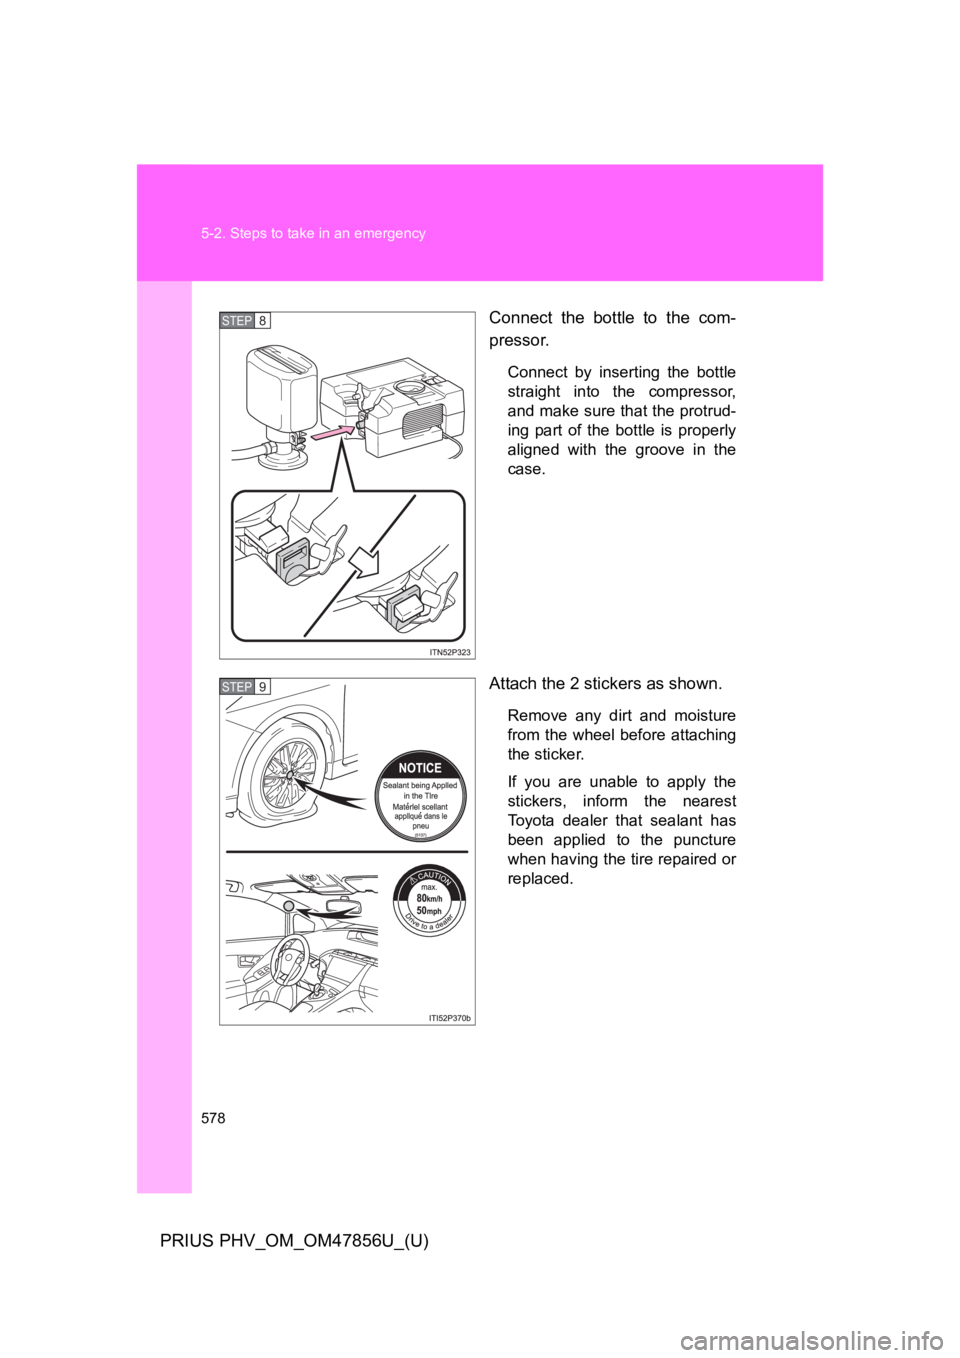
Connect the bottle to the com-
pressor.
Connect by inserting the bottle
straight into the compressor,
and make sure that the protrud-
ing part of the bottle is properly
aligned with the groove in the
case.
Attach the 2 stickers as shown.
Remove any dirt and moisture
from the wheel before attaching
the sticker.
If you are unable to apply the
stickers, inform the nearest
To y o t a d e a l e r t h a t s e a l a n t h a s
been applied to the puncture
when having the tire repaired or
replaced.
STEP8
STEP9
Page 618 of 724
5
When trouble arises
579
5-2. Steps to take in an emergency
PRIUS PHV_OM_OM47856U_(U)
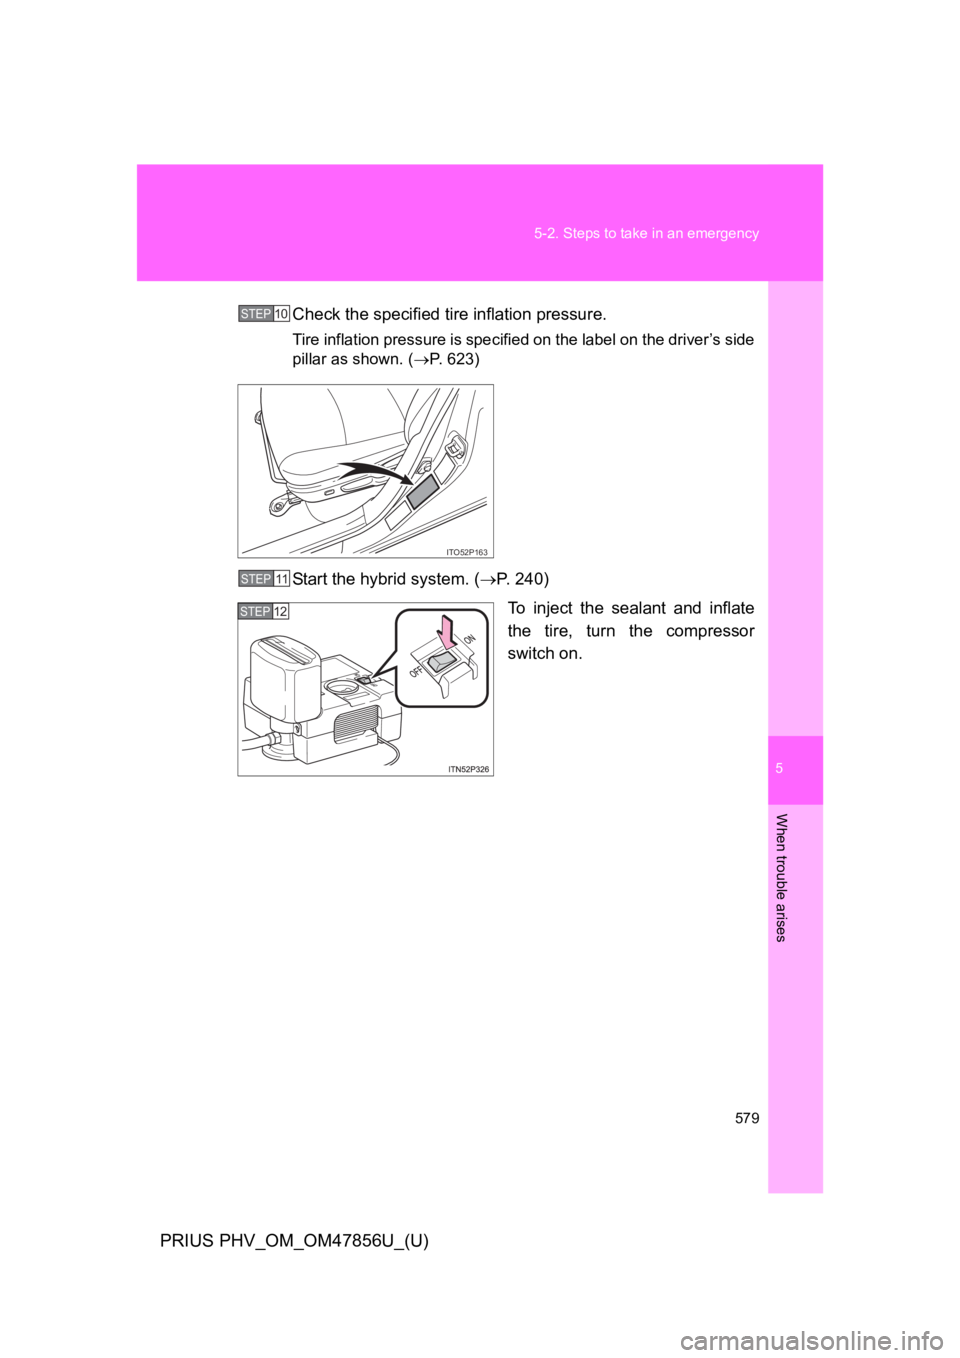
Check the specified tire inflation pressure.
Tire inflation pressure is specified on the label on the driver’s side
pillar as shown. (→P. 6 2 3 )
Start the hybrid system. (→P. 2 4 0 )
To i n j e c t t h e s e a l a n t a n d i n f l a t e
the tire, turn the compressor
switch on.
STEP10
ITO52P163
STEP11
STEP12
Page 619 of 724
580
5-2. Steps to take in an emergency
PRIUS PHV_OM_OM47856U_(U)
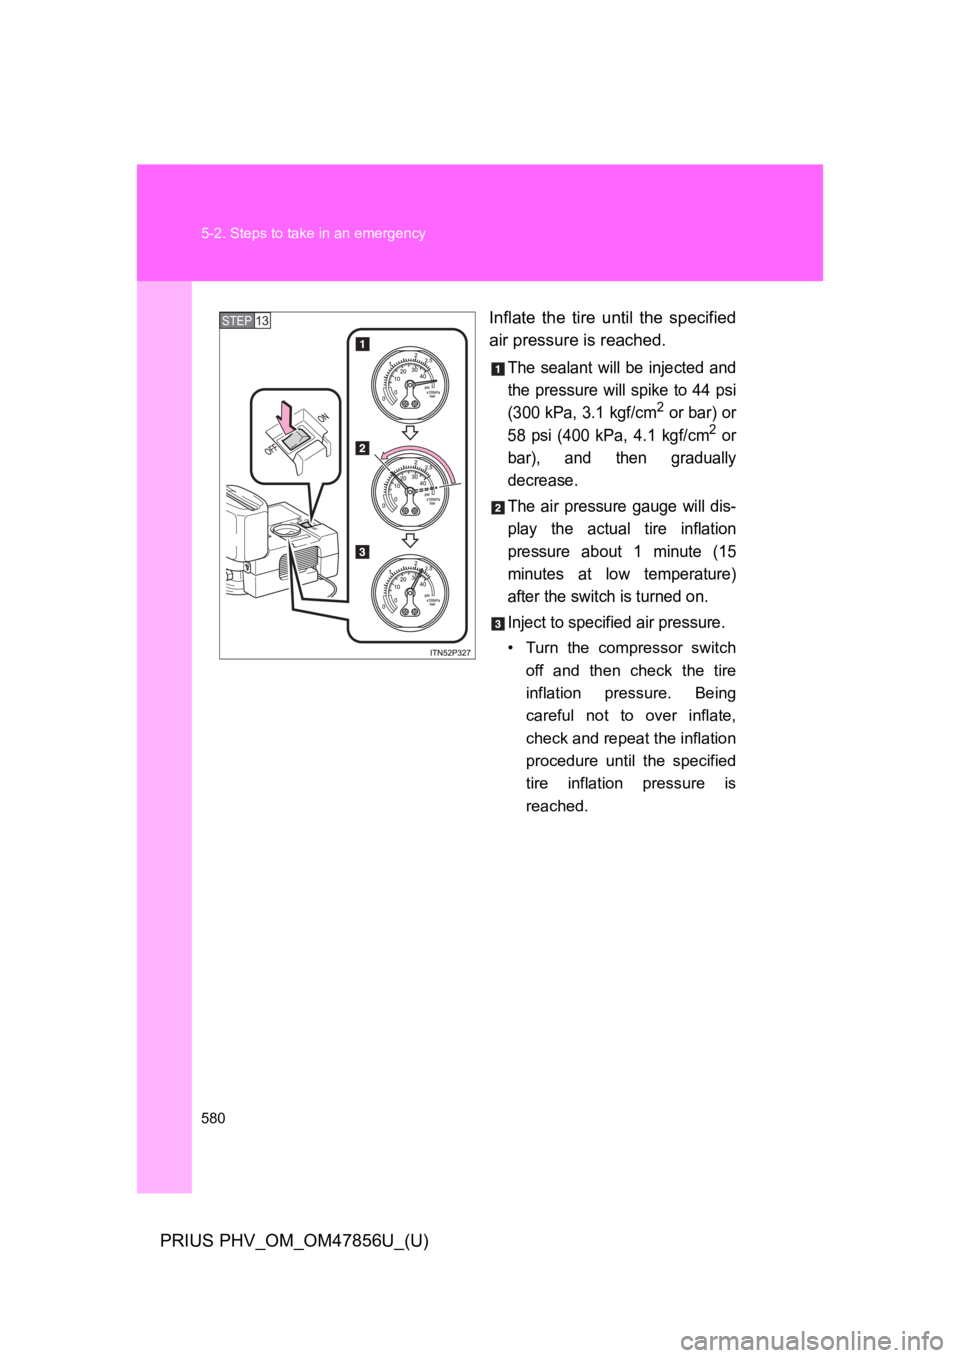
Inflate the tire until the specified
air pressure is reached.
The sealant will be injected and
the pressure will spike to 44 psi
(300 kPa, 3.1 kgf/cm2 or bar) or
58 psi (400 kPa, 4.1 kgf/cm2 or
bar), and then gradually
decrease.
The air pressure gauge will dis-
play the actual tire inflation
pressure about 1 minute (15
minutes at low temperature)
after the switch is turned on.
Inject to specified air pressure.
•Turn the compressor switch
off and then check the tire
inflation pressure. Being
careful not to over inflate,
check and repeat the inflation
procedure until the specified
tire inflation pressure is
reached.
STEP13
Page 620 of 724
5
When trouble arises
581
5-2. Steps to take in an emergency
PRIUS PHV_OM_OM47856U_(U)
•If the tire inflation pressure is
still lower than the specified
point after inflation for 10
minutes (40 minutes at low
temperature) with the switch
on, the tire is too damaged to
be repaired. Turn the com-
pressor switch off and con-
tact your Toyota dealer.
•If the tire inflation pressure
exceeds the specified air
pressure, let out some air to
adjust the tire inflation pres-
sure. (→P. 5 8 5 , 6 2 3 )
With the compressor switch off, disconnect the hose from the
valve on the tire and then pull out the power plug from the
power outlet socket.
Some sealant may leak when the hose is removed.
Install the valve cap onto the valve of the emergency repaired
tire.
STEP14
STEP15
Trending: alarm, oil type, odometer, change key battery, spare tire, check engine light, clock reset
