ECU TOYOTA PRIUS PLUG-IN HYBRID 2023 Owner's Guide
[x] Cancel search | Manufacturer: TOYOTA, Model Year: 2023, Model line: PRIUS PLUG-IN HYBRID, Model: TOYOTA PRIUS PLUG-IN HYBRID 2023Pages: 818, PDF Size: 128.72 MB
Page 76 of 818
741-3. Theft deterrent system
Prius Plug-in Hybrid_OM_OM47F38E_(EE)
Immobilizer system
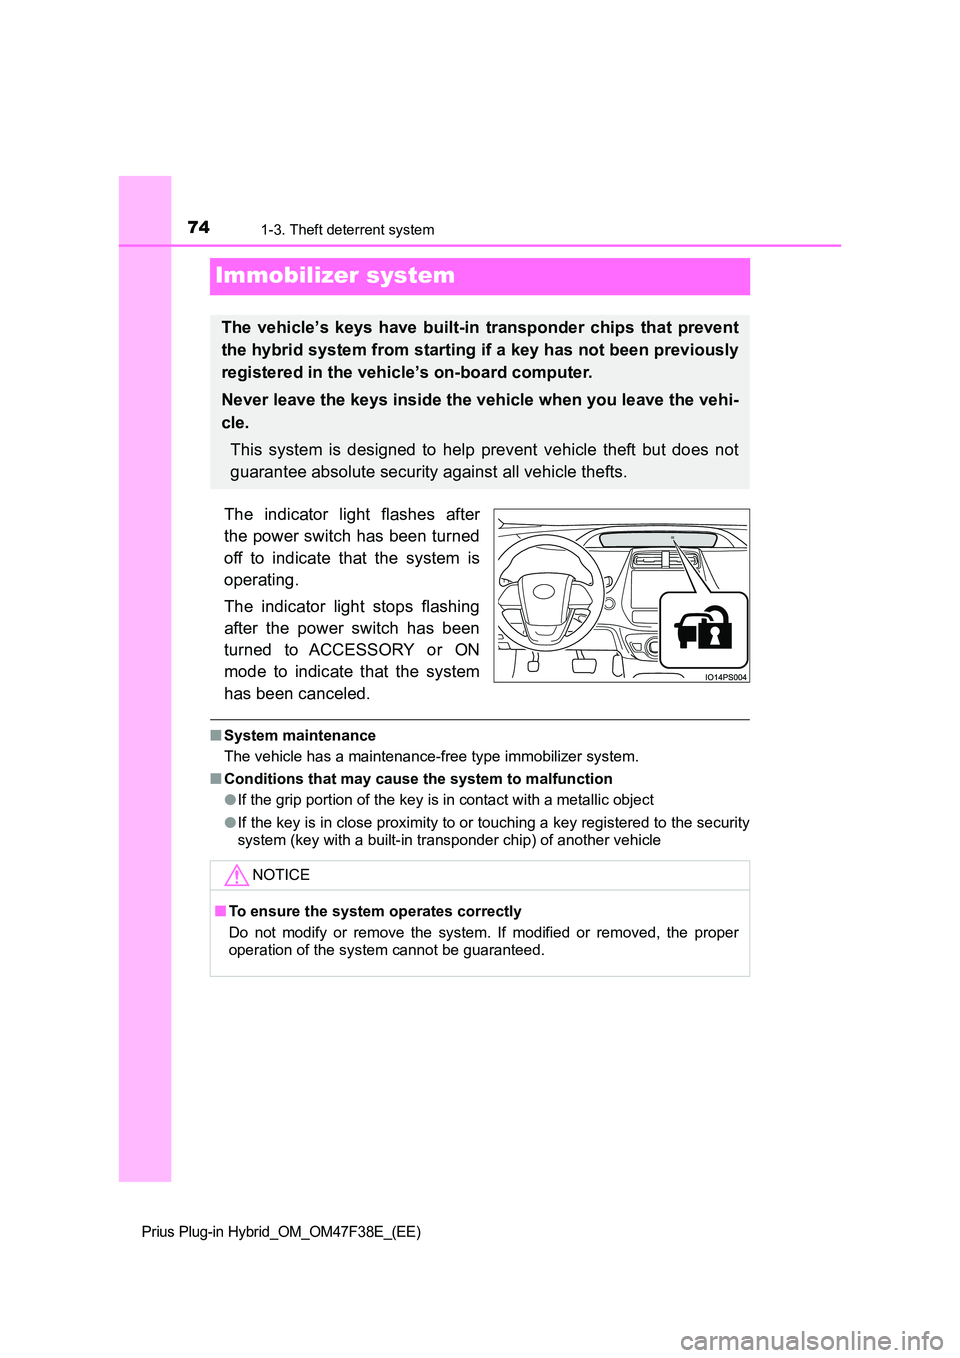
The indicator light flashes after
the power switch has been turned
off to indicate that the system is
operating.
The indicator light stops flashing
after the power switch has been
turned to ACCESSORY or ON
mode to indicate that the system
has been canceled.
■ System maintenance
The vehicle has a maintenance-free type immobilizer system.
■ Conditions that may cause the system to malfunction
● If the grip portion of the key is in contact with a metallic object
● If the key is in close proximity to or touching a key registered to the security
system (key with a built-in transponder chip) of another vehicle
The vehicle’s keys have built-in transponder chips that prevent
the hybrid system from starting if a key has not been previously
registered in the vehicle’s on-board computer.
Never leave the keys inside the vehicle when you leave the vehi-
cle.
This system is designed to help prevent vehicle theft but does not
guarantee absolute security against all vehicle thefts.
NOTICE
■ To ensure the system operates correctly
Do not modify or remove the system. If modified or removed, the proper
operation of the system cannot be guaranteed.
Page 77 of 818
75
1
1-3. Theft deterrent system
Prius Plug-in Hybrid_OM_OM47F38E_(EE)
For safety and security
Double locking system
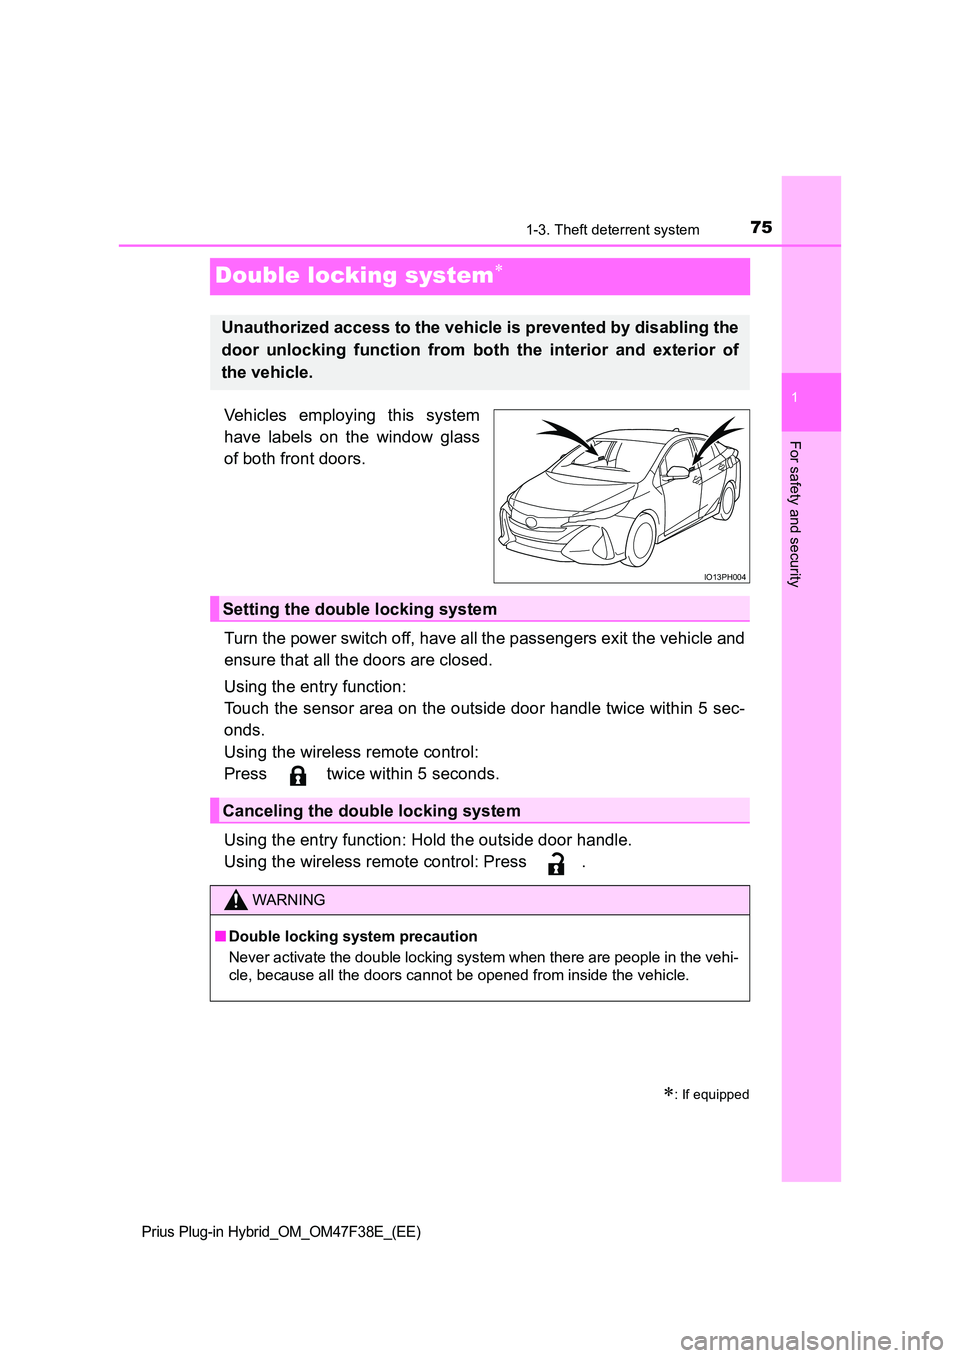
Vehicles employing this system
have labels on the window glass
of both front doors.
Turn the power switch off, have all the passengers exit the vehicle and
ensure that all the doors are closed.
Using the entry function:
Touch the sensor area on the outside door handle twice within 5 sec-
onds.
Using the wireless remote control:
Press twice within 5 seconds.
Using the entry function: Hold the outside door handle.
Using the wireless remote control: Press .
: If equipped
Unauthorized access to the vehicle is prevented by disabling the
door unlocking function from both the interior and exterior of
the vehicle.
IO13PH004
Setting the double locking system
Canceling the double locking system
WARNING
■ Double locking system precaution
Never activate the double locking system when there are people in the vehi-
cle, because all the doors cannot be opened from inside the vehicle.
Page 79 of 818
771-3. Theft deterrent system
1
Prius Plug-in Hybrid_OM_OM47F38E_(EE)
For safety and security
■System maintenance
The vehicle has a maintenance-free type alarm system.
■ Items to check before locking the vehicle
To prevent unexpected triggering of the alarm and vehicle theft, make sure of
the following.
● Nobody is in the vehicle.
● The side windows are closed before the alarm is set.
● No valuables or other personal items are left in the vehicle.
■ Triggering of the alarm
The alarm may be triggered in the following situations:
(Stopping the alarm deactivates the alarm system.)
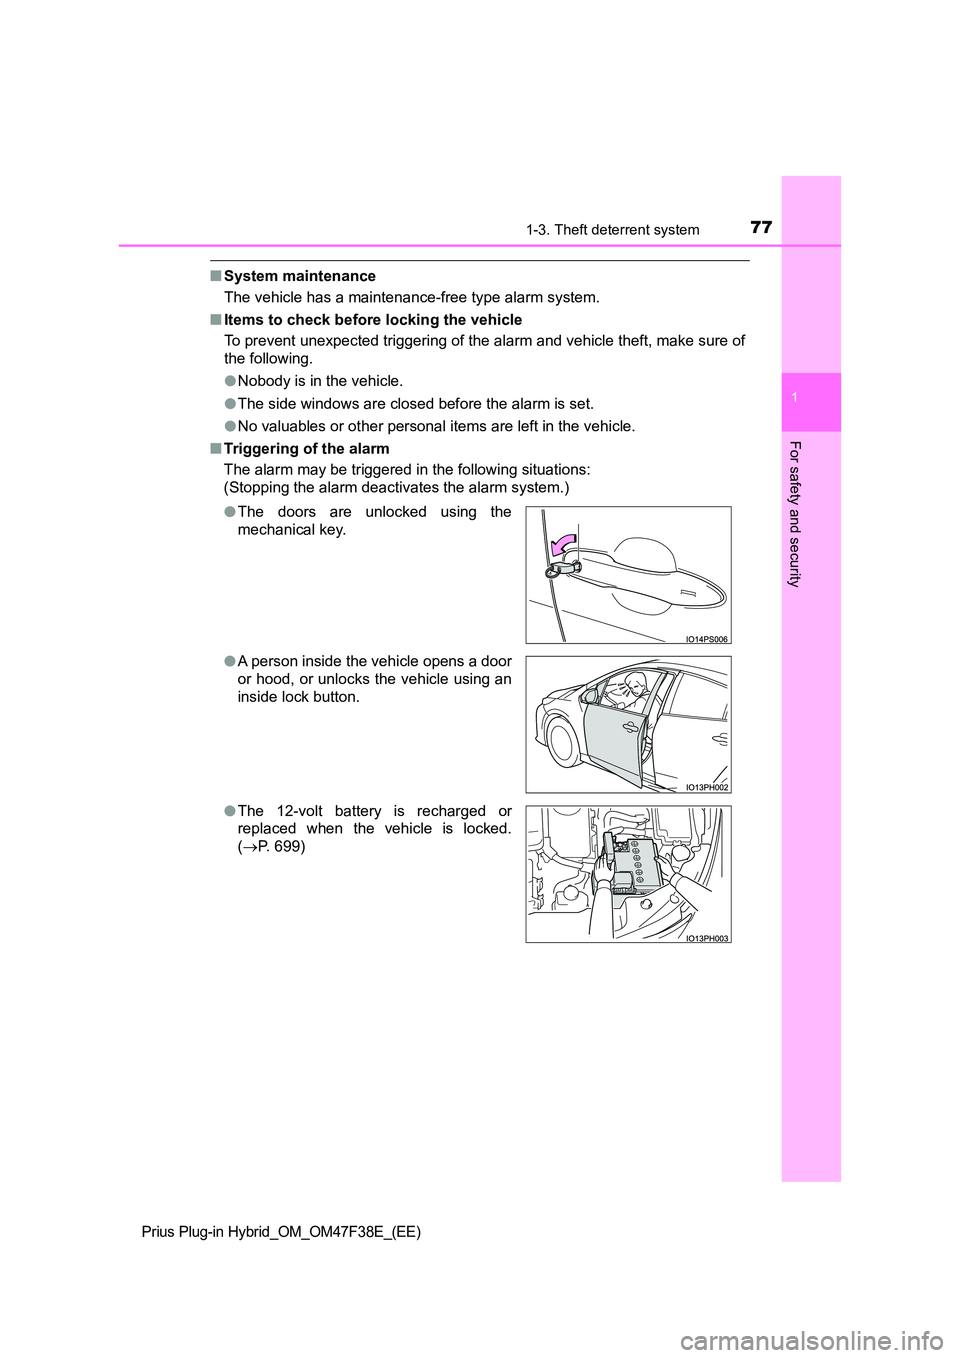
● The doors are unlocked using the
mechanical key.
● A person inside the vehicle opens a door
or hood, or unlocks the vehicle using an
inside lock button.
● The 12-volt battery is recharged or
replaced when the vehicle is locked.
( P. 699)
Page 81 of 818
791-3. Theft deterrent system
1
Prius Plug-in Hybrid_OM_OM47F38E_(EE)
For safety and security
The intrusion sensor detects intruders or movement in the vehicle.
This system is designed to deter and prevent vehicle theft but does
not guarantee absolute security against all intrusions.
■Setting the intrusion sensor
The intrusion sensor will be set automatically when the alarm is set.
( P. 7 6 )
■Canceling the intrusion sensor
If you are leaving pets or other moving things inside the vehicle,
make sure to disable the intrusion sensor before setting the alarm,
as they will respond to movement inside the vehicle.
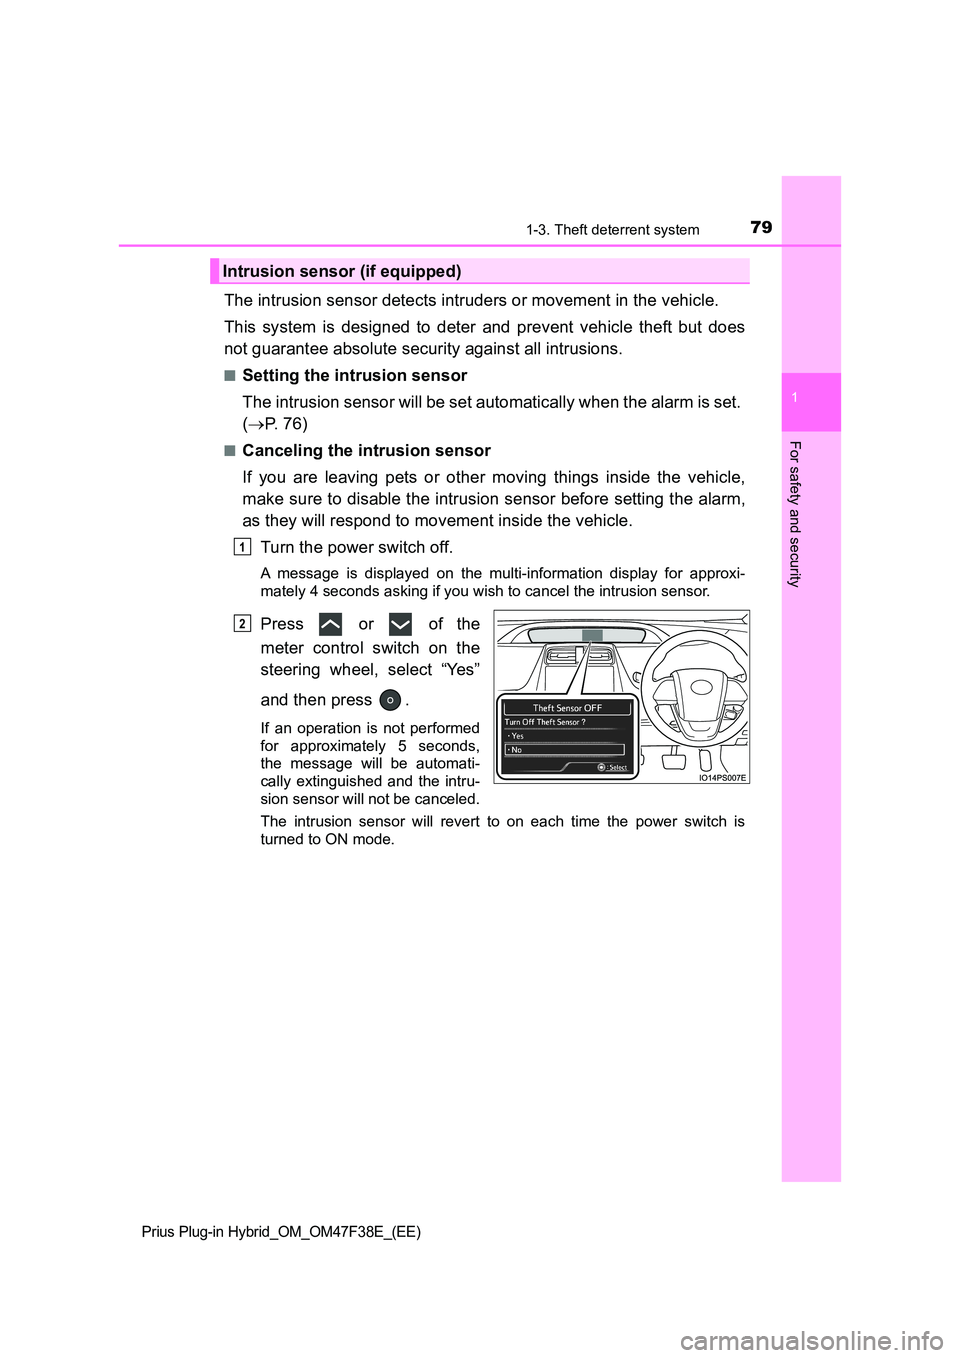
Turn the power switch off.
A message is displayed on the multi-information display for approxi-
mately 4 seconds asking if you wish to cancel the intrusion sensor.
Press or of the
meter control switch on the
steering wheel, select “Yes”
and then press .
If an operation is not performed
for approximately 5 seconds,
the message will be automati-
cally extinguished and the intru-
sion sensor will not be canceled.
The intrusion sensor will revert to on each time the power switch is
turned to ON mode.
Intrusion sensor (if equipped)
1
2
Page 83 of 818
811-3. Theft deterrent system
1
Prius Plug-in Hybrid_OM_OM47F38E_(EE)
For safety and security
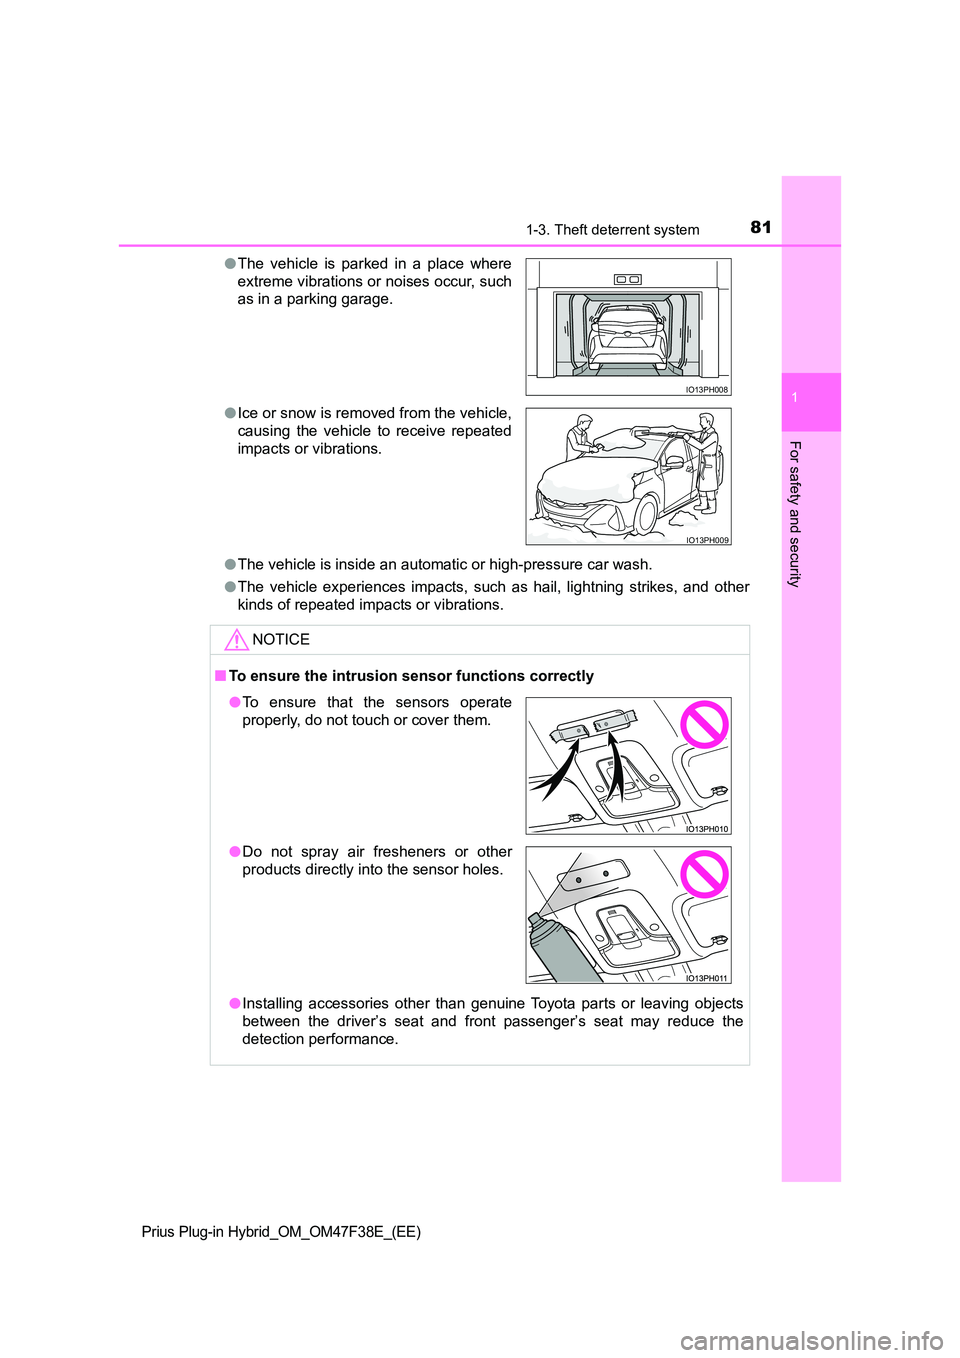
●The vehicle is inside an automatic or high-pressure car wash.
● The vehicle experiences impacts, such as hail, lightning strikes, and other
kinds of repeated impacts or vibrations.
● The vehicle is parked in a place where
extreme vibrations or noises occur, such
as in a parking garage.
● Ice or snow is removed from the vehicle,
causing the vehicle to receive repeated
impacts or vibrations.
NOTICE
■ To ensure the intrusion sensor functions correctly
● Installing accessories other than genuine Toyota parts or leaving objects
between the driver’s seat and front passenger’s seat may reduce the
detection performance.
IO13PH008
IO13PH009
● To ensure that the sensors operate
properly, do not touch or cover them.
● Do not spray air fresheners or other
products directly into the sensor holes.
Page 123 of 818
1212-2. Charging
2
Plug-in hybrid system
Prius Plug-in Hybrid_OM_OM47F38E_(EE)
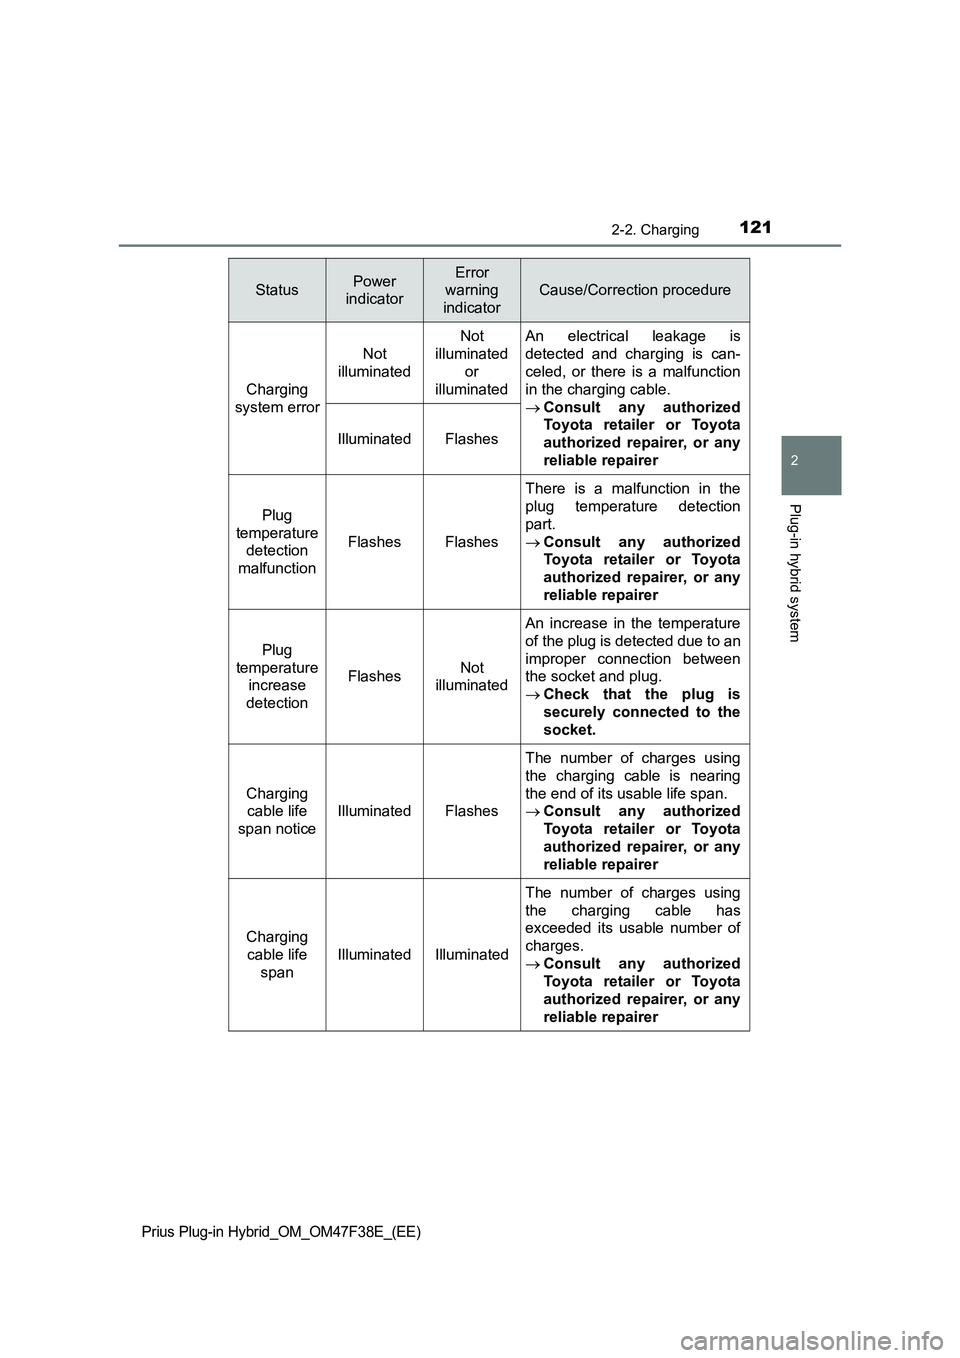
StatusPower
indicatorError
warning
indicator
Cause/Correction procedure
Charging
system errorNot
illuminatedNot
illuminated
or
illuminatedAn electrical leakage is
detected and charging is can-
celed, or there is a malfunction
in the charging cable.
Consult any authorized
Toyota retailer or Toyota
authorized repairer, or any
reliable repairer Illuminated Flashes
Plug
temperature
detection
malfunction
FlashesFlashes
There is a malfunction in the
plug temperature detection
part.
Consult any authorized
Toyota retailer or Toyota
authorized repairer, or any
reliable repairer
Plug
temperature
increase
detection
FlashesNot
illuminated
An increase in the temperature
of the plug is detected due to an
improper connection between
the socket and plug.
Check that the plug is
securely connected to the
socket.
Charging
cable life
span notice
IlluminatedFlashes
The number of charges using
the charging cable is nearing
the end of its usable life span.
Consult any authorized
Toyota retailer or Toyota
authorized repairer, or any
reliable repairer
Charging
cable life
span
IlluminatedIlluminated
The number of charges using
the charging cable has
exceeded its usable number of
charges.
Consult any authorized
Toyota retailer or Toyota
authorized repairer, or any
reliable repairer
Page 125 of 818

1232-2. Charging
2
Plug-in hybrid system
Prius Plug-in Hybrid_OM_OM47F38E_(EE)
With the release key fully
inserted into the release slot of
the CCID (Charging Circuit
Interrupting Device), turn the
plug-cord connector nut of the
plug-cord to remove the cord.
After the plug-cord is removed,
remove the release key.
Do not leave the vehicle alone with the plug-cord removed. If the plug-cord
is not installed, water or other foreign matter may enter the CCID
(Charging Circuit Interrupting Device), resulting in a malfunction.
Align the protrusion of the CCID
(Charging Circuit Interrupting
Device), with the groove of the
plug-cord, insert the plug-cord
into the CCID (Charging Circuit
Interrupting Device), and then
turn the plug-cord connector
nut of the plug-cord to install it.
Make sure that there are no foreign
objects attached to the connection
before installing the plug-cord.
Remove any foreign objects if they
are attached. Otherwise, water or
other foreign matter may enter the
CCID (Charging Circuit Interrupting
Device), resulting in a malfunction.
Turn the plug-cord connector nut of the plug-cord in the opposite direction
of removal until a click sound is heard and the plug-cord is secured.
Install the plug-cord connector cap and release key to the plug-cord
that has been removed.
Securely install the release key to the protection cap to prevent it from
being lost. Also, make sure that the release key does not fall out of the pro-
tection cap accidently.
Store the plug-cord in a safe, clean and dry place.
5
6
7
Page 128 of 818
1262-2. Charging
Prius Plug-in Hybrid_OM_OM47F38E_(EE)
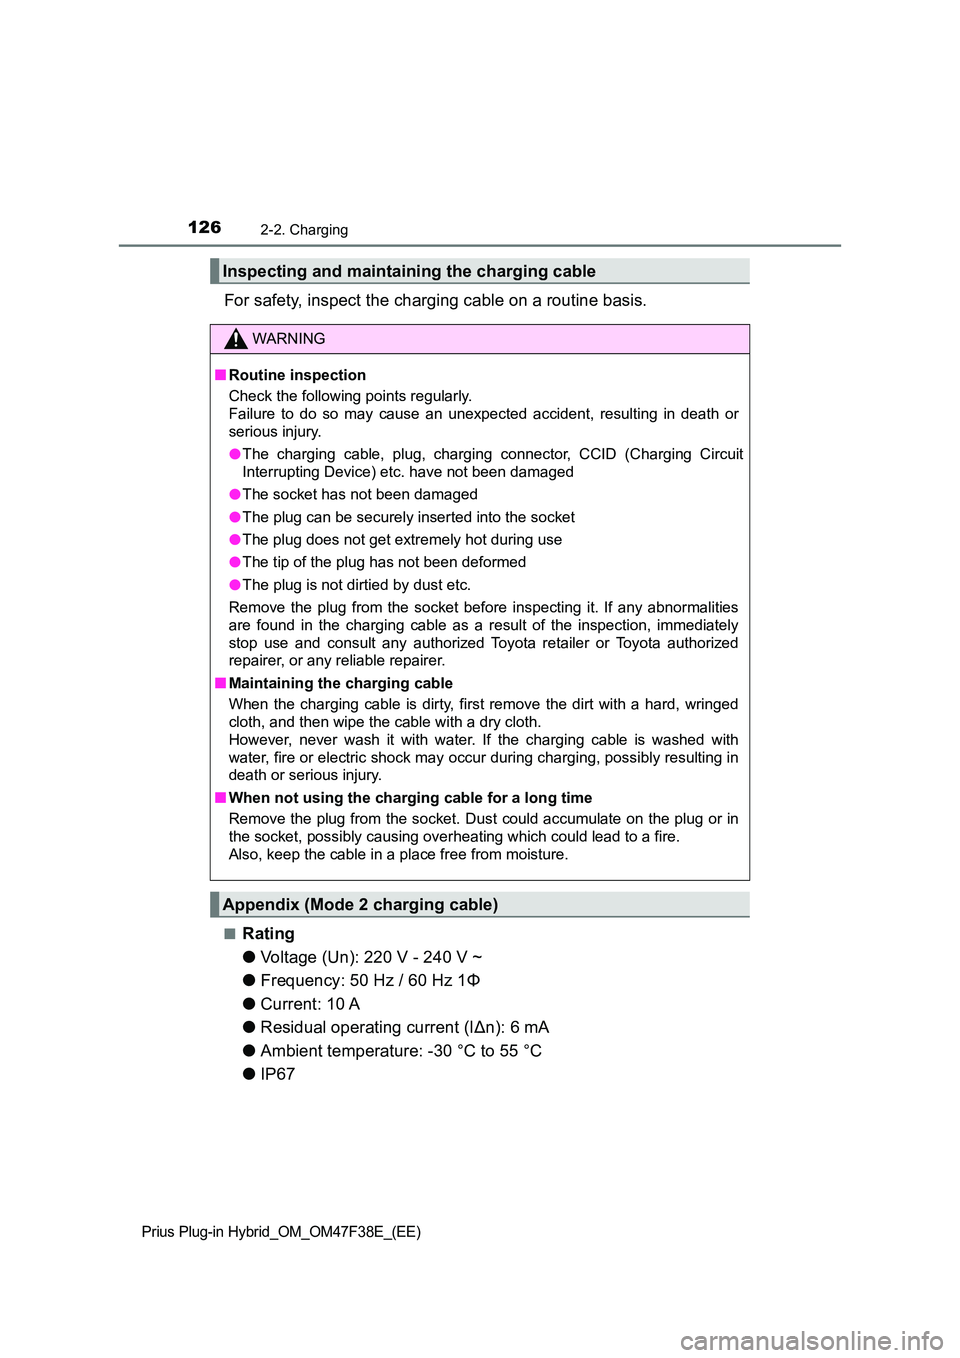
For safety, inspect the charging cable on a routine basis.
■Rating
● Voltage (Un): 220 V - 240 V ~
● Frequency: 50 Hz / 60 Hz 1Φ
● Current: 10 A
● Residual operating current (IΔn): 6 mA
● Ambient temperature: -30 °C to 55 °C
● IP67
Inspecting and maintaining the charging cable
WARNING
■Routine inspection
Check the following points regularly.
Failure to do so may cause an unexpected accident, resulting in death or
serious injury.
● The charging cable, plug, charging connector, CCID (Charging Circuit
Interrupting Device) etc. have not been damaged
● The socket has not been damaged
● The plug can be securely inserted into the socket
● The plug does not get extremely hot during use
● The tip of the plug has not been deformed
● The plug is not dirtied by dust etc.
Remove the plug from the socket before inspecting it. If any abnormalities
are found in the charging cable as a result of the inspection, immediately
stop use and consult any authorized Toyota retailer or Toyota authorized
repairer, or any reliable repairer.
■ Maintaining the charging cable
When the charging cable is dirty, first remove the dirt with a hard, wringed
cloth, and then wipe the cable with a dry cloth.
However, never wash it with water. If the charging cable is washed with
water, fire or electric shock may oc cur during charging, possibly resulting in
death or serious injury.
■ When not using the charging cable for a long time
Remove the plug from the socket. Dust could accumulate on the plug or in
the socket, possibly causing overheating which could lead to a fire.
Also, keep the cable in a place free from moisture.
Appendix (Mode 2 charging cable)
Page 155 of 818
1532-2. Charging
2
Plug-in hybrid system
Prius Plug-in Hybrid_OM_OM47F38E_(EE)
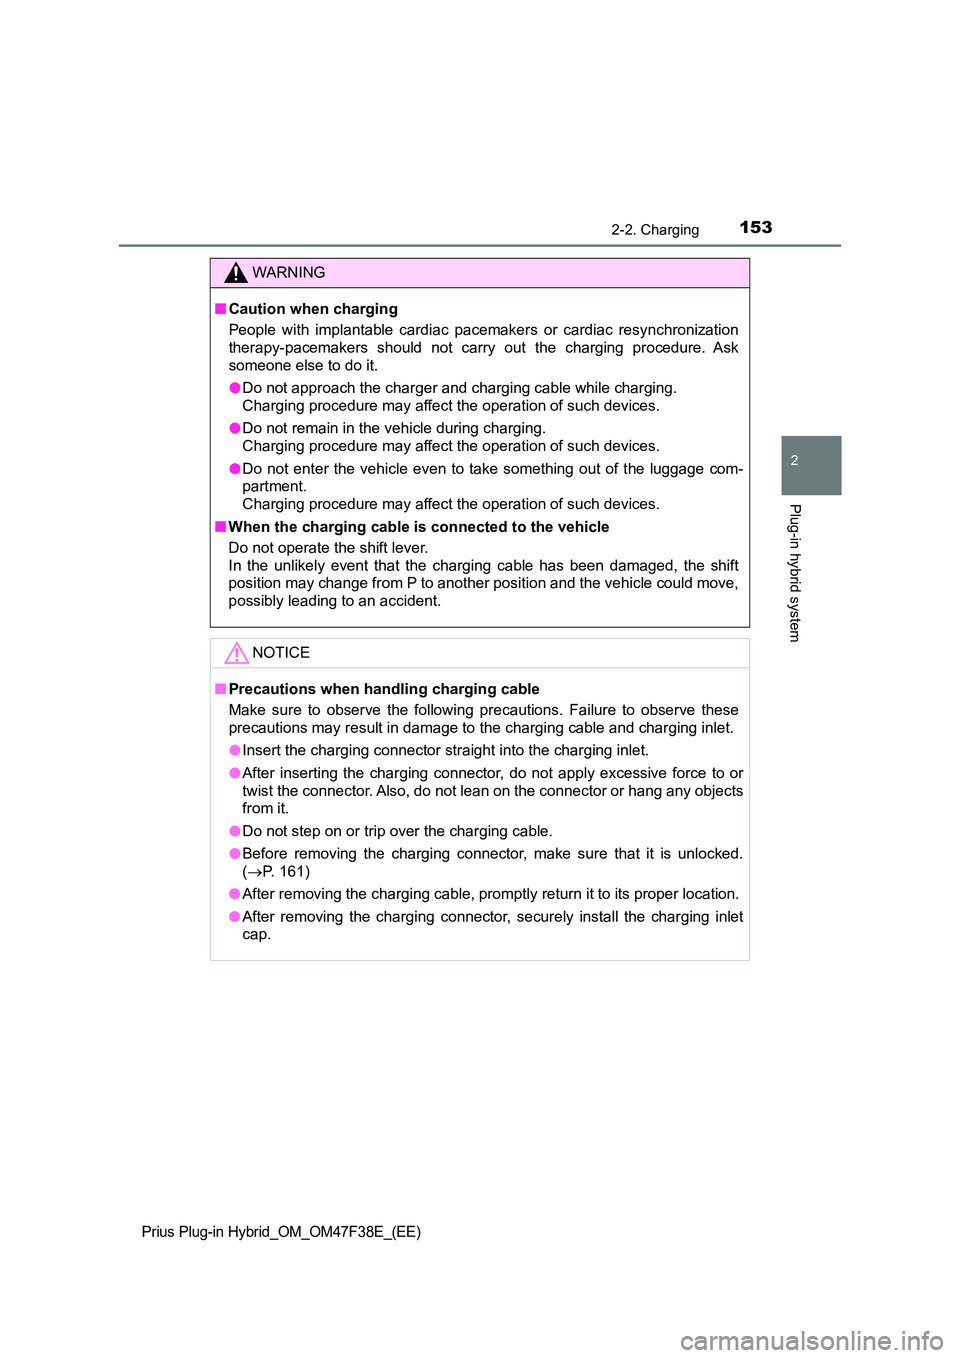
WARNING
■Caution when charging
People with implantable cardiac pacemakers or cardiac resynchronization
therapy-pacemakers should not carry out the charging procedure. Ask
someone else to do it.
● Do not approach the charger and charging cable while charging.
Charging procedure may affect the operation of such devices.
● Do not remain in the vehicle during charging.
Charging procedure may affect the operation of such devices.
● Do not enter the vehicle even to take something out of the luggage com-
partment.
Charging procedure may affect the operation of such devices.
■ When the charging cable is connected to the vehicle
Do not operate the shift lever.
In the unlikely event that the charging cable has been damaged, the shift
position may change from P to another position and the vehicle could move,
possibly leading to an accident.
NOTICE
■ Precautions when handling charging cable
Make sure to observe the following precautions. Failure to observe these
precautions may result in damage to the charging cable and charging inlet.
● Insert the charging connector straight into the charging inlet.
● After inserting the charging connector, do not apply excessive force to or
twist the connector. Also, do not lean on the connector or hang any objects
from it.
● Do not step on or trip over the charging cable.
● Before removing the charging connector, make sure that it is unlocked.
( P. 161)
● After removing the charging cable, promptly return it to its proper location.
● After removing the charging connector, securely install the charging inlet
cap.
Page 158 of 818
1562-2. Charging
Prius Plug-in Hybrid_OM_OM47F38E_(EE)
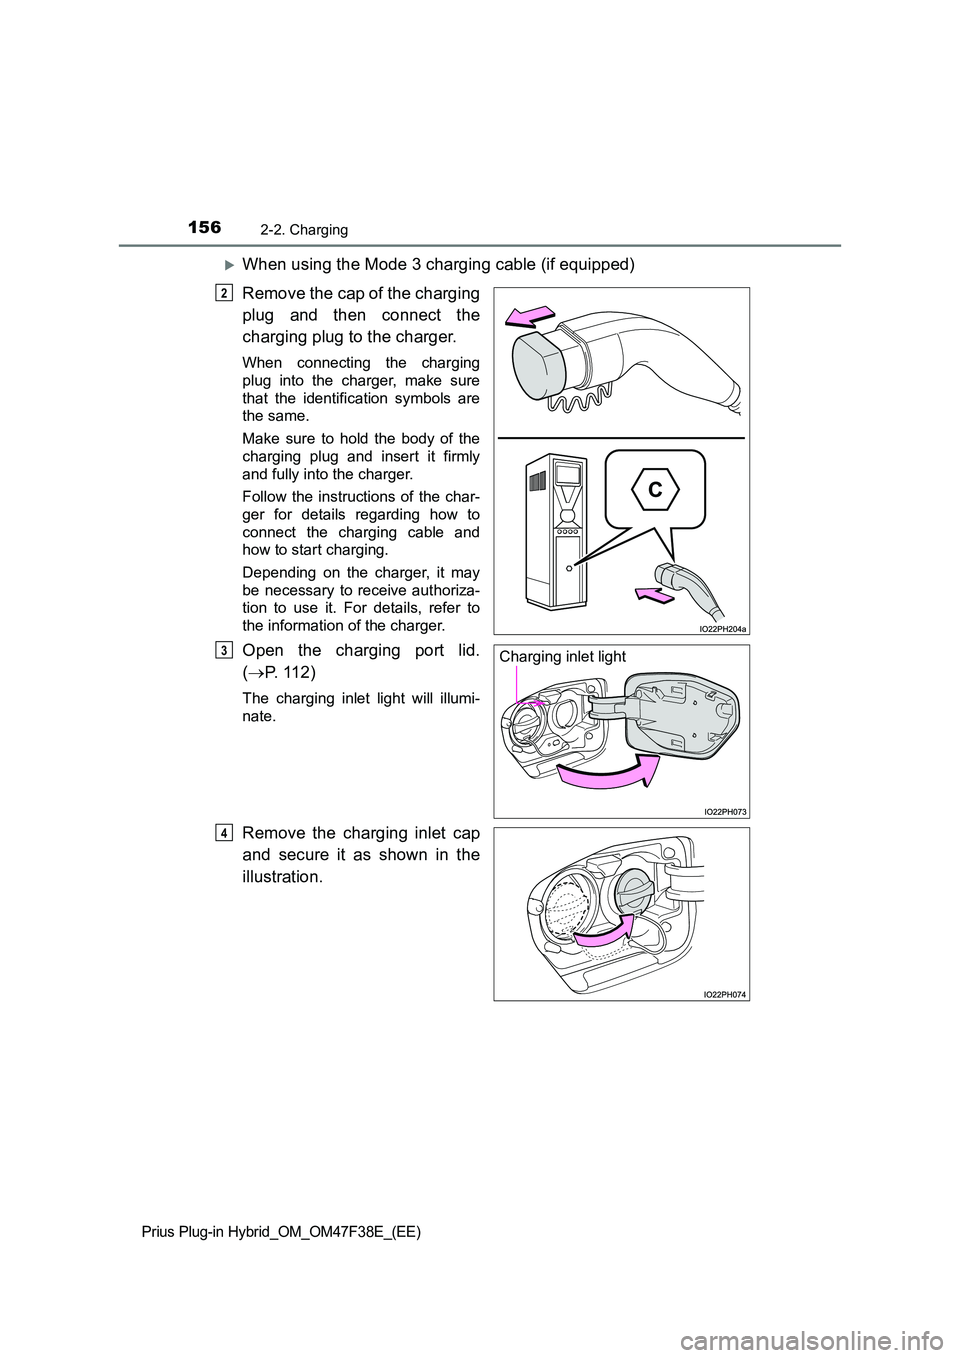
When using the Mode 3 charging cable (if equipped)
Remove the cap of the charging
plug and then connect the
charging plug to the charger.
When connecting the charging
plug into the charger, make sure
that the identification symbols are
the same.
Make sure to hold the body of the
charging plug and insert it firmly
and fully into the charger.
Follow the instructions of the char-
ger for details regarding how to
connect the charging cable and
how to start charging.
Depending on the charger, it may
be necessary to receive authoriza-
tion to use it. For details, refer to
the information of the charger.
Open the charging port lid.
( P. 1 1 2 )
The charging inlet light will illumi-
nate.
Remove the charging inlet cap
and secure it as shown in the
illustration.
2
Charging inlet light3
4