buttons TOYOTA PROACE 2022 Owners Manual
[x] Cancel search | Manufacturer: TOYOTA, Model Year: 2022, Model line: PROACE, Model: TOYOTA PROACE 2022Pages: 360, PDF Size: 70.79 MB
Page 11 of 360
11
Instruments
1
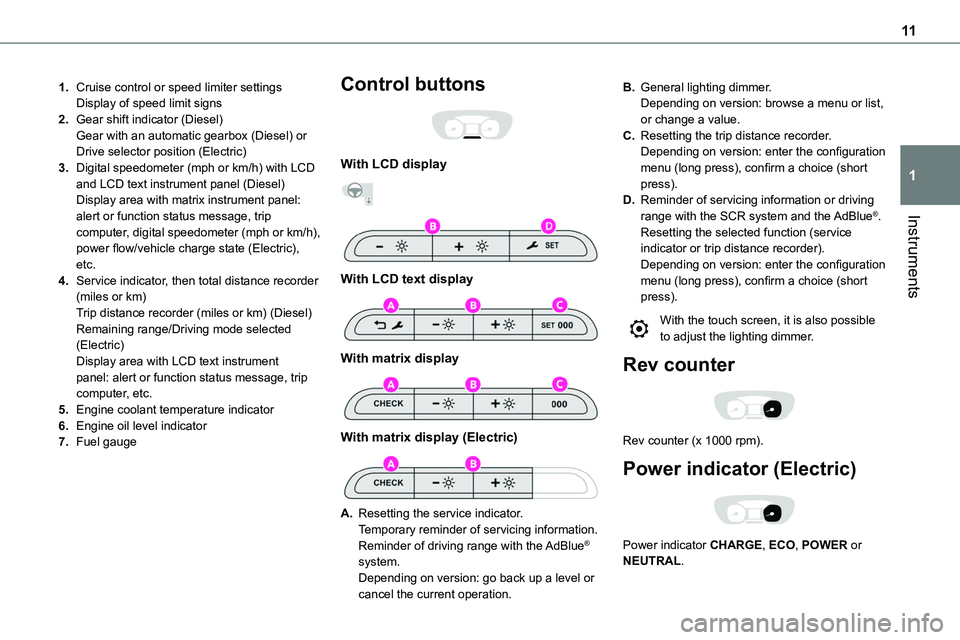
1.Cruise control or speed limiter settingsDisplay of speed limit signs
2.Gear shift indicator (Diesel)Gear with an automatic gearbox (Diesel) or Drive selector position (Electric)
3.Digital speedometer (mph or km/h) with LCD and LCD text instrument panel (Diesel)Display area with matrix instrument panel: alert or function status message, trip computer, digital speedometer (mph or km/h), power flow/vehicle charge state (Electric), etc.
4.Service indicator, then total distance recorder (miles or km)Trip distance recorder (miles or km) (Diesel)Remaining range/Driving mode selected (Electric)Display area with LCD text instrument panel: alert or function status message, trip computer, etc.
5.Engine coolant temperature indicator
6.Engine oil level indicator
7.Fuel gauge
Control buttons
With LCD display
With LCD text display
With matrix display
With matrix display (Electric)
A.Resetting the service indicator.Temporary reminder of servicing information.
Reminder of driving range with the AdBlue® system.Depending on version: go back up a level or cancel the current operation.
B.General lighting dimmer.Depending on version: browse a menu or list, or change a value.
C.Resetting the trip distance recorder.Depending on version: enter the configuration menu (long press), confirm a choice (short press).
D.Reminder of servicing information or driving range with the SCR system and the AdBlue®.Resetting the selected function (service indicator or trip distance recorder).Depending on version: enter the configuration menu (long press), confirm a choice (short press).
With the touch screen, it is also possible to adjust the lighting dimmer.
Rev counter
Rev counter (x 1000 rpm).
Power indicator (Electric)
Power indicator CHARGE, ECO, POWER or NEUTRAL.
Page 26 of 360
26
Touch screen
This system gives access to the following elements:– Permanent display of the time and outside temperature (a blue warning lamp appears if there is a risk of ice).– Vehicle functions and equipment setting menus.
– Audio system and telephone controls and display of related information.– Display of visual manoeuvring aid functions– Internet services and display of related information.– Navigation system controls and display of related information (depending on version).
WARNI NG
For safety reasons, always stop the vehicle before performing operations that require sustained attention.Some functions are not accessible while driving.
Recommendations
This screen is of the capacitive type.– Do not use pointed objects on the touch screen.– Do not touch the touch screen with wet hands.– Use a soft, clean cloth to clean the touch screen.
Principles
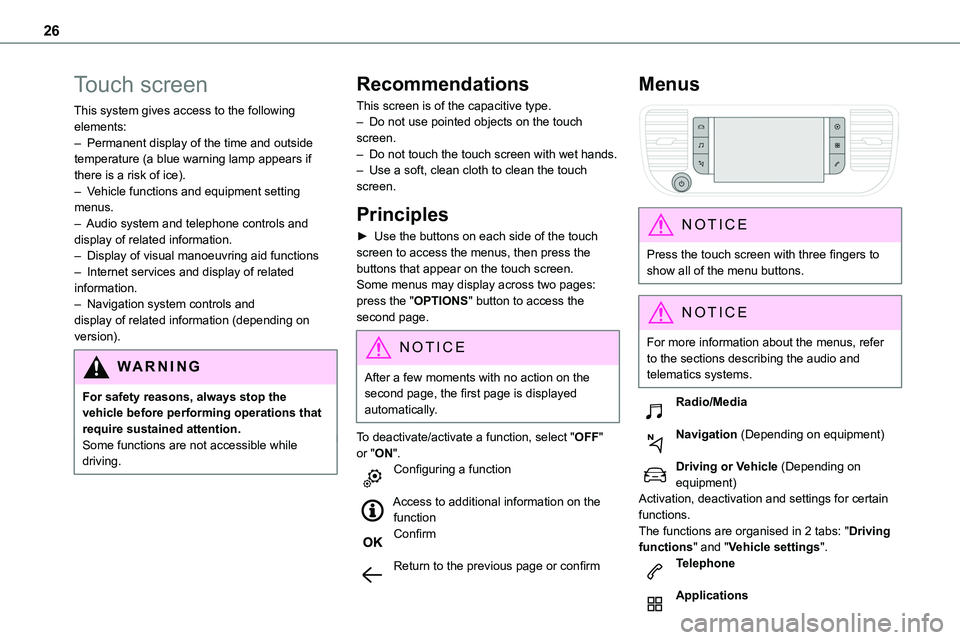
► Use the buttons on each side of the touch screen to access the menus, then press the buttons that appear on the touch screen.Some menus may display across two pages: press the "OPTIONS" button to access the second page.
NOTIC E
After a few moments with no action on the second page, the first page is displayed automatically.
To deactivate/activate a function, select "OFF" or "ON".Configuring a function
Access to additional information on the function
Confirm
Return to the previous page or confirm
Menus
NOTIC E
Press the touch screen with three fingers to show all of the menu buttons.
NOTIC E
For more information about the menus, refer to the sections describing the audio and telematics systems.
Radio/Media
Navigation (Depending on equipment)
Driving or Vehicle (Depending on equipment)Activation, deactivation and settings for certain functions.The functions are organised in 2 tabs: "Driving functions" and "Vehicle settings".Telephone
Applications
Page 27 of 360
27
Instruments
1
Display of available connected services.EnergyAccess the specific Electric functions (energy flow, consumption statistics, deferred charge) organised in the corresponding 3 tabs.orSettingsMain settings for the audio system and touch screen.
Audio system on/off.Volume adjustment/mute.
Upper bar
Certain information is displayed permanently in the upper bar of the touch screen:– Time and outside temperature (a blue warning lamp appears if there is a risk of ice).– Reminder of information from the Radio Media and Telephone menus and navigation instructions (depending on equipment).– Notifications.– Access to the Settings.
Energy menu
Depending on version, this is accessible either:– directly, by pressing the button near the touch screen.– via the Applications menu.
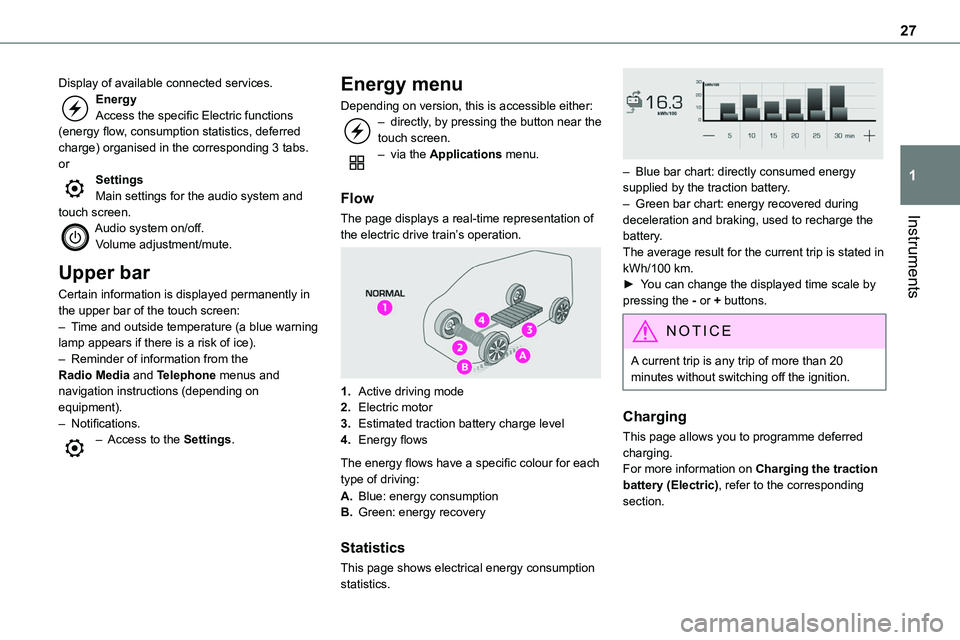
Flow
The page displays a real-time representation of
the electric drive train’s operation.
1.Active driving mode
2.Electric motor
3.Estimated traction battery charge level
4.Energy flows
The energy flows have a specific colour for each type of driving:
A.Blue: energy consumption
B.Green: energy recovery
Statistics
This page shows electrical energy consumption statistics.
– Blue bar chart: directly consumed energy supplied by the traction battery.– Green bar chart: energy recovered during deceleration and braking, used to recharge the battery.The average result for the current trip is stated in kWh/100 km.► You can change the displayed time scale by pressing the - or + buttons.
NOTIC E
A current trip is any trip of more than 20 minutes without switching off the ignition.
Charging
This page allows you to programme deferred charging.For more information on Charging the traction battery (Electric), refer to the corresponding section.
Page 28 of 360
28
Remotely-operable
functions (Electric)
(Available soon)
In addition to all the functions of the MyToyota application that you can access from a smartphone, you can access the following functions:– Battery charge management (Deferred charging).– Temperature pre-conditioning management.– Consultation of the state of charge and range of the vehicle.
Installation procedure
► Download the MyToyota app from the appropriate online store for your smartphone.► Create an account.► Enter the vehicle’s V.I.N. (code beginning with "VF" on the vehicle registration document).For more information on Identification markings, refer to the corresponding section.
NOTIC E
Network coverageIn order to be able to use the various remotely operable features, ensure that your vehicle is located in an area covered by the mobile network.A lack of network coverage may prevent communication with the vehicle (for example,
if it is in an underground car park). In such cases, the application will display a message indicating that the connection with the vehicle could not be established.
Setting the date and time
Without Bluetooth® audio
system
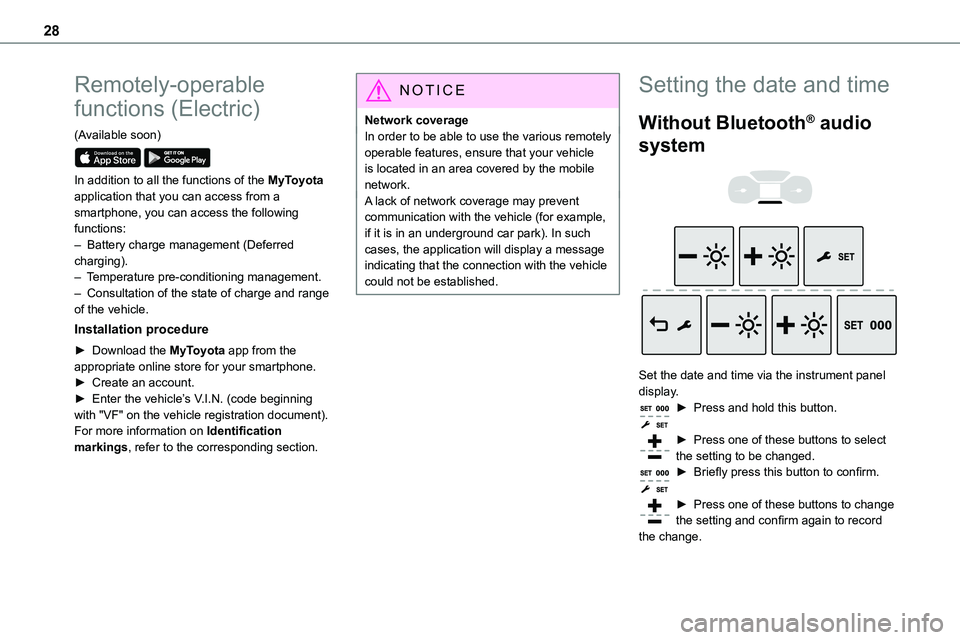
Set the date and time via the instrument panel display.► Press and hold this button.
► Press one of these buttons to select the setting to be changed.► Briefly press this button to confirm.
► Press one of these buttons to change the setting and confirm again to record
the change.
Page 29 of 360
29
Instruments
1
With Bluetooth® audio
system
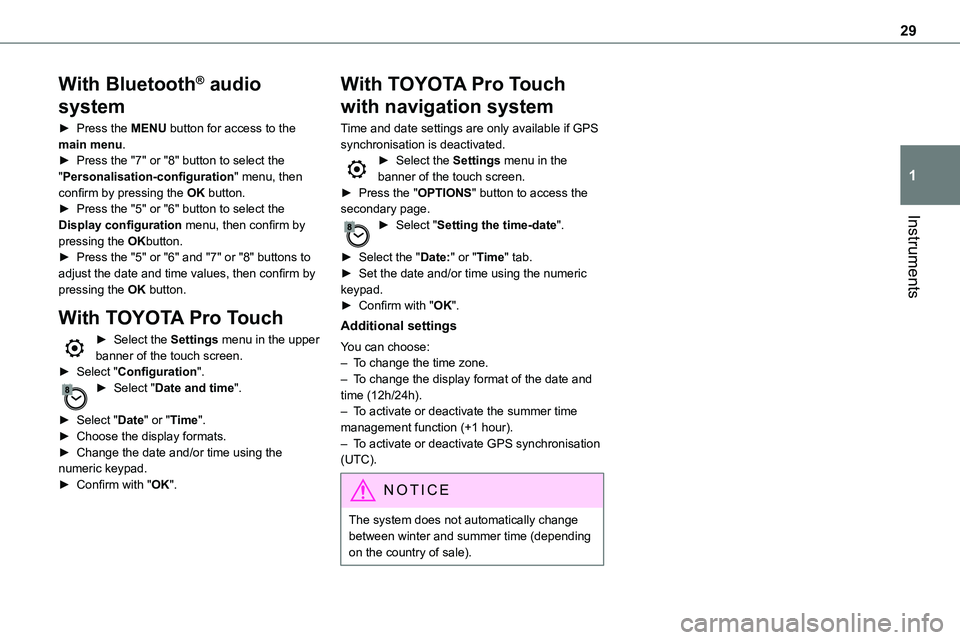
► Press the MENU button for access to the main menu.► Press the "7" or "8" button to select the "Personalisation-configuration" menu, then confirm by pressing the OK button.► Press the "5" or "6" button to select the
Display configuration menu, then confirm by pressing the OKbutton.► Press the "5" or "6" and "7" or "8" buttons to adjust the date and time values, then confirm by pressing the OK button.
With TOYOTA Pro Touch
► Select the Settings menu in the upper banner of the touch screen.► Select "Configuration".► Select "Date and time".
► Select "Date" or "Time".► Choose the display formats.► Change the date and/or time using the numeric keypad.► Confirm with "OK".
With TOYOTA Pro Touch
with navigation system
Time and date settings are only available if GPS synchronisation is deactivated.► Select the Settings menu in the banner of the touch screen.► Press the "OPTIONS" button to access the secondary page.
► Select "Setting the time-date".
► Select the "Date:" or "Time" tab.► Set the date and/or time using the numeric keypad.► Confirm with "OK".
Additional settings
You can choose:– To change the time zone.– To change the display format of the date and time (12h/24h).– To activate or deactivate the summer time management function (+1 hour).– To activate or deactivate GPS synchronisation (UTC).
NOTIC E
The system does not automatically change
between winter and summer time (depending on the country of sale).
Page 30 of 360
30
Electronic key with
remote control function
and built-in key,
NOTIC E
If one of the doors or the boot is still open or if the electronic key for the Smart Entry & Start
system has been left inside the vehicle, central locking will not take place.However, if the vehicle is fitted with an alarm, it will be activated after 45 seconds.
NOTIC E
If the vehicle is unlocked but the doors or boot are not subsequently opened, the vehicle will automatically lock itself again after about 30 seconds. If the vehicle is fitted with an alarm, it will be reactivated automatically.
NOTIC E
Automatic door mirror folding and unfolding can be deactivated by any authorized Toyota retailer or Toyota authorized repairer, or any reliable repairer.
WARNI NG
As a safety measure, never leave the vehicle, even for a short time, without taking the Smart Entry & Start system’s electronic key with you.Be aware of the risk of theft of the vehicle if the key is present in one of the defined areas while the vehicle is unlocked.
If a door is not properly closed (except the right-hand door with side-hinged rear doors):– when the vehicle is stationary and engine running, this warning lamp comes on, accompanied by a warning message for a few seconds, – when the vehicle is moving (at speeds above 6 mph (10 km/h)), this warning lamp comes on, accompanied by an audible signal and a warning message for a few seconds.
Remote control key
This allows the central locking or unlocking of the vehicle using the door lock or remotely.It also allows the vehicle to be located, the fuel filler cap to be removed and refitted and the engine to be started or switched off, as well as providing protection against theft.
NOTIC E
The remote control buttons are not active with the ignition switched on.
Unfolding / Folding the key
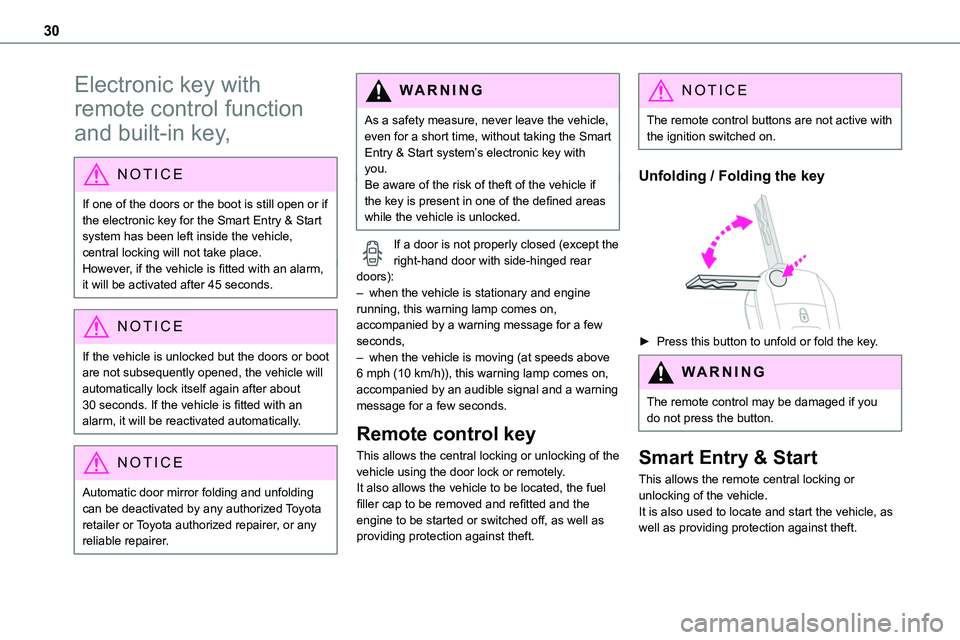
► Press this button to unfold or fold the key.
WARNI NG
The remote control may be damaged if you do not press the button.
Smart Entry & Start
This allows the remote central locking or unlocking of the vehicle.It is also used to locate and start the vehicle, as well as providing protection against theft.
Page 31 of 360
31
Access
2
Integral key
This is used to lock and unlock the vehicle when the remote control cannot operate:– remote control battery discharged, vehicle battery discharged or disconnected, etc.– vehicle located in an area subject to strong electromagnetic interference.
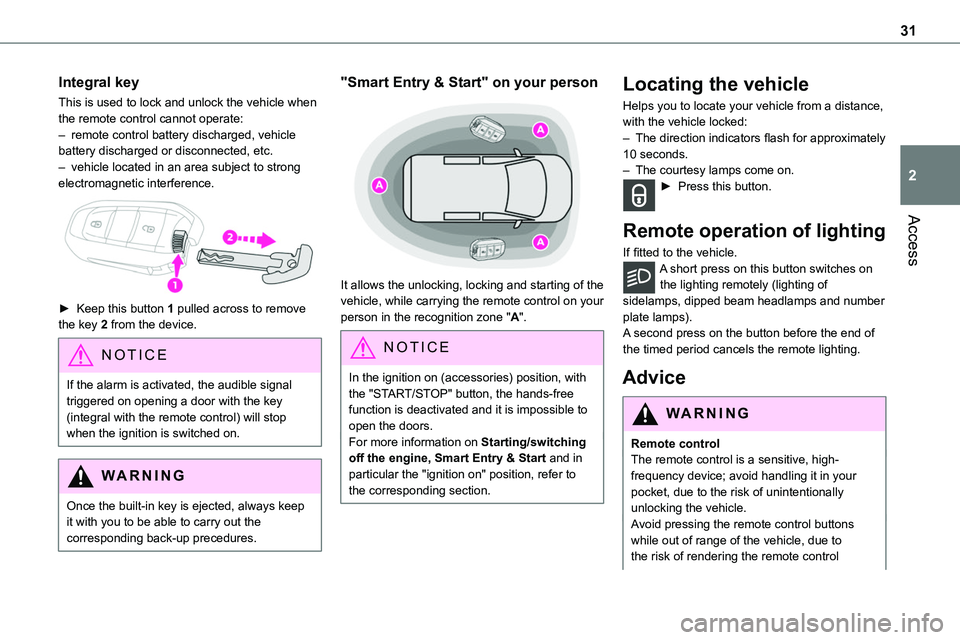
► Keep this button 1 pulled across to remove the key 2 from the device.
NOTIC E
If the alarm is activated, the audible signal triggered on opening a door with the key (integral with the remote control) will stop when the ignition is switched on.
WARNI NG
Once the built-in key is ejected, always keep it with you to be able to carry out the corresponding back-up precedures.
"Smart Entry & Start" on your person
It allows the unlocking, locking and starting of the vehicle, while carrying the remote control on your person in the recognition zone "A".
NOTIC E
In the ignition on (accessories) position, with the "START/STOP" button, the hands-free function is deactivated and it is impossible to open the doors.For more information on Starting/switching off the engine, Smart Entry & Start and in particular the "ignition on" position, refer to the corresponding section.
Locating the vehicle
Helps you to locate your vehicle from a distance, with the vehicle locked:– The direction indicators flash for approximately 10 seconds.– The courtesy lamps come on.► Press this button.
Remote operation of lighting
If fitted to the vehicle.A short press on this button switches on the lighting remotely (lighting of sidelamps, dipped beam headlamps and number plate lamps).A second press on the button before the end of the timed period cancels the remote lighting.
Advice
WARNI NG
Remote controlThe remote control is a sensitive, high-frequency device; avoid handling it in your pocket, due to the risk of unintentionally unlocking the vehicle.Avoid pressing the remote control buttons
while out of range of the vehicle, due to the risk of rendering the remote control
Page 32 of 360
32
inoperative. It would then be necessary to reset it.The remote control does not work when the key is in the ignition switch, even when the ignition is switched off.
WARNI NG
Anti-theft protectionDo not modify the electronic vehicle immobiliser, as this might result in malfunctions.For vehicles with a key ignition switch, remember to remove the key and turn the steering wheel to engage the steering lock.
WARNI NG
Locking the vehicleDriving with the doors locked could make it more difficult for the emergency services to enter the passenger compartment in an emergency.As a safety precaution, remove the key from the ignition or take the electronic key with you when leaving the vehicle, even for a short time.
NOTIC E
Purchasing a second-hand vehicleHave the key codes memorised by any authorized Toyota retailer or Toyota authorized repairer, or any reliable repairer, to ensure that the keys in your possession are the only ones able to start the vehicle.
WARNI NG
To preserve the battery charge in the electronic key and the vehicle's battery, the "hands-free" functions are set to hibernation mode after 21 days without use. To restore these functions, press one of the remote control buttons or start the engine with the electronic key in the reader.For more information on starting with the Smart Entry & Start system, refer to the corresponding section.
NOTIC E
Electrical interferenceThe electronic key may not operate if close to certain electronic devices such as telephones (switched on or on standby) or laptop computers, strong magnetic fields, etc. If this happens, remove the electronic key from the electronic device.
WARNI NG
Accumulations (water, dust, grime, salt, etc.) on the inner surface of the door handle may affect detection.If cleaning the inner surface of the door handle using a cloth does not restore detection, contact any authorized Toyota retailer or Toyota authorized repairer, or any reliable repairer.A sudden splash of water (stream of water, high pressure jet washer, etc.) may be identified by the system as the desire to open the vehicle.
Page 33 of 360
33
Access
2
Unlocking/Complete or
selective unlocking
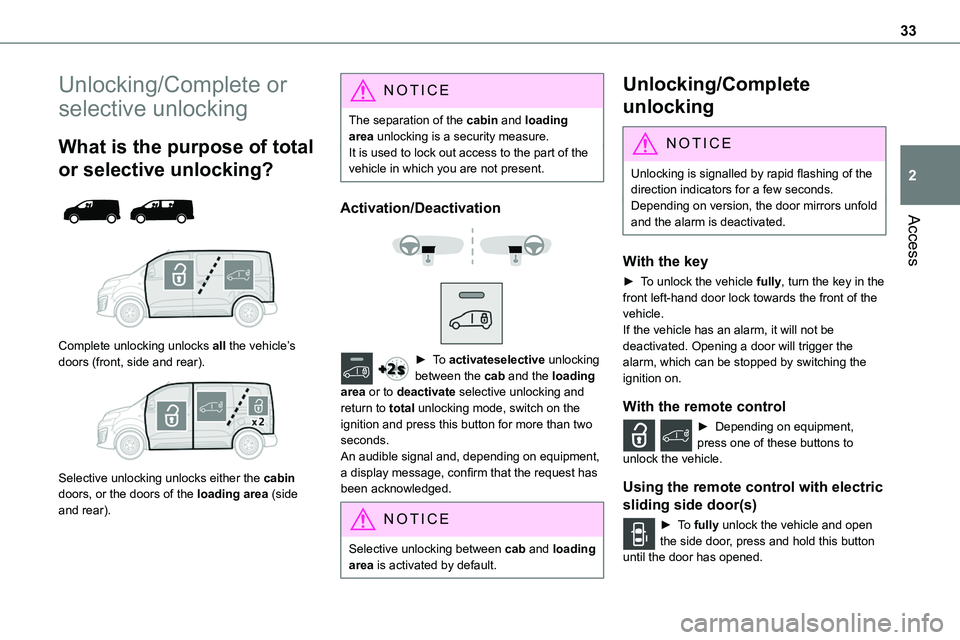
What is the purpose of total
or selective unlocking?
Complete unlocking unlocks all the vehicle’s doors (front, side and rear).
Selective unlocking unlocks either the cabin doors, or the doors of the loading area (side and rear).
NOTIC E
The separation of the cabin and loading area unlocking is a security measure.It is used to lock out access to the part of the vehicle in which you are not present.
Activation/Deactivation
► To activateselective unlocking between the cab and the loading area or to deactivate selective unlocking and return to total unlocking mode, switch on the ignition and press this button for more than two
seconds.An audible signal and, depending on equipment, a display message, confirm that the request has been acknowledged.
NOTIC E
Selective unlocking between cab and loading area is activated by default.
Unlocking/Complete
unlocking
NOTIC E
Unlocking is signalled by rapid flashing of the direction indicators for a few seconds.Depending on version, the door mirrors unfold and the alarm is deactivated.
With the key
► To unlock the vehicle fully, turn the key in the front left-hand door lock towards the front of the vehicle.If the vehicle has an alarm, it will not be deactivated. Opening a door will trigger the alarm, which can be stopped by switching the ignition on.
With the remote control
► Depending on equipment, press one of these buttons to unlock the vehicle.
Using the remote control with electric
sliding side door(s)
► To fully unlock the vehicle and open the side door, press and hold this button until the door has opened.
Page 42 of 360
42
NOTIC E
To deactivate this automatic locking, go to any authorized Toyota retailer or Toyota authorized repairer, or any reliable repairer.
Manual
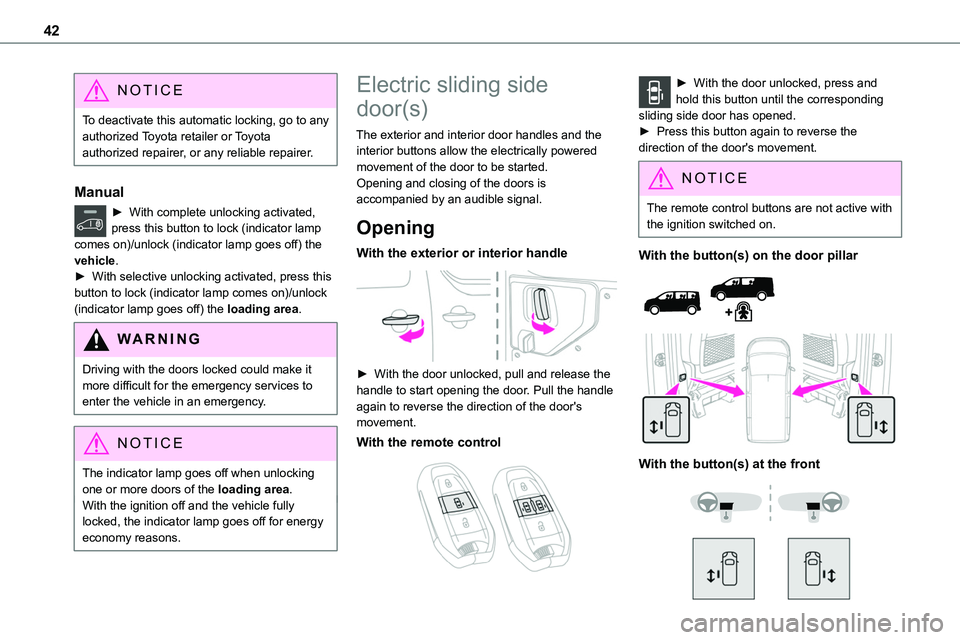
► With complete unlocking activated,
press this button to lock (indicator lamp comes on)/unlock (indicator lamp goes off) the vehicle.► With selective unlocking activated, press this button to lock (indicator lamp comes on)/unlock (indicator lamp goes off) the loading area.
WARNI NG
Driving with the doors locked could make it more difficult for the emergency services to enter the vehicle in an emergency.
NOTIC E
The indicator lamp goes off when unlocking one or more doors of the loading area.With the ignition off and the vehicle fully locked, the indicator lamp goes off for energy economy reasons.
Electric sliding side
door(s)
The exterior and interior door handles and the interior buttons allow the electrically powered movement of the door to be started.Opening and closing of the doors is accompanied by an audible signal.
Opening
With the exterior or interior handle
► With the door unlocked, pull and release the handle to start opening the door. Pull the handle again to reverse the direction of the door's movement.
With the remote control
► With the door unlocked, press and hold this button until the corresponding sliding side door has opened. ► Press this button again to reverse the direction of the door's movement.
NOTIC E
The remote control buttons are not active with the ignition switched on.
With the button(s) on the door pillar
With the button(s) at the front