Trip TOYOTA PROACE CITY 2021 Owners Manual
[x] Cancel search | Manufacturer: TOYOTA, Model Year: 2021, Model line: PROACE CITY, Model: TOYOTA PROACE CITY 2021Pages: 272, PDF Size: 60.75 MB
Page 2 of 272
2
■Overview
Labels 4
■Eco-driving
Eco-coaching 8
1Instruments
Instrument Panel 9Warning and indicator lamps 11Indicators 16Trip computer 21Setting the date and time 22
2Access
Electronic key with remote control function and built-in key, 23Back-up procedures 30Central locking / unlocking 33Doors 35General recommendations for
the sliding side doors 36Rear roof flap 37Alarm 38Electric windows 40Tilting rear door windows 41
3Ease of use and comfort
General recommendations for the seats 42Front seats 42
Steering wheel adjustment 45
Mirrors 452-seat front bench seat 46Rear bench seat 48Interior fittings 49Extenso cabin 54Crew cab 56Heating and Ventilation 60Heating 61Manual air conditioning 61Dual-zone automatic air conditioning 62Front demisting - defrosting 64Rear screen and/or door mirrors demisting - defrosting 66Additional heating/ventilation system 66
4Lighting and visibility
Lighting control lever 70Direction indicators 71Automatic illumination of headlamps 71Daytime running lamps / Sidelamps 72Parking lamps 72Automatic headlamp dipping 73
Headlamp beam height adjustment 74Wiper control lever 75Changing a wiper blade 77Automatic wiping 77
5Safety
General safety recommendations 79Emergency or assistance call 80Hazard warning lamps 82
Horn 82Electronic stability control (ESC) 82Advanced Grip Control 85Hill Assist Descent Control 86Seat belts 87Airbags 90Child seats 93Deactivating the front passenger airbag 95Manual child lock 98Electric child lock 98
6Driving
Driving recommendations 99Starting/switching off the engine 101Manual parking brake 105Electric parking brake 105Hill start assist 1085-speed manual gearbox 1096-speed manual gearbox 109Automatic gearbox 11 0Gear efficiency indicator 11 4Stop & Start 11 4
Under-inflation detection 11 6Head-up display 11 8Driving and manoeuvring aids - General recommendations 11 9Speed Limit Recognition and Recommendation 121Speed limiter 124Cruise control - particular recommendations 126Programmable cruise control 127
Adaptive Cruise Control 129
Page 5 of 272
5
Overview
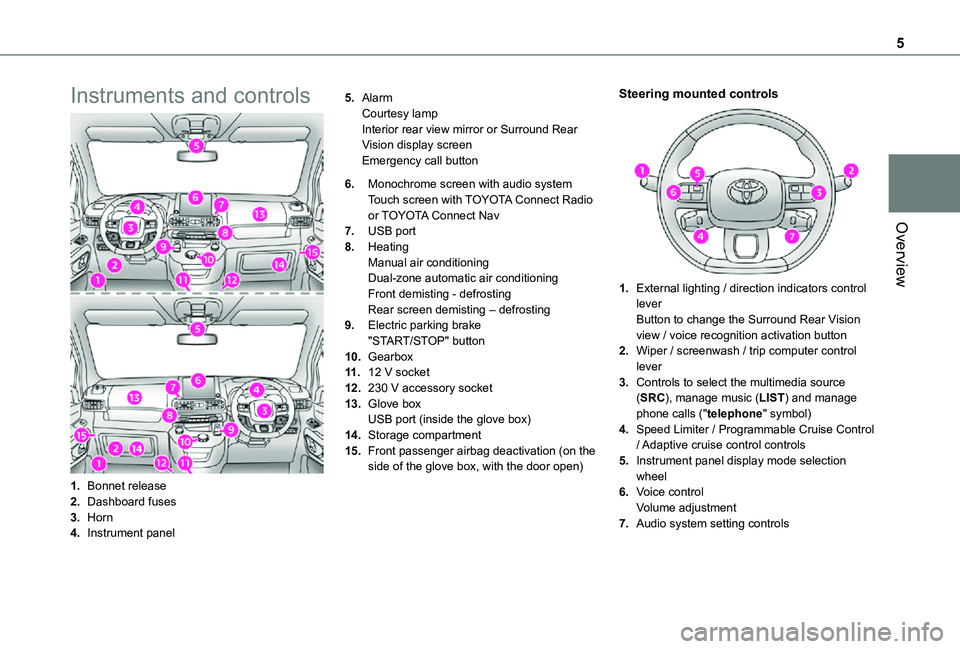
Instruments and controls
1.Bonnet release
2.Dashboard fuses
3.Horn
4.Instrument panel
5.AlarmCourtesy lampInterior rear view mirror or Surround Rear Vision display screenEmergency call button
6.Monochrome screen with audio systemTouch screen with TOYOTA Connect Radio or TOYOTA Connect Nav
7.USB port
8.HeatingManual air conditioningDual-zone automatic air conditioningFront demisting - defrostingRear screen demisting – defrosting
9.Electric parking brake"START/STOP" button
10.Gearbox
11 .12 V socket
12.230 V accessory socket
13.Glove boxUSB port (inside the glove box)
14.Storage compartment
15.Front passenger airbag deactivation (on the side of the glove box, with the door open)
Steering mounted controls
1.External lighting / direction indicators control leverButton to change the Surround Rear Vision view / voice recognition activation button
2.Wiper / screenwash / trip computer control lever
3.Controls to select the multimedia source (SRC), manage music (LIST) and manage phone calls ("telephone" symbol)
4.Speed Limiter / Programmable Cruise Control
/ Adaptive cruise control controls
5.Instrument panel display mode selection wheel
6.Voice controlVolume adjustment
7.Audio system setting controls
Page 8 of 272
8
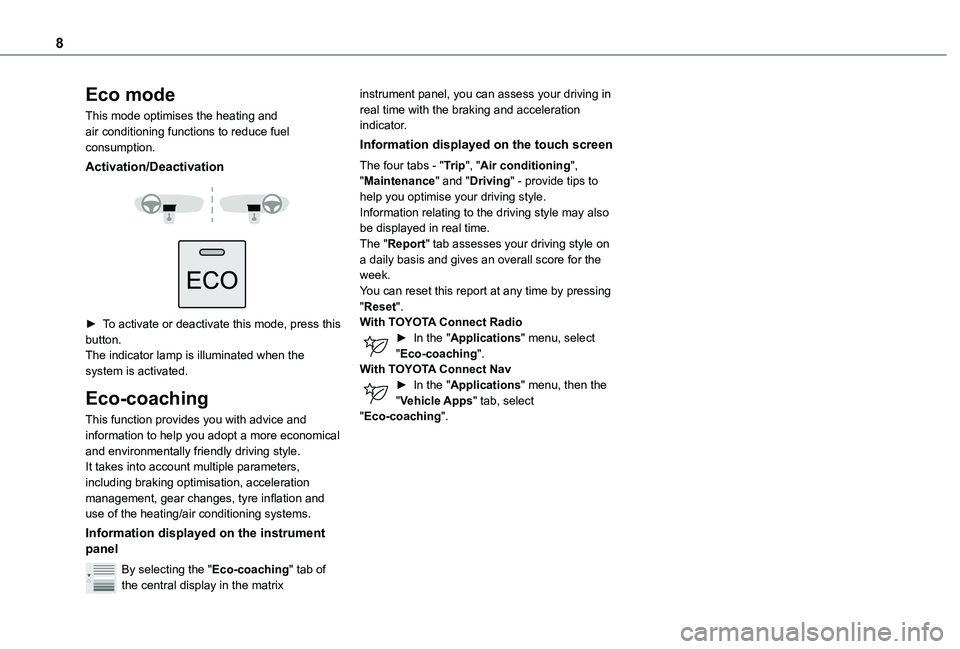
Eco mode
This mode optimises the heating and air conditioning functions to reduce fuel consumption.
Activation/Deactivation
► To activate or deactivate this mode, press this button.The indicator lamp is illuminated when the system is activated.
Eco-coaching
This function provides you with advice and information to help you adopt a more economical and environmentally friendly driving style.It takes into account multiple parameters, including braking optimisation, acceleration management, gear changes, tyre inflation and use of the heating/air conditioning systems.
Information displayed on the instrument panel
By selecting the "Eco-coaching" tab of the central display in the matrix
instrument panel, you can assess your driving in real time with the braking and acceleration indicator.
Information displayed on the touch screen
The four tabs - "Trip", "Air conditioning", "Maintenance" and "Driving" - provide tips to help you optimise your driving style.Information relating to the driving style may also be displayed in real time.The "Report" tab assesses your driving style on a daily basis and gives an overall score for the week.You can reset this report at any time by pressing "Reset".With TOYOTA Connect Radio► In the "Applications" menu, select "Eco-coaching".With TOYOTA Connect Nav► In the "Applications" menu, then the "Vehicle Apps" tab, select "Eco-coaching".
Page 10 of 272
10
With matrix instrument panel
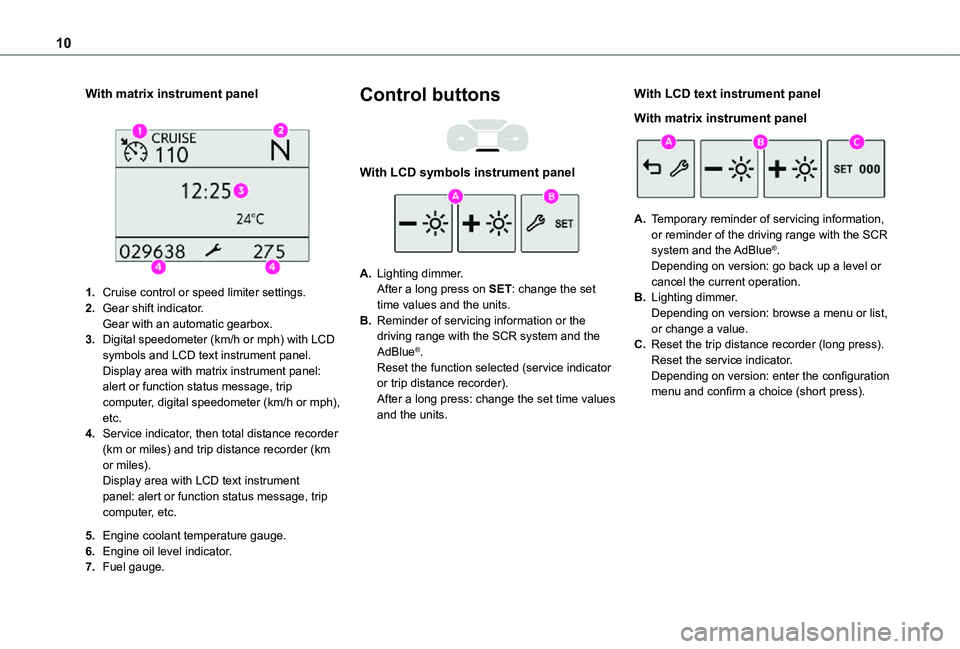
1.Cruise control or speed limiter settings.
2.Gear shift indicator.Gear with an automatic gearbox.
3.Digital speedometer (km/h or mph) with LCD symbols and LCD text instrument panel.Display area with matrix instrument panel: alert or function status message, trip computer, digital speedometer (km/h or mph), etc.
4.Service indicator, then total distance recorder (km or miles) and trip distance recorder (km or miles).Display area with LCD text instrument panel: alert or function status message, trip computer, etc.
5.Engine coolant temperature gauge.
6.Engine oil level indicator.
7.Fuel gauge.
Control buttons
With LCD symbols instrument panel
A.Lighting dimmer.After a long press on SET: change the set time values and the units.
B.Reminder of servicing information or the driving range with the SCR system and the AdBlue®.Reset the function selected (service indicator or trip distance recorder).After a long press: change the set time values and the units.
With LCD text instrument panel
With matrix instrument panel
A.Temporary reminder of servicing information, or reminder of the driving range with the SCR
system and the AdBlue®.Depending on version: go back up a level or cancel the current operation.
B.Lighting dimmer.Depending on version: browse a menu or list, or change a value.
C.Reset the trip distance recorder (long press).Reset the service indicator.Depending on version: enter the configuration menu and confirm a choice (short press).
Page 17 of 272
17
Instruments
1
NOTIC E
The distance indicated (in miles or kilometres) is calculated according to the distance covered and the time elapsed since the last service.The alert may be triggered close to a due date.
Resetting the service indicator
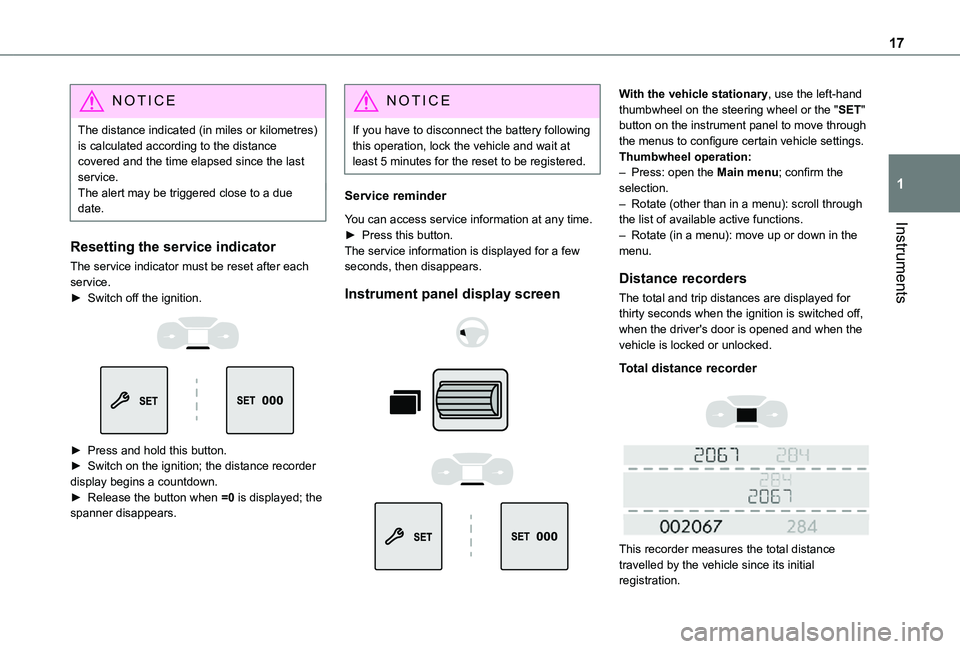
The service indicator must be reset after each service.► Switch off the ignition.
► Press and hold this button.► Switch on the ignition; the distance recorder display begins a countdown.► Release the button when =0 is displayed; the spanner disappears.
NOTIC E
If you have to disconnect the battery following this operation, lock the vehicle and wait at least 5 minutes for the reset to be registered.
Service reminder
You can access service information at any time.► Press this button.The service information is displayed for a few seconds, then disappears.
Instrument panel display screen
With the vehicle stationary, use the left-hand thumbwheel on the steering wheel or the "SET" button on the instrument panel to move through the menus to configure certain vehicle settings.Thumbwheel operation:– Press: open the Main menu; confirm the selection.– Rotate (other than in a menu): scroll through the list of available active functions.– Rotate (in a menu): move up or down in the menu.
Distance recorders
The total and trip distances are displayed for thirty seconds when the ignition is switched off, when the driver's door is opened and when the vehicle is locked or unlocked.
Total distance recorder
This recorder measures the total distance travelled by the vehicle since its initial registration.
Page 18 of 272
18
Trip distance recorder
This recorder measures the distance travelled since it was last reset by the driver.Resetting the trip recorder
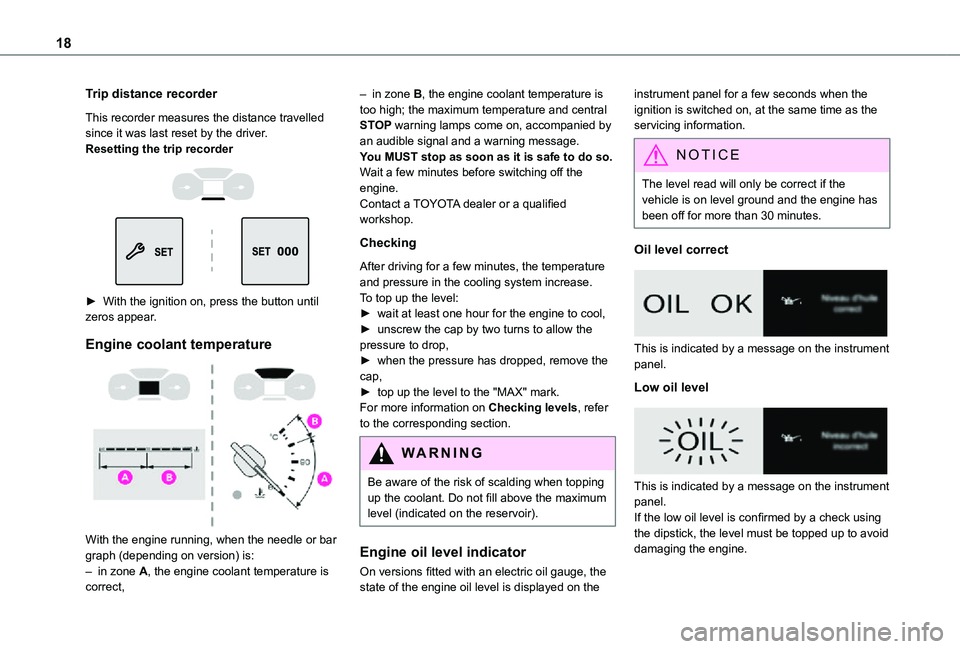
► With the ignition on, press the button until zeros appear.
Engine coolant temperature
With the engine running, when the needle or bar graph (depending on version) is:– in zone A, the engine coolant temperature is correct,
– in zone B, the engine coolant temperature is too high; the maximum temperature and central STOP warning lamps come on, accompanied by an audible signal and a warning message.You MUST stop as soon as it is safe to do so.Wait a few minutes before switching off the engine.Contact a TOYOTA dealer or a qualified workshop.
Checking
After driving for a few minutes, the temperature and pressure in the cooling system increase.To top up the level:► wait at least one hour for the engine to cool,► unscrew the cap by two turns to allow the pressure to drop,► when the pressure has dropped, remove the cap,► top up the level to the "MAX" mark.For more information on Checking levels, refer to the corresponding section.
WARNI NG
Be aware of the risk of scalding when topping up the coolant. Do not fill above the maximum level (indicated on the reservoir).
Engine oil level indicator
On versions fitted with an electric oil gauge, the state of the engine oil level is displayed on the
instrument panel for a few seconds when the ignition is switched on, at the same time as the servicing information.
NOTIC E
The level read will only be correct if the vehicle is on level ground and the engine has been off for more than 30 minutes.
Oil level correct
This is indicated by a message on the instrument panel.
Low oil level
This is indicated by a message on the instrument panel.If the low oil level is confirmed by a check using the dipstick, the level must be topped up to avoid
damaging the engine.
Page 21 of 272
21
Instruments
1
Touch screen lighting
dimmer
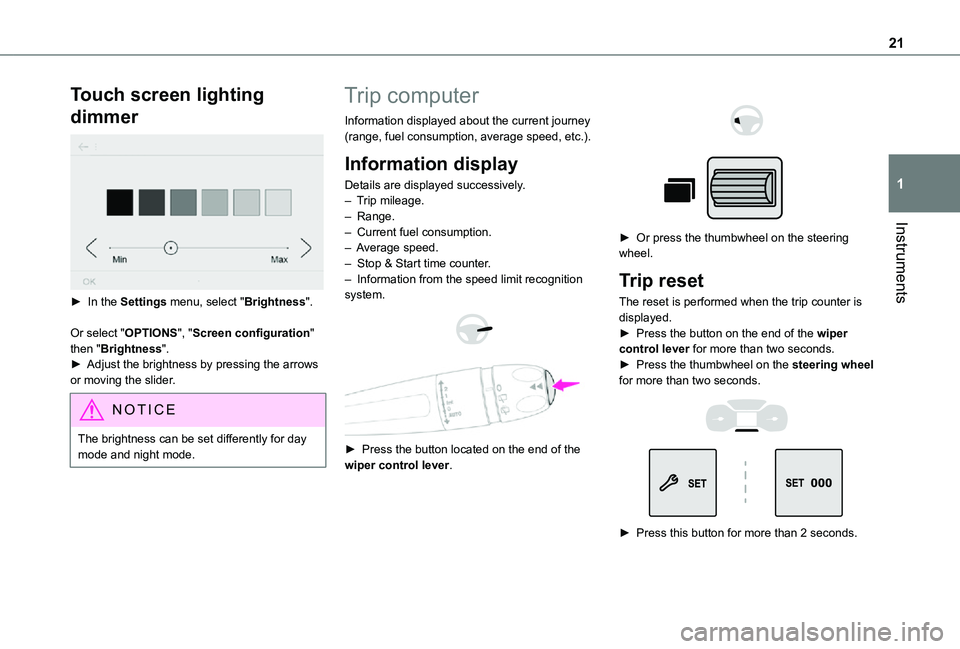
► In the Settings menu, select "Brightness".
Or select "OPTIONS", "Screen configuration" then "Brightness".► Adjust the brightness by pressing the arrows or moving the slider.
NOTIC E
The brightness can be set differently for day mode and night mode.
Trip computer
Information displayed about the current journey (range, fuel consumption, average speed, etc.).
Information display
Details are displayed successively.– Trip mileage.– Range.– Current fuel consumption.– Average speed.– Stop & Start time counter.– Information from the speed limit recognition system.
► Press the button located on the end of the wiper control lever.
► Or press the thumbwheel on the steering wheel.
Trip reset
The reset is performed when the trip counter is displayed.► Press the button on the end of the wiper control lever for more than two seconds.► Press the thumbwheel on the steering wheel for more than two seconds.
► Press this button for more than 2 seconds.
Page 22 of 272
22
A few definitions…
Range
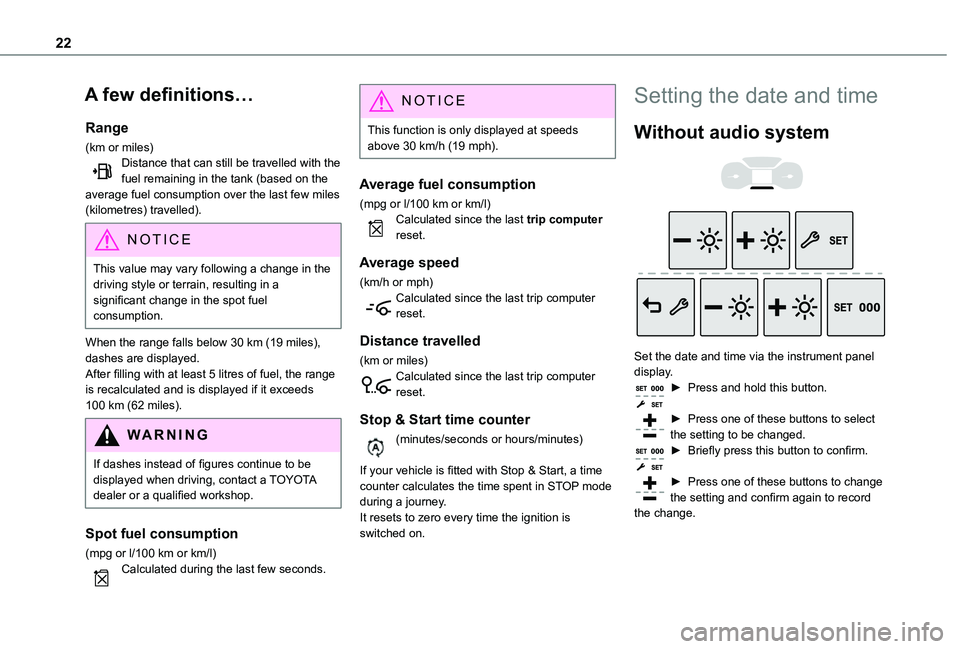
(km or miles)Distance that can still be travelled with the fuel remaining in the tank (based on the average fuel consumption over the last few miles (kilometres) travelled).
NOTIC E
This value may vary following a change in the driving style or terrain, resulting in a significant change in the spot fuel consumption.
When the range falls below 30 km (19 miles), dashes are displayed.After filling with at least 5 litres of fuel, the range is recalculated and is displayed if it exceeds 100 km (62 miles).
WARNI NG
If dashes instead of figures continue to be displayed when driving, contact a TOYOTA dealer or a qualified workshop.
Spot fuel consumption
(mpg or l/100 km or km/l)Calculated during the last few seconds.
NOTIC E
This function is only displayed at speeds above 30 km/h (19 mph).
Average fuel consumption
(mpg or l/100 km or km/l)Calculated since the last trip computer reset.
Average speed
(km/h or mph)Calculated since the last trip computer reset.
Distance travelled
(km or miles)Calculated since the last trip computer reset.
Stop & Start time counter
(minutes/seconds or hours/minutes)
If your vehicle is fitted with Stop & Start, a time counter calculates the time spent in STOP mode during a journey.It resets to zero every time the ignition is switched on.
Setting the date and time
Without audio system
Set the date and time via the instrument panel display.► Press and hold this button.
► Press one of these buttons to select the setting to be changed.► Briefly press this button to confirm.
► Press one of these buttons to change the setting and confirm again to record the change.
Page 38 of 272
38
WARNI NG
Never fasten a load to the roof flap.
WARNI NG
Never drive without the support bar in place.The rear doors will only lock when the support
bar is installed.When the roof flap is open, take care when driving where height is restricted.Never rest loads directly on the rear doors.Comply with the usual indications for warning other drivers.Only use the roof flap on short trips.
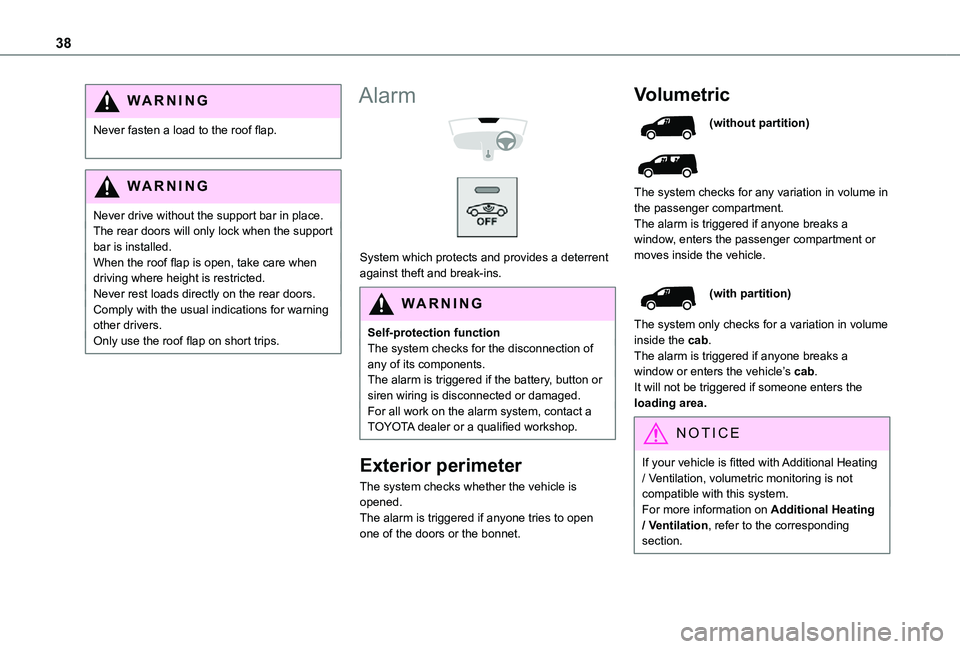
Alarm
System which protects and provides a deterrent against theft and break-ins.
WARNI NG
Self-protection functionThe system checks for the disconnection of any of its components.The alarm is triggered if the battery, button or siren wiring is disconnected or damaged.For all work on the alarm system, contact a TOYOTA dealer or a qualified workshop.
Exterior perimeter
The system checks whether the vehicle is opened.The alarm is triggered if anyone tries to open one of the doors or the bonnet.
Volumetric
(without partition)
The system checks for any variation in volume in the passenger compartment.The alarm is triggered if anyone breaks a window, enters the passenger compartment or
moves inside the vehicle.
(with partition)
The system only checks for a variation in volume inside the cab.The alarm is triggered if anyone breaks a window or enters the vehicle’s cab.It will not be triggered if someone enters the loading area.
NOTIC E
If your vehicle is fitted with Additional Heating / Ventilation, volumetric monitoring is not compatible with this system.For more information on Additional Heating / Ventilation, refer to the corresponding section.
Page 86 of 272
86
NOTIC E
The ASR and DSC systems will no longer act on the operation of the engine or of the brakes in the event of a change of trajectory.These systems are reactivated automatically from 50 km/h (31 mph) and whenever the ignition is switched on.
WARNI NG
RecommendationsYour vehicle is designed principally to drive on tarmac roads but it allows you to occasionally drive on other less passable terrain.However, it does not permit off-road driving such as:– crossing and driving on terrain which could damage the underbody or strip away components (fuel pipe, fuel cooler, etc.) due to obstacles or stones in particular,– driving on terrain with steep gradients and
poor grip,– crossing a stream.
Hill Assist Descent
Control
System that provides assistance when descending on loose or soft surfaces (gravel, mud, etc.) or a steep gradient.This system reduces the risk of slip or loss of control of the vehicle when descending, whether going forward or in reverse.During a descent, it assists the driver in maintaining a constant speed, depending on the gear engaged, while progressively releasing the brakes.
NOTIC E
For the system to activate, the slope must be greater than 5%.The system can be used with the gearbox in neutral.Otherwise engage a gear corresponding to the speed to prevent the engine stalling.With an automatic gearbox, the system can be used with the selector at N, D or R.
WARNI NG
When the system is regulating, the Active Safety Brake system is automatically
deactivated.
NOTIC E
The system is not available:– if the speed of the vehicle is above 70 km/h (43 mph),– if the speed of the vehicle is being controlled by the Adaptive Cruise Control, depending on the type of gearbox.
Switching on
By default, the system is not selected.The state of the function is not saved when the ignition is switched off.The driver can select the system when the engine is running, when the vehicle is stationary or when moving at speeds up to approximately 50 km/h (31 mph).
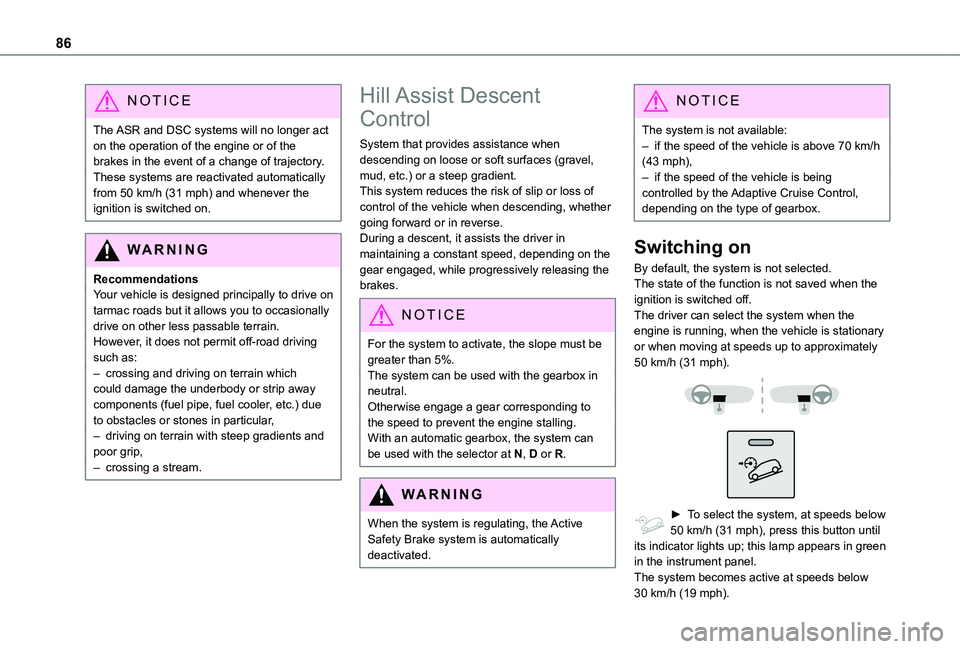
► To select the system, at speeds below 50 km/h (31 mph), press this button until its indicator lights up; this lamp appears in green in the instrument panel.The system becomes active at speeds below 30 km/h (19 mph).