turn signal TOYOTA PROACE CITY 2021 Owners Manual
[x] Cancel search | Manufacturer: TOYOTA, Model Year: 2021, Model line: PROACE CITY, Model: TOYOTA PROACE CITY 2021Pages: 272, PDF Size: 60.75 MB
Page 15 of 272
15
Instruments
1
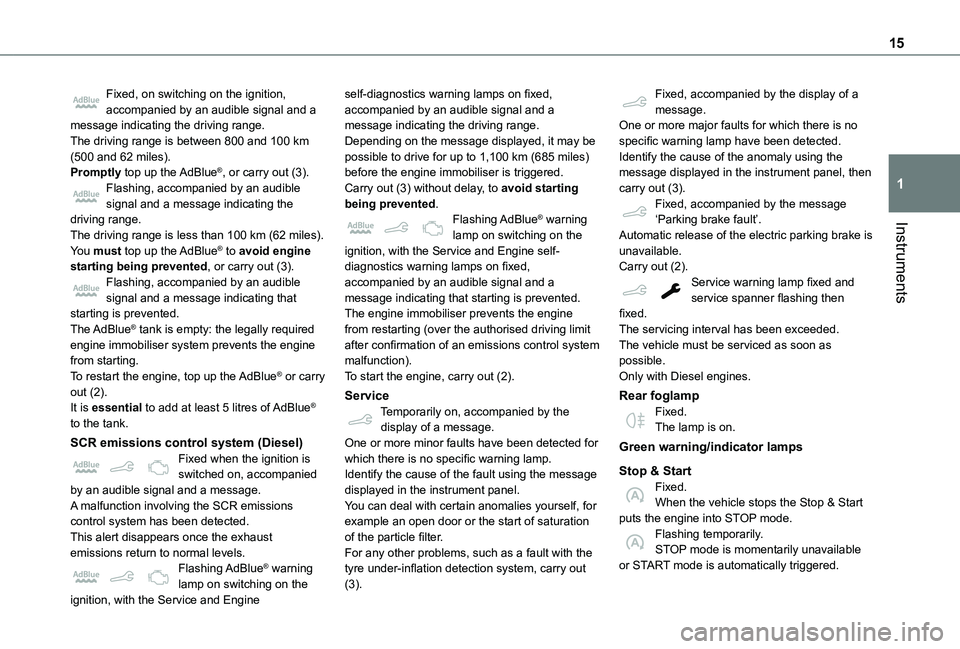
Fixed, on switching on the ignition, accompanied by an audible signal and a message indicating the driving range.The driving range is between 800 and 100 km (500 and 62 miles).Promptly top up the AdBlue®, or carry out (3).Flashing, accompanied by an audible signal and a message indicating the driving range.The driving range is less than 100 km (62 miles).You must top up the AdBlue® to avoid engine starting being prevented, or carry out (3).Flashing, accompanied by an audible signal and a message indicating that starting is prevented.The AdBlue® tank is empty: the legally required engine immobiliser system prevents the engine from starting.To restart the engine, top up the AdBlue® or carry out (2).It is essential to add at least 5 litres of AdBlue® to the tank.
SCR emissions control system (Diesel)
Fixed when the ignition is switched on, accompanied by an audible signal and a message.A malfunction involving the SCR emissions control system has been detected.This alert disappears once the exhaust emissions return to normal levels.Flashing AdBlue® warning lamp on switching on the
ignition, with the Service and Engine
self-diagnostics warning lamps on fixed, accompanied by an audible signal and a message indicating the driving range.Depending on the message displayed, it may be possible to drive for up to 1,100 km (685 miles) before the engine immobiliser is triggered.Carry out (3) without delay, to avoid starting being prevented.Flashing AdBlue® warning lamp on switching on the ignition, with the Service and Engine self-diagnostics warning lamps on fixed, accompanied by an audible signal and a message indicating that starting is prevented.The engine immobiliser prevents the engine from restarting (over the authorised driving limit after confirmation of an emissions control system malfunction).To start the engine, carry out (2).
ServiceTemporarily on, accompanied by the display of a message.One or more minor faults have been detected for
which there is no specific warning lamp.Identify the cause of the fault using the message displayed in the instrument panel.You can deal with certain anomalies yourself, for example an open door or the start of saturation of the particle filter.For any other problems, such as a fault with the tyre under-inflation detection system, carry out (3).
Fixed, accompanied by the display of a message.One or more major faults for which there is no specific warning lamp have been detected.Identify the cause of the anomaly using the message displayed in the instrument panel, then carry out (3).Fixed, accompanied by the message ‘Parking brake fault’.Automatic release of the electric parking brake is unavailable.Carry out (2).Service warning lamp fixed and service spanner flashing then fixed.The servicing interval has been exceeded.The vehicle must be serviced as soon as possible.Only with Diesel engines.
Rear foglampFixed.The lamp is on.
Green warning/indicator lamps
Stop & StartFixed.When the vehicle stops the Stop & Start puts the engine into STOP mode.Flashing temporarily.STOP mode is momentarily unavailable or START mode is automatically triggered.
Page 18 of 272
18
Trip distance recorder
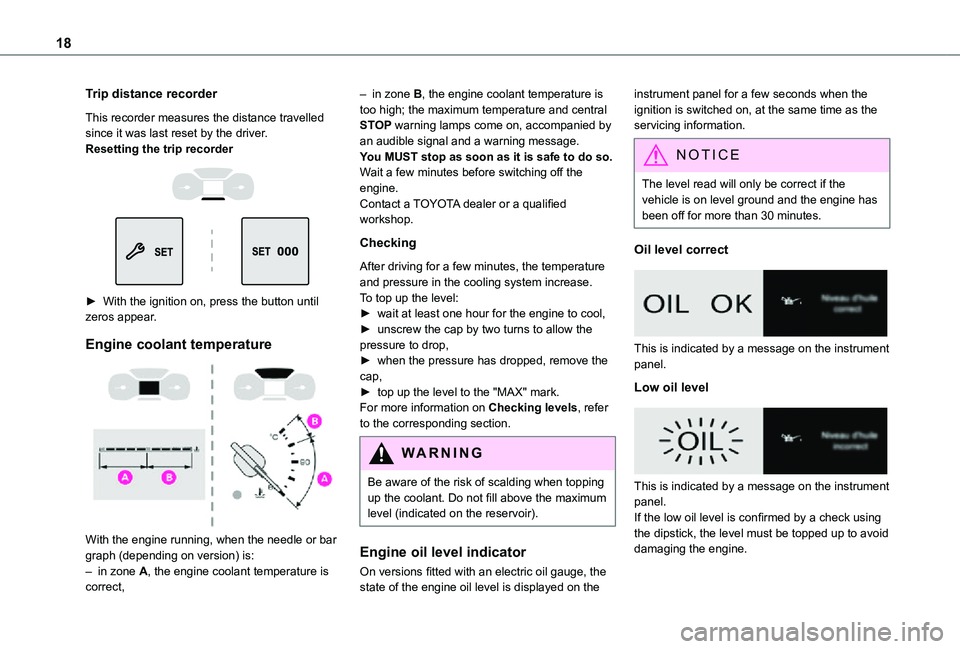
This recorder measures the distance travelled since it was last reset by the driver.Resetting the trip recorder
► With the ignition on, press the button until zeros appear.
Engine coolant temperature
With the engine running, when the needle or bar graph (depending on version) is:– in zone A, the engine coolant temperature is correct,
– in zone B, the engine coolant temperature is too high; the maximum temperature and central STOP warning lamps come on, accompanied by an audible signal and a warning message.You MUST stop as soon as it is safe to do so.Wait a few minutes before switching off the engine.Contact a TOYOTA dealer or a qualified workshop.
Checking
After driving for a few minutes, the temperature and pressure in the cooling system increase.To top up the level:► wait at least one hour for the engine to cool,► unscrew the cap by two turns to allow the pressure to drop,► when the pressure has dropped, remove the cap,► top up the level to the "MAX" mark.For more information on Checking levels, refer to the corresponding section.
WARNI NG
Be aware of the risk of scalding when topping up the coolant. Do not fill above the maximum level (indicated on the reservoir).
Engine oil level indicator
On versions fitted with an electric oil gauge, the state of the engine oil level is displayed on the
instrument panel for a few seconds when the ignition is switched on, at the same time as the servicing information.
NOTIC E
The level read will only be correct if the vehicle is on level ground and the engine has been off for more than 30 minutes.
Oil level correct
This is indicated by a message on the instrument panel.
Low oil level
This is indicated by a message on the instrument panel.If the low oil level is confirmed by a check using the dipstick, the level must be topped up to avoid
damaging the engine.
Page 26 of 272
26
Activation/Deactivation
Without audio system
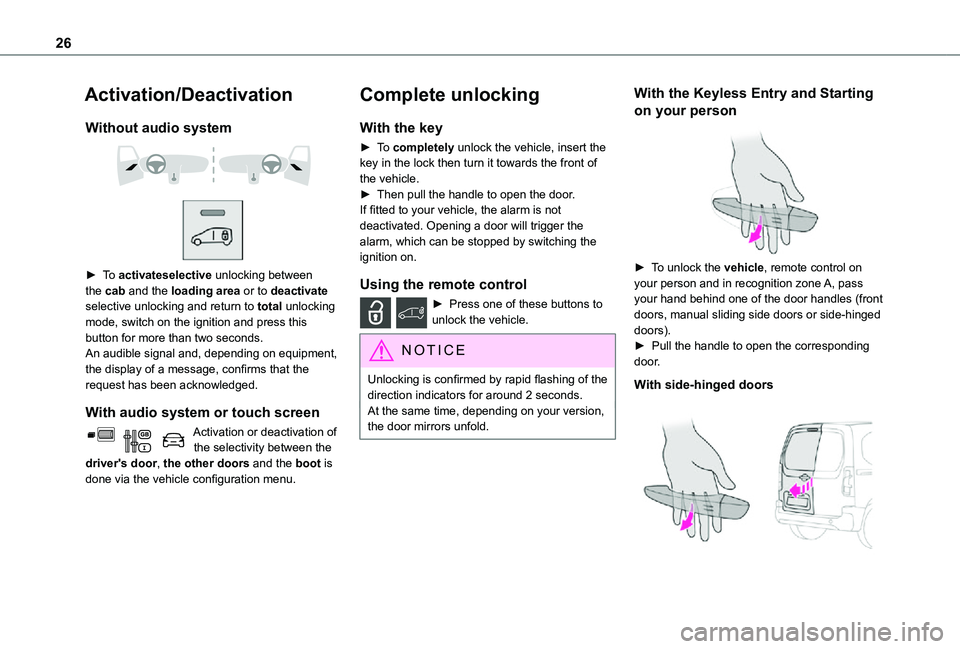
► To activateselective unlocking between the cab and the loading area or to deactivate selective unlocking and return to total unlocking mode, switch on the ignition and press this button for more than two seconds.An audible signal and, depending on equipment, the display of a message, confirms that the request has been acknowledged.
With audio system or touch screen
Activation or deactivation of the selectivity between the driver's door, the other doors and the boot is done via the vehicle configuration menu.
Complete unlocking
With the key
► To completely unlock the vehicle, insert the key in the lock then turn it towards the front of the vehicle.► Then pull the handle to open the door.If fitted to your vehicle, the alarm is not deactivated. Opening a door will trigger the alarm, which can be stopped by switching the ignition on.
Using the remote control
► Press one of these buttons to unlock the vehicle.
NOTIC E
Unlocking is confirmed by rapid flashing of the direction indicators for around 2 seconds.At the same time, depending on your version, the door mirrors unfold.
With the Keyless Entry and Starting
on your person
► To unlock the vehicle, remote control on your person and in recognition zone A, pass your hand behind one of the door handles (front doors, manual sliding side doors or side-hinged doors).► Pull the handle to open the corresponding door.
With side-hinged doors
Page 28 of 272
28
Unlocking
NOTIC E
Unlocking is signalled by rapid flashing of the direction indicators for a few seconds.Depending on version, the door mirrors unfold and the alarm is deactivated.
With the key
► To completely unlock the vehicle, insert the key in the lock then turn it towards the front of the vehicle.► Then pull the handle to open the door.If fitted to your vehicle, the alarm is not deactivated. Opening a door will trigger the alarm, which can be stopped by switching the ignition on.
Using the remote control
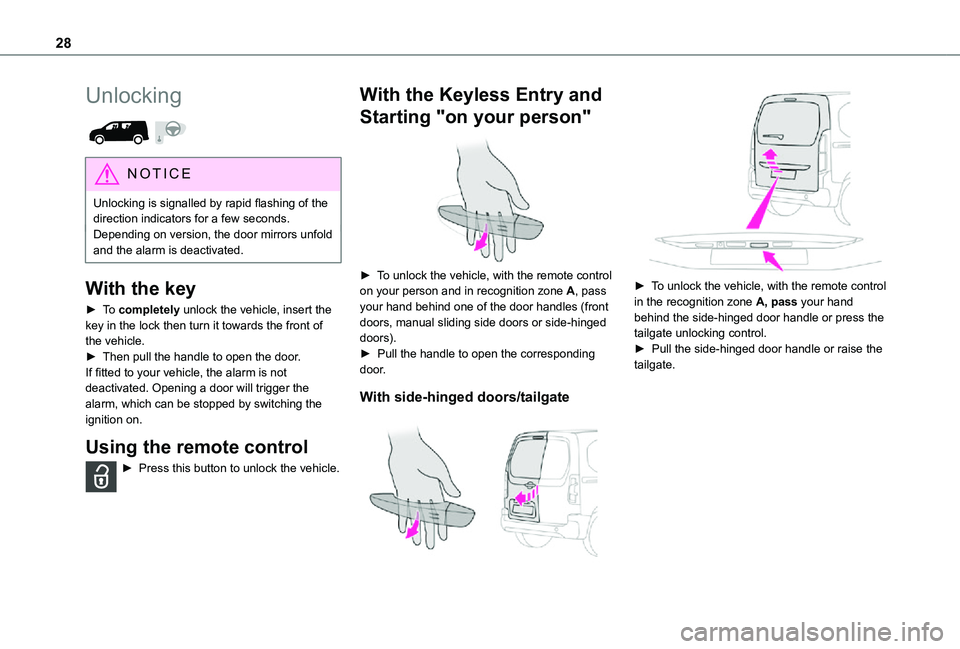
► Press this button to unlock the vehicle.
With the Keyless Entry and
Starting "on your person"
► To unlock the vehicle, with the remote control on your person and in recognition zone A, pass your hand behind one of the door handles (front doors, manual sliding side doors or side-hinged doors).► Pull the handle to open the corresponding door.
With side-hinged doors/tailgate
► To unlock the vehicle, with the remote control in the recognition zone A, pass your hand behind the side-hinged door handle or press the tailgate unlocking control. ► Pull the side-hinged door handle or raise the tailgate.
Page 29 of 272
29
Access
2
Locking
WARNI NG
Ensure that no person or object prevents the correct closing of the windows.Be particularly aware of children when operating the windows.
NOTIC E
If your vehicle is not fitted with an alarm, the locking/deadlocking is signalled by the fixed illumination of the direction indicators for about two seconds.Depending on your version, the door mirrors fold at the same time.
With the key
► To lock the vehicle, insert the key in the lock then turn it towards the rear of the vehicle.
With the remote control
► To lock the vehicle, press this button.
NOTIC E
If your vehicle is so equipped, pressing and holding this button closes the windows. The window stops in position when you release the button.
With the Keyless Entry and
Starting "on your person"
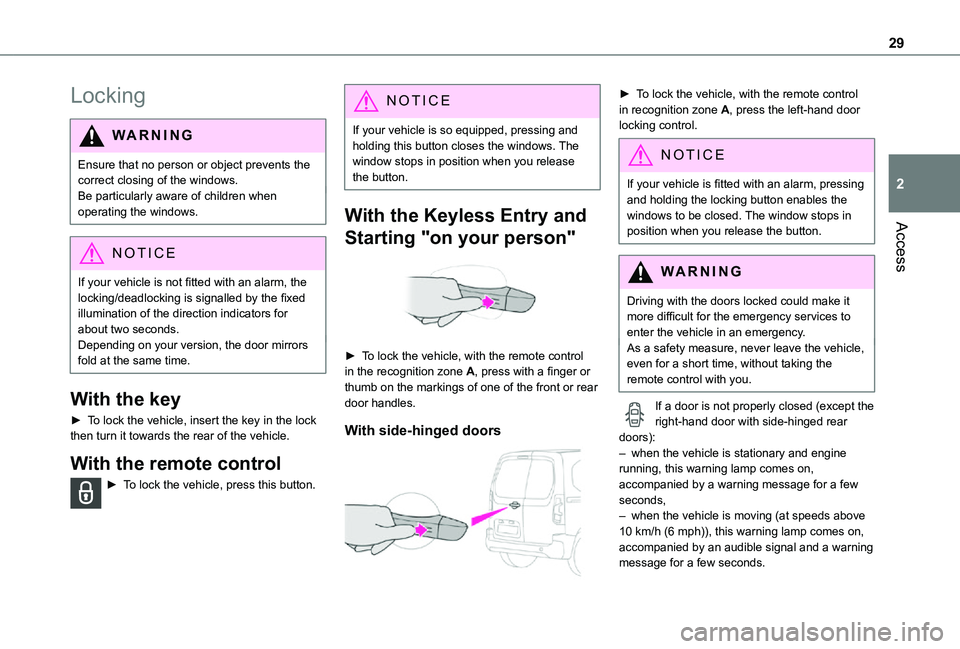
► To lock the vehicle, with the remote control in the recognition zone A, press with a finger or thumb on the markings of one of the front or rear door handles.
With side-hinged doors
► To lock the vehicle, with the remote control in recognition zone A, press the left-hand door locking control.
NOTIC E
If your vehicle is fitted with an alarm, pressing and holding the locking button enables the windows to be closed. The window stops in position when you release the button.
WARNI NG
Driving with the doors locked could make it more difficult for the emergency services to enter the vehicle in an emergency.As a safety measure, never leave the vehicle, even for a short time, without taking the remote control with you.
If a door is not properly closed (except the right-hand door with side-hinged rear doors):– when the vehicle is stationary and engine running, this warning lamp comes on, accompanied by a warning message for a few seconds, – when the vehicle is moving (at speeds above 10 km/h (6 mph)), this warning lamp comes on,
accompanied by an audible signal and a warning message for a few seconds.
Page 33 of 272
33
Access
2
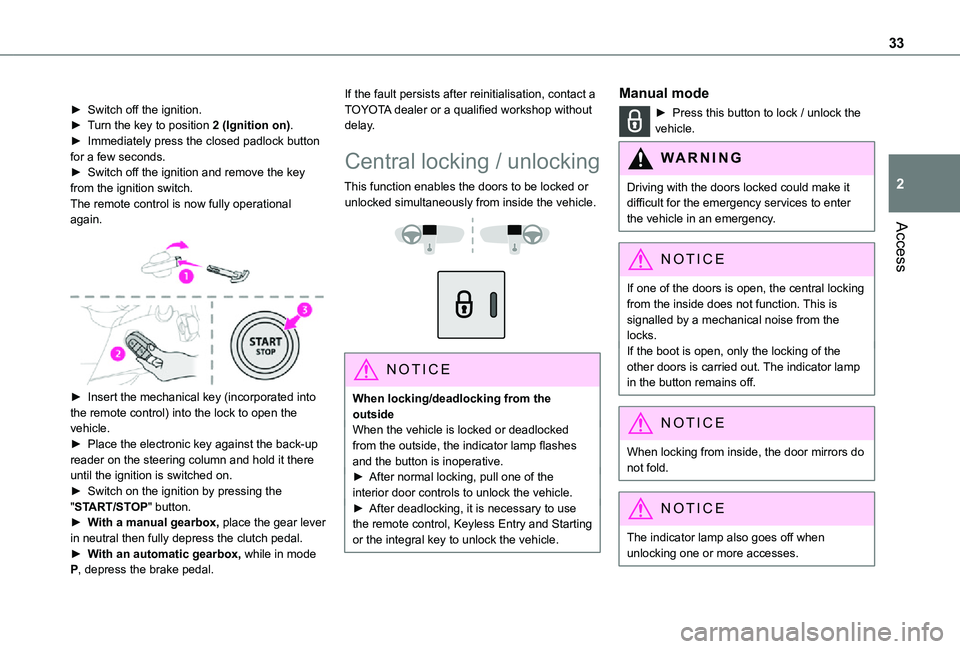
► Switch off the ignition.► Turn the key to position 2 (Ignition on).► Immediately press the closed padlock button for a few seconds.► Switch off the ignition and remove the key from the ignition switch.The remote control is now fully operational again.
► Insert the mechanical key (incorporated into the remote control) into the lock to open the vehicle.► Place the electronic key against the back-up
reader on the steering column and hold it there until the ignition is switched on.► Switch on the ignition by pressing the "START/STOP" button.► With a manual gearbox, place the gear lever in neutral then fully depress the clutch pedal.► With an automatic gearbox, while in mode P, depress the brake pedal.
If the fault persists after reinitialisation, contact a TOYOTA dealer or a qualified workshop without delay.
Central locking / unlocking
This function enables the doors to be locked or unlocked simultaneously from inside the vehicle.
NOTIC E
When locking/deadlocking from the outsideWhen the vehicle is locked or deadlocked from the outside, the indicator lamp flashes and the button is inoperative.► After normal locking, pull one of the interior door controls to unlock the vehicle.► After deadlocking, it is necessary to use the remote control, Keyless Entry and Starting or the integral key to unlock the vehicle.
Manual mode
► Press this button to lock / unlock the vehicle.
WARNI NG
Driving with the doors locked could make it difficult for the emergency services to enter the vehicle in an emergency.
NOTIC E
If one of the doors is open, the central locking from the inside does not function. This is signalled by a mechanical noise from the locks.If the boot is open, only the locking of the other doors is carried out. The indicator lamp in the button remains off.
NOTIC E
When locking from inside, the door mirrors do not fold.
NOTIC E
The indicator lamp also goes off when unlocking one or more accesses.
Page 71 of 272
71
Lighting and visibility
4
If the lighting is switched off automatically ("AUTO" position) or the dipped beam headlamps are switched off manually, the foglamps and sidelamps will remain on.► Turn the ring backwards to switch the foglamps off; the sidelamps will then switch off.
NOTIC E
When the lighting is left onAn audible signal when a front door is opened warns the driver that the vehicle's exterior lighting is on, with the ignition off and in manual lighting mode.In this case, switching off the lighting stops the audible signal.The lighting goes off when you switch off the ignition, but you can always switch it on again using the lighting control lever.
NOTIC E
Travelling abroad
If using your vehicle in a country that drives on the other side of the road, the headlamps must be adjusted to avoid dazzling on-coming drivers.Contact a TOYOTA dealer or a qualified workshop.
WARNI NG
In good or rainy weather, by both day and night, use of the front foglamps and the rear foglamps are prohibited. In these situations, the power of their beams may dazzle other drivers. They should only be used in fog or falling snow.In these weather conditions, it is your responsibility to switch on the foglamps and dipped headlamps manually as the sunshine sensor may detect sufficient light.Switch off the front and rear foglamps when they are no longer necessary.
WARNI NG
Never look too closely at the luminous beam of LED headlamps: risk of serious eye injury.
Direction indicators
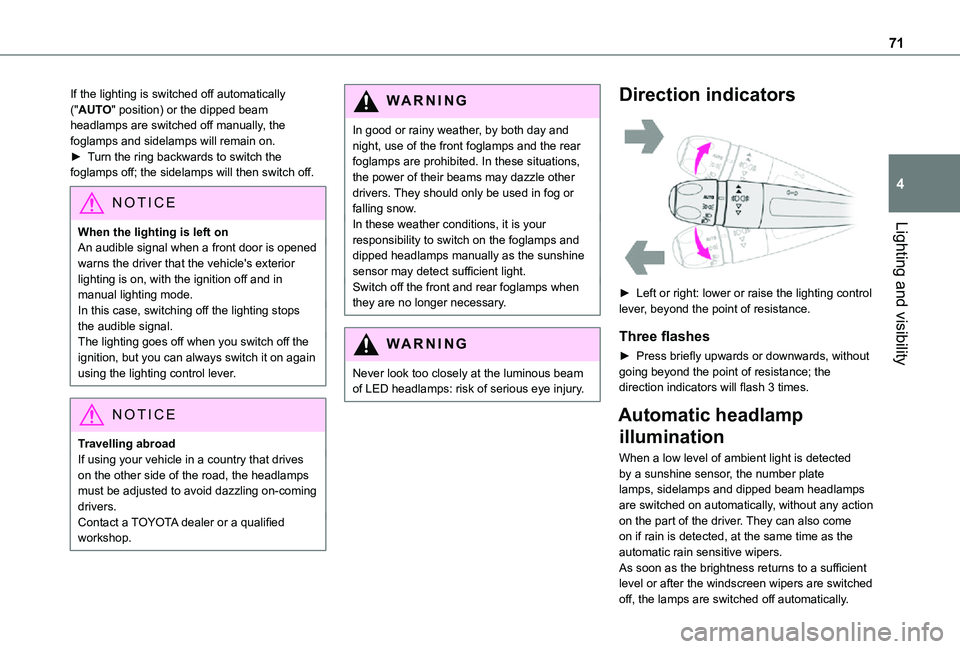
► Left or right: lower or raise the lighting control lever, beyond the point of resistance.
Three flashes
► Press briefly upwards or downwards, without going beyond the point of resistance; the direction indicators will flash 3 times.
Automatic headlamp
illumination
When a low level of ambient light is detected by a sunshine sensor, the number plate lamps, sidelamps and dipped beam headlamps are switched on automatically, without any action on the part of the driver. They can also come on if rain is detected, at the same time as the automatic rain sensitive wipers.As soon as the brightness returns to a sufficient level or after the windscreen wipers are switched off, the lamps are switched off automatically.
Page 72 of 272
72
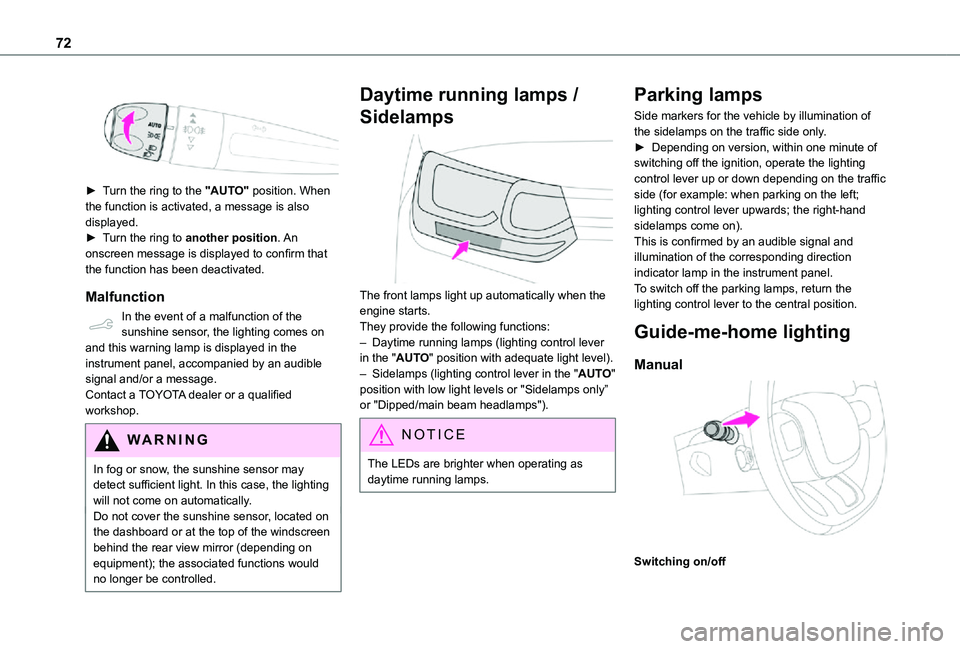
► Turn the ring to the "AUTO" position. When the function is activated, a message is also displayed.► Turn the ring to another position. An
onscreen message is displayed to confirm that the function has been deactivated.
Malfunction
In the event of a malfunction of the sunshine sensor, the lighting comes on and this warning lamp is displayed in the instrument panel, accompanied by an audible signal and/or a message.Contact a TOYOTA dealer or a qualified workshop.
WARNI NG
In fog or snow, the sunshine sensor may detect sufficient light. In this case, the lighting will not come on automatically.Do not cover the sunshine sensor, located on the dashboard or at the top of the windscreen behind the rear view mirror (depending on equipment); the associated functions would no longer be controlled.
Daytime running lamps /
Sidelamps
The front lamps light up automatically when the engine starts.They provide the following functions:– Daytime running lamps (lighting control lever in the "AUTO" position with adequate light level).– Sidelamps (lighting control lever in the "AUTO" position with low light levels or "Sidelamps only” or "Dipped/main beam headlamps").
NOTIC E
The LEDs are brighter when operating as daytime running lamps.
Parking lamps
Side markers for the vehicle by illumination of the sidelamps on the traffic side only.► Depending on version, within one minute of switching off the ignition, operate the lighting control lever up or down depending on the traffic side (for example: when parking on the left; lighting control lever upwards; the right-hand sidelamps come on).This is confirmed by an audible signal and illumination of the corresponding direction indicator lamp in the instrument panel.To switch off the parking lamps, return the lighting control lever to the central position.
Guide-me-home lighting
Manual
Switching on/off
Page 83 of 272
83
Safety
5
accompanied by a message and an audible signal, indicates an EBFD malfunction.You must stop as soon as it is safe to do so.Contact a TOYOTA dealer or a qualified workshop.
NOTIC E
The normal operation of the ABS may result in slight vibrations in the brake pedal.
WARNI NG
When braking in an emergency, press very firmly and maintain this pressure.
WARNI NG
When changing wheels (tyres and rims), ensure that these are approved for your vehicle.
WARNI NG
After an impact, have these systems checked by a TOYOTA dealer or a qualified workshop.
Emergency braking
assistance (EBA)
In an emergency, this system enables you to reach the optimum braking pressure more quickly and therefore reduce the stopping distance.It is triggered in relation to the speed at which the brake pedal is pressed. This is felt by a reduction in the resistance of the pedal and an increase in braking efficiency.
Anti-slip regulation (ASR)
/ Dynamic stability control
(DSC)
Anti-slip regulation optimises traction using engine braking and by applying the brakes on the driving wheels to avoid wheel spinning. It also enhances the vehicle's directional stability while accelerating.If there is a difference between the vehicle’s trajectory and the path desired by the driver, the
dynamic stability control system automatically uses engine braking and the brakes on one or more wheels to return the vehicle to the desired path, within the limits of the laws of physics.These systems are activated automatically every time the vehicle is started.They come into operation in the event of a grip or trajectory problem.
This warning lamp on the instrument panel flashes to indicate that they are operating.
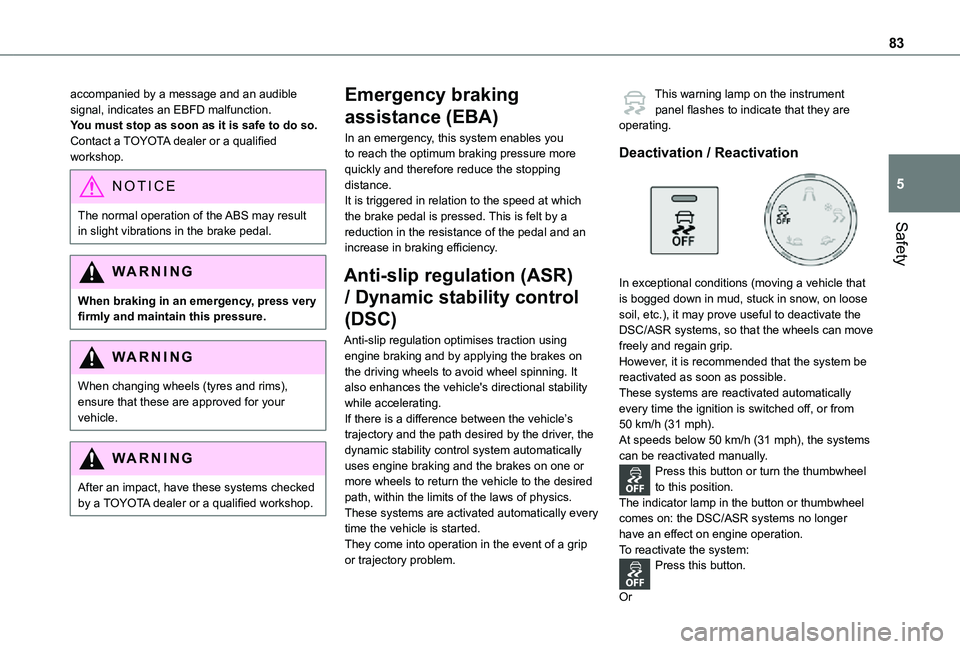
Deactivation / Reactivation
In exceptional conditions (moving a vehicle that is bogged down in mud, stuck in snow, on loose soil, etc.), it may prove useful to deactivate the DSC/ASR systems, so that the wheels can move freely and regain grip.However, it is recommended that the system be reactivated as soon as possible.These systems are reactivated automatically every time the ignition is switched off, or from 50 km/h (31 mph).At speeds below 50 km/h (31 mph), the systems can be reactivated manually.Press this button or turn the thumbwheel to this position.The indicator lamp in the button or thumbwheel comes on: the DSC/ASR systems no longer have an effect on engine operation.To reactivate the system:Press this button.
Or
Page 84 of 272
84
Turn the thumbwheel to this position.
The indicator lamp in the button or thumbwheel goes off.
Malfunction
In the event of a system malfunction, this warning lamp comes on, accompanied by an onscreen message and audible signal.Contact a TOYOTA dealer or a qualified workshop to have the systems checked.
WARNI NG
ASR / DSCThese systems enhance safety during normal driving, but should not encourage the driver to take extra risks or drive at high speed.It is in conditions of reduced grip (rain, snow, ice) that the risk of loss of grip increases. It is therefore important for your safety to keep these systems activated in all conditions, and particularly in difficult conditions.
Correct operation of these systems depends on compliance with the manufacturer's recommendations relating to the wheels (tyres and rims), braking and electronic components, as well as the assembly and repair procedures used by TOYOTA dealers.The use of snow tyres is recommended, to ensure that these systems remain effective in winter conditions. All four wheels must be fitted with tyres approved for the vehicle.
Trailer stability assist (TSA)
When towing, this system reduces the risk of the vehicle or trailer snaking.
Operation
The system is activated automatically when the ignition is switched on.The electronic stability control system (ESC) must not have any faults.At speeds between 60 and 160 km/h (37 and 99 mph), if the system detects oscillating trailer movements (snaking), it acts on the brakes to stabilise the trailer and, if necessary, reduces engine power to slow the vehicle.This warning lamp flashes on the instrument panel and the brake lamps light up to draw attention to this corrective action.For information on weights and towed loads, refer to the Engine Technical Data and Towed Loads section or your vehicle’s registration certificateTo ensure safe driving with a Towing device,
refer to the corresponding section.
Malfunction
If a fault occurs, this warning lamp comes on in the instrument panel, accompanied by a message and an audible signal.If you wish to continue towing a trailer, reduce your speed and drive carefully!Contact a TOYOTA dealer or a qualified workshop to have the system checked.
WARNI NG
The trailer stability assist system offers enhanced safety in normal driving, provided that the recommendations on towing a trailer are observed. It should not encourage the driver to take risks, such as towing a trailer in adverse operating conditions (overloading, failure to observe the trailer nose weight, worn or under-inflated tyres, faulty braking system, etc.), or to drive at excessive speeds.In certain cases, the system may not detect trailer snaking, particularly with a light trailer.When driving on slippery or poor surfaces, the system may not be able to prevent sudden trailer snaking.