settings TOYOTA PROACE EV 2021 Owners Manual
[x] Cancel search | Manufacturer: TOYOTA, Model Year: 2021, Model line: PROACE EV, Model: TOYOTA PROACE EV 2021Pages: 360, PDF Size: 68.91 MB
Page 3 of 360
3
Contents
Stop & Start 166Under-inflation detection 168Driving and manoeuvring aids - General recommendations 170Head-up display 172Memorising speeds 173Speed Limit Recognition and Recommendation 174Speed limiter 176Cruise control - particular recommendations 178Cruise control 179Adaptive Cruise Control 181Active Safety Brake with Collision Risk Alert and Intelligent emergency braking assistance 185Lane departure warning system 187Distraction detection 188Blind Spot Monitoring System 190Parking sensors 191VisioPark Light 193Top Rear Vision 194
7Practical informationCompatibility of fuels 197Refuelling 197Misfuel prevention (Diesel) 199Charging system (Electric) 199Charging the traction battery (Electric) 207Energy economy mode 2 11Snow chains 2 11Towing device 212Roof bars / Roof rack 213Bonnet 214Engine compartment 215Checking levels 216
Speed checks 218AdBlue® (Diesel engines) 221Free-wheeling 223Advice on care and maintenance 225
8In the event of a breakdownWarning triangle 227Running out of fuel (Diesel) 227Tool box 228Temporary puncture repair kit 229Spare wheel 233Changing a bulb 237Changing a fuse 24312 V battery / Accessory battery 246Towing 250
9Technical dataEngine technical data and towed loads 252Diesel engines 253Electric motor 257Dimensions 259Identification markings 262
10Bluetooth® audio systemFirst steps 263Steering mounted controls 264Menus 265Radio 265DAB (Digital Audio Broadcasting) radio 267Media 268Telephone 271Frequently asked questions 274
11TOYOTA Pro TouchFirst steps 276
Steering mounted controls 277Menus 278Applications 279Radio 280DAB (Digital Audio Broadcasting) radio 282Media 282Telephone 284Settings 287Frequently asked questions 289
12 TOYOTA Pro Touch with navigation systemFirst steps 291Steering mounted controls 292Menus 293Voice commands 294Navigation 298Connected navigation 301Applications 303Radio 306DAB (Digital Audio Broadcasting) radio 308Media 308Telephone 310Settings 313Frequently asked questions 315
■ Alphabetical index
Page 11 of 360
11
Instruments
1
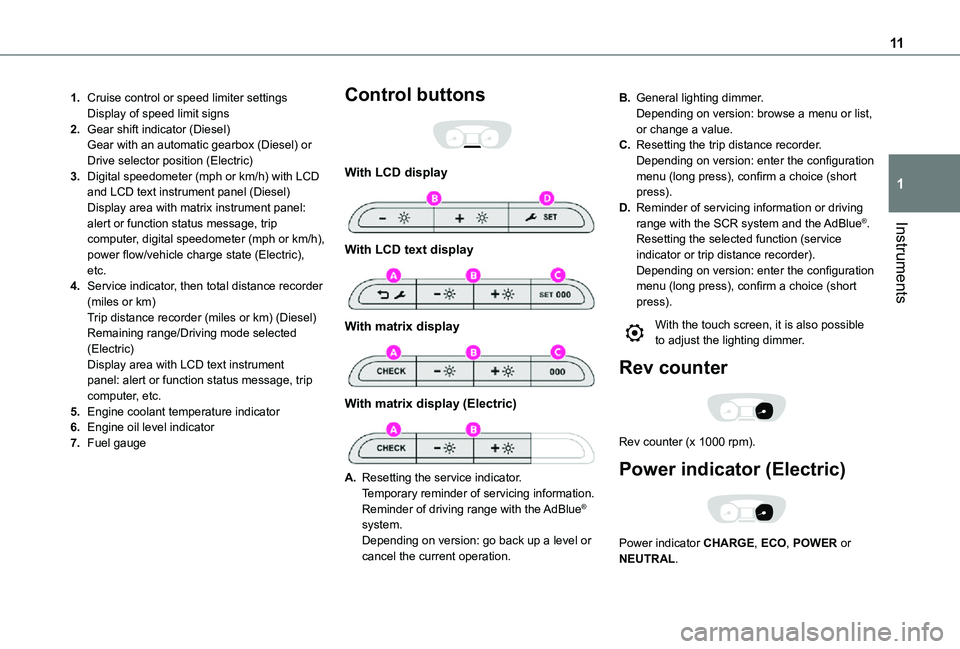
1.Cruise control or speed limiter settingsDisplay of speed limit signs
2.Gear shift indicator (Diesel)Gear with an automatic gearbox (Diesel) or Drive selector position (Electric)
3.Digital speedometer (mph or km/h) with LCD and LCD text instrument panel (Diesel)Display area with matrix instrument panel: alert or function status message, trip computer, digital speedometer (mph or km/h), power flow/vehicle charge state (Electric), etc.
4.Service indicator, then total distance recorder (miles or km)Trip distance recorder (miles or km) (Diesel)Remaining range/Driving mode selected (Electric)Display area with LCD text instrument panel: alert or function status message, trip computer, etc.
5.Engine coolant temperature indicator
6.Engine oil level indicator
7.Fuel gauge
Control buttons
With LCD display
With LCD text display
With matrix display
With matrix display (Electric)
A.Resetting the service indicator.Temporary reminder of servicing information.Reminder of driving range with the AdBlue® system.Depending on version: go back up a level or cancel the current operation.
B.General lighting dimmer.Depending on version: browse a menu or list, or change a value.
C.Resetting the trip distance recorder.Depending on version: enter the configuration menu (long press), confirm a choice (short press).
D.Reminder of servicing information or driving range with the SCR system and the AdBlue®.Resetting the selected function (service indicator or trip distance recorder).Depending on version: enter the configuration menu (long press), confirm a choice (short press).
With the touch screen, it is also possible to adjust the lighting dimmer.
Rev counter
Rev counter (x 1000 rpm).
Power indicator (Electric)
Power indicator CHARGE, ECO, POWER or NEUTRAL.
Page 23 of 360
23
Instruments
1
NOTIC E
To quickly heat or cool the passenger compartment, feel free to temporarily select the maximum heating or cooling setting.Excessive use of thermal comfort equipment, particularly at low speed, can significantly decrease the vehicle's range.Remember to optimise equipment settings upon achieving the desired level of comfort, and adjust them if necessary whenever you start the vehicle.After an extended period without using the heating, you may notice a slight odour during the first few minutes of use.
Distance recorders
The total and trip distances are displayed for thirty seconds when the ignition is switched off, when the driver's door is opened and when the vehicle is locked or unlocked.
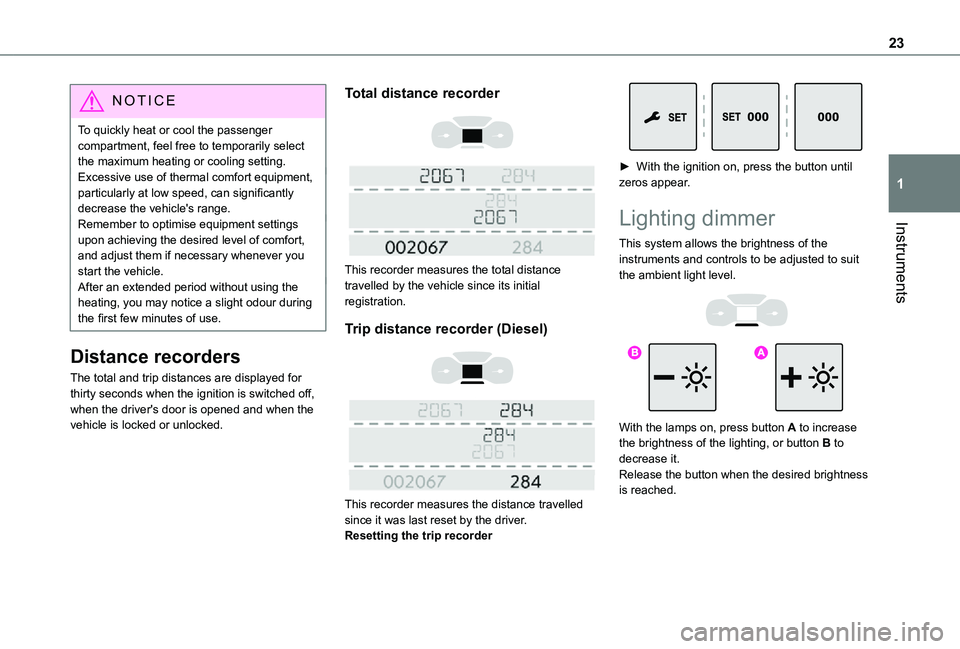
Total distance recorder
This recorder measures the total distance travelled by the vehicle since its initial registration.
Trip distance recorder (Diesel)
This recorder measures the distance travelled since it was last reset by the driver.Resetting the trip recorder
► With the ignition on, press the button until zeros appear.
Lighting dimmer
This system allows the brightness of the instruments and controls to be adjusted to suit the ambient light level.
With the lamps on, press button A to increase the brightness of the lighting, or button B to
decrease it.Release the button when the desired brightness is reached.
Page 24 of 360
24
With touch screen
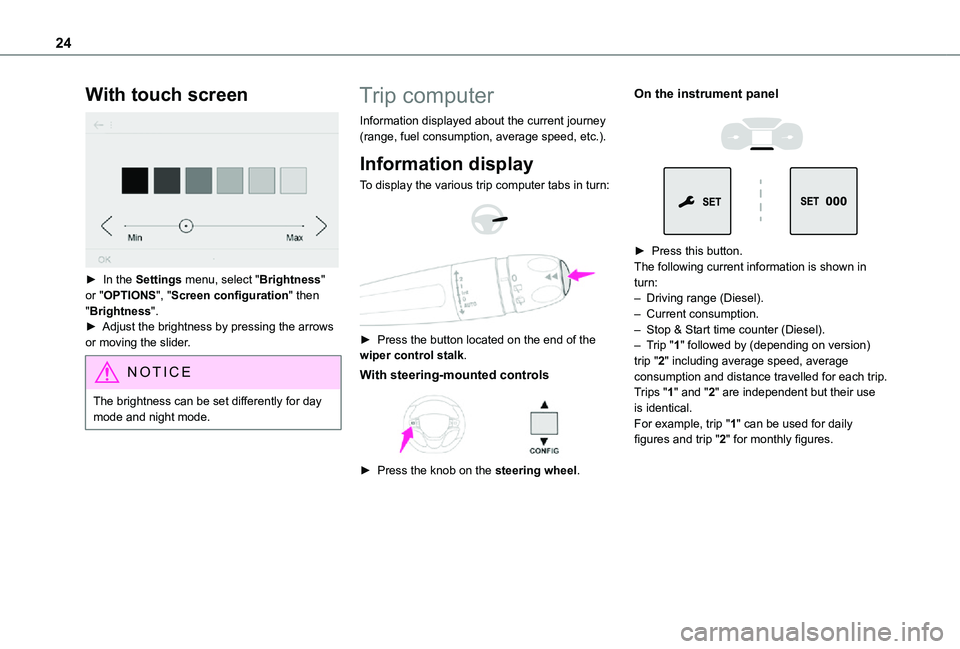
► In the Settings menu, select "Brightness" or "OPTIONS", "Screen configuration" then "Brightness".► Adjust the brightness by pressing the arrows or moving the slider.
NOTIC E
The brightness can be set differently for day mode and night mode.
Trip computer
Information displayed about the current journey (range, fuel consumption, average speed, etc.).
Information display
To display the various trip computer tabs in turn:
► Press the button located on the end of the wiper control stalk.
With steering-mounted controls
► Press the knob on the steering wheel.
On the instrument panel
► Press this button.The following current information is shown in turn:– Driving range (Diesel).– Current consumption.– Stop & Start time counter (Diesel).– Trip "1" followed by (depending on version) trip "2" including average speed, average consumption and distance travelled for each trip.Trips "1" and "2" are independent but their use is identical.For example, trip "1" can be used for daily figures and trip "2" for monthly figures.
Page 26 of 360
26
Touch screen
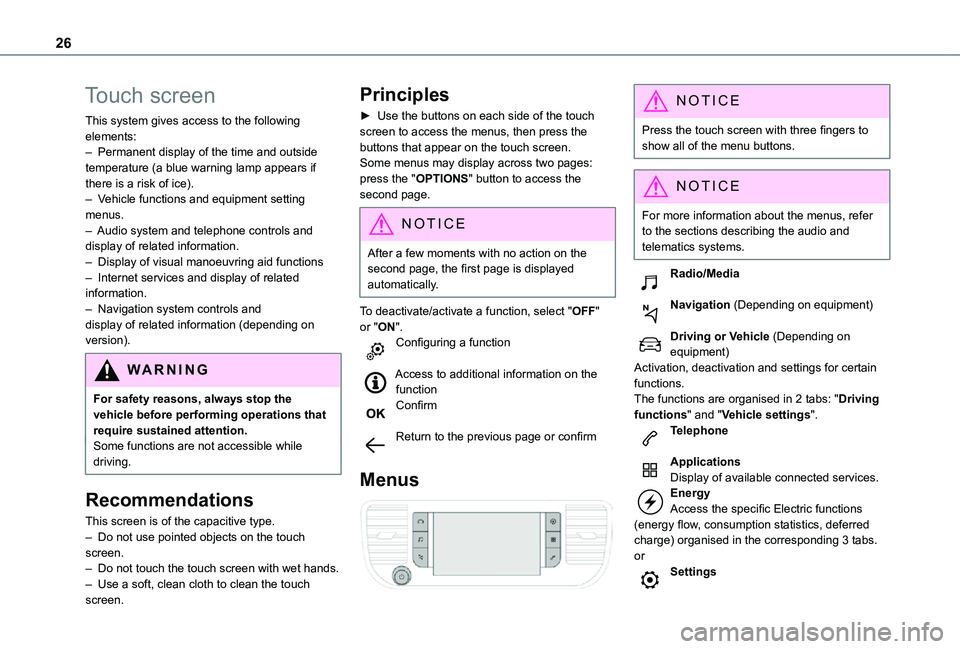
This system gives access to the following elements:– Permanent display of the time and outside temperature (a blue warning lamp appears if there is a risk of ice).– Vehicle functions and equipment setting menus.– Audio system and telephone controls and display of related information.– Display of visual manoeuvring aid functions– Internet services and display of related information.– Navigation system controls and display of related information (depending on version).
WARNI NG
For safety reasons, always stop the vehicle before performing operations that require sustained attention.Some functions are not accessible while driving.
Recommendations
This screen is of the capacitive type.– Do not use pointed objects on the touch screen.– Do not touch the touch screen with wet hands.– Use a soft, clean cloth to clean the touch screen.
Principles
► Use the buttons on each side of the touch screen to access the menus, then press the buttons that appear on the touch screen.Some menus may display across two pages: press the "OPTIONS" button to access the second page.
NOTIC E
After a few moments with no action on the second page, the first page is displayed automatically.
To deactivate/activate a function, select "OFF" or "ON".Configuring a function
Access to additional information on the functionConfirm
Return to the previous page or confirm
Menus
NOTIC E
Press the touch screen with three fingers to show all of the menu buttons.
NOTIC E
For more information about the menus, refer to the sections describing the audio and
telematics systems.
Radio/Media
Navigation (Depending on equipment)
Driving or Vehicle (Depending on equipment)Activation, deactivation and settings for certain functions.The functions are organised in 2 tabs: "Driving functions" and "Vehicle settings".Telephone
ApplicationsDisplay of available connected services.EnergyAccess the specific Electric functions (energy flow, consumption statistics, deferred charge) organised in the corresponding 3 tabs.orSettings
Page 27 of 360
27
Instruments
1
Main settings for the audio system and touch screen.Audio system on/off.Volume adjustment/mute.
Upper bar
Certain information is displayed permanently in the upper bar of the touch screen:– Time and outside temperature (a blue warning lamp appears if there is a risk of ice).– Reminder of information from the Radio Media and Telephone menus and navigation instructions (depending on equipment).– Notifications.– Access to the Settings.
Energy menu
Depending on version, this is accessible either:– directly, by pressing the button near the touch screen.– via the Applications menu.
Flow
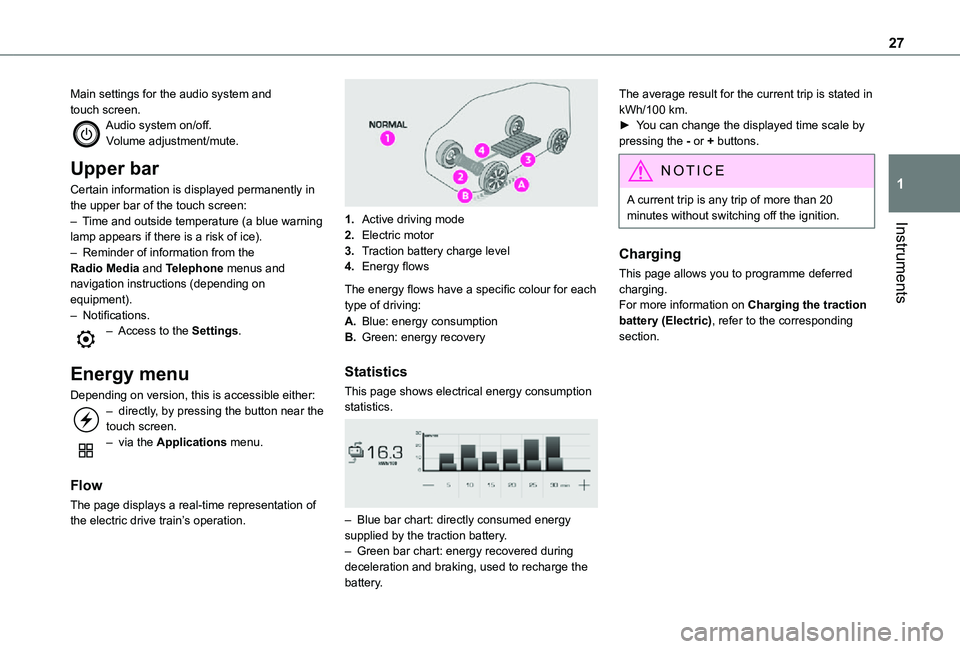
The page displays a real-time representation of the electric drive train’s operation.
1.Active driving mode
2.Electric motor
3.Traction battery charge level
4.Energy flows
The energy flows have a specific colour for each type of driving:
A.Blue: energy consumption
B.Green: energy recovery
Statistics
This page shows electrical energy consumption statistics.
– Blue bar chart: directly consumed energy supplied by the traction battery.– Green bar chart: energy recovered during deceleration and braking, used to recharge the battery.
The average result for the current trip is stated in kWh/100 km.► You can change the displayed time scale by pressing the - or + buttons.
NOTIC E
A current trip is any trip of more than 20 minutes without switching off the ignition.
Charging
This page allows you to programme deferred charging.For more information on Charging the traction battery (Electric), refer to the corresponding section.
Page 29 of 360
29
Instruments
1
With Bluetooth® audio
system
► Press the MENU button for access to the main menu.► Press the "7" or "8" button to select the "Personalisation-configuration" menu, then confirm by pressing the OK button.► Press the "5" or "6" button to select the Display configuration menu, then confirm by pressing the OKbutton.► Press the "5" or "6" and "7" or "8" buttons to adjust the date and time values, then confirm by pressing the OK button.
With TOYOTA Pro Touch
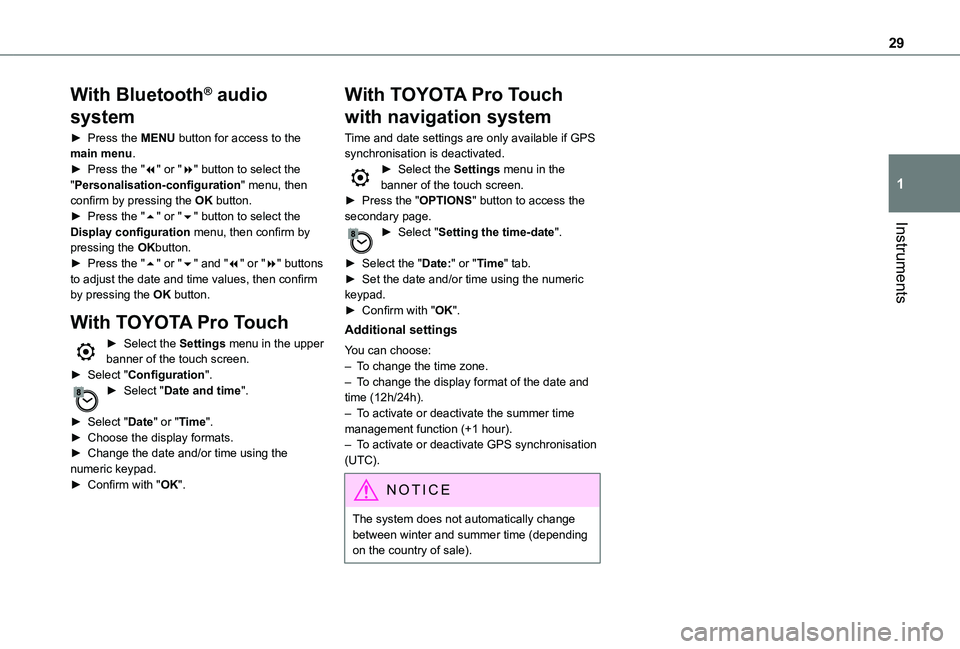
► Select the Settings menu in the upper banner of the touch screen.► Select "Configuration".► Select "Date and time".
► Select "Date" or "Time".► Choose the display formats.
► Change the date and/or time using the numeric keypad.► Confirm with "OK".
With TOYOTA Pro Touch
with navigation system
Time and date settings are only available if GPS synchronisation is deactivated.► Select the Settings menu in the banner of the touch screen.► Press the "OPTIONS" button to access the secondary page.► Select "Setting the time-date".
► Select the "Date:" or "Time" tab.► Set the date and/or time using the numeric keypad.► Confirm with "OK".
Additional settings
You can choose:– To change the time zone.– To change the display format of the date and time (12h/24h).– To activate or deactivate the summer time management function (+1 hour).
– To activate or deactivate GPS synchronisation (UTC).
NOTIC E
The system does not automatically change between winter and summer time (depending on the country of sale).
Page 64 of 360
64
Fixed one-piece bench
seat
The different equipment and settings described hereafter vary according to the version and the configuration of your vehicle.
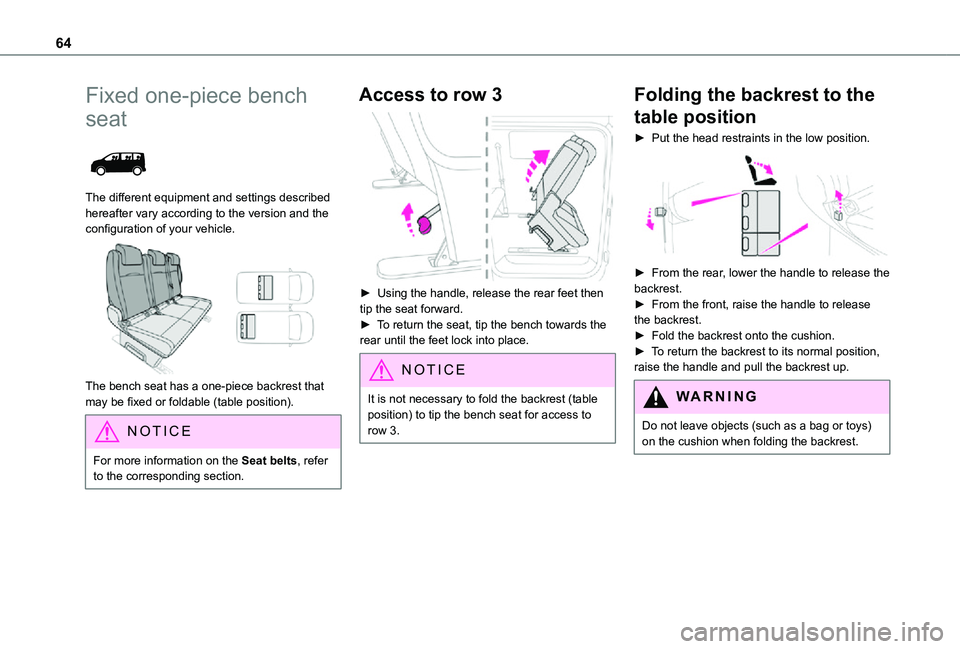
The bench seat has a one-piece backrest that may be fixed or foldable (table position).
NOTIC E
For more information on the Seat belts, refer to the corresponding section.
Access to row 3
► Using the handle, release the rear feet then tip the seat forward.► To return the seat, tip the bench towards the rear until the feet lock into place.
NOTIC E
It is not necessary to fold the backrest (table position) to tip the bench seat for access to row 3.
Folding the backrest to the
table position
► Put the head restraints in the low position.
► From the rear, lower the handle to release the backrest.► From the front, raise the handle to release the backrest.► Fold the backrest onto the cushion.► To return the backrest to its normal position, raise the handle and pull the backrest up.
WARNI NG
Do not leave objects (such as a bag or toys) on the cushion when folding the backrest.
Page 66 of 360
66
► If the vehicle is so equipped, pull the control and raise the backrest (from the rear, lower the handle).
NOTIC E
Check that the seat has correctly locked on the floor when returned to the seating position.
Fixed rear seat and bench
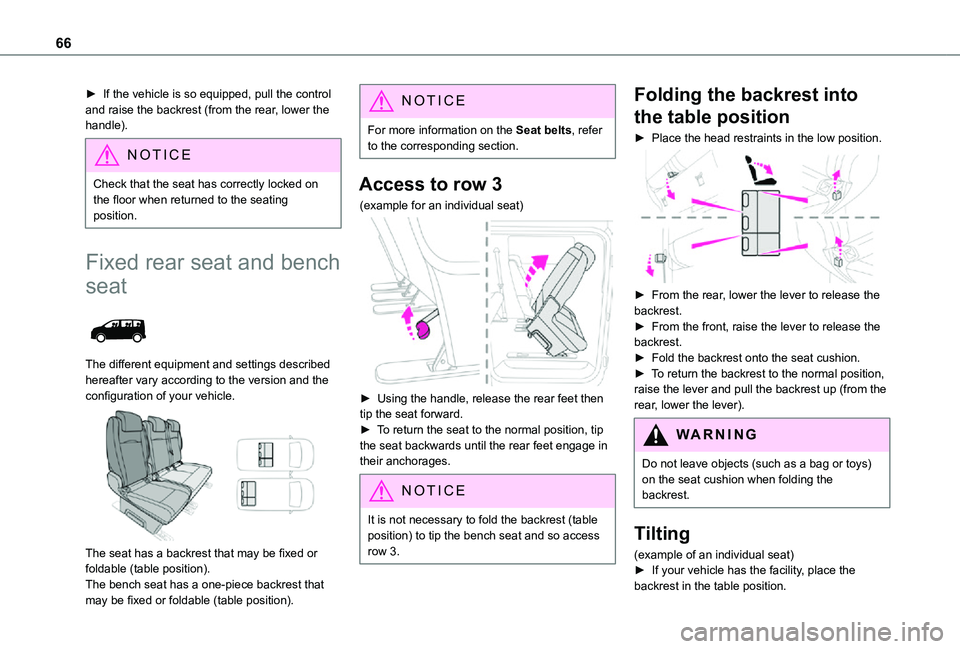
seat
The different equipment and settings described hereafter vary according to the version and the configuration of your vehicle.
The seat has a backrest that may be fixed or foldable (table position).The bench seat has a one-piece backrest that may be fixed or foldable (table position).
NOTIC E
For more information on the Seat belts, refer to the corresponding section.
Access to row 3
(example for an individual seat)
► Using the handle, release the rear feet then tip the seat forward.► To return the seat to the normal position, tip
the seat backwards until the rear feet engage in their anchorages.
NOTIC E
It is not necessary to fold the backrest (table position) to tip the bench seat and so access
row 3.
Folding the backrest into
the table position
► Place the head restraints in the low position.
► From the rear, lower the lever to release the backrest.► From the front, raise the lever to release the backrest.► Fold the backrest onto the seat cushion.► To return the backrest to the normal position, raise the lever and pull the backrest up (from the rear, lower the lever).
WARNI NG
Do not leave objects (such as a bag or toys) on the seat cushion when folding the backrest.
Tilting
(example of an individual seat)► If your vehicle has the facility, place the backrest in the table position.
Page 68 of 360
68
Rear seat and bench seat
on rails
PROACE VERSO
The different equipment and settings described hereafter vary according to the version and the configuration of your vehicle.
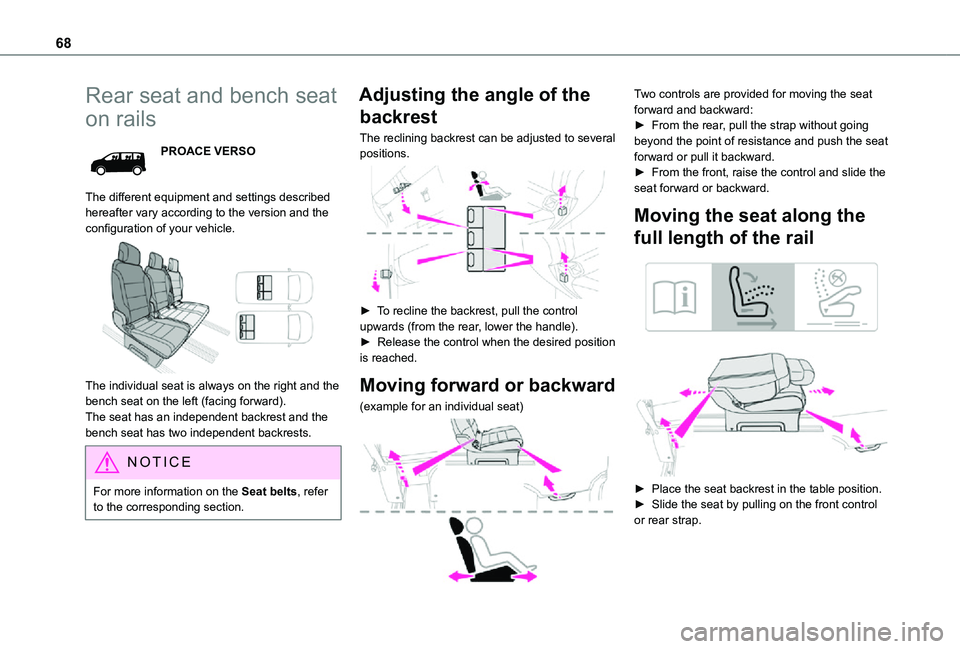
The individual seat is always on the right and the bench seat on the left (facing forward).The seat has an independent backrest and the bench seat has two independent backrests.
NOTIC E
For more information on the Seat belts, refer to the corresponding section.
Adjusting the angle of the
backrest
The reclining backrest can be adjusted to several positions.
► To recline the backrest, pull the control upwards (from the rear, lower the handle).► Release the control when the desired position is reached.
Moving forward or backward
(example for an individual seat)
Two controls are provided for moving the seat forward and backward:► From the rear, pull the strap without going beyond the point of resistance and push the seat forward or pull it backward.► From the front, raise the control and slide the seat forward or backward.
Moving the seat along the
full length of the rail
► Place the seat backrest in the table position.► Slide the seat by pulling on the front control or rear strap.