ignition TOYOTA PROACE VERSO 2020 Manual Online
[x] Cancel search | Manufacturer: TOYOTA, Model Year: 2020, Model line: PROACE VERSO, Model: TOYOTA PROACE VERSO 2020Pages: 418, PDF Size: 39.32 MB
Page 294 of 418

294
F If your vehicle has steel wheels, remove the wheel trim using tool 3.F If your vehicle has alloy wheels, remove the cap from each wheel bolt using tool 3.F If your vehicle has security wheel bolts, fit the security bolt socket 4 to the wheelbrace 1 to slacken the security bolt.F Slacken (without removing) the other wheel bolts using just the wheelbrace 1.
F Position the foot of the jack on the ground, ensuring that it is directly below the vehicle's jacking point A or B, the one closest to the wheel to be changed.
Removing a wheel
Parking the vehicle
Immobilise the vehicle where it does not block traffic: the ground must be level, stable and not slippery.
Do not use:- the jack for any other purpose than lifting the vehicle,
- a jack other than the one supplied by the manufacturer.
If your vehicle has a manual gearbox, engage first gear then switch off the ignition to block the wheels.
If your vehicle has an automatic gearbox, place the gear selector at position P then switch off the ignition to block the wheels.
If your vehicle has an electronic gearbox, place the gear selector at position A then switch off the ignition to block the wheels.
Apply the parking brake and check that
the warning lamp is on in the instrument panel.The occupants must get out of the vehicle and wait where they are safe.Never go underneath a vehicle raised using a jack; use an axle stand.
In the event of a breakdown
Page 311 of 418

311
F Open the glove box.F Unclip the cover.F Disengage the cover completely.
GoodFailed
Tw e e z e r
Access to the tools
F Take the tweezer from its housing.
The extraction tweezer is located behind thefusebox cover.
Before changing a fuse:F the cause of the failure must be identified and rectified,F all electrical consumers must be switched off,F the vehicle must be immobilised with the ignition off,F identify the failed fuse using the tables and layout drawings in the following pages.
Changing a fuse
To replace a fuse, you must:F use the special tweezer to extract the fuse from its housing and check the condition of its filament.F always replace the failed fuse with a fuse of the same rating (same colour); using a different rating could cause faults (risk of f i r e).If the fuse fails again soon after replacement, have the vehicle's electrical system checked by an authorized Toyota dealer or repairer, or another duly qualified and equipped professional.
The replacement of a fuse not shown in the tables below may cause a serious malfunction of your vehicle. Contact an authorized Toyota dealer or repairer, or another duly qualified and equipped professional.
Changing a fuse
8
In the event of a breakdown
Page 313 of 418
Functions
F110Electric power steering, clutch switch
F415Horn.
F520Front/rear screenwash pump.
F620Front/rear screenwash pump.
F710Rear 12 V accessory socket.
F820Single or double")
313
FuseN°Rating(A)Functions
F110Electric power steering, clutch switch
F415Horn.
F520Front/rear screenwash pump.
F620Front/rear screenwash pump.
F710Rear 12 V accessory socket.
F820Single or double rear wipers.
F10/F1130Front and rear, exterior, interior locks.
F1310Front air conditioning controls, radio controls, gear lever, head-up display.
F145Alarm, ER A-GLONASS emergency call system.
F175Instrument panel.
F193Steering mounted controls.
F213Smart Entry & Start System or ignition switch.
F223Rain and sunshine sensor, multifunction detection camera.
F235Seat belt unfastened or not fastened display screen.
F245Touch screen, reversing camera and parking sensors.
F255Airbags.
F2920Audio system, touch screen, CD player, navigation.
F3115Audio system (battery +).
F3215Front 12 V accessory socket.
F345Blind spot monitoring system, door mirror electric controls.
F355Heated washer jets, headlamp beam height control.
F365Rear courtesy lamp.
Version 1 (Eco)
The fuses described hereafter vary according to the equipment in your vehicle.
8
In the event of a breakdown
Page 314 of 418
Functions
F13Smart Entry & Start System or ignition switch.
F55Touch screen, reversing camera and parking sensors.
F710Rear air conditioning controls, Hi-Fi amplifier.
F820Single o")
314
FuseN°Rating(A)Functions
F13Smart Entry & Start System or ignition switch.
F55Touch screen, reversing camera and parking sensors.
F710Rear air conditioning controls, Hi-Fi amplifier.
F820Single or double rear wiper.
F10/F1130Front and rear, exterior, interior locks.
F123Alarm.
F1710Rear 12 V accessory socket.
F185ER A-GLONASS emergency call system.
F213Rear courtesy lamp.
F223Glove box lamp, rear courtesy lamps.
F235Blind spot monitoring system, door mirror electric controls.
F245Steering mounted controls.
F255Headlamp beam height control.
F263Seat belt unfastened or not fastened display screen.
F273Rain and sunshine sensor, multifunction detection camera.
F2810Front air conditioning controls, radio controls, gear lever, head-up display.
F30A or B15Audio system (battery +).
F315Airbags.
F3315Front 12 V accessory socket.
F355Instrument panel.
F3620Audio system, touch screen, CD player, navigation.
Version 2 (Full)
The fuses described hereafter vary according to the equipment in your vehicle.
In the event of a breakdown
Page 317 of 418

317
Starting using another
battery
Never try to start the engine by connecting a battery charger.Never use a 24 V or higher battery b o o s t e r.First check that the slave battery has a nominal voltage of 12 V and a capacity at least equal to that of the discharged battery.The two vehicles must not be in contact with each other.Switch off the electrical consumers on both vehicles (audio system, wipers, lighting, ...).Ensure that the jump lead cables do
not pass close to moving parts of the engine (cooling fan, belts, ...).Do not disconnect the (+) terminal when the engine is running.
F Raise the plastic cover on the (+) terminal, if your vehicle has one.F Connect the red cable to the positive terminal (+) of the flat battery A (at the metal elbow) then to the positive terminal (+) of the slave battery B or the b o o s t e r.F Connect one end of the green or black cable to the negative terminal (-) of the slave battery B or the booster (or earth point on the other vehicle).F Connect the other end of the green or black cable to the earth point C on the broken down vehicle.
F Start the engine of the vehicle with the good battery and leave it running for a few minutes.F Operate the starter on the broken down
vehicle and let the engine run.If the engine does not start straight away, switch off the ignition and wait a few moments before trying again.
When your vehicle's battery is discharged, the engine can be started using a slave battery (external or on another vehicle) and jump lead cables or a battery booster.
Some functions, including Stop & Start, are not available if the battery is not sufficiently charged.
F Wait until the engine returns to idle then disconnect the jump lead cables in the reverse order.F Refit the plastic cover to the (+) terminal, if your vehicle has one.F Allow the engine to run for at least 30 minutes, by driving or with the vehicle stationary, so that the battery reaches an adequate state of charge.
8
In the event of a breakdown
Page 318 of 418

318
For optimum ser vice life of the battery, it is essential to maintain an adequate state of charge.In some circumstances it may be necessary to charge the battery:- if you use your vehicle essentially for short journeys,- if the vehicle is to be taken off the road for several weeks.Contact an authorized Toyota dealer or repairer, or another duly qualified and equipped professional.
Charging the battery using
a battery charger
F Switch off the ignition.F Switch off all electrical consumers (audio system, lighting, wipers, ...).
If you envisage charging your vehicle's battery yourself, use only a charger compatible with lead-acid batteries of a nominal voltage of 12 V.
Follow the instructions for use provided by the manufacturer of the charger.Never reverse polarities.
Never try to charge a frozen battery.If the battery has been frozen, have it checked by an authorized Toyota dealer or repairer, or another duly qualified and equipped professional, who will check that the internal components have not been damaged and the casing is not cracked, which could cause a leak of toxic and corrosive acid.
If this label is present, it is essential to use only a 12 V charger, to avoid causing irreversible damage to the electrical components related to the Stop & Start system.
It is not necessary to disconnect the battery.
F Switch off the charger B before connecting the cables to the battery, so as to avoid any dangerous sparks.F Ensure that the charger cables are in good condition.F Raise the plastic cover, if your vehicle has one, on the (+) terminal.
F Connect the charger B cables as follows:- the positive (+) red cable to the (+) terminal of the battery A,- the negative (-) black cable to the earth point C on the vehicle.F At the end of the charging operation, switch off the charger B before disconnecting the cables from the battery A.
In the event of a breakdown
Page 319 of 418

319
Do not force the lever as locking will not be possible if the clamp is not positioned correctly; start the procedure again.
Disconnecting the battery
In order to maintain an adequate state of charge for starting the engine, it is recommended that the battery be disconnected if the vehicle is taken out of ser vice for a long period.Wait 2 minutes after switching off the ignition before disconnecting the battery.
F close the windows and the doors before disconnecting the battery,F switch off all electrical consumers (audio system, wipers, lighting, ...),F switch off the ignition and wait for four minutes.Having exposed the battery, it is only necessary to disconnect the (+) terminal.
Quick release terminal
Disconnecting the (+) terminal
F Raise the lever A fully to release the clamp B.
Following reconnection of the battery
Reconnecting the (+) terminal
F Position the open clamp B of the cable on the positive post (+) of the battery.F Press down on the clamp to position it correctly on the battery post.F Lock the clamp by lowering the lever A.
After reconnecting the battery, switch on the ignition and wait 1 minute before starting to allow initialisation of the electronic systems.However, if minor problems persist following this operation, contact an authorized Toyota dealer or repairer, or another duly qualified and equipped professional.Referring to the corresponding section, you must yourself reinitialise or reset certain
systems, such as:- the remote control or electronic key (depending on version),- the electric windows,- the date and time,- the radio preset stations.
The Stop & Start system may not be operational during the trip following the first engine start.In this case, the system will only be
available again after a continuous period of immobilisation of the vehicle, a period which depends on the ambient temperature and the state of charge of the battery (up to about 8 hours).
8
In the event of a breakdown
Page 322 of 418

322
On vehicles fitted with Diesel engines, the fuel system must be primed if you run out of fuel.For all versions other than with AdBlue, refer to the corresponding engine compartment view.
Running out of fuel (Diesel)
For more information on Diesel misfuel prevention, refer to the corresponding section.
F Add at least five litres of Diesel fuel to the tank.F Open the bonnet.F If necessary, unclip the styling cover for access to the priming pump.F Squeeze and release the priming pump repeatedly until resistance is felt (there may be resistance at the first press).F Operate the starter to start the engine (if the engine does not start at the first attempt, wait around 15 seconds before trying again).F If the engine does not start after a few attempts, operate the priming pump again then start the engine.F Refit the styling cover and clip it in place.F Close the bonnet.
1.6 D engine
(except AdBlue)
If the engine does not start first time, don't keep trying but start the procedure again from the beginning.
AdBlue engine
F Fill the fuel tank with at least five litres of Diesel.F Switch on the ignition (without starting the engine).F Wait around 6 seconds and switch off the ignition.F Repeat the operation 10 times.
F Operate the starter to run the engine.
Other engines
F Add at least five litres of Diesel fuel to the tank.F Open the bonnet.F If necessary, unclip the styling cover for access to the priming pump.F Squeeze and release the priming pump repeatedly until resistance is felt (there may be resistance at the first press).F Operate the starter to start the engine (if the engine does not start at the first attempt, wait around 15 seconds before trying again).F If the engine does not start after a few attempts, operate the priming pump again then start the engine.F Refit the styling cover and clip it in place.F Close the bonnet.
In the event of a breakdown
Page 329 of 418
329
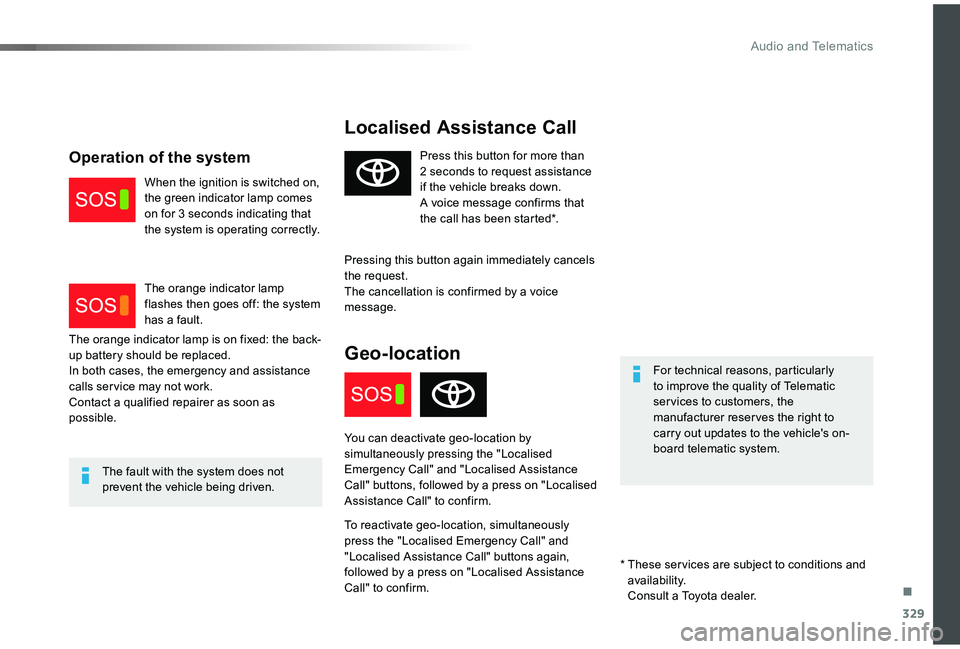
Localised Assistance Call
For technical reasons, particularly to improve the quality of Telematic ser vices to customers, the manufacturer reserves the right to carry out updates to the vehicle's on-board telematic system.
The fault with the system does not prevent the vehicle being driven.
Press this button for more than 2 seconds to request assistance if the vehicle breaks down.A voice message confirms that the call has been started*.
Pressing this button again immediately cancels the request.The cancellation is confirmed by a voice message.
Geo-location
You can deactivate geo-location by
simultaneously pressing the "Localised Emergency Call" and "Localised Assistance Call" buttons, followed by a press on "Localised Assistance Call" to confirm.
To reactivate geo-location, simultaneously press the "Localised Emergency Call" and "Localised Assistance Call" buttons again, followed by a press on "Localised Assistance Call" to confirm.
The orange indicator lamp is on fixed: the back-up battery should be replaced.In both cases, the emergency and assistance calls ser vice may not work.Contact a qualified repairer as soon as possible.
Operation of the system
When the ignition is switched on, the green indicator lamp comes on for 3 seconds indicating that the system is operating correctly.
The orange indicator lamp flashes then goes off: the system has a fault.
* These ser vices are subject to conditions and availability. Consult a Toyota dealer.
.
Audio and Telematics
Page 331 of 418

331
Toyota Pro Touch with
navigation system
GPS navigation -
Applications - Multimedia
audio system - Bluetooth®
telephone
The various functions and settings described differ according to the version and configuration of the vehicle.
For safety reasons and because they require continued attention on the part of the driver, the following operations must be carried out with the vehicle stationary and the ignition switched off:- Using a smartphone.- Pairing a Bluetooth mobile phone to the hands-free Bluetooth system of the audio system.- Smartphone connection operations for CarPlay®, MirrorLinkTM or Android Auto (certain applications interrupt their display when the vehicle starts to move again).- Watching a video (the video stops when the vehicle starts to move again).- The configuration of profiles.
The system is protected in such a way that it will only operate in the vehicle.The display of the message Energy Economy Mode signals that a change to standby is imminent.
First steps
With the engine running, a press mutes the sound.With the ignition off, a press turns the system on.
Increase or decrease the volume using the wheel or the "plus" or "minus" buttons (depending on the equipment).
Use the menu buttons on either side of or below the touch screen for access to the menus, then press the virtual buttons in the touch screen.
Depending on the model, use the "Source" or "Menu" buttons to access the rolling menus, then press the virtual buttons in the touch screen.
Display the rolling menus at any time by pressing the screen briefly with three fingers.
All of the touch areas of the screen are white.Press the back arrow to go back a level.Press "OK" to confirm.
ContentsFirst steps 331Steering mounted controls 332Menus 333Voice commands 334Navigation 342Connected navigation 344Applications 347Radio 350DAB (Digital Audio Broadcasting) radio 352Media 352Telephone 354Frequently asked questions 360
.
Toyota Pro Touch with navigation system